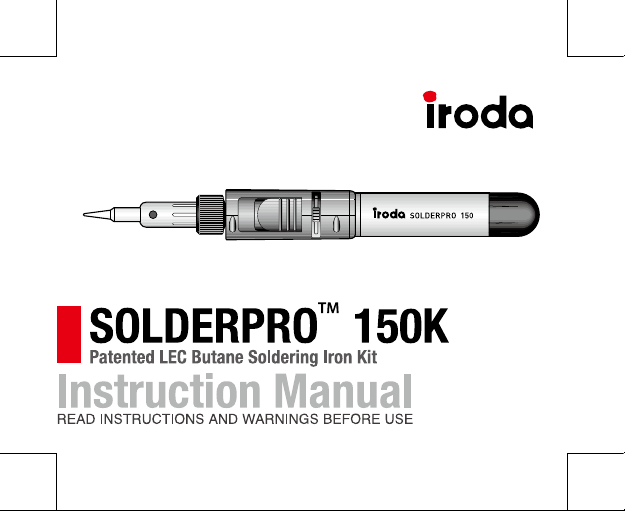
iroda SolderPRO 150K User manual

• Unitusesammablegas(Butane)underpressure–usewithcare.
• DONOTexposetoheatabove+50°C(120°F)andavoidprolonged
exposuretothesun.
• DONOTpunctureorincinerate.
• DONOTrell,igniteorusenearopename,heater,furnaceor
combustiblematerials.
• Keepworkareaclean.Clutteredareasandbenchesinviteinjuries.
• KEEPAWAYFROMCHILDREN.Visitorsshouldbekeptawayfrom
workarea.
• Storeindry,lockedcabinetoutofreachofchildren.
• Beextremelycarefulastorchametiptemperatureisover1300°C
(2400°F)
• Beextremelycarefulastorchameisalmostinvisibleindaylightor
understronglight.
• UseSafetyGlasses.
• Donottouchtheheatedtipoftheunit.
• DONOTleaveunitunattendedwhenoperatingorhot.
• Alwaysbesureunitiscoolbeforestoring.
• DONOTreplacecapwithoutswitchingunitoandensuringtiphas
cooled.
• Ifyourtorchmalfunctionsdonottrytorepair.Contactyourdealer
oronlinesupportforhelp.
• Butane-Propanemixorotherfuelcouldcreatemuchhigher
temperaturesandcauseare-upatthetipexhaustslots.
2 3
IMPORTANT SAFETY
INSTRUCTIONS
Warnings:
SafetyButton
ON/OFF
Ignition
Switch
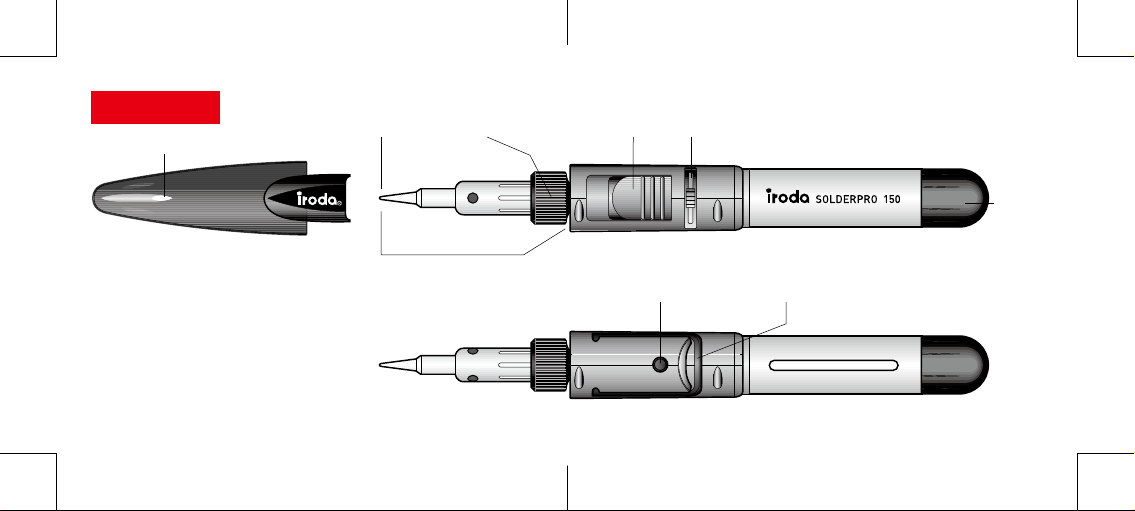
DESCRIPTION
4 5
Cap
Soldering
Tip
Knurled
Nut
LEC
Chamber
Cap
Gas
Control
Lever
SafetyStand
TipAssembly

HOW TO USE THE SOLDERPRO 150K
6
REFILLING LEC
Insert LEC into Torch
• Useonlyhigh-qualitybutanegas.
• Rellinawell-ventilatedareaawayfromanyignition
sourceandotherpeople.
1. Holdbutanecanisterupsidedownwhenlling(Fig.1)
2. FirmlypresscanisternozzleintoGas Filling Valve.
3. Observefuellevelandstopllingwhen90%Full.
(Gasoverowduringrellingisnormalanddoesnot
indicatealeak)
4. Waitforafewminutesbeforeuse.
1. RemoveChamberCapatbottomoftorch.
2. InsertLECintochamberwithgrayatsidetoward
insideofchamber.
3. DonotforceLECintochamber.ChamberCapwill
properlyseattheLECinchamberwhenscrewedon.
4. ReplaceChamberCap.
Fig.1
Fig.2
Fig.2
(LiquidEnergyCell)
Butane
7
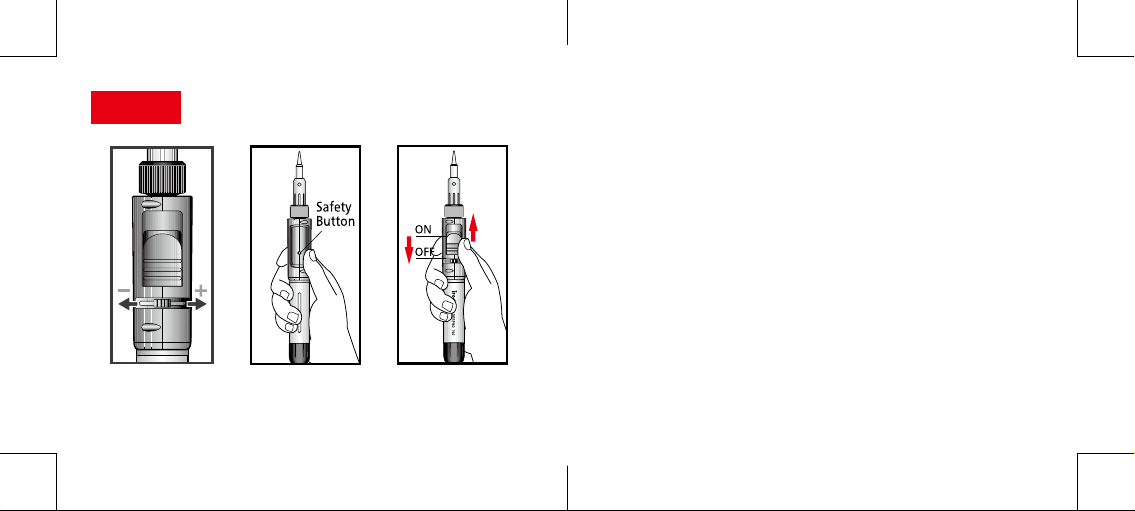
IGNITION
1. SetGas Control Leveratmid position.(Fig.3)
2. WhilepushinginandholdingtheSAFETY BUTTON(Fig.4)
SlowlyslideuptheON/OFF Ignition Switch(Fig.5)tothe"ON"
positiontostarttheowofgas.
3.Asgasisowing,continueslidingtheIgnition Switchtowardthe
tiptillyouhearaclick.Theautomaticignitionwilllightthegas.
4.Releasetheswitchanditwillautomaticallymovebacktothe
"ON"position.
5.Thetiphousingwillstarttoglowred.Ifnot,slidetheON/OFF
Ignition Switchbacktothe“OFF”positionandrepeatsteps2
and3.
6.Toturno,slidetheON/OFF Ignition Switchdownwardtothe
OFFposition.
Fig.3 Fig.4 Fig.5
89

10
• DonottouchTip,TipHousingorKnurledNutwhileigniting.(Fig.6)
• DonotignitetorchwhenTipAssemblyisnotscrewedon.(Fig.7)
Fig.6 Fig.7 11
• Thetiptemperaturecanbeadjustedbyturning
theGas Control Leverleftorright.(Fig.8)
• Settomid-positionwhensolderingor
brazing.
• Excessivegasow,are-uporcatalystpulsing
redmayoccurwhentheGas Control Leveris
settoohigh.
Fig.8
Mid-Position
IGNITION WARNINGS TEMPERATURE ADJUSTMENT

1. RemoveTipAssembly
2. UnscrewNozzle Assembly (A) fromtheTorch Body (C).
(Fig.10)Pliersmaybeusedtolightlygrasptheshankinorderto
loosenit.DonotgraspandturntheCeramic Head. (D)
3.CarefullyremoveOrice connector (B)byliftingitoutofthe
torchbody.NotethattheshortersideofOriceConnectorts
intotheTorchBody.
CHANGING TIPS
12
1. Besurethetiphascooledbefore
removal.
2. UnscrewTipAssemblywitha
counterclockwisemotion.(Fig.9)Pliers
mayberequiredtolightlygraspthe
Knurled Nutinordertoloosenthetip.
3. Replacewithdesiredtip.Becarefulnot
toovertightenasthiscoulddamagethe
threadinthecap.
Fig.9
Fig.10
13
Nozzle Assembly
CHANGING TIPS Knurled
Nut
WARNING: The catalyst inside the
soldering tip is very delicate and
will not sustain mechanical abuse
without serious damage.
CLEANING OR
REPLACING NOZZLE
ASSEMBLY

14
4.SoakOriceConnectorinNaphthaorothersimilarsolventfor
approximately5minutes.
5.Replacenew(orclean)Oriceconnector(B)rememberingto
inserttheshortersideintotheTorchBody.
6.ReplaceNozzleAssemblyandhandtightenortightengentlywith
pliersgraspingtheshankoftheNozzleAssemblynottheceramic
head.
7. ReplaceTipAssembly.
• Useonlymildsoapandadampclothtocleanthehousingsof
thetool.Manyhouseholdcleanerscontainchemicalswhich
couldseriouslydamagetheplastic.Alsodonotusegasoline,
turpentine,lacquerorpaintthinner,drycleaninguidsorsimilar
products.Neverletanyliquidgetinsidethetool;neverimmerse
anypartofthetoolintoaliquid.
CLEANING
15

16
• Thisproduct,whenusedforsolderingandsimilarapplications,
produceschemicalsknowntotheStateofCaliforniatocause
cancerandbirthdefectsorotherreproductiveharm.
• DepartmentofTransportationHazardousMaterialsRegulations
forbidthecarriageofbutaneorotherammablegasproductson
passengeraircraft.Donotpackthisitemoranyotherammable
gasitem,inanycheckedorcarry-onbaggage.
• Toreducetheriskofpersonalinjury,propertydamage,ordamage
toyourSOLDERPRO 150K,donotattempttorepairtheunitbody.
TROUBLE SHOOTING
PROBLEM PROBABLECAUSE HOWTOCORRECT
Doesnot
ignite
a. EmptyGasTank
b. Toohighorlowfuel
pressure
c. Pushingon/oignition
switchtoofast.
d. Cloggedoriceconnector
a. Rellwithbutanefuel
b. Adjustcontrollevertoa
higherorlowerposition.
c. Re-read"Howtouseasa
solderingiron"
d. Cleanorreplacewithnew
oriceassembly
Lowgas
pressureor
lowame
a. Cloggedoriceconnector
b. Coldfuel
c. Lowfuel
a. Cleanorreplacewithnew
one.
b. Holdbodyinhandsto
allowunittowarmup.
c. Refuel
SPECIAL WARNING
Tipdoes
notheatup
a. Used-upcatalyst(inside
TipHousing)
b. Insucientfuelpressure
c. Cloggedoriceconnector
a. Replacewithnewtip.
b. Adjustcontrollevertoa
higherposition.
c. Cleanorreplacewithnew
one.
17

SPECIFICATIONS
Length W/Cap 272mm(10.7inches)
W/SolderingTip 263mm(10.4inches)
Width 28mm(1.1inches)
Height W/Stand 65mm(2.6inches)
W/OStand 36mm(1.4inches)
Weight EmptyFuelTank 193g±2g
Watt 30W-125W
BTU 594
Approximate
Temperature
SolderingTip ≈842℉(450℃)
HotBlower ≈1300℉(650℃)
Deector ≈1300℉(650℃)
Capacity GasContainer 15ml(0.5oz)
FlameLength MidSetting 1.2cm(0.5inches)
OperatingTime MidSetting/OneGasFilling 115min.
HeatUpTime WorkingTemperature 25seconds
Thisappliancemaybelledwithanycartridgesmarked
“Butane”complyingwithEN417.
Warning:
-Useoutdoorsonlyoruseinwellventilatedareas.
-Readtheinstructionsbeforeusingtheappliance.
CAUTION:
-Accessiblepartsmaybeveryhot.Keepyoungchildren
awayfromtheappliance.
19
Table of contents
Other iroda Power Tools manuals


