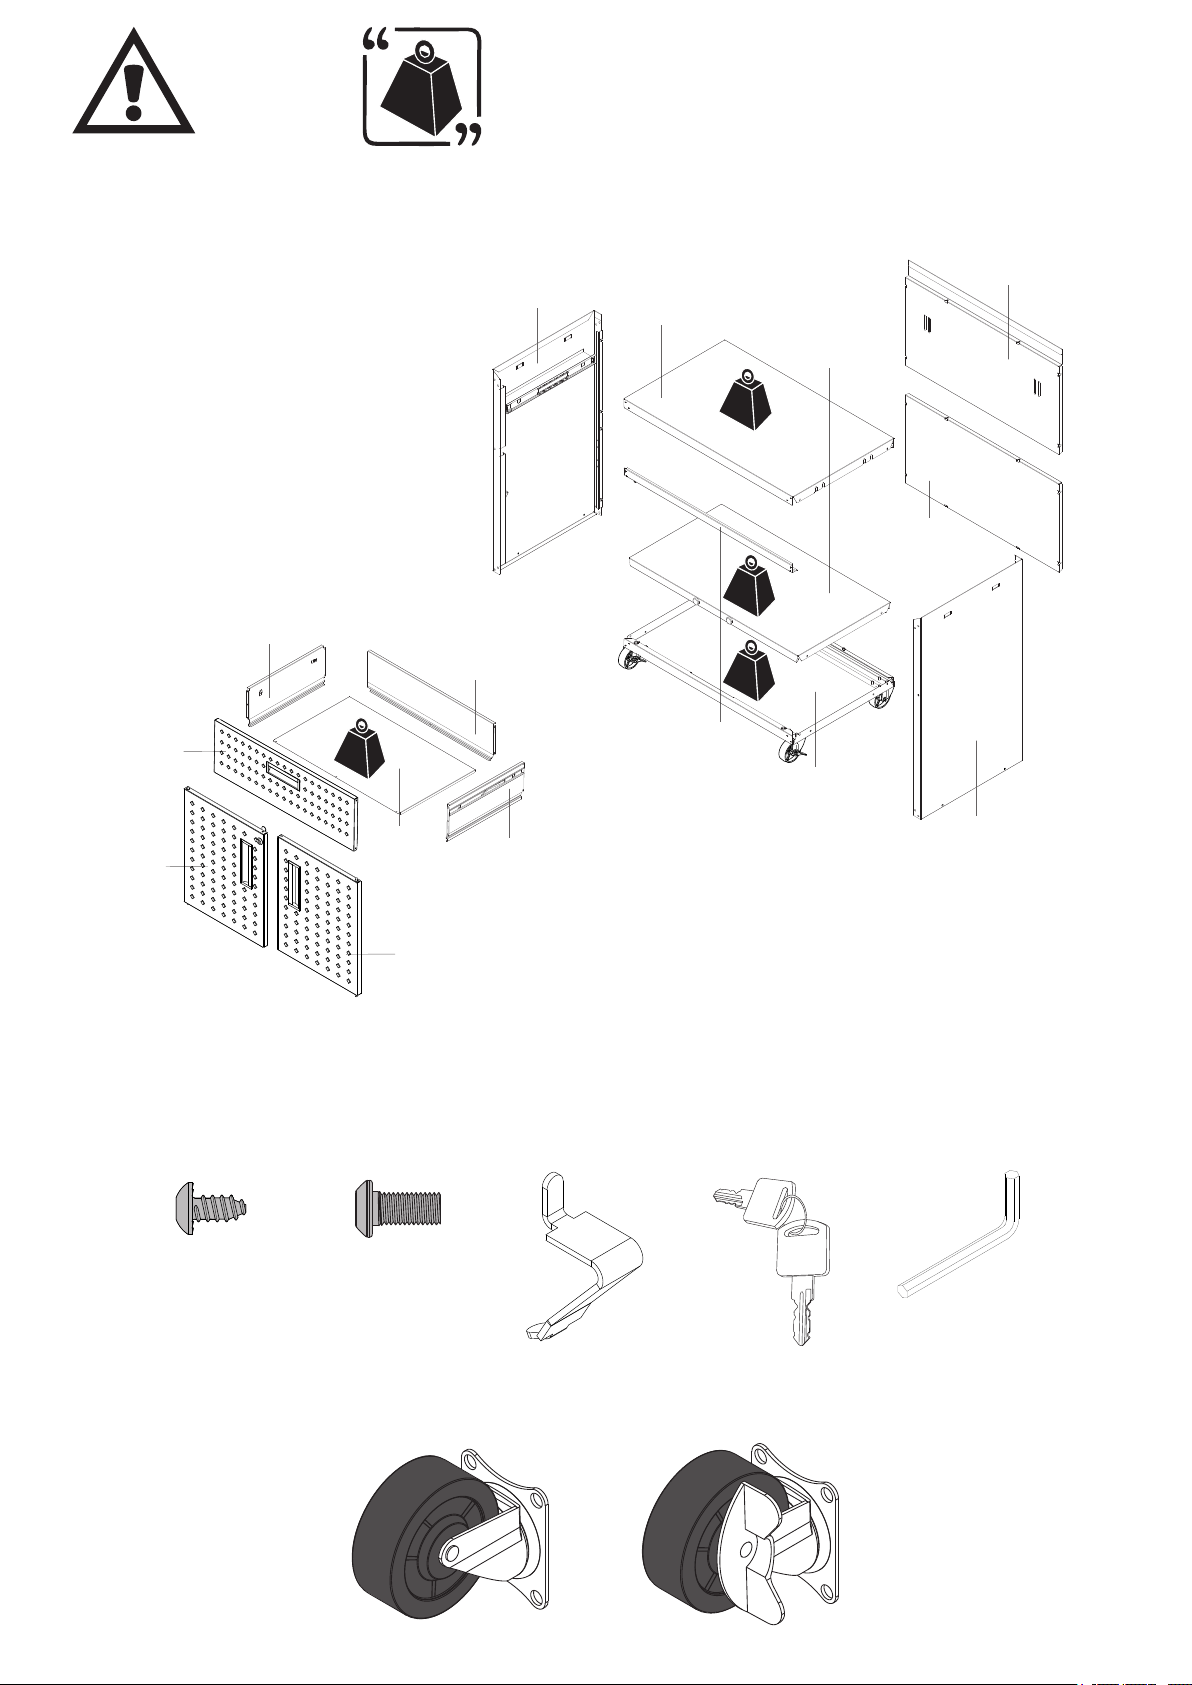
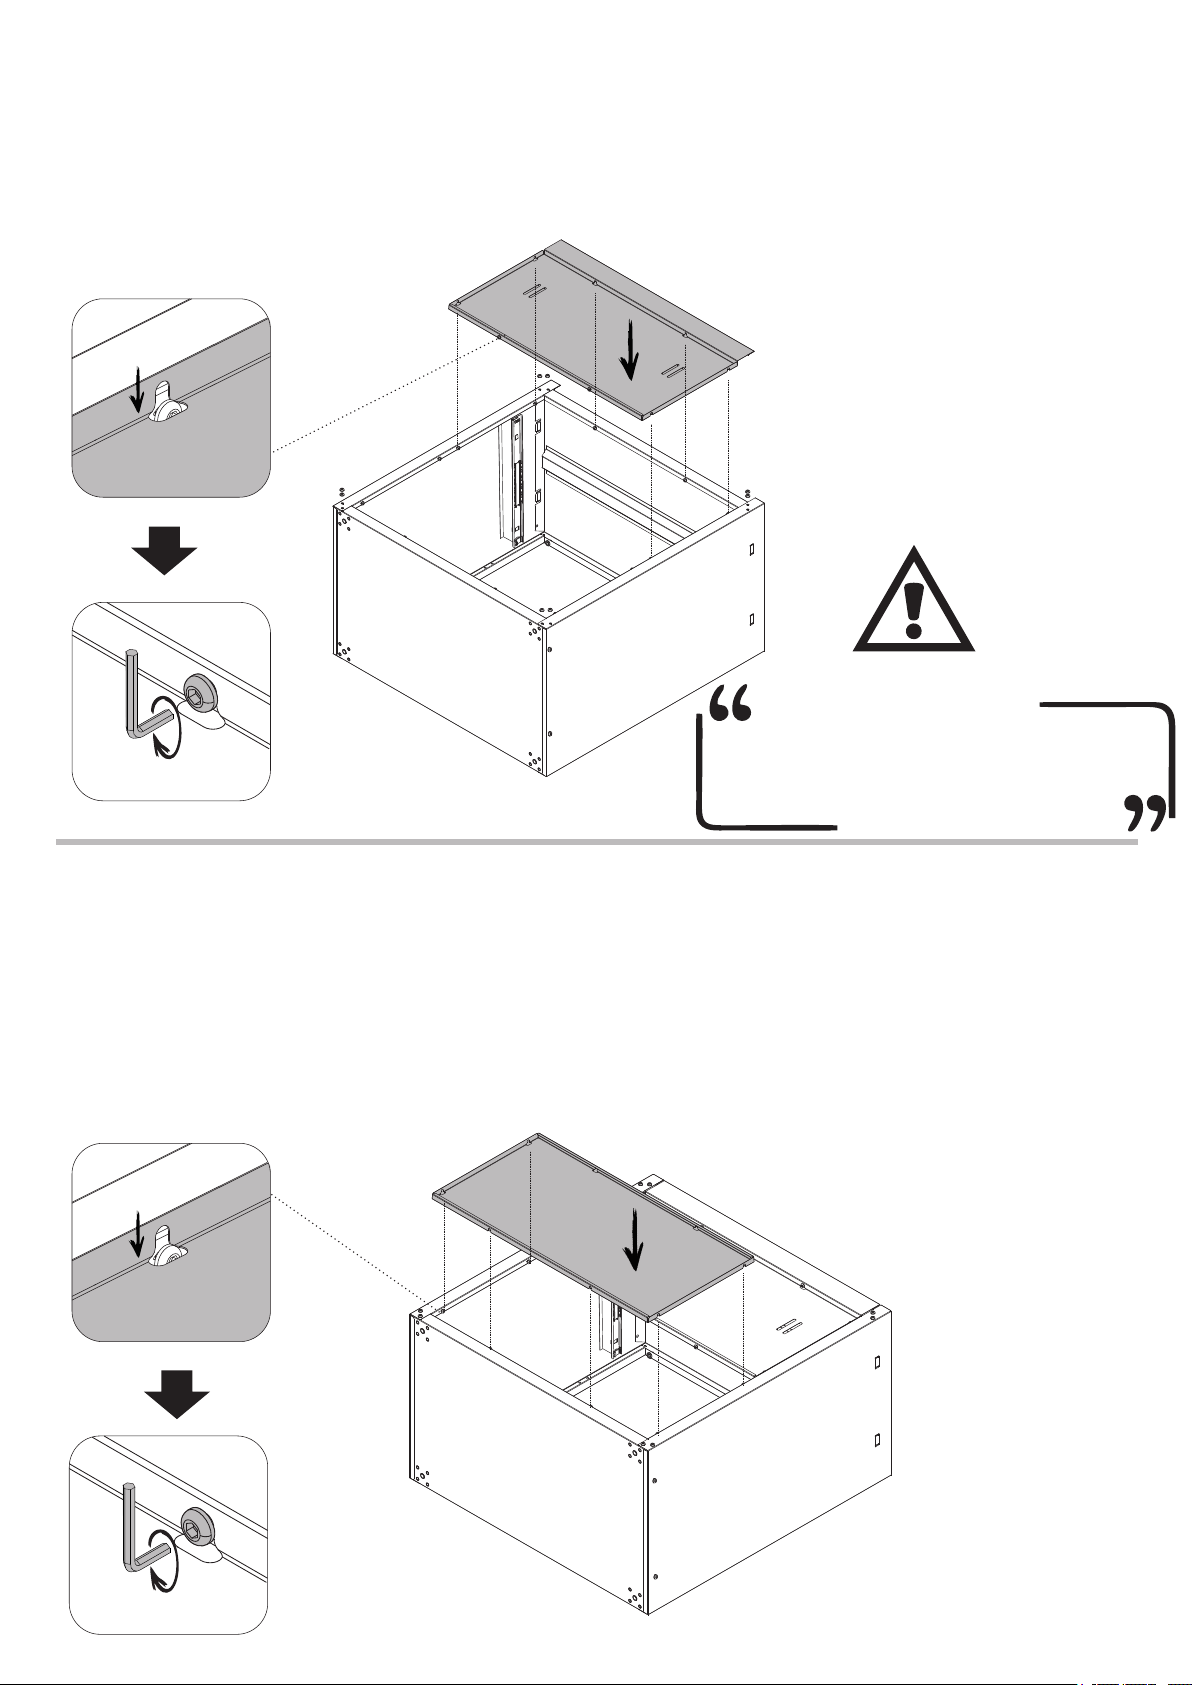
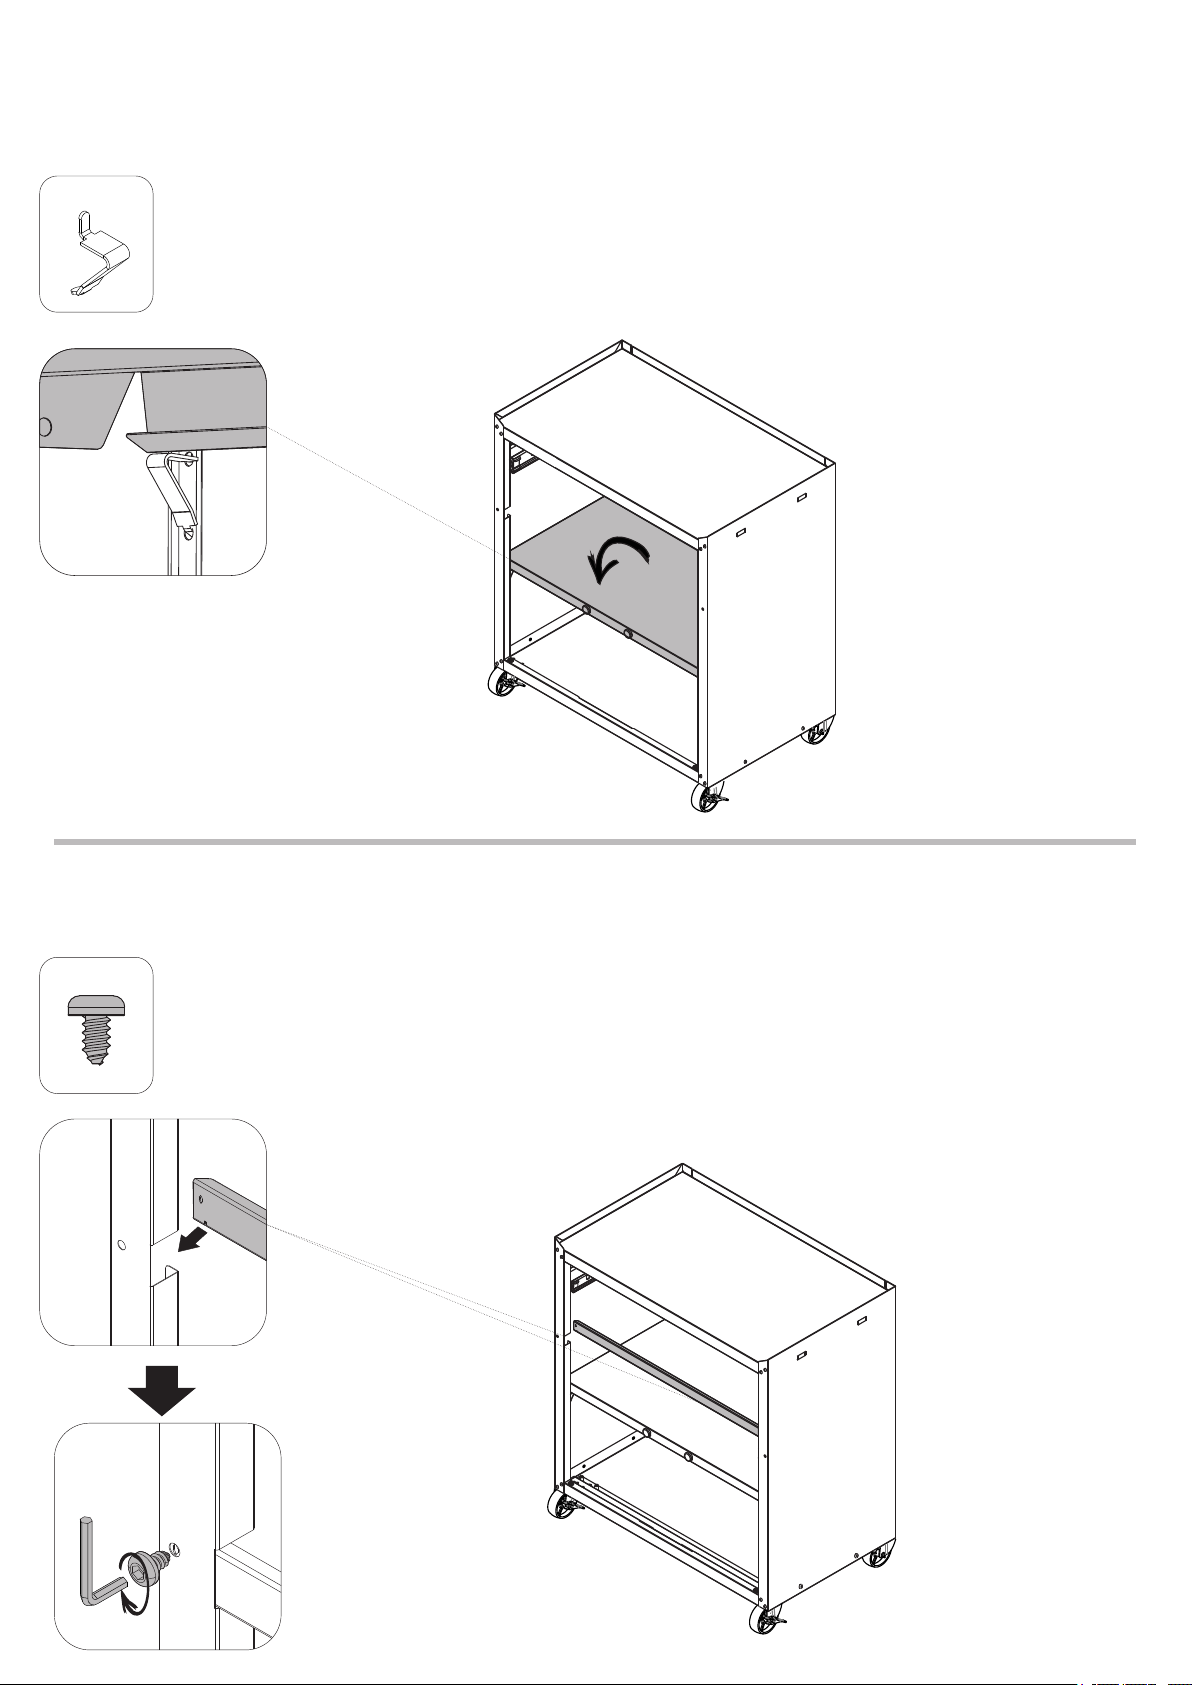
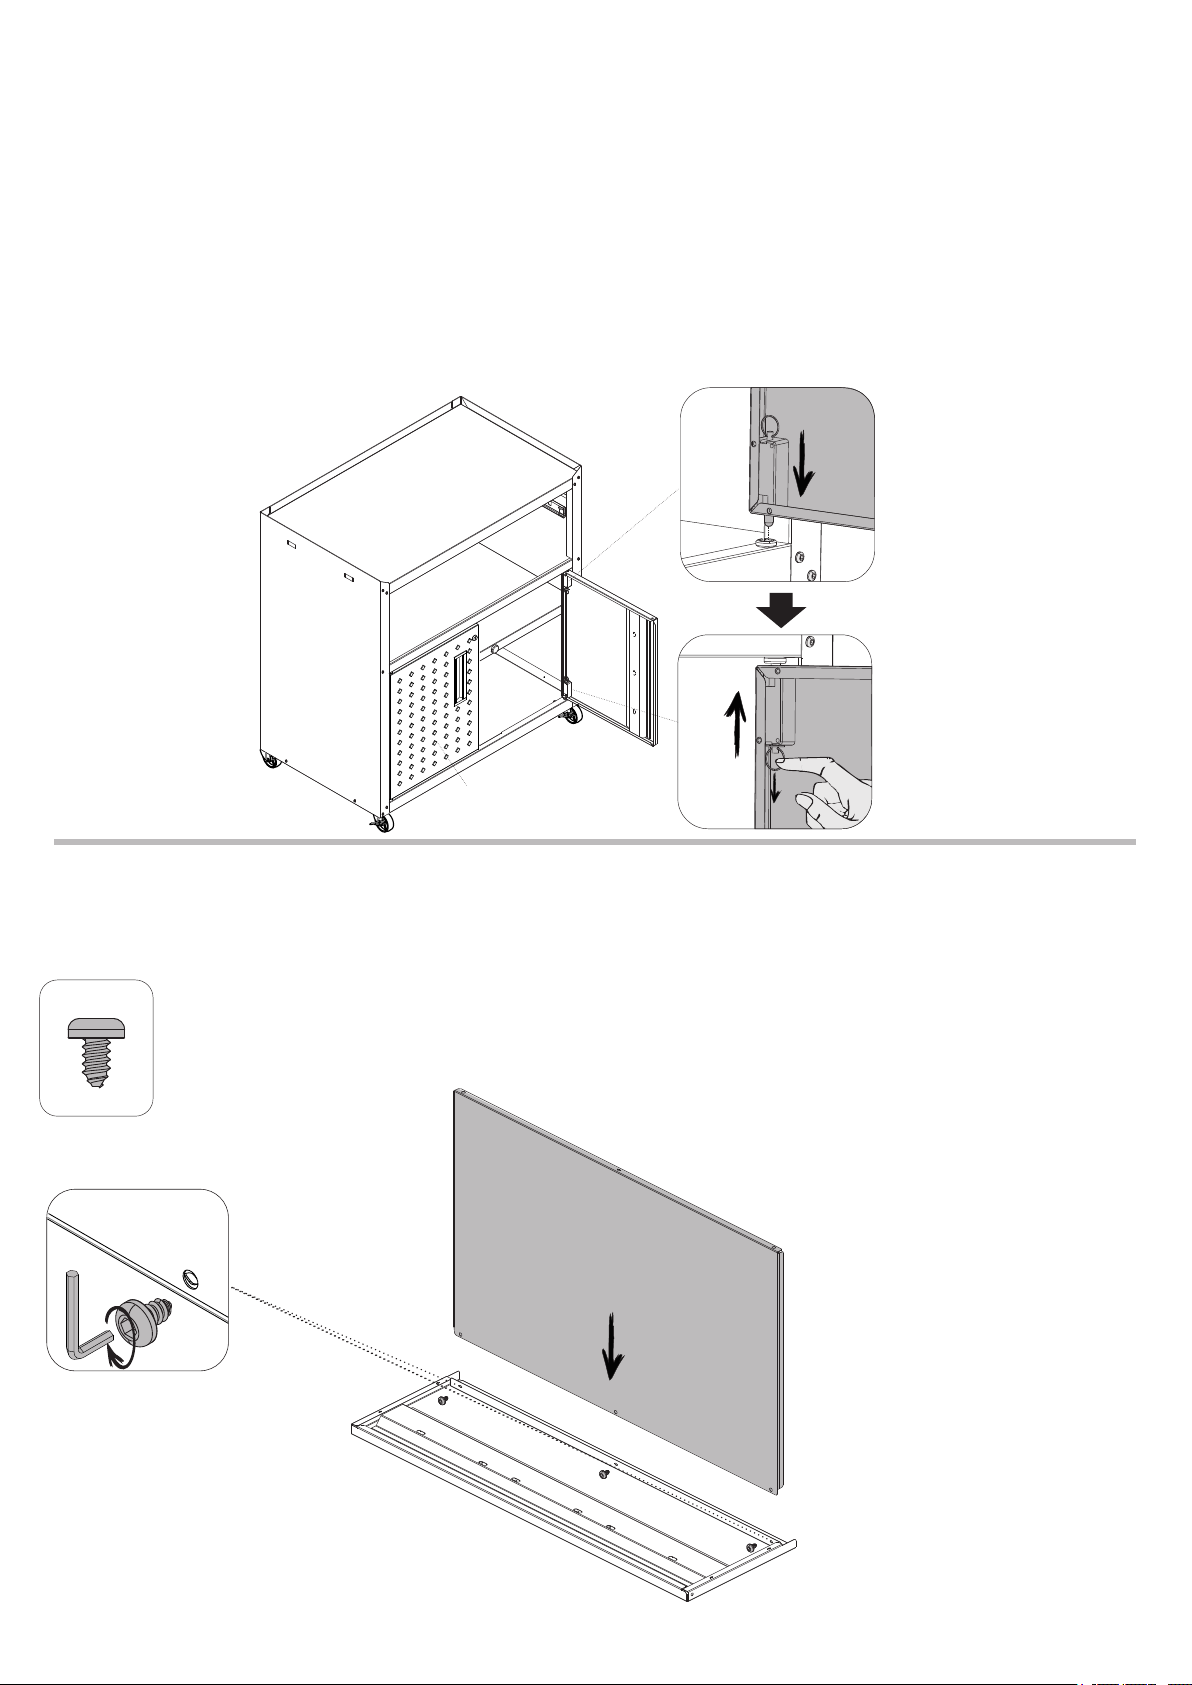
Itatiaia Titanium User manual
Other Itatiaia Indoor Furnishing manuals

Itatiaia
Itatiaia Lisboa BALC-40 1PT HOR 2GV LYON User manual

Itatiaia
Itatiaia IG3G2-105 LARA CLASS Owner's manual

Itatiaia
Itatiaia BALC 1PT 1GAV 65 EXCLUSIVE User manual

Itatiaia
Itatiaia LISBOA Series User manual

Itatiaia
Itatiaia BALC CANTO 4PT HOR User manual

Itatiaia
Itatiaia ARM 2PT VD ALTO 80 EXCLUSIVE User manual

Itatiaia
Itatiaia COZ AMORA Datasheet

Itatiaia
Itatiaia IG2A-80 COOK 4B User manual

Itatiaia
Itatiaia ARM-120 User manual

Itatiaia
Itatiaia I3G1-105 User manual

Itatiaia
Itatiaia CORPO User manual

Itatiaia
Itatiaia IP1-40 User manual

Itatiaia
Itatiaia GOURMET G1 PD 2PV-120 Installation guide

Itatiaia
Itatiaia NICHO-70 POP User manual

Itatiaia
Itatiaia New Jazz ARM-80 User manual

Itatiaia
Itatiaia ARM-80 1PH User manual

Itatiaia
Itatiaia I4G2-160 User manual

Itatiaia
Itatiaia NC 1P-35 SMART User manual

Itatiaia
Itatiaia GB CANTO 1P User manual

Itatiaia
Itatiaia IP3-120 PREMIUM Installation guide


Popular Indoor Furnishing manuals by other brands


Coaster
Coaster 4799N Assembly instructions

Stor-It-All
Stor-It-All WS39MP Assembly/installation instructions

Lexicon
Lexicon 194840161868 Assembly instruction

Next
Next AMELIA NEW 462947 Assembly instructions

impekk
impekk Manual II Assembly And Instructions

Elements
Elements Ember Nightstand CEB700NSE Assembly instructions