J-Scale JSR ECO 400 User manual

Thank you for purchasing the J-Scale®JSR ECO 400 digital scale. Please read all operating instructions carefully
before use. This electronic scale is a precision instrument. With normal care and proper treatment, it will provide
years of reliable service.
For further information or troubleshooting, please visit our website at www.jscale.com.
FEATURES & SPECIFICATIONS
USER MANUAL
ENGLISH
Made in China
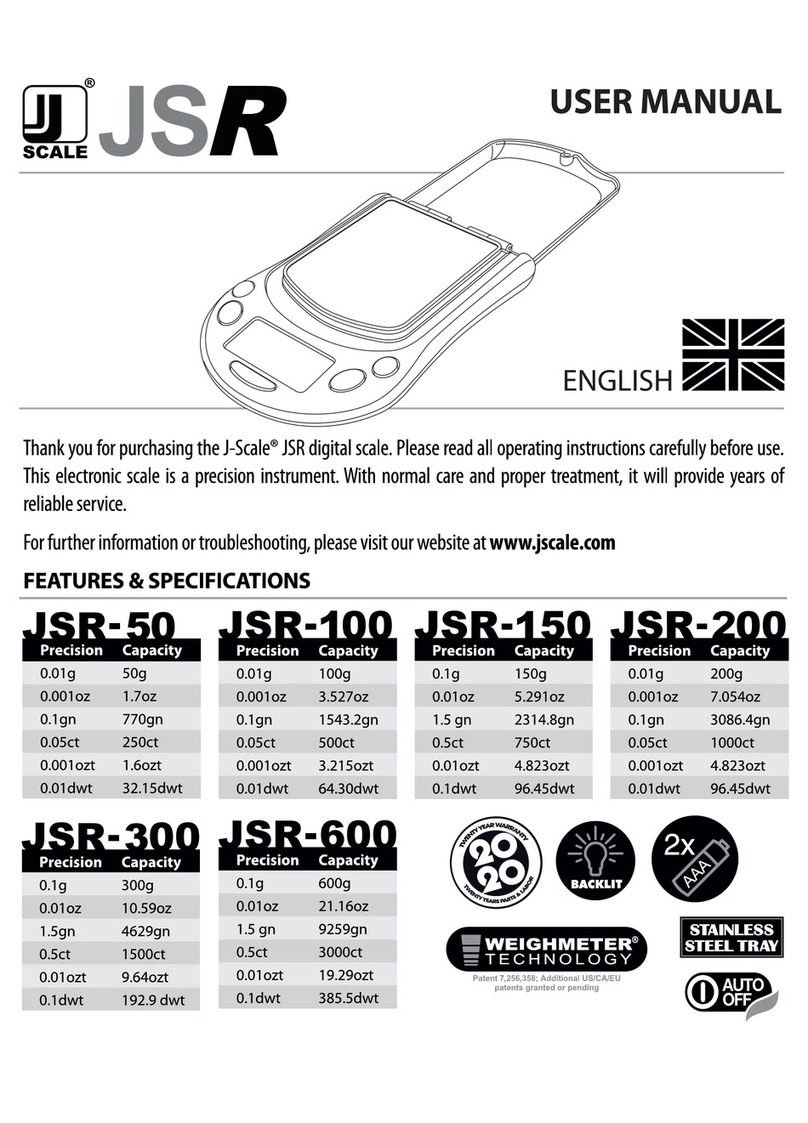
JSR-ECO 400
Precision Capacity
0.01g
0.0004oz
0.15gn
0.05ct
0.0003ozt
0.006dwt
400g
14.1oz
6172.9gn
2000ct
12.9ozt
257.2dwt

The JSR-200 require both 200g & 400g weights to calibrate.
1. Place the scale on a flat, very stable surface and turn it ON until the LCD displays “0.00”.
2. Press and hold the [M] key for 5 seconds until the display shows “CAL” then release the key.
3. Press the [M] key again, the display will flash “200.00g”.
4. Gently place a 200g weight on the platform of the scale, wait 3 seconds, the display will flash “400.0g”.
5. Gently place another 200g weight on the platform to make the total weight of 400g, wait for 3 seconds, the display
will show “PASS”.
6. The scale goes back to weighing mode. Calibration is complete. Remove the weight and turn the scale OFF.
NOTE: If after calibration your scale does not read accurately, this indicates calibration error and the calibration process
should be repeated slower. Please calibrate on a very stable flat surface.
INACCURACY/ERROR
The primary reason for inaccuracy or malfunction are low batteries, incorrect calibration, overload or operating on an unstable
surface. Please keep this in mind and maintain and operate your scale properly. The scale is a precise instrument and must
be handled with the utmost care and caution.
FEATURES
POWER UP SEGMENT TEST
When first turning the unit on, all segments of the display will appear. This display will remain for approximately 2 seconds
and then reset to “0”.
OVERLOAD
When an applied load exceeds the capacity. “O_ Ld” will appear on the display. Remove the excessive load immediately!
Although the JSR uses proprietary overload protection technology, it is still possible to damage the weighing sensors by
overload. REMEMBER: You can permanently damage the scale by overloading it!
WEIGHMETER®
On the side of the display you will notice a series of bars that increase as the load on the scale increases. This is our
Weighmeter®invention. It helps you know the remaining capacity on the scale and also will indicate an overload if one occurs.
Please use the Weighmeter®to monitor your weighing loads and please do not overload this scale.
TROUBLESHOOTING & OPERATION NOTES
1. If the display ever becomes locked on “8888”, “LLLL” or “EEEE”, this indicates that the scale was shocked, dropped
or otherwise damaged and the delicate weighing sensors may have been damaged. Please try recalibrating the scale
(If the sensor has not been hurt too badly it will work again after recalibration). Otherwise you will have to follow the
warranty instructions that came with your scale.
2. If the display shows “– Lo”, this often indicates low batteries. However sometimes it also may indicate a serious zero
mark error. This means when you turn the scale on, it can’t determine what zero is (a slight zero mark error will cause
situation #1 above). Thus, if new batteries do not fix this error the scale will have to be sent to us for replacement
under our 20 years warranty program.

Avoid lengthy exposure to extreme heat or cold, your scale works best when operated at normal room temperature. If the scale
has been subjected to temperature change, please allow the scale to acclimate to normal room temperature for at least one
hour before use. Allow sufficient warm up time. Turn the scale On and wait several seconds to give the internal components
a chance to stabilize before weighing. The cleaner the environment the better. Dust, dirt, moisture, vibration, air currents and
proximity to other electronic equipment can all cause an adverse effect on the reliability and accuracy of your scale. Handle
with care. Gently apply all items to be weighed onto tray top. Although this scale is designed to be quite durable, try to
avoid rough treatment as this may permanently damage the internal sensor and void your warranty. Avoid shaking, dropping
or otherwise shocking the scale. This is a precision instrument and MUST BE HANDLED WITH EXTREME CARE.
IMPORTANT ADVICE: Place the item to be weighed on the platform, after the stable weight is displayed remove the
item immediately. This will prolong the longevity and accuracy of this weighing instrument.
These electronic scales are precision instruments. Do not operate near an in-use cell phone, cordless phone, radio, computer
or other electronic device. These devices emit RF and can cause unstable scale readings. If your scale ever performs poorly, try
moving the scale to a different room or location. This is a very precise scale – the display may seem to wander or jump when
weighing. This is due to air currents or vibrations. Stable weighing is achieved when the display remains fixed for 3 seconds.
OPERATION
BATTERY OPERATION
1. 2x AAA batteries are required.
2. To install batteries: Release the battery cover by sliding out-wards. - Place batteries into battery compartment aligned
correctly. - Replace battery cover. DO NOT USE EXCESSIVE FORCE & DO NOT PRESS ON THE TRAY!!!
3. The scale is now ready for battery operation.
CALIBRATION
Calibration may be required when the scale is first set up for use, or if the scale is moved to a different altitude or new
location. This is necessary because the weight of a mass in one location is not necessarily the same in another location. Also,
with time and use, mechanical deviations can occur.

Although the JSR is designed to be extremely durable. It’s important that you never overload or drop/shock the scale. Scales
are delicate instruments and unlike Cellular phones,scales have delicate sensors that determine how much an item weighs. If
you drop or shock your scale, these sensors “feel” the shock and are sometimes destroyed. This happens with all digital scales.
We design our scales to be as resistant to shock or drops as possible. However there is no way for us to protect 100% against
load cell or sensor damage. A well-treated scale will provide years of reliable and accurate weighing. However an abused scale
will only work until it’s sensors are damaged.
KEY PAD FUNCTIONS
Mode selection. Press and release the key once to chance weight unit. You can select g (grams), oz (ounces), dwt
(pennyweight), ozt (troy ounces), ct (carats), or gn (grains).
Part counting mode. Sample sizes can be 25, 50, 75 or 100. The following steps outline the procedure for cummulative
weighing of samples: switch the scale on, Place a ‘given’ number of samples of an item on the tray. Press and hold the [PCS]
key until the display flash the number in PCS (the indicator should be on pcs). Press [M] key to select the sample size (the
same as you chose above), in the end press the [PCS] key. Then after 2 seconds, the scale will remember the sample size you
selected and show the starting sample size on the display. (You can now remove the samples if you want to return the scale
to 0 pcs). Place the items that you want counted onto the tray, the total number of items will show on the display. Press the
[M] key to exit the counting function and return to normal weighing mode.
On/Off. Press this key to turn the scale on. When the scale is on, press and hold the same key to turn the scale off.
Tare can be used for eliminating the weight value of an empty container. Place an empty container on the scale and press
[T]. Then place the items to be weighed in the container. NOTE: When all weight is removed from the weighing tray, the tared
value of a container will be displayed as a negative number. Press [T] again to return the scale to zero.
Press the center [LIGHT] key to turn on the bright LCD backlight. It will stay on for several seconds. Press this key again to
turn off the backlight.
www.jscale.com

Vielen Dank, dass Sie sich für den Kauf einer J-Scale®JSR ECO 400 Waage entschieden haben. Bei normaler und
sorgsamer Handhabung erweist sich das Gerät über viele Jahre als zuverlässig und betriebssicher. Bitte lesen Sie
aufmerksam die Bedienungsanleitung.
Weitere Informationen finden Sie auf unserer Webseite www.jscale.com.
KENNDATEN
BEDIENUNGSANLEITUNG
DEUTSCH
Made in China
JSR-ECO 400
Genauigkeit Kapazität
0.01g
0.0004oz
0.15gn
0.05ct
0.0003ozt
0.006dwt
400g
14.1oz
6172.9gn
2000ct
12.9ozt
257.2dwt

Für die JSR-200 ist ein Kalibriergewicht von sowohl 200g als auch 400g notwendig.
1. Legen Sie die Waage auf eine flache, sehr stabile Oberfläche und schalten Sie sie EIN. Im Display erscheint „0.0“
oder „0.00“.
2. Halten Sie die Taste [M] 5 Sekunden lang gedrückt, bis das Display CAL anzeigt - dann lassen Sie die Taste los.
3. Drücken Sie die Taste [M] erneut, im Display blinkt 200.00g auf.
4. Legen Sie vorsichtig ein Gewicht von 200g auf die Waagschale und warten Sie 3 Sekunden. Das Display zeigt 400.0g
an.
5. Entfernen Sie das Gewicht von 200g von der Waagschale und legen Sie nun vorsichtig ein Gewicht von 400 g auf. Im
Display erscheint nach 3 Sekunden die Anzeige PASS; die Waage kehrt in den normalen Wiegemodus zurück.
6. Die Kalibrierung ist abgeschlossen. Entfernen Sie das Gewicht und schalten Sie die Waage AUS.
NOTA: Sollte Ihre Waage nach der Kalibrierung ungenau arbeiten, so deutet dies auf einen Kalibrierfehler hin und der
Kalibriervorgang muss langsamer wiederholt werden. Bitte nehmen Sie die Kalibrierung auf einer sehr flachen Oberfläche vor.
UNGENAUIGKEIT / FEHLERMELDUNG
Hauptgrund für eine Ungenauigkeit bzw. eine Fehlfunktion sind leistungsschwache Batterien, eine fehlerhafte Kalibrierung,
Überlastung oder das Arbeiten auf einer instabilen Oberfläche. Bitte beachten Sie diese Punkte stets und bedienen Sie Ihre
Waage in der vorgeschriebenen Weise. Die Waage ist ein Präzisionsgerät, das mit höchster Sorgfalt behandet werden muss.
SYSTEM CHECK
Wenn das Gerät eingeschaltet wird, erscheinen alle Anzeigesegmente für ca. 2 Sekunden im Display, bevor es sich auf 0.0
zurückstellt.
ÜBERLASTUNG
Bei Überschreitung der Höchstkapazität zeigt das Display „O_Ld“ an. Entfernen Sie unverzüglich alle Gegenstände von der
Waage. Auch wenn die JSR mit einem Überlastungsschutz ausgerüstet ist, ist es dennoch möglich, die Wiegesensoren durch
Überlastung zu beschädigen. BEDENKEN SIE: Die Waage kann durch Überlastung dauerhaft beschädigt werden!
KAPAZITÄTSANZEIGE - WEIGHMETER®
Kapazitätsanzeige - An der Seite des Displays sehen Sie ein Balkendiagramm. Der Graph wächst, sowie Sie zunehmend Gewicht
auf die Waagschale legen. Diese Innovation nennen wir Weighmeter®. Es zeigt Ihnen die verbleibende Kapazität der Waage
an und weist auf eine Überlastung hin, sofern die Höchstkapazität überschritten wird. Bitte verwenden Sie den Weighmeter®,
um das Gewicht zu kontrollieren, und vermeiden Sie unbedingt eine Überlastung der Waage.
HINWEISE ZUR FEHLERBEHEBUNG UND BETRIEBSWEISE
1. Sollte die Anzeige bei 8888, OuER, LLLL oder EEEE blockieren, so ist dies ein Hinweis darauf, dass die Waage
erschüttert, fallen gelassen oder anderweitig beeinträchtigt wurde und die empfindlichen Sensoren beschädigt worden
sind. Versuchen Sie, die Waage neu zu kalibrieren. (Sofern die Sensoren nicht zu stark beschädigt wurden, wird das
Gerät nach erneuter Kalibrierung wieder normal arbeiten.) Andernfalls berücksichtigen Sie bitte die der Lieferung
beigefügten Garantieanweisungen.
2. Wenn die Anzeige – Lo anzeigt, so ist dies oft ein Zeichen für leistungsschwache Batterien. Manchmal kann es
sich jedoch in einem solchen Fall um einen schwerwiegenden Fehler in Bezug auf die Nullmarkierung handeln.
Dies bedeutet, dass das Gerät bei Einschaltung nicht die Nullmarke finden bzw. bestimmen kann (ein geringfügiger
Fehler bei der Nullmarkierung führt zu der unter 1) dargestellten Situation). Wenn also das Problem nicht durch
Einlegen neuer Batterien behoben werden kann, schicken Sie uns bitte die Waage zu, damit wir diese im Rahmen der
vereinbarten Garantieleistung von 20 Jahren austauschen können.
Setzen Sie das Gerät nicht dauerhaft extremer Hitze oder Kälte aus. Eine optimale Arbeitsweise ist gewährleistet, wenn das
Gerät bei normaler Raumtemperatur eingesetzt und gelagert wird. Sollte die Waage Temperaturschwankungen ausgesetzt
worden sein, so lassen Sie das Gerät sich mindestens eine Stunde vor Gebrauch auf normale Raumtemperatur einstellen.
Sorgen Sie füreine ausreichende Aufwärmzeit. Schalten Sie die Waage EIN und warten Sie einige Minuten, damit sich die
inneren Komponenten vor Beginn des Wiegevorgangs stabilisieren können. Je sauberer das Umfeld, desto besser. Staub,
Schmutz, Feuchtigkeit, Vibration, Luftströmungen sowie die Nähe zu anderen elektronischen Geräten können die Zuverlässigkeit
und Genauigkeit Ihrer Waage negativ beeinflussen. Wenden Sie Sorgfalt bei der Handhabung an. Legen Sie alle zu wiegenden
Gegenstände vorsichtig auf die Waagschale.Zwar ist die Konstruktion der Waage sehr robust und beständig, jedoch sollte eine
raue Handhabung vermieden werden, da dies dauerhaft zu einer Beschädigung des inneren Sensors führen kann und der
Garantieanspruch damit verfällt.Vermeiden Sie unbedingt Erschütterungen, Stürze oder andere Stöße. Es handelt sich um ein
Präzisionsgerät, DAS ÄUSSERSTER SORGFALT BEDARF.
WICHTIGER HINWEIS: Legen Sie den zu wiegenden Gegenstand auf die Waagschale. Nachdem das stabile Gewicht
angezeigt wurde, nehmen Sie den Gegenstand sofort herunter. Dies erhöht die Lebensdauer und Genauigkeit der Waage.
Diese elektronische Waage ist ein Präzisionsgerät. Verwenden Sie das Gerät nie in der Nähe von eingeschalteten Mobiltelefonen,
schnurlosen Telefonen, Radiogeräten, Computer oder anderen elektronischen Instrumenten. Alle diese Geräte senden
Hochfrequenzen aus und können zu ungenauen Messwerten führen. Sollte Ihre Waage einmal unpräzise arbeiten, so wechseln
Sie den Raum bzw. Standort. Es handelt sich bei JSCALE um ein äußerst präzise arbeitendes Gerät – auch wenn sich das
Display während des Wiegevorgangs auf und ab zu bewegen scheint. Ursache hierfür sind die vorherrschenden Luftströmungen
oder Vibrationen. Ein beständiger Wert wird erzielt, wenn die Anzeige 3 Sekunden lang unverändert bleibt.
BEDIENUNGSHINWEISE
BATTERIEBETRIEB
1. Sie benötigen zwei Batterien Typ AAA
2. Einlegen der Batterien: Öffnen Sie die Batterieverschlussklappe durch Drücken/Schieben nach außen. Legen Sie die
Batterien in der vorgeschriebenen Weise in das Batteriefach – stellen Sie sicher, daß die Polarität korrekt ist. Schliessen
Sie die Batterieverschlusskappe. Gehen Sie nicht mit Gewalt vor und üben Sie keinen Druck auf die Wiegefläche aus.
3. Die Waage ist nun funktionsbereit.
KALIBRIERUNG
Die Waage sollte kalibriert werden, wenn sie zum ersten Mal benutzt wird oder wenn die Waage unterschiedlichen Höhenmetern
ausgesetzt ist. Eine Kalibrierung ist erforderlich, da das Gewicht einer Menge an einem bestimmten Ort nicht das gleiche sein
muss wie an einem anderen Ort. Außerdem können mit der Zeit mechanische Abweichungen entstehen.

Auch wenn die JSR extrem solide gebaut ist, ist unbedingt darauf zu achten, dass die Waage niemals überlastet wird, fällt
bzw. erschüttert wird. Waagen sind sehr empfindliche Geräte, und im Gegensatz zu Mobiltelefonen verfügen Waagen über
empfindliche Sensoren, die das Gewicht des Gegenstandes bestimmen. Wenn Sie Ihre Waage fallen lassen oder stoßen,
nehmen die Sensoren diesen „Schlag“ wahr und werden manchmal beschädigt. Dies ist der Fall bei allen Digitalwaagen. Wir
konstruieren unsere Waagen so erschütterungs- und sturzfest wie möglich, jedoch haben wir keinerlei Möglichkeit, eine 100%
igen Schutz gegen Überlastung der Kraftmesszelle oder Beschädigung
des Sensors zu gewährleisten. Eine ordnungsgemäß eingesetzte Waage liefert über viele Jahre höchste Zuverlässigkeit. Bei
unsachgemäßem Einsatz arbeitet die Waage nur so lange, wie ihre Sensoren nicht beschädigt werden.
TASTENFUNKTIONEN
Modus/Einheit - Drücken Sie diese Taste ein Mal und lassen Sie sie wieder los, um die Gewichtseinheit zu wechseln. Sie
können zwischen g (Gramm), oz (Unzen), dwt. (pennyweight), ozt (Troyunzengewicht), ct (Karat) oder gn (grain) wählen .
Stückzahl - Die Probengröße kann 25, 50, 75 oder 100 betragen. Die nachfolgenden Schritte beschreiben die Vorgehensweise
beim kumulativen Wiegen von Proben: Schalten Sie die Waage ein, legen Sie eine „vorgegebene“ Anzahl von Proben eines
bestimmten Gegenstandes auf die Waagschale. Halten Sie die PCS-Taste gedrückt, bis das Display die entsprechende Stückzahl
angibt (die Anzeige sollte auf pcs. Stehen). Wählen Sie die Probengröße durch Drücken von [M] (dieselbe wie oben). Drücken
Sie zum Schluß die PCS-Taste. Nach 2 Sekunden zeigt die Waage die Anfangsgröße im Display an. (Sie können nun die Proben
herunternehmen, wenn Sie die Waage wieder auf 0 Stck. stellen wollen.) Legen Sie die Gegenstände, die gezählt werden
sollen, auf die Waagschale. Die gesamte Anzahl von Gegenständen wird nun im Display angezeigt. Drücken Sie [M], um die
Zählfunktion zu verlassen und in den normalen Wiegemodus zurückzukehren.
An/Aus - Drücken Sie diese Taste, um das Gerät einzuschalten. Wenn das Gerät eingeschaltet ist. Halten Sie die Taste gedrückt,
um die Waage wieder auszuschalten.
Tara kann verwendet werden, um das Gewicht einer leeren Waagschale zu löschen. Stellen Sie einen leeren Behälter auf die
Waage und drücken Sie [T]. Anschließend legen Sie die zu wiegenden Gegenstände in die Waagschale.
NOTA: Wenn das gesamte Gewicht von der Wiegefläche entfernt wurde, wird das Leergewicht eines Behälters als negative Zahl
angezeigt. Drücken Sie [T] erneut, um die Anzeige auf Null zurückzusetzen.
LICHT - Drücken Sie die Light-Taste in der Mitte, um die LCD-Hintergrundbeleuchtung einzuschalten. Diese bleibt einige
Sekunden lang eingeschaltet. Drücken Sie diese Taste erneut, um die Hintergrundbleuchtung wieder auszuschalten.
www.jscale.com

Merci d’avoir fait l’achat de la balance électronique J-Scale®JSR ECO 400. Veuillez lire les instructions d’utilisation
avant usage. Cette balance est un instrument de précision. Avec une utilisation normale et un traitement attentif,
cet instrument vous procurera des années de services fiables.
Pour plus d’information, veuillez visiter notre site internet www.jscale.com.
SPECIFICATIONS
MANUEL UTILISATEUR
Made in China
JSR-ECO 400
Précision Capacité
0.01g
0.0004oz
0.15gn
0.05ct
0.0003ozt
0.006dwt
400g
14.1oz
6172.9gn
2000ct
12.9ozt
257.2dwt
FRANÇAIS

La JSR-200 requiert les deux poids de 200g & 400g pour calibrer.
1. Placez la balance sur une surface stable et plane. Allumez la balance, l’écran LCD affiche “0.0”.
2. Maintenir appuyé la touche [M] pour 5 secondes juqu’à ce que l’écran affiche “CAL-” puis relâchez la touche.
3. Pressez encore une fois la touche [M], l’écran affichera “200.00g” clignote sur l’écran.
4. Posez prudemment un poids de 200g sur la balance et attendez 3 secondes. L’écran affichera “400g”.
5. Retirez le poids de 200g du plateau de pesée, posez prudemment un poids de 400g sur la balance et attendez 3
secondes. L’écran affichera “PASS”.
6. La balance retourne en mode de pesée. La calibration est terminée. Retirez le(s) poids et éteignez la balance.
NOTE: si la balance ne pèse pas précise après la calibration, cela indique une erreur de calibration. Le processus devra être
répétée plus lentement. Seulement calibrez la balance sur une surface stable et plate.
ERREUR ET MANQUE DE PRÉCISION
Les raisons premières du manque de précision sont des piles faibles, une calibration incorrecte, une surcharge ou une utilisation
sur une surface instable. Veuillez garder cela à l’esprit, maintenir et opérer votre balance correctement. La balance est un
instrument de précision et doit être utilisée avec grande précaution.
POINTS FORTS
TEST DE SEGMENTS DE DEMARRAGE
Si vous avez allumé la balance, tous les segments de l’écran sont affichés pour 2 secondes avant que l’écran retourne à “0”.
SURCHARGE
Si vous avez surchargé la capacité maximale de la balance, l’écran affiche “0_Ld”. Enlevez tous les objets de la balance. La
JSR est équipé d’une protection de surcharge, mais c’est toutefois possible que vous pouvez détériorer les capteurs de pesées
par surcharge.
INDICATION DE LA CAPACITÉ - WEIGHMETER®
Sur le côté de l’écran vous trouvez un diagramme en bâtons. Si vous ajoutez du poids au balance, le graphe va augmenter.
Cette innovation nous appelons Weighmeter®. Cela vous indique la capacité restante et vous fait attention d’une surcharge
au cas où vous avez dépassé la capacité maximale. S’il vous plaît utilisez le WeighmeterTM pour contrôler le poids et evitez
absolument une surcharge de la balance.
DEPANNAGE & REMARQUES D’UTILISATION
1. Si l’affichage se bloque sur “8888”, “LLLL” ou “EEEE”, cela indique que la balance a été choquée, a subit une chute
ou a été endommagé et que les capteurs délicats ont pu être endommagés. Veuillez essayer de re-calibrer la balance
(si le capteur n’a pas été trop secoué il fonctionnera à nouveau après calibration). Si cela ne fonctionne pas il faudra
alors suivre les instructions de garantie qui sont incluses avec la balance.
2. Quelquefois se peut traiter en ce cas d’une erreur grave concernant la marque zéro. Cela signifique que la balance
ne peut pas trouver ou déterminer la marque zéro (une erreur insignifiante concernant la marque zéro conduit à la
situation exposé sous 1). Si vous ne pouvez pas résoudre le problème en changer les batteries, s’il vous plaît renvoyez
la balance à nous.

Ne pas surcharger (excéder la capacité de la balance). Cela inclus tout objet sur le plateau: plateau supplémentaire, bol et
autres objets combinés. Surcharger, choquer ou laisser tomber la balance endommagerait le capteur et annulerait la garantie.
Donner à la balance suffisamment de temps pour se réchauffer. Allumer et attendre plusieurs secondes pour permettre aux
composants internes de se stabiliser avant de peser. Plus l’environnement est propre mieux c’est. Poussière, terre, humidité,
vibration, courant d’air et proximité d’autres équipements électroniques peuvent tous causer des effets négatifs sur la fiabilité
et la précision de votre balance. Utiliser avec attention; déposer délicatement tous les objets à peser sur le plateau. Même si
cette balance est conçue pour être très durable, il est bon d’éviter tout mauvais traîtement car cela pourrait endommager le
capteur interne de manière permanente et ainsi annuler la garantie. Eviter les longues expositions au froid ou à la chaleur,
votre balance fonctionne mieux lorsqu’elle est utilisée et stockée à températureambiante normale.
Déposer l’objet à peser sur le plateau, le retirer immédiatement une fois que le poids stable s’affiche. Cela prolongera la
longévité et la précision de votre balance.
Ceci est une balance très précise et l’affichage pourrait ne pas se stabiliser. Cela est dû aux courrants d’air et aux vibrations.
La mesure de poids stable est atteinte à partir du moment ou l’affichage est stable pour 3 secondes.
UTILISATION
UTILISATION DES PILES
1. Deux piles alcalines de type AAA sont requises.
2. Pour installer les piles: retirez le capot des piles en le faisant glisser vers l’extérieur. - Placez les piles dans le
compartiment en les alignant correctement. - remettez le capot des piles en place. NE PAS UTILISER DE FORCE
EXCESSIVE ET NE PAS PRESSER SUR LE PLATEAU DE PESEE!!!
3. La balance est maintenant prête à l’utilisation.
CALIBRATION
S’il vous plaît calibrer la balance si vous l’utilisez pour la première fois, si la balance est exposée aux dénivelés ou si vous
utilisez la balance dans un autre endroit. C’est nécessaire parce que le poids d’une quantité dans un endroit déterminé n’est
pas toujours le même dans un autre endroit. C’est aussi possible qu’il apparaîtront des deviations mécaniques de temps en
temps.

Même si la JSR a été conçue pour être extrêmement durable, il est important de ne jamais surcharger ou laisser tomber/
choquer la balance. Les balances sont des instruments délicats qui comportent des capteurs fragiles pour déterminer le poids
d’un objet. Lorsqu’une balance subit une chute ou un choc, ces capteurs ressentent la secousse et peuvent être détruits. C’est
un point commun de toutes les balances. Nous concevont nos balances pour être aussi résistantes que possible aux chocs
et chutes, mais il ne nous est pas possible de protéger contre les dommages de capteurs à 100%. Une balance utilisée
correctement procurera des années de services fiables et de pesées précises. En outre une balance abusée ne fonctionne que
jusqu’à ce que ses capteurs soient endommagés.
FONCTIONS CLÉS
Mode/Unité - Appuyez sur cette touche et la lâchez pour changer l’unité du poids.Vous pouvez sélectionner entre g (gramme),
oz (onces), dwt (pennyweight), ozt (onces troy), ct (carat) ou gn (grain).
Mode de comptage de pièces. La taille d’échantillon peut être de 25, 50, 75 ou 100. Les étapes suivantes décrivent la
procédure pour une pesée cumulée d’un échantillon: mettez la balance en route, placez un nombre ‘donné’ d’échantillons
d’un objet sur le plateau. Pressez et maintenir la touche [PCS] jusqu’à ce que l’écran affiche le nombre en PCS clignotant
(l’indicateur devrait être sur “pcs”). Pressez la touche [M] pour sélectionner la taille d’échantillon (la même que celle choisie
ci-dessus), pour finir, pressez la touche [PCS]. Après 2 secondes la balance se rappellera la taille d’échantillon choisie et
affichera la taille d’échantillon de départ (il est maintenant possible de retirer les échantillons si on veut faire retourner la
balance à 0 pcs). Placez les objets a compter sur le plateau, le nombre total d’objets s’affichera à l’écran. Pressez la touche
[M] pour sortir de la fonction de comptage et retournez au mode de pesée normal.
On/Off - Appuyez sur cette touche pour allumer la balance. Si l´appareil est allumé, maintenit appuyé cette touche pour
éteindre la balance.
Tare peut être utilisée pour éliminer le poids d’un contenant vide. Placez le contenant vide sur la balance puis pressez [T] .
Placez ensuite les objets à peser dans le contenant.
NOTE: Lorsque tous les objets sont retirés du plateau de pesée, la valeur de tare du contenant sera affichée en valeurs
négatives. Appuyez sur [T] de nouveau pour retourner la balance à zéro.
Lumière - Appuyez sur la touche [LIGHT] au milieu de la balance pour allumer l’illumination de l’écran. Cela reste allumé pour
quelques secondes. Appuyez nouvellement sur cette touche pour éteindre l’illumination.
www.jscale.com

Muchas gracias por su decisión de comprar nuestra báscula digital J-Scale®JSR ECO 400. Por favor léa
atentamente todas las instrucciones de uso. Aquí se trata de un aparato de precisión. En caso de un tratamiento
normal y cuidadoso, esta báscula supuestamente trabajará fiablemente y durará muchos años.
Encontrará más informaciones en nuestra página web www.jscale.com.
DATOS CARACTERISTICOS
INSTRUCCIONES DE OPERACION
Made in China
JSR-ECO 400
Precisión Capacidades
0.01g
0.0004oz
0.15gn
0.05ct
0.0003ozt
0.006dwt
400g
14.1oz
6172.9gn
2000ct
12.9ozt
257.2dwt
ESPAÑOL

JSR -200 necesita una pesa de 200g y 400g para calibrar.
1. Apague la báscula y pónganla en una superficie llana y estable.
2. Mantenga el botón [M] pulsado por unos 5 segundos hasta que el display indique “CALE“.
3. Pulse el botón [M] otra vez, aparece en el display “200.0g”.
4. Ponga el peso de 200g con precaución al platillo. A continuación, el display indicará “400.0g”.
5. Quite la pesa de 200g , ponga la pesa de 400g con precaución al platillo, espere 3 segundos hasta que el display
indique “PASS”.
6. La calibración está terminada. Pulse [ON/OFF] para apagar la báscula.
NOTA: Si su báscula pesa imprecisamente después del calibrado, esto significa un error de calibrar y el proceso de calibrar
debe estar repetido más despacio. Por favor solamente calibre en una superficie muy plana.
DATOS CARACTERISTICOS
CONEXIÓN DE TODOS LOS SEGMENTOS
Al encender la báscula, aparecen todos los segmentos del display. Esta imagen aparece por aproximadamente 3 segundos y
se pone otra vez a cero.
SOBRECARGA
En caso de sobrecarga de la capacidad, el display indica “O_ Ld”. Elimine inmediatamente la pesa. Quizás, la báscula
sigue trabajando normal. Tenga en cuenta que puede dañar la báscula permanentemente y así, podría caducar su derecho
a garantía!
INDICACIÓN DE LA CAPACIDAD - WEIGHMETER®
La JSR está equipada con una indicación gráfica de la capacidad. Esta indicación permite leer la capacidad restante de la
báscula a cualquier hora durante el proceso de pesar a la izquierda del display. Por favor nunca sobrecargue la báscula.
DEPURACIÓN & FUNCIONAMIENTO
1. Si en la pantalla aparece “8888”, “LLLL” o “EEEE”, esto significa que la báscula fue sobrecargada, cayó o fue dañada
de otra manera y que los sensores sensibles han sido dañados. Intente calibrar la báscula nuevamente. (Si los sensores
no han sido dañados tan fuerte, la báscula pesara normal después del calibrado nuevo). En otro caso, por favor siga
las instrucciones de la carta de garantía adjuntada a la báscula.
2. Si el display indica “-Lo”, esto significa pilas flojas. Todavia puede tratarse en tal caso de un error grave referente a
la marcación cero. Esto significa que el aparato no puede encontrar o determinar la marca cero al encender (un error
insignificante referente a la marcación cero lleva a la situación descrita bajo 1). Si no puede solucionar el problema
con el cambio de pilas, por favor devuelva la balanza a nosotros.

No trabaje con calor o frío extremo a larga duración. Un modo de operar óptimo será garantizado si la báscula se opera
a temperatura ambiente. Mantenga un ambiente limpio. Polvo, suciedad, vibración, estelas de aire o la cercanía de otros
aparatos electrónicos pueden influir negativamente la fiabilidad y exactitud de la báscula.
Aplique un manejo meticuloso. Ponga todos los objetos de pesar con precaución al platillo de la báscula. Evite sin falta
cualquier tipo de concusiones, derrumbes y otros choques. Básculas pertenecen a aparatos de medición sensible y, en
comparación con teléfonos móviles, disponen de sensores extremamente sensibles con los que se puede estimar el peso de
un objeto. En caso de que la báscula caiga o choque contra algún lado, estos sensores perciben un impacto y pueden ser
dañados considerablemente. Este es el caso de todas las básculas digitales. Nosotros construímos las básculas lo más seguro
posible para evitar todo tipo de choques y derrumbes. Sin embargo, no tenemos ninguna posibilidad de garantizar al 100%
la protección de sobrecarga del tensiómetro o el daño del sensor. En caso de que no use la báscula adecuadamente o no siga
las instrucciones manuales, su derecho a garantía puede caducar. Si es posible, mantenga la báscula a temperatura ambiente
por lo menos una hora antes de manejarla. Espere un tiempo suficiente de calentamiento. Espere unos 30-60 minutos antes
de la calibración para que los elementos internos puedan estabilizarse antes del procedimiento de pesaje.
INSTRUCCIONES DE OPERACION
APLICACIÓN DE LA PILA:
1. Abra el compartimento de pila presionando el bloqueo.
2. Preste atención a la polaridad al introducir la pila.
3. Coloque la tapa de la pila.
4. A partir de ahora, la báscula está lista para la operación de pila.
NO APLIQUE NINGUN TIPO DE FUERZA Y NO EMPLEE NINGUNA PRESION AL PLATILLO DE LA BASCULA.
CALIBRACION
Por favor calibre la balanza si la usa por primera vez, si está exponiendo a altitudes diferentes o si la usa en otro lugar. Es
necesario porque el peso de una cantidad en un lugar determinado no siempre es el mismo como en otro lugar. También
puede ser que, a ratos aparecen fluctuaciones mecánicas.
5.

No exceda nunca la capacidad máxima de la báscula. Aunque la JSR esté construída muy sólidamente y tenga una protección
de sobrecarga, se pueden causar daños consistentes con una sobrecarga. No trabaje con calor o frío extremo a larga duración.
Un modo de operar óptimo será garantizado si la báscula se opera a temperatura ambiente. Mantenga un ambiente limpio.
Polvo, suciedad, vibración, estelas de aire o la cercanía de otros aparatos electrónicos pueden influir negativamente la fiabilidad
y exactitud de la báscula.
FUNCIONES DEL TECLADO
Pulse [M] para seleccionar entre las unidades de peso g , oz, dwt , ozt , ct o gn.
Modo de contar. La cantidad de las muestras puede ser 25, 50, 75 o 100 unidades. Los pasos siguientes describen el
procedimiento del pesaje cumulativo de muestras: Encienda la báscula y ponga una cantidad predeterminada de un objeto
específico en la báscula. Mantenga presionado el botón PCS hasta que el display indique la cantidad correspondiente (el
display debería indicar pcs). Eliga una cantidad por presionar [M]. Al final presione la tecla PCS. Después de 2 segundos,
la báscula indica la cantidad inicial. (Ahora puede eliminar las muestras, si la báscula se encuentra a 0 piezas). Ponga los
objetos a contar en la báscula. La cantidad total está indicada en el display. Presione [M] para dejar la función de contar y
para volver al modo de pesar normal.
Pulse para encender el aparato. Mantenga el botón pulsado para apagar el aparato.
Tara se puede aplicar para borrar el peso de un platillo vacío. Ponga un recipiente vacío por encima de la báscula y pulse [T].
Después, ponga los objetos a pesar en el platillo de la balanza.
ATENCIÓN: Si remueva todas las pesas del platillo, el peso vacío de un recipiente será indicado como valor negativo. Pulse de
nuevo [T] para poner el display a cero.
Iluminación del display de fondo
Después de presionar el botón [LIGHT] , se enciende y se apaga la iluminación de display de fondo.
www.jscale.com
Table of contents
Languages:
Other J-Scale Scale manuals

J-Scale
J-Scale HP-200X User manual

J-Scale
J-Scale TB500 User manual

J-Scale
J-Scale Jennings MINI User manual

J-Scale
J-Scale J-TALK User manual

J-Scale
J-Scale JZ115 User manual

J-Scale
J-Scale CJ-600 User manual

J-Scale
J-Scale CJ User manual

J-Scale
J-Scale TB600 User manual

J-Scale
J-Scale JT-2 350 Configuration guide

J-Scale
J-Scale JSR-50 User manual