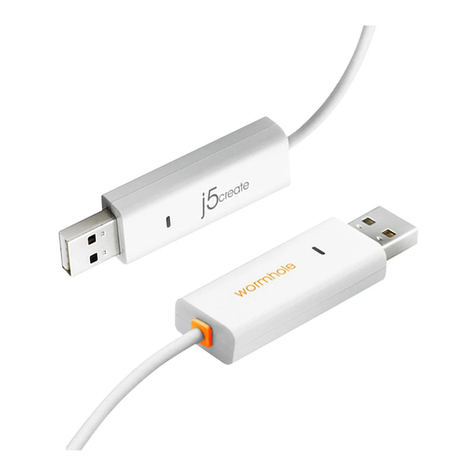
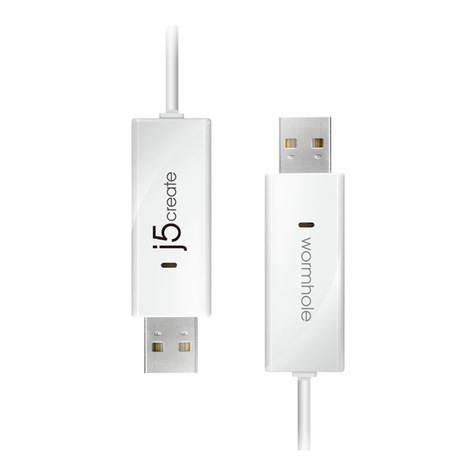
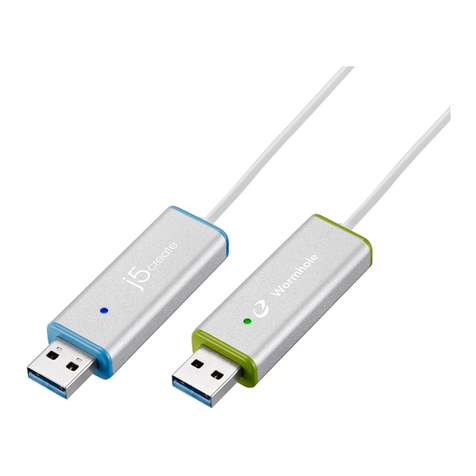
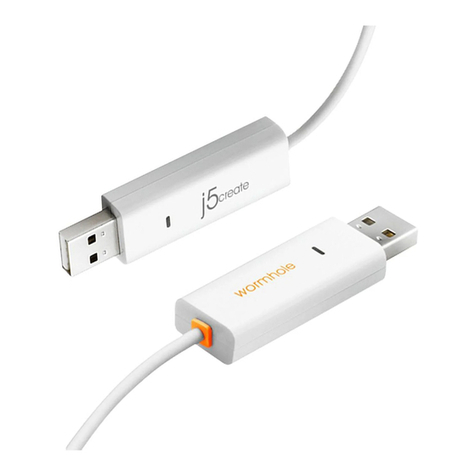
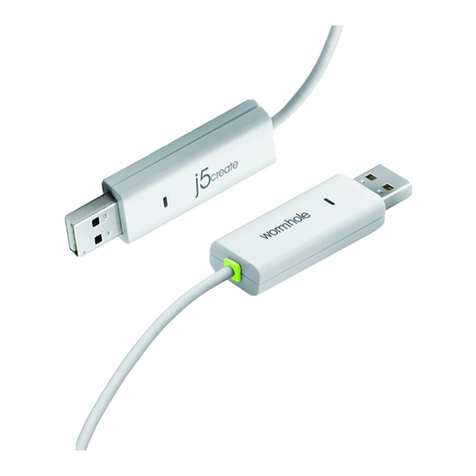
j5 create JUC500 User manual

JUC500 Ver1.0
USB3.0 wormhole switch
JUC500
For Mac& Windows OS
User Manual
Manual del usuario
Manuel de l'utilisateur
Benutzerhandbuch
ユーザー マニュアル
使用手冊


English
EN
USER MANUALWORMHOLE SWITCH
3
WORMHOLE SWITCH User Manual
2
User Manual ..................................................................................................................... 4
Manual del usuario ........................................................................................................ 11
Manuel de l'utilisateur ................................................................................................... 18
Benutzerhandbuch ........................................................................................................ 25
ユーザー マニュアル............................................................................................................... 32
使用手冊 ..........................................................................................................................39

4
English
EN
USER MANUALWORMHOLE SWITCH
WORMHOLE SWITCH USER MANUAL
2
SYSTEM REQUIREMENTS
Windows
OS: Windows 8.1 / 8 / 7 / Vista / XP
Available USB port: USB3.0 is recommended
Use USB3.0 Host: Fresco FL1000 / FL1009 install additional Host Driver
USB Host not supported: Asmedia, Etron 168 / 188, Via 801/ Via 805
CPU: Intel Pentium IV Processor or later
RAM: 1G or above
Hard Disc Capability: at least 100MB
Mac
Mac OS X 10.6/10.7/10.8/10.9/10.10
Available USB port: USB3.0 is recommended
CPU: Intel Pentium IV Processor or later
RAM: 1G or above
Hard Disc Capability: at least 100MB
※
Windows RT not supported.
※
On Vista
,
Restart your computer after the initial installation.
※
Virtual Windows or Mac OS by VMware is not supported.
※
The computer/user needs to have administrator rights.
※
If one of the two connected computers restarts, reboots, sleeps or hibernates, please
disconnect and reconnect both sides of the wormhole switch.

5
English
EN
USER MANUALWORMHOLE SWITCH
WORMHOLE SWITCH USER MANUAL
3
Windows installation
Please follow the instructions below to install the wormhole switch driver.
1. Connect one end of the wormhole switch to a standard USB port on one of the two
computers. And connect the other end of the wormhole switch to aUSB port on thesecond
computer.
2. The device willautomatically start the wormhole switch software installation on both
computers. An AutoPlay option window may appear. Please double-click the wormhole icon
to start the application.
3. If the User Account Control window appears on the screen, click Yes to continue.
4. Please run the steps above on both computers. If the other computer is a Mac, please refer to
the Mac installation guide.
5. When the wormhole switch is connected properly the wormhole launch page will be shown.
The wormhole switch icon will appear in the lower right-hand corner. If the two units are
connected to the USB3.0 port this icon will appear, indicating the transmission speed as
USB3.0; however, if a USB2.0 port is connected to one end, then this icon will appear,
indicating that the transmission speed is USB2.0.If the icon appears it means the other
computer is not connected.
6. Please set the position of the other PC. Please click on the wormhole switch or icon
to open the wormhole switch toolbar. Then click on The Position of Other PC and select the
screen location according to where you want your mouse to flow from one screen to the
other.

6
English
EN
USER MANUALWORMHOLE SWITCH
WORMHOLE SWITCH USER MANUAL
4
Mac installation
Please follow the instructions below to install the wormhole switch driver.
1. Connect one end of the wormhole switch to a standard USB port on one of the two
computers. And connect the other end of the wormhole switch to aUSB port on the second
computer.
2. When you initially connect the wormhole switch to the MAC computer the Keyboard Setup
Assistant window will pop up, follow the steps to select the keyboard type.
3. When both ends of the JUC500are plugged into the computers’ USB ports, the wormhole
icon will appear on the desktop, double-click wormhole icon to start the
software.If the Enable access for assistive devices window appears on the screen, click Yes
to continue.
4. Please run the steps above on both computers. If the other computer is a Windows, please
refer to the Windows installation guide.
5. When the wormhole switch is connected properly the wormhole launch page will be shown.
The wormhole switch icon will appear in the lower right-hand corner. If the two units are
connected to the USB3.0 port this icon will appear, indicating the transmission speed as
USB3.0; however, if a USB2.0 port is connected to one end, then this icon will appear,
indicating that the transmission speed is USB2.0.If the icon appears it means the other
computer is not connected.
6. Please set the position of the other PC.Please click on the wormhole switch or icon
to open the wormhole switch toolbar. Then click on The Position of Other PC and select the
screen location according to where you want your mouse to flow from one screen to the
other.

7
English
EN
USER MANUALWORMHOLE SWITCH
WORMHOLE SWITCH USER MANUAL
5
Functions:
Explore the wormhole switch’s convenient and user-friendly features.
Keyboard and Mouse Sharing
Move your mouse cursor between two computers naturally and seamlessly.
※
Please use a keyboard and mouse set.(The keyboard switch function always applies
to the computer the mouse is currently on).The icon indicates when the
keyboard & mouse are being controlled by the other computer.
Switch the keyboard usage to another computer
Move the mouse cursor to the second computer and open any editing application such as
Word, Excel, Power Point, etc. and use the keyboard of the first computer to type the text on
the file of the second computer.
Clipboard Sharing
With the clipboard sharing feature you can easily copy and paste clipboard content
bi-directionally between two computers.
※
The wormhole icon will change to or when sending/receiving clipboard
data.
File Transferring
Quickly and easily transfer files between two computers. Simply copy/paste or
drag/drop the file or folder to the other computer.
※
Please use the original system hotkey settings on your computer operating system
(the keyboard always follows the mouse cursor).

8
English
EN
USER MANUALWORMHOLE SWITCH
WORMHOLE SWITCH
USER MANUAL
6
SOFTWARE INSTRUCTIONS
To begin set up, please click the wormhole switch utility icon or , found on both Mac OS & Windows OS.
MAC OS:
Windows OS:
File Shuttle: You will be able to transfer files between the two computers.
The Position of the Other PC:You can quickly set up the position of the other computer by
using one of the 4 options (Right/Left/Up/Down)
Temporarily Disable/Enable the keyboard/mouse and/or clipboard sharing function:You
can quickly disable or enable the sharing option. If temporarily disabling one of sharing
functions, the or icon will be shown. If temporarily disabling both functions, the
icon or will be shown.
Preference Setup
MAC OS Windows OS:
Keyboard and Mouse Control Switch Settings:
Off: Turns the mouse/keyboard sharing option off.
Use the Mouse to Move off the Edge of the Screen
:You can adjust your settings so that
your mouse moves from one computer’s screen to the other computer’s screen from
either the right/left/up/down side of the PC.

9
English
EN
USER MANUALWORMHOLE SWITCH
WORMHOLE SWITCH
USER MANUAL
6
SOFTWARE INSTRUCTIONS
To begin set up, please click the wormhole switch utility icon or , found on both Mac OS & Windows OS.
MAC OS:
Windows OS:
File Shuttle: You will be able to transfer files between the two computers.
The Position of the Other PC:You can quickly set up the position of the other computer by
using one of the 4 options (Right/Left/Up/Down)
Temporarily Disable/Enable the keyboard/mouse and/or clipboard sharing function:You
can quickly disable or enable the sharing option. If temporarily disabling one of sharing
functions, the or icon will be shown. If temporarily disabling both functions, the
icon or will be shown.
Preference Setup
MAC OS Windows OS:
Keyboard and Mouse Control Switch Settings:
Off: Turns the mouse/keyboard sharing option off.
Use the Mouse to Move off the Edge of the Screen
:You can adjust your settings so that
your mouse moves from one computer’s screen to the other computer’s screen from
either the right/left/up/down side of the PC.
WORMHOLE SWITCH
USER MANUAL
7
Use only the Hotkey to switch:You can setup the hotkey to activate the
keyboard/mouse control switch. The default hotkey is (Alt+S)
Clipboard Share Options:
Turn Off or Auto Share
Others:
Show Connection Information:Un-checking this setting means the launch page will not be shown
when you start up the device.
※
This option is only available on Mac OS computers.
Resident this Application:When you choose this setting the wormhole switch program
automatically setsup every time you connect the wormhole device.
Enable Access for System Hotkey:Choose this setting toactivate the Hotkey function.
※
This option is only available on Mac OS computers.
Double Click the System Tray Icon to Turn Sharing On/Off Temporarily:Enable/disable the
clipboard sharing and keyboard/mouse control functions by simply double clicking the
icon on the bottom right-hand side of the taskbar.
※
This option is only available on Windows OS
computers.
Send Ctrl-Alt-Del to another computer:This option allows for alternative key options for the
[Ctrl-Alt-Del]command for the second computer.
※
This function is only available when
2Windows OS computersare connected.
Online Update:Check and update the latest version of software for the wormhole.
1. Please make sure you are connected to the internet and Do Not disconnect the
wormhole during the driver update.
2. Remove the wormhole cable from the slave computer.
3. SelectOnline Update
4.After you have finished the installation process,disconnect and then reconnect the
wormhole device on both computers.
About wormhole switch: Software version information can be found here.
Quit USB Switch/ Exit: The wormhole switch can be uninstalled in the confirmation box.
TECHNICAL SUPPORT
If you have any issues using this product, please follow the instructions below before returning this
product to the store.
1. The User Manual
Contains detailed instructionsand a troubleshooting section; many common issues can be
easily resolved by reading the user manual.
2. Online Support
Please visit the j5 create website (www.j5create.com) to find the latest software for your
device. If you still experience the same issue, you can submit a trouble description via
the next 24 business hours.
3. Telephone Support
Please call us at +1-888-689-4088 and one of our support technicians will be very happy to
assist you.
Customer Service:
Toll free number: +1-888-988-0488
Technical Support:
Toll free number: +1-888-689-4088
Email: service@j5create.com
Please contact Technical Support during business hours. 10:00AM-7:00PM E.S.T Monday-Friday
for further assistance.

10
English
EN
USER MANUALWORMHOLE SWITCH
WORMHOLE SWITCH User Manual
8
WARRANTY OF j5 create
j5 create offers a limited 1-year warranty. User’s wear & tear damage are not included.
The user shall call or email j5 create customer service with defect information of the product and obtain a return authorization
number.
Users are responsible for one way return freight cost and we will take care of one way freight back.
In order to obtain a return authorization, user should have the following information handy when calling or emailing the service
team:
(i) a copy of original purchase invoice to verify your warranty
(ii) a product serial number
(iii) a description of the problem
(iv) a return Material authorization number
(v) customer’s Name, address, and telephone number
j5 create does not warrant that the operation of the product will be uninterrupted or error-free. j5 create is not responsible for
damage arising from failure to follow instructions relating to the product’s use. This warranty does not apply to:(a) consumable
parts, unless damage has occurred due to a defect in materials or workmanship; (b) cosmetic damage, including but not
limited to scratches, dents ,and broken plastic on ports; (c) damage caused by use with non-j5 create products; (d) damage
caused by natural disasters (flood, fire, earthquake, lighting strike, typhoon etc.,)(e) damage caused by human misuse( lost,
accident, abuse, misuse or other external causes) (f) damage caused by operating the product outside the permitted or
intended uses described by j5 create ; (g) damage caused by service (including upgrades and expansions) performed by
anyone who is not a representative of j5 create or a j5 create Authorized Service Provider; (h) a product or part that has been
modified to alter functionality or capability without the written permission of j5 create; or (i) if any j5 create serial number on
the product has been removed or defaced.
If such a situation occurs, j5 create will calculate the cost of materials and repair for your reference.
This warranty is given by j5 create in lieu of any other warranties expressed or implied.
REGULATORY COMPLIANCE
FCC:This equipment has been tested and is found to comply with FCC Part 15 Subpart B § 15.109/15.107 Class B.
Operation is subject to the following two conditions:
• This device may not cause harmful interference
• This device must accept any interference, including interference that may cause undesired operation of the device.
CE:This equipment is in compliance with the requirements of the following regulations:
EN 55022 Class B (2006),
EN 55024 (1998+A1:2001+ A2:2003), (IEC/EN 61000-4-2 (1995+A1:1998+A2:2001)/-3(2006)
C-Tick:This equipment is in compliance with the requirements of the following regulations:
EN 55022 (2006) Class B, AS/NZS CISPR22 © IEC: 2005.
VCCI:This equipment is in compliance with the requirements of the following regulations:
CISPR22 © IEC: 2005
Disclaimer
Information in this document is subject to change without notice. The manufacturer does not make any representations or
warranties (implied or otherwise) regarding the accuracy and completeness of this document and shall in no event be liable
for any loss of profit or any commercial damage, including but not limited to special, incidental, consequential, or other
damage. No part of this document may be reproduced or transmitted in any form by any means, electronic or mechanical,
including photocopying, recording or information recording and retrieval systems without the expressed written permission of
the manufacturer.
Copyright© 2014j5 create. All rights reserved. All trade names are registered trademarks of their respective owners. Features
and specifications are subject to change without notice. Product may not be exactly as shown in the diagrams.
English
EN
MANUAL DEL USUARIOWORMHOLE SWITCH
11
Español
ES
WORMHOLE SWITCH User Manual
8
WARRANTY OF j5 create
j5 create offers a limited 1-year warranty. User’s wear & tear damage are not included.
The user shall call or email j5 create customer service with defect information of the product and obtain a return authorization
number.
Users are responsible for one way return freight cost and we will take care of one way freight back.
In order to obtain a return authorization, user should have the following information handy when calling or emailing the service
team:
(i) a copy of original purchase invoice to verify your warranty
(ii) a product serial number
(iii) a description of the problem
(iv) a return Material authorization number
(v) customer’s Name, address, and telephone number
j5 create does not warrant that the operation of the product will be uninterrupted or error-free. j5 create is not responsible for
damage arising from failure to follow instructions relating to the product’s use. This warranty does not apply to:(a) consumable
parts, unless damage has occurred due to a defect in materials or workmanship; (b) cosmetic damage, including but not
limited to scratches, dents ,and broken plastic on ports; (c) damage caused by use with non-j5 create products; (d) damage
caused by natural disasters (flood, fire, earthquake, lighting strike, typhoon etc.,)(e) damage caused by human misuse( lost,
accident, abuse, misuse or other external causes) (f) damage caused by operating the product outside the permitted or
intended uses described by j5 create ; (g) damage caused by service (including upgrades and expansions) performed by
anyone who is not a representative of j5 create or a j5 create Authorized Service Provider; (h) a product or part that has been
modified to alter functionality or capability without the written permission of j5 create; or (i) if any j5 create serial number on
the product has been removed or defaced.
If such a situation occurs, j5 create will calculate the cost of materials and repair for your reference.
This warranty is given by j5 create in lieu of any other warranties expressed or implied.
REGULATORY COMPLIANCE
FCC:This equipment has been tested and is found to comply with FCC Part 15 Subpart B § 15.109/15.107 Class B.
Operation is subject to the following two conditions:
• This device may not cause harmful interference
• This device must accept any interference, including interference that may cause undesired operation of the device.
CE:This equipment is in compliance with the requirements of the following regulations:
EN 55022 Class B (2006),
EN 55024 (1998+A1:2001+ A2:2003), (IEC/EN 61000-4-2 (1995+A1:1998+A2:2001)/-3(2006)
C-Tick:This equipment is in compliance with the requirements of the following regulations:
EN 55022 (2006) Class B, AS/NZS CISPR22 © IEC: 2005.
VCCI:This equipment is in compliance with the requirements of the following regulations:
CISPR22 © IEC: 2005
Disclaimer
Information in this document is subject to change without notice. The manufacturer does not make any representations or
warranties (implied or otherwise) regarding the accuracy and completeness of this document and shall in no event be liable
for any loss of profit or any commercial damage, including but not limited to special, incidental, consequential, or other
damage. No part of this document may be reproduced or transmitted in any form by any means, electronic or mechanical,
including photocopying, recording or information recording and retrieval systems without the expressed written permission of
the manufacturer.
Copyright© 2014j5 create. All rights reserved. All trade names are registered trademarks of their respective owners. Features
and specifications are subject to change without notice. Product may not be exactly as shown in the diagrams.
WORMHOLE SWITCH
Manual del usuario
2
Requisitos del entorno
Windows
OS: Windows 8.1 / 8 / 7 / Vista / XP
Puerto USB disponible (USB 3.0 recomendado)
Utilice USB3.0 Host: Fresco FL1000 / FL1009 instalar el Controlador de host adicional
USB Host no soportado: ASMedia, Etron 168/188, Via 801 / Via 805
CPU: Procesador Intel Pentium IV o superior
RAM: 1G o más
Disco duro: Requiere un espacio de al menos 100MB
Mac
Mac OS X 10.6/10.7/10.8/10.9/10.10
Puerto USB disponible (USB 3.0 recomendado)
CPU: Procesador Intel Pentium IV o superior
RAM: 1G o más
Disco duro: Requiere un espacio de al menos 100MB
※
Windows RT no se admite.
※
En Vista, reinicie el equipo después de la instalación inicial.
※
El sistema operativo Windows o Mac virtual de VMware no se admite.
※
El equipo o el usuario necesita tener derechos de administrador.
※
Si uno de los dos equipos conectados se reinicia o entra en el estado de suspensión o
hibernación, desconecte ambos extremos del conmutador wormhole y vuelva a conectarlos.

12
WORMHOLE SWITCH MANUAL DEL USUARIOWORMHOLE SWITCH
12
Español
ES
WORMHOLE SWITCH Manual del usuario
3
PRIMEROS PASOS –Windows
Siga las instrucciones que se indican a continuación para instalar el controlador del
conmutador wormhole.
1. Conecte un extremo del Wormhole Switch a un puerto USB estándar de uno de los
dos ordenadores.Conecte el otro extremo del Wormhole Switch a un puerto USB del
otro ordenador.
2. El dispositivo arrancará el software de instalación del Wormhole Switch
automáticamente en ambos ordenadores. Windows puede que abra las opciones
de “Reproducción automática”. Haga clic en la opción Wormhole.
3. Si la ventana “Control de cuentas de usuario” aparece en la pantalla, haga clic en
“Sí” para continuar..
4. Ejecute los pasos anteriores en ambos equipos. Si el otro equipo es un Mac, consulte
la guía de instalación para Mac.
5. Cuando el conmutador wormhole esté conectado correctamente a wormhole, se
mostrará la página de inicio.
El icono del conmutador wormhole aparecerá en la esquina inferior derecha. Si las dos
unidades están conectadas al puerto USB3.0, aparecerá el icono , lo que indica
que la velocidad de transmisión es USB3.0; sin embargo, si se conecta un puerto USB2.0
a un extremo, aparecerá el icono , lo que indica que la velocidad de transmisión
es USB2.0. Si aparece el icono , significa que el otro equipo no está conectado.
6. Establezca la posición del otro equipo. Haga clic en el icono del conmutador
wormhole para abrir la barra de herramientas del mismo. A
continuación, haga clic en The Position of Other PC (La posición del otro
equipo) y seleccione la ubicación de la pantalla conforme al lugar por el
que desea que fluya el ratón de una pantalla a otra.

13
WORMHOLE SWITCH MANUAL DEL USUARIOWORMHOLE SWITCH
13
Español
ES
WORMHOLE SWITCH Manual del usuario
4
PRIMEROS PASOS –MAC
Siga las instrucciones que se indican a continuación para instalar el controlador del conmutador
wormhole.
1. Conecte un extremo del Wormhole Switch a un puerto USB estándar de uno de los dos
ordenadores.Conecte el otro extremo del Wormhole Switch a un puerto USB del otro
ordenador.
2. Cuando conecta por primera vez el Wormhole Switch al ordenador MAC se abre una
ventana en la que se lee “Keyboard Setup Assistant”,siga los pasos para seleccionar el Tipo
de teclado.
3. Cuando ambos extremos de su JUC500 estén enchufados a los puertos USB de los equipos,
el icono de aparecerá en el escritorio. Si la ventana “Habilitar el acceso de los
dispositivos de asistencia” aparece en la pantalla, haga clic en “Sí” para continuar.
4. Ejecute los pasos anteriores en ambos equipos. Si el otro equipo es un Windows, consulte la
guía de instalación para Windows.
5. Cuando el conmutador wormhole esté conectado correctamente a wormhole, se
mostrará la página de inicio.
El icono del conmutador wormhole aparecerá en la esquina inferior derecha. Si las dos
unidades están conectadas al puerto USB3.0, aparecerá el icono , lo que indica que la
velocidad de transmisión es USB3.0; sin embargo, si se conecta un puerto USB2.0 a un
extremo, aparecerá el icono , lo que indica que la velocidad de transmisión es USB2.0.
Si aparece el icono , significa que el otro equipo no está conectado.
6. Establezca la posición del otro equipo. Haga clic en el icono del conmutador wormhole
para abrir la barra de herramientas del mismo. A continuación, haga clic en The
Position of Other PC (La posición del otro equipo) y seleccione la ubicación de la pantalla
conforme al lugar por el que desea que fluya el ratón de una pantalla a otra.

14
WORMHOLE SWITCH MANUAL DEL USUARIOWORMHOLE SWITCH
14
Español
ES
WORMHOLE SWITCH
Manual del usuario
5
¡EXPLORAR LAS INCREÍBLES CARACTERÍSTICAS
AHORA! ¡Prepárese para explorar las increíbles características!
Tras ajustar la configuración de la sección anterior, puede comenzar a usar su Wormhole
Switch y disfrutar de la comodidad que le ofrece.
Compartir teclado y ratón:
Mueva el cursor del ratón entre dos ordenadores de forma natural y sin problemas.
※
Por favor utilice un set de ratón y teclado. La función Keyboard Switch siempre sigue al cursor del
ratón del mismo ordenador. Cuando se usa un ratón USB o un teclado que no es parte del set, este
regresará a su función de cambio de pantalla limitada por defecto. Cuando el teclado y ratón son
controlados por otro ordenador, verá el icono en la esquina inferior derecha de la barra
de tareas.
Cambiar el uso del teclado a otro ordenador:
Mueva el cursor del ratón a un segundo ordenador y abra una aplicación de edición
como word, excel y power point, etc. y utilice el teclado del primer ordenador para
escribir el texto en el archivo del segundo ordenador.
Compartir el portapapeles
Con la función de uso compartido del portapapeles puede copiar y pegar fácilmente contenido del
portapapeles en ambas direcciones entre dos equipos.
※
El icono wormhole cambiará a ocuando envíe o reciba datos utilizando el portapapeles.
Transferencia de archives
Transfiera rápida y fácilmente archivos entre dos equipos. Simplemente copie y pegue o arrastre y coloque
el archivo o carpeta en el otro equipo.
※
Por favor utilice los ajustes de tecla de acceso directo del sistema original en el sistema operativo de su
ordenador (el teclado siempre sigue al cursos del ratón).

15
WORMHOLE SWITCH MANUAL DEL USUARIOWORMHOLE SWITCH
15
Español
ES
WORMHOLE SWITCH
Manual del usuario
6
INSTRUCCIONES DEL SOFTWARE
Para iniciar la configuración, haga clic en el icono de la utilidad Wormhole Switch en
la esquina inferior derecha de la pantalla.
MAC OS:
Windows OS:
File Shuttle: You will be able to transfer files between the two computers.
Posición del otro PC:Puede configurar rápidamente la posición del otro ordenador en las 4
opciones siguientes. (Derecha/Izquierda/Arriba/Abajo)
Deshabilitar control de teclado y ratón temporalmente&Deshabilitar uso compartido del
portapapeles temporalmente:Puede Habilitar o Deshabilitar rápidamente la opción de
compartir. Al Deshabilitar una de esas funciones temporalmente, aparecerá el icono
. Al deshabilitar ambas funciones temporalmente, aparecerá el icono .
Preferencias:
MAC OS Windows OS:
Usar desplazamiento del ratón más allá del borde de la pantalla: Puede ajustar la
configuración de forma que el ratón se mueva de la pantalla de un equipo a la
pantalla del otro equipo desde el lado derecho, izquierdo, superior o inferior del
equipo.

16
WORMHOLE SWITCH MANUAL DEL USUARIOWORMHOLE SWITCH
16
Español
ES
WORMHOLE SWITCH Manual del usuario
7
Combinación de teclas
Puede configurar una combinación de teclas para activar el cambio de control.La
combinación de teclas predeterminada es (Alt+s)
•Otros
Mostrar Información de Conexión
Desmarcar estos ajustes significa que la página de presentación no aparecerá cuando inicie el
dispositivo.
※
Esta opción est á disponible únicamente para Ordenadores Mac OS
Ejecutar esta aplicación de forma residente
Para elegir esta configuración, el programa del Wormhole Switch se instalará automáticamente
cada vez que conecte el dispositivo.
Habilitar Acceso para la Tecla de Acceso Directo del Sistema
Elija este ajuste para activar la función de Tecla de Acceso Directo.
※
Esta opción está disponible únicamente para Ordenadores Mac OS
Haga doble clic en el icono de la bandeja del sistema para encender o apagar Compartir
temporalmente
Esta configuración le ayuda a habilitar o deshabilitar compartir portapapeles y las funciones de
control del KM simplemente haciendo doble clic en el icono del j5 Wormhole Switch en la
esquina inferior derecha de la barra de tareas.
※
Esta opción está disponible únicamente para Ordenadores Windows OS
Envíe Ctrl-Alt-Del a otro ordenador presionando:
Opción de teclas alternativas [Ctrl-Alt-Insert]para el comando [Ctrl-Alt-Del] para otro ordenador.
※
Esta opción está disponible únicamente cuando 2 Ordenadores Windows OS están conectados
•Comprobar Nueva Actualización / Online Update
Compruebe y actualice la última versión del software para Wormhole utilizando la
siguiente opción
1. Asegúrese que la red está disponible y No desenchufe durante la actualización del
driver.
2. Retire el cable de la computadora esclava
3. Seleccione “Online update”/ “Comprobar Nueva Actualización”
4. Después de haber terminado el proceso de instalación
Acerca del j5 Wormhole Switch:
Toda la información del j5 Wormhole Switch aparecerá aquí
Salir USB Switch / Salir:
El dispositivo Wormhole puede ser desinstalado en el recuadro Confirmation.
SOPORTE TÉCNICO
Si surge algún problema al usar este producto, siga las instrucciones siguientes antes de devolver el producto a la tienda.
1. Manual del usuario
Contiene instrucciones detalladas y una sección para la solución de problemas; muchos problemas comunes
pueden resolverse fácilmente leyendo el manual del usuario.
2. Soporte en línea
Visite el sitio web j5 create (www.j5create.com) para encontrar el último software para su dispositivo. Si el mismo
problema persiste, puede enviar una descripción de éste por correo electrónico a service@j5create.com. El equipo
de soporte técnico de j5 create le contestará en las 24 horas siguientes.
3. Soporte telefónico
Llámenos al +1-888-689-4088 y uno de nuestros técnicos de soporte le atenderá con sumo gusto.
Servicio al cliente:Número gratuito: +1-888-988-0488
Soporte técnico:Número gratuito: +1-888-689-4088
Correo electrónico: service@j5create.com
Contacte con el Servicio técnico en horario de oficina. 09:00-19:00 U.S.A E.S.T. Lunes a viernes para mayor asistencia.

17
WORMHOLE SWITCH MANUAL DEL USUARIOWORMHOLE SWITCH
17
Español
ES
WORMHOLE SWITCH Manual del usuario
8
GARANTÍA DE j5 create
j5 create ofrece una garantía limitada de 1años. Los daños por desgaste y roturas no están incluidos.
El usuario deberá llamar o enviar un correo electrónico al servicio al cliente de j5 create con información sobre el defecto del
producto y obtendrá un número de autorización de devolución.
Los usuarios se hacen responsables del coste de la devolución y nosotros nos ocuparemos del envío posterior.
Para obtener una autorización de devolución, el usuario deberá tener la información siguiente a mano cuando llame o envíe
correo electrónico al equipo de servicio:
(i) una copia de la factura de compra original para verificar la garantía
(ii) el número de serie del producto
(iii) una descripción del problema
(iv) el número de autorización de material devuelto
(v) el nombre, dirección y número de teléfono del cliente
j5 create no garantiza que la funcionalidad del producto será continua y estará libre de errores. j5 create no se hace
responsable por los daños por no seguir las instrucciones relativas al uso del producto. Esta garantía no se aplica a: (a) partes
consumibles, a menos que el daño haya ocurrido debido a un defecto en materiales o mano de obra; (b) daños estéticos,
incluyendo, pero no limitándose a rayas, roturas y plástico roto en los puertos; (c) daños causados por el uso con productos que
no son j5 create; (d) daños causados por fuerzas mayores (desastres naturales, inundaciones, fuego, terremotos, rayos, tifones,
etc.); (e) daños causados por un mal uso (f) daños usados por una utilización del producto fuera de los usos permitidos o
normales descritos por j5 create ; (g) daños causados por reparaciones (incluyendo actualizaciones y ampliaciones) realizadas
por cualquier persona que no sea representante de j5 create o del Servicio Autorizado de j5 create; (h) un producto o parte de
él ha sido modificado para alterar la funcionalidad o capacidad sin el permiso por escrito de j5 create; o (i) si el número de serie
de j5 create ha sido quitado o deformado en el producto.
Si se da alguna de las situaciones anteriores, j5 create calculará el coste de los materiales y reparación para comunicárselo. Esta
garantía es ofrecida por j5 create sustituyendo cualquier otra garantía expresa o implícita.
CUMPLIMIENTO DE LA REGULACIÓN
FCC :Este equipo ha sido probado y cumple con el Apartado 15 de la FCC Subapartado B § 15.109/15.107 Clase B.
Su utilización está sujeta a estas dos condiciones:
•Este dispositivo no puede causar interferencias dañinas
•Este dispositivo debe aceptar cualquier interferencia, incluyendo interferencias que puedan causar un funcionamiento no
deseado en el dispositivo
CE:Este equipo cumple los requisitos de las regulaciones siguientes:
EN 55022 Clase B (2006),
EN 55024 (1998+A1:2001+ A2:2003), (IEC/EN 61000-4-2 (1995+A1:1998+A2:2001)/-3(2006)
C-Tick:Este equipo cumple los requisitos de las regulaciones siguientes:
EN 55022 (2006) Clase B, AS/NZS CISPR22 © IEC: 2005.
VCCI:Este equipo cumple los requisitos de las regulaciones siguientes:
CISPR22 © IEC: 2005
Renuncias
La información de este documento está sujeta a cambios sin previo aviso. El fabricante no hace representaciones o garantías
(implícitas o no) en lo concerniente a la precisión e integridad de este documento y en ningún caso se hará responsable por la
pérdida de beneficios o cualquier daño comercial, incluyendo, pero no limitándose a, daños especiales, incidentales,
consecuentes u otros. Ninguna parte de este documento puede ser reproducida o transmitida en modo alguno o por ningún
medio, ya sea electrónico o mecánico, incluyendo fotocopias, grabación o grabación de información y sistemas de
recuperación de datos sin el permiso expreso por escrito del fabricante.
Copyright© 2014j5 create. Todos los derechos reservados. Todos los nombres de marcas son marcas registradas de sus
respectivos propietarios. Las características y especificaciones están sujetas a cambios sin previo aviso. El producto puede no ser
exactamente como aparece en las imágenes.

18
WORMHOLE SWITCH MANUEL DE L'UTILISATEURWORMHOLE SWITCH
18
Française
FR
WORMHOLE SWITCH Manuel de l'utilisateur
2
Environnements requis
Windows
OS: Windows 8.1 / 8 / 7 / Vista / XP
Un port USB disponible (USB 3.0 est recommandé)
Use USB3.0 Host: Fresco FL1000 / FL1009 installer d'autres Host Driver
USB Host pas supportée: Asmedia, Etron 168 / 188, Via 801/ Via 805
CPU: Intel Pentium IV ou supérieur
RAM: 1G ou plus
Disque dur: Espace requis d'au moins 100MB
Mac
Mac OS X 10.6/10.7/10.8/10.9
Un port USB disponible (USB 3.0 est recommandé)
CPU: Intel Pentium IV ou supérieur
RAM: 1G ou plus
Disque dur: Espace requis d'au moins 100MB
※W ind o w s RTn o n p ris e n c h a rg e .
※Sur Vista , re d é m a rre z vo tre o rd in a te ur a p rè s l'insta lla tio n in itia le .
※W in d ow s e t M a c virtu a lisés p a r VM w a re n e so nt p a s p ris e n c h a rg e .
※L'o rd ina te ur/u tilisa te u r d o it
disposer des droits d'administrateur.
※Si u n d e s d e u x o rd ina te urs c o n ne c té s re d é m a rre o u se m e t e n ve ille o rd in a ire /p ro lo n g é e ,
déconnectez et reconnectez les deux côtés du commutateur Wormhole.

19
WORMHOLE SWITCH MANUEL DE L'UTILISATEURWORMHOLE SWITCH
19
Française
FR
WORMHOLE SWITCH Manuel de l'utilisateur
2
Environnements requis
Windows
OS: Windows 8.1 / 8 / 7 / Vista / XP
Un port USB disponible (USB 3.0 est recommandé)
Use USB3.0 Host: Fresco FL1000 / FL1009 installer d'autres Host Driver
USB Host pas supportée: Asmedia, Etron 168 / 188, Via 801/ Via 805
CPU: Intel Pentium IV ou supérieur
RAM: 1G ou plus
Disque dur: Espace requis d'au moins 100MB
Mac
Mac OS X 10.6/10.7/10.8/10.9
Un port USB disponible (USB 3.0 est recommandé)
CPU: Intel Pentium IV ou supérieur
RAM: 1G ou plus
Disque dur: Espace requis d'au moins 100MB
※W ind o w s RTn o n p ris e n c h a rg e .
※Sur Vista , re d é m a rre z v o tre o rd ina te ur a p rè s l'in sta lla tio n in itia le .
※W in d o w s e t M a c virtua lisé s p a r VM w a re n e son t p a s p ris e n c ha rg e .
※L'o rd in a te ur/u tilisa te ur d o it
disposer des droits d'administrateur.
※Si u n d e s d e u x o rd ina te urs c o n ne c té s re d é m a rre o u se m e t e n ve ille o rd in a ire /p ro lo n g é e ,
déconnectez et reconnectez les deux côtés du commutateur Wormhole.
WORMHOLE SWITCH Manuel de l'utilisateur
3
MISE EN ROUTE-Windows
Suivez les instructions ci-dessous pour installer le commutateur Wormhole.
1. Connectez une extrémité du Wormhole Switch à un port USB standard sur l'un des deux
ordinateurs.Branchez l'autre extrémité du Wormhole Switch à un port USB sur le second
ordinateur.
2. L'appareil démarrera automatiquement l'installation du logiciel Wormhole Switch sur les deux
ordinateurs Si l'exécution automatique ne se lance pas Allez dans Poste de travail et
double-cliquez sur l'icône du Wormhole pour lancer l'application.
3. Si la fenêtre «Contrôle de compte utilisateur »apparaît à l'écran, cliquez sur “Oui” pour
continuer.
4. Suivez les étapes ci-dessus sur les deux ordinateurs. Si l'autre ordinateur est un Mac, veuillez
vous reporter au guide d'installation pour Mac.
5. Lorsque le commutateur Wormhole est bien connecté, la page de lancement s'affichera.
L'icône du commutateur Wormhole s'affichera dans le coin inférieur droit. Si les deux appareils
sont connectés au port USB 3.0, cette icône s'affichera, indiquant que la vitesse de
transmission est USB 3.0. Cependant, si un port USB 2.0 est connecté à une extrémité, alors
cette icône s'affichera, pour indiquer que la vitesse de transmission est USB 2.0. Si l'icône
s'affiche, cela signifie que l'autre ordinateur n'est pas connecté.
6. Veuillez définir la position de l'autre PC. Cliquez sur l'icône du commutateur Wormhole
pour ouvrir sa barre d'outils. Puis cliquez sur The Position of Other PC (La
position de l'autre PC) et sélectionnez l'emplacement de l'écran conformément à
l'endroit à partir duquel la souris doit basculer d'un écran à l'autre.

20
WORMHOLE SWITCH MANUEL DE L'UTILISATEURWORMHOLE SWITCH
20
Française
FR
WORMHOLE SWITCH Manuel de l'utilisateur
4
MISE EN ROUTE –MAC
Suivez les instructions ci-dessous pour installer le commutateur Wormhole.
1. Connectez une extrémité du Wormhole Switch à un port USB standard sur l'un des deux
ordinateurs.Branchez l'autre extrémité du Wormhole Switch à un port USB sur le second
ordinateur.
2. Lorsque vous connectez d'abord le commutateur Wormhole Switch à l'ordinateur MAC,
une fenêtre pop up affiche, "Assistant de configuration du clavier’’ suivez les étapes pour
sélectionner le type de clavier.
3. Lorsque les deux extrémités du JUC500 sont branchées aux ports USB des ordinateurs, l'icône
Wormhole s'affichera sur le bureau. Cliquez alors sur wormhole pour lancer le
logiciel. Si la fenêtre «Activer l'accès pour les périphériques d'aide »apparaît à l'écran,
cliquez sur “Oui” pour continuer.
4. Suivez les étapes ci-dessus sur les deux ordinateurs. Si l'autre ordinateur est sous Windows,
veuillez vous reporter au guide d'installation pour Windows en page 3.
5. Lorsque le commutateur Wormhole est bien connecté, la page de lancement s'affichera.
L'icône du commutateur Wormhole s'affichera dans le coin inférieur droit. Si les deux
appareils sont connectés au port USB 3.0, cette icône s'affichera, indiquant que la
vitesse de transmission est USB 3.0. Cependant, si un port USB 2.0 est connecté à une
extrémité, alors cette icône s'affichera, pour indiquer que la vitesse de transmission est
USB 2.0. Si l'icône s'affiche, cela signifie que l'autre ordinateur n'est pas connecté.
6. Veuillez définir la position de l'autre PC. Cliquez sur l'icône du commutateur
Wormhole pour ouvrir sa barre d'outils. Puis cliquez sur The Position of Other
PC (La position de l'autre PC) et sélectionnez l'emplacement de l'écran
conformément à l'endroit à partir duquel la souris doit basculer d'un écran à
l'autre.
Table of contents
Languages:
Other j5 create Switch manuals

j5 create
j5 create JCA122 User manual

j5 create
j5 create JUH377 User manual

j5 create
j5 create JUC100 User manual

j5 create
j5 create JUC400 User manual

j5 create
j5 create JUC100 User manual

j5 create
j5 create JUC100 User manual

j5 create
j5 create JUC700 User manual

j5 create
j5 create JUD500 User manual

j5 create
j5 create Wormhole Station JUH-320 Operator's manual

j5 create
j5 create JUC100 New Version User manual