Drawer Components PER DRAWER (total
counts will be dependent on which unit was ordered):
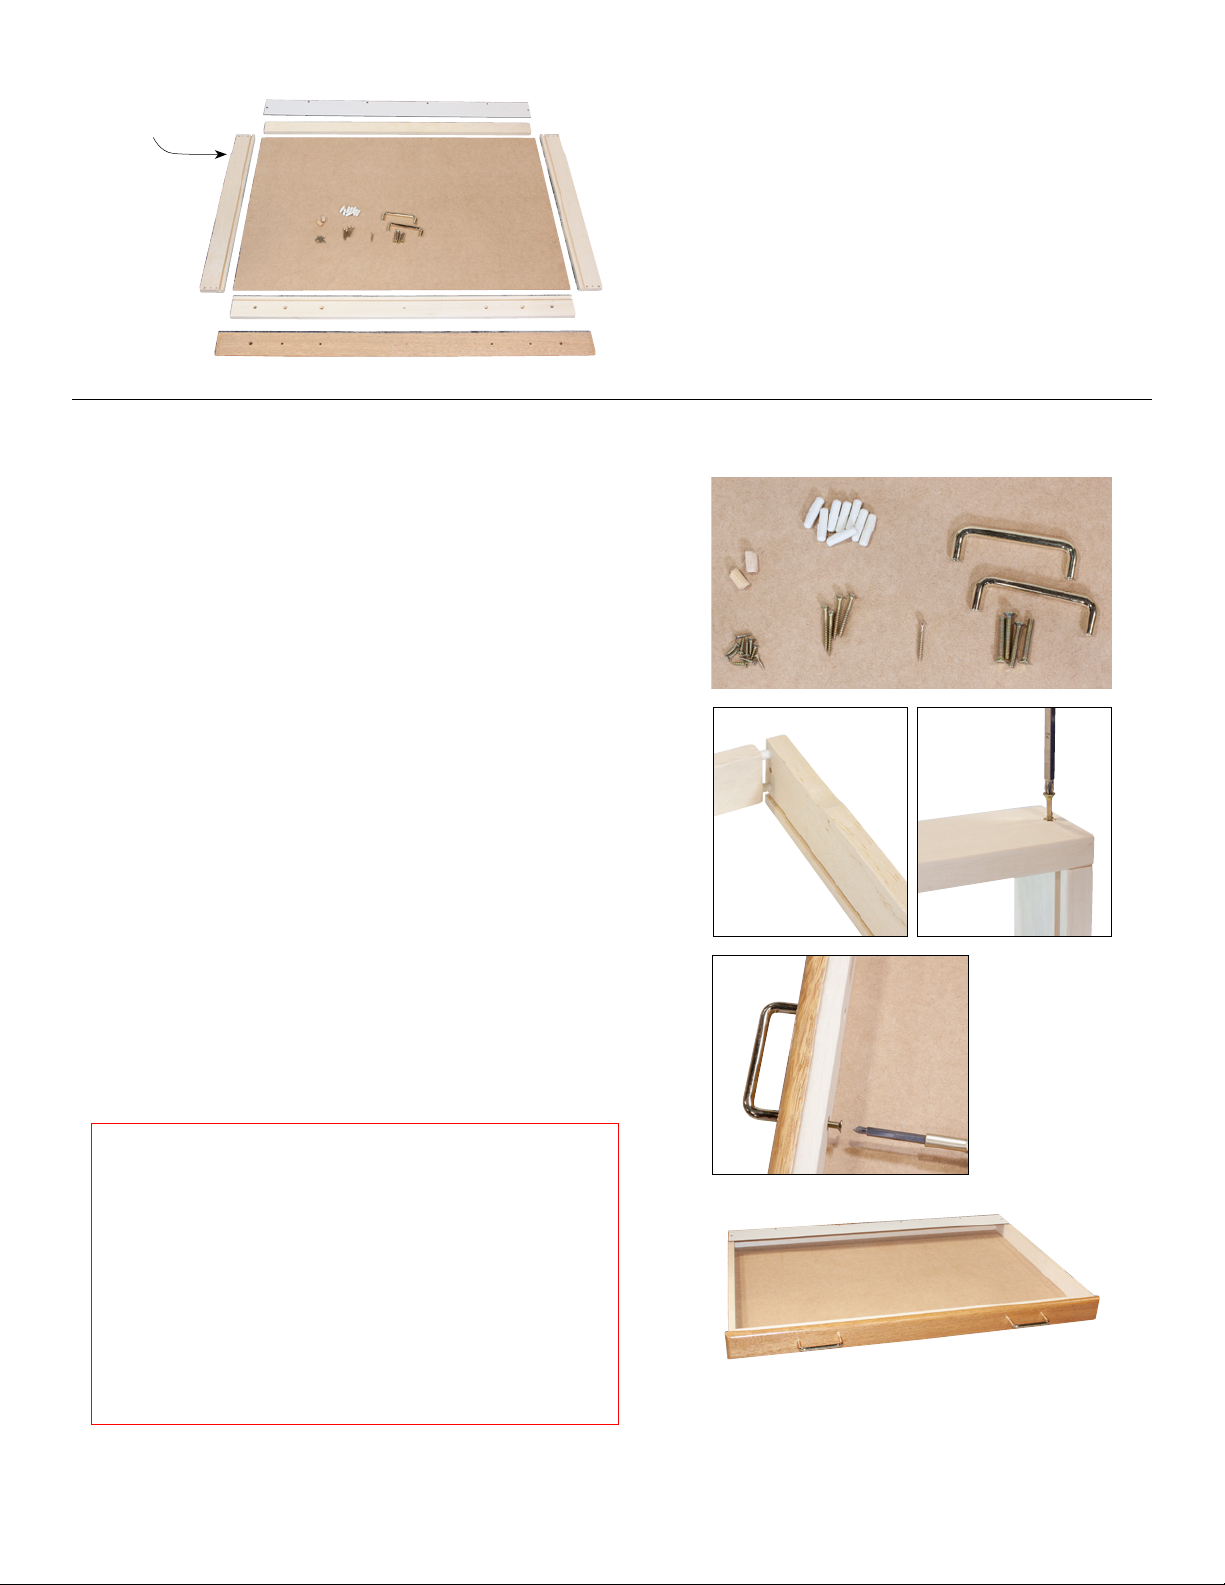
•7 parts: back piece (A), side pieces (B&C), front
piece (D), hardboard bottom (E), paper catch (F),
finished drawer face (G)
•Hardware: 8 plastic dowels, 4 - 1½" screws,
10 - ⅝" screws, 2 wood dowels, 1 - 1⅜" screw,
4 bolts, 2 handles
1. Lay out components as shown above before beginning assembly.
2. A. Push four plastic dowels (using ridged side of the dowel) into side holes on
back piece (A) and four on the front piece (D). Tap into place using a rubber
mallet. Making sure the cut out slot is down and facing inward on front and
side pieces (B&C), push all four pieces together.
B. Secure with four 1½" screws.
3. Slide hardboard bottom (E) into drawer. Pre-drilled, recessed holes should
face out and be at the back of the drawer. If the hardboard won't slide in
smoothly, slightly loosen one or two of the side screws to give it more
space. Keeping the bottom piece snuggly fitted in slots and squared up
with the back piece (A), use four ⅝"screws to attach. Start with the outer
corners and then do the middle screws.
4. Attach paper catch (F): Square up the paper catch with the back edge of the
frame (A). Hold in place and secure with six ⅝"screws, starting with the
two outer edges and then doing the middle screws.
5. Assemble the drawer face (G): Push wood dowels into outermost holes on
drawer face, align with the corresponding holes on front piece (D) and push
into place. Secure two pieces with one 1⅜" screw in the center hole.
6. Attach handles: Push four bolts from inside of drawer (D) to outside (G).
Align handles over bolts and screw in until handles fit snuggly against
drawer face.
7. Repeat steps 1-6 with the remaining drawers. Put assembled drawers into
flat file base. The unit is now complete.
Drawer Assembly Instructions
A
B C
D
E
F
G
2A
6
Slightly grooved edges
of B and C to the back
of the drawer.
2B
Hardware
A C
D
C
DG
ATTENTION: If you purchased an 8, 10 or 15 drawer unit:
1. Assemble the cabinet you want on the bottom first, but do not follow step one.
Instead, use six 1½" screws to attach the sides to the remaining frame in step four.
2. Assemble the unit you want as the top by following step one. In step two, secure the
sides to the bottom frame using six 1½" screws.
3. For the 15 drawer unit:
A. Assemble the middle unit using 12 - 1½" screws to connect sides to the frames.
(Middle unit will not have top or base pieces.)
B. Stack the units on top of one another. (Assistance recommended to prevent damage to
yourself or the flat file.)
C. Secure the units together by screwing three 1⅛" screws (from the cabinet hardware
bag) through the stacked frames. (3 for connecting the 8 and 10 drawer units; 6 for
connecting the 15 drawer units.)
If you are struggling to assemble your flat file, please call your dealer or call Jack Richeson & Co. at 800.233.2404. Business hours are 8-5, Monday-Thursday.


