Jam Zero Chill HX-P606 User manual

EN 1
”Zero Chill“
HX-P606
Instruction Book

EN 2
CONTENTS
A – Speaker
B – Aux-in cord
C – USB charging cable with spool wrap
D – Quick-Start Guide
E – Welcome card
F – Legal card
G – Jam sticker
CONTROLS
A – Power on/off/play/pause button
B – Volume up/next track
C – Volume down/previous track
D – LED light indicator
E – Charging cable with spool wrap
F – Aux-in port
G – Charging port
TABLE OF CONTENTS
English..................................................... 2
Français................................................... 9
Español.................................................. 17
Deutsch ................................................. 25
Nederlands ............................................ 32
Dansk .................................................... 39
Italiano .................................................. 46
Suomi .................................................... 53
Türkçe.................................................... 60
Svenska................................................. 67
Русский................................................. 74
Norsk..................................................... 81
Ελληνικά ............................................... 88
Čeština .................................................. 95
Magyar ................................................ 102
Português............................................ 109
Slovenčina........................................... 116
Română ............................................... 123
Polski................................................... 130
................................................ 137
한국어.................................................. 144
中文 ..................................................... 151

EN 3
CHARGE
AUX
CHARGE
SET UP
CHARGING YOUR SPEAKER
The “Zero Chill” speaker is powered by a rechargeable
battery. The speaker comes pre-charged; however, for
optimal play time, make sure to charge before rst use.
A–Open the bottom door on the speaker and take
out the spool. Unwrap the integrated charging cable,
open the door on the side of the speaker, thread the
micro USB end through the door, and plug it into the
charging port on the speaker.
B – Connect the larger USB plug to your computer
or a powered USB AC adapter. An AC adapter is not
included in the box, but you can use the one for
your cell phone or pick one up next time you’re at
the store.
C – When the LED ashes red, it indicates that the
battery is low and it’s time to plug in and recharge.
Charge for about 3 hours to get up to 22 hours of play
time; while charging, the light will stay solid red. Once
fully charged, the LED will turn off.
2hrs 12hrs
3 hrs 22 hrs

EN 4
USE
A – TURN ON YOUR SPEAKER
Long press the “play/pause” button for 3 seconds to
turn on your speaker.
B – CONNECTING TO A DEVICE
Once turned on, the speaker will immediately search
for a device to pair to. If a device has not been
previously paired, the light will switch from blinking
blue to blinking red and blue alternately. Enable
Bluetooth on your device. From the Bluetooth menu,
select “Zero Chill.” When the device and Zero Chill
are connected, you will hear a tone and the LED light
will turn solid blue momentarily then move to a slow
blinking blue.
You may also connect your device to Zero Chill using
an aux cord, which is included. When plugged in, the
light will turn solid red.
Note: Once paired, the speaker will remember the
device every time it is turned on. To disconnect the
speaker from the device, hold down the “X” and “play/
pause” buttons at the same time, for 2 seconds.
C – BUTTON FUNCTION
Short press the “play/pause” button for 0.5 seconds to
play your music. To increase the volume, short press
the “O” button; to lower the volume, short press the
“X” button. To skip forward a track, long press the “O”
button; to skip back a track, long press the “X” button.
0000
...0.5s
...3s
0000
Zero Chill
Zero Chill
...3s
...3s
...0.5s
...0.5s

EN 5
D – WATER & DUST PROOF
The smart folks who made this speaker designed it to
keep the party going through just about anything (they
call it IP67). This means that Zero Chill is dust proof, and
submersible in water up to 1 meter (3ft) for 30 minutes.
But those designers aren’t miracle workers. Doing
something like dropping your speaker from Mount Everest
or taking it deep-sea diving will damage your speaker and
prevent it from emitting the incredible sounds it is made
to. Always keep the side and bottom aps ush with the
speaker when you are using it near water, or it could be
damaged.
E – CALL HANDLING
While rocking out to your music, if a call comes in, short
press the “play/pause” button to pick it up; short press
again when you’re done, to hang up.
While on a call, if you want to make it private, long press
the “play/pause” button to move the call from the speaker
to your phone.
If a call comes in and you don’t want to pick it up,
long press the “play/pause” button to send the call
to voicemail.
*See the tables on the following pages for complete
button function and LED light indicator interpretation.
F – PAIR 2 ZERO CHILL SPEAKERS
1. Turn on speaker 1 (press and hold the “play/pause”
button for 3 seconds).
2. Turn on speaker 2 (press and hold the “play/pause”
button for 3 seconds).
3. On both speakers, press and hold the “X” and “O”
buttons at the same time for up to 4 seconds and
wait for a tone and the lights to blink green.
4. The speakers will begin to pair together. This will take
a few seconds.
5. Tone prompt will indicate when speakers are paired
together.
6. Choose “Zero Chill” from your device’s Bluetooth list.
7. Press the “play/pause” button on either speaker to
listen to music. Press “X” and “O” together to toggle
between stereo and mono modes.
8. Once paired, your speakers will recognize each other
every time both are turned on. To disconnect Pair 2
mode, press and hold the “X” and “O” buttons for up to
4 seconds. This will enter into pairing mode again.
Note: If either of your speakers has been previously paired
to a device, or will not pair automatically, press and hold
the “play/pause” and “X” buttons on both speakers for 5
seconds to activate pairing mode. You will know they have
reached pairing mode by the red and blue blinking light.
AUX
CHARGE
...3s
...3s
...0.5s
...0.5s
0000
...4s
...2s
0000
Zero
Chill
Zero
Chill

EN 6
LED INDICATORS
CHARGING IN USE
Red ash every 5 seconds Low battery
Solid red Charging
LED off Charging complete
Flash blue and red Speaker in pairing mode
Blue ash every 5 seconds Paired with device
BASIC FUNCTIONS
POWER PAIR 2 SPEAKERS
MUSICCALLS
Power on/off Long press play/pause button
Disconnect from device Long press play/pause and
X buttons
Enable Pair 2 Long press X and O buttons
simultaneously
Switch between
mono & stereo Short press X and O buttons
simultaneously
Play/pause Short press play/pause button
Volume up Short press O button
Volume down Short press X button
Skip forward a track Long press O button
Skip backward a track Long press X button
Pick up a call Short press play/pause button
Decline a call Long press play/pause button
End a call Short press play/pause button
Move active call from speaker
to device Long press play/pause button
Take a second incoming call Short press play/pause button
Decline a second
incoming call Long press play/pause button
HX-P606

EN 7
LEGAL INFORMATION
READ ALL INSTRUCTIONS BEFORE USE AND SAVE THESE
INSTRUCTIONS FOR FUTURE REFERENCE.
FCC Warning:
This equipment has been tested and found to comply with the
limits for a Class B digital device, pursuant to Part 15 of the FCC
Rules. These limits are designed to provide reasonable protection
against harmful interference in a residential installation. This
equipment generates, uses, and can radiate radio frequency
energy and, if not installed and used in accordance with
the instructions, may cause harmful interference to radio
communications. However, there is no guarantee that interference
will not occur in a particular installation. If this equipment does
cause harmful interference to radio or television reception, which
can be determined by turning the equipment off and on, the user
is encouraged to try to correct the interference by one or more of
the following measures:
• Reorient or relocate the receiving antenna.
• Increase the separation between the equipment and
receiver.
• Connect the equipment into an outlet on a circuit different
from that to which the receiver is connected.
• Consult the dealer or an experienced radio/TV technician
for help.
Any changes or modications not expressly approved by the party
responsible for compliance could void the user’s authority to
operate the equipment.
This device complies with Part 15 of the FCC Rules. Operation is
subject to the following two conditions:
(1) This device may not cause harmful interference, and
(2) This device must accept any interference received,
including interference that may cause undesired
operation.
FCC RF Exposure Statement:
This equipment complies with FCC radiation exposure limits set
forth for an uncontrolled environment. This transmitter must not
be co-located or operating in conjunction with any other antenna
or transmitter.
ISEDC Caution:
This device complies with Innovation, Science, and Economic
Development Canada licence-exempt RSS standard(s). Operation
is subject to the following two conditions:
(1) This device may not cause interference, and
(2) This device must accept any interference, including
interference that may cause undesired operation of the
device.
ISEDC RF Exposure Statement:
The device is in compliance with RF exposure guidelines; users
can obtain Canadian information on RF exposure and compliance.
1-YEAR LIMITED WARRANTY – US & CANADA
WARRANTY – US & CANADA
JAM warrants this product free from defect in material and
workmanship for a period of 1 year from the date of purchase.
This warranty does not cover damage caused by misuse or
abuse, accident, the attachment of any unauthorized accessory,
alteration to the product, or any other conditions whatsoever that
are beyond the control of JAM.
For detailed Warranty instructions and information, visit: www.
jamaudio.com/customer-support/warranty-1yr. To obtain
warranty service on your JAM product, contact a Consumer
Relations representative by the telephone number or email
address for your country of residence. Please make sure to have
the model number of the product available.
For service in the USA
Email:
Tel: 1-888-802-0040
8:30am–7:00pm EST M–F
For service in Canada
Email:
Tel: 1-888-225-7378
8:30am–5:00pm EST M–F
For service in Australia
Email:
Tel: 03-87566500
8:30am–5:00pm AEST M–F
www.jam-audio.com.au
WARRANTY – UK & EUROPE
JAM warrants this product free from defect in material and
workmanship for a period of 2 years from the date of purchase.
This warranty does not cover damage caused by misuse or
abuse, accident, the attachment of any unauthorised accessory,
alteration to the product, or any other conditions whatsoever
that are beyond the control of JAM. Distributed in the EU by FKA
Brands Ltd, Somerhill Business Park, Tonbridge, TN11 0GP, UK.
WARRANTY – AUSTRALIA
(1-YEAR LIMITED WARRANTY)
We or Us means HoMedics Australia Pty Ltd ACN 31 103 985 717
and our contact details are set out at the end of this warranty; You
means the purchaser or the original end-user of the Goods. You
may be a domestic user or a professional user; Supplier means
the authorized distributor or retailer of the Goods that sold you
the Goods in Australia and New Zealand; and Goods means the
product or equipment which was accompanied by this warranty
and purchased in Australia and New Zealand.
For Australia:
Our Goods come with guarantees that cannot be excluded under
the Australian Consumer Law. You are entitled, subject to the
provisions of the Australian Consumer Law, to a replacement
or refund for a major failure and for compensation for any other
reasonably foreseeable loss or damage. You are also entitled,
subject to the provisions of the Australian Consumer Law, to
have the Goods repaired or replaced if the goods fail to be of
acceptable quality and the failure does not amount to a major
failure. This is not a complete statement of your legal rights as a
consumer.
For New Zealand:
Our Goods come with guarantees that cannot be excluded under
the Consumer Guarantees Act 1993. This guarantee applies
in addition to the conditions and guarantees implied by that
legislation.
The Warranty
HoMedics sells its products with the intent that they are free
of defects in manufacture and workmanship under normal use
and service. In the unlikely event that your HoMedics product
proves to be faulty within 1 year from the date of purchase due
to workmanship or materials only, we will replace it at our own
expense, subject to the terms and conditions of this guarantee.
The warranty period is limited to 3 months from the date of
purchase for products used commercially/professionally.
Terms and Conditions:
In addition to the rights and remedies that you have under the
Australian Consumer Law, Consumer Guarantees Act of New
Zealand or any other applicable law and without excluding such
rights and remedies warranty against defects:
1. The Goods are designed to withstand the rigors of normal
household use and are manufactured to the highest standards
using the highest quality components. Whilst unlikely, if,
during the rst 12 months (3 months commercial use) from
their date of purchase from the Supplier (Warranty Period), the
Goods prove defective by reason of improper workmanship or
materials and none of your statutory rights or remedies apply,
we will replace the Goods, subject to the terms and conditions
of this warranty.

8
2. We do not have to replace the Goods under this Additional
Warranty if the Goods have been damaged due to misuse or
abuse, accident, the attachment of any unauthorised accessory,
alteration to the product, improper installation, unauthorised
repairs or modications, improper use of electrical/power
supply, loss of power, malfunction, or damage of an operating
part from failure to provide manufacturer’s recommended
maintenance, transportation damage, theft, neglect, vandalism,
environmental conditions, or any other conditions whatsoever
that are beyond the control of HoMedics.
3. This Warranty does not extend to the purchase of used,
repaired, or secondhand products, or to products not imported
or supplied by HoMedics Australia Pty Ltd, including but not
limited to those sold on offshore internet auction sites.
4. This Warranty extends only to consumers and does not extend
to Suppliers.
5. Even when we do not have to replace the Goods, we may decide
to do so anyway. In some cases, we may decide to substitute
the Goods with a similar alternative product of our choosing. All
such decisions are at our absolute discretion.
6. All such replaced or substituted Goods continue to receive
the benet of this Additional Warranty for the time remaining
on the original Warranty Period (or 3 months, whichever is the
longest).
7. This Additional Warranty does not cover items damaged
by normal wear and tear, including but not limited to chips,
scratches, abrasions, discolouration, and other minor defects,
where the damage has negligible effect on the operation or
performance of the Goods.
8. This Additional Warranty is limited to replacement or
substitution only. As far as the law permits, we will not be liable
for any loss or damage caused to property or persons arising
from any cause whatsoever, and shall have no liability for any
incidental, consequential, or special damages.
9. This warranty is only valid and enforceable in Australia and
New Zealand.
Making a Claim:
In order to claim under this Warranty, you must return the Goods
to the Supplier (place of purchase) for replacement. If this is not
possible, please contact our Consumer Relations department by
• All returned Goods must be accompanied by satisfactory proof
of purchase that clearly indicates the name and address of
the Supplier, the date and place of purchase, and identies the
product. It is best to provide an original, legible, and unmodied
receipt or sales invoice.
• You must bear any expense for return of the Goods or otherwise
associated with making your claim under this Additional
Warranty.
Distributed in Australia by HOMEDICS AUSTRALIA PTY LTD,
14 Kingsley Close, Rowville, Victoria 3178. Distributed in New
Zealand by Phoenix Distribution NZ Ltd, 7B Orbit Drive, Albany /
North Shore 0757, Auckland, New Zealand.
IMPORTANT SAFETY
INSTRUCTIONS
READ ALL INSTRUCTIONS BEFORE USING.
WARNING: Do not place speakers too close to ears. May cause
damage to ear drums, especially in young children.
• Use this product only for its intended purpose as described in
this manual. Do not use attachments not recommended by Jam.
• Jam is not liable for any damage caused to smartphones,
iPod/MP3 players, or any other devices.
• Do not place or store this product where it can fall or be dropped
into a tub or sink without shutting waterproof doors.
• Do not place or drop into water or any other liquid without
shutting waterproof doors.
• Not for use by children. THIS IS NOT A TOY.
• Never operate this product if it has a damaged cord, plug, cable,
or housing.
• Keep away from heated surfaces.
• Only set on dry surface. Do not place on surface wet from water
or cleaning solvents if waterproof doors are open.
WARNING:This product has an internal, non-
replaceable lithium battery. Please dispose in accordance with
your local, state, province, and country guidelines. Batteries
(battery pack or batteries installed) shall not be exposed to
excessive heat such as sunshine, re, or the like.
BATTERY REPLACEMENT
Your speaker includes a rechargeable battery designed to
last the lifetime of the product. In the unlikely event that you
should require a replacement battery, please contact Consumer
Relations, which will supply details of the warranty and out-of-
warranty replacement battery service. This product contains
small parts that may present a choking hazard for young children.
CAUTION: All servicing of this product must be performed by
authorized Jam Audio service personnel only. For complete user
guide and to register your product, visit www.jamaudio.com
(USA), canada.jamaudio.com (Canada), or
uk.jamaudio.com/instructionbooks (UK).
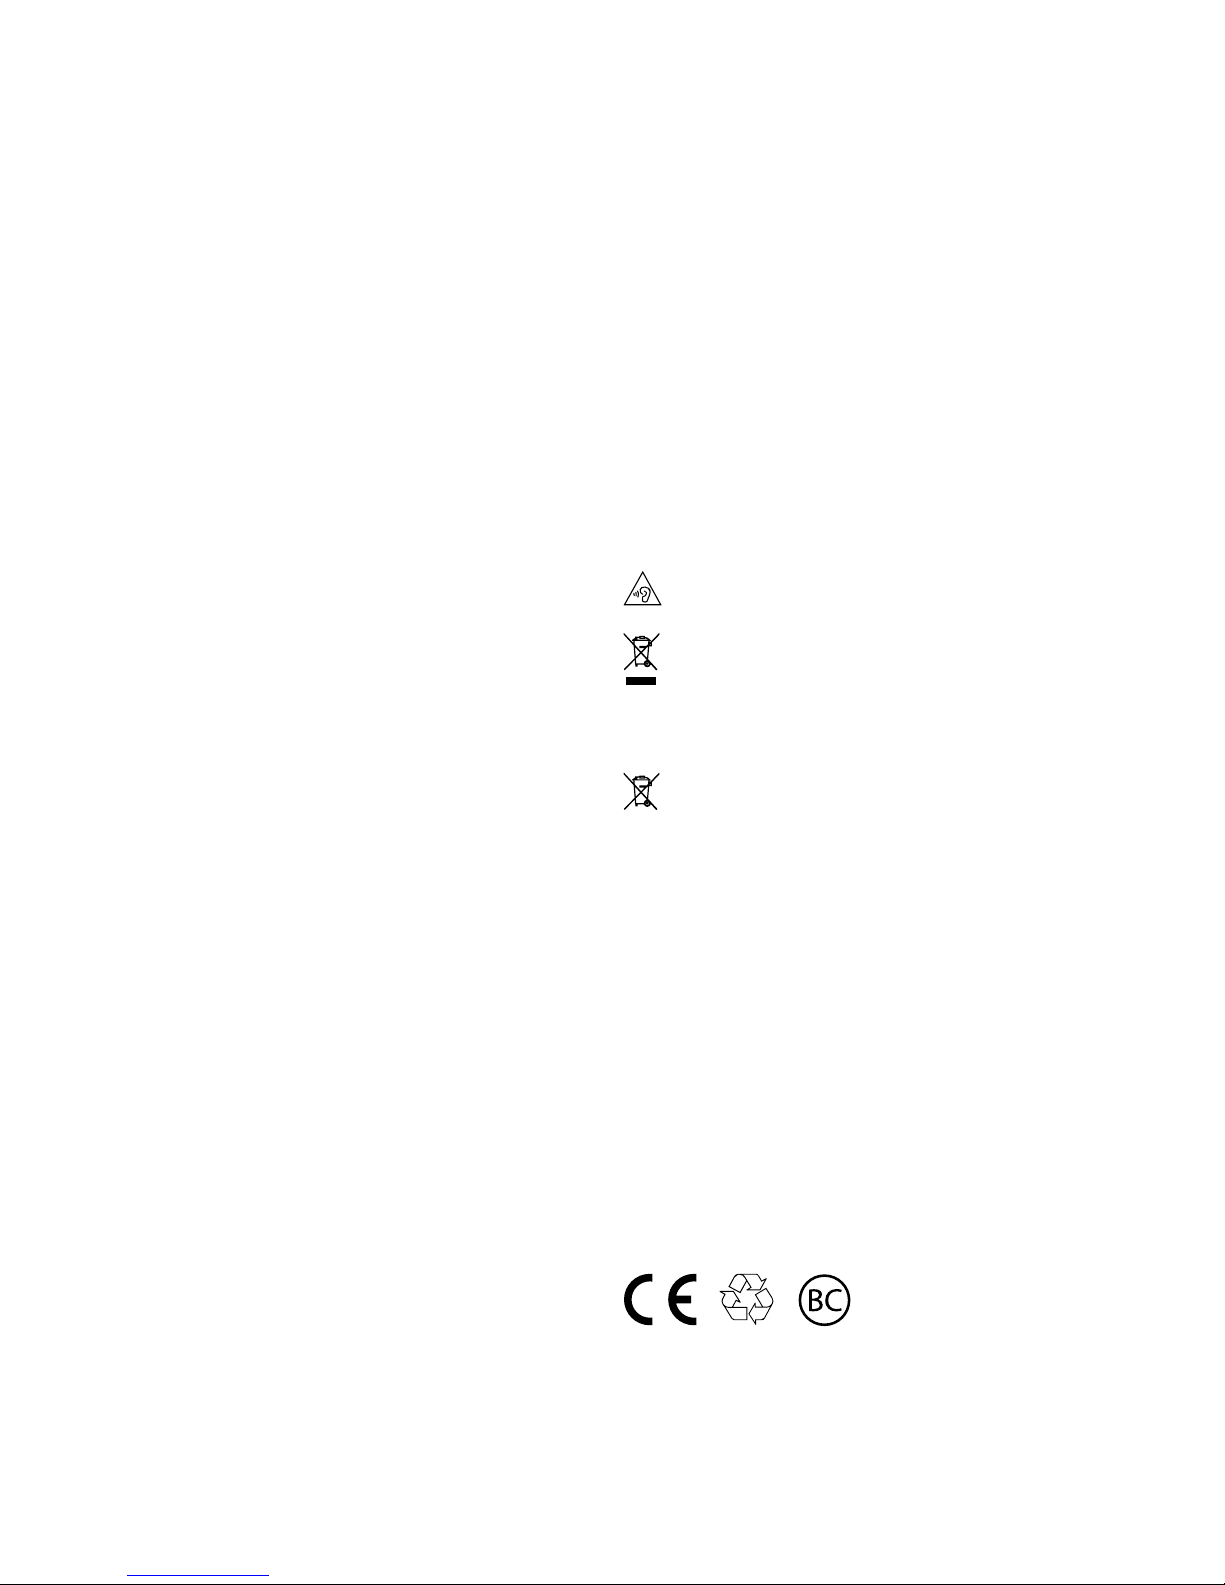
To prevent possible hearing damage, do not listen at high
volume for long periods.
WEEE EXPLANATION
This marking indicates that this product should not be
disposed with other household wastes throughout the EU.
To prevent possible harm to the environment or human health
from uncontrolled waste disposal, recycle it responsibly to
promote the sustainable reuse of material resources.
BATTERY DIRECTIVE
This symbol indicates that batteries must not be disposed
of in the domestic waste as they contain substances that
can be damaging to the environment and health. Please dispose
of batteries in designated collection points.
Hereby, FKA Brands Ltd, declares that this radio device is in
compliance with the essential requirements and other relevant
provisions of Directive 2014/53/EU. A copy of the Declaration of
Conformity can be obtained from uk.jamaudio.com/DoC.
All rights reserved..." statement along with the
MHz frequency (English Only) info is added
individually to each section.
© 2018 HMDX. All Rights Reserved. JAM is a registered trademark
of HMDX. HMDX is a registered trademark of FKA Distributing Co.
The Bluetooth® word mark and logos are registered trademarks
owned by Bluetooth SIG, Inc. and any use of such marks by HMDX
is under license.
Operating frequency band: 2402 - 2480MHz
HX-P606: Maximum radio—frequency power transmitted: -3.07dBm
Distributed by HMDX.
3000 N Pontiac Trail
Commerce Township, MI 48390
EN
All Rights Reserved.
IB-HXP606

EN 9
”Zero Chill“
HX-P606
Livret d’instructions

10
CONTENU COMMANDES
A – Haut-parleur
B – Cordon d’entrée auxiliaire
C – Câble de charge USB avec enrouleur
D – Guide de démarrage rapide
E – Carte de bienvenue
F – Carte juridique
G – Autocollant Jam
A – Bouton marche/arrêt/lecture/pause
B – Augmentation du volume/piste suivante
C – Réduction du volume/piste précédente
D – Voyant à DEL
E – Câble de charge et enrouleur
F – Port d’entrée auxiliaire
G – Port de charge
FR

11
CHARGE
AUX
CHARGE
CONFIGURATION
2hrs 12hrs
3 hrs 22 hrs
CHARGE DU HAUT-PARLEUR
Le haut-parleur « Zero Chill » est alimenté par une
batterie rechargeable. Le haut-parleur est fourni
préchargé; toutefois, pour assurer une durée d’écoute
optimale, veillez à le charger avant la première
utilisation.
A–Ouvrez le compartiment inférieur sur le haut-
parleur et sortez l’enrouleur. Déroulez le câble de
charge intégré, ouvrez le compartiment sur le côté du
haut-parleur, faites passer l’extrémité micro USB par
le compartiment et branchez-la sur le port de charge
du haut-parleur.
B – Branchez la plus grande la prise USB à votre
ordinateur ou à un adaptateur secteur USB alimenté.
L’adaptateur secteur n’est pas inclus dans la boîte,
mais vous pouvez utiliser celui de votre téléphone
cellulaire ou vous en procurer un lors de vos
prochains achats.
C–Lorsque le voyant à DEL clignote en rouge, cela
indique que la batterie est faible et qu’il est temps de
la brancher et de la recharger. Une charge d’environ
3 heures produit jusqu’à 22 heures d’écoute; pendant
la charge, le voyant reste allumé en rouge. Il s’éteint
lorsque l’appareil est chargé.
FR

12
UTILISATION
A - MISE EN MARCHE DU HAUT-PARLEUR
Appuyez sur le bouton « Lecture/Pause » pendant 3
secondes pour mettre le haut-parleur en marche.
B - CONNEXION À UN APPAREIL
Une fois activés, le haut-parleur recherche
immédiatement un appareil pour l’appairage. Si
l’appareil n’a pas déjà été appairé, le voyant passe
de bleu clignotant à un clignotement rouge et bleu
alternatif. Activez la fonction Bluetooth sur votre
appareil. Dans le menu Bluetooth, sélectionnez « Zero
Chill ». Lorsque l’appareil et Zero Chill sont connectés,
vous entendrez une tonalité et le voyant à DEL
s’allume momentanément en bleu xe puis clignote
lentement en bleu.
Vous pouvez également connecter votre appareil
à Zero Chill avec le câble auxiliaire inclus. Une fois
branché, le voyant s’allume en rouge xe.
Remarque : Une fois appairé, le haut-parleur détectera
l’appareil à chaque fois qu’il est mis en marche. Pour
déconnecter le haut-parleur de l’appareil, appuyez
simultanément sur les boutons « X » et « Lecture/
Pause » pendant 2 secondes.
C - FONCTION DES BOUTONS
Appuyez brièvement sur le bouton « Lecture/Pause »
pendant 0,5 seconde pour jouer votre musique.
Pour augmenter le volume, appuyez brièvement sur
le bouton « O ». Pour diminuer le volume, appuyez
brièvement sur le bouton « X ». Pour passer à la piste
suivante, appuyez momentanément sur le bouton « O »
pendant 3 secondes; pour reculer d’une piste, appuyez
momentanément sur le bouton « X ».
0000
...0.5s
...3s
0000
Zero Chill
Zero Chill
...3s
...3s
...0.5s
...0.5s
FR

13
D - ÉTANCHE À L’EAU ET À LA POUSSIÈRE
Les concepteurs de ce haut-parleur l’ont mis au point pour que
vous puissiez l’utiliser dans virtuellement toutes les situations,
ce qui signie qu’il est classé IP67. Cela signie que le haut-
parleur Zero Chill est étanche à la poussière et peut être
immergé dans l’eau jusqu’à 1 mètre pendant 30 minutes. Mais
ne vous attendez pas à des miracles. Faites-le tomber du mont
Everest ou emmenez-le en plongée sous-marine, et vous ne
pourrez plus bénécier de l’excellente qualité de sa sono. Veillez
aussi à toujours maintenir les protections inférieure et latérale
bien contre le haut-parleur lorsque vous l’utilisez près de l’eau
pour le protéger des dégâts.
E - GESTION DES APPELS
Tout en écoutant votre musique, en cas d’appel, appuyez
brièvement sur le bouton « Lecture/Pause » pour prendre
un appel, puis appuyez brièvement une fois de plus pour
raccrocher.
Si vous souhaitez que l’appel reste condentiel, appuyez
momentanément sur le bouton « Lecture/Pause » pour
transférer l’appel du haut-parleur à votre téléphone.
Pour ne pas répondre à un appel entrant, appuyez
momentanément sur le bouton « Lecture/Pause » pour envoyer
l’appel vers la messagerie vocale.
*Consultez les tableaux à la page suivante pour connaître toutes
les fonctions des boutons et la signication des voyants à DEL.
F - APPAIRAGE DE 2 HAUT-PARLEURS
1. Mettez le premier haut-parleur en marche (en appuyant sur le
bouton « Lecture/Pause » pendant 3 secondes).
2. Mettez le deuxième haut-parleur en marche (en appuyant sur
le bouton « Lecture/Pause » pendant 3 secondes).
3. Sur les deux haut-parleurs, appuyez simultanément sur les
boutons « X » et « O » pendant 4 secondes et attendez la
tonalité et le clignotement en vert des voyants.
4. Les haut-parleurs commencent à s’appairer. Cela prendra
quelques secondes.
5. Une tonalité indique que les haut-parleurs sont appairés l’un
à l’autre.
6. Choisissez « Zero Chill » dans la liste Bluetooth de votre appareil.
7. Appuyez sur le bouton « Lecture/Pause » sur l’un ou
l’autre haut-parleur pour écouter votre musique. Appuyez
simultanément sur « X » et « O » pour basculer entre les
modes mono et stéréo.
8. Une fois appairés, les haut-parleurs se détecteront à chaque
fois qu’ils sont mis en marche. Pour désactiver l’appairage
des deux haut-parleurs, appuyez simultanément sur les
boutons « X » et « O » pendant 4 secondes. Cela permet
d’activer de nouveau le mode d’appairage.
Remarque : Si aucun haut-parleur n’a été précédemment appairé
à un appareil ou s’il ne s’appaire pas automatiquement, appuyez
simultanément sur les boutons « Lecture/Pause » et « X »
pendant 5 secondes pour activer le mode d’appairage. Lorsque
le voyant clignote en rouge et en bleu, cela signie que le mode
d’appairage est terminé.
AUX
CHARGE
...3s
...3s
...0.5s
...0.5s
0000
...4s
...2s
0000
Zero
Chill
Zero
Chill
FR

14
VOYANTS À DEL
CHARGE EN COURS D’UTILISATION
Clignotement rouge toutes les
5 secondes Batterie faible
Rouge xe Charge en cours
Voyant à DEL éteint Charge terminée
Clignotement bleu et rouge Le haut-parleur est en mode
d'appairage
Clignotement bleu toutes les
5 secondes Appairé avec l’appareil
FONCTIONS DE BASE
MISE SOUS TENSION APPAIRAGE DE DEUX HAUT-PARLEURS
MUSIQUEAPPELS
Marche/Arrêt Appuyez momentanément sur
le bouton « Lecture/Pause »
Déconnexion de l'appareil Appuyez momentanément sur
les boutons « Lecture/Pause »
et « X »
Connexion de 2 haut-parleurs Appuyez momentanément
et simultanément sur les
boutons « X » et « O »
Basculer entre mono et stéréo Appuyez brièvement et
simultanément sur les
boutons « X » et « O »
Lecture/Pause Appuyez brièvement sur le
bouton « Lecture/Pause »
Augmentation du volume Appuyez brièvement sur le
bouton « O »
Réduction du volume Appuyez brièvement sur le
bouton « X »
Piste suivante Appuyez momentanément sur
le bouton « O »
Piste précédente Appuyez momentanément sur
le bouton « X »
Répondre à un appel Appuyez brièvement sur le
bouton « Lecture/Pause »
Refuser un appel Appuyez momentanément sur
le bouton « Lecture/Pause »
Raccrocher Appuyez brièvement sur le
bouton « Lecture/Pause »
Transférer l'appel en cours à
l'appareil Appuyez momentanément sur
le bouton « Lecture/Pause »
Répondre à un deuxième
appel entrant Appuyez brièvement sur le
bouton « Lecture/Pause »
Refuser un deuxième appel
entrant Appuyez momentanément sur
le bouton « Lecture/Pause »
FR

15
INFORMATIONS LÉGALES
LIRE TOUTES LES INSTRUCTIONS AVANT L’UTILISATION ET
CONSERVER CES INSTRUCTIONS POUR RÉFÉRENCE FUTURE.
Avertissement de la FCC :
Cet appareil a été testé et jugé conforme aux limites applicables
aux appareils de Classe B, conformément à la Partie 15 du
Règlement de la FCC. Ces limites sont conçues pour fournir
une protection raisonnable contre les interférences nuisibles
dans une installation résidentielle. Cet appareil génère, utilise
et peut émettre une énergie de radiofréquence et, s’il n’est pas
installé et utilisé conformément aux instructions, peut causer
des interférences nuisibles aux communications radio. Il n’est
toutefois pas garanti que des interférences ne se produiront pas
dans une installation particulière. Si cet appareil provoque des
interférences nuisibles à la récep- tion radio ou télévision, ce qui
peut être déterminé en éteignant l’appareil et en le rallumant, il est
recommandé d’essayer de corriger les interférences en prenant
une ou plusieurs des mesures suivantes :
• Réorienter ou déplacer l’antenne de réception;
• Augmenter la distance entre l’appareil et le récepteur;
• Brancher l’appareil dans une prise sur un circuit di érent de
celui auquel le récepteur est branché;
• Consulter le revendeur ou un technicien radio/TV expérimenté
pour obtenir de l’aide.
Les changements ou modi cations non expressément approuvés
par l’autorité responsable de la conformité peuvent annuler
l’autorisation d’utiliser l’équipement.
Cet appareil est conforme à la Partie 15 du Règlement de la FCC.
Son fonctionnement est soumis aux deux conditions suivantes :
(1) Cet appareil ne doit pas provoquer d’interférences nuisibles,
et
(2) Cet appareil doit accepter toute interférence reçue, y
compris les interférences pouvant entraîner un
fonctionnement indésirable.
Déclaration de la FCC relative à l’exposition aux RF :
Cet équipement est conforme aux limites d’exposition aux
radiations de la FCC établies pour un environnement non contrôlé.
Cet émetteur ne doit pas être localisé ou fonctionner avec une
autre antenne ou un autre émetteur.
Mise en garde d’ISDEC :
Cet appareil est conforme aux normes d’Innovation, Sciences et
Dévelop- pement économique Canada (ISDE) pour les appareils
radio exempts de licence. Le fonctionnement est soumis aux deux
conditions suivantes :
(1) Cet appareil ne doit pas provoquer d’interférences nuisibles,
et
(2) Cet appareil doit accepter toute interférence reçue, y compris
celles qui peuvent provoquer un fonctionnement indésirable
de l’appareil.
Déclaration de l’ISEDC relative à l’exposition aux RF :
L’appareil est conforme aux directives d’exposition RF. Les
utilisateurs peuvent obtenir de l’information canadienne sur
l’exposition aux RF et la conformité.
GARANTIE LIMITÉE D’UN AN - ÉTATS-UNIS ET CANADA
GARANTIE – ÉTATS-UNIS ET CANADA
JAM garantit que ce produit est exempt de vice de matériau et
de fabrication pendant une période d’un an àcompter de la date
d’achat. Cette garantie ne couvre pas les dommages causés par
une mauvaise utilisation ou un abus, un accident, la xation de
tout accessoire non autorisé, la modication du produit ou toute
autre condition de quelque nature que ce soit hors du contrôle de
JAM.
Pour obtenir des informations et des instructions détaillées sur la
garantie, veuillez visiter : www.jamaudio.com/customer-support/
warranty-1yr. Pour obtenir un service de garantie sur le produit
JAM, prière de contacter un représentant du Service àla clientèle
en utilisant le numéro de téléphone ou l’adresse de courriel
indiqués pour votre pays de résidence. Prière d’avoir le numéro de
modèle du produit àdisposition.
Coordonnées du service après-vente aux États Unis :
Courriel :
Téléphone : 1-888-802-0040
Du lundi au vendredi de 8 h 30 à19 h (heure normale de l’Est)
Coordonnées du service après-vente au Canada :
Courriel :
Téléphone : 1-888-225-7378
Du lundi au vendredi de 8 h 30 à17 h (heure normale de l’Est)
GARANTIE – ROYAUME-UNI ET EUROPE
JAM garantit que ce produit est exempt de vice de matériau et de
fabrication pendant une période de deux ans àcompter de la date
d’achat. Cette garantie ne couvre pas les dommages causés par
une mauvaise utilisation ou un abus, un accident, la xation de
tout accessoire non autorisé, la modication du produit ou toute
autre condition de quelque nature que ce soit hors du contrôle de
JAM. Distribuédans l’UE par FKA Brands Ltd, Somerhill Business
Park, Tonbridge, TN11 0GP, Royaume-Uni. Courriel :
INSTRUCTIONS DE SÉCURITÉ
IMPORTANTES
LIRE TOUTES LES INSTRUCTIONS AVANT L’UTILISATION
AVERTISSEMENT : Ne placez pas les haut-parleurs trop près des
oreilles. Peut causer des dommages aux tympans, surtout chez
les jeunes enfants.
• Ce produit ne doit être utilisé qu’aux ns décrites dans ce
manuel. N’utilisez pas d’accessoires non recommandés par
JAM.
• JAM n’est pas responsable des dommages causés aux
téléphones intelligents, iPod/MP3 et tout autre appareil.
• Ne placez pas ni ne rangez cet appareil àun endroit d’où il
pourrait chuter ou tomber dans un évier ou une baignoire.
• Ne placez pas l’appareil ni ne l’immergez dans de l’eau ou
un autre liquide sans avoir préalablement ferméles portes
étanches.
• Cet appareil ne doit pas être utilisépar les enfants. CET
APPAREIL N’EST PAS UN JOUET.
• N’utilisez jamais l’appareil si le cordon, la che, le câble ou le
boîtier sont endommagés.
• Éloignez l’appareil des surfaces chaudes.
• Ne posez l’appareil que sur des surfaces sèches. Ne placez pas
l’appareil sur des surfaces mouillées d’eau ou de solvants de
nettoyage si les portes étanches sont ouvertes.
AVERTISSEMENT:Ce produit est muni d’une
batterie au lithium interne qui ne peut pas être remplacée. Prière
d’éliminer conformément àtoutes les réglementations locales,
d’État, provinciales et nationales. Les batteries (bloc de batterie
ou batteries installées) ne doivent pas être exposées àune
chaleur excessive, comme le soleil, des ammes ou d’autres
sources de chaleur similaires.
REMPLACEMENT DE LA BATTERIE
Le produit est muni d’une batterie rechargeable conçue pour
durer la durée de vie du produit. Dans le cas peu probable que
vous ayez besoin d’une batterie de remplacement, veuillez
communiquer avec le Service aux consommateurs, qui fournira
les informations de remplacement de la batterie dans la cadre de
la garantie et hors garantie. Ce produit contient des petites pièces
qui peuvent présenter un risque de suffocation pour les jeunes
enfants.
FR

16FR
AllRightsReserved.
IB-HXP606
MISE EN GARDE: Toute réparation de ce produit doit être réalisée
exclusivement par le personnel de réparation Jam Audio. Pour le
guide de l’utilisateur complet et enregistrer le produit, prière de
visiter www.jamaudio.com (États-Unis) ou canada.jamaudio.com
(Canada) ou uk.jamaudio.com/instructionbooks (Royaume-Uni).
Pour éviter tout risque d’endommagement de l’ouïe,
n’écoutez pas àun volume élevépendant de longues
périodes.
EXPLICATION RELATIVE AUX DEEE
Ce marquage indique que ce produit ne doit pas être jeté
avec les autres déchets ménagers dans toute l’UE. Pour
éviter tout risque de dommage àl’environnement ou àla santé
humaine causépar une mise au rebut non contrôlée des déchets,
recycler de façon responsable pour promouvoir la réutilisation
durable des ressources matérielles.
DIRECTIVE SUR LES BATTERIES
Ce symbole indique que les batteries ne doivent pas être
éliminées dans les déchets domestiques, car ils contiennent des
substances qui peuvent être nocives pour l’environnement et la
santé. Prière d’éliminer les batteries auprès de sites de collecte
désignés.
Par les présentes, FKA Brands Ltd déclare que cet appareil
radio est conforme aux exigences essentielles et aux autres
dispositions pertinentes de la directive 2014/53/UE. La
Déclaration de conformitépeut être obtenue àl’adresse
uk.jamaudio.com/DoC.
Tous droits réservés.
IB-HXP606

17
ES
”Zero Chill“
HX-P606
Libro de Instrucciones

18ES
CONTENIDO CONTROLES
A – Altavoz
B – Cable de entrada auxiliar
C – Cable de carga USB con envoltura
de carrete
D – Guía de inicio rápido
E – Tarjeta de bienvenida
F – Tarjeta legal
G– Etiqueta de Jam
A – Botón de encendido/apagado,
reproducción/pausa
B – Subir volumen/siguiente pista
C – Bajar volumen/pista previa
D – Indicador de luz LED
E – Cable de carga y envoltura de carrete
F – Puerto de entrada auxiliar
G – Puerto de carga

19
CHARGE
AUX
CHARGE
CONFIGURACIÓN
2hrs 12hrs
3 hrs 22 hrs
CÓMO CARGAR SU ALTAVOZ
El altavoz “Zero Chill” se alimenta mediante una
batería recargable. El altavoz viene precargado, sin
embargo, para un tiempo de uso óptimo, asegúrese
de cargarlos antes del primer uso.
A–Abra la puerta inferior del altavoz. Saque el
carrete. Desenrolle el cable de carga integrado,
abra la puerta lateral del altavoz, pase el extremo
micro-USB por la puerta y conéctelo al puerto de
carga del altavoz.
B – Conecte el enchufe USB mayor a su
computadora o a un adaptador de CA USB
energizado. El adaptador de CA no está incluido en
la caja, pero puede usar el de su teléfono celular o
adquirir uno la próxima vez que visite la tienda.
C–Cuando el LED parpadea en color rojo, indica
que la batería está baja y que es momento para
enchufarse y recargar. Cargue por alrededor de 3
horas para hasta 22 horas de reproducción. La luz
LED permanecerá encendida en color rojo durante
el proceso de carga. Cuando esté completamente
cargado, la luz LED se apagará.
ES

20
MODO DE USO
A - ENCIENDA SU ALTAVOZ
Mantenga presionado el botón de “reproducción/pausa”
durante 3 segundos para encender su altavoz.
B - CONECTARSE A UN DISPOSITIVO
Una vez encendido, el altavoz comenzará a buscar de
inmediato un dispositivo para emparejarse. Si antes
no se ha emparejado algún dispositivo, la luz pasará
de parpadear en color azul a parpadear en colores rojo
y azul de manera alternada. Habilite Bluetooth en su
dispositivo. Desde el menú de Bluetooth seleccione
“Zero Chill”. Cuando el dispositivo y el altavoz Zero
Chill estén conectados, escuchará un tono y el LED
se iluminará por un momento en color azul continuo
y luego comenzará a parpadear lentamente en color
azul.
También puede conectar su dispositivo al altavoz Zero
Chill usando el cable auxiliar incluido. Al enchufarse, la
luz se tornará color rojo permanente.
Nota: Una vez emparejado, el altavoz detectará
el dispositivo cada vez que se encienda. Para
desconectar el altavoz del dispositivo, presione al
mismo tiempo el botón X y el botón de reproducción/
pausa durante 2 segundos.
C – FUNCIÓN DE LOS BOTONES
Presione brevemente por 0.5 segundos el botón
“reproducir/ pausar” para reproducir su música. Para
subir el volumen presione brevemente el botón “O”;
para bajar el volumen presione brevemente el botón
“X”. Para saltar una canción, presione más tiempo el
botón “O”; para regresar una canción, presione más
tiempo el botón “X”.
0000
...0.5s
...3s
0000
Zero Chill
Zero Chill
...3s
...3s
...0.5s
...0.5s
ES
Table of contents
Languages:
Other Jam Speakers manuals

Jam
Jam TRANCE PLUS User manual

Jam
Jam Trance Mini Instruction Manual

Jam
Jam Blaze HX-P265 Instruction Manual

Jam
Jam Xterior Plus HX-P570 Instruction Manual

Jam
Jam HX-TS100 User manual

Jam
Jam Chill Out HX-P202 User manual

Jam
Jam HX-P540 Instruction Manual

Jam
Jam Retro Classic+ User manual

Jam
Jam Hang Up HX-P101 User manual

Jam
Jam Zero Chill User manual