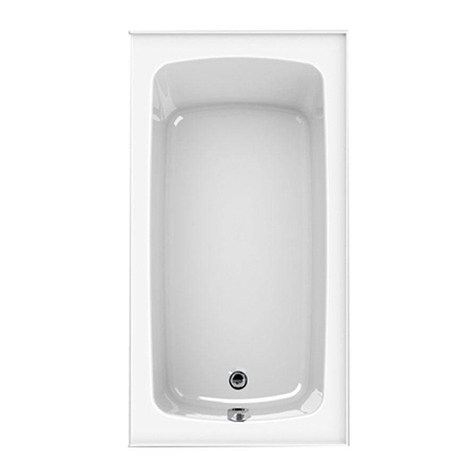
JASON Hydrotherapy SP200 User manual

Page 1 of 15
INSTALLATION INSTRUCTIONS
SP200 SHOWER PANEL
49-2040-004
Date 05/07
JASON INTERNATIONAL, INC.
8328 MacArthur Drive • North Little Rock, AR 72118 • www.jasoninternational.com
501-771-4477 • Fax: 501-771-2333 • Cust. Svc.: 800-255-5766

Page 2 of 15
Figure 1 - Dimensions

Page 3 of 15
Operating Pressure: max. 145 psi
Recommended pressure: 30.60 psi
Test pressure: 232 psi
Max. hot water temperature: 176°F *
Recommended hot water temperature: 120°F - 140°F *
Flow rate @ 45 psi
Handshower 2.5 gpm
Bodysprays <1 gpm each
Protection against back siphonage is provided by check
valves in the hot and cold supply elbows.
This panel incorporates a thermostatic mixing valve. The
high temperature limit stop on the mixing valve can be reset
to comply with local plumbing codes. See page 10.
* Know and follow all applicable local plumbing codes when setting the
temperature on the water heater.
Figure 2
Technical Data

Page 4 of 15
Preparation for Installation
1. Install 1/2” IPS nipples for the hot and cold water sup-
plies at the locations shown on the diagram. The nipples
should extend 5/8” outside the surface of the nish wall.
2. For proper operation of the unit, the hot supply should be
on the left, and the cold supply should be on the right.
3. Install the wall surface material. Make sure that the wall
is watertight before installing the panel.
4. Seal the wall around the nipples with waterproof seal-
ant.
Figure 3

Page 5 of 15
Installation Instructions
1. Wrap the nipples with several layers of Teon tape.
2.Install the elbows included with the panel. The outlets
should point downwards. The elbow should extend no
more than 1 1/4” from the surface of the nished wall.
See Figure 4 and Figure 5.
3.With a helper holding the panel in place, mark the posi-
tions of the screw holes. See Figure 6.
4.Set the panel aside, securely supported to prevent dam-
age.
Figure 5
Figure 4
Figure 6
5. Drill the screw holes with a 6 mm bit suitable for the wall
surface. (See Figure 7.)
6. Install the anchors. (See Figure 7.)
7. Seal the wall around the anchors with waterproof seal-
ant. (See Figure 7.)
Figure 7

Page 6 of 15
INSTALLATION INSTRUCTIONS (cont.)
8. Hold the panel against the wall.
9. Install the gray plastic insert. (See Figure 8.)
10. Insert the top screw through the front of the panel, the
washer and the insert. Screw it into the anchor. (See
Figure 8.)
11. Install the center and bottom screws and washers. (See
Figure 9.)
12. Connect the supply hoses to the hot and cold supply
elbows. (See Figure 10.)
13. Connect the supply hoses to the hot and cold inlet ports
on the valve. (See Figure 11 and Figure 12.)
Figure 8
Figure 9
Figure 10
Figure 11
Figure 12

Page 7 of 15
14. Turn the water on at the main. Push the diverter stem up
to turn the water on to the panel. (See Figure 13.)
15. Check all connections for leaks.
Figure 13
INSTALLATION INSTRUCTIONS (cont.)
16. Once you ensure that the connections are watertight,
push the diverter stem down to turn the water off to the
panel. (See Figure 14.)
17. Install the side seals on the front cover. (See Figure 15.)
Trim off any excess.
19. Install the diverter sleeve. (See Figure 17.)
Figure 14
Figure 15
Figure 16
Figure 17
18. Push the front cover into place. (See Figure 16.)

Page 8 of 15
20. Make sure that the indexing mark on the thermostatic
mixer sleeve is at the 12:00 position. (See Figure 18.)
21. Install the thermostatic mixer handle.(See Figure 18.)
22.Tighten the handle screw with a at-bladed screwdriver.
23. Install the diverter handle. Tighten the set screw with a
4 mm Allen wrench. (See Figure 19.)
24. Place a black rubber washer in one end of the hand-
shower hose. Screw this end of the hose to the hand-
shower outlet port. (See Figure 20.)
25. Place the screen washer in the other end of the hose.
(See Figure 20.)
26. Screw this end of the hose to the handshower. (See
Figure 20.)
27. Place the handshower in the holder.
Figure 18
Figure 19
Figure 20
INSTALLATION INSTRUCTIONS (cont.)

Page 9 of 15
You can make the slider easier or harder to move. Use a 2.5
mm Allen wrench to turn the set screw clockwise to increase
the tension, counter-clockwise to decrease the tension.
Figure 21
1. Turn the water on to the handshower.
2. Turn the thermostatic mixer handle until the output water
measures 100oon a thermometer. (See Figure 22.)
3. Turning the handle clockwise makes the water
cooler;turning the handle counter-clockwise makes the
water warmer.
4. Turn the water off.
5. Loosen the thermostatic mixer handle screw. Remove
the handle. (See Figure 23.)
6. Replace the handle so that the safety stop override but-
ton is at the 12:00 position. (See Figure 24.)
7. Tighten the set screw.
Figure 22
Figure 23
Figure 24
Adjust the Slider
Justify the Thermostatic Mixer Handle

Page 10 of 15
3. Turn the water on to the handshower.
4. Turn the temperature control stem until the output wa-
ter is the desired maximum high temperature -- usually
110o*. (See Figure 26.)
*Please know and follow all applicable local plumbing
codes when setting the high temperature limit stop.
5. Turn the water off.
6. Replace the stop ring so that the tooth is against the high
temperature limit stop. (See Figure 27.)
7. Replace the clip. (See Figure 27.)
8. Justify the handle. (See Figure 27.)
Figure 26
Figure 27
1. Remove the thermostatic mixer handle.
2. Remove the clip and the stop ring from the stem of the
thermostatic mixer. (See Figure 25.)
Figure 25
Set the High Temperature Limit Stop (Optional)

Page 11 of 15
1. Turn the handle clockwise to make the water cooler.
2. Turn the handle counter-clockwise to make the water
warmer. When the safety stop override is at the 12:00
position, the output water is 100oF, the handle will stop.
NOTE: If a user wants water hotter than 100oF, press
the safety stop override button and continue turning the
handle counter-clockwise.
Figure 28
User Instructions
Using the Thermostatic Mixer
Using the Three-Jet Handshower
To change spray modes, push the function lever until it is
next to the name of the desired function and the desired
spray is achieved. (See Figure 29 below.) There are ve
ows, Rain (Figure 30), Mix 1 (Figure 31), Balance (Figure 32),
Mix 2 (Figure 33), and Whirl (Figure 34).
Figure 29
Figure 30 - Rain
Figure 32 - Balance
Figure 34 - Whirl
Figure 31 - Mix 1
Figure 33 - Mix 2

Page 12 of 15
Pull the lever upward to turn the water on. Pivot the handle
to the desired function. There are ve functions:
1. Alll-aroundshower(handshowerand4 lower bodysprays).
(See Figure 35.)
2. Four (4) lower bodysprays. (See Figure 36.)
3. Two (2) upper bodysprays. (See Figure 37.)
4. Full-body massage (all 6 bodysprays). (See Figure 38.)
5.Handheld shower. (See Figure 39.)
Figure 35
Figure 36
Figure 37
Figure 38
Figure 39
Using the Diverter

Page 13 of 15
The spray channels are protected by the RubitTM self-clean-
ing system. Follow these steps to remove scale deposits:
2. If scale deposits are noticed on the spray face follow
these steps:
a) Pour about 3/4” of a commercial scale remover, such
as Lime-AwayTM or CLRTM ,into a shallow dish.
b) Dilute the scale remover according to the label in-
structions.
c) Soak only the spray face in the solution for the amount
of time specied on the label. (See Figure 41.)
Figure 40
Figure 41
Scale Removal
3. Rinse the handshower with clear water. (See Figure 42.)
4. Reinstall the handshower. Turn on the water and allow
the handshower to ush for at least one minute. (See
Figure 43.)
Figure 42
Figure 43
1. If scale deposits are noticed in the spray channels, turn
the water on lightly and rub the spray channels with a
nger or a sponge. (See Figure 40.)

Page 14 of 15
Problem Possible Cause Remedy
Insufcient water - Supply pressure inadequate - Check water pressure (If a pump has
been installed, check to see if the
pump is working).
- Filters on thermostat cartridge dirty - Clean thermostat lters
- Screen washer dirty - Clean screen washer between
shower and hose
Crossow, hot water being forced into
cold water pipe, or vice versa, when
mixer is closed
- Check valves dirty or leaking - Clean check valves, replace if neces-
sary
Output temperature does not corre-
spond with temperature set
- Handle not justied - Justify handle
- Hot water temperature too low - Reset high temperature limit stop
Temperature regulation not possible - Temperature regulator dirty or calci-
ed
- Clean temperature regulator, replace
if necessary
- Panel is cross-connected - Connect supply hoses to correct
supplies
Safety stop override button not operat-
ing
- Spring defective - Clean spring and/or button, replace if
necessary
- Button calcied
Diverter control stiff - Diverter cartridge defective or dirty - Replace cartridge
Troubleshooting
Modern faucetry and shower products utilize a combination
of materials to comply with the needs of the market with
regard to design and functionality.
To avoid damage, it is necessary to use some caution when
cleaning. Damage caused by improper treatment is not cov-
ered under the warranty.
Cleaning Materials for Faucets and Showers
• To remove lime scale, use only products made speci-
cally for that purpose. Always follow the manufacturer’s
instructions when using.
• Do not use cleaners that contain hydrochloric, formic,
acetic, or phosphoric acids, as these will cause consid-
erable damage to nishes and to plastic components.
• Never mix cleaning materials.
• Never use cleaners containing abrasives. Do not use
abrasive cleaning cloths, pads, or sponges.
Cleaning Recommendations
Cleaning Procedures
• Clean your faucets and shower products as and when
required. Regular cleaning will prevent scale buildup and
water spotting.
• Follow the label instructions. Do not allow any cleaner to
remain on the product for longer than necessary.
• When using spray cleaners, spray rst onto a sponge or
cloth – do not spray directly onto the product.
• After cleaning, rinse thoroughly with clear water to re-
move any cleaner residue.
Important
• Soap and shampoo residue can also cause damage to
the product. Rinse well with clean water after use.
• If the surface is already damaged, harsh cleaning mate-
rials will cause further damage.

Page 15 of 15
Figure 44
1 handshower 28519XXX
2 slider 97024XXX
3 handshower hose, 63” 28276XXX
4 upper cover 97324000
5 escutcheon 97326000
6 body shower 28406000
7 diverter handle 10490XXX
8 thermostatic mixer handle 38391XXX
9 ange 97858XXX
10 front cover 97859000
11 sleeve 95032XXX
12 adapter for handle 97108000
13 thermostat cartridge 94282000
14 nut 96945000
15 diverter cartridge 96645000
16 sealing set 95037000
17 connection hose 13099001
18 xing set for hose connection 94158000
19 mounting set 96179000
20 elbow (2) 25967001
21 check valve 97350000
22 lter 97973000
XXX = color
001 = chrome
Replacement Parts
Table of contents
Other JASON Hydrotherapy Bathroom Fixture manuals
JASON Hydrotherapy
JASON Hydrotherapy MicroSilk User manual

JASON Hydrotherapy
JASON Hydrotherapy forma User manual

JASON Hydrotherapy
JASON Hydrotherapy MicroSilk User manual

JASON Hydrotherapy
JASON Hydrotherapy forma Designer MicroSilk AirMasseur User manual

JASON Hydrotherapy
JASON Hydrotherapy Forma MicroSilk-AirMasseur User manual
Popular Bathroom Fixture manuals by other brands

FACTO
FACTO TP9921 installation instructions

Orbital Systems
Orbital Systems OAS Standart R3 Technology Installation

Porcelanosa
Porcelanosa noken Square 100090019 manual

Kohler
Kohler Sterling Ensemble AFD 7110 Series Installation and care guide

ALT
ALT VIA DANTE 70787 Installation & Care Guide

Kohler
Kohler K-18751 Homeowner's guide