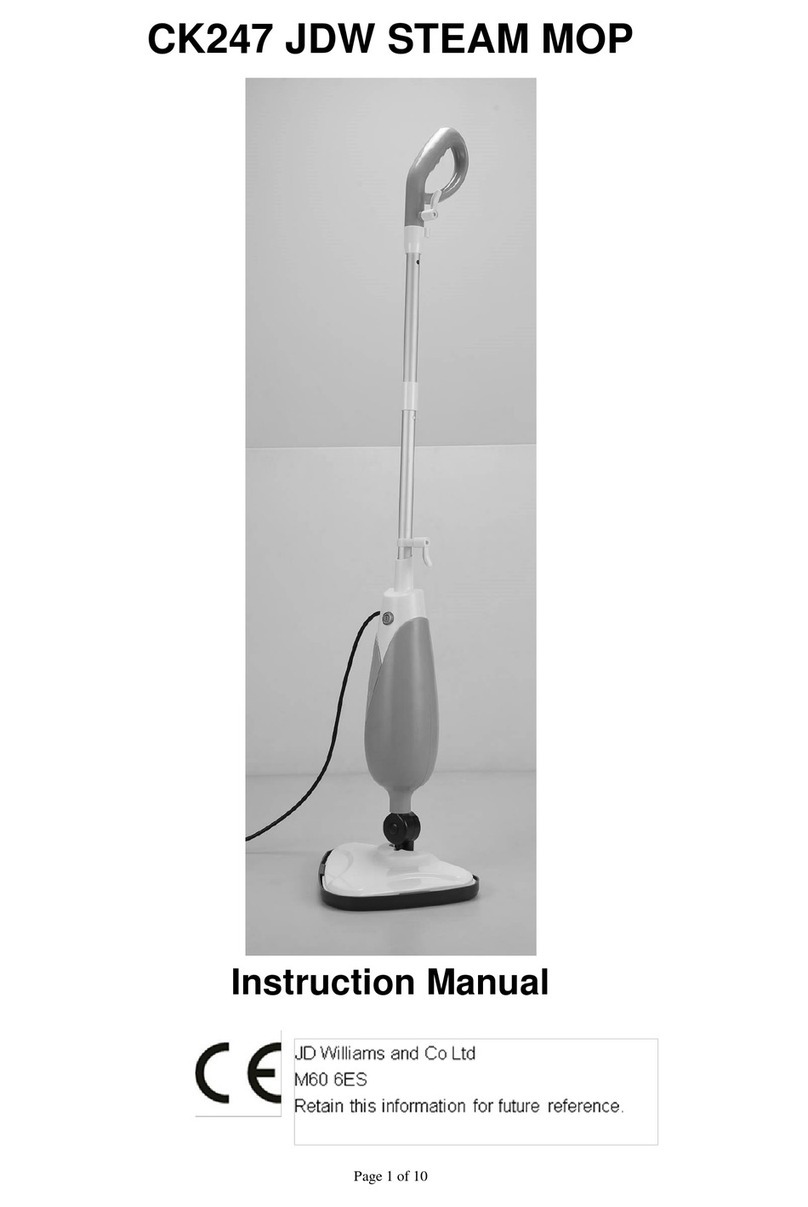
JD Williams Ltd. WN187 User manual

10 IN 1 STEAM MOP
Instruction Manual
Thank you for purchasing this appliance. Before using it, please
read this annual carefully.
JD Williams and Co Ltd
M60 6ES
Retain this information for future reference.

Plug Wiring (UK)
This appliance is fitted with a BS1363 13 amp plug. If you have to replace the fuse, only
those that are BSI approved to BS1362 and with a rated current of 13 amps should be
used. Spares fuses are available from electrical stores. If the plug outlets in your home
are not suitable for the plug of this product, the plug must be removed and disposed of
safely as insertion of the plug into a socket is likely to cause electric hazard.
A replacement plug should be wired according to the following instructions.
If in doubt, contact a qualified electrician.
This appliance must be earthed. The wires in the cord set are coloured in the following
way: BLUE-NEUTRAL. BROWN-LIVE, GREEN&YELLOW-EARTH
The wire that is coloured blue must be connected to the terminal that is marked with
the letter N.
The wire that is coloured brown must be connected to the terminal that is marked
with the letter L.
The wire that is coloured green & yellow must be connected to the terminal in the
plug that is marked with the letter E or marked with symbol.
If the supply cord is damaged a qualified person must replace it in order to avoid a
hazard.
Environment
The "crossed-out wheeled bin" symbol indicates that this product can be
recycled. Do not dispose of with household waste. Please take the Steam
Mop to your local refuse/collection site centre. If you are unsure of where
you local refuse centre is please contact your local authority.

Safety instructions
WARNING:Read all safety warnings and all instructions. Failure to follow the
warnings and instructions listed below may result in electric shock, fire and/or serious
injury.
Warning: When using electrical appliances, basics safety precautions, including the
following, should always be followed to reduce the risk of fire, electric shock, personal
injury and material damage.
●Read all of this manual carefully before using the appliance.
●The intended use is described in this manual. The use of any accessory or
attachment or the performance of any operation with this appliance other than those
recommended in this instruction manual may present a risk of personal injury.
●Retain this manual for future reference.
Using your appliance
●Do not direct steam at people, animals, electrical appliances or electrical outlets.
●Do not expose to rain.
●Do not immerse the appliance in the water.
●Do not leave the appliance unattended. Keep children away from unit while in use.
●Do not leave the appliance connected to an electrical outlet when not in use.
●Never pull the power cord to disconnect the appliance from the socket. Keep the
appliance cord away from heat, oil and sharp edges.
●Do not handle steam cleaner with wet hands.
●Do not pull or carry by cord, use cord as a handle, close door on cord, pull cord
around sharp corners or expose cord to heated surfaces.
●Do not use appliance in an enclosed space filled with vapor given off by oil-base
paint thinner, some moth-proofing substances flammable dust, or other explosive or
toxic vapors.
●do not use on leather, wax polished furniture or floors, synthetic fabrics, velvet or
other delicate, steam-sensitive materials.
●Do not use on any unsealed hard floor surfaces. Additionally, on surfaces that have
been treated with wax or some no-wax floors, the sheen may be removed by the heat
and steam action. It is always recommended to test an isolated area of the surface to
be cleaned before proceeding. We also recommend that you check the use and care
instructions from the floor manufacturer.
●Never put de-scaling, aromatic, alcoholic or detergent products into the steam mop,
as this may damage it or make it unsafe for use.
●If the circuit breaker activates while using the steam function, discontinue product
use immediately and contact the customer support center.(Beware of the risk of
electrical shock.)
●The appliance emits very hot steam to sanitize the area of use. This means that the
steam head and cleaning pads get very hot during use.
!Caution: Always wear suitable shoes when using your steam mop and when
changing the accessories on your steam mop. Do not wear slippers or open-toed

footwear.
●The lid may become hot during use.
●Care should be taken when using this appliance.DO NOT touch any parts which
may become hot during use.
●Do not use when micro-fiber cleaning pad not install correct.
Safety of others:
●This appliance is not intended for use by persons(including children) with reduced
physical, sensory or mental capabilities, or lack of experience and knowledge, unless
they have been given supervision or instruction concerning the use of the appliances
by a person responsible for their safety.
●Children should be supervised to ensure that they do not play with the appliance.
Safety Guidelines-Definitions
It is important for you to read and understand this manual. The information it contains
relates to protecting YOUR SAFETY and PREVENTING PROBLEMS. The symbols
below are used to help you recognize this information.
!DANGER:Indicates an imminently hazardous situation which, f not avoided, will
result in death or serious injury.
!WARNING:Indicates a potentially hazardous situation which, if not avoided, could
result in death or serious injury.
!CAUTION:Indicates a potentially hazardous situation which, if not avoided, may
result in minor or moderate injury.
NOTICE:Used without the safety alert symbol indicates a potentially hazardous
situation which, if not avoided, may result in property damage.
Residual risks:
Additional residual risks may arise when using the tool which may not be included in
the enclosed safety warnings. These risks can arise from misuse, prolonged use, etc.
Even with the application of the relevant safety regulations and the implementation of
safety devices, certain residual risks cannot be avoided. These include
●Injuries caused by touching any moving parts.
●Injuries caused by touching any hot parts.
●Injuries caused when changing any parts or accessories.
●Injuries caused by prolonged use of the appliance. When using any appliance for
prolonged periods ensure you take regular breaks.

Standard Features
A Main Body
B Holder
C Window Squeegee
D Small Scrub Brush
E Medium Scrub Brush
F Accessory Adaptor
G Angle Nozzle
H Grout Cleaning Tool
I Scraping Tool
J Measuring cup
K Microfiber Pad
L Garment Steamer Cloth
M Steam head
N Carpet Gilder
Product Components
1 spindle button
2 Holder
3 Cord Holder
4 Holder steam button
5 Steam head Spindle
6 Lock Catch
7 Main body steam button
8 Power Cord
9 Power switch
10 Indicator light
11 Water Inlet
12 Steam control Knob
13 Water tank Cap
14 Water tank Button
15 Water tank
A
BCDEF
GHIJ
KL
M
N
12
10
9
11
13
14
15 8
3
6
7
4
3
2
5
1

Function and specification
Function
Adjustable steam amount;
folding holder;
The split-type design;
removable water tank;
the handle bracket is configuration of steam button;
continuous steam output(up to 5 minutes continuously working , the steam
averaged):20-35g / min;
Steam output time:20 minutes
With a warm and dry indicator. when the appliance is connected to power
supply, and when the water tank is empty , the indicator is in red light;
pressure relief protection, keeping the pressure in the heating unit constant;
the angle of the rotation axis in the cleaner is greater;
Comprehensive accessories configuration;
Specification
Rated voltage:220-240V
Rated frequency:50Hz
Output power:1500W (+5%,-10%)
water tank capacity:350ML
Waterproof level:IPX4
ASSEMBLY
NOTE: Each steam mop is 100% tested in the factory to ensure product performance
and safety. When assembling your new steam mop for the first time you may notice
water residue inside of the unit.
!WARNING: Before attempting any of the following operations, make sure that the
appliance is switched off and unplugged and that the appliance is cold and contains
minimal or no water.

Spread holder
● Round the holder along spindle until click to fix holder.
● Press spindle button 1, turn the holder, the holder can become folded state.
Attaching the steam head
● Slide the bottom end of main body onto
the steam head M until Steam head Spindle 5
clicks into place
● The steam head M can be removed from the
Main body by pressing salient point on the
Steam head Spindle 5
Attaching a cleaning pad
Because of barb design at the bottom of steam head M,just
place a micro-fiber cleaning pad L to steam had,they can
bond hard.
Place the front of your shoe onto the cleaning pad removal
Tab and press down firmly.
Attaching Carpet Gilder
Press the micro-fiber cleaning pad L with main body to
Carpet gilder O by vertical pressure,until it into place.
Place the front of your shoe onto the cleaning pad removal
Tab and press down firmly,carpet gilder will remove form
steam head
OPERATION
1. Filling the water tank
Method 1::
Open the water tank cup 5 by counterclockwise
rotation, fill 350ML water use measuring cup,
and then clockwise rotation to close water tank cup 5.

Method two:
Remove the water tank from main body, open the
water tank cup 5 by counterclockwise rotation, fill
the water tank from water faucet. ,and then clockwise
rotation to close water tank cup 5.
Install the water tank 7to main body until it clicks into place.
2. Plug in the appliance to a grounded outlet.
3. When switch the appliance on, the indicator lights will turn red at the each side of
water tank, it indicate preheating. If the lights does not illuminate, please check the
"troubleshooting" section for more details.
4. It will takes approximately 25 seconds for preheating. Once the steam mop is ready
to use the water tank will glow blue.
5. When the water tank full fill with water, it can work approximately 20 minutes. If the
water tank 7 without water, the indicator lights 12 will glow red,and the lights will
flash to point out need to add water
NOTICE:If power off during preheating or after preheating,then power
again,the appliance will repeat above preheating action.
6.Press the steam button 4 and steam button13, the steam out.
7.Add control volume by turn steam control knob 8
clockwise,and counterclockwise to reduce. User
can adjust steam volume according different objects
NOTICE:steam volume control by PCB, It will takes 3 seconds adaptation time
when you adjust steam volume .It is normal phenomenon.
8. When normal cleaning, the steam head
has big rotary angle, can clean corners
and also can clean low space.
USE AS A STEAM CLEANER IN HAND
Push Lock Catch, take the main body A out of holder A, and also take out the
power cord.
Install the accessory adaptor at the top of main body A, until it into place.
Press salient point at the accessory adaptor to remove the accessory adaptor
from main body A
Choose the appropriate accessories(check accessories use list),according to
arrow indicator to align and implant to accessory adaptor G, then turn
anticlockwise, until it into place.

ACCESSORIES CHAR:
!CAUTION!
Before cleaning any electrical appliance, check and follow the user manual
ACCESSORY REQUIRED
ACCESSORIES THAT
MUST BE CONNECTED
TO THE ACCESSORY
ADAPTOR
SUGGESTED USE
Window
Squeegee/Garment
Steaming Tool
Shower glass doors,
mirrors, glass, removing
soap scum and grime.
Garment tool for taking
wrinkles out of garments,
steaming draperies,
tablecloths, and more.
Small and Medium Scrub
brushes
Oven, microwaves, stove
tops, showers, bathtubs,
faucet fixtures, tile, grout,
toys, refrigerators, etc.
Angle Nozzl Stove tops, around faucet
edges, grout, microwaves,
sinks, hard to reach areas,
etc.
Grout cleaning Tool Cleaning all grout lines,
sanded or non-sanded.
Scraping Tool Scraping baked on food,
grime, and grease.
Removing residue or other
difficult substances from
surfaces, such as stove tops
and ovens
Garment Steamer Cloth For use when steaming
garments, draperies,
tablecloths, etc.
Microfiber Pad For general cleaning of hard
floors and refreshing
carpets.

CLEANING AND MAINTENANCE
BE SURE THAT THE UNIT IS DISCONNECTED FROM THE ROWER
OUTLET WHEN PERFORMING CLEANING
Drain the remaining water in the tank and clean the tank after every use.
Please use detergent to clean the accessories (Jet Nozzle and Round Brush) when
they are dirty then wash with cleaning water and air dry
How to decalcify the Water Tank interior
To clean calcium deposits that build up inside the Water Tank , add one or two
tablespoons of white vinegar to a full Water Tank close the Water Tank Cap and then
shake the contents. DO NOT TURN THE STEAMER ON.
Cleaning procedure to remove lime scale
If your steam mop begins to produce steam more slowly than usual or stops
producing steam , you may need to remove lime scale. Lime scale can develop over
time on the metal parts and greatly affect mop performance.
It is necessary to remove lime scale on regular basis every 25-50 times you use a full
tank of water or at least once a month, especially in areas with hard water.
The frequency of lime scale removal depends upon the hardness of you tap water and
how often you use the steam mop.
By using cleaning solution
1. Prepare a solution of 1/3 white vinegar and 2/3 tap water and add to the water tank.
2. Secure and position the unit to ensure steam released is aimed away from the floor
or surrounding objects and surface. Plug the unit in , turn the unit ON by pressing the
power swith, and allow the unit to produce steam unit the vinegar/water solution in
used up.
3. Repeat the above procedure as many times as necessary unit a normal steam flow
rate is achieved.
4. Fill the water tank with fresh water and rinse our.
5. Fill the water tank with fresh water, attach to the unit and release steam through the
system unit the water tank is empty.

WARNING
Don't leave the steamer unattended during the lime scale removal
process and/or while in use
NOTICE:
Preform a test cleaning on a suitable isolated area after each lime scale removal to
ensure that there is no debris left in the system.
Cleaning bocked steamer accessories
Due to the high mineral content of water in some areas, you may notice that less
steam comes out form the Hand-Held steamer accessories
This may be caused by calcium buildup inside the tip of the nozzle
How to cleaning calcium buildup
We recommend using a spray lubricant. Spray a small burst or two of the lubricant
inside the tip of the Jet Nozzle. After spraying lubricant inside the component, till the
steamer with water according to the directions and run a continuous jet of steam
through the affected accessory for several minutes to remove the deposit once the
steam pathway is clear, aim the steamer at a neutral surface or cleaning cloth to make
sure no debris is emitted.
This product contains no serviceable parts. Do not try to repair it yourself. Any
servicing that requires disassembly other than cleaning must be performed by a
qualified appliance repair technician.
ALL servicing should be done by an authorized service representative.
CLEANING MICROFIBER PAD
Machine washable on "warm" setting. Always use a mild detergent.
For best care results, lay flat to dry
IMPORTANT:Allow the steamer to fully cool down before performing any
maintenance or troubleshooting checks.
IMPORTANT:Never use bleach or fabric softener when washing the microfiber
cleaning pad.
STORAGE
After the steamer is used, turn power off and then unplug the power cord.
Take out the water tank ,and empty the residual water in the tank and clean the
external surface with a dry cloth. Until the steam mop cools down, clean
appliances
Remove the cleaning pad and wash it so that it will be ready for next use.

Hang the power code in the cord hold, press spindle button, and fold the holder.
Then rotated cord hold 180°to prevent cord drop.
Store product in a protected, dry area. Keep water funnel and measuring cup for
future use.
Keep out of reach of children.
NOTICE:After cleaning, take out the water tank before cut off the power, and
then let the product work for a while, until there is no steam. It can make pipe
without water, good to store.
TROUBLESHOOTING
USE TROUBLESHOOTING GUIDE AS A FIRST STEP TO RESOLVE ANY
PROBLEMS YOU MAY BE EXPERIENCING.
!WARNING!:TO REDUCE RISK OF PERSONAL INJURY-UNPLUG STEAMER
BEFORE SERVICING AND ALLOW TO COOL
PROBLEM POSSIBLE REASON POSSIBLE SOLUTION
Reduced steam or no
steam
Water tank may be empty Fill water into the water
tank
Steam nozzle may be
blocked
Clean steam nozzle
There is no power to the
unit
Make sure unit is plugged
in
Didn't press steam button Press steam button
Steam control Knob is in
MIN.
Turn steam control knob
clockwise
Unit will not turn on
Blown fuse or breaker Replace fuse or reset
breaker in home
Power cord not plugged in Plug cord into a working
circuit
Internal fuse is blown Contact with customer
service
Correct Disposal of this product
This marking indicates that this product should not be disposed
with other household wastes throughout the EU. To prevent
possible harm to the environment or human health from
uncontrolled waste disposal, recycle it responsibly to promote the
sustainable reuse of material resources. To return your used
device, please use the return and collection systems or contact
the retailer where the product was purchased. They can take this
product for environmental safe recycling.
Table of contents
Other JD Williams Ltd. Steam Cleaner manuals
