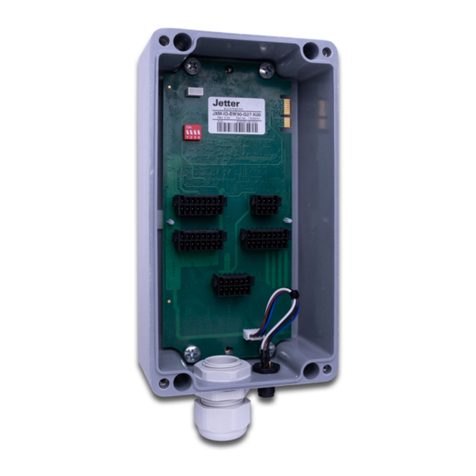
Jetter JXM-IO-E30 User manual

User Manual
JXM-IO-E30
Expansion module
We automate your success.
60883467_03

Jetter AG
Graeterstrasse 2
71642 Ludwigsburg Germany
Germany
Phone
Switchboard +49 7141 2550-0
Sales +49 7141 2550-621
Technical hotline +49 7141 2550-444
E-mail
Technical hotline [email protected]
Sales [email protected]
www.jetter.de
Translation of the german original User Manual
Revision 2.27.1
Date of issue 10/7/2022
This document has been compiled by Jetter AG with due diligence based on the state of the art as
known to them. Any revisions and technical advancements of our products are not automatically
made available in a revised document. Jetter AG shall not be liable for any errors either in form or
content, or for any missing updates, as well as for any damage or detriment resulting from such
failure.

Jetter AG Table of Contents
User Manual – JXM-IO-E30 iii
Table of Contents
1 Introduction......................................................................................................................................... 6
1.1 Information on this document ...................................................................................................... 6
1.2 Typographical conventions.......................................................................................................... 6
2 Safety ................................................................................................................................................... 7
2.1 General Information..................................................................................................................... 7
2.2 Purpose ....................................................................................................................................... 7
2.2.1 Intended use.................................................................................................................... 7
2.2.2 Usage other than intended .............................................................................................. 7
2.3 Warnings used in this document ................................................................................................. 7
3 Product Description ........................................................................................................................... 9
3.1 Variants ....................................................................................................................................... 9
3.2 Design ......................................................................................................................................... 9
3.3 Product features ........................................................................................................................ 10
3.4 Diagnostic capability via LEDs .................................................................................................. 10
3.5 Nameplate ................................................................................................................................. 11
3.6 Scope of delivery ....................................................................................................................... 11
4 Technical specifications .................................................................................................................. 12
4.1 Dimensions................................................................................................................................ 12
4.2 Mechanical specifications.......................................................................................................... 13
4.3 Electrical properties ................................................................................................................... 13
4.4 Environmental conditions .......................................................................................................... 14
4.5 EMI values................................................................................................................................. 14
4.6 Outputs ...................................................................................................................................... 16
4.6.1 Current diagnostics at the outputs................................................................................. 18
4.6.2 Overcurrent trip at outputs............................................................................................. 18
4.7 Inputs......................................................................................................................................... 19
5 Mechanical installation .................................................................................................................... 21
5.1 Requirements for installation location and mounting surface .................................................... 22
5.2 Mounting orientation .................................................................................................................. 23
5.2.1 Allowed mounting orientations....................................................................................... 23
5.2.2 Forbidden mounting orientations................................................................................... 24
5.3 Installing the expansion module ................................................................................................ 25

Jetter AG Table of Contents
User Manual – JXM-IO-E30 iv
6 Electrical connection........................................................................................................................ 26
6.1 Pin assignment .......................................................................................................................... 28
6.1.1 MOLEX connector ......................................................................................................... 28
6.2 Measures for use in the industrial sector................................................................................... 30
7 Identification and Configuration ..................................................................................................... 32
7.1 Identification .............................................................................................................................. 32
7.1.1 Device information......................................................................................................... 32
7.1.2 Electronic Data Sheet (EDS)......................................................................................... 33
7.2 Operating system ...................................................................................................................... 33
7.2.1 Operating System Update of the Expansion Module .................................................... 34
8 Parameterization............................................................................................................................... 36
8.1 Concept and control .................................................................................................................. 36
8.1.1 Configuration options of connections ............................................................................ 36
8.1.2 I/O ports and SDO map................................................................................................. 37
8.1.3 Overview – I/O interfaces .............................................................................................. 38
8.1.4 Parameters, values and statuses .................................................................................. 40
8.2 Setting the node ID.................................................................................................................... 45
8.3 Diagnostic information ............................................................................................................... 45
8.4 Saving settings permanently and resetting to default values .................................................... 46
8.5 System parameters ................................................................................................................... 47
8.6 Mapping of Process Data Objects (PDOs) ................................................................................ 48
8.6.1 RPDO communication parameters................................................................................ 48
8.6.2 TPDO communication parameters ................................................................................ 49
8.6.3 Mapping tables .............................................................................................................. 49
8.6.4 Mapping of digital values............................................................................................... 50
8.6.5 Sending interface input values via TPDO...................................................................... 52
8.7 Frequency measurement at the digital inputs............................................................................ 54
8.8 Acquisition of encoder signals ................................................................................................... 54
8.9 NMT commands ........................................................................................................................ 56
8.10 Troubleshooting......................................................................................................................... 56
8.10.1 Heartbeat....................................................................................................................... 58
8.11 Current control with PID controller............................................................................................. 59
8.11.1 Test scenario ................................................................................................................. 59
8.11.2 Current measurement at the PWMi_H3_X outputs ....................................................... 62
8.12 Dither technology for controlling hydraulic valves ..................................................................... 62
9 Maintenance and repairs.................................................................................................................. 64
9.1 Maintenance, repairs and disposal............................................................................................ 64
9.2 Storage and shipment ............................................................................................................... 64

Jetter AG Table of Contents
User Manual – JXM-IO-E30 v
10 Service ............................................................................................................................................... 65
10.1 Customer service....................................................................................................................... 65
11 Spare parts and accessories ........................................................................................................... 66
11.1 Accessories ............................................................................................................................... 66

Jetter AG Introduction | 1
User Manual – JXM-IO-E30 6 / 70
1 Introduction
1.1 Information on this document
This document forms an integral part of the product and must be read and under-
stood prior to using it. It contains important and safety-related information for the
proper use of the product as intended.
Target groups This document is intended for specialists with appropriate qualifications.
Only competent and trained personnel is allowed to put this device into operation.
During the whole product life cycle, safe handling and operation of the device
must be ensured. In the case of missing or inadequate technical knowledge or
knowledge of this document any liability is excluded.
Availability of
information
Make sure this document is kept at the ready in the vicinity of the product
throughout its service life.
For information on new revisions of this document, visit the download area on our
website. This document is not subject to any updating service.
Start | Jetter - We automate your success.
For further information refer to the following information products:
■JetSym software Online Help
Detailed description of software functions with application examples
■Application-oriented manuals
Cross-product documentation
■Version updates
Information about new versions of software products or of the operating
system of your controller
1.2 Typographical conventions
This manual uses different typographical effects to support you in finding and
classifying information. Below, there is an example of a step-by-step instruction:
üThis symbol indicates requirements which have to be met before executing
the following action.
►This sign or a numbering at the beginning of a paragraph marks an action
instruction that must be executed by the user. Execute the instructions one af-
ter the other.
ðThe target after a list of instructions indicates reactions to, or results of these
actions.
INFO Further information and practical tips
In the info box you will find helpful information and practical tips about your
product.

Jetter AG Safety | 2
User Manual – JXM-IO-E30 7 / 70
2 Safety
2.1 General Information
When placed on the market, this product corresponds to the current state of
science and technology.
In addition to the operating instructions, the laws, regulations and guidelines of
the country of operation or the EU apply to the operation of the product.
The operator is responsible for compliance with the relevant accident prevention
regulations and generally accepted safety rules.
2.2 Purpose
2.2.1 Intended use
This module is for adding multifunctional inputs and outputs to controllers.
Operate the device only in accordance with the intended conditions of use, and
within the limits set forth in the technical specifications.
Intended use of the product includes its operation in accordance with this man-
ual.
SELV The operating voltage of this device is classified as Safety Extra Low Voltage and
is therefore not subject to the European Low Voltage Directive. The device may
only be operated from a SELV source.
2.2.2 Usage other than intended
This device must not be used in technical systems which to a high degree have
to be fail-safe.
Machinery Directive This device is no safety-related part as per Machinery Directive 2006/42/EC, and
must, therefore, not be used for safety-relevant applications. This device is NOT
intended for the purpose of personal safety, and must, therefore, not be used to
protect persons.
2.3 Warnings used in this document
DANGER
High risk
Indicates an imminently hazardous situation which, if not
avoided, will result in death or serious injury.
WARNING
Medium risk
Indicates a potentially hazardous situation which, if not
avoided, could result in death or serious injury.

Jetter AG Safety | 2
User Manual – JXM-IO-E30 8 / 70
CAUTION
Low risk
Indicates a hazardous situation which, if not avoided, could
result in minor or moderate injury.
NOTICE
Material damage
Indicates a situation which, if not avoided, could result in mal-
functions or material damage.

Jetter AG Product Description | 3
User Manual – JXM-IO-E30 9 / 70
3 Product Description
The JXM-IO-E30 expansion module is a cost-effective and universally applicable
I/O extension for self-propelled machines. For use in the industrial sector, addi-
tional requirements must be met:
■Measures for use in the industrial sector [}30]
3.1 Variants
Some information in this document distinguishes between the following variants:
Variant Item number
JXM-IO-E30-G20-K00 10001687
JXM-IO-E30-G20-K00-O01
Model with CAN IN/OUT and AI10V
10002046
Observe the relevant information in the following chapters:
■Inputs [}19]
■MOLEX connector [}28]
3.2 Design
1
6
5
2
2
3
4
Fig.1: Design
1Housing
2Fastening lugs
3MOLEX connector
4Mounting surface
5LED indicators
6Contact pins

Jetter AG Product Description | 3
User Manual – JXM-IO-E30 10 / 70
3.3 Product features
■1 CAN port with optional terminating resistor
■Communication via CANopen protocol
■8 analog inputs for current or voltage measurement
■4 digital inputs for use as digital, frequency, period time or counter inputs
■4 digital outputs with current monitoring. 3A maximum load per channel.
The total current must not exceed 6A. These outputs can also be used as
digital inputs.
■6 PWM outputs, 7A max., with current monitoring. These outputs can also be
used as digital inputs.
■4 PWM outputs, 3A max., with precision current measurement and PID
current control. These outputs can also be used as digital inputs.
■3 outputs with monitored supply voltages for sensors (battery voltage)
■Separate connections for logic and output driver supply
■Total current output of up to 25A
3.4 Diagnostic capability via LEDs
The JXM-IO-E30 is equipped with 2LEDs to indicate various states and errors.
Color Blinking pattern Description
Red Permanently ON
■Operating voltage is present
(VBAT_ECU).
■The boot loader is not running.
Red Steady 200ms ■The boot loader is running.
■The device has no firmware.
OFF 200ms
Red
Steady 400ms ■The start process was completed without
errors.
■The device is in the Stopped state.
OFF 400ms
Green
Steady 200ms ■The start process was completed without
errors.
■The device is in the Pre-Operational
state.
OFF 200ms
Green
Steady 200ms ■The start process was completed without
errors.
■The device is in the Operational state.
OFF 600ms
Green
3x
ON/
OFF
200ms ■The start process was completed without
errors.
■The device is in calibration mode.
Break 400ms
Red Steady 200ms ■The device is in the Bus Off state.
■Bus communication is not possible.
■There is a wiring error.
OFF 400ms
Green Steady 200ms
OFF 400ms

Jetter AG Product Description | 3
User Manual – JXM-IO-E30 11 / 70
Color Blinking pattern Description
Red
3x
ON/
OFF
200ms
Measured values are outside their specified
ranges. The following errors may have oc-
curred:
■The PCB temperature is too high.
■The CPU temperature is too high.
Green Steady 400ms
OFF 400ms
3.5 Nameplate
1
6
5
4
2
3
Fig.2: Sample nameplate
1Logo
2Certification mark
3Registration number and hardware revision
4Barcode
5Serial number
6Model code number
3.6 Scope of delivery
Scope of delivery Item number Quantity
JXM-IO-E30-G20-K00 10001687 1
OR
JXM-IO-E30-G20-K00-O01
Model with CAN IN/OUT and AI10V
10002046 1

Jetter AG Technical specifications | 4
User Manual – JXM-IO-E30 12 / 70
4 Technical specifications
This chapter contains information on electrical and mechanical data as well as
operating data of the JXM-IO-E30.
4.1 Dimensions
43.1
93.5
38.4
139.8
124.8
76
1.5
Ø6.5
1.5
7.5
68.5
89.2
15.6
18.6
Fig.3: Dimensions in mm
INFO CAD data
CAD data of the device can be found in the download area of our homepage.

Jetter AG Technical specifications | 4
User Manual – JXM-IO-E30 13 / 70
4.2 Mechanical specifications
Parameter Description Standards
Weight 325 g
Enclosure specifications
Material Polyamid
Enclosure potential Isolated
Vibration resistance 10Hz...150Hz, 6h ISO16750-3
Shock resistance
Type of shock Half-sine wave ISO16750-3
Intensity and duration 50g for 11ms
Number and direction 10 shocks in the directions of all3 spatial axes
Free fall
Height of fall From 1 m height on solid
ground
ISO16750-3
Tab.1: Mechanical specifications
4.3 Electrical properties
Output driver
supply
Parameter Description
Abbreviation VBAT_PWR
Total current Max. 25 A
Operating voltage DC8V…32V
Protection against polarity
reversal
There is the danger of a short circuit if the polarity is
reversed. Protect the circuit by an external 25A fuse.
Voltage protection +36V for 1h at Tmax-20°C, function stateC
Tab.2: Output driver supply
ECU power supply Parameter Description
Abbreviation VBAT_ECU
Operating voltage DC8V…32V
Protection against polarity
reversal
Max. 32V
There is the danger of a short circuit if the polarity is
reversed. Protect the circuit by an external 2A fuse.
Current consumption At 12V approx. 49mA + total
current at VEXT_SEN
At 24V approx. 34mA + total
current at VEXT_SEN
Tab.3: ECU power supply
Ground reference Pin Purpose
GND_PWR Ground for VBAT_PWR and VBAT_ECU
GND_SEN Ground for VEXT_SEN
Tab.4: Ground reference

Jetter AG Technical specifications | 4
User Manual – JXM-IO-E30 14 / 70
4.4 Environmental conditions
Parameter Description Standards
Operating temperature -40°C…+85°C ISO16750-4
Storage temperature -40°C…+85°C
Relative humidity 5%…95%
Weather resistance The device is designed for use in all weather condi-
tions and is suitable for outdoor use.
Salt water resistance The device is not designed for maritime applications.
Degree of protection IP65 with mating connec-
tor plugged in
Tab.5: Environmental conditions
4.5 EMI values
The device has E1 approval according to ECER10Rev.5 and CE conformity ac-
cording to ISO14982.
In addition, the device has CE conformity according to EN61000-6-1 and
EN61000-6-2 in the industrial sector as of hardware revision 02. To comply with
CE conformity requirements, additional measures are necessary (see Measures
for use in the industrial sector [}30]).
Pulses ISO7637-2 Test pulse Values Functional class
1 -450V C
2a +37V B
2b +20V C
3a -150V A
3b +150V A
Tab.6: Pulses ISO7637-2
Pulses ISO16750-2 Test pulse Values Functional class
4 Ua1: -12V / 50ms
Ua2: -5V / 500ms
B (24V systems)
4 C (12V systems, E1)
5b Load dump
70V / 2Ω / 350ms
C
Tab.7: Pulses ISO16750-2
Irradiation
ISO11452
Parameter Values Functional class
Protection against RF
noise
20MHz...2GHz
60V/m
A
20MHz...2GHz
75V/m
B
20MHz ... 57MHz and
82MHz...2GHz
100V/m
B
Tab.8: Irradiation ISO11452

Jetter AG Technical specifications | 4
User Manual – JXM-IO-E30 15 / 70
Emission CISPR25 Parameter Values
Narrowband emission 30MHz...1,000MHz Min. 1 dB below limit
Wideband emission 30MHz...1,000MHz Min. 1 dB below limit
Tab.9: Emission CISPR25
ESDEN61000-4-2 ESDEN61000-4-2 Values Functional class
Contact discharge ±4kV A
Discharge through air ±8kV A
Tab.10: ESDEN61000-4-2
Tests for use in industrial applications
Burst Parameter Values Criterion Standards
Burst 2kV B EN61000-6-2
1kV B EN61000-6-1
Tab.11: Burst
RF induction Parameter Values Criterion Standards
RF induction 10V A EN61000-6-2
3V A EN61000-6-1
Tab.12: RF induction
Impulse voltages Parameter Values Criterion Standards
Impulse voltages ±1kV B EN61000-6-2
±0.5kV B EN61000-6-1
Tab.13: Impulse voltages

Jetter AG Technical specifications | 4
User Manual – JXM-IO-E30 16 / 70
4.6 Outputs
INFO Use as input
Using the outputs as inputs always affects the entire group. It is not possible to
configure individual outputs of a group as inputs.
Output PWMi_H3 Parameter Description
High-side PWM output with precise current diagnostics
Abbreviation PWMi_H3
Quantity 4
Peak Current 3A per channel
Load range 0.02A...3A per channel
Properties No-load detection Compatible with inductive
load
Overcurrent detection, precise current measurement
Pulse width modulation
PWM frequency Max. 1500Hz
Resolution 0.1%
Dithering frequency 50Hz…800Hz
Dither amplitude 0%…20%
Current control PID controller with configurable control parameters
Control period ≥5ms, adjustable
Current diagnostics
Resolution 12 bits
Measuring range 0.2A...4A
Measuring accuracy ±2.5% of the maximum value relating to a current
range of 3A
Use as input
NPN and PNP input Switching the interface to NPN or PNP affects the
entire group
PWMi_H3_x OFF!
L level ≤1.6V H level ≥4.6V
Input resistance PNP 94kΩ NPN 10kΩ
Tab.14: Outputs PWMi_H3_1...PWMi_H3_4
Output PWM_H7 Parameter Description
High-side PWM output with current diagnostics
Abbreviation PWM_H7
Quantity 6
Peak Current 7A per channel
Load range 0.2A...7A per channel
Properties No-load detection Compatible with inductive
load
Overcurrent detection
Current diagnostics Diagnostics value Measuring accuracy
Related to the measuring
range 7 A
<0.2A ±45%
≤1.5A ±35%
>1.5A...7A ±25%

Jetter AG Technical specifications | 4
User Manual – JXM-IO-E30 17 / 70
Parameter Description
Pulse width modulation
PWM frequency Min. 5Hz Max. 1500Hz
Resolution 0.1%
Dithering frequency 25Hz…800Hz
Dither amplitude 0%…20%
Use as input
NPN or PNP input Switching the interface to NPN or PNP affects the
entire PWM_H7_x group!
L level ≤1.6V H level ≥4.6V
Input resistance PNP 94kΩ NPN 10kΩ
Tab.15: Outputs PWM_H7_1...PWM_H7_6
INFO Measurability of very short pulses
The resolution of the duty cycle at the PWM output is 0.1%. Due to the limited
edge steepness, very short pulses may not be measured.
■Example - high frequency pulses:
At 10kHz output frequency, 0.1% or 99.9% duty cycle and low impedance
load, a signal can no longer be measured.
■Example - low frequency pulses:
1Hz output frequency allows for a 0.1% duty cycle to be measured.
Output DO_H3 Parameter Description
Digital output with current diagnostics
Abbreviation DO_H3
Quantity 4
Peak Current 3A per channel
Total current 6A max. for all 4 DO_H3 channels combined
Load range 0.02A…3A
On-Off switching fre-
quency
Max. 50Hz
Properties No-load detection Compatible with inductive
load
Overcurrent detection
Current diagnostics Current Measuring accuracy
Related to the measuring
range 3A
<0.2A ±45%
≤1.5A ±35%
>1.5A...3A ±25%
Use as input
NPN and PNP input Switching the interface to NPN or PNP affects the
entire DO_H3_x group!
L level ≤1.6V H level ≥4.6V
Input resistance PNP 94kΩ NPN 10kΩ
Tab.16: Outputs DO_H3_1...DO_H3_4

Jetter AG Technical specifications | 4
User Manual – JXM-IO-E30 18 / 70
Sensor output
VEXT_SEN
Parameter Description
Supply output for sensors:
VBAT_ECU is looped through to VEXT_SEN via a PTC resistor. An overcurrent
or short circuit at the sensor supply can be detected.
Abbreviation VEXT_SEN
Quantity 3
Peak Current Min. 100mA per channel at 85°C
Approx. 500mA per channel at 25°C
Tab.17: Sensor output VEXT_SEN
4.6.1 Current diagnostics at the outputs
The limit values vary for each output (see Outputs [}16]).
All outputs are calibrated at the factory to achieve the highest possible accuracy.
For low current values the current measurement is not linear. The measurement
is therefore linearized by the firmware:
T1 T2
A
B
Fig.4: Graph: Principle of linearization
ACurrent value
BADC value
■T1 is 200mA. Current below this value is displayed as 0.
■T2 is 500mA. From 200mA to 500mA the measured current value is lin-
earized.
4.6.2 Overcurrent trip at outputs
If overcurrent flows through an output for 500 ms (default value), the overcurrent
shutdown becomes active. This value can be changed using the parameter
OVERCURRENT_TIME. If an overcurrent event is detected, the output shuts
down and the overcurrent bit is set for 10 seconds. During this time the port can-
not be switched on again.
Re-enabling the
port
üThe JXM-IO-E30 is in the Operational state.
ü10s have passed since the output was shut down.
►Set the output value (digital or PWM) of the respective port again.

Jetter AG Technical specifications | 4
User Manual – JXM-IO-E30 19 / 70
4.7 Inputs
Within the operating voltage range, all inputs are voltage-proof and overcurrent
protected. The JXM-IO-E30 has 3 separate VEXT_SEN connector pins which
should be used to supply the sensors. The connector pins output the battery volt-
age via a PTC thermistor. The output voltage can be read back in the device so
that a failure of the sensor supply can be detected.
Alternatively, the analog inputs can also be used as digital inputs (DI_PNP).
Analog inputs Parameter Description
Analog inputs
Abbreviation AI
Quantity 8
Resolution 12 bits
Voltage measuring JXM-IO-E30 JXM-IO-E30-O01
Rated measuring range 0V…5V 0V…10V
Overvoltage measure-
ment
5V…7V 10V…12V
Input resistance ≥35kΩ
Load resistor 120Ω
Maximum voltage +32V
Measuring accuracy ±2% relating to the rated measuring range
Moving average filter
Filter depth range 1...32
At 1 no filtering is active.
Measuring cycle 1ms
Current measurement
Measuring range 0mA...20mA
Overcurrent range 21mA...24mA
Measuring accuracy ±1.5 % referred to the current measuring range 20
mA
Behavior in case of over-
current detection
In case of overcurrent, the current measurement is
interrupted. At the end of the overcurrent event, the
current measurement is automatically resumed.
As DI_PNP
H level ≥4.6V
L level ≤1.6V
Input frequency Max. 10Hz
Input resistance ≥35kΩ
Tab.18: Analog inputs

Jetter AG Technical specifications | 4
User Manual – JXM-IO-E30 20 / 70
Digital inputs All digital inputs are PNP inputs. From HW revision 02.00 onwards, digital input
DI_P_1 can also be configured as NPN input.
All outputs can also be used as simple digital NPN or PNP inputs with restric-
tions.
Parameter Description
Digital inputs with frequency measurement
Abbreviation DI_P
Quantity 4
Pull-down resistor 5.6kΩ
H level ≥4.6V
L level ≤1.6V
Input frequency 0.1Hz…10kHz
Dielectric strength Max. +32V
Tab.19: Digital inputs DI_P_1...DI_P_4
Configuration
inputs
Configuration inputs are tristate inputs and are used to set the node ID. The base
address can be set by the user and has the default value 0x30. The node ID can
be shifted by connecting the configuration inputs with VBAT_ECU or GND via an
offset.
Parameter Description
Configuration inputs for configuring the node ID
Abbreviation CFG1 CFG2
Quantity 2
Tab.20: Configuration inputs CFG1…CFG2
For more information refer to chapter Setting the node ID [}45].
Other manuals for JXM-IO-E30
2
Table of contents
Other Jetter Computer Hardware manuals
Popular Computer Hardware manuals by other brands

HP
HP MPIO Installation and reference manual

Fujitsu
Fujitsu MB2147-01 Application note

VIA Technologies
VIA Technologies Mobile360 FSS quick start guide

HYCON
HYCON HY17S68 Series Hardware user manual

PairGain
PairGain HiGain Line Unit HLU-388 Quick installation guide

ADLINK Technology
ADLINK Technology LEC-BASE MINI Technical reference

SK Pang Electronics
SK Pang Electronics PiCAN FD user guide

VIA Technologies
VIA Technologies SOM-9X50-STK quick start guide

FAAC
FAAC E145 manual

DIGITAL-LOGIC
DIGITAL-LOGIC SmartCore Express SMA200 Technical user's manual

Icop
Icop VEX2-6454 user manual

Avalue Technology
Avalue Technology EMX-H610P user manual