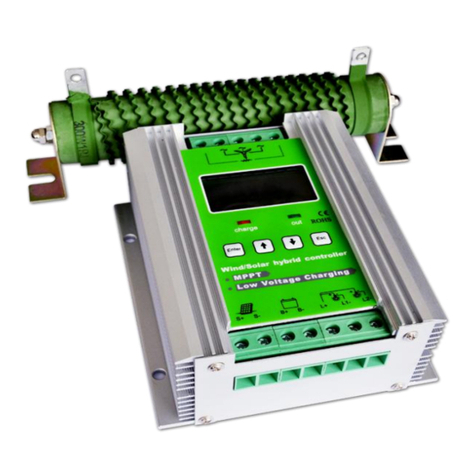
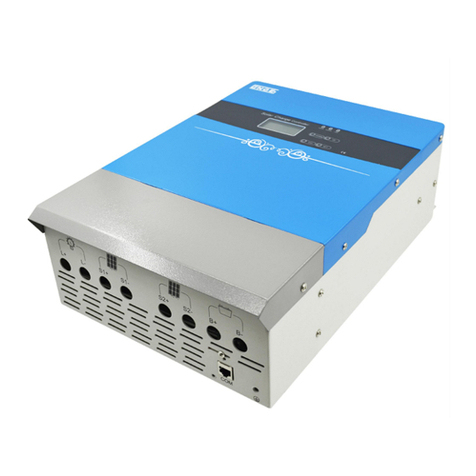
JNGE Power JW1230 User manual

High-End type wind solar hybrid
controller user manual
Type:JW-MPPT
version: 2.0
1
Safety
1. Please keep and read the instructions carefully during installation and carefully
before using the product.
2. Experienced technical personnel must install, and the installation process
must be in strict accordance with the user manuals to ensure that the product
works normally.
3. This product should avoid long-term exposure to corrosive gas and moist
environments.
4. Never place this product in damp, rain, exposure to the sun, serious dust,
vibration, corrosion and strong electromagnetic interference.
5. Do not open this product or repair the shell.
2

Directory
Ⅰ. Product overview.......................................................................3
Ⅱ. The model shows.......................................................................3
Ⅲ.performance characteristics and protection function..................3
Ⅳcontrol panel instructions............................................................5
Ⅴ. The system shows.....................................................................5
Ⅵ. Operating rules..........................................................................6
Ⅶ.The use of the environment........................................................8
Ⅷ.Safety and protection..................................................................8
Ⅸ.Fault analysis..............................................................................8
X. Technical Parameters.................................................................9
ⅪAfter-sales service.....................................................................10
3
Ⅰ. Product overview
The controller is designed specifically for wind solar hybrid street light system,
can make the wind solar hybrid street light system of various resources to
achieve the best configuration, of course, the controller with some simple
Settings can also be used in household system.
The Fan charging part and Solar charging part are independent of each
other, can make fan controller or solar controller using independent (As a fan
controller cannot use light control function).Fan charging adopted booster MPPT
technology, which makes under low wind speed, the fan's electricity can still be
used;In the high wind speed or the fan of power is beyond the scope of the
battery and load absorption, the controller immediately launched the step-less
unloading function (this function detailed description in later) protection system
of the equipment.Solar charging using in series MOS tube PWM technology,
which makes the controller power consumption is small, the system more
stable.
Discharge part working mode can be set,light control mode,Period of time
control function etc,The user can be set up according to the requirements on its
own combination.
Man-machine interface of the controller USES a custom LCD screen and
four key operation mode, the user to use simple and easy to use, popular and
easy to understand, convenient and quick.
The controllers with perfect protection function, including: lightning counter-attack,
solar charger, over-voltage automatic braking, storage battery reverse connect
and open protection, etc.
Ⅱ. Technical note
In off-grid system, there is always a pair of contradictions that produce energy
source and energy absorption of load does not match the problem, may be the
following situation: 1. The power supply can be issued under the condition of
sufficient electrical energy of the load is not likely to work and the battery power is
full, so this time we need to send power electricity do discharge processing,
4

otherwise may cause permanent damage to the equipment;2. In the power
supply does not have enough electric power support is likely to appear when
battery power is rarely lead to load can not have normal work, so we also need to
improve power generation capacity in this situation.
In our wind solar system, solar panels power relative to the fan power is very
stable power supply, so we had a wind solar hybrid controller mainly for fan
design the booster MPPT charging technology and step-less unloading function,
and in view of the solar panels still take simple and efficient PWM charging
technology.
Booster MPPT mainly for most of the time in many parts of the wind power is
not enough to support a generator to the condition of the battery charging,
specific working principle is: the fan under the condition of wind speed reach the
rated wind speed, the resulting voltage and power are not reach the rated power,
we through real-time acquisition fan by means of booster circuit of voltage and
current from the boost voltage to the battery voltage to the system requirements,
using the software MPPT algorithm make the fan of power use as much as
possible.
Step-less unloading function mainly aimed at the first case, when don't need
additional energy, will generate the energy consumption of the fan on unloading
device, the controller dedicated connection port of unloading device, the user can
be selected according to actual condition when the choose and buy, we suggest
in good wind conditions, such as coastal and western is empty,you must
configure unloading;In some inland areas where wind conditions in general, we
also recommend that try to configure unloading.
Other instructions:
Ⅲ.performance characteristics and protection function
Intelligent design succinct structure, control powerful, stable performance, safety
and reliability of the products.
Choose MPPT fan charging ways, charging more efficiency than ordinary PWM
way more superior
The boost charge function, solve the low charging efficiency problem of low wind
5
speed (optional)
Choose the big size LCD display, all parameters can directly visible
The humanized keys operate function, all of the parameters according to the
request of customers in orders to adjust all kinds of using environment.
Choose PWM step less uninstall way.
With output state should set function, common power/half power/of period of time
since the definition and characteristics (optional)
Using LCD to show the tinny battery voltage and electric current
Professional digital intelligent control.
protection function
protection
function
Explain
notes
Solar prevent
reverse
charge
At night or the light is bad, the battery voltage
may be higher than the solar array voltage.
The controller can prevent the generation of
solar cells reverse battery charge
Reverse
battery
protection.
Reversed when the batteries have a huge
transient current of the circuit fuse in the fuse
will automatically make the battery circuit is
disconnected, so as to effectively protect the
battery and the device.
Electronic
prevent
reverse
connection
protection
Battery open
circuit
protection
Long-term use, the battery open-circuit may
occur, or poor contact. The controller in the
battery open-circuit protection device itself
will not be damaged.
Regularly
check the line
connection

Ⅳ.Operating instructions
The controller to operating personnel must be a range of electrical theory
knowledge and practical experience of technical personnel,and strictly in
accordance with relevant provisions of the manual steps and manner.
1.Install
4-1 wiring diagram
7
Install step:
①Open the package; confirm the equipment without damage because of
transportation
②Install the controller in the right place.Installation position should retain the
necessary installation space, to ensure the normal heat dissipation of the
controller, and installation, using the environment temperature is not more than
the controller working temperature range.
③When installation, please use the multi-strand copper insulated wires.First
determine wire length, in the case of ensure the installation position, as far as
possible, reduce loss of power and choose wire specifications as requested.
④Connect the storage battery and equipment panel “BATTERY’ item with a
length of less than a meter of more than 4 square millimeters copper core cable,
and please pay attention to the distinction between positive and negative
electrode.When connect the wires ,first use a suitable length wire to connect on
the controller B+ terminals, then the other end is connected to the battery positive
electrode;Then choose another a suitable length wire,the same first its one end
connected to the controller B- terminal, then the other end connected to the
battery negative electrode.If the positive and negative reversed, the controller
has anti-reverse protection, found reverse, just dismantle wiring and wiring in
accordance with this order to re-connection.
⑤After finished the first step ④, the controller starts to work, the controller panel
two lights flashing, LCD screen light up, if it is found that the controller is not
normal, please check the attachment is the reverse, whether the battery voltage
reaches more than 8 v voltage, to ensure normal and according to the step ④
connection again.
⑥Choose the appropriate copper core cables connected load and load terminals
8
Power
resistance size(mm)
L1±5
L2±5
L3±5
H1±2
H2±5
300W
190
210
230
43
90
500W
180
210
240
63
110

to the controller, and please pay attention to the distinction between positive and
negative electrode, if the positive and negative connection errors may cause
permanent damage to the load, because you do not necessarily have protection
against reverse loads.The controller can connect two road load, if there are two
road load needs to connect, please positive screwed together two loads
connected to the controller L+ terminal and the negative electrode are connected
to the controller L1-, L2- terminals.After connection, observe whether the load is
normal work, if don't work properly, please observe whether the controller panel
out light is flashing, If flashing battery under-voltage, need to charge to work
properly.
⑦Choose appropriate copper core cable to connect the solar panels and solar
controller terminal S+ S-, and please pay attention to the distinction between
positive and negative electrode,If the positive and negative reversed, controller to
start the reverse connect protection (premise is in front of the 6 steps is
right).Connect the correct logo is the controller panel at the charge red light will
light (the premise must be during the day).
⑧Choose appropriate copper core cable to connect the unloading and controller
unloading terminal, no positive negative distinction.
⑨Choose appropriate copper core cable to connect the fan and controller fan
terminal, if it is a three-phase ac fan, three terminal non-electrode distinguish, if it
is a dc fan, connection in any controller fan three terminals of any two of the
above.Please select when install the fan under the condition of low wind speed,
so as to avoid accidents.
2.Operation debugging
(1)Status Indication:
LED
Status
Show
CHARGE
ON
Charging
OFF
No charging
OUT
ON
normal
OFF
Over voltage
FLASH
Under voltage
4 - 2
9
(2)Button instructions
4-2
As shown in figure 4-2,
Button①:Press this button to enter setup interface or switch set up program;
Button②:Click this button to switch down in page views,in the setup interface
click this button is used to reduce the parameter values, step 0.1 V.
Button③:Click this button to switch up browsing on page views,in the setup
interface click this button is used to increase the parameter value, step 0.1 V.
Button④:Click this button to exit the setup interface, and save the parameters.
(3)LCD screen (the default interface)
To the user in accordance with the specifications, general automatically entered
into the following interface (figure 4-3) :
4-3
on behalf of the display Battery voltage at this time, digital is the
Battery voltage readings;
represents the current day (if it is night, the icon into );
Two represent the charging and discharging, for charging, have the
current will show effect, when there is no current or current is very small, the label

will disappear;For discharge, when the battery is in a state of under-voltage,
flashing the overall effect, when the battery is in good state, according to static
effect, marking can pick up the load, after loading,if there are current,will display
effect.
On behalf of the solar panels, power generation, according to the
sun;
On behalf of the battery, the number of inside represent the current
battery capacity;
on behalf of the load, the load output will be lighting effects under the
condition of display;
On behalf of the fan, the wind will come, the animation will be shown.
(4)Parameters to browse
User press down key to view the fan charging current "Ifan",the solar charging
current"Ipv", press the up button to return to the interface of a parameter.
4-4
The above three pages, collectively known as browse pages, when a minute
don't operating controller buttons, LCD back-light will automatically go out.after
pressing any key will once again lit back-light and continuously for one minute.
(5)Parameter Settings:
Press Enter key,the controller into the parameter set interface, as shown in
Figure 4-5,“Vfloat” represent this time can be set to float charging voltage value,
the user can press or key numerical,each time you press the increase or
decrease 1v,set up finished,the user can press the ESC key to exit to browse the
first page, can also continue to press Enter to switch to the next project,
operation method as
above.
4-5
The controller can be set to Float charging pressure point "VFloat",under-voltage
point "Vunder", over-voltage point"Vover",fan unloading point
"Vfan_breaking",the operation method is the same as the first item.
Street light and houshold mode switch: as shown in figure 4-5, according to the
method described in this section, switch to the fifth, data area show * * H,
labeled Time, user can press the up and down key changes value, each Time
you press the increase or decrease 1, when the number is 24, that is the
controller is 24 hours working mode (that is, the household mode), for the other
Numbers that controller model is street light, XXH is light on time.
The above part for this controller standard functions.
The following account only for a specific load effectively, the standard
controller does not include these features.As a result, users before the order,
please contact with the company.
Street light model first time Tfirst and power Pfirst setup instructions: as shown
in figure 4-5, according to the method described in this section, switch to the sixth,
data area shows XXH, labeled Tfirst, user can press the up and down key
changes value, each time you press the increase or decrease 1, digital size is the

time value;according to the method described in this section, switch to the
seventh, data area shows XXX (0-100), labeled Pfirst, user can press the up and
down key changes value, each time you press the increase or decrease 10, the
power value for XX % of full power.Street light model second time Tsecond
power Psecond, set up means the same as the first time.
V.Use environment
1. Should be in a clean dry ventilated environment.
2. Avoid direct sunlight and the sun, rain, humid mist of the environment.
3. To avoid dust in a soil, dust in the environment.
4. The battery should be placed away from 0.5m or more.
5. Is strictly prohibited in flamable, explosive gas environments, to guard against
flames and sparks!
6. Ambient temperature -25 ℃- +50 ℃.
7. The air relative humidity less than 85% (25 ℃±5 ℃).
Ⅵ.Safety and protection
The controller has the solar energy the counter-attack, reverse connect battery,
battery open circuit, lightning protection, wind speed and over voltage protection
function.
Note: lightning protection refers to the last level of protection, equipment
necessary for lightning prone areas, need to use special multi-stage lightning
protection system of lightning protection device, etc.If the user has this
requirement, it is necessary to increase the corresponding cost of distribution
system and indicate when you order it.
Ⅶ.Dimension
13
The controller height is 66 mm.
Ⅷ.After-sales service
We provided product to the warranty period of one year since it is sold. If the
product is exceed warranty or damaged by transportation, improper use, human
element, force majeure, it is not under warranty.
Statement: we reserve the right to change products, product updates without
prior notice
14

Ⅸ.Technical Parameters
model
JW1230
JW2430
JW2450
JW2460
Rated voltage
12V
24V
24V
24V
Component power
200W
150W
250W
300W
Power of fan
300W
300W
500W
600W
charging
charging
30A
20A
23A
37.5A
Even charge
protection
14.4V±1%
28.8V±1%
floating Charge
13.8V±1%
27.6V±1%
Even charge
recover
13.2V±1%
26.4V±1%
Temperature
Compensation
-24mV/℃
-48mV/℃
Over
Discharge
Shut off (DC)
10.8V±1%
21.8V±1%
Resume (DC)
12.3V±1%
24.6V±1%
Over
Voltage
Shut off (DC)
16V±1%
32V±1%
Resume (DC)
15V±1%
30V±1%
No-load
Current
≤0.1A
≤0.1A
Voltage drop (DC)
≤0.5V
Control mode
Fan MPPT charge function, PWM uninstall function, PWM
over-current limiting
Boost charge
Flexible independent step-up circuit (optional)
Display
LCD
Show parameters
voltage、charge current,battery volumetric
Protected type
Lightning protection, solar cells, anti-anti-charge protection,
battery open-circuit protection, battery reversal protection,
over speed and over-voltage soft automatic brake
protection, overload protection.
Heat emanation way
radiator
Working Temperature
-25℃~+55℃
Height
≤5500m(2000m above the need to reduce power use)
Environment humidity
0~90%,No condensation
Net Weight
1.20KG
Size(L*W*H)
162×140×64(MM)
This manual suits for next models
3
Table of contents
Other JNGE Power Controllers manuals