Oxford®/Hoyer®
Elevate
294000.10046 Rev. A
9
English
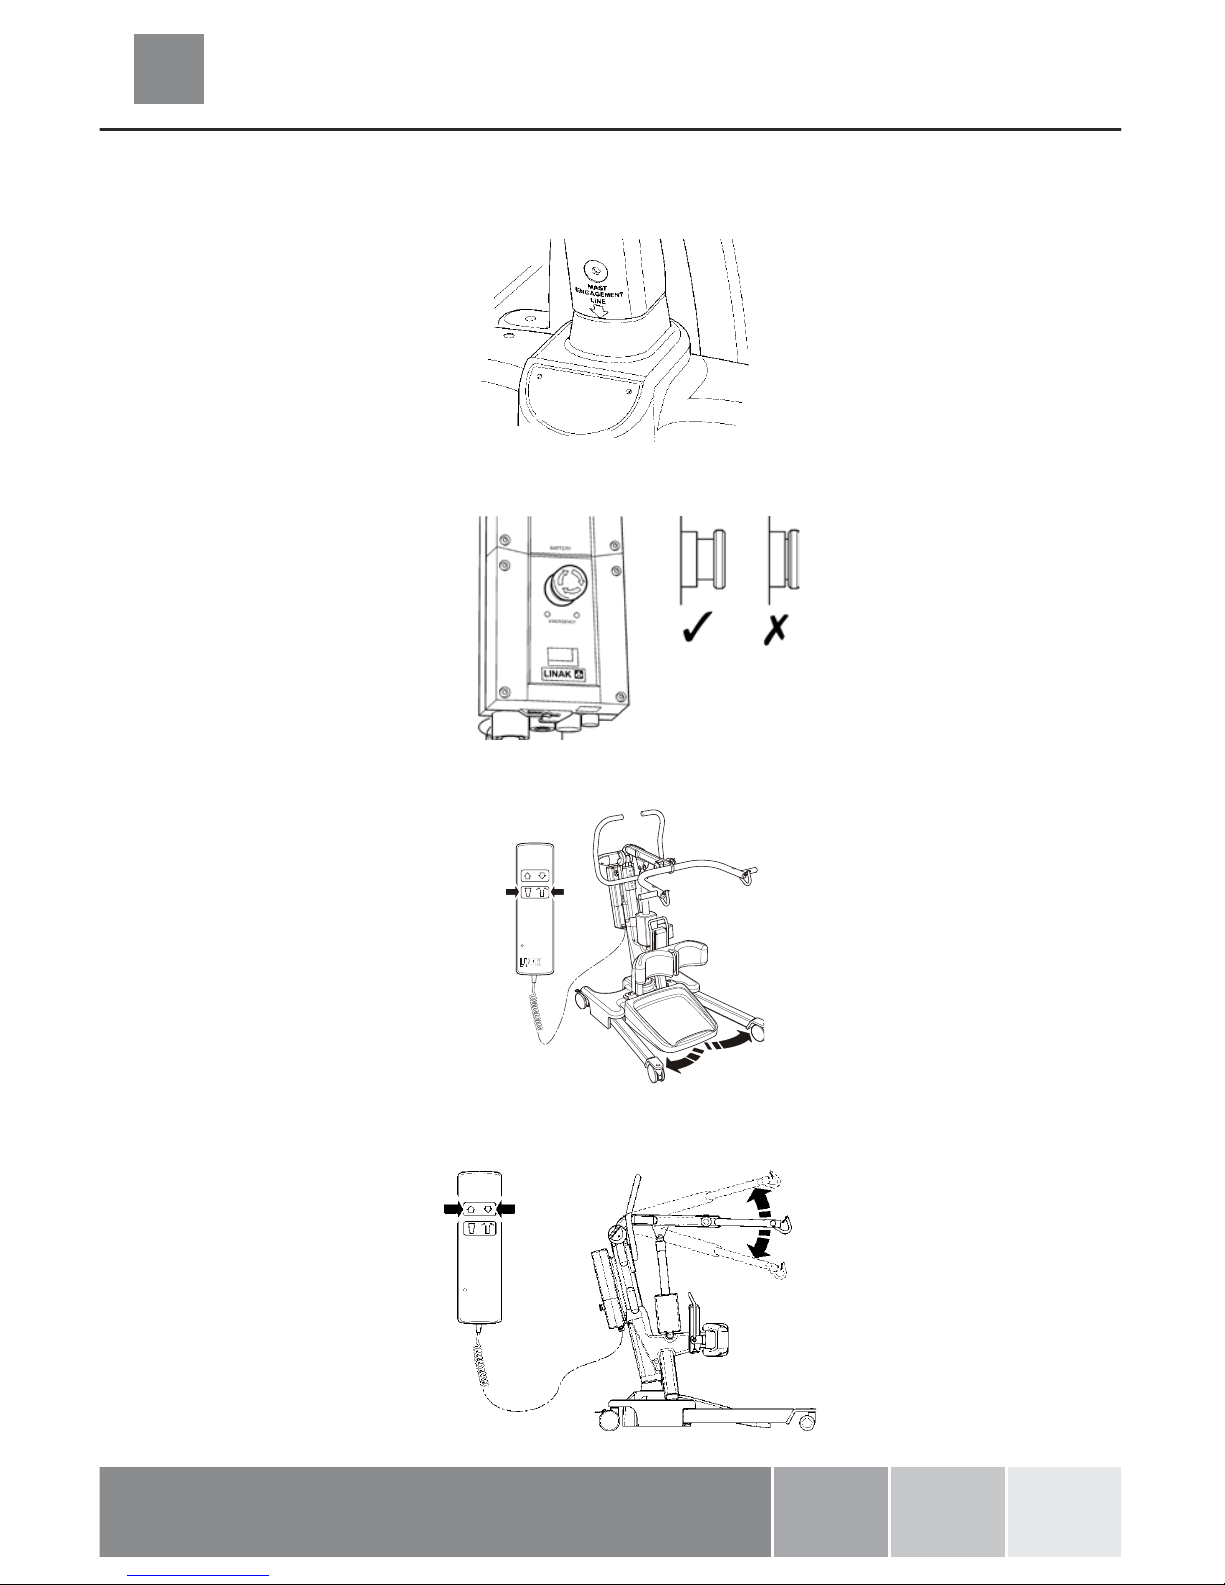
4. Sling Guide
The Oxford/Hoyer Elevate is suitable for patients in the SITTING position. The slings suitable for
this device are listed as follows:
* Oxford/Hoyer Transport sling
* Oxford/Hoyer Standing sling
USER GUIDE FOR STANDAID SLINGS
The Transport and Standing sling is an easy fit sling, suitable for standing and supporting. It is not
a general purpose sling and patients must be assessed for suitability by a qualified person.
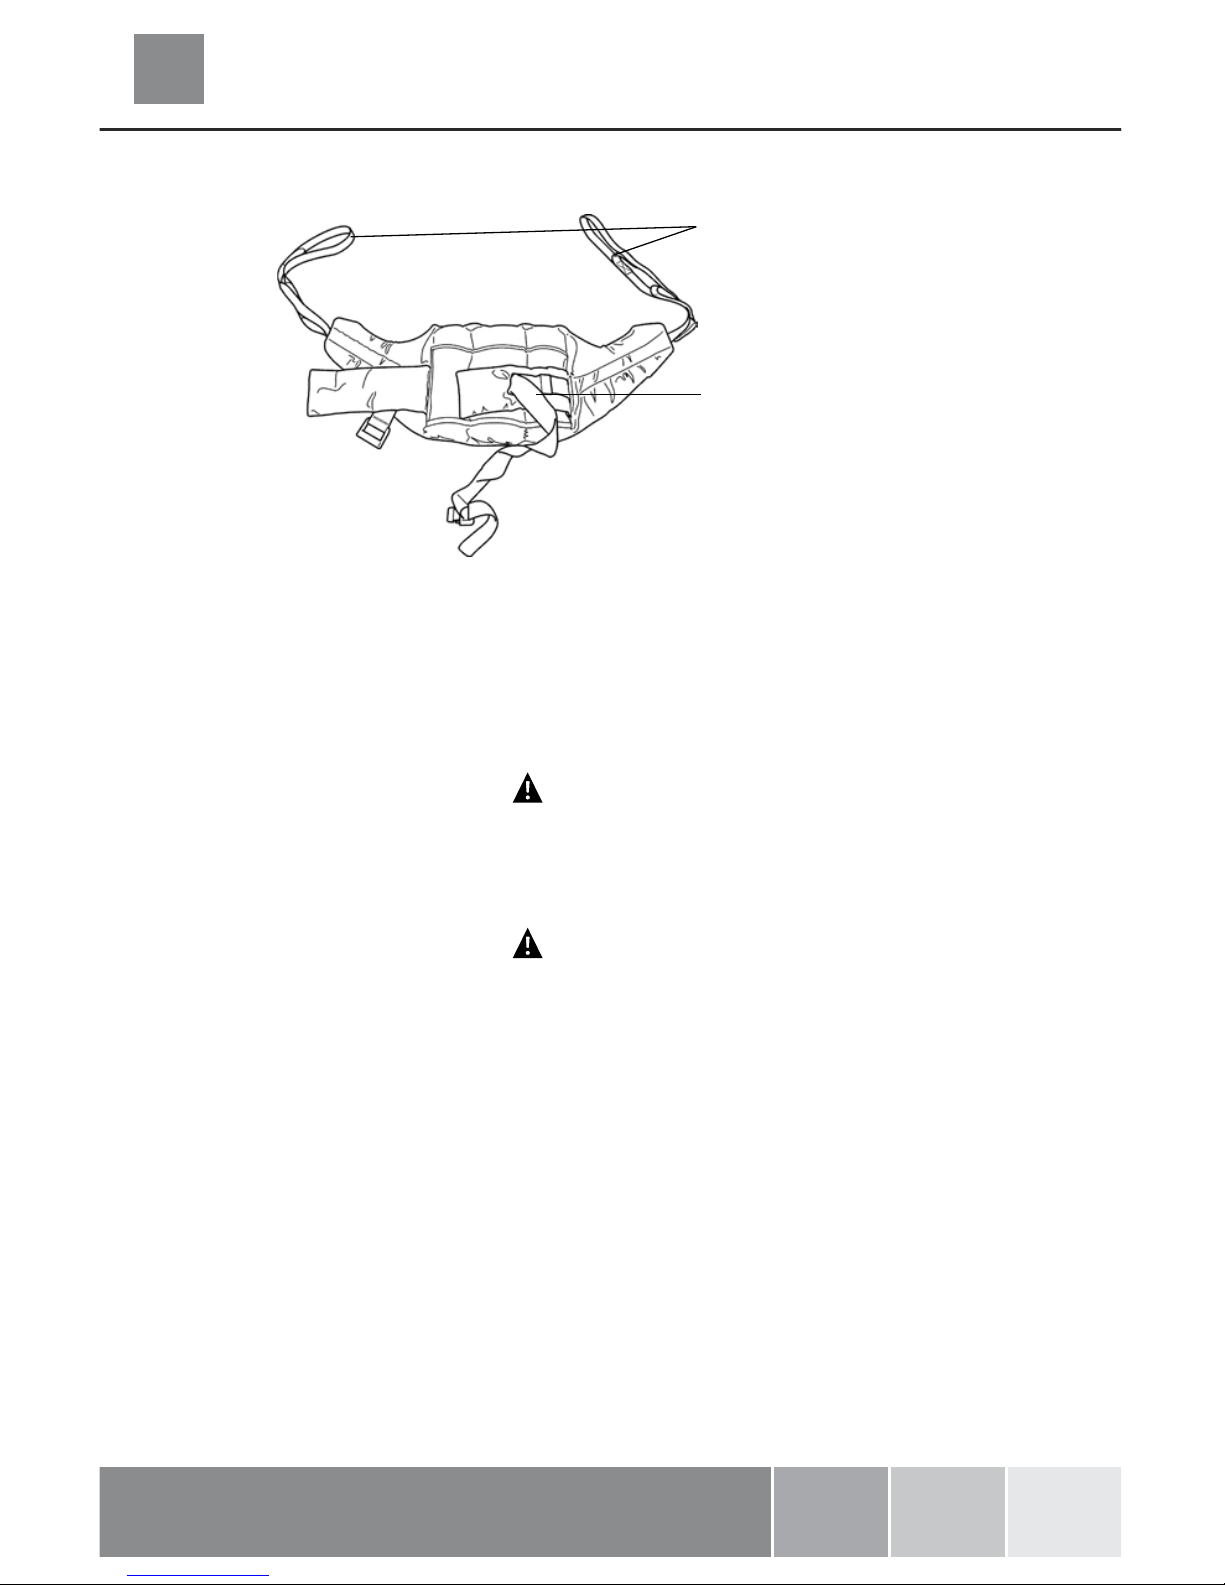
Transport Sling
Feed the sling down the back of the patient leaving the top of the commode aperture at the base of
the spine. Check the roll part of the sling is square across the patient’s back.
Attach the support strap around the chest of the patient. This strap need not be tight. It is there to
hold the sling in position whilst attaching the loops to the Standaid. It may be left off altogether if
preferred. Ensure patient’s arms are on the outside of the sling.
Raise the patient’s leg and feed the leg strap under and up between the legs. Ensure the sling is
not twisted or creased under the thigh. Repeat this procedure for the other leg. Attach the loops
on the roll parts of the sling to the white hooks at the end of the hand grips.
Without crossing the loops on the leg straps, attach to left and right black knobs on the lifting fork.
You would normally use the middle of the three loops. The patient is now ready to be raised from
the seat. Once clear of the seat, the patient will be more comfortable if lowered back in to the sit-
ting position.
NOTE: Joerns Healthcare recommends slings are checked regularly and before use for fraying or
damage. Do not use slings that are worn or damaged.
Attachment Loop Straps:
Shoulder
Attachment Loop Straps: Legs
Chest Supports and Buckle
Leg Supports