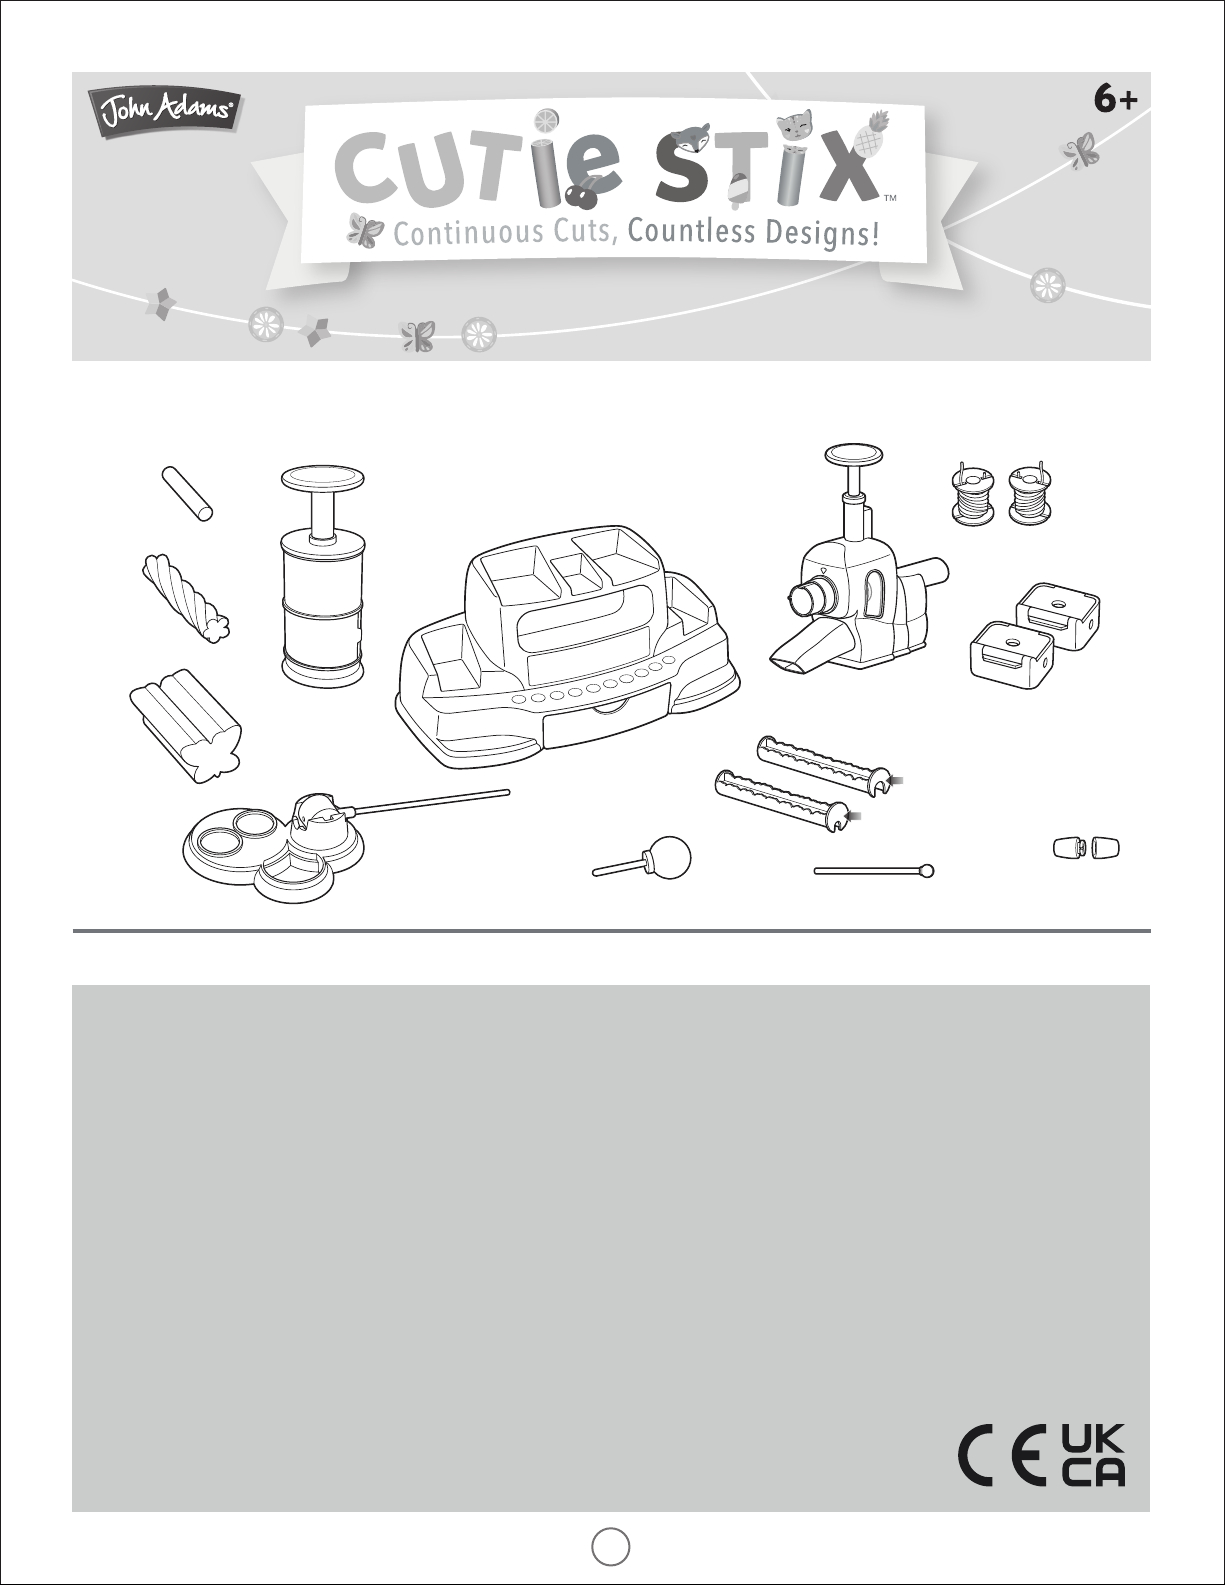
INSTRUCTION GUIDE
MAIN STORAGE BOX
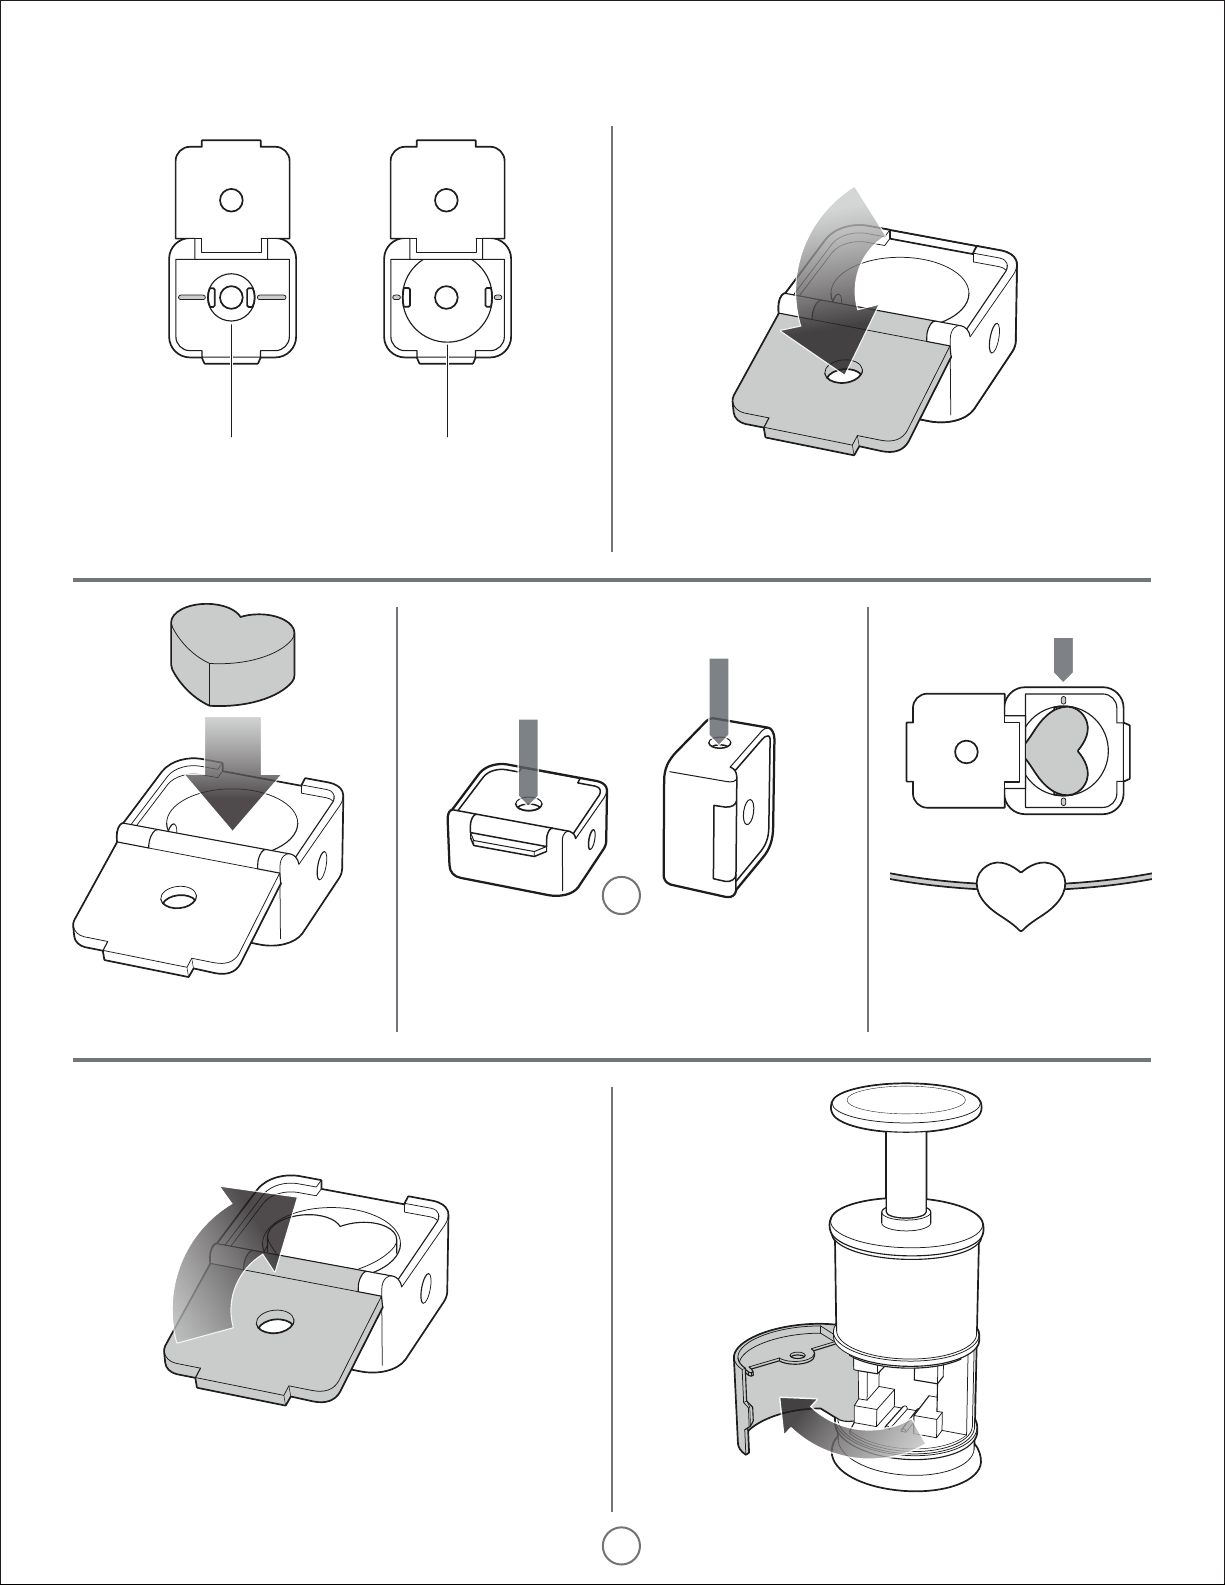
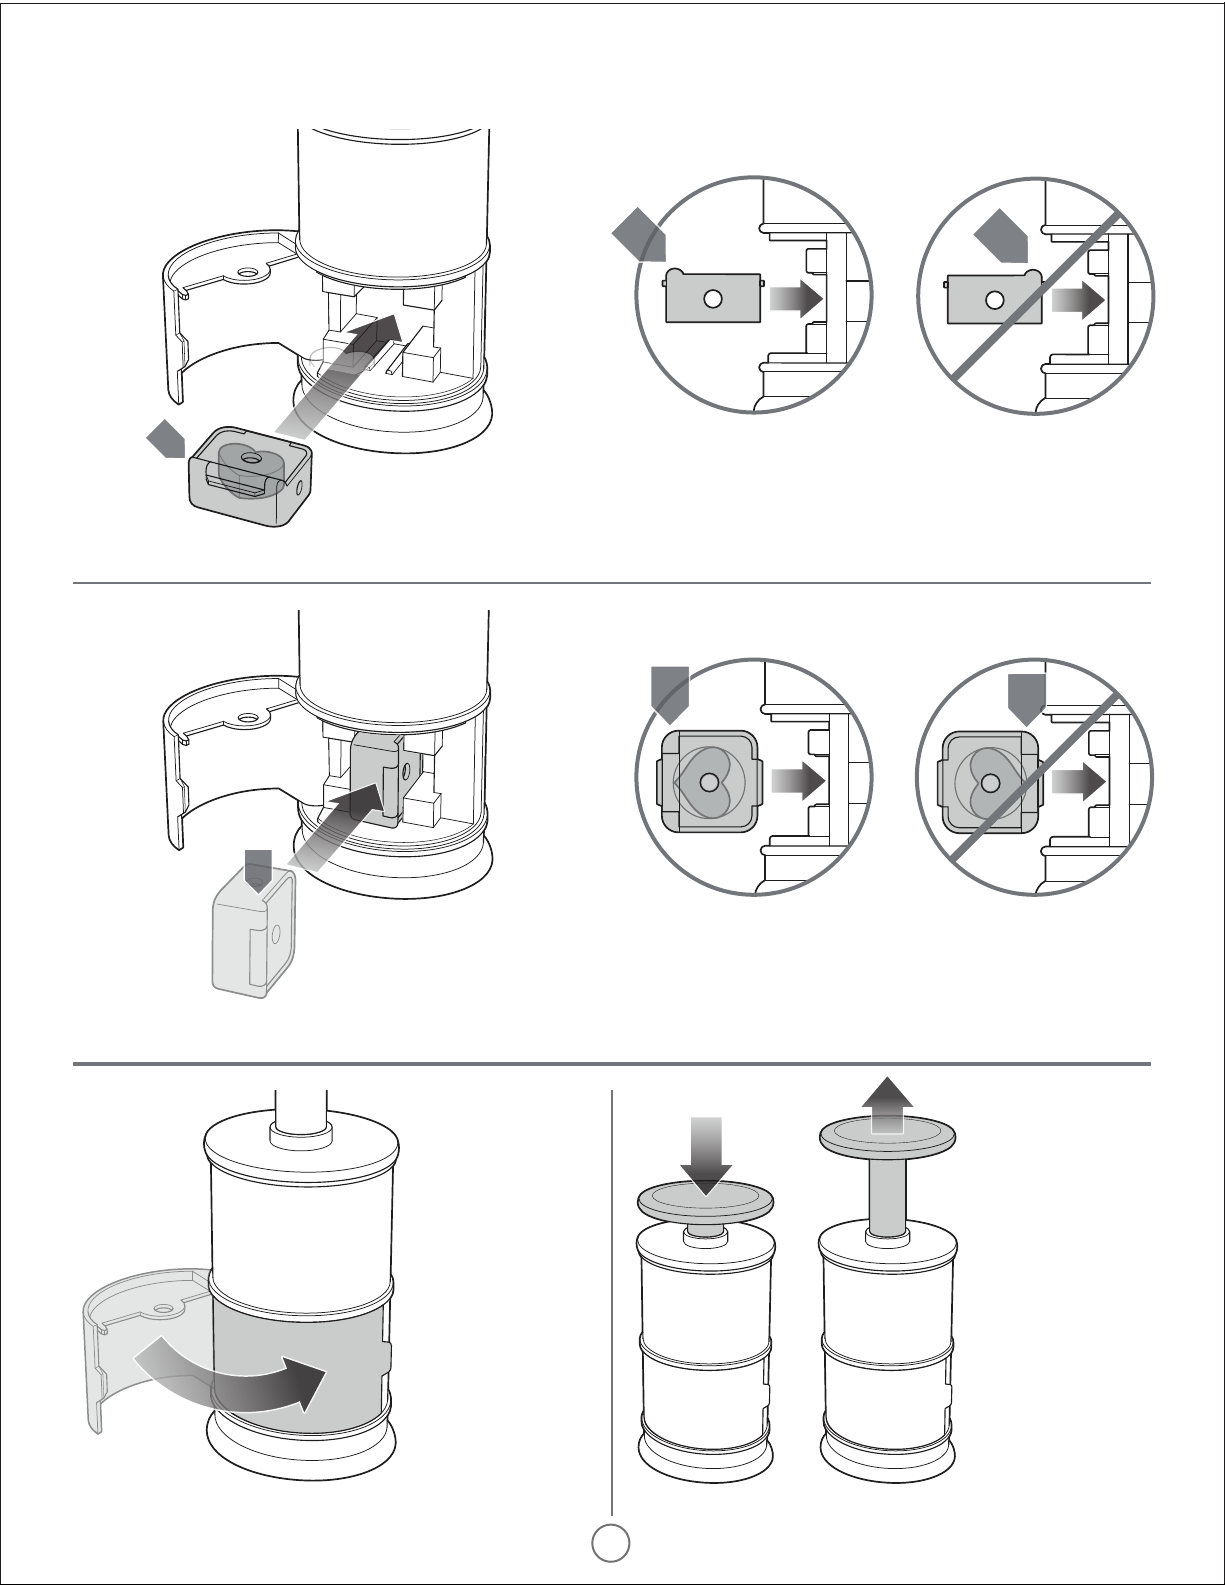
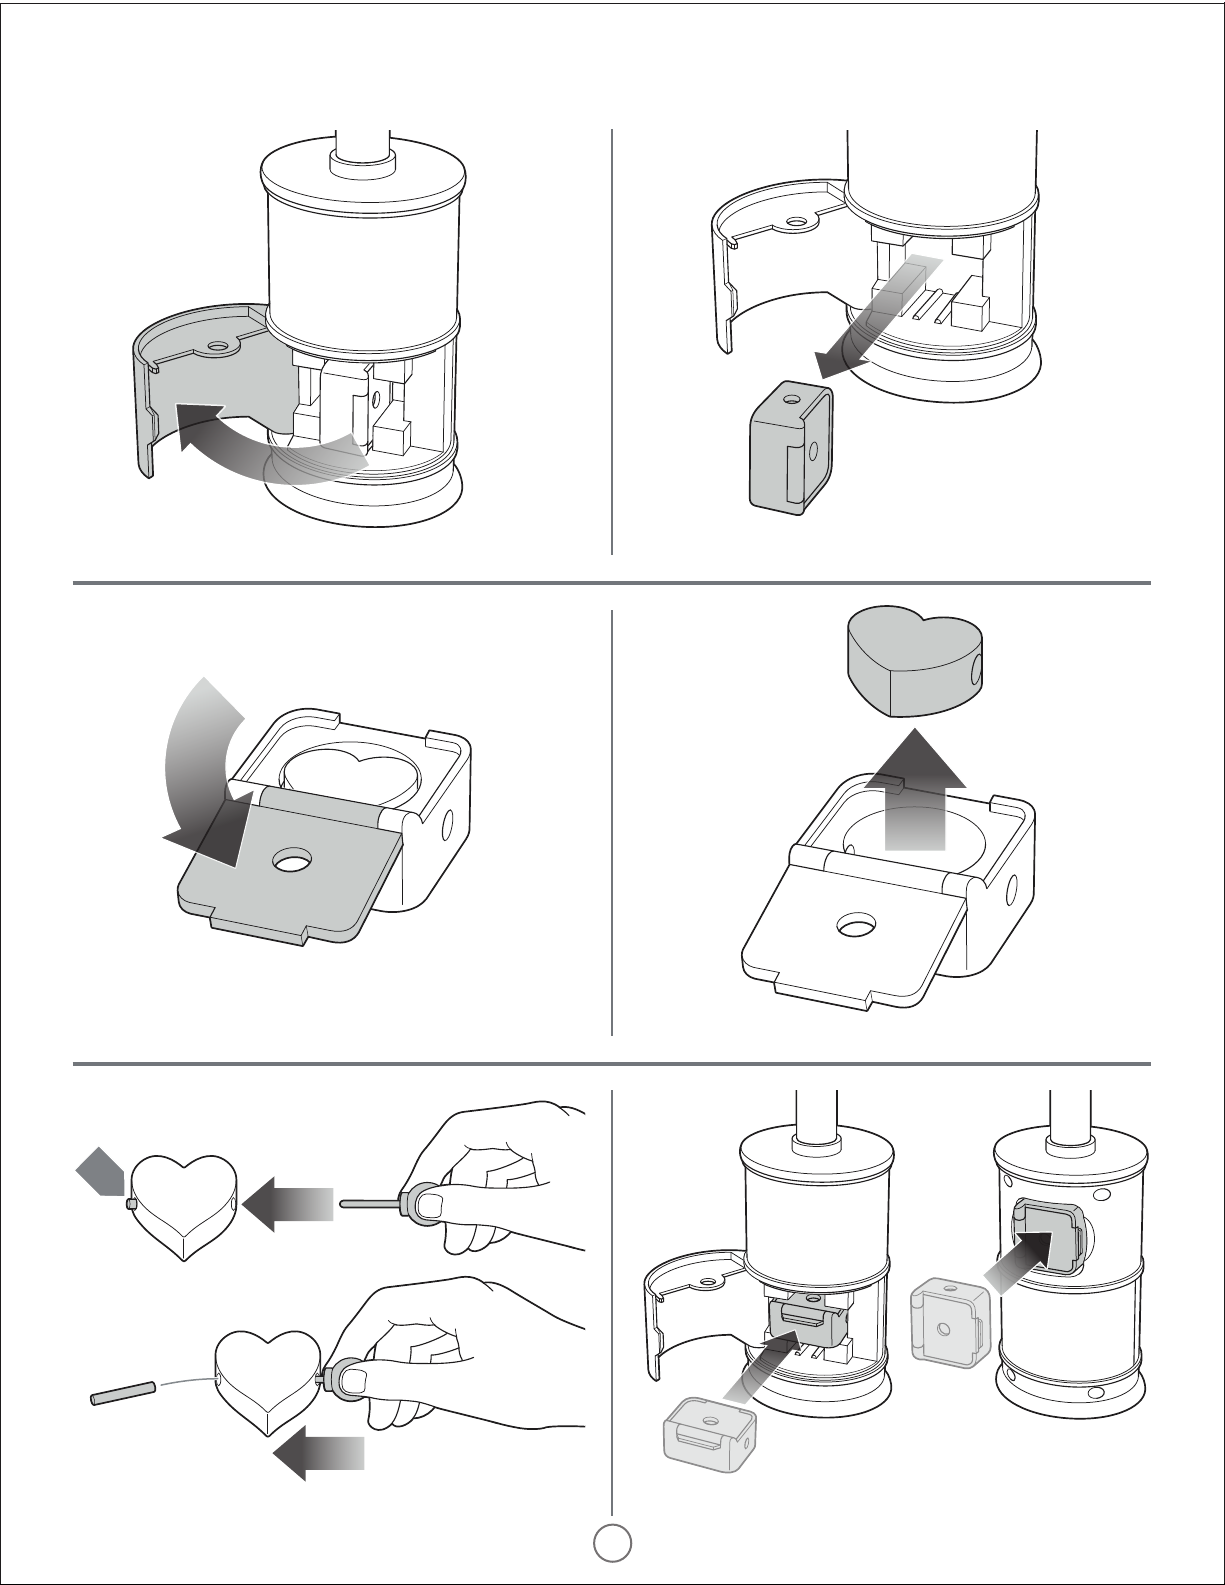
CUTTING UNIT
2 CUTTING MOULDS
CUTTING FRAME SECTION
CORING UNIT
2 STORAGE
BOXES
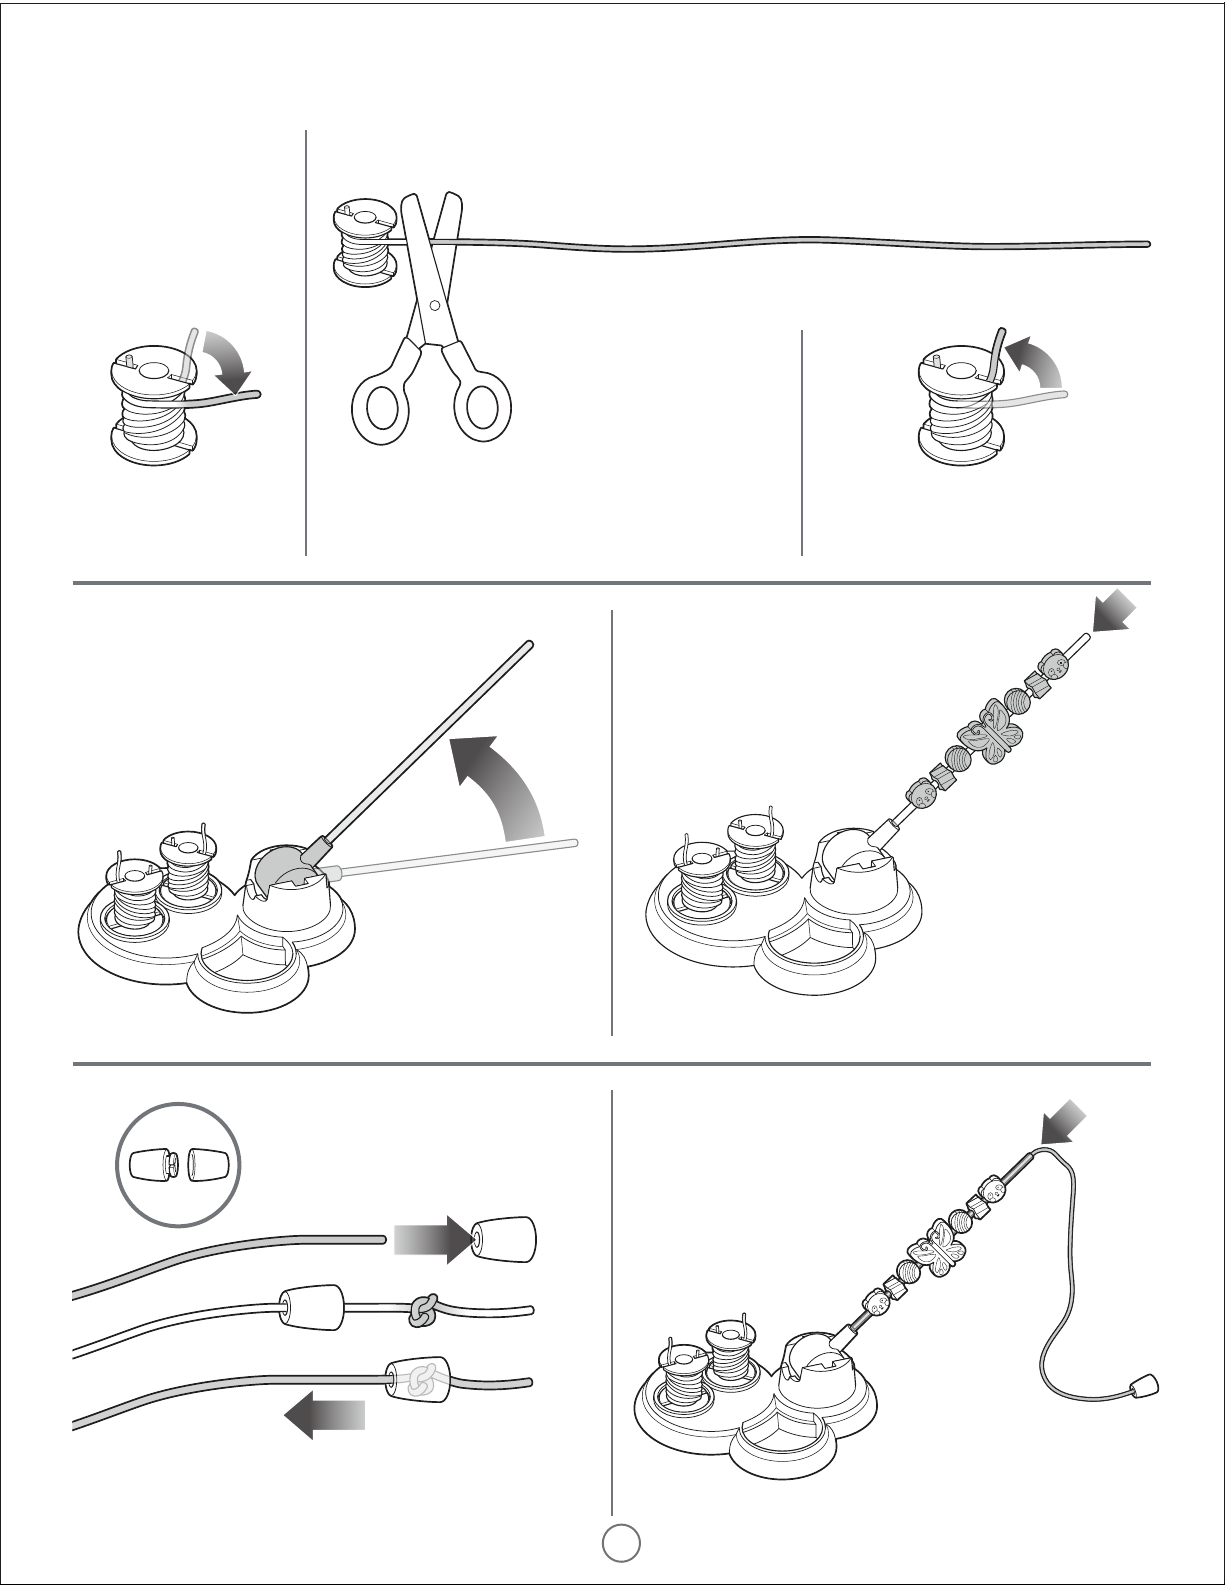
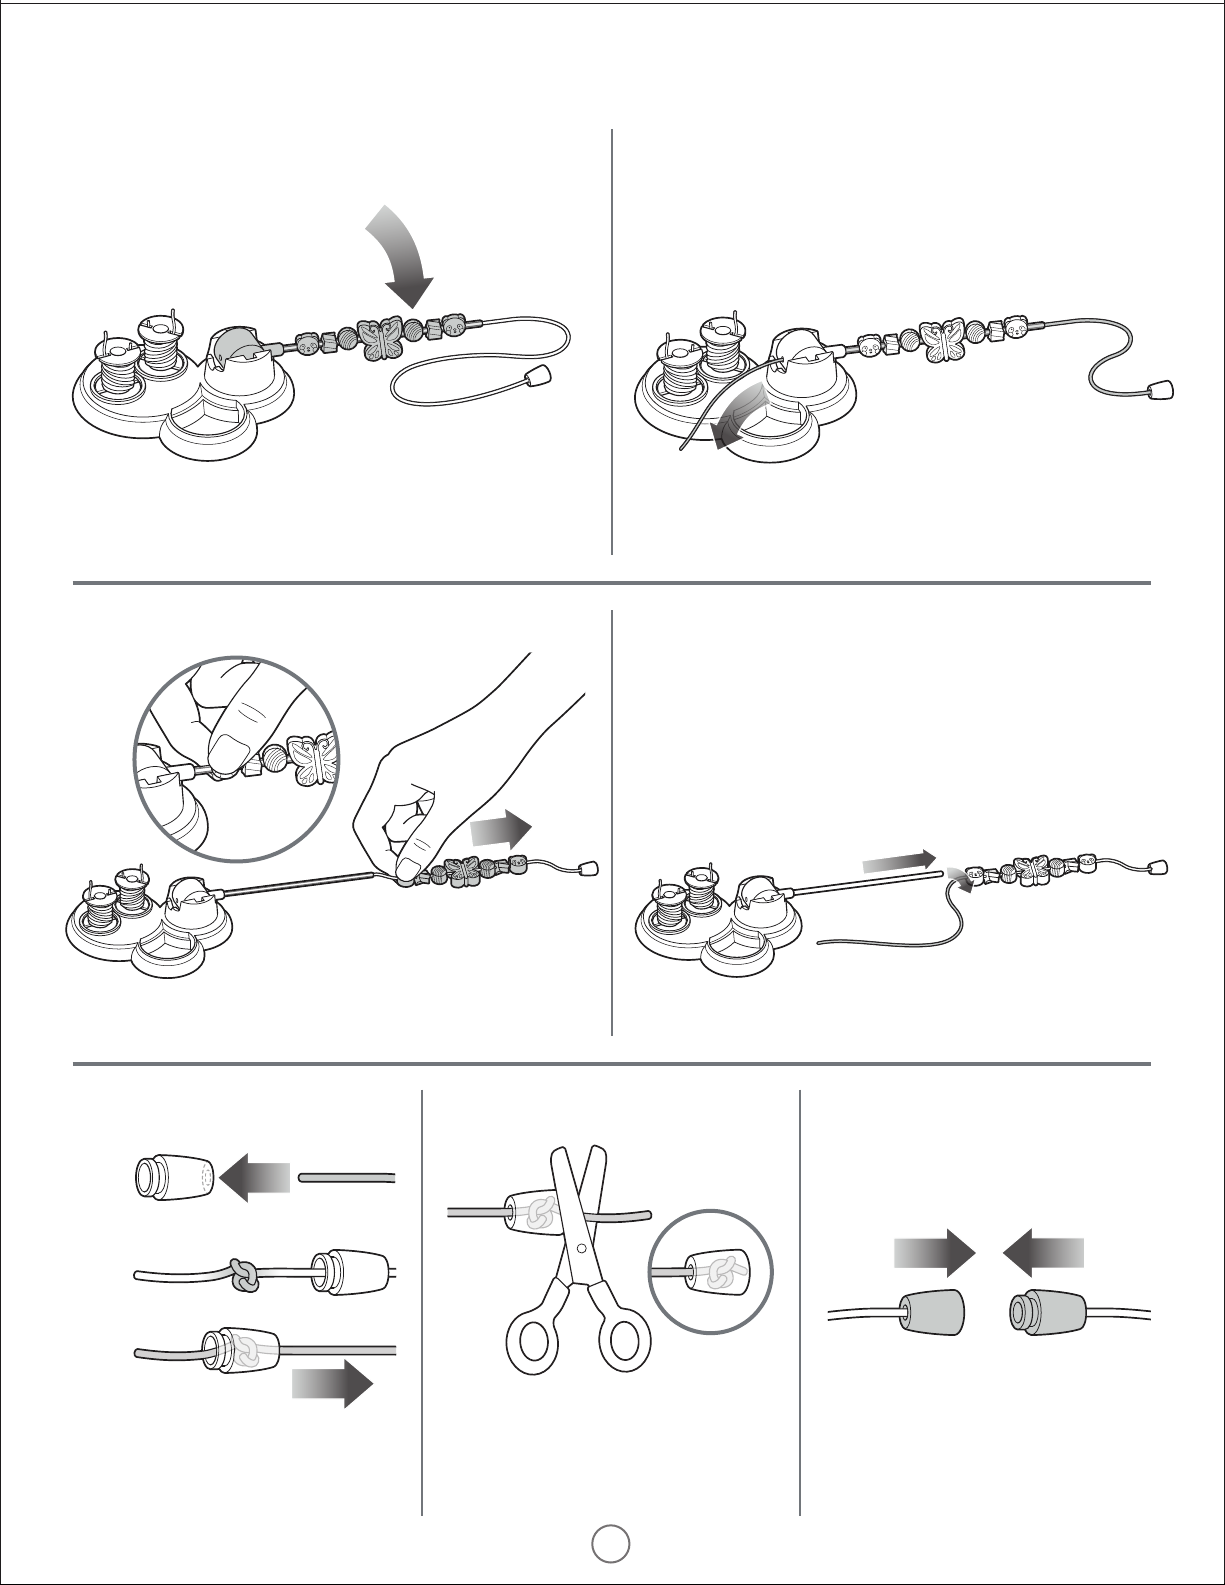
THREADER UNIT 1 RING STICK
1 PUSH ROD
2 THREAD SPOOLS
8 JEWELLERY
CLASPS
4
LARGE STIX
14
MEDIUM STIX
6 MINI STIX
READ ENCLOSED INSTRUCTIONS BEFORE OPENING OR USING THIS PRODUCT.
CREATIVE WORKSHOP
SAFETY
WARNING! Not suitable for children under 36 months. Choking hazard - contains small parts. Strangulation hazard - long cords. Adult
supervision required.
CAUTION! Toy contains inaccessible sharp edges. Never attempt to insert fingers into the Coring Unit. Never disassemble the Cutting Unit and
Coring Unit. Never open the door of the Coring Unit during coring process. Do not attempt or rebuild the machine if any functional issue found.
Please remove all packaging material before giving to children.
Do not insert Cutie Stix into nose or ears. If a substantial number of Cutie Stix are swallowed, or Cutie Stix are inserted into nose or ears, seek
immediate medical attention. Bring some Cutie Stix and the Instructions Sheet with you. Non- food product. Not for human consumption. Toy Only. Use
under constant Adult Supervision. Keep young children and animals away from the activity areas there are small parts which could be swallowed.
© Lansay SAS © 2020 John Adams Leisure Ltd.
John Adams Leisure Ltd. is constantly endeavouring to improve quality standards and therefore colours, sizes and contents may sometimes
vary from those shown. Packaging and leaflets printed on recycled paper wherever possible.
John Adams Leisure Ltd., Hercules House, Pierson Road, Enterprise Campus, Alconbury Weald, Huntingdon, Cambridgeshire. PE28 4YA, England.
EU authorised representative: John Adams Leisure EU Ltd., 1 Castlewood Avenue, Rathmines, Dublin 6, D06 H685, Ireland.
Please retain this information for reference. MADE IN CHINA. PATENT PENDING
To see more of our range visit www.johnadams.co.uk
CUTTING FRAME SECTION
10977_01_CUTIESTIX_WORKSHOP_INS_PRT02 220621
1