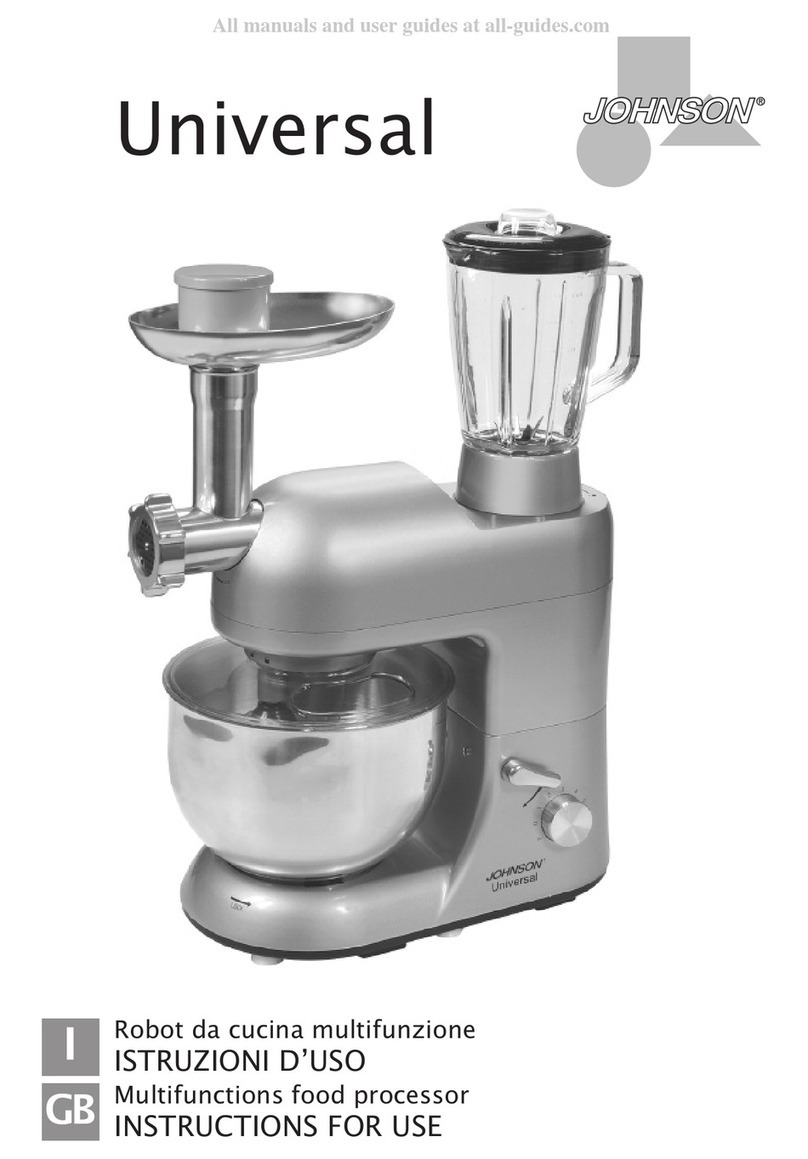
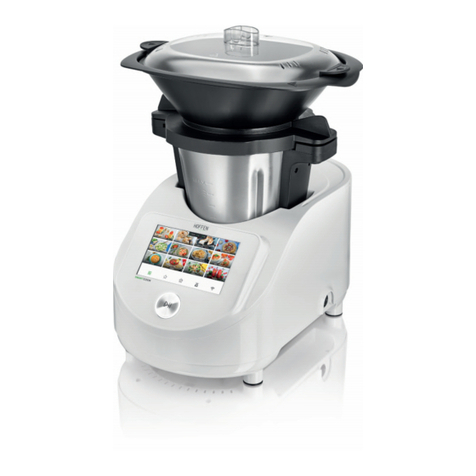
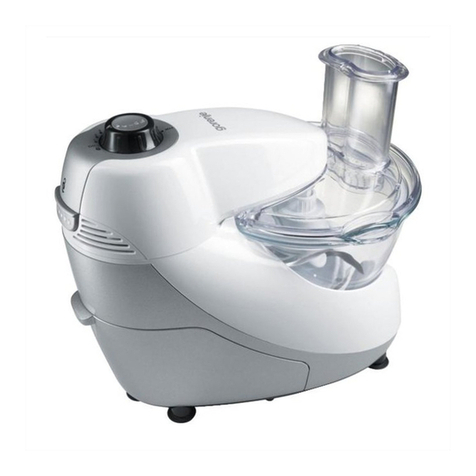
Johnson Universal User manual

Robot da cucina multifunzione
ISTRUZIONI D’USO
Multifunctions food processor
INSTRUCTIONS FOR USE
Universal
I
GB

2
G
T
U
V
X5
X6
F
Z
W3 W4
X1 X2 X3 X4
W2
NLM
E
B
O
R
Q
H
A D
S
2 1
W1
DC
J
230-240 V˜50/60 Hz 1200 W p. m. B 3 min.

A ERTENZE GENERALI
Conservate con cura il presente
manuale e leggetene attenta-
mente le avvertenze; esse forniscono im-
portanti indicazioni riguardanti la
sicurezza, l’uso immediato e futuro del-
l’apparecchio.
Questo apparecchio, adatto per il solo uso
domestico, dovrà essere destinato solo alla
funzione per il quale è stato espressamente
concepito.
Ogni altro uso è da considerarsi improprio
e pericoloso.
Il costruttore non può essere considerato
responsabile per eventuali danni derivanti
da usi impropri, errati ed irragionevoli.
L’installazione dovrà essere effettuata se-
condo le prescrizioni del costruttore.
Una errata installazione può causare danni
a persone, animali, cose, il costruttore non
può esserne ritenuto responsabile.
La sicurezza delle apparecchiature elettri-
che è garantita solo se queste sono colle-
gate ad un impianto elettrico provvisto di
idonea messa a terra secondo quanto sta-
bilito dagli attuali standard vigenti in ma-
teria di sicurezza elettrica.
Gli elementi dell’imballaggio (sacchetti in
plastica, chiodi, polistirolo espanso, ecc.)
non devono essere lasciati alla portata di
bambini o incapaci in quanto rappresen-
tano potenziali fonti di pericolo.
Prima di collegare l’apparecchio accertarsi
che i dati di targa siano rispondenti a quelli
della rete di distribuzione elettrica.
In caso di incompatibilità tra la presa e la
spina rivolgersi a personale qualificato per
le necessarie operazioni di adeguamento.
Non utilizzare adattatori, prese multiple
e/o prolunghe.
Qualora il loro uso si rendesse indispensa-
bile utilizzare esclusivamente materiale
conforme alle vigenti norme di sicurezza ed
aventi requisiti di compatibilità con appa-
recchio e rete di distribuzione elettrica.
Utilizzando l’apparecchio per la prima
volta, assicurarsi di aver tolto ogni etichetta
o foglio di protezione.
Se l’apparecchio è dotato di prese d’aria,
assicurarsi che non vengano mai occluse
nemmeno parzialmente.
L’uso di qualsiasi apparecchio elettrico
comporta l’osservanza di alcune regole
fondamentali ed in particolare:
Non immergere o bagnare l’apparecchio;
non usarlo vicino ad acqua, in vasca, nel la-
vello o in prossimità di altro recipiente con
liquidi. Nel caso l’apparecchio dovesse ca-
dere accidentalmente in acqua NON cercare
di recuperarlo ma innanzitutto togliere im-
mediatamente la spina dalla presa di cor-
rente.
Successivamente portarlo in un centro as-
sistenza qualificato per i necessari controlli.
Durante l’uso, l’apparecchio deve essere
lontano da qualsiasi oggetto o sostanza in-
fiammabile od esplosiva.
Non toccare l’apparecchio con mani ba-
gnate o umide.
Non usare l’apparecchio a piedi nudi.
Non tirare l’apparecchio o il cavo per stac-
care la spina dalla presa.
Non lasciare l’apparecchio esposto ad
agenti atmosferici (pioggia, sole).
Si raccomanda di tenere l’apparecchio fuori
dalla portata di bambini od incapaci e di
non permetterne loro l’utilizzo.
Scollegare la spina dalla presa di corrente
quando l’apparecchio non viene utilizzato
e prima di effettuare qualsiasi operazione
di pulizia o manutenzione.
I
3

Il cavo di alimentazione deve essere sroto-
lato per tutta la sua lunghezza al fine di
evitarne il surriscaldamento.
Il cavo di alimentazione non deve essere
avvicinato a fonti di calore e/o superfici ta-
glienti.
In caso di cavo di alimentazione danneg-
giato, provvedere alla sostituzione che deve
essere effettuata da personale qualificato.
In caso di guasto e/o cattivo funziona-
mento spegnere l’apparecchio e rivolgersi
a personale qualificato.
Eventuali manomissioni o interventi effet-
tuati da personale non qualificato fanno
decadere i diritti di garanzia.
Per pulire l’apparecchio usare solo un
panno morbido e non abrasivo.
Quando l’apparecchio, risulta inutilizzabile
e si desidera eliminarlo, asportarne i cavi e
smaltirlo presso un ente qualificato al fine
di non contaminare l’ambiente.
• Se nel prodotto vi sono parti in vetro,
queste non sono coperte da garanzia.
ATTENZIONE:
Le parti in plastica del prodotto non sono
coperte da garanzia.
ATTENZIONE:
I danni del cavo di alimentazione, derivanti
dall’usura non sono coperti da garanzia;
l’eventuale riparazione sarà pertanto a ca-
rico del proprietario
ATTENZIONE:
Se si rendesse necessario portare o spedire
l’apparecchio al centro assistenza autoriz-
zato, si raccomanda di pulirlo accurata-
mente in tutte le sue parti.
Se l’apparecchio risultasse anche minima-
mente sporco o incrostato o presentasse
depositi di cibo, depositi calcarei, depositi
di polvere o altro; esternamente o interna-
mente: per motivi igenico-sanitari, il centro
assistenza respingerà l’apparecchio stesso
senza visionarlo.
Il simbolo sul prodotto o sulla confe-
zione indica che il prodotto non deve es-
sere considerato come un normale rifiuto
domestico, ma deve essere portato nel
punto di raccolta appropriato per il rici-
claggio di apparecchiature elettriche ed
elettroniche.
Provvedendo a smaltire questo prodotto in
modo appropriato, si contribuisce a evitare
potenziali conseguenze negative per l’am-
biente e per la salute, che potrebbero deri-
vare da uno smaltimento inadeguato del
prodotto.
Per informazioni più dettagliate sul rici-
claggio di questo prodotto, contattare l’uf-
ficio comunale, il servizio locale di
smaltimento rifiuti o il negozio in cui è
stato acquistato il prodotto.
4

5
A ERTENZE PARTICOLARI
ATTENZIONE!
INFORMAZIONI SULLA SICUREZZA
Quando si usa un apparecchio elettrico è
consigliabile seguire le precauzioni di sicu-
rezza, comprese le seguenti, onde evitare
rischio di incendio, scossa elettrica o danni
alla persona:
• Rimuovere l’apparecchio dal suo involu-
cro prima di utilizzarlo per la prima volta.
• Staccare il Robot da Cucina dalla presa di
corrente quando non viene utilizzato,
prima di montarne o smontarne le parti e
prima di effettuarne la manutenzione.
• Non posizionare mai il Robot da Cucina
sul bordo del tavolo.
Assicurarsi che la superficie d’appoggio sia
stabile, pulita e sgombra da acqua o altre
sostanze.
• Non posizionare il Robot da Cucina vicino
superfici calde o fonti di calore.
• Assicurarsi sempre che il Robot da Cucina
sia correttamente assemblato prima del-
l’utilizzo.
Non toccare le parti in movimento.
Durante il funzionamento tenere mani, ca-
pelli, vestiti, spatole e altri utensili lontano
dalle fruste per ridurre il pericolo di feri-
mento a persone e/o danni al Robot da Cu-
cina.
• Nel caso in cui un oggetto finisca dentro
la ciotola durante la fase di mescolamento,
spegnere immediatamente il Robot da Cu-
cina posizionando la manopola su OFF,
staccare il cavo dalla presa di corrente e ri-
muovere il corpo estraneo dalla ciotola.
•Non utilizzare l’apparecchio per un
tempo prolungato o a velocità massima
per più di 3 minuti.
• Non superare le dosi riportare in questo
manuale.
• Non utilizzare il Robot da Cucina se que-
sto risulta danneggiato o mal funzionante.
• Assicurarsi che le fruste o il gancio si
siano fermate prima di rimuoverle dall’ap-
parecchio.
• Rimuovere dal mixer la frusta piatta, la
frusta a filo o il gancio per impastare prima
di procedere al lavaggio.
• Non utilizzare su barche o mezzi in mo-
vimento.
Non utilizzare all’esterno.
• Al fine di evitare il rischio di scossa elet-
trica, non immergere il Robot da Cucina in
acqua o in un altro liquido.
CARATTERISTICHE TECNICHE
Voltaggio/frequenza: 230-240VAC
50/60Hz
1200W
Capacità ciotola: 5,0 Lt
Capacità contenitore in vetro: 1,5 Lt

6
ISTRUZIONI D’USO
Al primo utilizzo di UNI ERSAL, lavare
preventivamente tutti gli accessori (NON il
corpo dell'apparecchio).
Per qualunque utilizzazione collocare l'ap-
parecchio su di un piano stabile facendo
aderire i piedini a ventosa.
Componenti e accessori
dell'apparecchio
A. Corpo superiore
B. Corpo base
C. Tappo anteriore
D. Coperchio posteriore
E. Alloggiamento per frullatore
F. Leva sblocco corpo superiore
G. Selettore regolazione velocità:
0, 1, 2, 3, 4, 5, 6, “P”
H. Coperchio trasparente di protezione
J. Ciotola in acciaio (capacità 5 Lt)
Accessori complementari per tritare,
insaccare, e trafilare pasta.
S. Pressore (anche contenitore per alcuni
accessori)
T. Bacinella
U. Tubo convogliatore
V. Vitona
Z. Ghiera di bloccaggio
Accessori per impastare
L. Gancio per impastare
M. Frusta a filo
N. Frusta piatta
Accessori per frullare
o tritare ghiaccio
O. Misurino tappo
Q. Coperchio
R. Contenitore in vetro (capacità 1,5 Lt)
con base porta lame
Accessori per insaccare
1. Imbutino e accoppiabile ghieretta in
plastica
2. Accessorio con bulbo e accoppiabile
ghieretta in plastica
Accessori per tritare la carne
W1.Lame
W2, W3, W4. Dischi trafila in metallo con
fori di diverso diametro
Accessori per trafilare la pasta
X1, X2, X3, X4, X5, X6. Dischi trafila in pla-
stica per differenti tipi di pasta.
Allestimento per impastare,
amalgamare, montare
Con spina disconnessa dalla presa di cor-
rente e il selettore (G) in posizione 0, ruo-
tare la leva di sblocco (F), sollevare il corpo
superiore (A).
Montare il coperchio trasparente di prote-
zione (H) bloccandolo in posizione con
una rotazione in senso antiorario. Inserire
a pressione uno degli accessori (L, M, N) e
ruotarlo in senso antiorario per bloccarlo.
Scegliere l'accessorio secondo l'utilizzo
previsto:
Frusta piatta (N) per impasti normali o
pesanti (torte, gallette, glassa a base di
panna, pane a lievitazione veloce, dolcetti,
polpettone, biscotti, purè di patate, impa-
sto per torte).
Frusta a filo (M) per montare (uova, pan
di Spagna, albumi, savoiardi, panna densa,
maionese, glassa cotta, alcuni dolcetti).
Gancio (L) per mescolare e impastare
pasta con il lievito (pane, torte per il caffè,
focacce, pasta per la pizza).
Posizionare la ciotola (J) nel corpo base (B)
e bloccarla (LOC ) con una rotazione in
senso antiorario.

7
Mettere gli ingredienti da trattare nella
ciotola, abbassare il corpo superiore (A),
inserire la spina in una presa di corrente
idonea a riceverla e attivare l'apparecchio
agendo sul selettore (G).
elocità suggerite
Iniziare sempre a velocità 1 per passare
poi a:
elocità 1 per amalgamare lentamente,
mescolare, ridurre in purea, iniziare I pro-
cedimenti di impasto.
Da selezionare quando si desidera sbat-
tere farina e ingredienti secchi o aggiun-
gere liquidi a ingredienti secchi.
Non usare la velocità 1 per mescolare o
impastare pasta lievitata.
elocità 2 per mescolare lentamente, ri-
durre in purea, amalgamare più veloce-
mente.
Da selezionare per mescolare e impastare
pasta lievitata, pastelle dense e dolcetti,
per ridurre in purea patate e altre verdure,
sminuzzare il grasso da pasticceria, me-
scolare pastelle morbide o liquide.
elocità 4 per mescolare, sbattere pa-
stelle mediamente dense come quelle dei
biscotti.
Da usare per incorporare zucchero e grasso
da pasticceria e per aggiungere zucchero
agli albumi per le meringhe.
Velocità media per impasti per torte.
elocità 6 per sbattere, montare a neve o
frustare.
Velocità da utilizzare nella fase finale di
preparazione di impasti per torte, ciam-
belle e altre pastelle.
Velocità elevata per impasti per torte.
A lavorazione completata, spegnere l'ap-
parecchio, scollegare la spina dalla presa
di corrente, sollevare il corpo superiore
(A), ruotare in senso orario la ciotola ed
estrarla per recuperare l'alimento.
Allestimento per frullare
o tritare ghiaccio
Con spina disinserita dalla presa di corrente,
con ciotola (J) e protezione (H) montate,
ruotare in senso antiorario il coperchio (D) e
rimuoverlo dal corpo superiore (A) liberando
l’alloggiamento (E) per collocarvi il conteni-
tore in vetro con base porta lame (R). Bloc-
carlo ruotandolo in senso orario come
indicato dai simboli.
Mettere gli alimenti da frullare o il ghiaccio
da tritare nel contenitore, posizionare il
coperchio (Q) e il tappo misurino (O).
Inserire la spina in una presa di corrente
idonea a riceverla. Attivare l’apparecchio
agendo sul selettore (G) impostando la ve-
locità come sotto indicato.
elocità suggerite
Iniziare sempre a velocità 1 per passare
poi a:
elocità 3-4 per frullare liquidi e impasti
leggeri.
elocità 5-6 per frullare liquidi e ali-
menti solidi.
Posizione “P” per Ghiaccio (movimenti
brevi ma intensi, per utilizzarla mantenere
il selettore fisso sulla posizione “P” oppure
in modo discontinuo ma ripetutamente).
A lavorazione completata mettere il selet-
tore (G) su 0 e disconnettere il cavo dalla
presa di corrente poi rimuovere il conte-
nitore (R) dall’alloggiamento (Z) ruotan-
dolo in senso orario.
Riposizionare il coperchio posteriore (D)
ruotandolo in senso orario (LOC ).

8
Allestimento per tritare la carne
Con spina disinserita dalla presa di cor-
rente e con ciotola (J) e protezione (H)
montate, asportare il tappo anteriore (C)
dal corpo superiore (A), introdurre il tubo
convogliatore (U) nel l'apertura frontale e
fissarlo ruotandolo in senso orario.
Inserire nell’apertura inferiore del convo-
gliatore, nell’ordine: vitona (V), lama (W1),
e una delle trafile in metallo (W2, W3, W4).
Bloccare il tutto per mezzo della ghiera (Z).
Posizionare la bacinella (T) sull’apertura
superiore del tubo convogliatore (U) e di-
sporre sul piano di lavoro, sotto alla ghiera,
un contenitore per ricevere la carne tritata.
Mettere la carne (preventivamente spez-
zettata) nella bacinella (T).
Inserire la spina in una presa di corrente
idonea a riceverla, attivare l’apparecchio
agendo sul selettore (G ) e con l’aiuto del
pressore (S) introdurre la carne nel tubo
convogliatore (U).
A lavorazione completata mettere il selet-
tore (G) in posizione 0 e disconnettere il
cavo dalla presa di corrente.
Allestimento per insaccare
Con spina disinserita dalla presa di cor-
rente e con ciotola (J) e protezione (H)
montate, asportare il tappo anteriore (C)
dal corpo superiore (A), introdurre il tubo
convogliatore (U) nell'apertura frontale e
fissarlo ruotandolo in senso orario.
Inserire nell’apertura inferiore dl convo-
gliatore, nell’ordine: vitona (V), disco
ghieretta e imbutino ( 1), bloccare il tutto
per mezzo della ghiera (Z), posizionare
sull’imbutino il materiale che dovrà con-
tenere l’insaccato.
Mettere l'alimento preventivamente tritato
nella bacinella (T) e inserire la spina in una
presa di corrente idonea a riceverla.
Attivare l’apparecchio impostando sul se-
lettore (G) la posizione di velocità 6 op-
pure su ”P” e con l’aiuto del pressore (S)
facilitare l’introduzione del tritato nel tubo
convogliatore (U).
A lavorazione completata mettere il selet-
tore (G) in posizione 0 e disconnettere il
cavo dalla presa di corrente.
Il disco ghieretta con il relativo accessorio
( 2) costituiscono un’alternativa all’uso
sopra descritto.
Allestimento per trafilare la pasta
Con spina disinserita dalla presa di cor-
rente, ciotola (J) e protezione (H) montate,
asportare il tappo anteriore (C) dal corpo
superiore (A), introdurre il tubo convoglia-
tore (U) nel foro anteriore e fissarlo ruotan-
dolo in senso orario.
Inserire nell’apertura inferiore, nell’ordine:
vitona (V) e una delle trafile in plastica (X1,
X2, X3, X4, X5, X6), bloccare il tutto per
mezzo della ghiera (Z).
Posizionare la bacinella (T) nell’apertura
superiore del tubo raccoglitore (U) e di-
sporre sul piano di lavoro, sotto alla
ghiera, un contenitore per accogliere la
pasta trafilata.
Mettere l’impasto da trafilare nella baci-
nella (T).
Inserire la spina in una presa di corrente
idonea a riceverla.
Attivare l’apparecchio agendo sul selettore
(G) e con il pressore (S) facilitare l’introdu-
zione dell’impasto nel tubo convogliatore
(U).
A lavorazione completata mettere il selet-
tore (G) in posizione 0 e disconnettere il
cavo dalla presa di corrente.

9
GENERAL SAFETY
REQUIREMENTS
Carefully read the requirements in
this manual and keep in a safe place. It
contains important instructions on the sa-
fety, use and future of your appliance.
This appliance is only for domestic use and
must only to be used for the purpose it was
specifically designed.
Any other use is considered improper and
dangerous.
The manufacturer cannot be held respon-
sible for any damages caused by improper,
incorrect and negligent use.
The installation must be carried out accor-
ding to the manufacturer’s instructions.
The manufacturer shall not be held respon-
sible for any damages to people, animals or
objects caused by incorrect installation.
The safety of the electrical equipment is
only guaranteed if it is connected to an
electrical installation equipped with a sui-
table earthing system in compliance with
the current standards on electrical safety.
Do not leave parts of packaging (plastic
bags, foam polystyrene, nails, etc) within
reach of children or incapacitated people
since they are potential sources of danger.
Before connecting the appliance, check that
the technical data on the rating label cor-
responds to those of the main electricity
network.
In case of incompatibility between the ou-
tlet and the plug, contact a qualified elec-
trician for the necessary adjustments.
Do not use adaptors, multiple plugs and
extension leads.
However, if absolutely necessary only use
materials that conform to the current safety
standards and that are compatible with the
appliance and the main electricity network.
On using the appliance for the first time,
remove any labels or protective sheets.
If the appliance is equipped with air inlets,
make sure they are never blocked not even
partially.
The use of any electrical appliance involves
the observance of some fundamental rules.
In particular:
Do not immerge the appliance in water and
do not wet; do not use it near water, in the
tub, washbasin or near other recipients
with liquids.
If the appliance should accidentally fall in
water, DO NOT try to touch it but immedia-
tely disconnect the plug from the mains
power.
Then bring it to an authorised service cen-
tre for the necessary controls.
During use, the appliance must be kept
away from any inflammable objects or sub-
stances or explosives.
Do not touch the appliance with wet hands
or feet.
Do not use the appliance with bare feet.
Do not pull on the power cord or on the ap-
pliance itself to disconnect the plug from
the power outlet.
Do not leave the appliance exposed to at-
mospheric agents (sun, rain…)
eep the appliance out of reach of children
or incapacitated people and do not let them
use it.
Disconnect the plug from the power outlet
when the appliance is not being used and
before carrying out any cleaning or main-
tenance.
The power cord must be completely un-
wound to prevent it from overheating.
The power cord must be kept away from
heat sources and/or sharp edges.
If power cord is damaged, have it replaced
by qualified personnel.
GB

10
Switch off and contact a qualified techni-
cian if the appliance should breakdown
and/or not function properly.
Any tampering or interventions executed
by unqualified people will cancel the gua-
rantee.
Use a soft and non-abrasive cloth to clean
the appliance.
When the appliance is unserviceable and
must be eliminated, remove its cords and
dispose of it at an authorised disposal
centre in order to protect the environment.
• Warranty does not cover any glass parts
of the product.
ATTENTION:
The damages of the power supply cord,
originate by the wear aren’t covered by
guarantee; the repair will be in charge to
the owner.
ATTENTION:
Warranty does not cover any plastic parts
of the product
ATTENTION:
If the need should arise to take or send the
appliance to an authorised service centre,
make sure to clean all its parts thoroughly.
For hygienic purposes, the service centre
shall reject appliances that are not perfec-
tly clean on the outside or inside without
making any controls or repairs.
The symbol on the product or on its
packaging indicates that this product may
not be treated as household waste.
Instead it shall be handed over to the ap-
plicable collection point for the recycling
of electrical and electronic equipment.
By ensuring this product is disposed of
correctly, you will help prevent potential
negative consequences for the environ-
ment and human health, which could
otherwise be caused by inappropriate
waste handling of this product.
For more detailed information about recy-
cling of this product, please contact your
local city office, your household waste di-
sposal service or the shop where you pur-
chased the product.

11
SPECIAL WARNINGS
CAUTION!
INFORMATION SAFETY
When using an electrical appliance should
follow the safety precautions, including the
following, to avoid risk of fire, electric
shock or personal injury:
• Remove the appliance from its packaging
before using the first time.
• Disconnect the itchen Robot from the
outlet when not in use, before to assemble
or disassemble the parts and before its
maintenance.
• Never place the itchen Robot on the
edge of the kitchen table. Check the sup-
port surface in stable, clean and free of
water or other substances.
• Do not place the itchen Robot near hot
surfaces or hot sources.
• Always make sure that the itchen Robot
is properly assembled before use.
Do not touch moving parts.
During operation, keep hands, hair, clo-
thes, spatulas and others tools away from
beaters to reduce the risk of injury to per-
sons and / or damage to the Robot itchen.
• If an object ends up in the bowl during
mixing, immediately turn off the Robot it-
chen placing the knob into OFF, unplug the
cable from the socket and remove the fo-
reign body from the bowl.
•Do not use the appliance for a pro-
longed time or top speed for more than
3 minutes.
• Do not exceed the doses given in this
manual.
• Do not use the itchen robot if it is da-
maged because of malfunctioning.
• Make sure the beaters or the hook have
stopped before removing them from the
appliance.
• Remove from the mixer the flat beater,
the wire whip or dough hook before wa-
shing it.
• Do not use on boats or moving vehicles.
Do not use outside.
• In order toa void a risk of electric shock
do not immerse the itchen Robot in water
or another liquid.
TECHNICAL CHARACTERISTICS
Voltage/frequency: 230-240VAC
50/60Hz
1200W
Bowl capacity: 5,0 Lt
Glass jar capacity: 1,5 Lt

12
INSTRUCTIONS FOR USE
At the first use of UNI ERSAL, wash pre-
viously all the accessories (NOT the body
of the appliance).
For any use place the appliance on a stable
surface by adhering the suction feet.
Parts and accessories
of the appliance
A. Upper body
B. Basic body
C. Front stopper
D. Back cover
E. Blender housing
F. Lever release upper body
G. Speed control button:
0, 1, 2, 3, 4, 5, 6, “P”
H. Transparent protective cover
J. Steel bowl (capacity 5 Lt)
Complementary accessories
for chopping, stuffing
and pasta extruded.
S. Pressure roller (also housing for some
accessories)
T. Tray
U. Conveyor tube
V. Big screw
Z. Block ring
Accessories for kneading
L. neading hook
M. Wire whip
N. Flat beater
Accessories for blend
or ice crushing
O. Measuring cap
Q. Lid
R. Glass jar (1,5 Lt capacity) with blade
holder base
Accessories for sausages
1. Funnel and coupled plastic ring
2. Accessory with bulb and coupled
plastic ring
Accessories for grind meat
W1.Blades
W2, W3, W4. Metal extruder disc with holes
of different diameters
Accessories for pasta extruded
X1, X2, X3, X4, X5, X6. Plastic extruder
discs for different types of pasta.
Equipment for kneading,
blending, beat the egg whites
With plug disconnected from the outlet
and the (G) button on 0, rotate the release
lever (F), lift the upper body (A).
Assembly the transparent protective cover
(H) by locking in place with a counter-
clockwise rotation.
Insert by pressing one of the accessories
(L, M, N) and turn it counter-clockwise to
lock. Choose the accessory according to
the intended use:
Flat beater (N) for normal or heavy mixes
(cakes, biscuits, glaze made from cream,
fast-rising bread, small sponge cake, mea-
tloaf, puree, pie dough).
Wire whip (M) to mount (eggs, sponge
cake, eggs white, savoiardi, thick cream,
mayonnaise, cooked glaze, some candies).
Hook (L) to mix and knead dough with
yeast (bread, cakes for coffee, focacce,
pizza dough).
Place the bowl (J) on the basic body (B) and
lock it (LOC ) with a counter-clockwise
rotation. Put all ingredients into the bowl,
lower the upper body (A), insert the plug
into an outlet suitable and start the ap-
pliance by pressing the button (G).

13
Speed suggested
Always start at speed 1 and then move on:
Speed 1 to blend slowly, mixing, puree,
start the kneading process.
To select when you want to beat flour and
dried ingredients or add liquids to dried
ingredients.
Do not use speed 1 to mix or kneading
dough leavened.
2-speeds to mix slowly, puree, mix quic-
kly.
Select it for mixing and kneading dough
leavened, dense batters and small sponge
cakes, for pureeing potatoes and other ve-
getables, shred the fat for pastries, mixing
soft or liquid batters.
4-speeds to mix, beating batters on ave-
rage dense as those of biscuits.
To incorporate sugar and fat for pastry
and to add sugar on eggs whites for me-
ringues. Average speed for pies dough.
6-speeds for whipping, beat the egg whi-
tes or flogging.
Speed to use in the final stages of pre-
paring dough for pies, cakes and other
batters.
High speed for pies dough.
At the end of process, turn off the ap-
pliance, disconnect the plug from the soc-
ket, lift the upper body (A), turn clockwise
the bowl and remove it to retrieve the
food.
Equipment to blend or ice crushing
With the plug disconnect from the socket,
with bowl (J) and protection (H) mounted,
rotate counter-clockwise the lid (D) and
remove it from the upper body (A), relea-
sing the housing (E) to place the glass jar
with holder blade base (R).
Lock it by rotating clockwise as indicated
by the symbols.
Put the food to blend or crushing ice in the
jar, place the lid (Q) and the measuring cap
(O).
Insert the plug into a compatible power
outlet. Start the appliance by pressing the
button (G) by setting the rate as indicated
below.
Speed suggested
Always start at speed 1 and then move on:
3-4 speed for blending liquids and light
kneading.
5-6 speed for blending liquids and solid
foods.
“P” position for ice (short but intense mo-
vements, to use it maintain the button
fixed on “P” position or intermittently but
repeatedly).
At the end of process place the button (G)
on 0 and disconnect the cord from the
socket then remove the jar (R) from the
housing (Z) by turning it clockwise.
Replace the back cover (D) by turning it
clockwise (LOC ).
Equipment to grind meat
With the plug disconnected from the soc-
ket and bowl (J) and protection (H) assem-
bled, remove the front cap (C) from the
upper body (A), insert the conveyor tube
(U) in the front opening and secure it by
turning clockwise.
Insert into the lower opening of conveyor,
in order: large screw (V), blade (W1) and
one metal extruder disc (W2, W3, W4).
Lock all through the ring (Z).
Place the tray (T) over the upper opening
of the conveyor tube (U) and place on the
work surface, below the ring, a container
for the meat grinded.
Place the meat (previously broke into pie-
ces) in the tray (T).

14
Insert the plug into a socket suitable to re-
ceive, start the appliance by the button (G)
and using the pressure roller (S) insert the
meat in the conveyor tube (U).
At the end of the process place the button
(G) in position 0 and disconnect the cable
from the socket.
Equipment to sausages
With the plug disconnected from the soc-
ket and bowl (J) and protection (H) assem-
bled, remove the front cap (C) from the
upper body (A), insert the conveyor tube
(U) in the front opening and secure it by
turning clockwise.
Insert into the lower opening of conveyor,
in order: large screw (V), disc ring and
funnel ( 1), lock the whole by means of
the nut (Z), place the material which must
contain the sausage on the funnel.
Put the food into the bowl (T) previously
chopped and insert the plug into a socket
suitable to receive it.
Start the appliance by setting 6-speed or
“P” on the button (G) and use a pressure
roller (S) to facilitate the introduction of
the grinded in the conveyor tube (U).
At the end of the process place the button
(G) in position 0 and disconnect the cable
from the socket.
The ring disc with the correspondent ac-
cessory ( 2) is an alternative to the use
described above.
Equipment for pasta extruded
With the plug disconnected from the soc-
ket, bowl (J) and protection (H) assembled,
remove the front cap (C) from the upper
body (A), insert the conveyor tube (U) in
the front opening and secure it by turning
clockwise.
Insert into the lower opening, in order:
large screw (V) and one plastic extruder
disc (X1, X2, X3, X4, X5, X6), lock all
through the ring (Z).
Place the tray (T) in the upper opening of
the collector tube (U) and put on the work
surface, below the ring, a container to re-
ceive the extruded pasta.
Place in tray (T) the dough to be extruded.
Insert the plug into a socket suitable to re-
ceive it. Start the appliance by pressing the
button (G) and with the pressure roller (S)
make easy the introduction of the dough
in the conveyor tube (U).
At the end of the process place the button
(G) in position 0 and disconnect the cable
from the socket.


MOD. Universal
Compilare all’atto dell’acquisto
Check before purchasing
DATA ACQUISTO
PURCHASE DATE
Allegare scontrino fiscale con timbro del rivenditore
Seller’s stamp
La presente garanzia non é valida se incompleta
This certificate of guarantee has to be dulyfilled
in to be valid
internet: www.johnson.it e-mail: com @johnson.it
GARANZIA
La durata della garanzia decorre dalla data di acquisto dell’apparecchio, comprovata dal timbro del rivenditore e cessa dopo il periodo
prescritto anche se l’apparecchio non é stato usato. Rientrano nella garanzia tutte le sostituzioni o riparazioni che si rendessero ne-
cessarie per difetti di materiale o di fabbricazione. La garanzia decade qualora l’apparecchio venga manomesso o quando il difetto
sia dovuto ad uso improprio. Le sostituzioni o le riparazioni contemplate nella garanzia vengono effettuate gratuitamente per merce
resa franco nostri centri assistenza. Sono a carico dell’utente le sole spese di trasporto. Le parti o gli apparecchi sostituiti diventano
di nostra proprietà.
GUARANTEE
The validity of the guarantee starts from the purchasing date certified by the seller’s stamp and expires at the end of the indicated
period, even when the device has not been used. The guarantee covers all substitutions or repairs due to material or manufacturing
defects. The guarantee has no validity in case of device tampering or when the defect is due to incorrect or improper use of the
same. Substitutions and repair covered by the guarantee are made free of any charge for goods delivered free our service company
representative. Only the freight will be at buyer’s expense. All replaced parts or devices will become our property.
GARANTIE
La validité de la garantie commence à partir de la date d’achat de l’appareil, attestée par la timbre du revendeur et termine après la
période prescrit, même si l’appareil n’a pas été utilisé. Rentrent dans la garantie: toutes les substitutions ou réparations qui seraient
nécessaires par défauts de matériel ou de fabrication. La garantie n’est pas valable si l’appareil a été manumis ou si le défaut est dû
à usage impropre. Les substitutions ou les réparations couvertes par la garantie sont faites gratuitement pour marchandise rendue
franco nos centres d’assistance. Sont à la charge de l’acheteur simplement les frais de transport. Les pièces et les appareils substitués
deviennent de notre propriété.
GARANTIE
Die Garantiedauer läuft vom Einkaufsdatum der Gerätes an das durch den Stempel des Verkäufres nachgewiesen ist, und verfällt
nach der vorgeschriebenen Zeit, auch wenn das Gerät nicht gebraucht worden ist. Die Garantie schliesst alle Ersetzungen oder Re-
paraturen ein, die wegen schadhaften Materials oder fehlerhafter Herstellung erfordert würden. Die Garantie verfällt, wenn das Gerät
zerbrochen wird oder der Fehler auf ungeeigneten Gebrauch zurückzuführen ist. Die von der Garantie vorgesehenen Ersetzungen
oder Reparaturen werden für ab unserren undenzentren gelieferte Ware kostenlos ausgeführt. Nur die Frachtkosten gehen zu Lasten
des Verbrauchers. Die Ersetzen Teile oder Geräte werden unser Eigentum.
GARANTIA
El período de garantia inicia en la fecha de compra del aparato comprobada por el sello del vendedor y termina después del período
prescrito aunque el aparato no sea usado. Entran en la garantia todas las sustituciones o reparaciones que sean necesarias por de-
fectos de materiales o de fabricación. La garantia se pierde cuando el aparato sea reparado en un centro de asistencia no autorizado
o cuando el defecto es causado por un uso inapropiado. Las sustituciones o las reparaciones contempladas en la garantia vienen
efectuadas gratuitamente. Solamente son a cargo del usuario los gastos de transporte. Las partes o los aparatos sustituidos perma-
necen en nuestro poder.
GARANTIA
A validade da garantia começa a partir da data da compra do aparelho, comprovada pelo carimbo do vendedor e termina após o pe-
riodo indicado, mesmo se o aparelho não tiver sido utilizado. A garantia cobre todas as substituições ou reparações que sejam ne-
cessárias, devido a defeitos do material ou de fabrico. A garantia perde a validade se o aparelho fôr indevidamente utilizado ou se o
defeito fôr devido a utilizaçao imprópria do mesmo. As substituições ou reparações cobertas pela garantia sâo efectuadas gratuita-
mente, sendo a mercadoria entregue sem despesas nos nossos centros de assistència. Apenas fiçarao a cargo do comprador as de-
spesas de transporte. As peças ou os aparelhos substituidos serâo de nossa propriedade.
ΕΓΓΥΗΣΗ
Η διάρκεια της εγγύησης τίθεται σε ισχύ από την ημερομηνία αγοράς της συσκευής, με βάση την σφραγίδα του καταστηματάρχη
και έως ότου παρέλθει η προβλεπόμενη περίοδος ακόμα και στην περίπτωση που η συσκευή δεν έχει χρησιμοποιηθεί. Η εγγύηση
καλύπτει όλες τις αντικαταστάσεις ή/και επισκευές που αποδεικνύονται αναγκαίες για ελαττώματα υλικών ή κατασκευής. Η
εγγύηση παύει να ισχύει εάν στην συσκευή γίνουν αυθαίρετες παρεμβάσεις ή όταν η δυσλειτουργία προκληθεί από ακατάλληλη
χρήση. Οι προβλεπόμενες από την εγγύηση αντικαταστάσεις και οι επισκευές γίνονται δωρεάν για προϊόντα που στέλνονται
ελεύθερης παράδοσης στα κέντρα εξυπηρέτησης πελατών μας. Ο χρήστης αναλαμβάνει μόνο τα έξοδα μεταφοράς. Τα
εξαρτήματα ή οι συσκευές που αντικαθιστώνται παραμένουν στην δική μας ιδιοκτησία.
ГАРАНТИЯ
Гаран ийный срок начинае ся с да ы приобре ения ус ройс ва, засведе ельс вованый печа ями магазина,и прекращае ся
после ус ановленного срока, даже если ус ройс во не используе ся. Покры ые гаран ии с любой замены или ремон а
могу оказа ься необходимыми в связи с дефек ами ма ериалов или изго овления. Гаран ия ис екае , если ус ройс во
изменено или когда дефек связан с неправильным использованием. Замена или ремон согласно данной гаран ии
осущес вляе ся беспла но для оваров в наших сервисных цен рах. Расходы предс авляе олько ранспор ировка. Час и
замененного оборудования с ановя ся нашей собс веннос ью.
GARANZIA GUARANTEE GARANTIE GARANTIE GARANTIA GARANTIA ΕΓΓΥΗΣΗ ГАрАНТиЯ
2ANNI YEARS ANS JAHRE AñOS ANOS χρόνια роки ГоДА
MOD. Universal
DATA ACQUISTO
PURCHASE DATE
DATA RIPARAZIONE
REPARE DATE
TIMBRO CENTRO ASSISTENZA
AFTER SALES SERVICE CENTER STAMP
Other manuals for Universal
1
Table of contents
Languages:
Other Johnson Food Processor manuals

Johnson
Johnson Mustang User manual

Johnson
Johnson PureMix User manual

Johnson
Johnson Mustang User manual

Johnson
Johnson Universal User manual

Johnson
Johnson KOKO User manual

Johnson
Johnson Food Processor User manual

Johnson
Johnson Master-Chef User manual

Johnson
Johnson Tuttofare User manual

Johnson
Johnson Trizzy User manual

Johnson
Johnson Choppy User manual