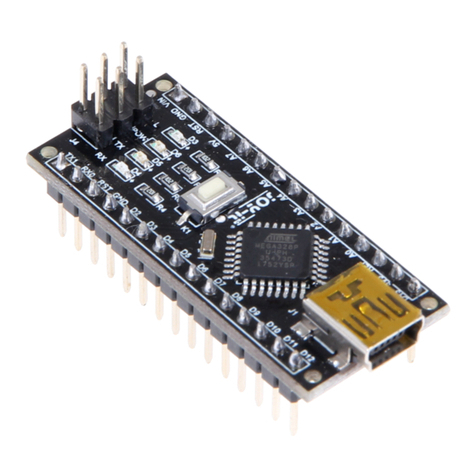
Joy-it DIGISPARK User manual

JOY-IT® DIGISPARK MICROCONTROLLER
26 x 12 mm sized microcontroller
1. GENERAL INFORMATION
Dear customer,
Thank you for purchasing our product. In the following are information
which you should note before commissiong. Whenever you have unfore-
seeable problems do not hesitate to contact us.

2. PREPARING THE INSTALLATION
If the Arduino-Soware is not installed on your systems, please download
the soware with the following link and install it.
https://www.arduino.cc/en/Main/Soware
As the next step, please download the Digispark drivers here.
For computers with Windows 7 or older:
During the boot process, repeatedly press the key that leads to the BIOS (e.g.
F2, F8, F10 or Del). In the next menu, please choose the option Disable driver
signature enforcement.
For computers with Windows 8 or newer:
Click the On/O button. Keep holding the Shi key and click on restart.
In the next menu, choose Troubleshoot → Advanced Options →
Startup Settings →Restart
Aer restarting, please install the previously downloaded driver.
Next, as seen in the next images, open up the Arduino conguration and
insert the following URL to the Additional Boards Manager URL:
http://digistump.com/package_digistump_index.json

If you haven‘t already installed, please install the Digistump AVR Board
library from the Boardmanager.
Now you need to change your Arduino conguration to the
Digispark (Default—16.5 MHz) board

The Arduino IDE is now ready to use with your Digispark. Please do not
connect your Digispark to your computer until the program is asking you to
connect it. This prompt does not appear until code transmission has been
initiated.
3. CONNECTING THE DEVICE
The Digispark can be easily connected to your computer via USB. For the
casual usage, if you don‘t want to power your Digispark by USB, you can
connect a power supply of 5V to the +5V connection or a power supply of
7-35V to the VIN connection. Further devices or components can be
connected to the integrated PINs.
You can see a detailed overview of the pin assignment in the picture below:
4. PROGRAMMING PIN P5
The Pin P5 of our Digispark is predened as Reset-Pin because it is needed
to initialise the bootloader. Without additional conguration, the Pin P5 is
not useable like the other Pins.
The bootloader is already installed when you receive your Digispark. From
this time, the Reset-Pin is no longer needed and can be overwritten.
You can skip this step if you don‘t need the Pin P5. Otherwise you can
enable the functions of the Pin with the following steps.

Warning! An Arduino Uno is needed to congurate the Pin P5.
Open up your Arduino IDE and open the preinstalled ArduinoISP example
(Files → Examples → ArduinoISP) and transfer it to your Arduino Uno.
Watch out that you, if you have already transfered something to your
Digispark, to choose the right board-conguration.
Aer you transfered the code, note the port where your Arduino is
connected to.
You can see the used port under Tools → Port.
Next, connect an 10uF capacitor to the RESET and the GROUND Pin of your
Arduino Uno. Warning! The capacitor is necessary! Do not skip this step!
Now connect your Digispark to your Arduino Uno as seen in the next image
or in the table.

Arduino Uno Arduino Digispark
5 V
GND
10
11
12
13
5 V
GND
P5
P0
P1
P2
To edit your Arduino Digispark by command-line, you need the AVRDude
programm. Therefore, please download the WinAV Tool from this website.
https://sourceforge.net/projects/winavr/?source=typ_redirect
Aer you have installed the programm, open up the command prompt
and enter the following commands:
In our case, our Arduino Uno was connected to the port COM3. If your
Arduino Uno is connected to another port, please repleace the specic
port in the commands.
avrdude -P COM3 -b 19200 -c avrisp -p attiny85 -n
avrdude -P COM3 -b 19200 -p attiny85 -c avrisp -U hfuse:w:0x5F:m
This is how the output should look like:
avrdude: please dene PAGEL and BS2 signals in the conguration le for part ATtiny85
avrdude: AVR device initialized and ready to accept instructions
Reading | ################################################## | 100% 0.02s
avrdude: Device signature = 0x1e930b
avrdude: reading input le „0x5F“
avrdude: writing hfuse (1 bytes):
Writing | ################################################## | 100% 0.02s
avrdude: 1 bytes of hfuse written
avrdude: verifying hfuse memory against 0x5F:
avrdude: load data hfuse data from input le 0x5F:
avrdude: input le 0x5F contains 1 bytes
avrdude: reading on-chip hfuse data:
Reading | ################################################## | 100% 0.01s
avrdude: verifying ...
avrdude: 1 bytes of hfuse veried
avrdude: safemode: Fuses OK
avrdude done. Thank you.
The Pin P5 of your Digispark should now be ready to use.

5. TRANSFER OF EXAMPLE CODE
The following example code is for your rst setup and to test the basic
functionality of the Digispark. The integrated LED will keep switching on and
o.
Please transfer the code to your Digispark. Do not connect your Digispark to
your computer until you are asked to.
void setup() {
//Initialisation of digital PIN
pinMode(0, OUTPUT); //LED on Model B
pinMode(1, OUTPUT); //LED on Model A or Pro
}
void loop() {
digitalWrite(0, HIGH); //turns on LED
digitalWrite(1, HIGH);
delay(1000); //waits a second
digitalWrite(0, LOW); //turns o LED
digitalWrite(1, LOW);
delay(1000); //waits a second
}
6. FURTHER INFORMATION
Our information and redemption obligation according to the electro-law (ElektroG)
Symbol on electrial and electronic products :
This crossed-out bin means that electrical and electronic products do not
belong into the household waste. You must hand over your old appliance
to a registration oice. Before you can hand over the old appliance, you
must remove used batteries and accumulators which are not enclosed by
the device.
Return options :
As the end user, you can hand over with the purchase of a new device
your old appliance (which has essentially the same functions as the new
one) free of charge for disposal. Small devices which do not have outer
dimensions greater than 25 cm can be submitted independently of the
purchase of a new product in normal household quantities.
Possibility of restitution at our company location during our opening
hours :
Simac GmbH, Pascalstr. 8, D-47506 Neukirchen-Vluyn
Possibility of restitution nearby :
We send you a parcel stamp with which you can send us your old appliance
free of charge. For this possibility, you must contact us via e-mail at
service@joy-it.net or via telephone.
2

7. SUPPORT
We also support you aer your purchase. If you have any questions le or
encounter any problems, feel free to contact us by E-Mail, phone or with our
ticket-supportsystem on our website.
E-Mail: service@joy-it.net
Ticket-System: http://support.joy-it.net
Phone: +49 (0)2845 98469 – 66 (11- 17 o‘clock)
For further informations, please visit our website:
www.joy-it.net
www.joy-it.net
SIMAC Electronics GmbH
Pascalstr. 8, 47506 Neukirchen-Vluyn
published: 07.06.2019
Information about packaging:
Please package your old appliance safe during transport. Should you not
have a suitable packaging material or you do not want to use your own
material, you can contact us and we will send you an appropriate package.
This manual suits for next models
3
Table of contents
Other Joy-it Microcontroller manuals
Popular Microcontroller manuals by other brands

Renesas
Renesas RZ Series quick start guide

Silicon Laboratories
Silicon Laboratories C8051F31 Series user guide

onsemi
onsemi AXM0F343 user manual

Motorola
Motorola M-CORE MMC2001 Series Reference manual

4ms
4ms Quad Clock Distributor Expander Builder's guide

Matrix Orbital
Matrix Orbital Scoodo EVE Shield Hardware manual