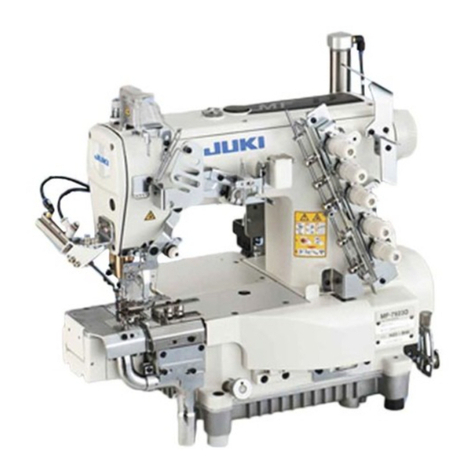
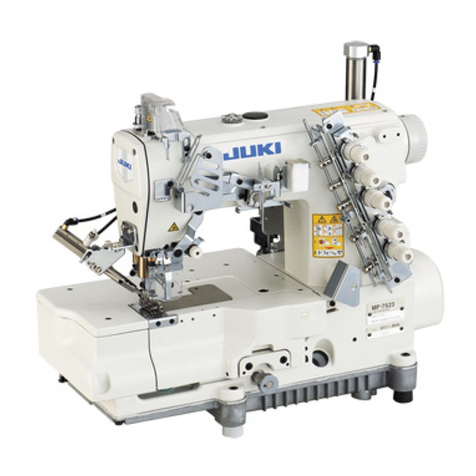
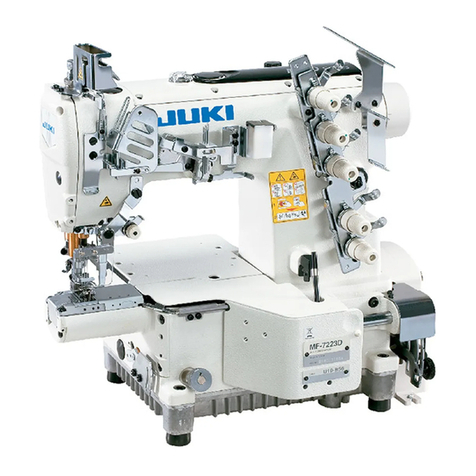
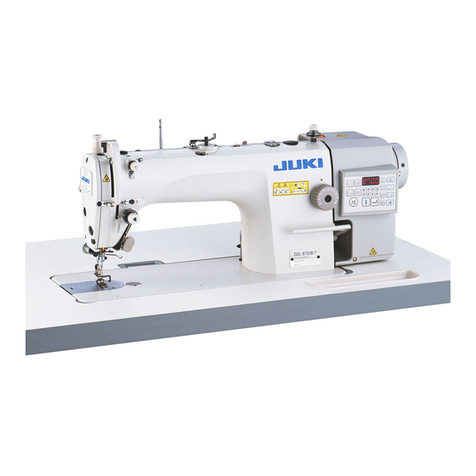
JUKI MF-7800 User manual

R
INSTRUCTION MANUAL BETRIEBSANLEITUNG
MANUEL D’UTILISATION MANUAL DE INSTRUCCIONES
MANUALE D’ISTRUZIONI
No.03
13450101
MF-7800
NOTE : Read safety instructions carefully and understand them before using.
Retain this Instruction Manual for future reference.
HINWEIS : Lesen Sie die Sicherheitsanweisungen aufmerksam durch, um sich mit ihnen vertraut zu machen,
bevor Sie diese Maschine in Betrieb nehmen. Bewahren Sie diese Bedienungsanleitung für
spätere Bezugnahme auf.
NOTE : Avant d’utiliser la machine, lire attentivement toutes les consignes de sécurité.
Conserver ce manuel pour pouvior le consulter en cas de besoin.
NOTA : Antes de comenzar a usar esta máquina lea con detención hasta comprender todas las
instrucciones de sequridad. Conserve este Manual de instrucciones a mano para futuras
consultas.
NOTA : Leggere attentamente e compredere tutte le istruzioni per la sicurezza prima di inziare l’ uso di
questa macchina. Conservare questo Manuale d’Instruzioni per pronto riferimento.

xx
CONTENTS
11
11
1. SPECIFICATIONS ........................................................................................................ 1
22
22
2. CONFIGURATION OF THE MACHINE COMPONENTS ............................................. 5
33
33
3. INSTALLATION ............................................................................................................ 8
1. Installing the machine head onto the table................................................................................ 8
2. Selecting the motor pulley and the belt ................................................................................... 11
3. Installing the motor .................................................................................................................... 14
4. Setting the belt ........................................................................................................................... 16
5. Installing the belt cover ............................................................................................................. 18
6. IInstalling the chain .................................................................................................................... 19
7. Installing the thread guide......................................................................................................... 19
44
44
4. LUBRICATION AND OILING...................................................................................... 20
1. Lubricating oil............................................................................................................................. 20
2. Oiling ........................................................................................................................................... 22
3. Sillcon oil lubrication unit ......................................................................................................... 23
55
55
5. OPERATION ............................................................................................................... 24
1. Needle.......................................................................................................................................... 24
2. Attaching the needle .................................................................................................................. 25
3. Threading the machine head..................................................................................................... 26
(1)Standard threading ....................................................................................................................... 27
(2)Threading for soft seams ............................................................................................................. 30
4. Adjusting the stitch length ........................................................................................................ 33
5. Adjusting the differential feed ratio.......................................................................................... 35
6. Adjusting the presser foot pressure ........................................................................................ 37
7. Adjusting the thread tension ......................................................................................................... 38
66
66
6. ADJUSTING THE SEWING MACHINE ...................................................................... 39
1. Adjusting the silicon container thread guide .......................................................................... 39
2. Adjusting the needle bar thread take-up thread receiver ....................................................... 41
3. Adjusting the rocking thread take-up....................................................................................... 42
4. Adjusting the rocking thread take-up thread receiver ............................................................ 43
5. Adjusting the spreader thread guide........................................................................................ 44
6. Adjusting the looper thread cam ..............................................................................................45
7. Adjusting the looper thread cam thread guide........................................................................ 46
8. Adjusting the looper thread winding prevention plate ........................................................... 47
9. Adjusting the looper .................................................................................................................. 48
10. Adjusting the height of the needle ......................................................................................... 50
11. Adjusting the rear needle guard .............................................................................................52
12. Relation between the rocking thread take-up timing and the needle thread loop ............. 54
13. Adjusting the height of the feed dog ...................................................................................... 57
14. Installing position of the spreader.......................................................................................... 58
15. Adjusting the spreader thread guide and the needle clamp thread guide ......................... 60
16. Adjusting the front needle guard ............................................................................................62
17. Adjusting the presser foot lift ................................................................................................. 64
18. Adjusting the micro-lifter......................................................................................................... 65
77
77
7. MAINTENANCE .......................................................................................................... 66
1. Cleaning the sewing machine ................................................................................................... 66
2. Replacing the lubricating oil ..................................................................................................... 67
3. Inspecing and replacing the oil filter ........................................................................................ 68

– 1 –
11
11
1.仕様
機種名称 高速シリンダーベッド飾り縫いミシン
型式 MF-7800 シリーズ
縫い目形式 ISO 規格 406、407、602、605
用途例 ニット、メリヤス製品へのヘム縫い、カバーリング縫い
最高縫い速度 最高毎分 6500 針(間欠運転時)
針幅 3 本針 --------- 5.6mm、6.4mm
2本針--------- 3.2mm、4.0mm、4.8mm
差動送り比 1:0.6 〜 1:1.8(縫い目長さ 2.5mm 以下)
微量差動送り調節機構装備(マイクロアジャスト)
縫い目長さ 0.9mm 〜 3.6mm(調整により 4.5mm まで可)
使用針
UY128GAS # 9S 〜# 14S(標準# 10S)
針棒ストローク 31mm
外観寸法 高さ:450 ×左右:456 ×前後:267
質量 42kg
押え上昇量 6mm(針幅 5.6mm上飾りなし)、5mm(上飾り付き)
微量押え上げ機構装備
送り調節方法 主送り -------------- ダイヤル式縫目ピッチ調節方式
差動送り ----------- レバー調節方式(マイクロアジャスト機構装備)
ルーパー機構 球面ロッド駆動方式
潤滑方法 ギアポンプによる強制潤滑給油方式
潤滑油 JUKIMACHINEOIL18
貯油量 オイルゲージ下線 600cc〜上線 900cc
据付け方法 上乗せ式
Model name High-speed, cylinder-bed coverstitch machine
Model MF-7800 series
Stitch type ISO standard 406, 407, 602, and 605
Example of application Hemming and covering for knits and general knitted fabrics
Max. sewing speed Max. 6,500 rpm (at the time of intermittent operation)
Needle gauge 3-needle ... 5.6 mm and 6.4 mm
2-needle ... 3.2 mm, 4.0 mm and 4.8 mm
Differential feed ratio 1 : 0.6 to 1 : 1.8 (stitch length : less than 2.5 mm)
Micro-differential feed adjustment mechanism is provided. (Micro-adjustment)
Stitch length 0.9 mm to 3.6 mm (can be adjusted up to 4.5 mm)
Needle UY128GAS #9S to #14S (standard #10S)
Needle bar stroke 31mm
Dimensions (Height) 450 x (Width) 456 x (Length) 267
Weight 42 kg
Lift of presser foot 6 mm (needle gauge : 5.6 mm without top covering), and 5 mm (with top covering)
Micro-lifter mechanism is provided.
Feed adjustment method Main feed ... dial type stitch pitch adjustment method
Differential feed ... lever adjustment method (micro-adjustment mechanism is provided.)
Looper mechanism Spherical rod drive method
Lubricating system Forced lubrication method by gear pump
Lubricating oil JUKI MACHINE OIL 18
Oil reservoir capacity Oil gauge lower line : 600 cc to upper line : 900 cc
Installation Top mount type
Noise Workplace-related noise at sewing speed
n= 5,000 min-1 : LPA ≦78 dB (A)
Noise measurement according to DIN 45635-48-A-1.
11
11
1. SPECIFICATIONS

– 5 –
22
22
2. 各部の名称 /CONFIGURATION OF THE MACHINE COMPONENTS
KONFIGURATION DER MASCHINENTEILE
CONFIGURATION DES PIECES DE LA MACHINE
CONFIGURACION DE LOS COMPONENTES DE LA MAQUINA DE COSER
CONFIGURAZIONE DEI COMPONENTI DELLA MACCHINA / 各部分的名稱
1押え調節ねじ !0 糸調子つまみ !9 糸切り刃
2針棒天びんカバー !1 オイルゲージ @0 揺動天びん糸受け
3オイル循環確認窓 !2 送り調節つまみ @1 揺動天びん
4給油口キャップ !3 目保護カバー @2 前カバー
5微量押え上げ !4 針板 @3 スライドカバー
6「OIL」表示 !5 針先エスレン装置 @4 針棒天びん糸受け
7針糸エスレン装置 !6 差動ロックナット @5 揺動天びん糸案内
8第一糸案内 !7 マイクロアジャストつまみ @6 エスレンタンク糸案内
9上プーリ !8 指ガード @7 ベルトカバー
@8 差動調節レバー
1Presser spring regulator !0 Thread tension nut @0 Rocking thread take-up receiver
2Needle bar thread take-up cover !1 Oil gauge @1 Rocking thread take-up
3Oil circulation identification window !2 Feed regulating knob @2 Front cover
4Oil hole cap !3 Eye guard cover @3 Slide cover
5Micro-lifter !4 Throat plate @4 Needle bar thread take-up thread
6"Oil" indication !5 Needle tip silicon oil lubricating unit receiver
7Needle thread silicon !6 Differential lock nut @5
Rocking thread take-up thread guide
oil lubricating unit !7 Micro-adjustment knob @6 Silicon container thread guide
8Thread guide No. 1 !8 Finger guard @7 Belt cover
9Upper pulley !9 Thread trimming knife @8 Differential feed regulating lever
12345678
9
!0
!1
!2
!3
!4
!5
!6
!7
!8
!9
@0 @1
@7
@3
@2
@5
@4
@6
@8

– 8 –
33
33
3. 据え付け方/ INSTALLATION / INSTALACION / INSTALLAZIONE
安裝方法
1. ミシン頭部のテーブルへの据え付け / Installing the machine head onto the table
Installieren des Maschinenkopfes auf der Tischplatte
Installation de la tête de la machine sur la table
Modo de instalar el cabezal de la máquina de coser en la mesa
Installazione della testa della macchina sul tavolo / 縫紉機機頭往機台上的安裝
注意:
すべての作業が終了するまで、モータの電源プラグはコンセントに差し込まないでください。
機械に巻き込まれて、けがをするおそれがあります。
WARNING :
Do not insert the power plug of the motor into the receptacle until all works have been completed. There is
a danger of injury by being caught in the machine.
WARNUNG :
Schließen Sie den Netzstecker des Motors erst an die Steckdose an, nachdem alle Arbeiten abgeschlossen
sind. Es besteht sonst die Gefahr, von der Maschine erfasst zu werden.
AVERTISSEMENT :
Ne pas brancher la fiche d’alimentation du moteur tant que l’installation n’est pas complètement terminée.
On pourrait être blessé par la machine.
¡AVISO!
No inserte el enchufe de la corriente eléctrica del motor en el receptáculo hasta que se haya completado
todo el trabajo. Existe el peligro de lesión al ser atrapado en la máquina de coser.
AVVERTIMENTO :
Non collegare la spina del motore alla presa di corrente finché tutti i lavori siano stati completati. C’è il
pericolo di ferimenti causati da intrappolamento nella macchina.
注意 :
所有的作業完了之前,請不要把馬達的電源插頭插到電源插座上。以防止被卷入機器里,造成負傷的危險。
注意:
ミシンは 42kg 以上の質量があります。開梱、運搬、据え付けは、必ず 2 人以上で行ってください。
WARNING :
The weight of the sewing machine is more than 42 kg. Be sure to perform the work with two persons or
more in case of unpacking, transportation or installation.
WARNUNG :
Die Nähmaschine wiegt mehr als 42 kg. Heben Sie die Nähmaschine beim Auspacken, Transportieren oder
Installieren mit zwei oder mehr Personen.
AVERTISSEMENT :
La machine pèse plus de 42 kg. Pour la déballer, la transporter ou l’installer, il faut être au moins deux.
¡AVISO!
La máquina de coser pesa más de 42 kg. Asegúrese de ejecutar el trabajo entre dos personas o más en al
hacer el desembalaje o al transportar o instalar la máquina.
AVVERTIMENTO :
Il peso della macchina per cucire è più di 42 kg. Non mancare di eseguire il lavoro con due persone o più
in caso di sballatura, trasporto o installazione della stessa.
注意 :
本縫紉機的質量有 42kg 。因此,開箱、搬運、安裝時,請務必 2 人以上來操作。

– 9 –
図のようにピンとゴム座を取り付けて、ミシンを正しく
据え付けてください。
1ゴム座 4ナット
2座金 5ピン
3スプリング座金
Attach the pins and the rubber cushions as shown in the
illustration and properly install the sewing machine.
1Rubber cushion 4Nut
2Washer 5Pin
3Spring washer
Die Stifte und die Gummidämpfer montieren, wie in der
Abbildung gezeigt, und die Nähmaschine korrekt installieren.
1Gummidämpfer 4Mutter
2Unterlegscheibe 5Stift
3Federscheibe
Fixer les axes et les coussinets élastiques comme sur l’illustration et installer correctement la machine..
1Coussinet élastique 4Ecrou
2Rondelle 5Axe
3Rondelle Grower
Coloque los pasadores y almohadillas de goma tal como se muestra en la ilustración, e instale la máquina de coser
apropiadamente.
1Amortiguador de goma 4Tuerca
2Arandela 5Pasador
3Arandela de resorte
Attaccare i perni ed i cuscini di gomma come mostrato nell’illustrazione ed installare la macchina per cucire correttamente.
1Cuscino di gomma 4Dado
2Rondella 5Perno
3Rondella elestica
如圖所示安裝銷子和橡膠墊,正確地安裝縫紉機。
1橡膠座 4螺母
2墊片 5銷子
3彈簧座
1
5
上乗せ式 / Top mount type / Hochmontagetyp
Type à montage supérieur / Tipo montaje superior
Tipo montaggio sulla superficie / 上部安裝式
2
3
4

– 10 –
98
テーブル図面(上乗せ式)/ DRAWING OF TABLE (TOP MOUNT TYPE)
MASSZEICHNUNG DES TISCHES (HOCHMONTAGETYP) / SCHEMA DE LA TABLE (TYPE A MONTAGE SUPERIEUR)
DIBUJO DE LA MESA (TIPO MONTAJE SUPERIOR) / DISEGNO DEL TAVOLO (TIPO MONTAGGIO SULLA SUPERFICIE)
機台圖紙(上部安裝式)
A4-ø 3.4 裏面深さ 20(セット時穴開けのこと)
B17 きり
C2-ø 3.4 裏面深さ 10(セット時穴開けのこと)
DY-Y(3ヶ所)
A4- ø 3.4 on the bottom surface, depth 20
(Drill a hole at the time of set-up.)
BDrilled hole 17
C2- ø 3.4 on the bottom surface, depth 10
(Drill a hole at the time of set-up.)
DY-Y (3-places)
A4- ø 3,4 auf der Unterseite, Tiefe 20
(Ein Loch bei der Installation bohren.)
BBohrung 17
C2- ø 3,4 auf der Unterseite, Tiefe 10
(Ein Loch bei der Installation bohren.)
DY - Y (3 Stellen)
A4 orifices de ø3,4 sur la face inférieure,
profondeur 20 (Percer un orifice lors de l’installation.)
BOrifice percé de 17
C2 orifices de ø3,4 sur la face inférieure,
profondeur 10 (Percer un orifice lors de l’installation.)
DY - Y (3 points)
A4 – ø3,4 en la superficie inferior, profundidad 20
(Taladre el agujero en el momento de la instalación.)
BAgujero perforado 17
C2 – ø3,4 en la superficie inferior, profundidad 10
(Taladre el agujero en el momento de la instalación.)
DY – Y (3 lugares)
A4-ø3,4 sulla superficie inferiore, profondità 20
(Trapanare un foro al momento della messa a punto.)
BForo trapanato 17
C2-ø3,4 sulla superficie inferiore, profondità 10
(Trapanare un foro al momento della messa a punto.)
DY-Y (3 posti)
A4- φ 3.4 背面深度 20(安裝時應鑽孔)
B17 鑽挖
C2- φ 3.4 背面深度 10(安裝時應鑽孔)
DY-Y(3處)
Z - Z
130
810
159 ±1 74 ±1
75
R30
57
239 ±1
5 x 20
52. 17
115 40
ø 26
ø 8.5
10
30˚
D
360
570
60
(90)
B
A
66 ±1
33
YY
R10
R10
387
R10
R10
45
Z
Z
R10
40
R30
192 ±1
27
R10
R10
1
120
300
330
152
115
R10
R10
49
124
ø 50
221
R10
R10
R10
34
55
71
R10
R10
7
248 ±1
4 x 8.5
68
221
158.5
96
33.5
C

– 11 –
2. モータプーリ・ベルトの選び方/ Selecting the motor pulley and the belt
Wahl der Motorriemenscheibe und des Keilriemens
Choix de la poulie de moteur et de la courroie
Modo de seleccionar la polea y la correa del motor
Selezione delle pulegge motore e cinghie / 馬達皮帶輪、皮帶的選定方法
※表は、3 相 2 極 400 ワット(1/2HP)の
クラッチモータを使用した場合の数値で
す。
※市販のプーリは、外径が 5mm 単位に
なっていますので、計算値に近い市販
プーリを指定しています。
モータプーリとベルト
50Hz 60Hz
プーリ外径
ベルトサイズ
プーリ外径
ベルトサイズ
4,500 ø 100 M-39 ø 85 M-38
4,800 ø 110 M-40 ø 90 M-38
5,000 ø 115 M-40 ø 95 M-39
5,500 ø 125 M-41 ø 105 M-39
5,800 ø 135 M-42 ø 110 M-40
6,000 ø 140 M-42 ø 115 M-40
6,200 ø 145 M-43 ø 120 M-41
6,500 ø 150 M-43 ø 125 M-41
ミシンの
回転数(rpm)
本製品に適合したモータプーリを使用して
ください。
適合したモータプーリを使用しないと、ミ
シンの最高回転を超え、ミシンが故障する
原因になります。
新しいミシンを使用するときは、最初の
200 時間(約 1ヵ月)は 4,500rpm 以下で
使用してください。耐久性から見て、良い結
果が得られます。
*The table shows the numbers when a 3-phase 2-pole 400 W
clutch motor (1 / 2 HP) is used.
*The commercially-available motor pulley near to the counted
value is designated since the outside diameter of the
commercially-available motor pulley counts by 5 mm.
Use a motor pulley which is adaptable to this
sewing machine. The sewing speed exceeds
the max. sewing speed of this sewing
machine and machine trouble will be caused
unless a motor pulley which is adaptable to
this sewing machine is used.
When you use a new sewing machine, use
the machine at a speed of 4,500 rpm or less
for the first 200 hours (approximately one
month). A good result can be obtained in
terms of the durability.
Cau tion
Motor pulley and belt
50Hz 60Hz
Pulley size Belt size Pulley size Belt size
4,500 ø 100 M-39 ø 85 M-38
4,800 ø 110 M-40 ø 90 M-38
5,000 ø 115 M-40 ø 95 M-39
5,500 ø 125 M-41 ø 105 M-39
5,800 ø 135 M-42 ø 110 M-40
6,000 ø 140 M-42 ø 115 M-40
6,200 ø 145 M-43 ø 120 M-41
6,500 ø 150 M-43 ø 125 M-41
Sewing
speed (rpm)
参考
参考
Reference

– 14 –
3. モータの取り付け / Installing the motor / Installieren des Motors
Installation du moteur / Modo de instalar el motor / Installazione del motore
馬達的安裝
モータプーリ
Motor pulley
Motorriemenscheibe
Poulie de moteur
Polea de motor
Puleggia motore
馬達皮帶輪
40˚
5.5 mm
10 mm
M型Vベルト / M type V belt
Keilriemen des Typs M
Courroie trapézoïdale du type M
Correa V tipo M / Cinghia a “V” tipo M
M型V形皮帶
モータは3相2極400ワット(1/2HP)のクラッチモー
タを、ベルトは M 型 V ベルトを使用してください。
1) ペダルを踏み込むとモータプーリは左に寄ります。
その状態のとき、モータプーリと下プーリの中心が
一致するようにモータを取り付けてください。
※モータプーリの取り付け方は、モータの取扱説明書
を参照してください。
Use a clutch motor of 3-phase, 2-pole, 400 W (1/2HP).
Use the M type V belt.
1) The motor pulley shifts to the left-hand side when
depressing the pedal. At this time, install the motor so
that the centers of motor pulley and lower pulley align
with each other.
* For the installing procedure of the motor pulley, refer to
the Instruction Manual for motor.
下プーリ
Lower pulley
Untere
Riemenscheibe
Poulie inférieure
Polea inferior
Puleggia inferiore
下皮帶輪
Verwenden Sie einen 2-poligen Dreiphasen-Kupplungsmotor von 400 W (1/2 PS).
Verwenden Sie einen Keilriemen des Typs M.
1) Die Motorriemenscheibe wird nach links verschoben, wenn das Pedal niedergedrückt wird. In diesem Zustand ist der
Motor so zu installieren, dass die Motorriemenscheibe und die untere Riemenscheibe auf einer Linie liegen.
* Angaben zum Installationsverfahren der Motorriemenscheibe entnehmen Sie bitte der Betriebsanleitung des Motors.
Utiliser un moteur à embrayage triphasé bipolaire de 400 W(1/2 HP). Utiliser une courroie trapézoïdale de type M.
1) Lorsqu’on appuie sur la pédale, la poulie du moteur se déplace vers la gauche. Installer alors le moteur de façon que les
axes de la poulie du moteur et de la poulie inférieure soient alignés l’un sur l’autre.
* Pour la procédure d’installation de la poulie du moteur, consulter le manuel d’utilisation du moteur.
Use un motor de embrague trifásico, 2 polos, 400 W (1/2 HP).Use correa en V tipo M.
1) La polea del motor se desvía hacia el lado izquierdo cuando se presiona el pedal. En este caso, instale el motor de
modo que los centros de la polea del motor y de la polea inferior queden alineados entre sí.
* Para el procedimiento de instalación de la polea del motor, consulte el Manual de Instrucciones para el motor.
Usare un motore a frizione trifase, 2 poli, 400W (1/2 HP).
Usare la cinghia a V tipo M.
1) La puleggia del motore si sposta verso il lato sinistro quando il pedale viene premuto. Allora, installare il motore in modo
che i centri della puleggia del motore e della puleggia inferiore siano allineati l'uno all'altro.
* Per la procedura di installazione della puleggia del motore, consultare il Manuale d'Istruzioni per il motore.
請使用 3 相 2 極 400 瓦特(1/2HP)的離合馬達,並使用 M 型 V 形皮帶。
1) 踩了踏板之後,馬達皮帶輪向左靠緊。此狀態時,請調整馬達讓馬達皮帶輪和下皮帶輪的中心對齊。
※ 馬達皮帶輪的安裝方法,請參照馬達使用說明書。

– 15 –
2) Install the motor so that the pulley rotates clockwise.
If the machine pulley rotates in the
reverse direction, nomal lubrication
cannot be performed. As a result,
machine trouble will be caused.
2) Installieren Sie den Motor so, dass sich die Maschinenriemenscheibe entgegen dem Uhrzeigersinn dreht.
Falls sich die Maschinenriemenscheibe in entgegengesetzter Richtung dreht, erfolgt keine normale
Schmierung. Dies hat Maschinenstörungen zur Folge.
2) Installer le moteur de telle sorte que la poulie de la machine tourne dans le sens inverse des aiguilles d’une montre.
Si la poulie de la machine tourne en sens inverse, la lubrification normale du dispositif ne peut être
exécutée et ceci risque de provoquer des dérangements affectant la machine.
2) Instale el motor de modo que la polea de la máquina gire hacia la izquierda.
Si la polea de la máquina gira en dirección inversa, no se puede ejecutar la lubricación normal. Como
resultado, se producirán problemas en la máquina.
2) Installare il motore in modo che la puleggia macchina giri in senso antiorario.
Se la puleggia macchina gira nel senso inverso, la lubricazione regolare non può essere effettuata. Di
conseguenza, saranno causati guasti alla macchina.
2) 安裝馬達時,請讓縫紉機皮帶輪向逆時針方向轉動。
縫紉機皮帶輪反轉的話,就不能正常加油,造成縫紉機故障。
2) プーリが時計回りに回転するように、モータを取り
付けてください。
ミシンプーリが逆回転すると、正常な給油が
行えず故障の原因となります。
Cau tion
Vor sicht
Atten zione
注 意
Atten tion
Aten ción

– 16 –
4. ベルトの掛け方 / Setting the belt / Anbringen des Keilriemens
Mise en place de la courroie / Modo de fijar la correa
Posizionamento della cinghia / 皮帶的掛法
1) ベルト 1を下プ−リ 2に掛けてください。
2) 上プーリ 3を回しながら、ベルトの片方をモータ
プーリ 4に掛けてください。
3) ベルトの中央部を約 10N(1.02kgf)の力で押し
たとき、たわみ量が 15 〜 20mmになるようにベ
ルトを張ってください。
4) ベルトを張り終わったら、ロックナット 5で確実
に固定してください。
ミシンを運転してベルトの振れが大きい場合
は、ベルトの張りを再度見直してください。
注意:
ベルトの 掛け替えをするときは、必ずモータの電源を切り、モータの回転停止を確認してから行ってください。ベルトに手や
衣服を巻き込まれて、けがをする恐れがあります。
WARNING :
When replacing the belt, be sure to turn OFF the power to the motor and ascertain that the motor has totally
stopped rotating before starting the work. There is a danger of injury since hands or clothes may be caught
in the belt.
WARNUNG :
Schalten Sie zum Auswechseln des Keilriemens die Stromversorgung des Motors aus und vergewissern
Sie sich, dass der Motor vollkommen stillsteht, bevor Sie mit der Arbeit beginnen. Anderenfalls besteht
Verletzungsgefahr, da Hände oder Kleidungsstücke vom Keilriemen erfasst werden können.
AVERTISSEMENT :
Avant de remplacer la courroie, mettre le moteur hors tension et s’assurer qu’il est à l’arrêt complet. On
risquerait autrement de se blesser en se prenant la main ou les vêtements dans la courroie.
¡AVISO!
Cuando reemplace la correa, desconecte sin falta la corriente eléctrica del motor y cerciórese de que el
motor se para totalmente antes de iniciar el trabajo, porque se corre el peligro de lesiones debido a que las
manos o los vestidos pueden quedar atrapados en la correa.
AVVERTIMENTO :
Quando si sostituisce la cinghia, non mancare di spegnere il motore e assicurarsi che il motore abbia
completamente cessato di ruotare prima di eseguire il lavoro. C’è il pericolo di ferimenti poiché mani o
lembi di vestiario potrebbero essere intrappolati nella cinghia.
注意 :
更換皮帶時,請一定關掉馬達的電源,確認馬達停止轉動之後再進行更換作業。否則,有發生手、衣服卷進縫紉機,
發生負傷的事故的危險。
Cau tion
1) Fit belt 1to lower pulley 2.
2) Turning upper pulley 3, set the other side of the belt to motor pulley 4.
3) Adjust the belt tension so that the belt sags 15 to 20 mm when the center of the belt is pressed with an approximate
10N (1.02 kgf) load.
4) Securely fix the belt with lock nut 5when the belt has been set.
If the deflection of the belt is excessive when the sewing machine is operated, check again the belt
tension.
1
3
4
5
2
15 〜 20mm

– 17 –
1) Den Keilriemen 1an der unteren Riemenscheibe 2anbringen.
2) Bringen Sie die andere Seite des Keilriemens an der Motorriemenscheibe 4an, während Sie die obere
Riemenscheibe 3drehen.
3) Die Riemenspannung so einstellen, dass der Keilriemen 15 bis 20 mm nachgibt, wenn die Mitte des Keilriemens mit
einer Kraft von etwa 10N (1,02 kg) eingedrückt wird.
4) Nach der Einstellung der Riemenspannung die Sicherungsmutter 5fest anziehen.
Falls die Riemendurchbiegung während des Betriebs der Nähmaschine zu groß ist, überprüfen Sie die
Riemenspannung erneut.
Vor sicht
1) Fije la correa 1a la polea inferior 2.
2) Girando la polea superior 3, fije el otro lado de la correa a la polea 4del motor.
3) Ajuste la tensión de la correa de modo que la correa ceda de 15 a 20 mm cuando el centro de la correa se presiona
con una carga de aproximadamente 10N (1,02 kgf).
4) Fije con seguridad la correa con la contratuerca 5una vez que se ha colocado la correa.
Si la flexión de la correa es excesiva cuando la máquina está funcionando, vuelva a comprobar la
tensión de la correa.
Aten ción
1) Inserire la cinghia 1alla puleggia inferiore 2.
2) Girando la puleggia superiore 3, mettere l'altro lato della cinghia alla puleggia del motore 4.
3) Regolare la tensione della cinghia in modo che la cinghia si incurvi di 15 a 20 mm quando il centro della cinghia
viene premuto con un carico di circa 10N (1,02 kgf).
4) Fissare saldamente la cinghia con il controdado 5quando la cinghia è stata posizionata.
Se la deformazione della cinghia è eccessiva quando la macchina per cucire è in funzione, controllare
nuovamente la tensione della cinghia.
Atten zione
1)請把皮帶 1褂到下皮帶輪 2上。
2)一邊轉動上皮帶輪 3,一邊把皮帶的一頭褂到馬達皮帶輪 4上。
3)用約 10N(1.02kgf)的力量按壓皮帶的中央部後,鬆弛量應為 15 ∼ 20mm ,請按此標準進行調整。
4)調整好皮帶張力之後,請用固定螺母 5確實地擰緊固定。
運轉縫紉機皮帶擺動過大時,請重新調整皮帶張力。
注 意
1) Placer la courroie 1sur la poulie inférieure 2.
2) Tourner la poulie supérieure 3et placer l’autre côté de la courroie sur la poulie du moteur 4.
3) Régler la tension de la courroie de façon que celle-ci présente une flèche (mouvement vers le bas) de 15 à 20 mm
lorsqu’on exerce une poussée d’environ 10 N (1,02 kgf) au centre de la courroie.
4) Une fois la courroie en place, la fixer solidement avec le contre-écrou 5.
Si la flèche de la courroie est excessive lorsque la machine fonctionne, vérifier à nouveau la tension de
la courroie.
Atten tion

– 18 –
5. ベルトカバーの取り付け / Installing the belt cover
Installieren der Riemenabdeckung / Installation du couvercle de courroie
Modo de instalar la cubierta de la correa / Installazione del copricinghia
皮帶罩的安裝
ベルトカバー 3は図のように取り付けてください。
1ねじ首下長さ 12mm(付属品)
2ねじ首下長さ 8mm (付属品)
ベルトカバー取り付け時は、4の部分を切り取ってご使
用ください。
※シンクロナイザーをご使用の場合は、下側のねじ1
の替わりにシンクロナイザー固定棒(付属品)をご
使用ください。
注意:
ベルトカバ ーは必ず取り付けてください。取り付けないと、手や衣服を巻き込まれてけがをしたり、縫製物が巻き込まれて破
損する恐れがあります。
WARNING :
Be sure to install the belt cover. If it is not installed, there is a danger of injury since hands or clothes may
be caught in the machine or a danger of damage of the machine since sewing products may be caught in the
machine.
WARNUNG :
Die Riemenabdeckung muss unbedingt installiert werden. Wird sie nicht installiert, besteht Verletzungsgefahr
durch Hängenbleiben von Händen oder Kleidungsstücken in der Maschine, oder die Gefahr einer
Beschädigung der Maschine durch Hängenbleiben von Nähprodukten in der Maschine.
AVERTISSEMENT :
Toujours installer le couvercle de courroie. Si on ne l’installe pas, on risque de se prendre les mains ou les
vêtements dans la machine et de se blesser. Des articles de couture peuvent également se prendre dans la
machine et causer des dommages.
¡AVISO!
Instale sin falta la cubierta de la correa. Si no la instala, existe el peligro de lesión dado que es fácil que las
manos o vestidos queden cazados en la máquina o que se dañe la máquina dado que el producto de cosido
puede ser atrapado por la máquina.
AVVERTIMENTO :
Non mancare di installare il copricinghia. Se il copricinghia non è installato, c’è il pericolo di ferimenti
poiché mani o lembi di vestiario potrebbero essere intrappolati nella macchina o c’è il pericolo di danni alla
macchina poiché i prodotti di cucitura potrebbero essere intrappolati nella macchina.
注意 :
請一定安裝皮帶罩。如果沒有安裝,就有把手、衣服卷入機器內,或把縫製物卷入機器內的危險。
1
2
3
Die Riemenabdeckung 3gemäß der Abbildung installieren.
1Schraube von 12 mm (mitgeliefert)
2Schraube von 8 mm (mitgeliefert)
Wenn Sie die Riemenabdeckung installieren, schneiden Sie
den Teil 4zum Gebrauch ab.
* Wenn der Positionsgeber verwendet wird, ist die
Positionsgeber-Montagestange (mitgeliefert) anstelle der
Schraube 1am unteren Teil zu verwenden.
Instale la cubierta 3de la correa tal como se muestra en la
ilustración.
1
Tornillo de 12 mm de longitud (que se suministra como accesorio).
2
Tornillo de 8 mm de longitud (que se suministra como accesorio).
Cuando instale la cubierta de la correa para el uso, corte la
parte de 4.
* Cuando se utiliza el sincronizador, utilice la varilla de
fijación del sincronizador (que se suministra como
accesorio) en lugar del tornillo 1, ubicado en el lado
inferior.
Poser le couvre-courroie 3comme sur l’illustration.
1Vis de 12 mm de long (fournie comme accessoire)
2Vis de 8 mm de long (fournie comme accessoire)
Lors de la pose du couvre-courroie, couper la partie de 4
pour l’utilisation.
* Lorsqu’on utilise un synchroniseur, utiliser la tige de
fixation de synchroniseur (fournie comme accessoire)
au lieu de la vis 1située sur le côté inférieur.
4
Install belt cover 3as shown in the illustration.
1Screw 12 mm length (supplied as accessories)
2Screw 8 mm length(supplied as accessories)
When installing the belt cover, cut the part of 4for use.
* When the synchronizer is used, use synchronizer fixing
rod (supplied as accessories) instead of screw 1located
on the lower side.

– 19 –
1)鎖 1のフック2を、押え上げレバー 3に掛けてく
ださい。
2)鎖 1の反対側のフックをペダルに掛けてください。
1) Hang hook 2of chain 1to presser bar lifting lever 3.
2) Hook the other side of the chain 1to the pedal.
1)Den Haken
2
der Kette
1
an den
Stoffdrückerstangenhebel
3
hängen.
2) Das andere Ende der Kette
1
am Pedal befestigen.
1) Accrocher le crochet
2
de la chaîne
1
au levier de
relevage de barre de presseur
3
.
2) Accrocher l’autre extrémité de la chaîne 1à la pédale.
1) Enganche el gancho 2de la cadena
1
a la palanca
3
elevadora del la barra prensatela.
2) Enganche el otro lado de la cadena
1
al pedal.
1) Appendere il gancio 2della catena
1
alla leva di sollevamento della barra del pressore 3.
2) Appendere l'altro lato della catena
1
al pedale.
1) 請把鏈條
1
的鉤 2褂到壓腳提昇撥桿
3
上。
2) 請把鏈條
1
另一側的鉤褂到踏板上。
6. 鎖の取り付け / Installing the chain / Installieren der Kette/ Installation de la chaîne
Modo de instalar la cadena / Installazione della catena / 鏈條的安裝
3
2
1
1
2
7. 糸案内の取り付け / Installing the thread guide / Installieren der Fadenführung
Pose du guide-fil / Instalación de guíahilos / Installazione del guidafilo
導線器的安裝
1) 付属の第一糸案内 1をねじ 2でアームに取り付け
てください。
2) 糸案内 3を第一糸案内 1にねじ4で取り付けてく
ださい。
1) Install thread guide No. 1 1supplied as accessories on
the machine arm with screws 2.
2) Install thread guide 3on thread guide No. 1 1with screw
4.
1) Die mitgelieferte Fadenführung Nr. 1 1mit den
Schrauben 2am Maschinenarm befestigen.
2) Die Fadenführung 3mit der Schraube 4an der
Fadenführung Nr. 1 1befestigen.
1) Poser le guide-fil nº 1 1(fourni comme accessoire) sur le bras de la machine avec les vis 2.
2) Poser le guide-fil 3sur le guide-fil nº 1 1avec la vis 4.
1) Instale, utilizando los tornillos 2, el guíahilos No. 1 1(que se suministra como accesorio) en el brazo de la máquina.
2) Instale, utilizando el tornillo 4, el guíahilos 3en el guíahilos No. 1 1.
1) Installare il guidafilo No. 1 1fornito come accessori sul braccio della macchina con le viti 2.
2) Installare il guidafilo 3sul guidafilo No. 1 1con la vite 4.
1)把附屬的第 1 導線器 1用螺絲 2安裝到機臂上。
2)把導線器 3用螺絲 4安裝到第 1 導線器 1。
4
3
Installare il copricinghia 3come mostrato nell'illustrazione.
1Vite 12 mm in lunghezza (fornita come accessori)
2Vite 8 mm in lunghezza (fornita come accessori)
Quando si installa il copricinghia, tagliare la parte 4per
l’uso.
* Quando il sincronizzatore è usato, usare l’asta di
fissaggio del sincronizzatore (fornito come accessori)
invece della vite 1posta sul lato inferiore.
請如圖所示安裝皮帶防護罩 3。
1螺絲頭下長度 12mm(選購品)
2螺絲頭下長度 8mm(選購品)
安裝皮帶護罩時,請把 4的部分切下使用。
※ 使用信號指示燈時,請不要使用下側螺絲 1,而使
用信號指示燈固定桿(附屬品)。

– 20 –
44
44
4. 給油・注油について / LUBRICATION AND OILING /
SCHMIERUNG UND ÖLUNG / LUBRIFICATION ET HUILAGE
LUBRICACIÓN Y MODO DE APLICAR EL ACEITE
RIFORNIMENTO DELL’OLIO E LUBRIFICAZIONE / 關於加油、注油
1. 潤滑油について / Lubricating oil / Schmieröl / Huile lubrifiante / Aceite lubricante
Olio lubrificante / 關於機油
給油 / Lubrication
Schmierung / Lubrification
Lubricatión
Rifornimento dell’ olio
加油
1
2
<When using the sewing machine for the first time>
Lubricating oil has been taken out at the time of delivery. Be
sure to supply lubricating oil before using the sewing machine
for the first time.
• Oil used : JUKI MACHINE OIL 18
Do not use oil addition agent since deterioration of lubricating oil or machine trouble will be
caused.
Remove oil hole cap 2on which “OIL” is indicated and fill the oil reservoir with lubricating oil up to the level between the
upper and lower engraved marker lines.
<Checking before using the sewing machine>
1) Check oil gauge 1and make sure that lubricating oil level is between the upper and lower two lines. When lubricating
oil level lowers below the lower line, supply lubricating oil.
2) Make sure that lubricating oil comes out from the nozzle of oil circulation identification window 3when rotating the sewing
machine. When lubricating oil does not come out, perform “Inspecting and replacing the oil filter”. (See page 74.)
Cau tion
3
< ミシンを初めて使用するとき>
出荷時、潤滑油は抜いてあります。ミシンを初めて使用
する前には、必ず潤滑油を給油してください。
¡ 使用オイル:JUKIMACHINEOIL18
オイルの添加剤は、潤滑油の劣化やミシン故
障の原因となりますので、使用しないでくだ
さい。
給油は、「OIL」と指示されている給油口キャップ 2を
取り外して、オイルゲージ1の上下の刻線の間まで入れ
てください。
< ミシンを使用する前の点検>
1)オイルゲージ1を点検し、上下2本の線の間に潤滑
油があるか確認してください。潤滑油が線より下に
あるときは、潤滑油を補給してください。
2)ミシンを回したとき、オイル循環確認窓3のノズル
から潤滑油が出ることを確認してください。潤滑油
が出ないときは、「オイルフィルタの点検・交換」
(74 ページ参照)を行ってください。
<Bei der ersten Inbetriebnahme der Nähmaschine>
Das Schmieröl ist vor der Auslieferung abgelassen worden. Füllen Sie unbedingt Schmieröl ein, bevor Sie die Nähmaschine
zum ersten Mal in Betrieb nehmen.
• Verwendetes Öl : JUKI MACHINE OIL 18
Verwenden Sie keine Ölzusätze, weil dadurch eine Verschlechterung des Schmieröls oder
Maschinenstörungen verursacht werden.
Den Öleinfülldeckel 2mit der Aufschrift "OIL" entfernen, und den Ölbehälter bis zu einem Stand zwischen der oberen und
unteren eingravierten Markierungslinie mit Schmieröl füllen.
<Überprüfen vor Benutzung der Nähmaschine>
1
)Den Ölstandanzeiger 1überprüfen und sicherstellen, dass sich der Schmierölstand zwischen der oberen und unteren Linie
befindet. Wenn der Schmierölstand unter die untere Linie abfällt, ist Schmieröl nachzufüllen.
2) Vergewissern Sie sich, dass Schmieröl aus der Düse des Ölumlauf-Prüffensters 3herauskommt, wenn die Nähmaschine
in Betrieb ist. Falls kein Schmieröl herauskommt, führen Sie den Vorgang unter "Überprüfen und Auswechseln des
Ölfilters" durch. (Siehe Seite 74.)
Vor sicht

– 21 –
〈初次使用縫紉機時〉
出貨時,機油均被排放。因此初次使用縫紉機之前,請一定加入機油。
.使用機油:JUKIMACHINEOIL18
機油添加劑會造成機油的劣化或造成縫紉機的故障,因此請不要使用。
加油時,請卸下標有「OIL」的加油口蓋子 2,把機油加到油尺 1的上下刻線之間。
〈使用縫紉機前的檢查〉
1) 檢查油尺 1,請確認油量是否在上下 2 根刻線之間。如果油量比下線還低時,請補加機油。
2) 轉動縫紉機,從機油椒環確認窗3確認是否機油從噴嘴噴出來。如果沒有機油噴出時,請進行「機油過濾器的檢
查和更換」(參照 74 頁)。
注 意
<Lors de la première utilisation de la machine>
La machine est livrée sans huile lubrifiante à l’intérieur. Mettre impérativement de l’huile lubrifiante avant la première
utilisation de la machine.
• Huile préconisée : JUKI MACHINE OIL 18
Ne pas utiliser d’additif d’huile car ceci dégraderait l’huile et causerait des dommages à la machine.
Retirer le bouchon d’orifice d’huile 2portant la mention “OIL” et remplir le réservoir d’huile avec de l’huile lubrifiante jusqu’à
un niveau compris entre les traits de repère supérieur et inférieur.
<Vérification avant l’utilisation de la machine>
1) Vérifier la jauge d’huile 1et s’assurer que le niveau d’huile lubrifiante se trouve entre les traits supérieur et inférieur.
Lorsque le niveau d’huile descend sous le trait inférieur, faire l’appoint d’huile lubrifiante.
2) S’assurer que l’huile lubrifiante sort par la buse du hublot de contrôle de circulation d’huile 3lorsque la machine tourne. Si
l’huile lubrifiante ne sort pas, effectuer le “Contrôle et remplacement du filtre à huile”. (Voir page 74.)
Atten tion
<Cuando la máquina de coser se usa por primera vez>
El aceite lubricante se ha extraído al tiempo de la entrega. Cerciórese de suministrar aceite lubricante antes de usar por
primera vez la máquina de coser.
• Aceite a usar: JUKI MACHINE OIL 18
No use ningún agente adicional al aceite porque se corre el peligro de deteriorar el aceite lubricante causando
problemas en la máquina de coser.
Retire la tapa 2del agujero de aceite que lleva la marca “OIL” (aceite) y llene el depósito con aceite lubricante hasta el nivel entre
las líneas demarcadoras grabadas superior e inferior.
<Verificaciones antes de usar la máquina de coser>
1) Revise el manómetro de aceite 1y asegúrese de que el nivel del aceite lubricante se encuentre entre las líneas
superior e inferior. Cuando el nivel del aceite lubricante se encuentre por debajo de la línea inferior, rellene aceite
lubricante.
2) Asegúrese de que el aceite lubricante fluya de la boquilla de la mirilla de verificación de circulación de aceite 3cuando se gira
la máquina de coser. En caso de que no fluya el aceite lubricante, ejecute el procedimiento de “Inspección y reemplazo del
filtro de aceite”. (Vea la página 74.)
Aten ción
<Quando la macchina per cucire viene messa in funzione per la prima volta>
L’olio lubrificante è stato tolto al momento della consegna. Non mancare di rifornire l’olio lubrificante prima di mettere in
funzione la macchina per cucire per la prima volta.
• Olio usato : JUKI MACHINE OIL 18
Non usare addittivo per olio poiché saranno causati deterioramento dell’olio lubrificante o guasti alla
macchina.
Rimuovere il tappo del foro dell'olio 2sul quale "OIL" è indicato e riempire serbatoio dell'olio con olio lubrificante fino al
livello tra le linee di riferimento superiore e inferiore.
<Controllo da effettuare prima di usare la macchina per cucire>
1) Controllare l'indicatore di livello dell'olio 1e assicurarsi che il livello dell'olio lubrificante sia tra le due linee superiore e
inferiore. Quando il livello dell'olio lubrificante scende al di sotto della linea inferiore, rabboccare con olio lubrificante.
2) Assicurarsi che olio lubrificante esca fuori dall'ugello dell'indicatore visivo della circolazione dell'olio 3quando la macchina
per cucire viene fatta girare. Quando olio lubrificante non esce fuori, effettuare "Ispezione e sostituzione del filtro dell'olio".
(Vedere la pagina 74.)
Atten zione

– 22 –
初めて使用するときや長期間使用されなかったときは、
必ず針棒 4に潤滑油を 2 〜 3 滴注油してください。
潤滑油は JUKIMACHINEOIL18 をご使用ください。
When you operate the sewing machine for the first time or
after an extended period of disuse, be sure to apply 2 to 3
drops of lubricating oil to needle bar 4.
For the lubricating oil, use JUKI MACHINE OIL 18.
Wenn Sie die Nähmaschine zum ersten Mal oder nach
längerer Nichtbenutzung in Betrieb nehmen, geben Sie
unbedingt 2 bis 3 Tropfen Schmieröl auf die Nadelstange
4.
Verwenden Sie als Schmieröl JUKI MACHINE OIL 18.
Avant d’utiliser la machine pour la première fois ou après une longue interruption de service, mettre 2 ou 3 gouttes
d’huile lubrifiante sur la barre à aiguille 4.
Comme huile lubrifiante, utiliser de la JUKI MACHINE OIL 18.
Cuando utilice la máquina por primera vez o después de un período prolongado de desuso, asegúrese de aplicar de 2
a 3 gotas de aceite lubricante a la barra de agujas 4.
Utilice el ACEITE DE MÁQUINA JUKI 18 como aceite lubricante.
Quando la macchina per cucire viene attivata per la prima volta dopo l'installazione o dopo un lungo periodo di inattività,
aver cura di applicare 2 o 3 gocce di olio lubrificante alla barra ago 4.
Per l'olio lubrificante, usare JUKI MACHINE OIL 18.
初次使用時或較長時間沒有使用縫紉機時,請一定向針桿 4滴2∼3滴機油。
請一定使用 JUKIMACHINEOIL18 機油。
2. 注油について / Oiling / Ölen / Huilage / Mode de aplicar el aceite / Lubrificazione /
關於加油
注意:
ミシンの不意の起動による人身の損傷を防ぐため、電源を切り、モータの回転が止まったことを確認してから行なってください。
WARNING :
To protect against possible personal injury due to abrupt start of the machine, be sure to start the following
work after turning the power off and ascertaining that the motor is at rest.
WARNUNG :
Um durch plötzliches Anlaufen der Nähmaschine verursachte Verletzungen zu vermeiden, führen Sie die
folgende Arbeit erst aus, nachdem Sie den Netzschalter ausgeschaltet und sich vergewissert haben, daß
der Motor vollkommen stillsteht.
AVERTISSEMENT :
Pour ne pas risquer des blessures causées par une brusque mise en marche de la machine, toujours la
mettre hors tension et s’assurer que le moteur est au repos avant d’effectuer les opérations suivantes.
¡AVISO!
Para protegerse contra posibles lesiones personales debido a un arranque brusco de la máquina de coser,
cerciórese de comenzar el siguiente trabajo después de desconectar la corriente y de estar seguro que el
motor está completamente parado.
AVVERTIMENTO :
Per evitare possibili ferimenti causati dall’avvio improvviso della macchina per cucire, prima di effettuare
le seguenti operazioni spegnere l’interruttore dell’alimentazione ed assicurarsi che il motore abbia
completamente cessato di ruotare.
注意 :
為了防止突然啟動造成人身事故,請關掉電源,確認馬達確實停止轉動後再進行。
4

– 23 –
本製品は、エスレン装置が標準装備されています。高速
縫製および化繊糸、化繊生地を使用する場合は、糸切れ、
目飛び防止のため、エスレン装置を使用してください。
使用する油は、シリコンオイル(ジメチルシリコン)です。
エスレンタンク 1のふた 2を開き、針糸、針先、エス
レン装置にシリコンオイルが入っているか確認してくだ
さい。不足しているときは、シリコンオイル(ジメチルシ
リコン)を補給してください。
シリコンオイルがエスレン装置以外の部
品に付着したときは、必ず拭き取ってく
ださい。付着したままにしておくと、ミシ
ンの故障の原因になります。
3. エスレン装置について/ Silicon oil lubricating unit / Silikonöl-Schmiereinheit
Dispositif de lubrification à huile de silicone
Unidad para lubricación con aceite de silicona
Unità di lubrificazione ad olio di silicone / 線冷卻裝置
1
Cau tion Vor sicht
Diese Nähmaschine ist serienmäßig mit einer Silikonöl-
Schmiereinheit ausgestattet. Wenn Sie mit hoher
Geschwindigkeit nähen oder Synthetikgarn oder
Synthetikstoff verwenden, ist die Verwendung der Silikonöl-
Schmiereinheit zu empfehlen, um Fadenbruch oder
Stichauslassen zu verhüten. Für diese Einheit wird Silikonöl
(Dimethylsilikon) verwendet.
Die Deckel 2der Silikonölbehälter 1öffnen und prüfen, ob
Silikonöl für den Nadelfaden und die Nadelspitze in den
Behältern vorhanden ist.
Falls der Ölstand unzureichend ist, füllen Sie Öl
(Dimethylsilikon) nach.
Wenn Silikonöl an anderen Teilen außer
der Silikonöl-Schmiereinheit haftet,
wischen Sie es ab. Falls die Teile, an
denen Silikonöl haftet, nicht
abgewischt werden, kann es zu
Nähmaschinenstörungen kommen.
Cette machine est équipée en standard d’un dispositif de
lubrification à huile de silicone.
Utiliser le dispositif de lubrification à huile de silicone pour
empêcher une cassure du fil ou un saut de points lors d’une
couture à grande vitesse ou avec du fil ou du tissu
synthétique.
Huile de silicone utilisée (silicone diméthyl).
Ouvrir le couvercle 2du conteneur de silicone 1et s’assurer
que l’huile silicone atteint le fil d’aiguille, la pointe de l’aiguille
et l’unité de lubrification à huile silicone. Si l’huile silicone
est insuffisante en ces points, en remettre (silicone diméthyl)
S’il y a de l’huile de silicone sur des
pièces autres que le dispositif de
lubrification à huile de silicone, les
essuyer. Ne pas laisser d’huile de
silicone sur ces pièces car ceci pourrait
causer une anomalie de la machine.
Atten tion
Esta máquina de coser viene provista, como estándar, con
la unidad lubricante con aceite de silicona.
En el caso de coser a alta velocidad, o de usar hilos químicos
o materiales químicos, use la unidad lubricante con aceite
de silicona para evitar rotura de hilo o salto de puntada. El
aceite a usar es el aceite de silicona (silicona dimetílica).
Abra la cubierta 2del contenedor de silicona 1y cerciórese
de que el aceite de silicona entra en el hilo de la aguja, en la
punta de la aguja y en la unidad lubricante de aceite de
silicona. En caso de que el aceite de silicona sea insuficiente
ahí, rellene (silicona dimetílica).
Cuando el aceite de silicona se adhiere a
componentes que no sean la unidad
lubricante de aceite de silicona, hay que
limpiarlos sin falta. Si estos componentes
a los que se ha adherido aceite de silicona
se mantienen sin limpiarlos quitando bien
el aceite, aparecerán problemas en la
máquina de coser.
Aten ción
1
2
2
This sewing machine is provided with the silicon oil lubricating
unit as standard.In case of sewing at a high speed, or using
chemical thread or chemical fabric, use the silicon oil
lubricating unit to prevent thread breakage or stitch skipping.
Oil used is silicon oil (dimethyl silicon).
Open cover 2of silicon container 1and make sure that
silicon oil enters needle thread, needle tip and silicon oil
lubricating unit. If silicon oil is insufficient there, supply it
(dimethyl silicon).
When silicon oil adhered to the components
other than the silicon oil lubricating unit, be
sure to wipe it out. If the components to which
silicon oil adhered are kept without wiping
out the oil, sewing machine trouble will be
caused.

– 24 –
Questa macchina per cucire è dotata di unità di lubrificazione
ad olio di silicone come standard.
In caso della cucitura ad alta velocità, o quando si usa il filo
sintetico o tessuto sintetico, usare l’unità di lubrificazione ad
olio di silicone per prevenire rottura del filo o salti di punto.
L’olio usato è olio di silicone (silicone dimetilico)
Aprire il coperchio 2del contenitore del silicone 1e assicurarsi
che esista olio di silicone nell'unità di lubrificazione ad olio di silicone
per filo dell'ago e punta dell'ago. Se olio di silicone è insufficiente,
rifornirli di olio di silicone (silicone dimetilico).
Quando olio di silicone è aderito ai
componenti tranne l’unità di
lubrificazione ad olio di silicone, non
mancare di pulirlo. Se i componenti ai
quali olio di silicone è aderito sono
lasciati senza pulire l’olio, saranno
causati guasti alla macchina per
cucire.
Atten zione
本產品標準裝備有線冷卻裝置。高速縫製以及使用化纖
線、化纖布料時,為防止斷線、跳線,請使用線冷卻裝
置。
使用的油是珪油(二甲基珪)。
打開冷卻槽 1的蓋子 2,確認裡面是否有機線、針頭、
硅膠油。如果油不夠時,請補加硅膠油(二甲基硅)。
珪油如果沾附到線冷卻裝置以外的零件上,
請一定擦乾淨。如果不擦乾淨,就會使縫紉
機發生故障。
55
55
5. ミシンの使い方/ OPERATION / BETRIEB / UTILISATION
OPERACION / FUNZIONAMENTO / 縫紉機的使用方法
1. 針について / Needle / Nadel / Aiguille / Aguja / Ago / 關於縫紉機針
本製品で使用する針は、UY128GAS です。針の番手は縫製
条件に合わせて適切な針を選定してください。
日本番手 9 10 11 12 14
ドイツ番手 65 70 75 80 90
The needle used for this sewing machine is UY128GAS.
For the needle No., select a proper needle in accordance with the
sewing conditions.
Japan No. 9 10 11 12 14
German No. 65 70 75 80 90
Die für diese Nähmaschine verwendete Nadel ist UY128GAS.
Wählen Sie je nach den Nähbedingungen eine Nadel mit geeigneter
Feinheitsnummer.
Japanische Nr. 9 10 11 12 14
Deutsche Nr. 65 70 75 80 90
L’aiguille utilisée pour cette machine est une UY128GAS.
Comme numéro d’aiguille, sélectionner une aiguille adaptée aux
conditions de couture.
N°japonais 9 10 11 12 14
Nº allemand 65 70 75 80 90
La aguja que se utiliza en esta máquina de coser es UY128GAS..
En cuanto al No. de la aguja, seleccione la aguja apropiada de
acuerdo con las condiciones de cosido.
No. de Japón 9 10 11 12 14
No. de Alemania
65 70 75 80 90
L'ago usato per questa macchina per cucire è UY128GAS.
Per il No. di ago, selezionare un ago corretto a seconda delle
condizioni di cucitura.
No. giapponese 9 10 11 12 14
No. tedesco 65 70 75 80 90
本產品使用的縫紉機針是 UY128GAS 。
機針的針號應根據縫製條件來適當地選擇。
日本針號 910111214
德國針號 65 70 75 80 90
注 意

– 25 –
2. 針の取り付け方/ Attaching the needle / Anbringen der Nadel / Pose de l’aiguille
Modo de colocar la aguja / Posizionamento dell’ago / 機針的安裝方法
注意:
ミシンの不意の起動による人身の損傷を防ぐため、電源を切り、モータの回転が止まったことを確認してから行なってください。
WARNING :
To protect against possible personal injury due to abrupt start of the machine, be sure to start the following
work after turning the power off and ascertaining that the motor is at rest.
WARNUNG :
Um durch plötzliches Anlaufen der Nähmaschine verursachte Verletzungen zu vermeiden, führen Sie die
folgende Arbeit erst aus, nachdem Sie den Netzschalter ausgeschaltet und sich vergewissert haben, daß
der Motor vollkommen stillsteht.
AVERTISSEMENT :
Pour ne pas risquer des blessures causées par une brusque mise en marche de la machine, toujours la
mettre hors tension et s’assurer que le moteur est au repos avant d’effectuer les opérations suivantes.
¡AVISO!
Para protegerse contra posibles lesiones personales debido a un arranque brusco de la máquina de coser,
cerciórese de comenzar el siguiente trabajo después de desconectar la corriente y de estar seguro que el
motor está completamente parado.
AVVERTIMENTO :
Per evitare possibili ferimenti causati dall’avvio improvviso della macchina per cucire, prima di effettuare
le seguenti operazioni spegnere l’interruttore dell’alimentazione ed assicurarsi che il motore abbia
completamente cessato di ruotare.
注意 :
為了防止突然啟動造成人身事故,請關掉電源,確認馬達確實停止轉動後再進行。
1)ドライバーで針1の止めねじ2をゆるめてください。
2)新しい針を、えぐりが奥向きになるように、針留め
3の穴の奥まで差し込んでください。
3)針の止めねじ 2を締め付けてください。
1) Loosen setscrew 2of needle 1with a screwdriver.
2) Hold the new needle with indented part facing to the rear
and insert it into the hole in needle clamp 3until the end
of hole is reached.
3) Securely tighten setscrew 2of the needle.
1) Die Klemmschraube 2der Nadel 1mit einem
Schraubendreher lösen.
2) Die neue Nadel so halten, dass ihre Hohlkehle nach
hinten zeigt, und dann bis zum Anschlag in die Bohrung
der Nadelklemme 3einführen.
3) Die Klemmschraube 2der Nadel fest anziehen.
1) Desserrer la vis de fixation 2de l’aiguille 1avec un
tournevis.
2) Tenir la nouvelle aiguille avec sa saignée tournée vers l’arrière
et l’introduire à fond dans l’orifice du pince-aiguille 3.
3) Serrer à fond la vis de fixation 2de l’aiguille.
1) Afloje el tornillo 2de la aguja 1con un destornillador.
2) Sostenga la nueva aguja con su parte indentada mirando hacia atrás e insértela en el agujero del sujetador 3de la
aguja, hasta que llegue al fin del agujero.
3) Apriete bien el tornillo 2de la aguja.
1) Allentare la vite di fissaggio 2dell’ago 1con un cacciavite.
2) Tenere l'ago nuovo con la parte incava volta verso il dietro e inserirlo nel foro nel morsetto dell'ago 3finché il fondo
del foro venga raggiunto.
3) Stringere saldamente la vite di fissaggio 2dell’ago.
1) 用螺絲刀擰鬆機針 1的固定螺絲 2。
2) 把新縫紉機針的凹部朝向裡側,然後紳紳地插進針座 3的孔裡。
3) 然後請擰緊機針固定螺絲 2。
1
2
3
[
エグリ部分
Scarf
Hohlkehle
Creux
Partes indentadas
Parti intaccate
凹槽
○
○×
×
Table of contents
Other JUKI Sewing Machine manuals

JUKI
JUKI DLN-9010A User manual

JUKI
JUKI MO-103 User manual

JUKI
JUKI PLK-J4040R User manual

JUKI
JUKI LH-4128 User manual

JUKI
JUKI MO-634DEV User manual

JUKI
JUKI LZ-2290A/IP-110A/SC-915 User manual

JUKI
JUKI MO-1000 User manual

JUKI
JUKI DDL-5550N-7 User manual

JUKI
JUKI DDL-5550N-7 User manual

JUKI
JUKI LH-3528 User manual