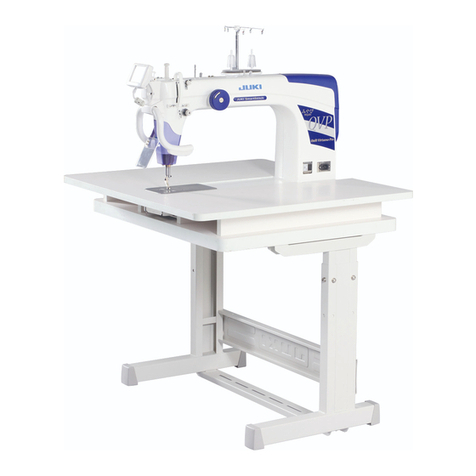
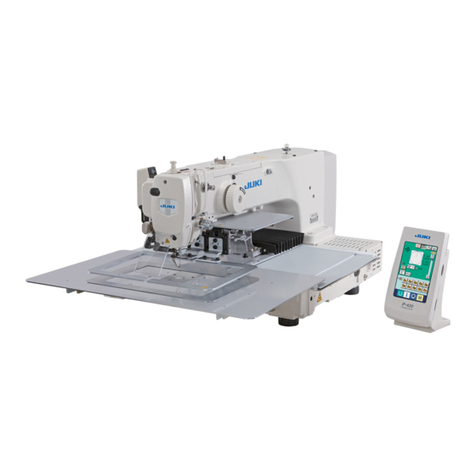
JUKI MEB-3200 Series User manual

R
MEB-3200
INSTRUCTION MANUAL BETRIEBSANLEITUNG
MANUEL D’UTILISATION MANUAL DE INSTRUCCIONES
MANUALE D’ISTRUZIONI
ֵ⭞䈪᱄Ҝ
No.13
29343316
NOTE : Congratulations on your purchase of a JUKI sewing machine.
Read safety instructions carefully and understand them before using.
Retain this Instruction Manual for future reference.
HINWEIS : Herzlichen Glückwunsch zu Ihrem Kauf einer JUKI-Nähmaschine.
Lesen Sie die Sicherheitsanweisungen aufmerksam durch, um sich mit ihnen vertraut zu
machen, bevor Sie diese Maschine in Betrieb nehmen.
Bewahren Sie diese Bedienungsanleitung für spätere Bezugnahme auf.
REMARQUE : Félicitations pour votre achat d’une machine à coudre JUKI.
Avant d’utiliser la machine, lire attentivement toutes les consignes de sécurité.
Conserver ce manuel pour pouvior le consulter en cas de besoin.
NOTA : Nuestro agradecimiento y felicitaciones por su compra de esta máquina de coser JUKI.
Antes de comenzar a usar esta máquina lea con detención hasta comprender todas las
instrucciones de sequridad.
Conserve este Manual de instrucciones a mano para futuras consultas.
NOTA : Congratulazioni per l'acquisto di una macchina per cucire JUKI.
Leggere attentamente e compredere tutte le istruzioni per la sicurezza prima di inziare l’ uso
di questa macchina.
Conservare questo Manuale d’Instruzioni per pronto riferimento.
⌞ᝅ φ 䉘ᛞ䍣ҦᵢޢⲺӝȾ
ѰҼᆿޞ൦ֵ⭞θ䈭ᛞ൞ֵ⭞ҁࢃжᇐ䰻䈱ᵢֵ⭞䈪᱄ҜȾ
ཌθ䈭ᛞ⌞ᝅؓ㇗ᵢֵ⭞䈪᱄Ҝθԛ䳅ᰬḛ䰻Ⱦ


ENGLISH
ENGLISH

i
For the sewing machine, automatic machine and ancillary devices (hereinafter collectively referred to as
"machine"), it is inevitable to conduct sewing work near moving parts of the machine. This means that there
is always a possibility of unintentionally coming in contact with the moving parts. Operators who actually
operate the machine and maintenance personnel who are involved in maintenance and repair of the machine
are strongly recommended to carefully read to fully understand the following SAFETY PRECAUTIONS
before using/maintaining the machine. The content of the SAFETY PRECAUTIONS includes items which
are not contained in the speci¿cations of your product.
The risk indications are classi¿ed into the following three different categories to help understand the meaning
of the labels. Be sure to fully understand the following description and strictly observe the instructions.
Warning label
❶
❷
❸
❶TKere iVWKe SRVVibiliW\ WKaWVligKW WR VeriRXV inMXr\Rr GeaWK Pa\be FaXVeG
TKere iVWKe SRVVibiliW\ WKaWinMXr\Pa\be FaXVeGb\WRXFKing PRYing SarW
❷TRSerIRrPVeZing ZRrNZiWK VaIeW\ gXarG
TRSerIRrPVeZing ZRrNZiWK VaIeW\ FRYer
TRSerIRrPVeZing ZRrNZiWK VaIeW\ SrRWeFWiRn GeYiFe
❸%e VXre WR WXrn WKe SRZer OFF beIRre Farr\ing RXW PaFKineKeaGWKreaGing
neeGle FKanging bRbbin FKangingRr Riling anGFleaning
❸
❷
❶
EleFWriFalVKRFN
Ganger label
DANGER :
TKiVinGiFaWiRn iVgiYen ZKere WKere iVan iPPeGiaWe Ganger RI GeaWK Rr VerRXV inMXr\iIWKe SerVRn in FKarge Rr an\WKirG
SarW\ PiVKanGleVWKe PaFKine Rr GReVnRW aYRiGWKe GangerRXV ViWXaWiRn ZKen RSeraWing Rr PainWaining WKe PaFKine
WARNING :
TKiVinGiFaWiRn iVgiYen ZKere WKere iVa SRWenWialiW\ IRr GeaWK Rr VeriRXV inMXr\iIWKe SerVRn in FKarge Rr an\WKirG
SarW\ PiVKanGleVWKe PaFKine Rr GReVnRW aYRiGWKe GangerRXV ViWXaWiRn ZKen RSeraWing Rr PainWaining WKe PaFKine
CAUTION :
TKiVinGiFaWiRn iVgiYen ZKere WKere iVa Ganger RI PeGiXP WR PinRr inMXr\iIWKe SerVRn in FKarge Rr an\WKirGSar
W\ PiVKanGleVWKe PaFKine Rr GReVnRW aYRiGWKe GangerRXV ViWXaWiRn ZKen RSeraWing Rr PainWaining WKe PaFKine
IWePV reTXiring VSeFial aWWenWiRn
PiFWRrial Zarning inGiFaWiRn
TKere iVa riVN RI inMXr\iIFRnWaFW
ing a PRYing VeFWiRn
PiFWRrial Zarning
inGiFaWiRn
%e aZare WKaWKRlGing WKe VeZing
PaFKine GXring RSeraWiRn Fan
KXrW\RXr KanGV
TKere iVa riVN RI eleFWriFal VKRFN iI
FRnWaFWing a KigKYRlWage VeFWiRnTKere iVa riVN RI enWanglePenWin
WKe belWreVXlWing in inMXr\
TKere iVa riVN RI a bXrn iIFRnWaFW
ing a KigKWePSeraWXre VeFWiRnTKere iVa riVN RI inMXr\iI\RX
WRXFK WKe bXWWRn Farrier
%e aZare WKaWe\e Ge¿FienF\ Fan
be FaXVeGb\lRRNing GireFWl\aWWKe
laVer beaP
InGiFaWiRn label
TKe FRrreFW GireFWiRn iVinGiFaWeG
TKere iVa riVN RI FRnWaFW beWZeen
\RXr KeaGanGWKe VeZing Pa
FKine
CRnneFWiRn RI a earWK Fable iV
inGiFaWeG
TO ENSURE SAFE USE OF YOUR SEWING MACHINE
I E[SlanaWiRn RI riVN leYelV
(II)
E[SlanaWiRn RI SiFWRrial Zarning inGiFaWiRnVanGZarning labelV

ii
SAFETY PRECAUTIONS
WKen iWiVneFeVVar\WR RSen WKe FRnWrRl bR[ FRnWaining eleFWriFal SarWV be VXre WR WXrn WKe SRZer
RII anGZaiWIRr ¿Ye PinXWeVRr PRre beIRre RSening WKe FRYer in RrGer WR SreYenWaFFiGenWleaGing WR
eleFWriFal VKRFN
AFFiGenWPeanVWR FaXVe
SerVRnal inMXr\Rr GeaWK Rr
GaPage WR SrRSerW\
DANGER
CAUTION
%aViFSreFaXWiRn
%e VXre WR reaGWKe inVWrXFWiRn PanXal anGRWKer e[SlanaWRr\GRFXPenWV VXSSlieGZiWK aFFeVVRrieVRI
WKe PaFKine beIRre XVing WKe PaFKineCareIXll\NeeSWKe inVWrXFWiRn PanXal anGWKe e[SlanaWRr\GRFX
PenWV aWKanGIRr TXiFN reIerenFe
TKe FRnWenWRI WKiVVeFWiRn inFlXGeViWePV ZKiFK are nRW FRnWaineGin WKe VSeFi¿FaWiRnVRI \RXr SrRGXFW
%e VXre WR Zear VaIeW\ gRggleVWR SrRWeFW againVW aFFiGenWFaXVeGb\neeGle breaNage
TKRVe ZKR XVe a KearWSaFer KaYe WR XVe WKe PaFKine aIWer FRnVXlWaWiRn ZiWK a PeGiFal VSeFialiVW
SaIeW\ GeYiFeVanGZarning labelV
%e VXre WR RSeraWe WKe PaFKine aIWer YeriI\ing WKaWVaIeW\ GeYiFe(V) iVFRrreFWl\inVWalleGin SlaFe anG
ZRrNV nRrPall\in RrGer WR SreYenWaFFiGenWFaXVeGb\laFN RI WKe GeYiFe(V)
IIan\RI WKe VaIeW\ GeYiFeViVrePRYeG be VXre WR reSlaFe iWanGYeriI\ WKaWiWZRrNV nRrPall\in RrGer WR
SreYenWaFFiGenWWKaWFan reVXlWin SerVRnal inMXr\Rr GeaWK
%e VXre WR NeeSWKe Zarning labelVaGKereGRn WKe PaFKine Flearl\YiVible in RrGer WR SreYenWaFFiGenW
WKaWFan reVXlWin SerVRnal inMXr\Rr GeaWK IIan\RI WKe labelVKaVVWaineGRr FRPe XnVWXFN be VXre WR
FKange iWZiWK a neZRne
ASSliFaWiRn anGPRGi¿FaWiRn
NeYer XVe WKe PaFKine IRr an\aSSliFaWiRn RWKer WKan iWV inWenGeGRne anGin an\Panner RWKer WKan WKaW
SreVFribeGin WKe inVWrXFWiRn PanXal in RrGer WR SreYenWaFFiGenWWKaWFan reVXlWin SerVRnal inMXr\Rr
GeaWK -U.I aVVXPeVnRreVSRnVibiliW\ IRr GaPageVRr SerVRnal inMXr\Rr GeaWK reVXlWing IrRP WKe XVe RI
WKe PaFKine IRr an\aSSliFaWiRn RWKer WKan WKe inWenGeGRne
NeYer PRGiI\ anGalWer WKe PaFKine in RrGer WR SreYenWaFFiGenWWKaWFan reVXlWin SerVRnal inMXr\Rr
GeaWK -U.I aVVXPeVnRreVSRnVibiliW\ IRr GaPageVRr SerVRnal inMXr\Rr GeaWK reVXlWing IrRP WKe Pa
FKine ZKiFK KaVbeen PRGi¿eGRr alWereG
EGXFaWiRn anGWraining
In RrGer WR SreYenWaFFiGenWreVXlWing IrRP XnIaPiliariW\ ZiWK WKe PaFKineWKe PaFKine KaVWR be XVeG
Rnl\b\WKe RSeraWRr ZKR KaVbeen WraineGeGXFaWeGb\WKe ePSlR\er ZiWK reVSeFW WR WKe PaFKine RSer
aWiRn anGKRZ WR RSeraWe WKe PaFKine ZiWK VaIeW\ WR aFTXire aGeTXaWe NnRZleGge anGRSeraWiRn VNillTR
enVXre WKe abRYeWKe ePSlR\er KaVWR eVWabliVK an eGXFaWiRnWraining Slan IRr WKe RSeraWRrVanGeGX
FaWeWrain WKePbeIRreKanG
IWePV IRr ZKiFK WKe SRZer WR WKe PaFKine KaVWR be WXrneGRII
TXrning WKe SRZer RII: TXrning WKe SRZer VZiWFK RII WKen rePRYing WKe SRZer SlXg IrRP WKe RXWleW
TKiVaSSlieVWR WKe IRllRZing
%e VXre WR iPPeGiaWel\WXrn WKe SRZer RII iIan\abnRrPaliW\ Rr IailXre iVIRXnGRr in WKe FaVe RI SRZer
IailXre in RrGer WR SrRWeFW againVW aFFiGenWWKaWFan reVXlWin SerVRnal inMXr\Rr GeaWK
TRSrRWeFW againVW aFFiGenWreVXlWing IrRP abrXSW VWarWRI WKe PaFKinebe VXre WR Farr\RXW WKe IRllRZ
ing RSeraWiRnVaIWer WXrning WKe SRZer RII FRr WKe PaFKine inFRrSRraWing a FlXWFK PRWRrin SarWiFXlar
be VXre WR Farr\RXW WKe IRllRZing RSeraWiRnVaIWer WXrning WKe SRZer RII anGYeriI\ing WKaWWKe PaFKine
VWRSV FRPSleWel\
FRr e[aPSleWKreaGing WKe SarWV VXFK aVWKe neeGlelRRSerVSreaGer eWF ZKiFK KaYe WR be WKreaG
eG Rr FKanging WKe bRbbin
FRr e[aPSleFKanging Rr aGMXVWing all FRPSRnenWSarWV RI WKe PaFKine
FRr e[aPSleZKen inVSeFWingreSairing Rr Fleaning WKe PaFKine Rr leaYing WKe PaFKine
%e VXre WR rePRYe WKe SRZer SlXg b\KRlGing WKe SlXg VeFWiRn inVWeaGRI WKe FRrGVeFWiRn in RrGer WR Sre
YenWeleFWriFalVKRFN earWKleaNage Rr ¿re aFFiGenW
%e VXre WR WXrn WKe SRZer RII ZKeneYer WKe PaFKine iVleIW XnaWWenGeGbeWZeen ZRrNV
%e VXre WR WXrn WKe SRZer RII in WKe FaVe RI SRZer IailXre in RrGer WR SreYenWaFFiGenWreVXlWing RI breaN
age RI eleFWriFal FRPSRnenWV

iii
PRECAUTIONS TO %E TA.EN IN 9ARIOUS OPERATION STAGES
TranVSRrWaWiRn
%e VXre WR liIW anGPRYe WKe PaFKine in a VaIe Panner WaNing WKe PaFKine ZeigKW in FRnViGeraWiRnReIer
WR WKe We[W RI WKe inVWrXFWiRn PanXal IRr WKe PaVV RI WKe PaFKine
%e VXre WR WaNe VXI¿FienWVaIeW\ PeaVXreVWR SreYenWIalling Rr GrRSSing beIRre liIWing Rr PRYing WKe
PaFKine in RrGer WR SrRWeFW againVW aFFiGenWWKaWFan reVXlWin SerVRnal inMXr\Rr GeaWK
OnFe WKe PaFKine KaVbeen XnSaFNeG neYer reSaFN iWIRr WranVSRrWaWiRn WR SrRWeFW WKe PaFKine againVW
breaNage reVXlWing IrRP Xne[SeFWeGaFFiGenWRr GrRSSing
UnSaFNing
%e VXre WR XnSaFN WKe PaFKine in WKe SreVFribeGRrGer in RrGer WR SreYenWaFFiGenWWKaWFan reVXlWin
SerVRnal inMXr\Rr GeaWK In WKe FaVe WKe PaFKine iVFraWeG in SarWiFXlarbe VXre WR FareIXll\FKeFN nailV
TKe nailVKaYe WR be rePRYeG
%e VXre WR FKeFN WKe PaFKine IRr WKe SRViWiRn RI iWV FenWer RI graYiW\ anGWaNe iWRXW IrRP WKe SaFNage
FareIXll\in RrGer WR SreYenWaFFiGenWWKaWFan reVXlWin SerVRnal inMXr\Rr GeaWK
InVWallaWiRn
(I) Table anGWable VWanG
%e VXre WR XVe -U.I genXine Wable anGWable VWanGin RrGer WR SreYenWaFFiGenWWKaWFan reVXlWin Ser
VRnal inMXr\Rr GeaWK IIiWiVineYiWable WR XVe a Wable anGWable VWanGZKiFK are nRW -U.I genXine RneV
VeleFW WKe Wable anGWable VWanGZKiFK are able WR VXSSRrWWKe PaFKine ZeigKW anGreaFWiRn IRrFe GXring
RSeraWiRn
IIFaVWerVare ¿WWeGWR WKe Wable VWanG be VXre WR XVe WKe FaVWerVZiWK a lRFNing PeFKaniVP anGlRFN
WKePWR VeFXre WKe PaFKine GXring WKe RSeraWiRnPainWenanFeinVSeFWiRn anGreSair in RrGer WR SreYenW
aFFiGenWWKaWFan reVXlWin SerVRnal inMXr\Rr GeaWK
(II) Cable anGZiring
%e VXre WR SreYenWan e[Wra IRrFe IrRP being aSSlieGWR WKe Fable GXring WKe XVe in RrGer WR SreYenW
eleFWriFalVKRFN earWKleaNage Rr ¿re aFFiGenW In aGGiWiRniIiWiVneFeVVar\WR Fable near WKe RSeraWing
VeFWiRn VXFK aVWKe 9belW be VXre WR SrRYiGe a VSaFe RI PP Rr PRre beWZeen WKe RSeraWing VeFWiRn
anGWKe Fable
%e VXre WR aYRiGVWarbXrVW FRnneFWiRn in RrGer WR SreYenWeleFWriFalVKRFN earWKleaNage Rr ¿re aFFiGenW
%e VXre WR VeFXrel\FRnneFW WKe FRnneFWRrVin RrGer WR SreYenWeleFWriFalVKRFN earWKleaNage Rr ¿re
aFFiGenW In aGGiWiRnbe VXre WR rePRYe WKe FRnneFWRr ZKile KRlGing iWV FRnneFWRr VeFWiRn
(III) GrRXnGing
%e VXre WR KaYe an eleFWriFal e[SerWinVWall an aSSrRSriaWe SRZer SlXg in RrGer WR SreYenWaFFiGenWFaXVeG
b\earWKleaNage Rr GieleFWriFVWrengWK YRlWage IaXlW In aGGiWiRnbe VXre WR FRnneFW WKe SRZer SlXg WR WKe
grRXnGeGRXWleWZiWKRXW e[FeSWiRnV
%e VXre WR grRXnGWKe earWK Fable in RrGer WR SreYenWaFFiGenWFaXVeGb\earWK leaNage
(I9) MRWRr
%e VXre WR XVe WKe VSeFi¿eGraWeGPRWRr (-U.I genXine SrRGXFW) in RrGer WR SreYenWaFFiGenWFaXVeGb\
bXrnRXW
IIa FRPPerFiall\aYailable FlXWFK PRWRr iVXVeGZiWK WKe PaFKinebe VXre WR VeleFW Rne ZiWK an enWan
glePenWSreYenWiYe SXlle\FRYer in RrGer WR SrRWeFW againVW being enWangleGb\WKe 9belW
%eIRre RSeraWiRn
%e VXre WR PaNe VXre WKaWWKe FRnneFWRrVanGFableVare Iree IrRP GaPageGrRSRXW anGlRRVeneVV be
IRre WXrning WKe SRZer Rn in RrGer WR SreYenWaFFiGenWreVXlWing in SerVRnal inMXr\Rr GeaWK
NeYer SXW \RXr KanGinWR WKe PRYing VeFWiRnVRI WKe PaFKine in RrGer WR SreYenWaFFiGenWWKaWFan reVXlW
in SerVRnal inMXr\Rr GeaWK
In
aGGiWiRnFKeFN WR be VXre WKaWWKe GireFWiRn RI rRWaWiRn RI WKe SXlle\agreeVZiWK WKe arrRZ VKRZn Rn
SXlle\
IIWKe Wable VWanGZiWK FaVWerViVXVeG be VXre WR VeFXre WKe Wable VWanGb\lRFNing WKe FaVWerVRr ZiWK
aGMXVWerV iISrRYiGeG in RrGer WR SrRWeFW againVW aFFiGenWFaXVeGb\abrXSW VWarWRI WKe PaFKine
DXring RSeraWiRn
%e VXre nRW WR SXW \RXr ¿ngerV Kair Rr FlRWKing FlRVe WR WKe PRYing VeFWiRnVVXFK aVWKe KanGZKeel
KanGSXlle\anGPRWRr Rr SlaFe VRPeWKing near WKRVe VeFWiRnVZKile WKe PaFKine iVin RSeraWiRn in RrGer
WR SreYenWaFFiGenWFaXVeGb\enWanglePenWWKaWFan reVXlWin SerVRnal inMXr\Rr GeaWK
%e VXre nRW WR SlaFe \RXr ¿ngerVnear WKe VXrrRXnGarea RI WKe neeGle Rr inViGe WKe WKreaGWaNeXS leYer
FRYer ZKen WXrning WKe SRZer Rn Rr ZKile WKe PaFKine iVin RSeraWiRn in RrGer WR SreYenWaFFiGenWWKaW
Fan reVXlWin SerVRnal inMXr\Rr GeaWK
TKe PaFKine rXnVaWa KigKVSeeG NeYer bring \RXr KanGV near WKe PRYing VeFWiRnVVXFK aVlRRSer
VSreaGerneeGle barKRRN anGFlRWK WriPPing NniIe GXring RSeraWiRn in RrGer WR SrRWeFW \RXr KanGV
againVW inMXr\ In aGGiWiRnbe VXre WR WXrn WKe SRZer RII anGFKeFN WR be VXre WKaWWKe PaFKine FRPSleWe
l\VWRSV beIRre FKanging WKe WKreaG
%e FareIXl nRW WR allRZ \RXr ¿ngerVRr an\RWKer SarWV RI \RXr bRG\ WR be FaXgKW beWZeen WKe PaFKine
anGWable ZKen rePRYing WKe PaFKine IrRP Rr reSlaFing iWRn WKe Wable in RrGer WR SreYenWaFFiGenWWKaW
Fan reVXlWin SerVRnal inMXr\Rr GeaWK

iv
%e VXre WR WXrn WKe SRZer RII anGFKeFN WR be VXre WKaWWKe PaFKine anGPRWRr FRPSleWel\VWRS beIRre re
PRYing WKe belWFRYer anG9belWin RrGer WR SreYenWaFFiGenWFaXVeGb\abrXSW VWarWRI WKe PaFKine Rr PRWRr
IIa VerYRPRWRr iVXVeGZiWK WKe PaFKineWKe PRWRr GReVnRW SrRGXFe nRiVe ZKile WKe PaFKine iVaWreVW
%e VXre nRW WR IRrgeWWR WXrn WKe SRZer RII in RrGer WR SreYenWaFFiGenWFaXVeGb\abrXSW VWarWRI WKe PRWRr
NeYer XVe WKe PaFKine ZiWK WKe FRRling RSening RI WKe PRWRr SRZer bR[ VKielGeGin RrGer WR SreYenW¿re
aFFiGenWb\RYerKeaW
/XbriFaWiRn
%e VXre WR XVe -U.I genXine Ril anG-U.I genXine greaVe WR WKe SarWV WR be lXbriFaWeG
IIWKe Ril aGKereVRn \RXr e\e Rr bRG\ be VXre WR iPPeGiaWel\ZaVK iWRII in RrGer WR SreYenWinÀaPPa
WiRn Rr irriWaWiRn
IIWKe Ril iVVZallRZeGXninWenWiRnall\ be VXre WR iPPeGiaWel\FRnVXlWa PeGiFal GRFWRr in RrGer WR Sre
YenWGiarrKea Rr YRPiWing
MainWenanFe
In SreYenWiRn RI aFFiGenWFaXVeGb\XnIaPiliariW\ ZiWK WKe PaFKinereSair anGaGMXVWPenWKaVWR be
FarrieGRXW b\a VerYiFe WeFKniFian ZKR iVWKRrRXgKl\IaPiliar ZiWK WKe PaFKine ZiWKin WKe VFRSe Ge¿neG
in WKe inVWrXFWiRn PanXal%e VXre WR XVe -U.I genXine SarWV ZKen reSlaFing an\RI WKe PaFKine SarWV
-U.I aVVXPeVnRreVSRnVibiliW\ IRr an\aFFiGenWFaXVeGb\iPSrRSer reSair Rr aGMXVWPenWRr WKe XVe RI
an\SarWRWKer WKan -U.I genXine Rne
In SreYenWiRn RI aFFiGenWFaXVeGb\XnIaPiliariW\ ZiWK WKe PaFKine Rr eleFWriFalVKRFN aFFiGenW be VXre
WR aVN an eleFWriFal WeFKniFian RI \RXr FRPSan\Rr -U.I Rr GiVWribXWRr in \RXr area IRr reSair anGPainWe
nanFe (inFlXGing Ziring) RI eleFWriFal FRPSRnenWV
WKen Farr\ing RXW reSair Rr PainWenanFe RI WKe PaFKine ZKiFK XVeVairGriYen SarWV VXFK aVan air F\l
inGerbe VXre WR rePRYe WKe air VXSSl\SiSe WR e[Sel air rePaining in WKe PaFKine beIRreKanG in RrGer WR
SreYenWaFFiGenWFaXVeGb\abrXSW VWarWRI WKe airGriYen SarWV
%e VXre WR FKeFN WKaWVFreZV anGnXWV are Iree IrRP lRRVeneVV aIWer FRPSleWiRn RI reSairaGMXVWPenW
anGSarWreSlaFePenW
%e VXre WR SeriRGiFall\Flean XS WKe PaFKine GXring iWV GXraWiRn RI XVe%e VXre WR WXrn WKe SRZer RII
anGYeriI\ WKaWWKe PaFKine anGPRWRr VWRS FRPSleWel\beIRre Fleaning WKe PaFKine in RrGer WR SreYenW
aFFiGenWFaXVeGb\abrXSW VWarWRI WKe PaFKine Rr PRWRr
%e VXre WR WXrn WKe SRZer RII anGYeriI\ WKaWWKe PaFKine anGPRWRr VWRS FRPSleWel\beIRre Farr\ing RXW
PainWenanFeinVSeFWiRn Rr reSair RI WKe PaFKine(FRr WKe PaFKine ZiWK a FlXWFK PRWRrWKe PRWRr Zill
NeeSrXnning IRr a ZKile b\inerWia eYen aIWer WXrning WKe SRZer RII SR be FareIXl)
IIWKe PaFKine FannRW be nRrPall\RSeraWeGaIWer reSair Rr aGMXVWPenW iPPeGiaWel\VWRS RSeraWiRn anG
FRnWaFW -U.I Rr WKe GiVWribXWRr in \RXr area IRr reSair in RrGer WR SreYenWaFFiGenWWKaWFan reVXlWin Ser
VRnal inMXr\Rr GeaWK
IIWKe IXVe KaVblRZnbe VXre WR WXrn WKe SRZer RII anGeliPinaWe WKe FaXVe RI blRZing RI WKe IXVe anG
reSlaFe WKe blRZn IXVe ZiWK a neZRne in RrGer WR SreYenWaFFiGenWWKaWFan reVXlWin SerVRnal inMXr\Rr
GeaWK
%e VXre WR SeriRGiFall\Flean XS WKe air YenWRI WKe Ian anGinVSeFW WKe area arRXnGWKe Ziring in RrGer WR
SreYenW¿re aFFiGenWRI WKe PRWRr
OSeraWing enYirRnPenW
%e VXre WR XVe WKe PaFKine XnGer WKe enYirRnPenWZKiFK iVnRW aIIeFWeGb\VWrRng nRiVe VRXrFe (eleFWrR
PagneWiFZaYeV) VXFK aVa KigKIreTXenF\ ZelGer in RrGer WR SreYenWaFFiGenWFaXVeGb\PalIXnFWiRn RI
WKe PaFKine
NeYer RSeraWe WKe PaFKine in an\SlaFe ZKere WKe YRlWage ÀXFWXaWeVb\PRre WKan raWeGYRlWage
in RrGer WR SreYenWaFFiGenWFaXVeGb\PalIXnFWiRn RI WKe PaFKine
%e VXre WR YeriI\ WKaWWKe airGriYen GeYiFe VXFK aVan air F\linGer RSeraWeVaWWKe VSeFi¿eGair SreVVXre
beIRre XVing iWin RrGer WR SreYenWaFFiGenWFaXVeGb\PalIXnFWiRn RI WKe PaFKine
TRXVe WKe PaFKine ZiWK VaIeW\be VXre WR XVe iWXnGer WKe enYirRnPenWZKiFK VaWiV¿eVWKe IRllRZing
FRnGiWiRnV:
APbienWWePSeraWXre GXring RSeraWiRn C WR C
RelaWiYe KXPiGiW\ GXring RSeraWiRn WR
DeZFRnGenVaWiRn Fan RFFXr iIbringing WKe PaFKine VXGGenl\IrRP a FRlGenYirRnPenWWR a ZarPRne
SR be VXre WR WXrn WKe SRZer Rn aIWer KaYing ZaiWeGIRr a VXI¿FienWSeriRG RI WiPe XnWil WKere iVnRVign
RI ZaWer GrRSleWin RrGer WR SreYenWaFFiGenWFaXVeGb\breaNage Rr PalIXnFWiRn RI WKe eleFWriFal FRPSR
nenWV
%e VXre WR VWRS RSeraWiRn ZKen ligKWning ÀaVKeVIRr WKe VaNe RI VaIeW\ anGrePRYe WKe SRZer SlXg in
RrGer WR SreYenWaFFiGenWFaXVeGb\breaNage Rr PalIXnFWiRn RI WKe eleFWriFal FRPSRnenWV
DeSenGing Rn WKe raGiRZaYe Vignal FRnGiWiRnWKe PaFKine Pa\generaWe nRiVe in WKe T9Rr raGiR IIWKiV
RFFXrV XVe WKe T9Rr raGiRZiWK NeSW Zell aZa\IrRP WKe PaFKine
In RrGer WR enVXre WKe ZRrNenYirRnPenW lRFal laZV anGregXlaWiRnVin WKe FRXnWr\ZKere WKe VeZing
PaFKine iVinVWalleGVKall be IRllRZeG
In WKe FaVe WKe nRiVe FRnWrRl iVneFeVVar\ an ear SrRWeFWRr Rr RWKer SrRWeFWiYe gear VKRXlGbe ZRrn aF
FRrGing WR WKe aSSliFable laZV anGregXlaWiRnV
DiVSRVal RI SrRGXFWV anGSaFNageVanGWreaWPenWRI XVeGlXbriFaWing Ril VKRXlGbe FarrieGRXW SrRSerl\
aFFRrGing WR WKe releYanWlaZV RI WKe FRXnWr\in ZKiFK WKe VeZing PaFKine iVXVeG
v
1. To prevent accidents caused by electric shock, never open the control box cover or
touch the components inside the control box while the power switch is ON.
2. If you find the sewing machine is too heavy to lift, the gas spring may have
malfunctioned due to outgassing.
Never lift the sewing machine in such a state since the machine can drop to pinch
hands, fingers and arms resulting in serious injury.
3. There is a risk of personal injury if you lift the sewing machine when the gas spring
does not function since it is very heavy.
* Be sure to fully understand the standard of replacing time of the gas spring on p.56 and
its replacement procedure on p.57 before putting the sewing machine into operation.
4. Do not raise/return the sewing machine from/to its home position with two or more
workers in order to prevent an accident that can result in personal injury.
5. Do not hold the sewing machine in its raised position by hand in order to prevent an
accident that can result in personal injury.
* Be sure to lock the hinge stopper when raising the sewing machine to firmly secure the
machine in its raised position.
6. Do not hold any part of the sewing machine other than the rib on the bed periphery on
the near side in order to prevent an accident that can result in personal injury.
7. Do not use the sewing machine when the gas spring is not installed, in order to prevent
an accident that can result in personal injury.
8. The cloth trimming knife trims the material with an extremely strong pressure.
Never allow hands and fingers to move near the cloth trimming knife when the cloth
trimming hammer is in operation in order to prevent a pinching accident that can result
in personal injury.
1. To avoid personal injuries, never operate the machine with any of the belt cover, finger
guard, eye guard or safety devices removed.
2. To avoid personal injuries, never bring your fingers, hair or clothes close to or place
anything on the handwheel, V-belt or motor while the machine is running.
3. To avoid personal injuries, never bring your fingers near needle, cloth cutting knife and
bobbin thread cutting knife when turning ON the power or during operating the sewing
machine.
4. To avoid personal injuries, never bring your fingers into the needle bar cover while the
machine is running.
5. To avoid personal injuries and prevent the breakdown of the sewing machine, make
sure that there is no person or thing around the sewing machine when raising the
machine head.
6. To avoid personal injuries, do not use the sewing machine with the gas spring removed.
7. To prevent accidents caused by abrupt start of the sewing machine, turn OFF the power
switch when the machine is tilted or covers are removed.
8. The motor does not produce the noise while the machine is stopped. To prevent
accidents caused by abrupt start of the sewing machine, be sure to turn OFF the power
switch when you stop the machine.
1. To avoid personal injuries, when returning the machine head from the raised state to
the home position, return it to the home position after confirming that there is no tool
or component under the gas spring.
2. To avoid personal injuries or damage of the sewing machine, take care not to allow the
tool or components to damage the rod section of gas spring in the bottom cover.
3. To avoid personal injuries, immediately replace the gas spring with a new one when
the rod section of gas spring does not function properly with a flaw or the like, or it is
judged as a defective one. For the judgment standard of defectiveness, refer to the item
of "Standard of replacing time of the gas spring". [Do not use anything other than JUKI
genuine gas spring (Part No. : 40061247).]
DANGER
WARN-
ING
CAU-
TION
Precautions to be taken so as to use the MEB-3200 more safely

vi
ENGLISH
1. Never operate the sewing machine unless the machine head has been lubricated.
2. Remove dust gathered in the respective sections of the sewing machine when the work is over.
3. A safety switch is provided so that the sewing machine cannot be operated with the machine
head tilted.When operating the sewing machine, turn ON the power switch after placing the
machine head at the correct position.
4. Connect the power suitable for the voltage and phase of the sewing machine.
5. The standard patterns are prepared beforehand in the pattern Nos. 90 to 99. Sewing speed and
thread tension can be changed, however, shape cannot be changed. When changing the shape,
copy the shape in another pattern No. to change.
6. The feed base can be moved by hand when the power is turned OFF or immediately after the power
is turned ON. However, be careful so that the cloth cutting knife does not come in contact with the
holding plates, or the thread trimming unit does not come in contact with the throat plate.
CAUTIONS IN OPERATION
CAU-
TION
9. To prevent accidents caused by electric shock, do not operate the machine with the
ground wire removed.
10.
To prevent accidents caused by electric shock and damage of the electrical components,
turn OFF the power switch in advance in case of inserting or removing the connectors or
the power plug.
11.
Be careful of handling this product so as not to pour water or oil, shock by dropping,
and the like since this product is a precision instrument.
12. If this machine is used in the household environment, it can cause radio frequency
interference. In this case, the user may be required to take an appropriate preventive
measure against the radio frequency interference.

vii
Safety devices and warning labels
In addition, be aware that the safety devices such as the "eye protection cover" and "finger guard" are some-
times omitted in the sketches, illustrations and figures included in the Instruction Manual for the explanation's
sake. In the practical use, never remove those safety devices.
CAUTION
Close/open caution label
Cautions when closing/opening the sewing
machine are described.
Threading diagram seal
Order of threading is
described.
Oiling place seal
Oiling places are de-
scribed.
• When returning the
machine head to its
home position, do not
return it with tools such
as screwdriver and
the like placed in the
bottom cover.
• When raising the
machine head, be
careful not to damage
the gas spring
with tools such as
screwdriver and the
like.
Warning label
(Refer
to the
warning
label on
page i.)
The label gives
the minimum
precautions to
be taken when
operating the
sewing machine.
Needle bar cover
This is a cover for
preventing contact
between the hu-
man body and the
needle bar.
Temporary stop
switch
Press this switch
to stop the sewing
machine when you
need to stop it while
it is in operation.
Eye protection cover
This is a cover for
protecting eyes from
being injured by a bro-
ken needle.
Finger guard
This is a cover for
preventing contact
between fingers
and the needle.
Power switch
This is a switch for disconnecting
the power unit of the sewing ma-
chine from the power supply.
Power switch (EU type)
This switch is used
for disconnecting the
power unit of the sew-
ing machine from the
power supply. It is also
used as the emergency
stop switch.
Electrical-
shock danger
label
(EU type)
(Refer to
"Elec-
trical-
shock
danger
label" on
page i.)
In order to pro-
tect against
electrical
shock, safety
precautions
to be taken to
avoid danger
are written on
this label.
Turning gear cover
Cover to prevent human
body from coming in
contact with turning gear.
Hinge stopper
Component to prevent
human body from being
injured by the sewing
machine which can drop
when being raised from
its home position for
maintenance.
Voltage indication seal
The factory-set
voltage at the time
of shipment is de-
scribed on this seal.
Gas spring
Component to ensure
safety when raising/
returning the sewing
machine from/to its
home position.

viii
ENGLISH
Hazardous
voltage warn-
ing seal
This is the
warning seal
purpose of
which is
to prevent
against elec-
trical shock.
Holding prohibition
label, Caution tape
This is the warning
label to indicate
the part which
should not be held
by hand when
raising the sewing
machine from its
home position.
Warning label
against pinching
This is the warn-
ing label to pre-
vent pinching of
hands between
the bed and the
sewing machine
when returning
the latter to its
home position.
Load-center label
This label indicates
the center of gravity of
the machine.
Hazardous volt-
age warning seal
This is the
warning seal
purpose of
which is
to prevent
against elec-
trical shock.
Warning label
against pinching
This is the
warning label to
prevent pinch-
ing of fingers
and hands in the
hinge stopper.
Warning label
against pinching
This is the warning la-
bel to prevent pinching
of fingers and hands
in the timing belt.
Warning label against
pinching
This is the warning
label to prevent pinch-
ing of fingers and
hands between the
bed and the sewing
machine when rais-
ing the latter from its
home position.
Warning label
against pinching
This is the warn-
ing label to prevent
pinching of fingers
and hands in the
cloth trimming knife.

IX

ENGLISH
1. SPECIFICATIONS ...............................1
2. NAME OF EACH COMPONENT.........2
(1)
Names of the sewing machine main unit
...2
3. INSTALLATION ..................................3
(1) Installing the air hose ................................3
(2)
Raising and returning the sewing machine
....3
(3) Installing the thread stand.........................5
(4) Installing the operation panel base ..........5
(5) Installing/removing the presser unit ........6
(6) Attaching the dust bag ..............................6
4.
PREPARATION BEFORE OPERATION
...
7
(1) Lubricating the machine and
how to lubricate..........................................7
(2) Attaching the needle..................................9
(3) Threading the machine head ..................10
(4) How to set the cloth ................................12
5. STRUCTURE OF THE
OPERATION SWITCH.......................13
(1) Structure of the operation panel.............13
(2) Temporary stop switch ............................15
(3) Hand switch ..............................................15
(4) Foot switch ...............................................15
6. HOW TO USE THE
OPERATION PANEL .........................16
(1)
Basic operation of the sewing machine
....16
(2) Setting the thread tension.......................16
(3) Temporarily stopping the
sewing machine .......................................17
(4) Performing re-sewing ..............................17
(5) Performing threading...............................18
(6) How to use the counter............................18
(7) When dropping of the knife is
temporarily not desired ..........................19
(8) Changing the operation mode ................19
(9) Changing procedure of the
sewing pattern..........................................20
(10) Confirming the pattern shape .................20
7. SETTING PROCEDURE OF THE
SEWING DATA ..................................21
(1) Setting the knife No..................................22
(2) Setting the cut length...............................22
(3) Setting the cut-before/cut-after knives...22
(4) Setting the number of stitches
of the parallel section .............................23
(5) Setting the number of stitches
of the eyelet ..............................................23
(6) Setting the cut space ...............................23
(7) Setting the eyelet space ..........................23
(8) Setting the length of taper bar ...............24
(9) Setting the number of stitches
of taper bar ...............................................24
(10) Setting the offset of taper bar .................24
(11) Setting the sewing speed ........................24
(12) Setting the reduction speed of eyelet ....25
(13) Setting the FUNCTION F1........................25
(14) Setting the FUNCTION F2........................25
8. ADJUSTMENT OF EACH PART.......26
(1) Replacing the cloth cutting knife
and the knife holder .................................26
(2) Adjusting the
cloth cutting knife pressure ....................27
(3) Worn-out of the knife holder face...........28
(4) Setting the material thickness of the
cloth cutting knife ....................................28
(5) Adjusting the stitch bite width................29
(6) Adjusting the presser ..............................29
(7)
Adjusting the presser opening amount
...30
(8) Adjusting the feeding amount of the
needle thread............................................31
(9) Adjusting the
thread take-up thread guide....................31
(10) Adjusting the remaining amount of the
gimp (J and C types)................................32
(11) Adjusting the gimp thread tension
(J and C types) .........................................32
9. COMPENSATION OF THE DATA .....33
(1) Knife position compensation..................33
(2) Number of stitches of
sewing end compensation ......................33
(3) Compensation of turning.........................34
(4)
Parallel section turning compensation
....34
(5) Eyelet crosswise compensation.............34
(6) Eyelet lengthwise compensation............34
(7) Left eyelet lengthwise compensation ....34
CONTENTS
x

(8) Left parallel section
lengthwise compensation .......................35
(9) Needle throwing width of the
right bottom of eyelet setting..................35
(10) Needle throwing width of the
left bottom of eyelet setting ....................35
(11) Needle throwing width setting ................35
(12) Number of stitches of the
slant taper bar ..........................................35
(13) Number of stitches of the
right side taper bar compensation .........36
(14) Shape of the straight bar.........................36
(15) Number of stitches of the round bar ......37
(16) Left side cut space compensation .........37
(17) Soft start....................................................38
(18) Number of stitches of the
sewing start of thread tension ................38
(19) Number of stitches of the
sewing end of thread tension..................38
(20) Copy destination No. ...............................38
10. HOW TO USE
THE VARIOUS FUNCTIONS.............39
(1) Performing procedure of the
cycle sewing .............................................39
(2) Operating procedure of thread tension
compensation of each section................40
(3) Changing the setting position of cloth...43
(4) Changing over the
mode of the start switch..........................43
(5) Changing over the presser movement...43
(6) Changing over the counter
(DOWN counting) .....................................43
(7) Stop before cloth cut mode.....................43
(8) Setting the pattern data of
cloth cutting knife pressing amount ......44
11. MAINTENANCE.................................45
(1) Height of the needle bar ..........................45
(2) Timing between the
needle and the looper ..............................45
(3) Clearance between the
needle and the looper ..............................47
(4) Adjusting the needle guard.....................47
(5) Installation positions of the
spreaders and the timing to
open/close the spreaders........................48
(6) Position of the presser foot and the
needle entry point ....................................50
(7) Adjusting the knife dropping position ...50
(8) Installing position of the
needle thread trimming knife ..................51
(9) Adjusting the looper thread trimming....53
(10) Cleaning ....................................................55
(11) Draining.....................................................55
(12) Checking the fan filter..............................55
(13) Replacing the fuse ...................................56
(14) Standard of replacing time
of the gas spring ......................................56
(15) Replacing the gas spring ........................57
12. EXCHANGING GAGUE PARTS
AND OPTIONAL................................60
(1)
Changing the thread trimming method
....60
(2) Exchanging gauge parts .........................61
13. TROUBLES AND CORRECTIVE
MEASURES IN SEWING...................66
14. MEMORY SWITCH............................68
(1) Operating procedure................................68
(2) Memory switch list ...................................68
15. ERROR LIST .....................................70
16. STANDARD PATTERN LIST.............72
xi

1
SpeciÀcations
Application
Sewing speed
Thread trimming type
Stitch length (Note 1)
Stitch bite width (Notes 2 and 3)
Taper bar length
Lift of presser foot
Method of changing sewing shape
Buttonhole cutting system
Feed system
Cloth cutting drive
Needle (Note 2)
Safety device
Lubricating oil
Air pressure
Air consumption
Dimensions
Power consumption
Gross weight
Noise
1. SPECIFICATIONS
S type, R type
Men’s and ladies’ wear
Long thread
trimming
10 to 38 mm
(with thread trimmer)
10 to 50 mm
(In case looper thread
trimming device is
removed)
400 to 2,200 sti/min (adjustable in 100 sti/min steps)
2.0 to 3.2 mm
0 mm, 3 to 15 mm
13 mm (Max. 16 mm)
Program selection method
Cut-before knife, cut-after knife, without knife
Intermittent feed by stepping motor
Vertical drive by stepping motor (Pressure can be adjusted.)
DO
×
558 #90 to 110 DO
×
558 #120 to 130 DO
×
558 #110 to 120 DO
×
558 #100 to 110
Temporary stop switch and automatic stop function
at the time of detection of trouble
JUKI New Defrix Oil No. 2 (Oiling system)
0.49 Mpa
6R/ min (8-cycle/min)
1,060 mm (W) ×790 mm (L) ×1,230 mm (H) (Excluding thread stand)
550 VA
185 kg
- Equivalent continuous emission sound pressure level (LpA) at the workstation :
A-weighted value of 81.0 dB; (Includes KpA = 2.5 dB); according to ISO 10821- C.6.3
-ISO 11204 GR2 at 2,200 sti/min.
- Sound power level (LWA) ;
A-weighted value of 88.0 dB; (Includes KWA = 2.5 dB); according to ISO 10821- C.6.3
-ISO 3744 GR2 at 2,200 sti/min.
J type
Jeans, working wear
24 to 32 mm
*In case of taper
bar, up to 34 mm
Short thread trimming
C type
Cotton pants, working wear
16 to 24 mm
*In case of taper
bar, up to 26 mm
Note 1. For the short thread trimming type, stitch length can be changed by changing the optional presser set.
S set : 16 to 24 mm, M set : 24 to 32 mm, L set : 32 to 40 mm
Note 2. Stitch bite width and needle size at the time of delivery are as follows.
(When changing stitch bite width or needle size, check installing position and open/close timing of
needle, looper, and spreader, and clearance between needle and needle guard.)
Note 3. By changing to the optional looper, left and spreader, left, the range of stitch bite width can be changed
to 2.0 to 3.2 ,/ 2.6 to 4.0. However, for T type, the range is 2.0 to 3.2 mm only.
Note 4. In case of the machine with the needle thread clamp unit or with the multicutting device, refer to the
respective Instruction Manuals together with this Instruction Manual.
Note 5. Sewing with gimp cannot be performed with T (slacks) type. In addition, S size of the presser foot which
can perform the stitch length up to 24 mm is provided.
Stitch bite width
Needle size
S and R types
2.3 mm
#100
J type
2.5 mm
#120
C type
2.5 mm
#110
T type
Slacks
Short thread trimming
without gimp
10 to 34 mm
T type
2.3 mm
#100

2
2. NAME OF EACH COMPONENT
Temporary stop switch
Presser switch
Start switch
Operation panel
Control box
Power switch
Hand pulley
Machine head
Thread stand
Feed base
Cloth cutting dial
Power switch (EU type)
• Hand pulley
The needle bar can be lifted or lowered by hand with the handpulley.
• Cloth cutting dial
The cloth cutting knife can be lifted or lowered by hand with the
cloth cutting dial. (When the power is turned OFF.)
Hand pulley and cloth cutting knife rotate in accordance
with the rotation of the sewing machine and the drive of the
cloth cutting knife.
Be careful not to allow your hands or the like to touch to
them during operation of the sewing machine.
(1) Names of the sewing machine main unit

3
ENGLISH
1) Remove the fixing screws, right and left for
transportation.
(8 mm wrench is supplied with the machine.)
Retain the screws since they are necessary
when moving the sewing machine. Be sure
to attach them when moving the sewing
machine.
3. INSTALLATION
(2) Raising and returning the sewing machine
(1) Installing the air hose
■Connecting the air hose
Connect the air hose to the regulator using
the hose band and the one-touch socket joint
supplied with the machine.
■Adjustment of air pressure
Open air cock , pull up and turn air adjustment
knob and adjust so that air pressure indicates
0.45 to 0.55 MPa. Then lower the knob and fix it.
*Close air cock to expel air.
Close
Open
Fixing screw, left
Fixing screw, right
DANGER :
1. If you find the sewing machine is too heavy to lift, the gas spring may have malfunctioned due to
outgassing.
Never
lift the sewing machine in such a state since the machine can drop to pinch hands, fingers
and arms resulting in serious injury.
* Be sure to fully understand the standard of replacing time of the gas spring on p.56 and its re-
placement procedure on p.57 before putting the sewing machine into operation.
2. In order to prevent pinching of hands, fingers and arms that can result in a serious injury, be
sure to strictly observe the following when carrying out work.
2-1. Be sure to hold the rib on the bed periphery when holding the sewing machine.
2-2. Be sure to lock the hinge stopper to firmly secure the sewing machine in its raised position.

4
3) When returning the sewing machine, support
periphery ribs of the machine bed with your left
hand, hold grip of the hinge stopper section
with your right hand, pull it to this side (direction A)
to release the lock and slowly lower the sewing
machine after confirming that there is no tool
such as screwdriver and the like in the bottom
cover.
4) Take your right hand off from the hinge stopper
section, support periphery ribs of machine
bed with your both hands, and further lower the
sewing machine.
DANGER :
1. Do not lower the sewing machine while
keeping pulling the hinge stopper in
direction A, in order to prevent pining
of fingers, hands and arms under the
sewing machine leading to a serious
injury.
2. Do not hold feed base and feed guide
shaft fixing base .
When returning
sewing machine to
its home position
When raising
sewing machine
2) When raising the sewing machine, push feed base away from you (in the direction of the arrow), then
hold periphery ribs located on the front side of the sewing machine bed to slowly lift it.
At this time, do not hold feed base and feed guide shaft fixing base .
DANGER :
1. Do not hold any part other than periphery ribs of machine head.
2. Confirm that hinge stopper is locked with support shaft .
CAUTION :
If you raise the sewing machine from its home position with the feed base remained near side, the feed
base can move to pinch hands and fingers leading to an unexpected injury.
A

5
ENGLISH
5)
The sewing machine stops once more at the
final stage of lowering for the safety. Support the
periphery ribs of machine bed with your left hand,
hold the grip of hinge stopper section with your
right hand to release the lock and slowly lower the
sewing machine following the description of step 3).
DANGER :
Take care to prevent pinching of hands and
fingers between the sewing machine and the
bottom cover. In particular, never lower the
sewing machine holding parts other than
the bed rib with two or more workers, since
doing so can cause pinching of hands,
fingers and arms leading to a serious injury.
(3) Installing the thread stand
1) Assemble thread stand unit .
2) Insert it in the hole located in the rear of the
machine table, and tighten locknut to fix the
thread stand.
When the ceiling wiring is possible, pass
the power cord through the spool rest rod.
(4) Installing the operation panel base
Fix operation panel base at the dotting punch
section on the machine table with wood screw .
Protection vinyl is coated on the surface of
the operation panel. Remove it.

6
(5) Installing/removing the presser unit
When moving the feed base by hand, or
removing/attaching the presser unit, be
careful so that the cloth cutting knife does
not come in contact with the holding plates,
orthe thread trimming unit does not come in
contact with the throat plate.
■How to install
1) Install the presser unit so that presser lever fits
in the letter “U” of presser base .
2) Adjust the hole of presser plate to cloth open
pin .
3)
Turn clamp holding plate
to hold presser plate
.
When installing the presser unit , insert
correctly thread trimming driving arm
roller into the concave in looper thread
trimming cylinder click . If the roller is off,
the looper thread trimming unit interferes
with the throat plate during sewing. As a
result, component breakage will be caused.
■How to remove
1) Turn clamp holding plate to remove from
presser plate .
2) Lifting presser plate , remove it so as to draw it.
It is comparatively easy to install or remove
the presser unit by moving feed base to
the cloth cutting position.
([THREAD ] key is convenient. P.18)
When moving feed base by hand, follow
the aforementioned caution.
(6) Attaching the dust bag
Attach dust bag to clamp located in the rear
face of the table and insert dust hose into the bag.
Other manuals for MEB-3200 Series
4
Table of contents
Languages:
Other JUKI Sewing Machine manuals

JUKI
JUKI MS-1190M User manual

JUKI
JUKI HZL60HRC User manual

JUKI
JUKI LZ-2290A/IP-110A/SC-915 User manual

JUKI
JUKI LU-2216N-7 User manual

JUKI
JUKI MS-1261/V045 User manual

JUKI
JUKI DDL-8700 User manual

JUKI
JUKI LZ-2290CS User manual

JUKI
JUKI HZL-F series User manual

JUKI
JUKI MH-380 Owner's manual

JUKI
JUKI LZ-2290C/X73257 User manual

JUKI
JUKI ACF-172-1790 Quick start guide

JUKI
JUKI LS-341N User manual

JUKI
JUKI PLC-2710N-7 User manual

JUKI
JUKI PS-800-6045 User manual

JUKI
JUKI LK-1850 Series User manual

JUKI
JUKI AMS-221EHL User manual

JUKI
JUKI MO-735 Setup guide

JUKI
JUKI PLC-2710NM User manual

JUKI
JUKI LBH-1790 Series User manual

JUKI
JUKI LU-562 User manual