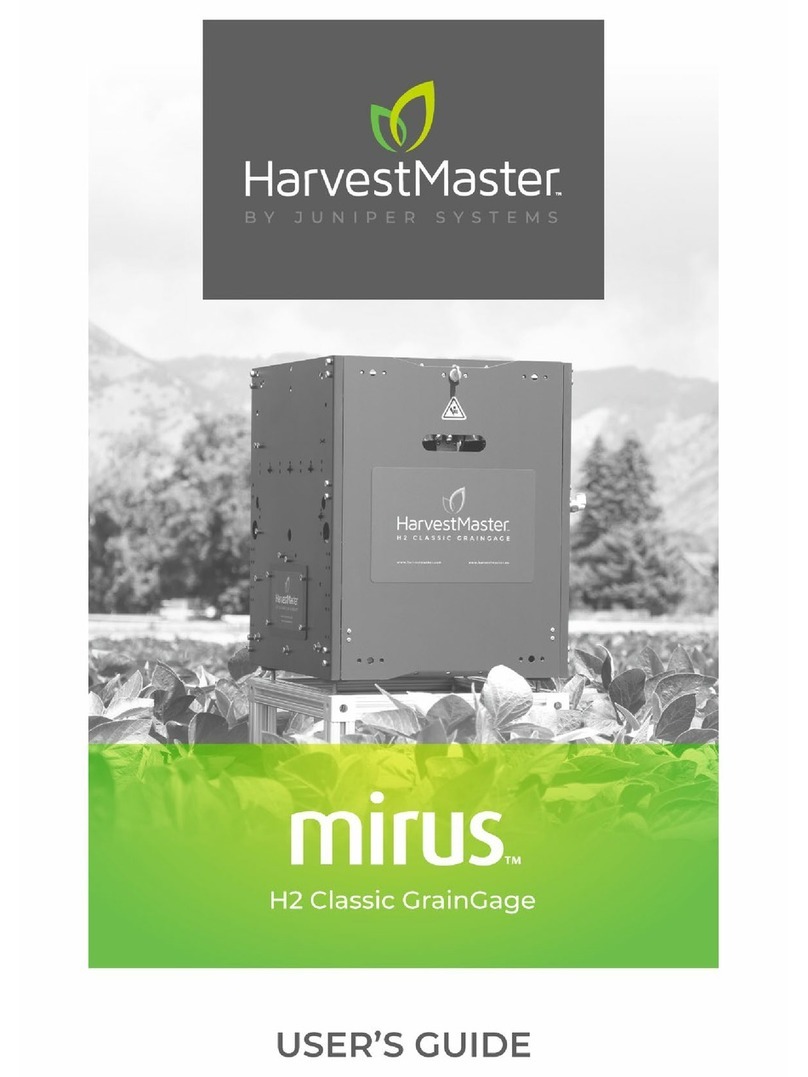
Juniper HarvestMaster mirus H2 Classic GrainGage User manual


HarvestMaster Europe Wels,
Austria
Phone: +43 7242219333
Email: [email protected]
www.harvestmaster.eu
Mirus for H2/H3 Classic GrainGage
User’s Guide
Copyright © 2023HarvestMaster. All rights reserved. Information subject to change
without notice.
Part Number: 30438-02
Trademarks
HarvestMaster, GrainGage, and Mirus are recognized trademarks of Juniper Systems, Inc.
All other trademarks are registered or recognized by their respective owners.
Disclaimer
Information is subject to change without notice.
Cautions
CAUTION: This symbol indicates that failure to follow directions could result in
damage to equipment or loss of information.
HarvestMaster Logan, Utah, USA
Phone: 435.753.1881
Email:
www.harvestmaster.com

Mirus for H2/H3 GrainGage User's Guide
iii
Contents
Mirus Installation
System Requirements............................................................................................................................................................. 9
Download and Install Mirus................................................................................................................................................. 9
Download and Activate Mirus for the H2 and H3 Classic GrainGage ..................................... 9
Enable the H3 Classic GrainGage Plugin.................................................................................................... 9
Preparing the GrainGage.................................................................................................................................................... 10
Verify GrainGage Readiness.............................................................................................................................. 10
Turn on the GrainGage ......................................................................................................................................... 10
Mirus and GrainGage Setup
Start Mirus....................................................................................................................................................................................... 12
Connect to the GrainGage Plugin................................................................................................................. 12
Setup Mirus Preferences ..................................................................................................................................................... 14
Open Setup................................................................................................................................................................... 14
Set Preferred Units of Measure....................................................................................................................... 14
Set Preferred Language....................................................................................................................................... 15
Set Preferred Backup Log Location............................................................................................................. 16
Clear Cached Settings........................................................................................................................................... 16
Set Low Disk Space Warnings......................................................................................................................... 17
Setup the GrainGage............................................................................................................................................................... 17
Open Setup................................................................................................................................................................... 17
Configure Actuators................................................................................................................................................ 18
View GrainGage Info............................................................................................................................................... 22
Configure Weight Sensors ................................................................................................................................. 23
Configure Test Weight Sensors ...................................................................................................................... 25
Configure Moisture Sensors............................................................................................................................. 26
Configure Overflow Sensor............................................................................................................................... 27
Configure the GrainGage System Settings............................................................................................ 28
Reset the GrainGage to Factory Settings ............................................................................................... 28
Update the GrainGage Firmware................................................................................................................. 29
Export SCiO Files...................................................................................................................................................... 29
Create and Record Traits.................................................................................................................................... 30
View Information About Mirus ........................................................................................................................ 32
GrainGage Diagnostics and Alerts

Mirus for H2/H3 GrainGage User's Guide
iv
Diagnostics Dialog Box........................................................................................................................................................ 34
Tare the GrainGage ................................................................................................................................................. 35
Open/Close All............................................................................................................................................................ 36
Weight Diagnostics................................................................................................................................................ 37
H2 GrainGage Sensor Info Diagnostics..................................................................................................... 38
H3 GrainGage Sensor Info Diagnostics..................................................................................................... 39
Test Weight Diagnostics..................................................................................................................................... 40
Level Detect Diagnostics..................................................................................................................................... 41
Health Diagnostics.................................................................................................................................................. 42
Actuators Diagnostics .......................................................................................................................................... 42
Alerts................................................................................................................................................................................................. 42
H2 or H3 Weight Calibration
Slope and Motion Calibration.......................................................................................................................................... 46
Weigh Bucket Load Cell Calibration .......................................................................................................................... 48
Calibrate Weigh Bucket...................................................................................................................................... 48
Check Weigh Bucket Calibration.................................................................................................................. 51
Test Weight Load Cell Calibration.................................................................................................................................. 51
Calibrate Test Weight............................................................................................................................................ 51
Check Test Weight Calibration ...................................................................................................................... 54
SCiO NIR Sensor Self Test.................................................................................................................................................... 55
Chamber Calibration
SCiO Sensor Considerations............................................................................................................................................... 61
EM2/3 Sensor Considerations............................................................................................................................................ 61
M2.0 Moisture.............................................................................................................................................................. 61
EM Moisture.................................................................................................................................................................. 61
Chamber Calibration Best Practices ............................................................................................................................ 61
Prepare Samples....................................................................................................................................................................... 62
Additional Preparation for Samples used with EM Sensors ...................................................... 63
Moisture Curve and Chamber Calibration Wizard ............................................................................................ 63
Create a SCiO Calibration File ......................................................................................................................... 64
Create an M2.0 Calibration File ...................................................................................................................... 67
M2.0 Chamber Calibration ......................................................................................................................... 68
Create an EM Calibration File.......................................................................................................................... 74
Chamber Calibration Overview............................................................................................................... 74
EM Chamber Calibration............................................................................................................................. 74

Mirus for H2/H3 GrainGage User's Guide
v
Test a Calibration File (Moisture Curve)..................................................................................................................... 79
Test Weight Recalibration................................................................................................................................................. 80
SCiO Offset Recalibration.................................................................................................................................................... 83
M2.0 Moisture Model Recalibration ............................................................................................................ 87
EM Moisture Recalibrate....................................................................................................................................................... 91
Manual Calibrationof an EM Moisture Curve Using Excel........................................................................... 93
Calibrate High Moisture Corn on an EM Moisture Curve............................................................................. 94
Field Maps
Create a Range Row Field Map...................................................................................................................................... 99
Create a Standard Plot ID Map...................................................................................................................................... 103
Create a Sub-Map.................................................................................................................................................................... 110
Import a Map .............................................................................................................................................................................. 113
Import a Range Row Map.................................................................................................................................. 113
Import a Two-Dimensional (2D) Map......................................................................................................................... 117
Import Multiple Maps ........................................................................................................................................................... 119
View a Map ................................................................................................................................................................................... 121
Delete a Map.............................................................................................................................................................................. 123
Copy a Map.................................................................................................................................................................................. 123
Export Map Data ..................................................................................................................................................................... 124
Export a Heat Map ................................................................................................................................................................. 127
Harvest Mode
Options for Opening Harvest Mode............................................................................................................................ 131
Open Harvest Mode ............................................................................................................................................................... 131
Configure Harvest Screen Options............................................................................................................................. 135
Configure Cycle Settings................................................................................................................................... 136
Quad View ................................................................................................................................................................... 139
Diagnostics Screen............................................................................................................................................... 140
Navigation Screen.................................................................................................................................................. 141
Observations Screen............................................................................................................................................ 142
Graph View................................................................................................................................................................. 143
List View ....................................................................................................................................................................... 144
Configure Weight in Spatial Display ........................................................................................................ 144
Configure Moisture in Spatial Display ..................................................................................................... 145
Configure Test Weight in Spatial Display ............................................................................................. 146
Configure Plot Size and Yield in Spatial Display............................................................................... 146

Mirus for H2/H3 GrainGage User's Guide
vi
Collect Harvest Data ............................................................................................................................................................. 147
Harvest with Cycle Button............................................................................................................................... 147
Harvest with Countdown Timer .................................................................................................................. 149
Appendix A: Standard Moisture and Test Weight
References for Standard Moisture and Test Weight...................................................................................... 152
Appendix B: Troubleshooting Mirus
Error Logs ..................................................................................................................................................................................... 155
Flag Errors.................................................................................................................................................................... 155
Find and Send Error and Backup Logs.................................................................................................... 156
SCiO Sensor Errors ................................................................................................................................................................. 156
Enable or Disable Debug Streaming ........................................................................................................................ 157
Common Errors........................................................................................................................................................................ 158
Inaccurate Plot Weight ..................................................................................................................................... 158
Inaccurate Test Weight..................................................................................................................................... 158
Inaccurate Moisture or Constituent Data.............................................................................................. 159
Not Meeting Minimum Weight Threshold ........................................................................................... 159
Can’t Connect to GrainGage.......................................................................................................................... 160
Tare Warnings.......................................................................................................................................................... 160
Contact HarvestMaster........................................................................................................................................................ 161
Instructional Content............................................................................................................................................ 161
Contact a HarvestMaster Field Service Engineer.............................................................................. 161
Appendix C: Use the Conditional Action Plugin
Cycling Hierarchy.................................................................................................................................................................... 163
Create a Conditional Action............................................................................................................................................. 163
Evaluation Points .................................................................................................................................................................... 166
Conditions.................................................................................................................................................................................... 168
Actions............................................................................................................................................................................................ 169
Appendix D: Take Notes in Mirus
Enter Note Taking ................................................................................................................................................................... 171
Configure the Note Taking Screen............................................................................................................................. 174
Navigation Screen................................................................................................................................................. 175
Observations/Notes Screen ............................................................................................................................. 175
Quad View ................................................................................................................................................................... 176
Map View...................................................................................................................................................................... 176
List View ........................................................................................................................................................................ 176

Mirus for H2/H3 GrainGage User's Guide
vii
Ten Key........................................................................................................................................................................... 176
Identifier Search (Imported Maps Only) ................................................................................................................. 176
Appendix E: Limited Warranty
Software ......................................................................................................................................................................................... 181
Disclaimer of Warranties.................................................................................................................................................... 181
Updates or Modifications ................................................................................................................................................... 181
Removal of Serial Number ................................................................................................................................................ 181
Extended Warranties ............................................................................................................................................................ 181

CHAPTER
1. Mirus Installation

1. Mirus Installation 9
Mirus for H2/H3 Graingage User's Guide
1.
2.
3.
4.
5.
6.
7.
1.
2.
The Mirus app operates the H2 and H3 Classic GrainGage and runs on a Windows tablet.
The H2 Classic GrainGage uses an EM sensor to detect the EM or M2.0 moisture content
of the sample. The H3 Classic GrainGage can use a SCiO sensor to detect the SCiO
constituent data, or an EM sensor to detect the EM or M2.0 moisture content of the
sample.
GrainGage Connections
GrainGage Sensor Calibration
H2 Classic EM EM Moisture and M2.0 Moisture
H3 Classic EM EM Moisture and M2.0 Moisture
H3 Classic SCiO SCiO constituent data
After you have purchased a license for Mirus for the H2 GrainGage,
Go to http://www.harvestmaster.com/support/mirus/downloads.
Tap the down arrow for Mirus Harvest Software.
Select and download the most recent Mirus release.
Follow the installation instructions.
Go to http://www.harvestmaster.com/activate and fill out the form.
HarvestMaster will send the unlock code via email.
Return to the Mirus activation screen and input the unlock code.
After you have purchased a license for the H3 Plugin,
Open the Mirus Plugin Manager and enable the H3 Plugin, close the Plugin
Manager.
Note: When you attempt to connect to the H3 GrainGage Plugin for the first time,
Mirus will prompt you to register the plugin. The H3 Plugin is registered separately
from Mirus.
Go to http://www.harvestmaster.com/activate and fill out the form.
Mirus Installation
System Requirements
Operating System: Windows®10 or higher; 32 or 64-bit OS
Processor Speed: 2.0 GHz Quad Core
Memory: 8 GB or higher recommended
Data Storage: 500 MB available disk space
Display Resolution: 1280 x 800 or higher
Mirus Version: 4.5.0 or higher
Download and Install Mirus
Download and Activate Mirus for the H2 and H3 Classic GrainGage
Enable the H3 Classic GrainGage Plugin

1. Mirus Installation 10
Mirus for H2/H3 Graingage User's Guide
3.
4.
1.
2.
3.
HarvestMaster will send the unlock code via email.
Return to the H3 Plugin activation screen and input the unlock code.
Check https://www.harvestmaster.com/support/article/14646 annually for updated
software.
Verify the GrainGage is ready for operation by checking the following:
To turn on the GrainGage,
Start the combine.
Activate the GrainGage by pressing the red button on the system controller.
Open Mirus.
Note: HarvestMaster recommends verifying the weight and test weight calibrations (in
Diagnostics) of the GrainGage each morning by following the steps in Check Weigh
Bucket Calibrationand Check Test Weight Calibration. If the weight is off, then
recalibrate by following the steps in sections Weigh Bucket Load Cell Calibration and
Test Weight Load Cell Calibration.
Preparing the GrainGage
Verify GrainGage Readiness
The Mirus app is installed and activated.
The H3 plugin is installed and activated (if needed).
Windows updates are current.
Automatic sleep, hibernate, and shutdown are disabled on the tablet if it is
plugged in.
The charging cable is connected to the tablet and the tablet is charging.
Power (12 VDC) is connected to the GrainGage DSP 2 Module and System
Controller.
The CAN cable between the GrainGage and System Controller is connected.
The USB to CAN or Serial to CAN cable is connected between the CAN bus and
tablet.
For the H3, the SCiOserial to USB cable is connected to the tablet and GrainGage.
The remote enter button (typically on the hydrostat lever) is connected properly
and functioning.
The pressurized air is turned on and connected to the GrainGage.
Turn on the GrainGage

CHAPTER
2. Mirus and GrainGage Setup

2. Mirus and GrainGage Setup 12
Mirus for H2/H3 Graingage User's Guide
1.
2.
3.
Double tap the Mirus icon on your Windows desktop.
Mirus opens the Home screen. You can return to the Home screen at any time by
selecting the Mirushome icon on the top left corner of the screen.
On the Mirus Home screen,
Tap Connect Plugin.
Tap H2 GrainGage orH3 GrainGage.
Note: You will only be able to select the H3 Plugin after it's been enabled in the
Mirus Plugin Manager. SeeEnable the H3 Classic GrainGage Plugin.
Tap the check icon .
Mirus and GrainGage Setup
Start Mirus
Connect to the GrainGage Plugin

2. Mirus and GrainGage Setup 13
Mirus for H2/H3 Graingage User's Guide
If Mirus is unable to detect the GrainGage, the software may display a device connection
error.
Or
If further troubleshooting is needed, seeCan’t Connect to GrainGage .
After connecting to the H2 or H3 GrainGage plugin, Mirus displays an icon for the
GrainGage on the Main Menu screen.
If you upgraded Mirus to a new version or changed settings in emulator mode before
connecting to the GrainGage, Mirus will display a Changed Settings Summary warning.
You will be prompted to Use Local Settings or Use GrainGage Settings.
Note: If you want to keep the current GrainGage weight and test weight calibrations, it is
recommended to use the GrainGage Settings.
Check the GrainGage power source to all modules (a green LED illuminated on
each module).
TapUse Emulatorto proceed without connecting the GrainGage. Emulator Mode
is not recommended for setting up the GrainGage.
Local settings use the current settings on the tablet.
GrainGage settings use the old settings saved to the GrainGage from the previous
Mirus version.

2. Mirus and GrainGage Setup 14
Mirus for H2/H3 Graingage User's Guide
1.
Open the Home screen,
Tap Setup.
Mirus opens the Setup screen.
On the Setup screen,
Setup Mirus Preferences
Open Setup
Set Preferred Units of Measure

2. Mirus and GrainGage Setup 15
Mirus for H2/H3 Graingage User's Guide
1.
2.
3.
4.
1.
2.
3.
Tap Preferences.
Tap Units of Measure.
Select your preferred units of measure.
Tap Save.
On the Setup > Preferences screen,
Select Language.
Choose your preferred language.
Tap Save.
Set Preferred Language

2. Mirus and GrainGage Setup 16
Mirus for H2/H3 Graingage User's Guide
1.
2.
3.
1.
Note: Some languages may not be currently available in Mirus version 4.4.0.
On the Setup > Preferences screen,
Tap Backup Log.
Enter your preferred file path for the Mirus backup log.
Tap Save.
Note: Changing the Backup Log location is not recommended. If you do change
it, be sure to record the new location.
CAUTION: This cannot be undone! Clearing the cache will set the application
settings back to default and restart Mirus. This should only be done in consultation
with a HarvestMaster Field Service Engineer.
On the Setup > Preferences screen,
Tap Application Cache.
Set Preferred Backup Log Location
Clear Cached Settings

2. Mirus and GrainGage Setup 17
Mirus for H2/H3 Graingage User's Guide
2.
1.
2.
3.
4.
1.
Tap Clear Settings.
On the Setup > Preferences screen,
Tap Low Disk Space Warnings.
Set the amount of available disk space left that will trigger a warning.
Set the minimum amount of disk space to allow harvest.
Tap Save.
Generally, Mirus (and additional plugins) may use around 900 MB of disk space.
However, the amount of space used in addition to this depends on the size of
your map, the amount of data collected, and the quantity of maps created.
On the Home screen,
Tap Setup.
Mirus opens the Setup screen.
Set Low Disk Space Warnings
Setup the GrainGage
Open Setup

2. Mirus and GrainGage Setup 18
Mirus for H2/H3 Graingage User's Guide
1.
The Setup screen defaults to Devices where you will set up your GrainGage.
Tap H2 GrainGage or H3 GrainGage.
Configure Actuators

2. Mirus and GrainGage Setup 19
Mirus for H2/H3 Graingage User's Guide
2. Tap Actuator.
Mirus opens the Actuator Setup screen on which you can configure settings for each
actuator in the GrainGage.
The following tables display the default values for each actuator,which may need to be
adjusted based onyour specific harvest conditions. Please contact a HarvestMaster Field
Service Engineer for support.
Top Gate Settings
Setup
Parameter Default Value Description
Actuator Dual
The type of actuator. See Auxiliary Actuator
Controls—DSP Actuator 5 & 6table below for
actuator type descriptions.
When using the H2 or H3GrainGage Classic,
do not change.

2. Mirus and GrainGage Setup 20
Mirus for H2/H3 Graingage User's Guide
Limit Switch
on Close Yes Enables the limit switch when the gate closes.
Limit Switch
on Open No
Enables the limit switch when the gate opens.
This is not supported in the H2 or
H3GrainGage Classic.
Bottom Gate Settings
Setup
Parameter Default Value Description
Actuator Dual
The type of actuator.See Auxiliary Actuator
Controls—DSP Actuator 5 & 6table below for
actuator type descriptions.
Limit Switch
on Close Yes Enables the limit switch when the gate closes.
Limit Switch
on Open No Enables the limit switch when the gate opens.
This is not supported in the GrainGage.
Separator Cylinder Settings
Setup Parameter Default
Value Description
Actuator Dual
The type of actuator.See Auxiliary Actuator
Controls—DSP Actuator 5 & 6table below for
actuator type descriptions.
Limit Switch on
Close Yes Enables the limit switch when the gate closes.
Limit Switch on
Open No Enables the limit switch when the gate opens.
This is not supported in GrainGage.
Isolation Gate Settings
Setup Parameter Default Value Description
This manual suits for next models
1
Table of contents
Other Juniper Farm Equipment manuals
Popular Farm Equipment manuals by other brands

Schaffert
Schaffert Rebounder Mounting instructions

Stocks AG
Stocks AG Fan Jet Pro Plus 65 Original Operating Manual and parts list

Cumberland
Cumberland Integra Feed-Link Installation and operation manual

BROWN
BROWN BDHP-1250 Owner's/operator's manual

Molon
Molon BCS operating instructions

Vaderstad
Vaderstad Rapid Series instructions


