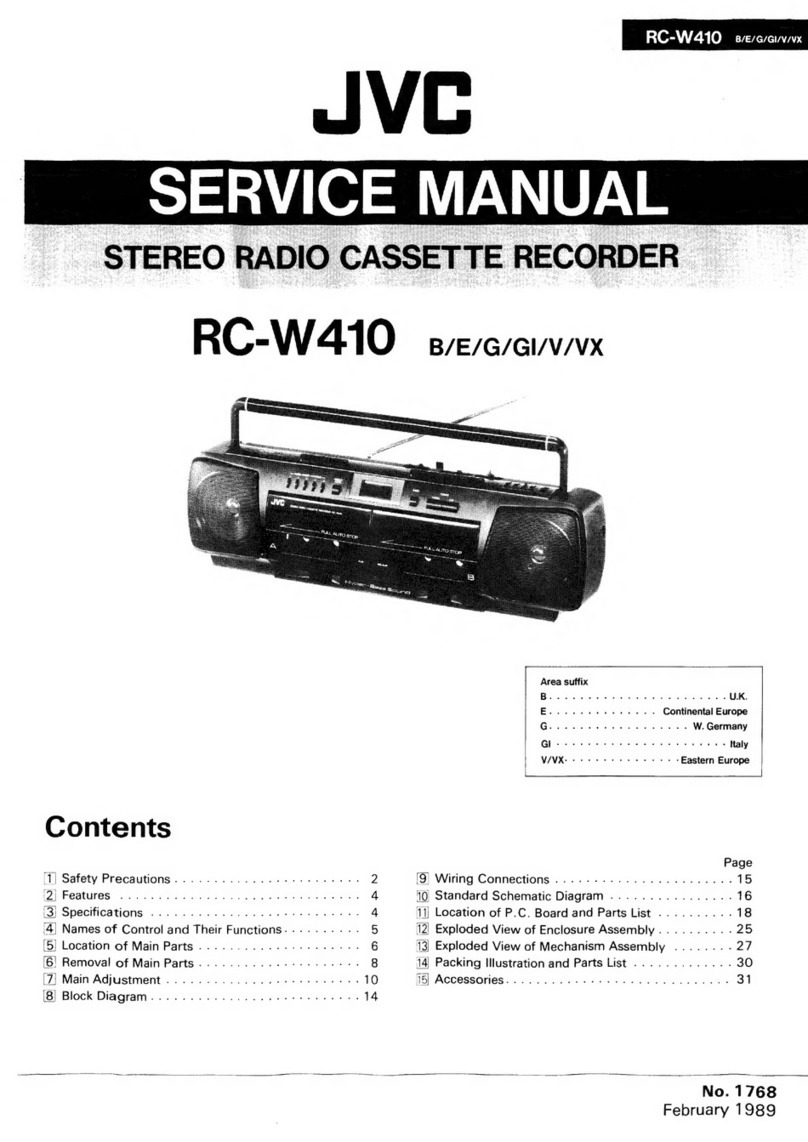
JVC RC-W410B User manual

SPECIFICATIONS
<
Tuner
Section>
Frequency
ranges
Antennas
<Tape
Recorder
Section>
Track
system
Frequency
response
Wow
&
flutter
Fast
wind
time
<General>
3D
system
Speakers
Power
output
S.E.A.
characteristics
Input
jack
Output
jack
Power
supply
(RC-W410E
only)
:
FM
87.5
—
108
MHz
MW
522
—1629
kHz
LW
144
—
290
kHz
:
Telescopic
antenna
for
FM
Ferrite
Core
antenna
for
MW
&
LW
:
4-track
2-channel
stereo
:
80
—
12,500
Hz
:
0.15
%
(WRMS)
:
Approx.
120
sec.
(C-60
cassette)
:
ASW
(Acoustic
Super
Woofer)
:
10cm
x
2
;
:
7.0
W
(3.5
W
+
3.5
W)
at
8
©
and
8.0
W
for
3D
at
12
2
(Max.}
4.0
W
(2.0
W
+
2.0
W)
at
8
Q
and
6.0
W
for
3D
at.
12
2
(10%
THD)
:
S.E.A.
center
frequencies:
100
Hz/330
Hz/2
kHz/10
kHz
S.E.A.
control
range:
+8
dB
:
MIX
MIC
x
1
(3
mV/-50
dBV)
200
2
—2k2
:
Headphones
x
1
(20
mW/32
2,8
2
—
1kQ)
:
DC
12.V
(8
"R20"
cells)
AC
220
—
240
V/110
—
120
V,
50/60
Hz
Ext.
DC
!N
12
V
(car
battery
via
optional
JVC
Instructions
STEREO
RADIO
CASSETTE
RECORDER
RC-W410
sec
STEREO-RADIO-CASSETTENRECORDER
RC-W410B/E/G
RADIO-CASSETTE
STEREO
RC-W410B/E/G
CN:332.car
adapter)
:18W
:
560(W)
x
167(H)
x
153(D).mm
including
knobs
:
Approx.
3.9
kg
(without
batteries)
Power
consumption
Dimensions
Oe:
<>
ee
Weight
es
OO
05
Design
and
specifications
subject
to
change
without
notice.
IMPORTANT
CONNECTION
TO AC
MAINS
(for
U.K.
only)
Frehautie
*In
the
United
Kingdom,
the
mains
lead
supplied
with
the
recorder
enables
it
to
be
operated
BB
a
ing
EC
U.K
from
240
V
AC
mains
supplies.
E
tees
Continental
Europe
The
wires
in
this
mains
lead
are
coloured
in
accordance
with
the
following
code:
Blue-Neutral,
Guid
ea
W.Germany
Brown-Live.
tf
these
colours
do
not
correspond
with
the
termina!
identifications
of
your
plug;
connect
as
follows:
Blue
wire
to
terminal
coded
N.(Neutral)
or
coloured
Black.
-Brown
wire
to
terminal
coded
L
(Live)
or
coloured
Red.
Do
not
make
any
connection
to
the
larger
terminal
coded
E
or
coloured
Green
or
Green
&
Yellow.
A
fused
plug
must
be
fitted
with
a
3
Amp
fuse.
When
using
a
non-fused
plug,
any
external
mains
fuse
must
not
exceed
5
Amp.
!f
in
doubt
—
consutt
a
competent
electrician.
JVC
VICTOR
COMPANY
OF
JAPAN,
LIMITED
The
lightning
flash
with
arrowhead
symbol,
-
within
an
equilateral
triangle,
is
intended
to
alert
the
user
to
the
presence
of
uninsulated
“dangerous
voltage’
within
the
product's
enclosure
that
may
be.
of
sufficient
magni-
tude
to
constitute
a
risk
of
electric
shock
to
persons.
CAUTION
RISK
OF
ELECTRIC
SHOCK
00
NOT
OPEN
LN
CAUTION
“TO
REOUCE
THE
RISK
OF
ELECTRIC
SHOCK,
DO
NOT
REMOVE
COVER
(OR
BACK)
NO
USER-SERVICEABLE
PARTS
INSIDE.
REFER
SERVICING
TO
QUALIFIED
SERVICE
PERSONNEL.”
The
exclamation
point
within
an
equilateral
triangle
is
intended
to
alert
the
user
to
the
presence
of
important
operating
and
main-
tenance
(servicing)
instructions
in
the
litera-
ture
accompanying
the
appliance.
WARNING:
:
TO
REDUCE
THE
RISK
OF
FIRE
OR
ELECTRIC
SHOCK,
DO
NOT
EXPOSE
THIS
APPLIANCE
TO
RAIN
OR
MOISTURE.
Printed
in
Japan
se
VNN5131-271
1490-US
Pre-recorded
tapes,
records
or
discs
should
not
be
re-recorded
without
the
consent
of
the
owners
of
copyright
in
the
sound
recording
and
in
any
copyright
musical
or
Jiterary
work
em-
bodied
in
that
recording
as
this
constitutes
an
infringement
of
copyright.
OPERATIONS
(2)
BEDIENUNG
(2)
FONCTIONNEMENTS
(2)
i!
peut
étre
illégal
d’enregistrer
ou
de
reproduire
des
oeuvres
sous
copyright
sans
le
consente-
ment
du
détenteur
des
droits
d’auteur.
@
Select
the
source
to
be
recorded.
@
@
(Refer
to
FUNCTION
switch.)
Die
Signalquelle
wahlen.
(Siehe
FUNCTION-Schalter.)
Sélectionner
la
source
4
enregistrer.
(Se
reporter
au
sélecteur
FUNCTION.)
Note:
The
recording
characteristics
of
this
unit
are
those
of
normal
tape.
Normal
tape
has
different
characteristics
from
CrO,
and
metal
tapes.
Hinweis:
Der
Aufnahmeschaltkreis
dieses
Gerdts
ist
fur
Normal-
band
ausgelegt
und
nicht
fur
CrO,-.oder
Metallband
REW
PLAY
[REC]
H/al
«
>
<
PAUSE
STOP/EJECT
FF
Load
a
blank
tape.
Eine
unbespielte
Cassette
einlegen.
Charger
une
cassette
vierge.
-_-
Press.
geeignet.
Drticken.
Remarque:
ae
Tae
aati
;
Enfoncer.
Les
caractéristiques
d’enregistrement
de
cet
appareil
ie
ee
Teil
; :
sont
celles
d’une
bande
normale.
La
bande
normale
a
des
caractéristiques
différentes
des
bandes
CrO,
et
métal.
®
Load
a
prerecorded
tape
into
8)
@)
6)
Deck
A
and
a
blank
tape
into
Deck
B.
In
Deck
A
eine
bespielte
Cassette,
in
Deck
B
eine
unbespielte
Note:
;
When
Deck
B
is
set
to
the
record-
Cassette
ejnlegen.
Charger
une
cassette
préenregistrée
dans
la
platine
A
et
une
cassette
vierge
dans
fa
platine
B.
@)
FUNCTION
Funktion
(FUNCTION)
Fonction
(FUNCTION)
>
:
NORMAL
TAPE,
SPEEO
|
puto
HIGH
SPEED
»
[STANOBY)
RADIO
DUBBING
FUNCTION
Set
to
the
type
of
tape
in
Deck
A.
Die
Bandsorte
fir
Deck
A
ein-
stellen.
Régler
sur
le
type
de
la
bande
dans
la
platine
A,
=
TAPE:
NORMAL
METALIGO2
{Par
TAPE
FM
MODE
Set
Deck
B
to
the
rec-pause
mode:
Deck
B
auf
Aufnahmepause
schaiten.
Mettre
la
platine
B
en
mode
de
pause-enregistrement.
PAUSE
STOP/EJETT
FF
.REW
PLAY
Press
the
PLAY
button
of
Deck
A.
Die
PLAY-Taste
von
Deck
A
betdtigen.
Appuyer
sur
la
touche
PLAY
de
fa
platine
A.
STOPIEJECT
FF
=
-REW
PLAY
wel
ale
la
pause
mode
and
Deck
A
is
stopped,
the
pause
mode
will
be
disengaged.
Hinweis:
Wird
Deck
-A
auf
Stop
geschaltet,
wird
die.
Aufnahmepause
von
Deck
B
beendet.
Remarque:
Quand
/a
platine
B
est
placée
dans
le
mode
de
pause-enregistrement
et
que
la
platine
A
est
arrétée,
fe
mode
de
pause
est
libéré,
Connect
a
microphone.
Ein
Mikrofon
anschlieBen.
Raccorder
un
microphone.
FUNCTION
Funktion
(FUNCTION)
Fonction
(FUNCTION)
©)
@Play
a
tape.
(Deck
A
or
B).
@
Ein
Band
abspielen
(Deck
A
oder
B).
©
Lire
une
bande.
(platine
A
ou
B)
e@
To
record
the
mixed
sound
The
sound
from
the
tape
in
Deck
A
mixed
with
the
sound
from
the
microphone
can
be
recorded
onto
a
tape
in
Deck
B.
¢@
Aufnahme
mit
Mikrofon-Einblendung
Note:
Use
the
microphone
as
far
away
from
the
set
as
possible.
When
the
microphone
is
too
near
the
speakers,
howling
may
occur.
Hinweis:
Das
Mikrofon
mdglichst
weit
vom
Gerat
ent-
fernt
halten,
Bei
zu
geringem
Abstand
zu
den
Das
Signal
vom
in
Deck
A
eingelegten
Cassettenband
kann
zusammen
mit
dem
Mikrofonsignal
auf
der
in
Deck
8
ein-
gelegten
Cassette
aufgenommen
werden.
®
Enregistrement
du
son
mélangé
;
Le
son
de
la
bande
dans
ta
platine
A
mélangé
avec
fe
son
du
microphone
peut
étre
enregistré
sur
une
bande
dans
la
platine
B.
:
Lautsprechern
kann
es
zu
Rickkopplungsstérun-
gen
kommen.
Remarque:
Utiliser
le
microphone
le
plus
loin
possible
de
l'appareil.
S’il
est
trop
prés
des
haut-parleurs,
des
hurlements
risquent
de
se
produire,

CAUTIONS
1,
Even
when
the
FUNCTION
switch
is
set
to
TAPE/RADIO
STANDBY,
a
very
small
current
will
flow.
To
save
power
and
for
safety
when
not
using
the
unit
for
an
extended
period
of
time,
disconnect
the
power
cord
from
the
household
AC
outlet.
2.
Do
not
leave
this
unit
in
direct
sunlight,
extremely
hot
{above
40°C
(104°F))
or
humid
places
or
in
closed
automobiles
in
the
sun.
Exhausted
batteries
in
the
unit
may
cause
damage.
Remove
the
batteries
when
the
unit
is
not
to
be
used.
}
Never
use
benzine
or
thinner
for
cleaning
the
cabinet
as
they
may
damage
the
surface
finish.
Do
not
bring
any
metallic
object
near
the
head
to
prevent
head
magnetization.
C-120
cassettes
are
not
recommendable
due
to
proneness
in
malfunctioning:
Do
not
insert
any
metallic
object
inside
the
unit
to
prevent
electric
shock
hazard.
Keep
the
unit
as
far
away
from
your
TV
as
possible.
UR
BEACHTUNG
Auch
bei
auf
TAPE/RADIO
STANDBY
gestelltem
FUNCTION-Schaiter
wird
eine
geringe
Leistung
aufgenomimen,.
Aus
Sicherheitsgriinden
und
zur
Stromersparnis
das
Netzkabel
ab-
ziehen,
wenn
das
Gerat
fiir
langere
Zeit
nicht
benutzt
wird.
2.
Schiitzen
Sie
das
Gerdt
vor
direktem
Sonnenlicht
oder
sehr
hohen
(iiber
40°C)
Temperaturen
und
vor
Feuchtigkeit.
Lassen
Sie
das
Gerat
nicht
in
einem
verschlossenen
Wagen,
der
in
der
Sonne
geparkt
ist.
3.
Erschdpfte
Batterien
kénnen
das
Gerat
beschadigen.
Entfernen
Sie
die
Batterien,
wenn
das
Gerat
fir
langere
Zeit
nicht
benutzt
wird.
4.
Verwenden
Sie
zur
Reinigung
niemals
Benzin
oder
Verdiinner,
weil
dadurch
die
Gehduse-
oberflache
beschadigt
werden
kann.
5.
Bringen
Sie
kéine
metallischen
Gegenstande
an
den
Tonkopf,
da
diese
den
Tonkopf
magnetisieren
kdnnen.
6.
C-120-Cassetten
werden
nicht
empfohlen,
da
diese
Betriebsstérungen
verursachen
kénnen.
7.
Fihren
Sie
zur
Vermeidung
von
Kurzschltissen
keine
metallischen
Gegensténde
in
das
Ge-
hduseinnere
ein.
~
-
N
ON
OOS
-
8,
Das
Gerat-
nicht
in
der
Nahe
eines
T
V-Gerats
benutzen.
PRECAUTIONS
A
OBSERVER
1.
Méme
quand
le
sélecteur
FUNCTION
est
placé
sur
TAPE/RADIO
STANDBY,
il
circule
un
trés
faible
courant.
Pour
économiser
|’électricité
et
pour
la
sécurité,
si
lappareil
n’est
pas
utilisé
pendant
une
longue
période,
débrancher
le
cordon
d’alimentation
de
la
prise
secteur.
2.
Ne
pas
laisser
cet
appareil
exposé
4
la
lumiére
directe
du
soleil,
dans
des
endroits
trés
chauds
(plus
de
40°C)
ou
humides,
ni
dans
des
véhicules
fermés
au
soleil.
3.
Des
piles
déchargées
laissées
dans
l'appareil
peuvent
endommager
celui
i-ci.
Les
retirer
lorsque
vous
n‘utilisez
pas
l'appareil.
4,
Ne
jamais
utiliser
de
benzine
ou
de
diluant
pour
le
nettoyage
car
ils
risquent
d’endommager
le
vernis
de
surface.
5.
Ne
pas
approcher
d’objets
métalliques
prés
des
tétes
pour
éviter
la
magnétisation
de
celles-ci.
6.
Les
cassettes
C-120
ne
sont
pas
recommandées
du
fait
qu’elles
provoquent
souvent
de
mauvais
fonctionnements,
7.
Ne
pas
introduire
d’objets
métalliques
dans
l'appareil
pour
éviter
les
risques
d’électrocution.
8.
Ne
pas
faire
fonctionner
la
radiocassette
4
proximité
d’un
téléviseur.
A
POWER
SUPPLY
SPANNUNGSVERSORGUNG
ALIMENTATION
-
1.
Batteriebetrieb
8
Batterien
vom
Typ
’’R20”
einlegen.
1.
Battery
operation
Insert
8
“R20”
batteries.
1.
Fonctionnement
sur
piles
Introduire
8
piles
’’R20°”,
@)
Replace
the
cover.
Den
Deckel
wieder
anbringen.
Remettre
le
couvercle
en
place.
2.
Household
AC
operation
1.
Set
the
line
voltage
selector
switch
to
220-240
V
or
110-120
V
according
to
your
local
voltage.
2.
Connect
the
AC
power
cord.
2.
Netzbetrieb
—
1,
Den
Spannungswahler
wie
erfordertich
auf
220-240
V
oder
110-120
V
einstellen.
2.
Das
Netzkabel
anschlieRen.
2.
Fonctionnement
sur
le
secteur
1,
Régler
le
sélecteur
de
tention
d’alimentation
sur
220-240
V
ou
110-120
V,
en
fonction
de
Ja
tension
secteur
locale.
2.
Raccorder
fe
cordon
d’alimentation
secteur.
3.
Car
battery
operation
(E
version
only)
Connect
the
external
DC
input
jack
(DC
IN
12
V)
to
the
car’s
cigarette
lighter
socket
using
the
optional
exclusive
adapter
(CN-332).
3.
Auto-Bordnetz
(nur
E
Ausfiihrung)
Die
externe
Gleichstrombuchse
(DC
IN 12
V)
unter
Verwendung
eines
Auto-Bordnetz-
adapters
(CN-332,
Sonderzubeh6r)
an
den
Zigarettenanziinder
im
Auto
anschlieRen,
3.
Fonctionnement
sur
une
source
d’alimentation
CC
extérieure
(Version
E
seulement)
Raccorder
la
prise
d’entrée
extérieure
CC
(DC
IN.12
V)
a
la
douille
de
Vallume-cigares
en
utilisant
un
adaptateur
pour
automobile
en
option
(CN-332).
AUTOMATIC
LEVEL
CONTROL
(ALC)
ALC
maintains
the
correct
recording
level
at
all
times.
AUTOMATISCHE
AUFNAHMEAUSSTEUERUNG
(ALC)
Garantiert
stets
korrekte
Aufnahmepegelregelung.
CONTROLE
AUTOMATIQUE
DU
NIVEAU
(ALC)
Le
circuit
ALC
maintient
toujours
le
niveau
d’enregistrement
correct.
FULL
AUTO-STOP
In-all
modes,
when
the
end
of
the
tape
is
reached,
the
auto-stop
mechanism
operates
to
release
the
operation
button
and
stop
the
tape
transport
mechanism.
VOLLAUTOMATISCHE
ENDABSCHALTUNG
Bei
Erreichen
des
Barndendes
wird
die
eingestelite
Cassettenbetriebsart
abgeschaltet
und
das
Laufwerk
gestoppt.
ARRET
AUTOMATIQUE
COMPLET
Dans
tous
les
modes,
quand
la
bande
atteint
sa
fin
de
course,
le
dispositif
d’arrét
automatique
fonctinnne
vour
relacher
la
touche
de
fonctionnement
et
arréter
le
défilement
de
la
bande.
-
TROUBLESHOOTING
What
seems
to
be
trouble
is
not
always
real
trouble.
Make
sure
first.
1.
Cassette
cannot
be
loaded.
*!s
cassette
loaded
correctly?
*!s
PLAY
button
pressed?
2.
REC
button
cannot
be
pressed.
*Is
cassette
loaded?
*Are
cassette
tabs
knocked
out?
(Deck
B)
.
Unit
does
not
operate
when
buttons
are
pressed.
*{s
polarity
of
batteries
correct?
*Are
bat-
teries
exhausted?
.
When
PLAY
button
is
pressed,
it
is
immediately
reset.
*!s
tape
fully
rewound
on
the
left?
When
volume
is
increased
to
max.,
sound
is
small.
*Are
batteries
run
down?
Sound
quality
is
unstable.
*Are
heads
dirty
or
magnetized?
.
Wow
and
flutter
occur.
*Are
pinch
roller,
capstan
or
heads
dirty?
.
Previous
recording
is
not
erased.
*Is
erase
head
dirty?
(Deck
B)
.
High-speed
dubbing
cannot
be
performed.
*Is
the
position
of
FUNCTION
switch
correct?
STORUNGSSUCHE
Eine
St6rung
mu8
nicht
immer
auf
einen
Schaden
zuriickzufiihren
sein.
Priifen
Sie
erst
selbst
nach.
1.
Eine
Cassette
kann
nicht
eingelegt
werden.
*Ist
die
Cassette
richtig
ausgerichtet?
*Ist
die
Wiedergabetaste
(PLAY)
gedriickt?
2.
Die
Aufnahmetaste
(REC)
kann
nicht
gedriickt
werden.
*Ist
eine
Cassette
eingelegt?
*Sind
die
Sicherheitszungen
der
Cassette
herausgebrochen
worden?
(Deck
B)
3.
Das
Gerat
funktioniert
nicht,
wenn
die
Tasten
gedrtickt
werden.
*Stimmt
die
Polaritat
der
j
Batterien?
*Sind
die
Batterien
erschdpft?
.
Wenn
die
Wiedergabetaste
(PLAY)
gedrickt
wird,
rastet
¢
sie
sofort
wieder
aus.
*Ist
das
Band
komplett
auf
die
linke
Spule
gewickelt?
5.
Wenn
die
Lautstarke
auf
Maximum
gedreht
wird,
bleibt
der
Ton
leise.
*Sind
die
Batterien
erschépft?
6.
Die
Klangqualitat
ist
instabil.
*Sind
die
Tonkdpfe
schmutzig
oder
magnetisiert?
7..
Gleichlaufschwankungen
treten
auf.
*Sind
Andruckrolle,
Tonwelle
oder
die
Tonkdpfe
schmutzig?
8.
Bereits
aufgenommenes
Tonmaterial
kann
nicht
vollstandig
getoeclit
werden.
Léschkopf
schmutzig?
(Deck
B)
9.
Schnell-Uberspielung
ist
nicht
mdglich.
*Ist
der
FUNCTION-
Schalter
korrekt
eingestelit?
EN
CAS
DE
DIFFICULTES
Ce
qui
apparait
au
premier
abord
comme
un
ennui
mécanique
n’en
est
pas
toujours
un.
I!
con-
vient
préalablement
de
vous
en
assurer.
1.
La
cassette
ne
peut
€tre
mise
en
place,
*La
cassette
est:
-elle
introduite
correctement?
*La
touche
de
lecture
(PLAY)
est-elle
enfoncée?
2.
La
touche
d’enregistrement
(REC)
ne
peut
étre
enfoncée.
*Les
languettes
de
la
cassette
ont-elles
été
brisées?
(Platine
B)
3.
L’appareil
ne
fonetionne
pas
lorsque
les
touches
sont
enfoncées.
*La
polarité
des
piles
a-t-
elle
été
respectée?
*Les
piles
sont-elles
déchargées?
La
touche
de
lecture
(PLAY)
est
immédiatement
désengagée
aprés
avoir
été
enfoncée.
*La
bande
est-elle
entiérement
réenroulée
sur
la
gauche?
Le
son
reste
faible
bien
que
la
commande
de
volume
soit
tournée
au
maximum.
*Les
piles
sont-elles
déchargées?
La
qualité
sonore
est
instable.
*Les
tétes
sont-elles
sales
ou
magnétisées?
.
Pleurage
et
scintillement
se
produisent.
*Tétes,
galet
presseur
ou
cabestan
sont-ils
sales?
L’enregistrement
précédent
n‘est
pas
effacé
*La
téte
d’effacement
est-elle
sale?
(Platine
B)
-
La
copie
4
grande
vitesse
ne
peut
pas
étre
effectuée.
*La
position
du
sélecteur
FUNCTION
est-elle
correcte?
wo
WOON
Dos
*ist
der
*La
cassette
est-elle
en
place?
—
&
SANA
CASSETTE
TAPE
CASSETTENBAND
CASSETTES
1.
Loose
tape
may
cause
trouble.
Use
a
pencil
to
gently
tighten
the
tape
as
shown.
2.
To
prevent
a
recording
from
being
accidentally
erased,
remove
the
tabs
with
a
screwdriver.
Reseal
the
slots
with
adhesive
tape
to
erase
and
re-record
after
the
tabs
have
been
broken.
1..
Lose
Bander
kénnen
BetriebsstGrungen
verursachen.
Verwenden
Sie
einen
Bleistift,
um
das
“
~
Band
Vorsichtig
zu
straffen,
wie
es
unten
gezeigt
ist...
2.
Entfernen
Sie
die
Sicherheitszungen
mit
einem
Schraubenzieher
,
um
unbeabsichtigtes
Léschen
von
Aufnahmen
zu
vermeiden.
Verschlie&en
Sie
die
Offnungen
mit
Klebeband,
wenn
Sie
eine
Cassette
wieder
léschen
und
neu
bespielen
méchten,
bei
der
die
Sicherhejts-
zungen
entferh
wurden.
7.
Une
bande
qui
a
du
jeu
peut
étre
source
de
mauvais
fonctionnement.
Servez-vous
d’un
crayon
pour
la
retendre
comme
indiqué.
2.
Pour
éviter
l’effacement
accidentel
d’un
enregistrement
6tez
les
languettes
au
moyen
d’un
tournevis.
Rebouchez
les
orifices
avec
du
ruban
adhésif
si
vous
désirez
effacer
ou
réenre-
gistrerjaprés
que
les
languettes
aient
été
cassées.
Turn
the
pencil
to
tighten
the
tape.
Bleistift.
zur
Straffung
des
Bandes
drehen.
|
Tourner
le
crayon
pour
tendre
la
bande,
Side
“A”
Seite
“A”
Face
“A”
Tab
“B”’
Side
"B’’
Tab
“A”
Adhesive
tape
Sicherheitszunge
‘'B’’
Seite
‘’B’’
Sicherheitszunge
"A
Klebeband
Languette
“B”
Face
“B”
Languette
“A”
Ruban
adhésif
MAINTENANCE
WARTUNG
ENTRETIEN
A
soiled
head,
capstan
or
pinch
roller
may
cause
sound
deterioration.
Clean
them
as
described
below
every
ten
hours
of
use.
:
1.
Open
the
cassette
door.
2.
Depress
the
PLAY
button
to
make
the
parts
accessible.
3.
Wipe
off
the
surface
with
a
cotton
swab
soaked
in
pure
alcohol.
Depress
the
STOP/EJECT
button
after
cleaning.
Notes:1)
Do
not
touch
the
head
surface
or
pinch
roller
with
your
fingers.
2)
As
the
erase
head
of
this
unit-is
of
magnetic
type,
do
not
demagnetize
it.
Bei
Verunreinigung
von
Tonkopf,Capstan
oder
Andruckrolle
kann
es
zu
Klangbeeintrachtigungen
kommen.
Daher
sollte
ajle
zehn
Betriebsstunden
eine
Reinigung
entsprechend
den
folgenden
Angaben
vorgenommen
werden,
1.
Den
Cassettenhalter
offnen.
2.
Die
PLAY-Taste
betatigen,
so
daR
die
zu
reinigenden
Teile
erreichbar
sind.
3.
Die
Oberflache
mit
einem
mit
reinem
Alkohol
getrankten
Wattestabchen
séubern.
Nach
der
Reinigung
die
STOP/EJECT-Taste
betatigen.
Hinweise:
1)
Die
Andruckrollenlaufflache
nicht
mit
den
Fingern
berithren,
2)
Da
ein
Magnetléschkopf
eingebaut
ist,
keine
Entmagnetisierung
vornehmen.
Si
la
téte,
fe
galet
presseur
ou
le
cabestan
sont
sales,
la
qualité
sonore
risque
d’étre
détériorée.
Nettoyez-les
de
la
maniére
décrite
ci-dessous
toutes
les
dix
heures
d’utilisation.
1.
Ouvrir
la
fenétre
du
compartiment
cassette.
2.
Enfoncer
la
touche
de
lecture
(PLAY)
pour
rendre
ces
piéces
accessibles.
3.
Nettoyer
les
surfaces
4
l'aide
d’un
coton-tige
imbibé
d’alcool.
Aprés
nettoyage,
enfoncer
la
touche
d’arrét/éjection
(STOP/EJECT).
Notes:
7)
Ne
pas
toucher
Ja
surface
de
la
téte
ou
du
galet
presseur
avec
les
doigts.
2)
Etant
donné
que
la
téte
d’effacement
de
cet
appareil
est
de
type
magnétique,
ne
pas
la
démagnétiser.
Pinch
roller
Erase
head
Andruckrolle
|
Loschkopf
Galet
presseur
Téte
d’effacement
Record/play
head
Aufnahme/Wiedergabe-K
opf
_
Téte
d’enregistrement/lecture
--Capstan
shaft
Tonwelle
Axe
du
cabestan
Capstan
shaft
Tonwelle
Axe
du
cabestan
Play
head
Wiedergabe-K
opf
Tétég@e,
lecture

LOCATION
OF
CONTROLS
0 9
@
Cassette
operation
buttons
(Deck
A)
M/4
STOP/EJECT
button
“4-4
FF
button
‘PP
REW
button
“4
PLAY
button
@
Cassette
operation
buttons
(Deck
B)
ff
PAUSE
button
m@/4
STOP/EJECT
button
“44
FF
button
Pr
REW
button
“@
PLAY
button
OREC
button
@
TAPE/FM
MODE
switch
@
FUNCTION
switch
@
3D
(HYPER-BASS
SOUND)
switch
6]
4-BAND
GRAPHIC
EQUALIZER
(S.E.
A.
)
controls
@
VOLUME
contro!
@
Preset
station
button
@
PRESET
SCAN
button
@
Cassette
holder
(Deck
A)
@
LCD
digital
display
Band
indicator
(FM1-FM2-MW-LW)
Radio
frequency
display
Preset
station
indicator
FM
stereo
(STEREO)
indicator
BAND
button
TUNING
control
¥
DOWN
frequency
A
UP
frequency
Cassette
holder
(Deck
B)
PHONES
jack
(3.5
mm
dia.
stereo
mini)
@
®
@
®
®
MIX
MIC
jack
(3.5
mm
dia:
mini)
@
®
@
@
44
Vorspultaste
(FF)
PP
Riickspultaste
(REW)
“4
Wiedergabetaste
(PLAY)
W&
Pausetaste
(PAUSE)
4-4
Vorspultaste
(FF)
PP
Riickspultaste
(REW)
<@
Wiedergabetaste
(PLAY)
O
Aufnahmetaste
(REC)
@
Lautstarkeregler
(VOLUME)
(8)
Senderspeichertasten
@
Cassettenhalter
(Deck
A)
@
LCD-Anzeige
Senderfrequenzanzeige
Stationsspeicheranzeige
UKW-Stereoanzeige
(STEREO)
@
Wellenbereichstaste
(BAND)
®
Abstimmtasten
(TUNING)
@
Cassettenhalter
(Deck
B)
Telescopic
antenna
BEAT
CUT
switch
VOLTAGE
SELECTOR/AC
IN
(AC
input)
jack
DC
IN
12
V
jack
(Q-2-@
)
(RC-W410E
only)
-
Battery
compartment
cover
.
AC
IN)
@
UKW-Teleskopantenne
@)
Gleichspannungseingang
(DC
IN
12
v)
(O>-@®)
¥V
Abnehmende
Frequenz
(DOWN)
A
Zunehmende
Frequenz
(UP)
®
Interferenzenschalter
(BEAT
CUT)
@
Spannungswahler/Netzeingang
(VOLTAGE
SELECTOR/
@
Cassettenbetrieb-Funktionstasten
(Deck
A)
@/4
Stop-/Auswurftaste
(STOP/EJECT)
@
Cassettenbetrieb-Funktionstasten
(Deck
B)
m/&
Stop-/Auswurftaste
(STOP/EJECT)
@
Bandsorten-/UKW-Betriebsartschalter
(TAPE/FM
MODE)
@
Funktionsschalter
(FUNCTION)
@
30-Schalter
(HYPER-BASS
SOUND)
@
4
Schieberegler
fir
S.E.A.
Graphic
Equalizer
(4-BAND
GRAPHIC
EQUALIZER
(S.E.A.))
@
Senderspeichersuchlauftaste
(PRESET
SCAN)
Wellenbereichsanzeige
(UKW1-U
KW2-MW-LW)
@®
Kopfhdrerbuchse
(PHONES)
(3,5
mm
¢
Stereo-Mini)
®
Mikrofoneinblendbuchse
(MIX
MIC}
(3,
5
mm
Mini)
EMPLACEMENT
DES
COMMANDES
@
Touches
de
fonctionnement
de
cassette
(Platine
A)
B/“
Touche
d‘arrét/éjection
(STOP/EJECT)
“44
Touche
d’avance
rapide
(FF}
P&P
Touche
de
réembobinage
(REW)
“4
Touche
de
lecture
(PLAY)
@
Touches
de
fonctionnement
de
cassette
(Platine
B)
Wf
Touche
de
pause
(PAUSE)
W/4
Touche
d’arrét/éjection
(STOP/EJECT)
“44
Touche
d’avance
rapide
(FF)
PP
Touche
de
réembobinage
(REW)
“4
Touche
de
lecture
(PLAY)
O
Touche
d’enregistrement
(REC)
®
Sélecteur
de
bande/mode
FM
(TAPE/FM
MODE)
@
Sélecteur
de
fonction
(FUNCTION)
@
Sélecteur
3D
(Son
hyper
grave)
(HYPER-BASS
SOUND)
@
Commandes
dégaliseur
graphique
4
4
gammes
(4-BAND
GRAPHIC
EQUALIZER
(8.E.A.))
@
Commutateur
de
volume
{VOLUME}
@
Touches
de
stations
préréglées
@
Touche
de
balayage
des
stations
préréglées
(PRESET
SCAN)
@
Porte
cassette
(Platine
A)
®@
Affichage
numérique
4
cristaux
liguides
Indicateur
de
gamme
{FM1-FM2-PO-GO)
Affichage
de
la
fréquence
radio
Indicateur
de
station
préréglée
Indicateur
FM
stéréo
(STEREO)
@
Touche
de
gamme
(BAND)
®
Commande
de
syntonisation
(TUNING)
¥
Fréquence
descendante
(DOWN)
A
Fréquence
ascendante
(UP)
®
Porte
cassette
(Platine
B)
®
Prise
de
casque
d’écoute
(PHONES)
(mini
stéréo
de
3,5
mm
de
diamétre)
@
Prise
de
mélange
de
microphone
(MIX
MIC)
(miniorise
de3,5mm
de
diamétre}
®
Antenne
téléscopique
Commutateur
coupe-battements
(BEAT
CUT)
®
Sélecteur
de
tension
(VOLTAGE
SELECTOR)
/Prise
(nur
RC-W4T0E)
@
Batteriefachdeckel
@
TAPE/FM
MODE
switch
TAPE
switch:
Set
this
switch
according
to.
the
type
of
tape
to
be
used.
NORMAL:
Set
to
this
position
to
listen
to
a
normal
(type
!)
tape.
METAL/CrO,
:
(Playback
only)
Set
to
this
position
to
listen
to
a
metal
(tape
IV)
or
chrome
(type
HI)
tape.
FM
MODE
switch:
STEREO:
Set
to
this
position
to
listen
to
or
record
an
FM
stereo.
broadcast.
MONO:
Set
to
this
position
when
FM
stereo
reception
is
obscured
by
noise.
@
Bandsorten-/UKW-Betriebsartschalter
(TAPE/FM
MODE)
Bandsortenschalter
(TAPE):
Entsprechend
der
verwendeten
Bandsorte
einstellen,
NORMAL:
Position
fur
Normalband
(Type
1)
METAL/CrO,
:
(nur
Wiedergabe)
Position
fir
Metallband
(Type
1V)
oder
Chromband
(Type
II)
UKW-Betriebsartschalter
(FM
MODE):
STEREO:
Position
fur
UKW-Stereoempfang.
MONO:
Position
flir
gestorten
UKW-
-Stereoempfang.
5
@
Sélecteur
de
bande/mode
FM
craPeret
»
MODE)
S6électeur
de
bande
(TAPE):
Placer
ce
sélecteur
en
fonction
du
type
de
ends
4
utiliser.
NORMAL:
Placer
sur
cette
position
pour
écouter
une
bande
normale
(type
1).
METAL/CrO,
:
(lecture
seulement)
Placer
sur
cette
position
pour
écouter
une
bande
métal
(type
1V)
ou
chrome
(type
M1).
Sélecteur
de
mode
FM
(FM
MODE):
STEREO:
Placer
sur
cette
position
pour
écouter
ou
enregistrer
une
émission
FM.
MONO:
Placer
sur
cette
position
quand
fa
réception
stéréo
FM
est
bruitée.
@
FUNCTION
switch
TAPE
(RADIO
STANDBY)
—
NORMAL
SPEED
DUBBING:
Set
to
this
position
to
listen
to
a
cassette
or
record
using
the
external
microphone;
also
set
to
this
position
to
dub
at
normal
speed
or
to
switch
off
the
pagio:
TAPE
(RADIO
STANDBY)
~—
HIGH
SPEED
DUBBING:
Set
to
this
position
to
dub
at
high
speed
or
to
switch
off
the
radio.
RADIO:
;
Set
to
this
position
to
listen
to
or
record
from
the
radio.
"entrée
CA
TAC
ING
@
Prise
d’entrée
CC
12
V
(DC
IN
12
V)
(©--@)
(RC-W4
10E
seulement)
@
Couvercle
du
compartiment
des
piles
Q
Funktionsschalter
(FUNCTION)
TAPE
(RADIO
STANDBY)
—
NORMAL
SPEED
DUBBING:
Position
fiir
Cassettenwiedergabe
oder
Aufnahme
mit
externem
Mikrofon,
sowie
fir
Uberspielbetrieb
(Normalgeschwindigkeit)
und
Abschaltung
des
Radioteils.
TAPE
(RADIO
STANDBY)
—
HIGH
SPEED
DUBBING:
Position
fiir
Uberspielbetrieb
(hohe
Geschwindigkeit)
und
Abschaltung
des
Radioteils,
RADIO:
:
Position
fiir
Radioempfang
und
Aufnahme
vom
Radioteil.
@
Sélecteur
de
fonction
(FUNCTION)
TAPE
(RADIO
STANDBY)
—
NORMAL
SPEED
DUBBING:
Placer
sur
cette
position
en
écoutant
une
cassette
ou
en
enregistrant
en
utilisant
le
microphone
externe;
placer
également
sur
cette
position
en
copiant
a
vitesse
normale,
TAPE
(RADIO
STANDBY)
—
HIGH
SPEED
DUBBING:
Placer
sur
cette
position
en
copiant
a
grande
vitesse.
RADIO:
Placer
sur
cette
position
en
écoutant
ou
en
enregistrant
4
partir
de
la
radio.
©
3D
(HYPER-BASS
SOUND)
switch
OFF:
Set
to
this
position
when
the
hyper-bass
sound
is
not
required.
ON:
Set
to
this
position
to
listen
to
the
hyper-bass
sound.
@
3D-Schalter
(HYPER-BASS
SOUND)
OFF:
Klangwiedergabe
ohne
das
Hyper-Bass
Sound-System.
ON:
Klangwiedergabe
mit
dem
Hyper-Bass
Sound-System.
@
Sélecteur
3D
(Son
hyper
grave)
(HYPER-BASS
SOUND)
OFF:
; ;
Régler
sur
cette
position
quand
le
son
hyper
grave
n’est
pas
nécessaire.
ON:
Régler
sur
cette
position
pour
écouter
le
son
hyper
grave.
@
BEAT
CUT
switch
Usually
set
to
“NORM
1”
position.
Beats
which
may
occur
while
recording
an
MW
or
LW
broadcast
can
be
eliminated
by
changing
the
position
of
this
switch.
@
Interferenzenschalter
(BEAT
CUT)
Normalerweise
auf
’*NORM
1”
stellen.
Interferenzen,
die
bei
Aufnahme
von
MW-,
oder
LW-Sendtingen
auftreten
kGnnen,
kdénnen
durch
Umstellén
dieses
Schalters reduziert
werden.
@
Commutateur
coupe-battements
(BEAT
CUT)
Normalement
placer
sur
la
position
“NORM
1”.
Des
battements
qui
peuvent
se
produire
en
enregistrant
une
émission
PO
ou
GO
peuvent
étre
éliminés
en
changeant
fa
position
de
ce
commutateur.

OPERATIONS
(1)
BETRIEB
(1)
FONCTIONNEMENTS
(1)
@
STOPLEJECT
ia]
Press.
Dracken.
Enfoncer,
insert
the
cassette
with
the
side
you
want
to
play
back
or
record
facing
towards
you.
‘Die
Cassette
so
einlegen,
da
die
ab-
zuspielende
oder
zu
bespielende
Seite
nach
auRen
weist.
Introduire
la
cassette
avec
le
c6té
a
lire
ou
a
enregistrer
tourné
vers
vous.
FUNCTION
Funktion
(FUNCTION)
Fonction
(FUNCTION)
Set
the
TAPE
switch
as
required.
(Refer
to
TAPE
switch.)
Die
Bandsorte
(TAPE)
wie
(Egon
erforderlich
einstellen.
(Siehe
—_
——
TAPE-Schalter)
ee
GR,
Régler
le
sélecteur
TAPE
CUSHING
FUNCTION
comme
requis.
(Se
reporter
au
sélecteur
TAPE,
}
°
|
(bTT)
Load
a
prerecorded
tape.
TAPE
WORRIAL
|
FETA
Eine
bespielte
Cassette
einlegen.
TAPE
SEM
MODE
Charger
une
cassette
préenre-
gistrée.
®
STOP/EJECT
FF
=
REW
PLAY
Press,
Drucken,
Enfoncer.
©
(5)
Adjust
S.6.A.
and
VOLUME.
S.E.A.
und
Lautstarke
(VOLUME)
einstellen.
A
:
einstellen,
Régler
le
S.E.A,
et
le
VOLUME.
Régler
le
sélecteur
3D
comme
WOOH2
30H
te
Otte
voulu.
Set
the
3D
switch
as
required.
Manin
sl
ic
mI
i
JD){RYPER-BASS
SOUND,
Den
3D-Schalter
wie
erforderlich
Note:
Deck
B
is
operated
for
playback
in
the
same
way.
When
Decks
A
and
B
are
set
to
the
play
mode
simultane-
ously,
sound
will
be
heard
only
from
Deck
A.
Hinweis:
Fur
Deck
B_
gelten
die
gleichen
Bedienschritte.
Werden
Deck
A
und
B
gleichzeitig
auf
Wiedergabe
geschaltet,
erfolgt
die
Wiedergabe
nur
fOr
Deck
A.
Remarque:
La
platine
B
fonctionne
en
lecture
de
-
0)
FUNCTION
@
Funktion
(FUNCTION)
Fonction
(FUNCTION)
Set
the
TAPE
switch
as
required.
(lj
Die
Bandsorte
(TAPE)
wie
erforderlich
einstellen.
Res
‘eer
:
Régler
le
sélecteur
TAPE
DUBBING
FUNCTION
comme
requis.
>
@)
ree
Load
prerecorded
tapes
in
Decks
TAPE
NORMAL
METALIC(Ot
A
and
B.
i
(PLAY)
In
Deck
A
und
B
bespielte
Cas-
TAPE/FM
MODE
setten
einlegen.
°
Charger
des
cassettes
préenre-
gistrées
dans
les
platines
A
et
B.
®
For
FM
reception
only.
Set
as
desired.
(Refer
to
FM
MODE
switch.)
FUNCTION
;
Bei
UKW-Empfang
wie
erfor-
Funktion
(FUNCTION)
derlich
einstellen.
(Siehe
FM
Fonction
(FUNCTION)
MODE-Schalter)
Pour
Ia
réception
FM
seule-
wm
(TT
]|
ment,
Régler
comme
voulu.
®
Press
the
PLAY
button
of
Deck
A.
Die
PLAY-Taste
von
Deck
A
betatigen.
Appuyer
sur
la
touche
PLAY
de
la
platine
A.
STOP/EJECI
FF.
REW
PLAY
eel=l>
La)
Deck
B’s
pause
mode
will
be
re-
leased
and
playback
of
its
tape
will
start,
6
Set
Deck
B
to
tke
play-pause
Mettre
la
platine
B
en
mode
de
pause-lecture.
PAUSE
STOP/EECT
FF
REW
PLAY
et
/a
lecture
de
sa
cassette
com-
When
Deck
A
stops
for
any
reason,
Wird
Deck
A
auf
Stop
geschaltet,
erfolgt
Umschaltung
von
Wieder-
mode.
gabepause
auf
Wiedergabe
bei
Deck
B
auf
Wiedergabepause
Deck
B.
schalten,
Quand
la
platine
A
s’arréte
pour
»
n‘importe
quelle
raison,
le
mode
de
pause
de
Ia
platine
B
est
libéré
Remarque:
la
méme
fagon.
Si
les
platines
A
et
B
sont
mises
simultanément
dans
le
mode
de
lecture,
fe
son
sera
entendu
seulement
de
la
platine
A,
Note:
Use
the
same
type
of
tape
in
Decks
A
and
B.
Hinweis:
Fir
Deck
A
‘und
B
die
gleiche
Bandsorte
verwenden,
Utiliser
le
méme
type
de
bande
dans
les
platines
A
et
B.
Cw
[aval
«|
|
a
To)
Li
cae
ae
ee
ae
Tune
to
the
desired
station.
Den
gewiinschten
Sender
ejn-
®
stellen,
:
Set
the
3D
switch
as
required.
Syntoniser
sur
la
station
voulue.
Den
3D-Schalter
wie
erforderlich
nade
TUNING
ies
einstellen,
Régler
le
sélecteur
3D
comme
voulu.
AL
{Se
reporter
au
sélecteur
RADIO
FUNCTION
FM
MODE.)
~->.
(@)
;
BAND
Select
the
band.
ln
Wellenbereich
einstellen.
Sélectionner
la
gamme,
TAPE
FM,
MODE
-_-
©
Adjust
S.E.A.
and
VOLUME.
S.E.A.
und
Lautstérke
(VOLUME)
einstellen.
Régler
le
S.E.A,
et
le
VOLUME.
Using
antenna
Verwendung
der
Antenne
Utilisation
de
l’antenne
FM
UKW
A
FM
MW
&
LW
MW
und
LW
PO
et
GO
a
Five
stations
in
each
band
(FM1,
FM2,
MW
and
LW)
can
be
preset
as
follows:
Press
Preset
button
“3”
for
more
than
2.
sec.
(after
2
sec.
the
LCD
display
shows
a
flashing
e
Example
(when
presetting
Preset
button
“3”
to
FM
station
at
103.5
MHz)
3m)
‘
R
Fur
jeden
Wellenbereich
kénnen
jeweils
5
Sender
(UKW1,
UKW2,
MW
und
LW)
wie
folgt
©
Repeat
the
above
procedure
for
each
of
the
gespeichert
werden,
other
four
stations
using
a
different.
Preset
®
Beispiel
(Belegung
von
Senderspeichertaste
3’’
mit
UKW-Sender
bei
103,5
MHz
Sender-
button
each
time.
frequenz)
a
®@Follow
the
above
procedure
for
the
other
Cing
stations
de
chaque
gamme
(FM1,
FM2,
PO
et
GO)
peuvent
étre
préréglées
comme
suit:
bands
(FM2;
MW
and
LW).
@
Exemple
(pour
prérégler
ta
touche
de
préréglage
‘’3’’
sur
une
station
FM
a
103,5
MHz)
Senderspeichertaste
““3’2:flir
mehr
als
2
Sekunden
® @
TUNING
BAND
1
DOWN
auUP
Select
the
FM1
band
Syntoniser
sur
la
station
using
the
BAND
button.
mac.
gt
:
Fy
ly
=
FM
“
Co>
1F.5
vier
Senderspeichertagte
Tune
to
the
desired
station.
Den
gewUunschten
Sender
einstellen.
gedruckt
halten.
(Nach
2
Sekunden
zeigt
das
LCDDisplay
die
Blinkahzeige
3°")
@
Die
obigen
Bediens@pritte
fir
die
restlichen
@
Fur
FM2,
MW
und
EW
auf
die
gleiche
Weise
die
Senderspeichertasten
belegen.
Appuyer
sur
la
touthe
de
préréglage
“3”
pendant
plus
de
2
secondes.
(aprés
2
secondes,
voulue.
Vaffichage
4
cristaux
liquides
montre
un
“3”
Mit
der
Wellenbereichstaste
®
(BAND)
auf
UKW
schalten.
cPTUNER:
PRESET,
“STATIONS
Sélectionner
la
gamme
FM1
en
utilisant
la
| |
|
touche
BAND.
clignotant)
©
Répéter
le
procédé
ci-dessus
pour
chacune
7
des
quatres
autres
stations
en
utilisant
une
<T}
.
>
:
Beem
touche
de
préréglage
différente
a
chaque
fois.
tit
ct.
1
MHz}
©
Suivre
le
procédé.
ci-dessus
pour
les
autres
©
gammes
(FM2,
PO
et
-GO).
Note:
When
the
unit
is
used
more
than
30
minutes
after
being
preset,
the
preset
station
memory
will
be
held
for
approx.
48
hours
after
unplug-
ging
the
power
cord
or
removing
the
batteries.
Presetting
is
required
again
when
the
preset
Stations
are
cancelled,
Hinweis:
,
Wenn
dieses
Gerdt
nach
der
Senderspeicher-
belegung
fiir
Uber
30
Minuten
eingeschaltet
ist,
werden
die
Senderspeicher
fiir
ca.
48
Stunden
beibehalten,
auch
wenn
das
Netzkabel
abge-
zogen
ist,
bzw.
wenn
die
Batterien
entnommen
werden.
Nach
Léschung
der
Senderspeicher
ist
eine
erneute
Belegung
erforderlich,
Remarque:
Si
lappareil
est
utilisé
plus
de
30
minutes
apres
étre
préréglé;
la
mémoire
de
station
pré-
réglée
sera
maintenue
pour
environ
48
heures
apres
débranchement
du
cordon
secteur
ou
retrait
des
piles.
I
faut
refaire
le
préréglage
lorsque
les
stations
préréglées
sont
effacées,
This
makes
it
possible
to
automatically
scan
preset
FM,
MW
and’LW
stations.
Gespeicherte
UKW-,
MW-.
und
LW-Sender
kénnen
automatisch
angewahit
werden,
i!
est
possible
de
balayer
automatiquement
les
stations
préréglées
FM,
PO
et
GO.
Appuyer
sur
la
touche
PRESET
SCAN.
Scanning
is
performed
in
the
order
of
preset
stations
in
each
frequency
band
(FM1,
FM2,
MW
and
LW).
Each
preset
station
is
heard
for
approx.
5
seconds,
Press
the
PRESET
SCAN
button.
Der
Suchlauf
erfolgt
pro
Wellenbereich
in
der
Ein-
Die
PRESET
SCAN-Taste
betatigen.
gabereihenfolge
(FM1,
FM2,
MW
und
LW).
Jeder
ge-
speicherte
Sender
wird
fir
jeweils
ca.
5
Sekunden
ge-
a
halten.
;
SCAN
Le
balayage
est
effectué
dans
l’ordre
des
stations
pré-
régiées
dans
toutes
les
gammes
de
fréquence
(FM1,
FM2,
PO
et
GO.)
Chaque
station
préréglée
est
entendue
pendant
environ
5
secondes.
®
When
the
required
station
is
heard
and
its
frequency
is
flashing,
press
the
PRESET
SCAN
button
again.
Den
gewiinschten
Sender
bei
blinkender
Fre-
quenzanzeige
durch
nochmaliges
Betatigen
der
PRESET
SGAN-
Taste
beibehalten.
Quand
fa
statiof#f
voulue
est
entendue
et
que
sa
fréquence
est
clignotante,
appuyer
a
nouveau
sur
la
touche
PRESET
SCAN.
This manual suits for next models
2
Other JVC Cassette Player manuals