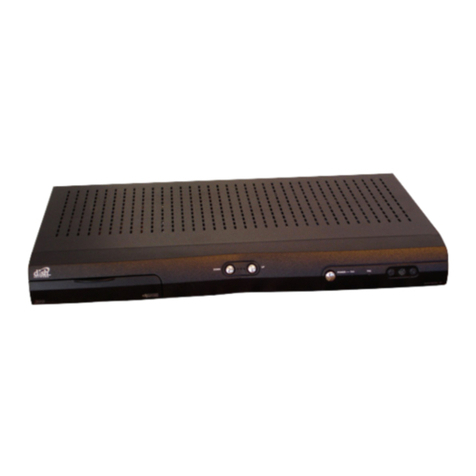
JVC KT-HDP1 - HD Radio Tuner User manual

..lye
TRANSPORTABLE HD
RADIO™
RECEIVER
RECEPTOR TRANSPORTABLE DE HD
RADIO™
KT-HDP1
INSTRUCTIONS
MANUAL
DE
INSTRUCCIONES
For
customer
Use:
Enter
below
the
Model
No.
and
Serial No.
which
are
located
on
the
top
or
bottom
of
the
cabinet.
Retain this
information
for
future
reference.
Model
No.
Serial
No.
49.HPAJV.OOl
L
VT1796-00
1A

Lt.
WARNINGS
FCC Warning: This equipment may
generate or use radio frequency
energy. Changes or modifications to
this equipment may cause harmful
interference unless the modifications
are expressly approved
in
this User
Guide. The user could lose the
authority to operate this equipment if
an
unauthorized change or
modification is made.
Note: This equipment has been tested
and found to comply with the limits for
aClass Bdigital device, pursuant to
part 15
of
the FCC Rules. These limits
are designed to provide reasonable
protection against harmful interference
in
aresidential installation. This
equipment generates, uses and can
radiate radio frequency energy and, if
1
not installed and used
in
accordance
with the instructions, may cause
harmful interference to radio
communications. However, there
is
no
guarantee that interference will not
occur
in
aparticular installation. If this
equipment does cause harmful
interference to radio or television
reception, which can be determined by
tuning the equipment off and on, the
user is encouraged to try to correct the
interference by one or more
of
the
following measures:
Reorient or relocate the receiving
antenna.
Increase the separation between the
equipment and receiver.
Connect the equipment into
an
outlet
on acircuit different from that to
which the receiver
is
connected.
Consult the dealer or an experienced
radiolTV technician for help.
Operating Temperature
The receiver
is
designed to operate
between
~20°C
(-4°F)
to +70
°c
(158°F). .
Avoid leaving the receiver in avehicle
or elsewhere where the temperature
may fall outside this range. Extreme
temperatures or extreme temperature
fluctuations can degrade the
performance of the LCD display
screen, and possibly damage it.
Cleaning and Maintenance
If the receiver or accessories become
dirty, turn the power off and wipe it
clean with asoft cloth. Do not use hard
cloths, strong cleaning fluids, paint
thinner, alcohol, or other volatile
solvents to clean. These may cause
damage to the receiver.
Changes
or
modifications not approved
by
JVC could void the user's authority to
operate the equipment.
2

~
CAUTIONS
This
symbol
means
important
instructions.
Failure
to
heed
them
can
result
in
injury
or
material
property
damage.
Liquid Crystal Precautions
•If the liquid crystal fluid comes
in
contact with your skin, wipe the
skin area with acloth and then
wash the skin thoroughly with
soap and running water.
•If the liquid crystal fluid gets into
your eye, flush the eye with clean
water for at least
15
minutes.
Seek medical care.
•Ifthe liquid crystal fluid
is
ingested,
flush your mouth thoroughly with
water. Drink large quantities
of
water and induce vomiting. Seek
3
medical care.
Safety Precautions
Be sure to observe the following
warnings. Failure to follow these
safety instructions and warnings may
result
in
aserious accident.
•Do not operate the receiver
in
a
way that might divert your
attention from driving safely. As a
driver, you alone are responsible
for safely operating your vehicle
in
accordance with traffic safety laws
at all times.
•Do not install the receiver where
it
may obstruct your view through
the windshield, or ofyour vehicle's
indicator displays.
•Do not install the receiver where it
may hinder the function of safety

devices such as
an
airbag. Doing
so may prevent the airbag from
functioning properly
in
the event
of
an
accident.
Be sure the receiver and
accessories are installed as
deseflbea--in
the installation
instructions which accompany
each accessory kit.
To
avoid short circuits, do not
open the receiver or accessories,
and never put or leave any
metallic objects (coins, tools, etc.)
inside the receiver.
If the receiver or accessories
emits smoke
or
unusual odors,
turn the power off immediately,
and disconnect the receiver from
any power source.
Do not drop the receiver or
su
bject it to strong shocks.
If the receiver doesn't seem to be
working properly, turn the receiver
off, wait 10 seconds, replace the
battery and then turn it on again.
The installation and use suggestions
contained
in
this manual are subject to
any restrictions
or
limitations that may
be imposed by applicable law. The
purchaser should check applicable law
for any restrictions or limitations before
installing and/or operating this unit.
[European Union only]
4

Index
Package Contents 7
Optional Accessories (Sold Separately) 9
Installation for Car Use 12
"Professional" Installation 12
"Do it Yourself' Installation 15
Installation for Home Use 18
Connecting the Cigarette LighterAdapter 19
Controls 20
Getting to Know Your HD Radio Receiver 20
Getting to Know Your Remote ControL 23
On-Screen Information 26
During HD Radio Mode 26
During FM/AM Mode 27
Menu Options 28
5

Loudness
33
Factory Defau
It
34
Specifications
35
29
32
31
33
29
30
34
32
..
.............................................................................
..............................................................................
....................................................
...............................................................................
................................................................................
.................................................................................
..................................................................................
Equalizer .
Tone
Control
Balance
...
Software Version.
Operations .
FM
Transmitter
Display Options
Aud
io
Control
...
6

@0
HD
CD
G
(~'!T)
0
VOL
HD
G G
EQ
CJ
DISP
CJ
OJ
CTI
CD
BAND
CJCDCDCD
This
product
contains
a
CR
Coin
Cell
Lithium
Battery
which
contains
Perchlorate
Material
-
special
handling
may
apply.
See
www.dtsc.ca.gov/hazardouswaste/perchlorate
3. Remote control
with
battery
\
1.
HD
Radio receiver
Package Contents
2. Cigarette lighter adapter
7

•Do not install any battery other than CR2025 or its equivalent; otherwise, it
may explode.
•Store the battery
in
aplace where children cannot reach to avoid risk
of
accident.
•
To
prevent the battery from over-heating, cracking, or starting afire;
-Do not recharge, short, disassemble, heat the battery, or dispose
of
it
in
fire.
-Do not leave the battery with other metallic materials.
-Do not poke the battery with tweezers or similar tools.
-Wrap the battery with tape and insulate when throwing away
or
saving
it.
Note/ You will need to purchase an additional Home or Car installation kit to
use your KT-HDP1.
8

Optional Accessories (Sold Separately)
1.
Car Kit [KV-K1017]
"Professional" Installation Kit (Optional)
(a) Cable clip
~
_7
7 7 7 7 7 7 7 7 I7 7 7 7 I7 7
lm~
(b) Connection unit
9
(c) Dash mount
(d) Audio cable

2.
Car Kit [KV-K1018]
"Do it Yourself" Installation Kit (Optional)
o
(a)
Input antenna (Sleeve type)
(b)
Output antenna (Sleeve type)
(c)
Cable clip
~.~
/ / I
1/1
I I / / / / I/ / I
nn.~
(d) Suction cup
(e) Audio cable
10

3.
Home Kit [KV-K1019] (Optional)
(a) Home (Input) antenna
(b) AC adapter
-----
11
(c) Cable clip
?:::ill I I I I I I I I I I I I I I I
I~
(d) Home stand
(e) Audio cable

Installation
for
Car Use
There are two ways for installation: "Professional' installation and "Do
it
Yourself' installation.
"Professional" Installation
Professional installation requires an experienced technician to install this product
in
your vehicle, and provides advice for selecting asuitable mounting location,
installation
of
the antenna, and routing all the necessary wires and cables.
•
"Professional"
Installation- Type (A)
Professional installation-type (A) is for car radios with an AUX-IN (audio input)
function. Please locate the AUX-IN (audio input)'s location and determine
whether it is
in
front or rear
of
the car radio.
12

Professional InstallationA
Vehicle
antenna
IN-ANT.
AUDIO
1
..
1
i.
~
·~I
~~
~~
';i
!
Connection
unit
Car
radio
12V
DC
12V
CLA
Audio
AUX
Input
Note! Some motorized vehicle antennas will automatically retract down when AUX-IN
mode
is
selected. Under the mentioned circumstances, signal reception will become
poor and the sound quality will
be
poor. Vehicles equipped with abuilt-in windshield
antenna, will automatically turn off when switching the car radio
to
AUX-IN mode.
13

14
12V
CLA
12V
DC
Car
radio
ANT.-OUT
IN-ANT.
ProfessionallnstaUationB
Connection
unit
Vehicle
antenna
•
"Professional"
Installation- Type (B)
Professional installation-type
(8)
is
for car radios
without
Aux-in
(audio input)
and is using wired
FM
Transmitter's function.

"Do
it
Yourself"
Installation
"Do it Yourself' installation facilitates you to set
up
your device
in
convenient and
quick ways.
•
"Do
it
Yourself"
Installation- Type (A)
Do it Yourself installation-type (A)
is
for car radios with
Aux-in
(audio input)
connection. Do
it
Yourself
Installation
A
Input
antenna
(Sleeve
type)
udio
AUX
Input
=<
:>
12V
CLA
(:
IN-ANT
.
./~
I)• I
AUDIO
..
~
\
5~r
---
r--+~
-
,----
~-~
12V
DC
Car
radio
Dr
)
81
A
[§J:o;
JW
I
>r
~><
I~
15

Do
it
Yourself Installation B
16
12VDC
'-----=<.:
:>
12VCLA
Car
radio
Input
antenna (Sleeve type)
--......--
__
-..--C:
)lIN-ANT.
~~~§;;
Output
antenna (Sleeve type)
I.
)"~A
I
GJANT...QUT
•
"Do
it
Yourself"
Installation- Type (8)
Do
it
Yourself installation-type (8)
is
for car radios
without
Aux-in
(audio
input) and uses a
wired
FM Transmitter connection. Do it Yourself
installation-type (8) uses asleeve type
of
antenna for
FM
signal reception.

•
"Do
it
Yourself"
Installation-
Type (C)
Do it Yourself installation-type (C) takes advantage
of
receiver's internal
antenna and uses a
wireless
FM
Transmitter
for linking to the car radio.
Do
it
YourselfInstallation C
Input
antenna
(Sleeve
type)
.--------'""""""-(:
} IN-ANT.
~
~~SS;;:
"___..TT,
-12V DC
Car
radio
12V
CLA
17

Installation for Home Use
Your transportable HD Radio receiver can
be
also used while at home.
Home Use Installation
Home
antenna
IN-ANT.
Audio
cable
12V
DC
Adapter
@
~IO~
DDDOOD,
@
o§c::I:J:J:I:I 0
c::::::J
CJfml
18

Connecting the Cigarette Lighter Adapter
Connect the provided cigarette lighter adapter (12V CLA) to the 12V DC
connection at the side
of
the receiver.
Changing Fuse
Replace the fuse with one of the specified rating (2A).
19
Other manuals for KT-HDP1 - HD Radio Tuner
2
Table of contents
Other JVC Receiver manuals