manuals.online logo
Brands
  1. Home
  2. •
  3. Brands
  4. •
  5. KAM
  6. •
  7. Measuring Instrument
  8. •
  9. KAM Ultimate V2 User manual

KAM Ultimate V2 User manual

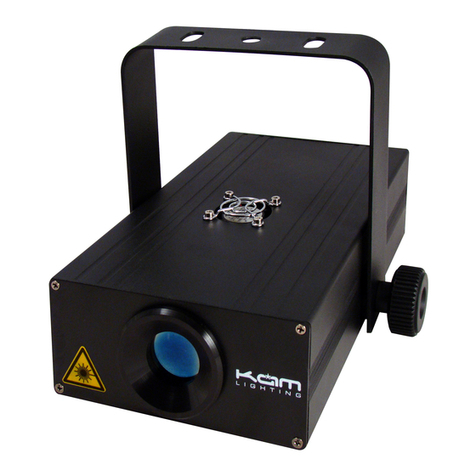
DMX Star Cluster Ultimate V2
Red and green star cluster effect
Multiple laser effects including
Star cluster, firework,3D, kaleido
100mW red / 40mW green diodes
Built-in programs
Sound activation
Full 512 DMX compatible
8 DMX channels
Fan cooled cool running
Safety key lock
Solid metal chassis
Adjustable hanging bracket
M A N U A L V E R S I O N 1 . 0
Date 18/11/2010
For the latest instruction manual updates and information on the entire Kam range visit:
www.kam.co.uk
Kam products are manufactured by: Lamba plc, Unit 1, Southfields Road, Dunstable, Bedfordshire, United Kingdom LU6 3EJ
Telephone: (+44) (0)1582 690600 • Fax: (+44) (0)1582 690400 • Email: [email protected] • Web: www.lambaplc.com
If this product is ever no longer functional please take it to a recycling plant for environmentally friendly disposal.
Due to continuous product development, specifications and appearance are subject to change.
© Copyright Lamba plc 2010. E&OE.
Thank you for purchasing this KAM product, we are sure that it will serve you for many years to come.
To optimise the performance of this product, please read these operating instructions carefully to familiarise yourself with the
basic operations of this unit. After you have read the instructions, please retain them for future reference.
This unit has been tested at the factory before being shipped to you.
To prevent or reduce the risk of electrical shock or fire, do not expose the unit to rain or moisture. To prevent a fire hazard, do not
expose the unit to any naked flame sources. Unplug this apparatus during lightning storms or if it is unlikely to be used for long
periods of time.
When installing the unit, please ensure you leave enough space around the unit for ventilation. Slots and openings in the unit are
provided for ventilation to ensure reliable operation of the product and to protect it from overheating. To prevent fire hazard, the
openings should never be blocked or covered.
Always handle the power cable by the plug. Never pull out the plug by pulling on the cable. Never touch the power cable when
your hands are wet as this could cause an electric shock. Do not tie a knot in the cable. The power cable should be placed such
that it is not likely to be stepped on. A damaged power cable can cause a fire or give you an electrical shock. Check
the power cord periodicaly, if you ever find that it is damaged, replace it before using the unit again. Contact your retailer for a
replacement.
The voltage of the available power supply differs according to country or region. Be sure that the power supply voltage of the area
where this unit is to be used meets the required written on the unit.
The lightning flash symbol inside a triangle is intended to alert the user to the presence high voltage within the unit’s
enclosure that may be of sufficient power to constitute a risk of electrical shock to persons.
Caution: to prevent the risk of electric shock, do not attempt to open the unit. No user-serviceable parts inside. Refer all
servicing to qualified service personnel.
The exclamation mark inside a triangle is intended to alert the user to the presence of important operating and
maintenance instructions in the literature accompanying the appliance.
Any modification carried out on the unit may invalidate the unit’s warranty.
If applicable, only use the stand, tripod or bracket specified or sold with the apparatus.
Select the installation location of your unit carefully. Avoid placing it in direct sunlight or locations subject to vibration and
excessive dust. Do not use the unit where there are extremes in temperature (below 41ºF / 5ºC or exceeding 95ºF / 35ºC).
Unpacking and safety: Please unpack your new product carefully, your new product should reach you in perfect condition. Please
check that no damage has occurred during transit. If any damage is found, do not operate your unit. Please contact the retailer
you purchased it from immediately. If there is any damage to the mains cable do not use the device. Always disconnect the unit
from the mains supply when carrying out any servicing or cleaning of the unit.
The serial number for this equipment should be located on the rear or underside of the unit. Please make a note of this number as
you will need it for your warranty, it is a good idea to keep a copy of the serial number for your own records.

Operation
When laser is powered on, LED display on the rear panel shows the current operating status.
With help of LED display panel, it is very easy to set and change the operating mode of laser.
Key lock
Located on the rear panel is the safety key lock, when in the on position the laser will function correctly. When in the off position
the laser diodes will not function but the unit will still power up.
Remote socket
This can be connected to a remote safety lock off switch if required (not supplied).
Mode
Mode/Function Option, to choose the operating mode of laser.
Enter
Confirmation, to confirm all settings or change of LED control panel.
UP/DOWN to change operating mode, parameter or DMX address.
Stand alone mode
Using the function button press until one of the following is displayed Sra,Ara,Asr, and is flashing
Use the up / down buttons to select desired program
Press enter to confirm
DISPLAY
STAND ALONE MODE PRE PROGRAM EFFECT
ARA
Auto Running rAndom Effect
ASR
Auto Slow running Effect
SRA
Sound Activated rAndom Effect
MASTER/SLAVE MODE
Several units can be linked together using a DMX cable (not supplied). This can be done with or without a DMX controller.
Stand alone (no controller)
One unit must be set as the master unit, using the function button select the desired program. All other units must be set to slave
mode, using the function button until SLA is displayed, then press enter to confirm. This must be done on all slave units.
And they must be linked together using a 3pin XLR to XLR DMX cable.
Connect from the DMX output of the master into the DMX output of the first slave device and continue linking in this way to all
other slave units.
In sound mode use the rotary dial on the rear panel to adjust the sound sensitivity.
Linking with DMX controller
Each unit uses 8 DMX channels. Using the function button press until 001-512 is displayed. Using the up/down button select the
required DMX starting address and press enter to confirm. This will start the DMX address at 001. If wanting to control several
units exactly the same, all units must be set to this start address. If wanting individual control of all units, each unit must have its
own starting address. E.g. unit 1 set to 001 unit 2 set to 009 and so on. Each unit must be set at least 8 channels apart and no
channel address must cross over with another unit.
DMX Protocol
Channel
DMX value
Description
1
Mode
000-009
Black out
010-060
ARA, Auto Running Random Effect
061-110
ASR, Auto Slow Running Effect
111-160
SRA, Sound Activated Random Effect
161-255
DMX MODE (Other channels activated)
2
Grating
000-025
Grating Effect 1
026-050
Grating Effect 2
051-074
Grating Effect 3
075-100
Grating Effect 4
101-125
Grating Effect 5
126-150
Grating Effect 6
151-175
Grating Effect 7
176-200
Grating Effect 8
201-225
Grating Effect 9
226-255
Grating Effect 10
3
Movement 1
000-255
Slow to Fast
4
Movement 2
000-127
The Second Grating --- OFF
128-255
The Second Grating --- ON
5
Movement 3
Channel 6 must have value above 25
000-255
Slow to Fast
6
Movement 4
Ch5 must have a value
000-255
Slow to fast
7
Colour
For strobe effect ch 8 must have
value above 10
000-036
Black Out
037-072
Red
073-108
Green
109-144
Alternately Strobing Red & Green
145-180
Red On, Strobing Green
181-216
Green On, Strobing Red
217-255
Both Red and Green Strobing
8
Strobing
000-009
No Strobing
010-255
Slow to Fast
IMPORTANT
For your own safely and full laser safety regulation,
we do strongly recommend you do use an optional switch!
Available from your local electrical contractor. Used in the remote socket.
Specifications
Mains Input: AC100-240V, 50/60Hz
Fuse: 250V 1.6A Slow Blow (20mm Glass)
Total Power: 20W
Music Control: Internal microphone
Laser Power: 40mW 532nm Green CW
100mW 650nm Red CW
Laser Classification: Class 3B
Laser Safety Standard: EN60825-1 2007
Condition Temperature: 10~40℃
DMX Connections: 3 pins XLR Male/Female
DMX Channels: 8 channels
Measurement: See diagram on the right
Weight: 3.0 Kg

Other KAM Measuring Instrument manuals

KAM Simple Precision PKF User manual

KAM

KAM Simple Precision PKF User manual

KAM Star Cluster Micro V2 User manual

KAM

KAM Star Cluster Micro V2 User manual

KAM LRW User manual

KAM

KAM LRW User manual

KAM Tri140 FScan User manual

KAM

KAM Tri140 FScan User manual

KAM DMX Laser40 FScan User manual

KAM

KAM DMX Laser40 FScan User manual

KAM Combi Cluster User manual

KAM

KAM Combi Cluster User manual

KAM BLUE MOVER 500 SD FSCAN User manual

KAM

KAM BLUE MOVER 500 SD FSCAN User manual

KAM Simple Precision OWD User manual

KAM

KAM Simple Precision OWD User manual

KAM TRI 160 User manual

KAM

KAM TRI 160 User manual

KAM Simple Precision CHA User manual

KAM

KAM Simple Precision CHA User manual

Popular Measuring Instrument manuals by other brands

ABB NETA-21 Installation and startup guide

ABB

ABB NETA-21 Installation and startup guide

Teledyne Lecroy WaveMaster 8000HD Getting started guide

Teledyne Lecroy

Teledyne Lecroy WaveMaster 8000HD Getting started guide

DGH DGH 55B Operator's manual

DGH

DGH DGH 55B Operator's manual

YOKOGAWA SC4A instruction manual

YOKOGAWA

YOKOGAWA SC4A instruction manual

Datacolor ColorReaderPRO DC10-1 user guide

Datacolor

Datacolor ColorReaderPRO DC10-1 user guide

Martek Mark 25 instruction manual

Martek

Martek Mark 25 instruction manual

Ditel BETA-D instruction manual

Ditel

Ditel BETA-D instruction manual

Orbis CONTAX D-6331 S0 user manual

Orbis

Orbis CONTAX D-6331 S0 user manual

ZIEHL UFR1001 operating manual

ZIEHL

ZIEHL UFR1001 operating manual

SIRETTA SNYPER-LTE+ quick start guide

SIRETTA

SIRETTA SNYPER-LTE+ quick start guide

Sorama L642 user manual

Sorama

Sorama L642 user manual

Amalgamated Wireless F242A manual

Amalgamated Wireless

Amalgamated Wireless F242A manual

FUZRR ES3001 manual

FUZRR

FUZRR ES3001 manual

Netatmo Smart Rain Gauge manual

Netatmo

Netatmo Smart Rain Gauge manual

JYTEK PXIe-69852 user manual

JYTEK

JYTEK PXIe-69852 user manual

ETI 810-130 operating instructions

ETI

ETI 810-130 operating instructions

Teledyne Princeton Instruments FER785-MM user manual

Teledyne

Teledyne Princeton Instruments FER785-MM user manual

Lumel N20HPLUS user manual

Lumel

Lumel N20HPLUS user manual

manuals.online logo
manuals.online logoBrands
  • About & Mission
  • Contact us
  • Privacy Policy
  • Terms and Conditions

Copyright 2025 Manuals.Online. All Rights Reserved.