manuals.online logo
Brands
  1. Home
  2. •
  3. Brands
  4. •
  5. KEENCUT
  6. •
  7. Cutter
  8. •
  9. KEENCUT ARTIST User manual

KEENCUT ARTIST User manual

1
THE WORLD’S FINEST CUTTING MACHINES
ARTIST
MAT CUTTER
INSTRUCTION MANUAL
GB
2
3
User Instructions
Contents
GB
4
Getting Started The Slipmat & Blade Information 5
Bevel Cutting Setting the Blade 6
Cutting a Simple Mat 1 7
Cutting a Simple Mat 2 8
Calibration 9
Maintenance Squaring 1 10
Squaring 2 11
The Slide Bearings, Lubrication &
Cleaning
12
Optional Accessories Vertical Cutting Attachment & Squaring
Arm
13
Fitting the Twin Production Stops 14
Using the Twin Production Stops 15
The “Plus Pack” 16
Cutting Techniques Cutting Unequal Margins & Offset
Corner Mats
17
Cutting a V-groove 18
Cutting Multiple Openings & Title Boxes 19
Know your ‘ARTIST’ Mat Cutter
4
User Instructions
Know your ARTIST Mat Cutter
GB
Lifting Handle
Matguide
Base
Cutter
Head
Matguide
Indicator
Cutterbar
End Plate
Slip Mat
(not included)
Bevel Blade
Holder
Blade Clamping
Screw
Stop Indicator
Blade
Depth
Screw
Thank you for choosing a Keencut Artist Mat
Cutter. Every effort has been made to bring
you a superbly built product with the promise of
many years of good service. Please read these
instructions carefully in order to obtain
maximum benefit from your machine and
remember, in case of difficulties ask your
distributor or Keencut Limited for assistance.
Start Indicator
5 GB
THE SLIPMAT
A Slipmat (A) is used under the matboard (B) when bevel
cutting, this ensures crisp clean cutting.
Make it from standard matboard avoid using dense matboard.
Size - approximately 15cm (6") wide and at least 5cm (2")
longer than the longest mat you are going to cut.
When using - ensure the white side is uppermost and replace it
when the surface damage becomes obvious.
BLADES ARE ONE OF THE MOST CRITICAL PARTS OF THE MACHINE, in all cases the blade used
should be the one most suited to the job - when bevel cutting, a precision ground and honed blade is required
with an oil free surface (many blades are packed with an oil film to protect them) and the surface should be
corrosion free.
The hardness and toughness of the blade is also critical.
All these factors add to the manufacturing cost of quality blades, however the option to use inexpensive
blades leaves quality to chance and can increase wastage.
BLADE DEPTH is critical when bevel cutting. Too deep and hooking will occur, too shallow and the blade will not
penetrate. The tip of the blade should cut through the matboard and score the slip mat about 0.5 - 1 mm (1/64" -
1/32") deep. The method of adjustment is explained later.
HOOKING is when a curved cut is produced at the beginning of a bevel cut. This is caused by the blade bending
or moving sideways when being pushed into the matboard, the blade then springs or moves back to its correct
position as it begins to travel down the cut.
BEVEL CUTTING blades used on the Artist are rectangular and come in three varieties:-
User Instructions
Getting Started - The Slipmat & Blade Information
Please note: When using the Tech S.012 blades you can only use the one tip as indicated on the blade.
A
B
If you require sample blades contact Keencut direct and a small quantity will be sent F.O.C We would be
pleased to know your results!
TECH D 012
Double ground edge 0.012"
thick. (knife edge)
For general purpose cutting on most
matboard (some are supplied with your
machine)
TECH D 015 Double ground edge 0.015"
thick. (knife edge)
TECH S 012
Single ground edge 0.012" thick.
(chisel edge)
Particularly useful for thicker soft
materials like foam centred board and
double thickness standard matboard.
Suitable for many thicker, dense
matboards such as conservation board
and museum board.
CUT
6
User Instructions
Bevel Cutting - Setting the Blade
GB
TIP Change your blade regularly. The cost
of half a blade (two cutting tips per blade)
compared to matboard is negligible.
NOTE:
The Artist has been tested and adjusted to give
accurate results on a standard matboard. You
may need to adjust the machine to give accurate
cutting if your matboard is of a slightly different
thickness to that of the test mat.
IF NOT
INSTALLING THE BLADE
Firstly remove the blade left in the holder from test
cutting, slacken the Blade Clamping Screw (A) and
slide the blade out from the back of the Bevel Blade
Holder.
Slide a new blade in from the back of the holder, push
it forward until it reaches the blade stop.
Fasten the Blade Clamping Screw.
KEENCUT
TECH D 012
A
ADJUSTING THE BLADE DEPTH
Place the slipmat (B) and matboard (C) in the
machine as for normal cutting. Slide the cutter head
towards the top edge of the matboard.
Depress the blade holder fully to penetrate into the
slipmat at a point close to the edge of the matboard.
Inspect the amount of blade penetration into the
slipmat, It should be 0.5 - 1mm (1/64" - 1/32"). B C
ADJUST THE BLADE DEPTH
Slacken the Blade Clamping Screw. Using the
2.5mm hexagon wrench, turn the Blade Depth
Adjustment Screw (D) clockwise to reduce the depth,
counter-clockwise to increase it.
Press the blade forward against the blade stop,
tighten the Blade Clamping Screw and check the
blade depth. D
7
User Instructions
Bevel Cutting - Cutting a Simple Mat 1
GB
3DRAW THE CUTTING LINES
Lift the cutter bar using the handle and place the
matboard coloured face down on the slip mat.
Ensure the left hand edge of the matboard is touching
the mat guide and lower the cutter bar to clamp the
matboard in position.
Draw a pencil line down the length of the matboard.
Rotate the board and repeat drawing a line along
each of the four sides of the matboard.
The following example shows how to cut a simple mat with a border of 3 (cms or inches) on all
four sides.
SQUARENESS
Before cutting the inside of the mat it is essential that the blank is accurately cut to size and has square
corners. Do not rely on full size sheets of Mat Board being square and always check the squareness of pre-
cut blanks. The Artist Matcutter is not fitted with a vertical cutter (for cutting the outside of the mat) as
standard, it is available as an option.
See the ‘Optional Accessories’ section.
IMPORTANT
1 CUT THE BLANK
It is important to cut the blank of matboard accurately
to size with square corners. Any size of blank larger
than 20cms(8”)square will suit this example.
2SET THE MATGUIDE
After checking the blade depth place a slip mat in
position on the cutter.
Lock the Matguide Limit Stop (A) on 3 (cms or
inches) - this sets the border width. A
8
User Instructions
Bevel Cutting - Cutting a Simple Mat 2
GB
4READJUST THE MATGUIDE
The blade cuts about 1mm (1/16”) to the left of
the Cutter Bar, move the Matguide to the left
by that amount and when cutting the blade will
cut down the pencil line.
1mm (1/16”)
5THE START
POSITION
Bring the Cutter Head
towards you until the Start
Indicator (A) lines up with the pencil line.
A
6INSERT THE BLADE
With your left hand, grip across the Cutter Bar
in front of the Cutter Head, and tight to it, to
prevent the Cutter Head moving away from
you when the blade is inserted. Tip the Bevel
Blade Holder forward to insert the blade in the
mat.
8THE END POSITION
When the engraved line
on the Blade Support
Plate reaches the finish
line retract the Blade
Holder.
9CUT THE OTHER THREE SIDES
Turn the matboard a quarter of a turn and cut
the other three sides in the same way.
7MAKE THE CUT
Pull the Cutter Head towards you using
constant downward pressure to make the cut.
9
CALIBRATING THE START POSITION
Measure the amount of overcut or undercut at the Start of Cut, mark out
a mat as explained previously and position the cutting head on the
pencilled starting line.
Loosen the Start Indicator Adjustment Screw (E) using an Allen key and
slide the Indicator away from you by the amount of overcut or towards
you by the amount of the undercut. Holding the Cutter Head still tighten
the Indicator Screw and check that the distance between the pencilled
line and the Indicator mark is the same as the overcut/undercut.
E
User Instructions
Bevel Cutting - Calibration
GB
INSPECTION
Inspect the corners on the coloured side
of the mat and look for any overcuts or
undercuts at the start or end of the cut.
Be careful to identify correctly the Start
and End of the cut, remember the
matboard has been turned over.
CALIBRATING THE END POSITION
Measure the amount of overcut or undercut at the
End of Cut, when cutting the next matboard allow for
the difference visually. That is, if your were
overcutting stop before the engraved line on the
Blade Support Plate reaches the pencilled line and
visa versa.
TIP The End of Cut can be accurately and
easily judged by the position of the blade
itself in relation to the pencilled line. Try
practicing on some scrap matboard first.
BLADE DEPTH
Altering Blade Depth is not the correct way of
calibrating for overcuts and undercuts. The
blade depth should be set first and the cutter
then calibrated accordingly.
IMPORTANT
Firstly, measure the border width on the coloured
face of the mat. If the border width is not accurate,
say it measures 3.1cm (3 1/16”) release the
Adjustment Screw (A) and slide the Mat Guide
Adjuster (B) so it reads what you have measured—
3.1cm (3 1/16”).
The Mat Guide is now calibrated to cut any size of
border width accurately made from that thickness of
matboard.
A B
A
OVERCUTTING
A- Start of cut
B - End of cut
B
C
UNDERCUTTING
C- Start of cut
D- End of cut
D
10
3 Repeat for the third edge. 4 And again for the fourth edge, always making sure
the bottom edge of the mat is in close contact with the
Measuring Arm
User Instructions
Maintenance - Squaring 1
GB
YOU SHOULD NOT NEED TO ADJUST THE SQUARING OF THE MACHINE!
SQUARING THE CUTTER BAR AND END PLATE is carried out in our factory before despatch on all new
machines. Therefore adjustment should never be necessary.
1 Take a matboard at least 65 x 65cm (25” x 25”) in
size. Clamp it under the Cutter Bar and trim off
approx 1cm (1/2”) from the left hand edge using the
vertical blade, ensuring the bottom edge is in close
contact with the Measuring Arm.
2 Turn the mat a quarter of a turn counter-clockwise
and trim the same amount from the second edge.
SETTING THE END PLATE SQUARE
WITH THE CUTTER BAR
The best method of squaring the End
Plate (A) with the Cutter Bar (B) is to
use the Optional Vertical Cutting
Attachment and cut a test matboard as
described below. If you do not have the
Vertical Cutter use a carpenters of
draughtsman's square between the
right hand edge of the Cutter Bar and
the End Plate, skip this section and
proceed over the page.
A Square B
11
User Instructions
Maintenance - Squaring 2
GB
SQUARING THE MAT GUIDE
Place a strip of matboard under the Cutter Bar so that it does not
protrude to the left of the Cutter Bar. Move the Matguide across
to touch the Cutter Bar and tighten the Wing Bolt (W).
The Matguide should be parallel with the Cutter Bar and should
touch long its whole length.
If not loosen the three Matguide Adjustment Screws (B) and the
Wing Bolt, move the Matguide to the right until it touches the
Cutter Bar along its whole length.
Tighten the Wing Bolt, then the Adjustment Screws whilst holding
the Matguide onto the Cutter Bar.
W
B
CONTINUED IF THERE IS A GAP between
the matboard and the Cutter Bar,
then the machine requires
adjustment and this gap
represents four times the error
of the machine.
If you are using a Square any
out of alignment seen is the
actual error and should be
adjusted accordingly.
Rotate the mat a quarter of a turn
counter-clockwise but this time place the
bottom edge on the Measuring Arm/End
Plate and slide it to the left until it comes
into contact with the Cutter Bar. If you
are using a Square substitute this for the
Matboard.
If the mat (or Square) comes into
close contact with the Cutter Bar
along its whole length the machine is
square.
3
3
A
ADJUSTING THE END PLATE/MEASURING ARM
Loosen the three nuts (A) that hold the End Plate in position (they
are on the underside of the base). Adjust the angle of the
Measuring Arm and End Plate to close the gap by a quarter (the full
gap if using a Square). Tighten the nuts and repeat the test, make
further adjustments if necessary.
2
2
12
User Instructions
Maintenance - The Slide Bearings, Lubrication & Cleaning
GB
ADJUSTING THE CUTTER HEAD SLIDE
BEARINGS
The bearings which control the sliding motion of the
Artist cutting head are machined from a remarkable
material called Ultra High Molecular Weight Polyfine
and they will never wear out. As the bearings settle
into position you may wish to adjust them to eliminate
side play from the sliding head as follows:-
Remove the slip sheet to allow the cutter bar to
lay flat on the machine base.
Place the 2mm hexagon wrench in the front
bearing adjustment screw (A) and turn
clockwise by small increments (1/16th of a
turn) sliding the head each time to check for
free running.
When the head slides less easily turn the
adjustment screw back counter-clockwise by
one small increment or two to restore free
running.
Repeat steps 2 & 3 on the back bearing
adjustment (B) first rotating the bevel blade
holder to gain access to the head of the
adjustment screw.
It is not necessary to remove the head for cleaning
and once the bearings are adjusted to your
preference you may never have to do it again.
A
B
IMPORTANT
CLEANING
Most important is to keep the cutter clean and ideally
covered when not in use. Clean with a dry cloth, for
stubborn marks use diluted detergent on a cloth. Do
not use solvent cleaners or lighter fluid.
DO NOT USE OIL OR SOLVENTS
LUBRICATION
Use a Silicone Lubricant sprayed onto a cloth or
sponge to lubricate the Cutter Bar, do not use oil. Be
careful not to get silicone on the base of the cutter or
it may spoil the mat.
IMPORTANT
13
For replacement Blades
order ‘SM02 blades’ from
your Keencut dealer.
FITTING THE VERTICAL CUTTING ATTACHMENT (OPTIONAL EXTRA)
The Vertical Cutting Attachment
or the Blade must be removed when
bevel cutting or the mat will be
damaged.
IMPORTANT
FITTING THE MEASURING ARM (OPTIONAL
EXTRA)
The Measuring Arm is used as a guide when cutting
matboard to size (sizing) to ensure the board is cut at
90º.
It features a fitted plug in bracket (A) and Limit Stop (B)
together with a separate Locking Screw (C).
Present the Measuring Arm bracket into the slot in the
End Plate (D) at an elevated angle (as shown), push
into position and lower to the horizontal.
Screw in the Measuring Arm Locking Screw to fasten
the Arm in place.
B
C
D
A
3 The blade is inserted in the vertical slot and
fastened in position with the Clamping Knob.
The depth of the blade should be adjusted to
just cut through the matboard, if the blade is
set too deep it will be harder to cut the board
and the cut could be jagged.
PLEASE ASK YOUR KEENCUT SUPPLIER FOR:-
KX36 VERTICAL CUTTING ATTACHMENT & 46cm - 18” SQUARING ARM
1 Locate the fixing hole (E) on the side of the
Cutter Head, screw the attachment firmly in
place.
E
2 Screw the attachment firmly in place.
GB
User Instructions
Optional Accessories - Vertical Cutting Attachment & Squaring Arm
14
User Instructions
Optional Accessories - Fitting the Twin Production Stops
GB
OPTIONAL PRODUCTION STOPS
These are available as an option to help speed up
volume mat production. By marking out the first mat
the stops can be set therefore removing the need to
mark out the remainder.
FITTING THE STOPS
Check the Cutter Head has no side play on the Cutter Bar, if it does please refer to the
Maintenance section ‘ADJUSTING THE CUTTER HEAD SLIDE BEARINGS’.
2 Raise the Lift Arm (B) out of the way.
B
4 Carefully slide the Cutter Head back
followed by the Start of Cut Stop (D).
D
6 Reassemble the Lift Arm, Block and
screws. Remove the Stop Bar (E) using the
3mm Allen key. This is no longer needed.
E
5 Ensure the Clamping Blocks in each of the
stops are correctly positioned. The end of the
thumb screw fits into the recess in the
Clamping Block
1Using the 4mm Allen key remove the two
screws and Block (A) at the top end of the
Cutter Bar.
A
3 Slide off the Cutter Head. Select the End
of Cut Stop (C), slacken the thumb screw and
slide it onto the Cutter Bar.
C
PLEASE ASK YOUR KEENCUT SUPPLIER
FOR:- KX37 TWIN PRODUCTION STOPS
15
When Bevel Cutting with the Optional Production Stops the first mat is marked out with a pencil in the normal
way, which enables the position of the stops to be set for cutting the subsequent mats. First, all the short cuts
are made, then the Start of Cut Stop is reset to then cut all the long cuts.
Both accuracy and speed is increased, but it is important that the matboard blanks are cut with square corners.
GB
User Instructions
Optional Accessories - Using the Twin Production Stops
1Mark out the mat in the normal way.
Position the mat in the machine as for normal
cutting.
2 Position the Start Indicator on the start line,
bring the Start of Cut Stop into contact with the
Cutter Head and tighten the thumb screw to
lock it in position.
3 Enter the blade into the mat and cut in the
normal way until you reach the end position.
Bring the End of Cut Stop into contact with the
Cutter Head and tighten the thumb screw to
lock it in position.
5 When the last side has been cut return to
the original marked out mat and position it to
make the next cut. Reset the Start of Cut Stop
in the same way as before and cut the
remaining sides. The End of Cut Stop position
will not need resetting.
4 Turn the mat a half a turn and make the
opposite cut using the two production stops.
Make the same two cuts in the remainder of
the batch of mats, they do not need to be
marked out.
16
PLEASE ASK YOUR KEENCUT SUPPLIER FOR:-
KX38 - ARTIST “PLUS PACK”
User Instructions
Optional Accessories - The “Plus Pack”
The Atrist ‘Plus Pack’ includes everything required to
upgrade your Artist mat cutter to an ‘Artist plus’.
The pack includes:-
•Professional cutter head with Bevel & Vertical
Blade Holders and Start of Cut Gauge.
•Finish of cut Stop with measuring scales
•46cm—18” Squaring Arm
For more information please contact your Keencut
distributor.
Professional Cutting head with Vertical Blade Holder
The Start of Cut Gauge, no more pencilling lines. The Finish of Cut Gauge.
17
4
3.5
3
User Instructions
Cutting Techniques - Cutting Unequal Margins & Offset Corner Mats
GB
UNEQUAL MARGINS
Unequal Margin mats are often used to overcome the
optical illusion of a picture appearing to be set too low
in the frame.
Cutting a mat with Unequal Margins is as simple as
cutting a standard mat, increase the setting of the
Matguide when marking out the bottom edge of the
mat and cut to the pencil lines in the normal way.
OFFSET CORNER MAT
1 To cut an offset corner
mat 2 sets of 4 cuts are
made.
Only two dimensions are
required (see drawing). Set
the Matguide to, say, 4
(cms or inches) and mark
the mat all way round.
Then set it to 3 and again
draw all four sides.
DOUBLE OFFSET CORNER MAT
Set the Limit Stops to the dimensions in the table
below. Follow the sequence below, on the FIRST set
of cuts and the LAST set of cuts - remove and re-
insert the blade at approximately the middle on all
four sides. This helps to keep as much of the fallout
intact until the last cut.
LIFT
LIFT
LIFT
LIFT
LIFT
LIFT
LIFT
LIFT
1st set of cuts 2nd set of cuts 3rd set of cuts The finished Mat
lift
lift
lift
lift
2 Cut the 3 (cms or
inches) borders as
shown then move the
Matguide to make the
remaining cuts but when
cutting lift out and
reinsert the blade in the
mat in the middle of the
cut. This keeps the
fallout in one piece until
the mat is complete.
4
3
18
Place the fallout face down and position the mat on it using
the light pencil mark as a guide to place the pieces back
correctly.
Tape the mount and the fallout together along the cut lines.
NOTE: Use the thin tape or the thickness could upset
the blade depth.
Take the assembled mat board and cut a mat inside the V-
Groove in the normal way.
User Instructions
Cutting Techniques - Cutting a V-groove
GB
Pencil mark
CUTTING A V-GROOVE
Lightly mark the back of the mat board with a pencil and
then cut a mat.
Remove the mat and fallout and retain both.
Remove slip mat.
Set the Mat Guide forward so it is approximately 2mm
(1/16”) away from the Cutter Bar. This is only an initial
setting and adjustment may be necessary after a trial cut,
changing the width of the V-Groove is explained below.
Place the fallout (coloured face up) under the cutter bar
against the Mat Guide.
Fully depress the blade and draw it through the card.
Take care to remove the trimming.
Repeat on the remaining three edges of the fallout.
CHANGING THE V-GROOVE WIDTH
If the trial cut results in the V-Groove being too wide or
narrow the gap set between the Margin Guide and Cutter
Bar can be adjusted. Once a desired gap has been found
a spacer can be made from board, plastic, wood, etc. so
the setting can be returned to.
19
User Instructions
Cutting Techniques - Cutting Multiple Openings & Title Boxes
GB
CUTTING MULTIPLE OPENINGS AND
TITLE BOXES
Pencil mark the back of the mat board
with the required layout and place an 'x'
in each aperture to be cut. If the 'x' of the
aperture to be cut is under or to the right
of the Cutter Bar then the bevel will not
be accidentally cut in the wrong direction.
Place the mat board under the Cutter Bar
so the bevel blade cuts along the pencil
line.
Using the Start (A) and Stop (B)
Indicators in the normal way make the
cuts accordingly.
Repeat until all the apertures are
complete.
20
KEENCUT LIMITED
Weldon South Ind. Estate, Corby, Northants England NN18 8AZ.
Tel: +44 (0) 1536 263158 Fax: +44 (0) 1536 204227
Email: sales@keencut.co.uk
KEENCUT INC. (North American Sales)
#366 - 3560 Pine Grove Ave., Port Huron, MI 48060, USA
Toll Free: 1 800 240 5336 Tel: 1 (519) 652 0970 Fax: 1 (519) 652 0396
Email: northamericansal[email protected]

This manual suits for next models

1

Other KEENCUT Cutter manuals

KEENCUT SteelTrak User manual

KEENCUT

KEENCUT SteelTrak User manual

KEENCUT Evolution3 BenchTop User manual

KEENCUT

KEENCUT Evolution3 BenchTop User manual

KEENCUT Evolution3 SmartFold User manual

KEENCUT

KEENCUT Evolution3 SmartFold User manual

KEENCUT EXCALIBUR 1000X User manual

KEENCUT

KEENCUT EXCALIBUR 1000X User manual

KEENCUT SteelTrak 165 User manual

KEENCUT

KEENCUT SteelTrak 165 User manual

KEENCUT Evolution3 SmartFold User manual

KEENCUT

KEENCUT Evolution3 SmartFold User manual

KEENCUT General Purpose Cutter User manual

KEENCUT

KEENCUT General Purpose Cutter User manual

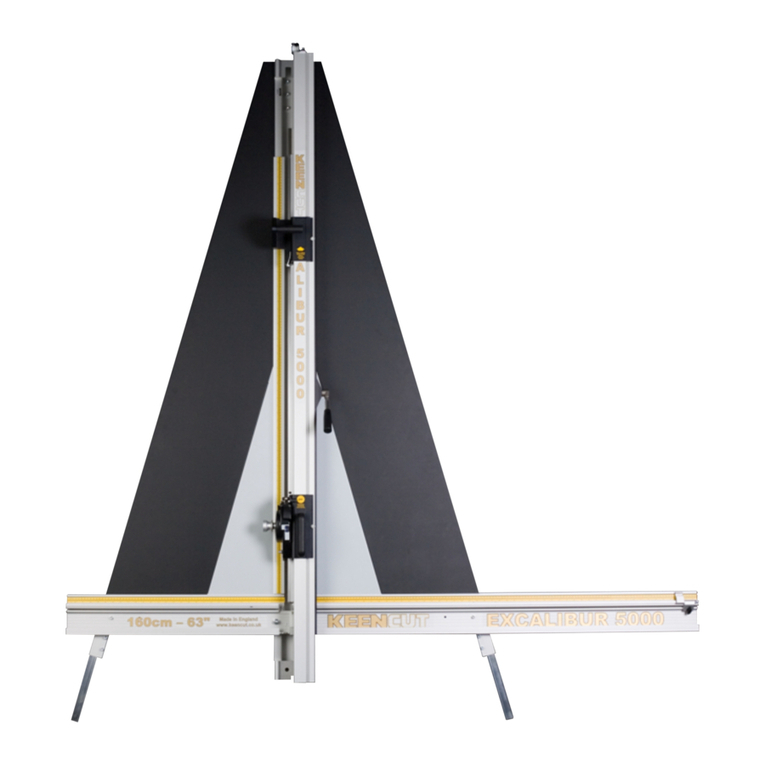
KEENCUT EXCALIBUR 5000 User manual

KEENCUT

KEENCUT EXCALIBUR 5000 User manual

KEENCUT Evolution3 SmartFold User manual

KEENCUT

KEENCUT Evolution3 SmartFold User manual

KEENCUT Excalibur 6000 User manual

KEENCUT

KEENCUT Excalibur 6000 User manual
KEENCUT Javelin User manual

KEENCUT

KEENCUT Javelin User manual

KEENCUT SteelTrak 165 User manual

KEENCUT

KEENCUT SteelTrak 165 User manual

KEENCUT Evolution3 SmartFold User manual

KEENCUT

KEENCUT Evolution3 SmartFold User manual

KEENCUT Evolution3 FreeHand User manual

KEENCUT

KEENCUT Evolution3 FreeHand User manual

KEENCUT Big Bench User manual

KEENCUT

KEENCUT Big Bench User manual

KEENCUT Evolution3 BenchTop User manual

KEENCUT

KEENCUT Evolution3 BenchTop User manual

KEENCUT Evolution Bench User manual

KEENCUT

KEENCUT Evolution Bench User manual

KEENCUT OVAL 6 User manual

KEENCUT

KEENCUT OVAL 6 User manual

KEENCUT ARTIST plus User manual

KEENCUT

KEENCUT ARTIST plus User manual
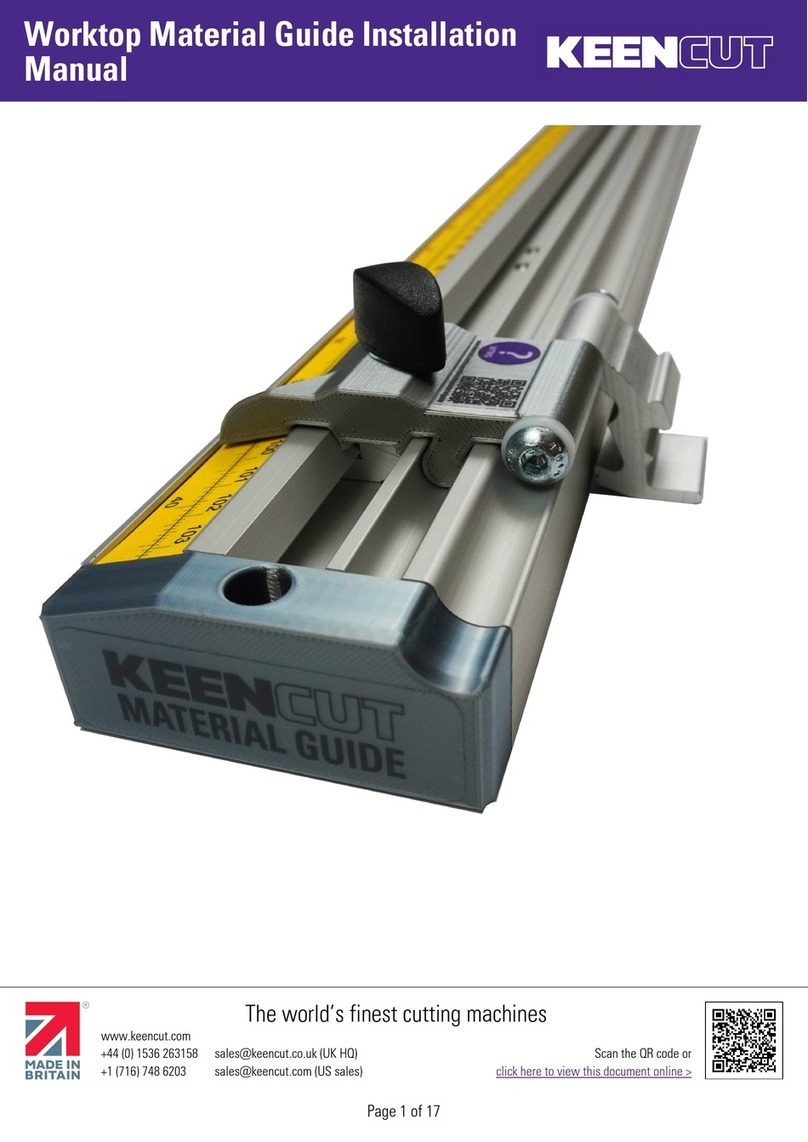
KEENCUT Evolution E2 User manual

KEENCUT

KEENCUT Evolution E2 User manual
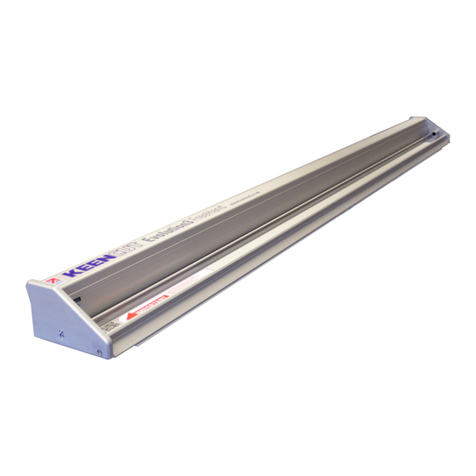
KEENCUT SteelTrak 165 User manual

KEENCUT

KEENCUT SteelTrak 165 User manual

KEENCUT EXCALIBUR 3S User manual

KEENCUT

KEENCUT EXCALIBUR 3S User manual
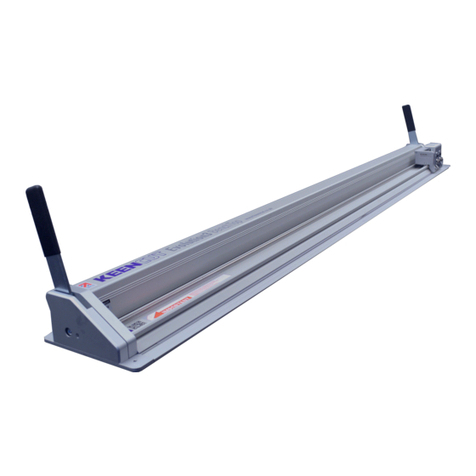
KEENCUT ULTIMAT GOLD User manual

KEENCUT

KEENCUT ULTIMAT GOLD User manual

KEENCUT Javelin Integra User manual

KEENCUT

KEENCUT Javelin Integra User manual

Popular Cutter manuals by other brands

Longridge Maxi System manual

Longridge

Longridge Maxi System manual

VONROC TC502AC Original instructions

VONROC

VONROC TC502AC Original instructions

Elliott One Revolution 9060 Series Operating and maintenance instructions

Elliott

Elliott One Revolution 9060 Series Operating and maintenance instructions

HP Latex Plus Site preparation guide

HP

HP Latex Plus Site preparation guide

Pegasus M Series Setup instructions

Pegasus

Pegasus M Series Setup instructions

ermengineering DC-200 Use and maintenance manual

ermengineering

ermengineering DC-200 Use and maintenance manual

Bosch Professional GOP 12V-LI Original instructions

Bosch

Bosch Professional GOP 12V-LI Original instructions

Mafell NFU 32 Operating instructions and spare parts list

Mafell

Mafell NFU 32 Operating instructions and spare parts list

HERKULES H-FS 618 Original operating instructions

HERKULES

HERKULES H-FS 618 Original operating instructions

PROFIX 135 instruction manual

PROFIX

PROFIX 135 instruction manual

Makita DCS551RTJ instruction manual

Makita

Makita DCS551RTJ instruction manual

Tally Dascom 7206 Series Installation and user guide

Tally Dascom

Tally Dascom 7206 Series Installation and user guide

QEP 10424Q owner's manual

QEP

QEP 10424Q owner's manual

Pace Technologies MEGA-T400 instruction manual

Pace Technologies

Pace Technologies MEGA-T400 instruction manual

Black & Decker BPSP125 manual

Black & Decker

Black & Decker BPSP125 manual

Battipav MAGIK operating instructions

Battipav

Battipav MAGIK operating instructions

Thermal Dynamics A80 CUTMASTER operating manual

Thermal Dynamics

Thermal Dynamics A80 CUTMASTER operating manual

Makita 4101RH instruction manual

Makita

Makita 4101RH instruction manual

manuals.online logo
manuals.online logoBrands
  • About & Mission
  • Contact us
  • Privacy Policy
  • Terms and Conditions

Copyright 2025 Manuals.Online. All Rights Reserved.