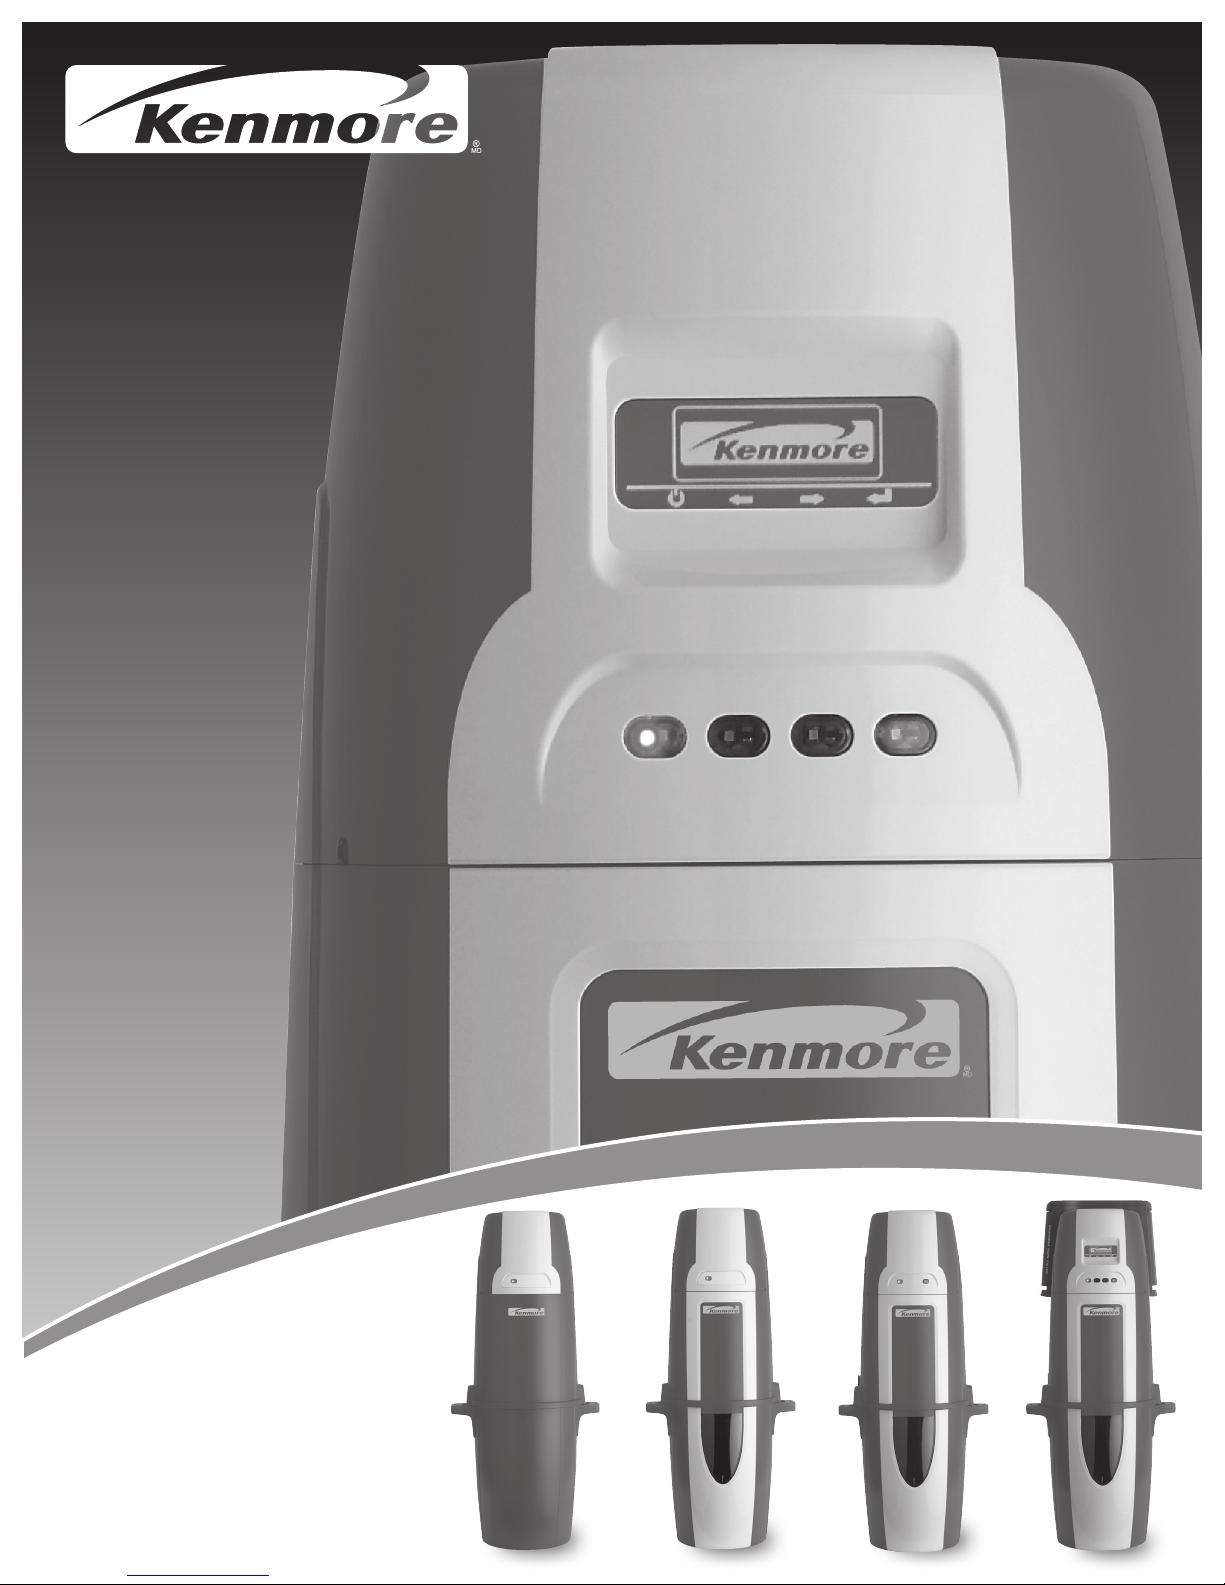
Kenmore TYPE K User manual

Central Vacuum Systems
Owner’s Manual
Type K
Système central d’aspiration
Manual du propriétaire
Type K
# 460445

2
IMPORTANT SAFEGUARDS
When using an electronic appliance, basic precautions should always be followed, including the following:
READ ALL INSTRUCTIONS BEFORE USING THIS VACUUM CLEANER SYSTEM.
This central vacuum power unit is intended for the removal of normal household dust.
CONTENTS
Your central vacuum system package consists of the following items.
WARNING
To reduce the risk of fire, electric shock or injury:
• Donotuseoutdoorsoronwetsurfaces.
• Donotblockthemotorhoodorventilationopeningsandducton
the top of the power unit. Lack of ventilation airflow will cause the
motor to overheat.
• Donotlocatethepowerunitinahightemperatureareaorwhereit
is inaccessible, for example, an attic or crawl space.
• Mountthepowerunitnolessthan12in(30cm)fromtheceiling
oranyadjacentwallandatleast27.5in(70cm)fromtheoor.
Additionally, review any local codes and regulations that may apply.
• Donotallowtobeusedasatoy.Closeattentionisnecessary
when used by or near children.
• Thisapplianceisnotintendedforusebypersons(including
children)withreducedphysical,sensory,ormentalcapabilities,
or lack of experience and knowledge, unless they have been
given supervision or instruction concerning use of the appliance
by a person responsible for their safety.
• Useonlyasdescribedinthismanual.Useonlymanufacturer’s
recommended attachments.
• Donotusewithdamagedcordorplug.Ifvacuumcleanerisnot
working as it should, has been dropped, damaged, left outdoors
or dropped in water, return it to a service center.
• Connecttoaproperlygroundedoutletonly
(refertogroundinginstructions).
• Donotuseextensioncordsoroutletswithinadequatecurrent
carrying capacity.
• Turnoffallcontrolsbeforeunplugging.
• Donotunplugbypullingoncord.Tounplug,grasptheplug,
not the cord.
• Donothandleplugorcordwithwethands.
• Donotputanyobjectintoopenings.Donotusewithanyopenings
blocked; keep free of dust, lint, hair and anything that may reduce
airflow.
• Thisvacuumcleanercreatessuction.Keephair,looseclothing,
fingers and all parts of body away from openings and moving parts.
• Donotpickupanythingthatisburningorsmoking,suchas
cigarettes, matches, or hot ashes.
• Useextracarewhencleaningonstairs.
•Donotpickupammableorcombustibleliquidssuchasgasoline,
or use in areas where they may be present.
•Keepyourworkareawelllighted.
•Unplugelectricalappliancesbeforevacuumingthem.
• Ifthesuppliedpowercordisdamaged,itmustbereplacedbya
special cord available from the authorized local dealer/distributor
• Donotusewithoutdustbagand/orlterinplace.
SAVE THESE INSTRUCTIONS
Bag Adapter
IntakeInsert
PowerUnit
1-VacuumBag
External Exhaust
Adapter
90° Elbow Bag
Adapter
WallMount,
2 Screws
IntakePlug
ImportantSafeguards......................................... 2
GeneralInformation ............................................ 3
Installation .......................................................... 3
System Test........................................................ 4
How to use......................................................... 4
LEDIndications .................................................. 4
LCDScreen........................................................ 4
Bag Adaptor....................................................... 5
UtilityValve ......................................................... 5
Overheating Protection ....................................... 5
Overload Protection............................................ 5
DiagnosticsAndMaintenance ............................ 5
FilterMaintenance .............................................. 6
Paper Bag Filter.................................................. 6
Trouble Shooting ................................................ 6
Warranty............................................................. 7
Images .............................................................. 15

3
GENERAL INFORMATION
Thecentralvacuumisdesignedfordrypick-upofhouseholddirtand
dust. Avoid picking up hard or sharp objects with this system to prevent
hose and plastic pipe damage or clogs.
This manual will cover the final steps of installation of the power unit in
yourhome.Itwillalsoprovidethenecessaryinformationformaintenance
andtroubleshooting,intheunlikelyeventthatitwillbeneeded.Ifyou
requirefurtherinformationaboutinstallationorinquiresontheproduct
please contact your local authorized dealer/distributor.
INSTALLATION SAFETY EqUIPMENT
For wall preparations and cover preparations,
safetyequipmentsuchashelmet,gloves,goggles
and hearing protection are recommended.
CAUTION
Usecautionwhendrillingholesinwallsasgaspipelinesandwaterpipes
and electrical wires may be present.
Ifyouhaveanyquestionsregardingtheproduct,spareparts,service,warranty
or anything else, please contact your local authorized dealer or distributor.
GROUNDING INSTRUCTIONS
Thisappliancemustbegrounded.Ifitshouldmalfunctionorbrakedown,
grounding provides a path of least resistance for electrical current to reduce
theriskofelectricalshock.Thisapplianceisequippedwithacordhaving
anequipment-groundingconductorandgroundingplug.Theplugmust
be plugged into an appropriate outlet that is properly installed and
grounded in accordance with all local codes and ordinances.
WARNING
Improperconnectionoftheequipment-groundingconductorcanresultin
electricalshock.Checkwithaqualiedelectricianorservicepersonifyouare
in doubt as to whether the outlet is properly grounded, or if the outlet does
nottintoanoutlet.Donotmodifytheplugprovidedwiththeappliance.
Thisapplianceisforuseonanominal120voltcircuitandhasagrounding
plugthatlooksliketheplugillustratedinFigureA.Makesurethattheappliance
is connected to an outlet having the same configuration as the plug.
No adapter should be used with the appliance.
NOTE:InCanada,theuseofatemporaryadapter
isnotpermittedbytheCanadianElectricalCode.
WARNING
Ifthesupplycordisdamaged,itmustbereplacedbyaspecialcord
available from your local authorized dealer/distributor.
SERVICE INFORMATION
The instructions in this booklet serve as a guide to routine maintenance. For
additionalinformation,contactyou’renearestauthorizeddealer/distributor.
RATING PLATE
The type, model, and serial numbers are indicated on the rating plate
located on the control panel or motor hood. For prompt and complete service
information,alwaysrefertothesenumberswheninquiringaboutservice.
WARNING
Non-observanceofthesafetydirectionsmayresultinbodilyharm.
PRODUCT DIMENSIONS
Refertopage15-Image1
WASTE OF ELECTRIC AND ELECTRICAL
EqUIPMENT (WEEE)
This symbol on the product or on its packaging indicates that this product
maynotbetreatedashouseholdwaste.Insteaditshouldbehandedover
to applicable collection point for the recycling of electronics and electrical
equipment.Byensuringthisproductisdisposedofcorrectly,youwillhelp
preventpotentialnegativeconsequencesfortheenvironmentandhuman
health, which could otherwise be caused by inappropriate waste handling
of this product. For more detailed information about this product, please
contact your local waste disposal service or the shop where you purchased
the product.
INSTALLATION
Your home is most likely already fitted with the system of plastic pipes
andinletvalvesandyouarereadytoinstallthecentralpowerunit.Ifyour
home is not fitted for a central vacuum system, you can contract to have
theKenmoreCentralVacuumSysteminstalledbyaprofessionalby
contactingyourlocaldealerordistributororchoosetodo-it-yourself.
The central power unit should be located as far away from the general living
area as possible, yet accessible so you can remove the dirt receptacle, reach
the filter, and inspect the central power unit. A typical location would be in a
garage, where you could vacuum your car or garage area, and where emptying
the dirt receptacle and cleaning the filter would be more convenient. Other suit-
able locations are in the basement, laundry room, or ventilated storage room.
CAUTION
Usecautionwhen drilling holes in walls as gas pipelines and water pipes
and electrical wires may be present. Holes in the masonry are only
allowable if through it its standing stability is not impaired. Holes in wood
studsshouldbedrilled.Dependingonwhatmaterialyourhomeis
built with, use the appropriate anchors to hang your power unit. Power unit
simply slides onto mounting bracket and clicks into place.
Refertopage15-Image3
• Placethecentralpowerunitinaplacethatisremovedfromthegeneral
living area. The exhaust should be easy to connect to a ventilation pipe.
Thiscanbedoneregardlessofthehouse’sconstructionmaterial.
• Locatethetwolowvoltagewiresnearthemainpipe.Removethe
insulationfromthelowvoltwire.Insertthelowvoltwireintothespring
loaded low volt connectors. Be certain you comply with your local
electrical codes and regulations.
Refertopage15-Image4
• Makesurethereisadedicatedelectricsocketforthepowerunit.
• PluginyourCVSwiththesuppliedpowercord.

4
YourKenmorepowerunitdoesnotrequiretheassemblyofamufer.
YourCVShasthemuferinstalledinternally.Youmayhoweverdesireto
exhausttheairoutside.Inthiscaseyouwillneedtoattachtheexhaust
adapter. This will convert the size of the exhaust to the diameter of the
central vacuum pipe.
Refertopage15-Image5
• Placethepowerunitinordertomaketheexhaustpipeasshortas
possible.Exhaustsshouldbelimitedtonolongerthan16.5ft(5m).
• Keepinmindthatyoumayneedspaceonthesidesofyour
central unit to be able to access the dirt receptacle.
Refertopage15-Image6
• Alignthepowerunitintakettingtothemaintrunklineprojectingfromthe
wall. DO NOT GLUE. Attach the exhaust pipe to the motor exhaust if
exhaustingoutdoors.Makesuretheexhaustpipeisasshortaspossible.
NOTE:Mountcentralpowerunitatleast12in(30cm)fromtheceiling
andanyadjacentwall,atleast27.5in(70cm)fromtheoorandwithin6ft
(1.8m)ofanelectricaloutlet.Reviewanylocalregulationsthatmayapply.
Refertopage15-Image2
WARNING
Donotblockthehoodventilationopeningsonthetopofthecentral
power unit. Lack of ventilation will cause the motor to overheat.
WARNING
Donotlocatethecentralpowerunitinahightemperatureareawhereit
is inaccessible for example, an attic or crawl space.
For the ultimate in air control you have the 650 series. The 650 series
features a true HEPA filter and may be included with your choice of
power unit or can be purchased from an authorized dealer/distributor.
Simply attach the true HEPA filter as shown.
Refertopage15-Image7
SYSTEM TEST
Be certain to comply with local electrical codes and regulations. Plug
the unit into a regular electrical outlet. You are now ready to check the
installation of the unit:
• Besurethelterisproperlyinstalledinthepowerunit.
• Besurethedirtreceptacleisproperlysecuredtothepowerunit.
• Plugthehoseintoeachinletvalvetobesuretheelectrical
contacts operate properly.
• Checkeachinletvalveforairleaks.
• Checkeachpipeconnectionforairleaks.
Refertopage15-Image8
HOW TO USE CENTRAL VACUUM SYSTEM
Your central vacuum system is controlled by a switch on your hose.
Simply insert the hose into the valve and turn the switch to the on position.
This will start the power unit and the flow of air.
When you are finished, turn the switch on the hose to the off position
and remove the hose from the inlet valve. When unplugging the hose,
hold the inlet cover open for a few seconds to allow suction to decrease
thus, protecting the inlet valve seal.
Refertopage15-Image8
LED INDICATIONS - OPTIONAL DEPENDING ON MODEL
Youmachinemaybeequippedwithsomeoralloftheindicatorslistedbelow.
Refertopage15-Image9
On/Off MotorFault DirtReceptacleFull Reset
YourpowerunitisequippedwithamulticolorLEDpanel.ThisLED
panelwillprovideyouwithnecessaryinformationonyourpowerunit’s
performance, maintenance and diagnostics. Below are descriptions
of the different messages the power unit will provide.
NORMAL OPERATION
When the power unit is OFF and considered to be in standby mode the
LEDbuttonwillbeRED.
WhenthepowerunitisONandinusetheLEDwillbeGREEN.When
the motor fault light is ON see further description below. When the dirt
receptacle light is ON, empty dirt receptacle and press the RESET
button,andholdfor10seconds.
WhenyouLCDpowerunitisinstandbymodethefourwhitelightsonyour
LCDunitwilllightupinsequenceandalternatemovingfromlefttoright
then reversing right to left. This pattern will repeat continuously and is an
indication that your power unit is ready for use and functioning properly.
MOTOR FAULT
Inthecaseofablownfuseordisconnectedmotorwireandthepower
unitisnotfunctioningtheON/OFFbuttonwillbeconstantlyGREENInthe
caseofanovercurrentshutdown,theON/OFFbuttonwillbeashingRED,
theGREENlightwillonandoffrapidlyandtheMOTORFAULTlightwillbe
AMBERandturnonandoffrapidly.Thisfaultwillresetautomaticallyin
15secondsifthelowvoltconnectionisOFFatthehose.
Inthecaseofacontinuedovercurrentandthelowvoltconnectionis
ONandthehosetheON/OFFbuttonwillconstantlybeRED,theGREEN
lightwillashslowlyandtheMOTORFAULTwillslowlyashAMBER.
Intheunlikelyeventofabadfrequencyreceivedbythepowerunitthe
powerunitwillnotstartandtheON/OFFbuttonwillremainconstantlyRED.
InthecaseofahighlinevoltagereceivedbythepowerunittheON/OFF
buttonwillalternatebetweenREDandGREENthreetimes-pausebriey
–alternatebetweenREDandGREENthreetimes–longpause-andthen
repeat. This will continue until the line voltage returns to the correct level.
LCD SCREEN - OPTIONAL
Refertopage15-Image8
650 SERIES
InthemainscreenoftheLCD,theKenmorelogowillappear.Thislogo
may scroll from side to side to avoid the image ingraining itself onto the
LCDDisplay.Youwillseethelogowhenthepowerunitisnotinuse.
The button that best lines up with the Power symbol on the screen can
be used to activate the unit. Press this button to toggle the unit on/off.
The unit may also be activated from any installed inlet.

5
IN USE
When in use the power indicator turns green. The 4 progressive performance
bars will appear. A normally functioning unit should have all 4 performance
barslit.Ifthereareconsistentlylessthan2bars,youshouldcheckforthe
problem. Possible issues causing the performance bars to lessen could be:
1.Blockedsuctionatthehoseend
2.Cloggedpipeinsystem
3.Airrestrictivetoolbeingused,suchasacrevicetool
4. Full dirt receptacle
5.Cloggedltrationsystem
EMPTY DIRT RECEPTACLE
Every25hoursofuse(approximately6months)theemptydirtreceptacle
indicator will flash on the screen. This is an indication to check the dirt
receptacle and empty it. Since this is time based, you may find the dirt
receptacletooemptyortoofull.Ifyouhavepets,aworkshoporother
factorsthatcausewastemorefrequently,youmaywishtocheckthe
dirtreceptaclemorefrequently.
Once the dirt receptacle is emptied, you push the return button to reset
the25hourstimer.Ifyourpowersupplyisinterrupted,orotherwise
unplugged, the empty dirt receptacle indicator will keep a memory of its
previous status and continue life measure.
TomanuallyresettheEmptyDirtReceptacleindicator,simplypressthe
buttonliningupwiththeEntersymbol,andholdfor10seconds.
LIFE METER
Thelifemeterhas8barsonit.Oncethesebarsaredepletedyouunitwill
continue to run, although it is strongly recommended to take it to your local
service center to be inspected and serviced. A life bar will deplete every
65 hours of vacuum use, meaning your central vacuum will have a long life
of service to you. The life meter can be reset only by your service technician.
Ifyoupowersupplyisinterrupted,orotherwiseunplugged,thelifemeter
will keep a memory of its previous status and continue life measure.
SERVICE INDICATOR
Ifthereisasystemfault,ormalfunctionwithyourpowerunit,theserviceindicator
willash.Uponseeingthissymbol,werecommendthatyouturnthepower
unitoff,unplugthepowersupplyfor10secondsandthenplugitbackin.Ifthe
service symbol is still on the screen, we recommend that you call for service.
This symbol may appear due to the following faults:
• Motorproblem
• Electronicproblem
• Voltageorcurrentproblem(toohighortoolow)
• Powerunitnotrespondingtoelectronics
SCROLLING YOUR LCD
Whennotinuse,youcanscrollthroughthefeaturesofyourLCDto
observe the dirt receptacle status, life monitor measure or most recent
recorded power level.
To scroll through these features simply push the button corresponding
with the right pointing arrow symbol.
ThenextscreenyouwillseewillbetheLifeMeter.Scrollrightfurther
and you will find Bucket Status. Yet another scroll will show you last
recorded performance levels of the power unit, using the Performance
MeterontheIn-Usescreen.Thenalscrollrightwillshowyouthecustomer
service phone number.
The button lining up with the left scroll button will allow you to scroll
backwards through the screens.
BAG ADAPTOR
Your power unit can all be fitted with a convenient paper bag for more
convenient dirt disposal. For maintenance of the paper bag, please see
thePaperBagFiltersection,underFilterMaintenance.
Refertopage15-Image10
UTILITY VALVE
TheutilityvalveissimilartoanInletvalve,butislocatednearthepower
unit. This valve is present for your convenience, as it can help clean up
any dirt spilled close to the central vacuum.
OVERHEATING PROTECTION
Ifthecircuitboardreachesanelevatedtemperature,thepowerunitthe
powerunitwillnotoperateandtheLEDwillbeofforonLCDmodelthe
screenwillbeashing.Intheeventoftheseproblems,presstheOn/Off
button,unplughoseorwaitfortemperaturetolower.Ifproblemspersist;
contact your authorized dealer or distributor.
Refertopage15-Image9
OVERLOAD PROTECTION
The central vacuum system employs features that monitor the following operating
levels:ACvoltage,andcurrentdraw.Ifthevoltageisbeloworabovestandard
operating voltage, high current draw or locked rotor, the power unit will not
operate.InthiscasetheOn/Offbuttonwillblinkuntiltheproblemceasesoron
theLCDmodelthescreenwillash.Ifproblemspersist;contactyourauthorized
dealerordistributor.Thepowerunitrequires30minutestocooldown.
Refertopage15-Image9
DIAGNOSTICS AND MAINTENANCE
Reduced airflow or suction indicates the central vacuum system is not
operatingatmaximumefciency.Ifthedirtreceptacleisfullandthelter
is clogged, no air can pass through the unit and no cleaning can take place.
Instructionsprovidedinthebookletserveasaguidetoroutinemaintenance.
Proper airflow or suction can be maintained by keeping the dirt receptacle
and filter clean and the plastic tubing and hose free from clogs.
EMPTYING THE DIRT RECEPTACLE
Mostmodelsfeaturedirtreceptacleswithwindowstotellataglancewhen
thedirtreceptacleshouldbeemptied.Inmostcases,thedirtreceptacle
onlyneedstobeemptiedtwotothree(2-3)timesayear.Toremove the dirt

6
receptacle, press the buttons on the receptacle handles. Remove and empty
the contents. Return the receptacle by attaching the bucket to the power
unit. To avoid suction loss make sure the receptacle is securely attached.
Refertopage15-Image11
FILTER MAINTENANCE
TheKenmorelterispermanentandselfcleaning.However,ifyouhave
questionsaboutyourpermanentself-cleaninglter,pleasecontactyour
local authorized dealer/distributor.
PAPER BAG FILTERS - OPTIONAL
The volume of the paper bag is 22 liters. A full dust bag reduces the
systemsperformance.Dependingonhowoftenyouuseyourcentral
vacuumsystem,thedustbagmayneedtobechanged2-3times
per year – and can be obtained at your local dealer/distributor.
Instructions for changing the dust bag:
1.Removethepowerunitdirtreceptacle
2. Loosen the dust bag from the intake tube, remove and dispose.
3.Placeandpressthenewdustbagrmlyintothetube.
Turnthedustbag’sopeningtomakeitfastenrmlyonthetube.
4. Put the dirt receptacle back on the central power unit.
IF YOU ExPERIENCE TROUBLE WITH YOUR
KENMORE CENTRAL VACUUM SYSTEM, FOLLOW
THE SUGGESTIONS BELOW BEFORE CALLING
FOR SERVICE.
PARTIAL/TOTAL LOSS OF SUCTION POWER
• Besuredirtreceptacleisonproperly.
• Emptydirtreceptacle.
• Removedebrisfromlter.
• Besureeachinletvalveisproperlyclosed.
CLEAR BLOCKAGE IN PIPES
Blockage in the hose
Plughoseintoanyinletvalve.Ifthereisnosuctionthroughthehoseafter
connecting at a couple of inlets, the blockage is in the hose. To clear the
hoseobstruction,insertabluntinstrumentintothehose(gardenhose,
wooddowel).Youcanalsoattempttoreversethesuctionthroughthe
hose to dislodge the blockage.
Refertopage15-Image12and13
Ifthereisoneinletvalvewithoutnormalsuctionandyouhavechecked
for hose blockage, then the blockage is in the pipe system between the
blockedinletvalveandthepowerunit(seeinstructionsbelow).
Insertthehoseintotheinletvalvewherethereisnosuction;holdyour
handoverthehoseend.Releasehandquickly.Repeatseveraltimes.If
blockagedoesnotclear,contactyournearestKenmoredealer/distributor.
POWER UNIT WILL NOT START
• Checkforblownfuseorcircuitbreakerinmainhouseelectricsupplybox.
• Unplugandcheckallwallinletandlowvoltageconnectionsforloosewires.
• Ifunitstillwillnotstart,contactyournearestauthorizedservice
station/dealer.
POWER UNIT WILL NOT STOP
• Checkinsideeachinletvalveforobstructionoflow-voltagecontacts.
Ifnovisualobstructioncanbedetected,disconnectthecleanerfrom
the power receptacle and contact your nearest service station/dealer.
CENTRAL POWER UNIT SHUTS OFF BY ITSELF
• Removeandthenre-inserthoseintoinletortoggleswitchoff-on
located on hose handle. See “Overload Protection”.
Instructions to install utility inlet – optional
Instructions pour l'installation de la prise utilitaire – optionnelle
PVC pipe Insert (length optional)
Raccord de tuyau en PVC
(longueur facultative)
Power unit
Unité motrice
PVC pipe to system
Tuyau en PVC raccordé
au système
Sweep 90 tee
Té évasé à 90 degrés
Inlet valve (low voltage)
Prise utilitaire
(à basse tension)
Low voltage wire to cleaner control box
Fil à basse tension au panneau de commandes
de l'aspirateur

7
KENMORE PRODUCT – LIMITED WARRANTY
SearsCanadaInc.warrantsthisproducttobefreefromdefectsin
material and workmanship and agrees to remedy, subject to the
limitations and exclusions set out below, any such defect for a period
as stated below from the date of original purchase.
CENTRAL VACUUM – TWO (2) YEAR, PARTS AND
LABOUR
15 YEAR GUARANTEE ON POWER UNIT BODY
AND ALL NON-ELECTRICAL COMPONENTS -
(PARTS ONLY)
SearsguaranteethatyourKenmoreCentralVacuumPowerUnitBody
andallNon-ElectricalComponentsinitsuchas–letsandgaskets,
shall be free from defects in labour, workmanship, and materials for a full
15yearsfromdateofpurchase.
15 YEAR GUARANTEE THE INSTALLATION
COMPONENTS AND WALL INLETS - (PARTS ONLY)
Installationcomponentsincludesallpiping(tubing),ttings(elbows)and
wallinletsusedtoinstallyourKenmoreCentralvacuum.IfanyofKenmore
installation components fail to function properly due to manufacturing
defects, they will be replaced free of charge.
KENMORE MOTOR AND ELECTRICAL CENTRAL
VACUUM GUARANTEE – (PARTS ONLY)
SearsguaranteethatyourKenmoreCentralvacuummotorand
electricalcomponents,Partsonlyforaperiodof5to10yearsfromdate
purchase, depending on the model you purchase. This guarantee applies
toallelectricalcomponentsintheKenmoreCentralVacuumpowerunit.
For the guarantee periods listed below:
Model Guarantee
34088(InPkg34525,34827) 5Years
34089(InPkg34826,34828,34829) 7Years
(InPkg34830) 8Years
34087(InPkg34834) 10Years
34090(InPkg34835) 10Years
KENMORE TWO YEAR ACCESSORY GUARANTEE
Withintwofullyearsfromdateofpurchase,shouldanyKenmorecentral
vacuum accessory, including the power head, hose or cleaning tools,
fail to perform due to manufacturing defects return it to your nearest
Sears service depot and they will repair or replace free of charge.
LIMITATIONS AND ExCLUSIONS
ThiswarrantydoesnotapplytoproductspurchasedoutsideCanadaor
to any product which has been improperly installed and /or assembled,
subjected to usage for which the product has was not designed, misused
or abused, damaged during moving, or which has been altered or repaired
in any way, including by any unauthorized service or repair representative,
that affects the reliability or detracts from the performance, nor does it
cover any product with is used commercially. This warranty excludes
damage caused by misuse or improper handling, such as vacumming
offoreignobjectsoritemslargeenoughtobepickedupbyhand(e.g.
clothing,suchassocks,toysetc.)Partsorcomponentsthatrequire
replacement under normal use; such as drive belts. Light bulbs and
brush roll bristles are excluded from coverage under this warranty.
APurchasereceiptorotherproofofdateoforiginalpurchaseisrequired
before warranty of service is performed.
IN NO EVENT WILL SEARS CANADA INC.
BE LIABLE FOR ANY SPECIAL, INDIRECT OR
CONSEqUENTIAL DAMAGES.
Incertaininstances,somejurisdictionsdonotallowtheexclusion
orlimitationofIncidentalorconsequentialdamages,ortheexclusion
of implied warranties, so the Above limitations and exclusions may
not be applicable.
WARRANTY SERVICE FOR PRODUCT OPERATION
ASSISTANCE,
Pleasecontact:OurCustomerCallCentre:
Telephone # 1-800-4-MY-HOME
(1800-469-4663)
Email link: www.sears.ca
FOR PRODUCT REPAIRS,
pleaselocateyournearestSearsServiceCentre.
IF YOU SHIP THE PRODUCT TO A SERVICE CENTRE
Carefullypackandsendprepaid,adequatelyinsuredandpreferably
intheoriginalcarton.Includedetailsofthedefectclaimed,andproofof
date of original purchase.
KENMORE CENTRAL VACUUM WARRANTY

8
IMPORTANTES CONSIGNES DE SÉCURITÉ
Lorsquevousutilisezunappareilélectrique,desprécautionsdebasedoiventêtreprises,dontcellesquisuivent:
LISEZ TOUTES LES DIRECTIVES AVANT D’UTILISER CE SYSTÈME CENTRAL D’ASPIRATION.
L’unitémotricedecetaspirateurcentralestconçuepourl’enlèvementdespoussièresdomestiquesnormales.
CONTENU
L’emballagedevotresystèmecentrald’aspirationcontientlesarticlessuivants:
AVERTISSEMENT
Anderéduirelesrisquesd’incendie,dedéchargesélectriquesoude
blessures :
• N’utilisezpascetappareilàl’extérieurousurdessurfacesmouillées.
• Nebloquezpaslecapotdumoteur,nilesfentesetconduitsde
ventilationquisetrouventauhautdel’unitémotrice.Lemanquede
ventilation peut entraîner la surchauffe du moteur.
• Neplacezpasl’unitémotricedansunendroitoùlatempératureest
élevéeoudansunendroitoùilseradifciled’yaccédercommeun
comble ou un vide sanitaire.
• Installezl’unitémotriceaumurenlaissantunespaced’aumoins
30cm(12’’)entrecelle-cietleplafondetlesmursadjacentsetd’au
moins70cm(27,5’’)entrecelle-cietleplancher.Deplus,vérieztous
lescodesetrèglementslocauxquipeuvents’appliquer.
• Nelaissezjamaislesenfantsl’utilisercommeunjouet.Unesurveillance
étroiteestnécessairelorsquecetappareilestutilisépardesenfants
ouprèsdeceux-ci.
• Cetappareiln’estpasdestinéàêtreutilisépardespersonnes(incluant
lesenfants)ayantdescapacitésphysiques,sensoriellesoumentales
réduites,oumanquantd’expérienceoudeconnaissances,àmoins
qu’unepersonneresponsabledeleursécuriténeleuraitdonnédes
directivessurl’utilisationdel’appareiloulessupervise.
• N’utilisezcetappareilquedelafaçondécritedanscemanuel.
N’utilisezquelesaccessoiresrecommandésparlefabricant.
•
N’utilisezpasl’appareilsilecordonoulachesontendommagés.Sil’appareil
nefonctionnepascommeilledevrait,s’ilaétééchappé,endommagé,laissé
àl’extérieurouéchappédansl’eau,rapportez-leàuncentredeservice.
• Branchez-ledansunprisedecourantcorrectementmiseàlaterre
seulement(consultezlasection«Instructionspourmiseàlaterre».
• N’utilisezpasdecordonsderallongeoudeprisedontl’intensitéde
courantadmissiblen’estpasacceptable.
• Fermeztouteslescommandesavantdedébrancher.
• Nedébranchezpasentirantsurlecordon.Pourdébrancher,tirezla
fiche, pas le cordon.
• Nemanipulezpaslacheoulecordonavecdesmainsmouillées.
• N’insérezaucunobjetdanslesprisesd’admissiond’air.N’utilisez
pasl’appareilsiunedesprisesd’admissionestobstruée;gardez
lesprisesd’admissionlibresdetouteaccumulationdepoussières,
charpie,cheveuxouautresquipourraientréduireledébitd’air.
• Cetaspirateurcréeunesuccion.Gardezlescheveux,lesvêtements
amples, les doigts et toutes les autres parties du corps loin des prises
d’admissionetdespiècesmobiles.
• Neramassezrienquivientdebrûleroudontunefumées’échappe,
comme des cigarettes, des allumettes ou des cendres chaudes.
• Redoublezdeprudencelorsquevousnettoyezlesescaliers.
•N’utilisezpascetappareilpourramasserdesliquidesinammables
oucombustiblescommedel’essenceoupournettoyerdansun
endroitoùdesproduitsdecegenrepeuventêtreprésents.
•Gardezvotreairedetravailbienéclairée.
•Débranchezlesappareilsélectriquesavantdelesnettoyer.
• Silecordond’alimentationfourniestendommagé,ildoitêtreremplacépar
uncordonspécialquevoustrouverezchezledétaillantouledistributeurlocal.
• N’utilisezpasl’appareilsansquelesacàpoussièreet/ouleltre
soi(en)tenplace.
CONSERVEZ CES DIRECTIVES
Raccord
adaptateur
pour sac
Unitémotrice
1sacd’aspirateur
Adaptateur pour
évacuationexterne
Coudeadaptateur
à90°poursac
Support de fixation
murale avec vis
Adaptateur de
prised’admission
Importantesconsignesdesécurité ..................... 8
Informationgénérale........................................... 9
Installation .......................................................... 9
Véricationdusystème...................................... 10
Moded’utilisation .............................................. 10
VoyantsàDEL................................................... 10
PanneauACL .................................................... 11
Adaptateur pour sac.......................................... 12
Prised’admissionutilitaire.................................. 12
Protection contre la surchauffe .......................... 12
Protection contre les surcharges........................ 12
Diagnosticsetmaintenance............................... 12
Entretien du filtre................................................ 12
Sac filtreur en papier.......................................... 12
Dépannage........................................................ 12
Garantie ............................................................ 14
Images .............................................................. 15

9
INFORMATION GÉNÉRALE
Cesystèmecentrald’aspirationestconçupourramasserdespoussières
etdesdébrisdomestiquessecs.Évitezderamasserdesobjetsdurs
oupointusaveccesystèmeandenepasendommagerouobstruerle
boyauoulatuyauterieenplastique.
Cemanuelcouvriralesétapesnalesdel’installationdel’unitémotrice
dansvotremaison.Ilfourniraégalementl’informationnécessairepour
l’entretienainsiquedesconseilsdedépannageaucas,peuprobable,
oùcelaseraitnécessaire.Sivousavezbesoindeplusd’information
concernantl’installationouleproduit,veuillezcommuniqueravecvotre
détaillantoudistributeurautorisélocal.
ÉqUIPEMENT DE SÉCURITÉ POUR L’INSTALLATION
Pourlapréparationdesmursetdesrevêtements,leport
d’équipementdesécurité–casque,gants,lunetteset
protège-oreilles–estrecommandé.
PRUDENCE
Faitespreuvedeprudencelorsquevouspercezdestrousdanslesmurs
puisquedesconduitesdegazoud’eauainsiquedeslsélectriques
peuvents’ytrouver.
Pourtoutesquestionsconcernantleproduit,lespiècesderechange,
leserviceaprès-vente,lagarantieouquoiquecesoitd’autres,veuillez
communiqueravecvotredétaillantoudistributeurautorisélocal.
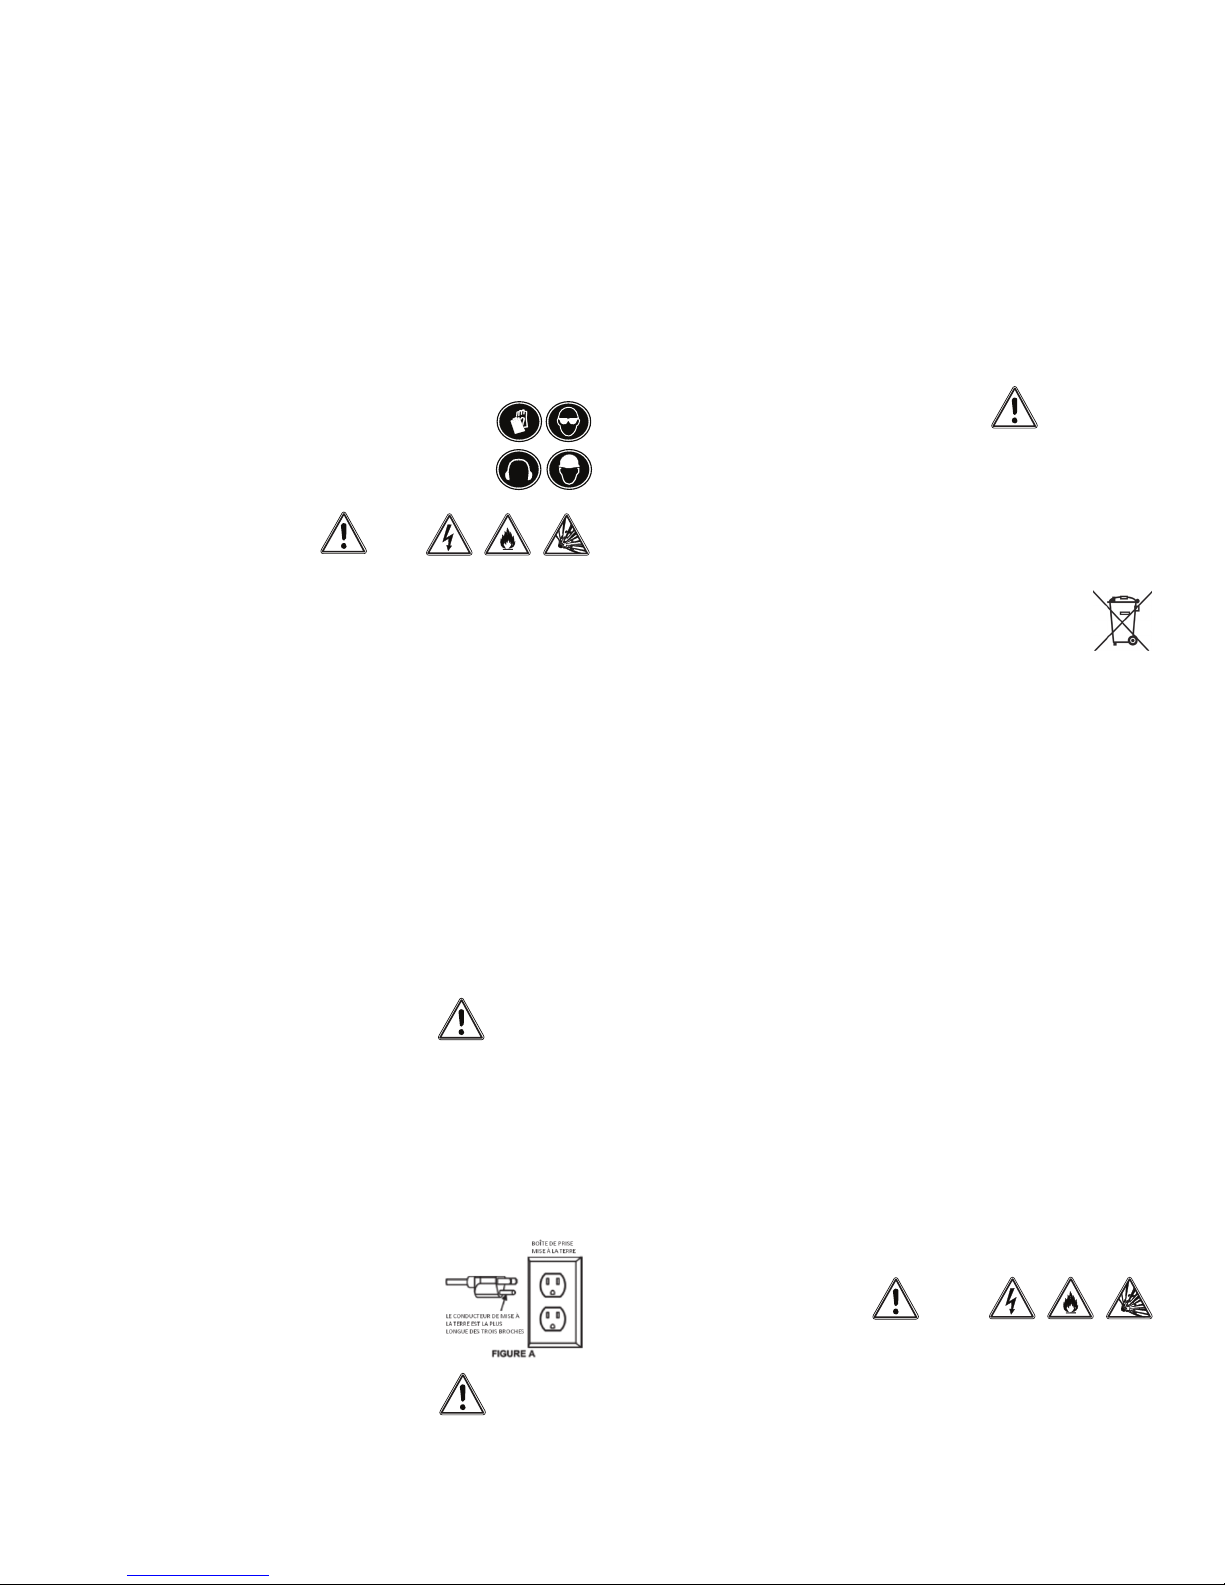
INSTRUCTIONS POUR MISE À LA TERRE
Cetappareildoitêtrebranchédansuneprisemiseàlaterre.Encasde
mauvaisfonctionnementoudepanne,lamiseàlaterreoffreunevoie
demoindrerésistancepourlecourantélectriquecequiréduitlerisque
dedéchargeélectrique.Cetappareilestdotéd’uncordonetd’uneche
munisd’unconducteurdemiseàlaterre.Lachedoitêtrebranchée
dansunepriseappropriée,laquelledoitêtrecorrectementinstalléeet
miseàlaterreconformémentauxcodesetrèglementslocauxquirégissent
lesinstallationsélectriques.
AVERTISSEMENT
Lebranchementinadéquatd’unappareildotéd’undispositifdemise
àlaterrepeutcauserdesdéchargesélectriques.Sivousn’êtespas
certainquelaprisedecourantestconvenablementmiseàlaterre,
consultezunélectricienqualiéouuntechniciendeservice.Nemodiez
paslachequivousestfournieavecl’appareil.
Cetappareilutiliseuncircuitnominalde120voltsetestdotéd’uneche
avecconducteurdemiseàlaterrequiressembleàlachemontréeà
laFigureA.Aucunadaptateurnedevraitêtre
utiliséavecl’appareil.
NOTE :AuCanada,l’utilisationd’unadaptateur
temporairen’estpaspermiseparleCode
canadiendel’électricité.
AVERTISSEMENT
Silecordond’alimentationestendommagé,ildoitêtreremplacéparun
cordonspécialquevoustrouverezchezvotredétaillantoudistributeur
autorisélocal.
INFORMATION CONCERNANT L’ENTRETIEN
Les instructions contenues dans ce manuel servent de guide pour
l’entretienderoutine.Pourplusd’information,communiquezavecvotre
détaillantoudistributeurautorisélocal.
PLAqUE SIGNALÉTIqUE
Letypeetlesnumérosdemodèleetdesériesontindiquéssurla
plaquesignalétiquequisetrouvesurlepanneaudecommandesousur
lecapotdumoteur.Pourobtenirrapidementdesinformationscomplètes,
assurez-vousdetoujoursavoircesnumérosenmainlorsquevous
appelez pour des informations ou pour un appel de service.
AVERTISSEMENT
Lenon-respectdesconsignesdesécuritépeutentraînerdes
dommages corporels.
DIMENSIONS DU PRODUIT
Voirenpage15–Image1
DÉCHETS D’ÉqUIPEMENTS ÉLECTRIqUES
ET ÉLECTRONIqUES (DEEE)
Cesymbolesurleproduitousursonemballageindiquequeceproduitne
peutpasêtretraitécommeundéchetdomestique.Ildoitplutôtêtreapporté
dansunpointdecollectepourlerecyclagedeséquipementsélectriqueset
électroniques.Envousassurantqueceproduitestéliminécorrectement,
vousaiderezàréduirelesconséquencespotentiellementnéfastespour
l’environnementetlasantéhumainequipourraientdécoulerd’unemanipulation
inappropriédesdéchetsdeceproduit.Pourobtenirdel’information
détailléeconcernantceproduit,communiquezavecvotreservicelocal
d’éliminationdesdéchetsouaveclemagasinoùvousavezachetéleproduit.
INSTALLATION
Sivotremaisonestdéjàéquipéedusystèmedetuyauterieenplastiqueet
deprisesd’admission,vousêtesprêtàinstallerl’unitémotricecentrale.
Sivotremaisonn’estpaséquipéepourunsystèmecentrald’aspiration,
vouspouvezfaireinstallervotresystèmed’aspirationcentralparun
professionnelencommuniquantavecvotredétaillantoudistributeur
localouchoisirdefairel’installationvous-même.
L’unitémotricecentraledevraitêtreplacéeaussiloinquepossibledes
piècesoùvousvivezgénéralement,toutenétantdansunendroit
accessibleoùilvousserapossiblederetirerlacuveàpoussière,
d’atteindrelefiltreetd’examinerl’unitémotrice.Unemplacement
typiqueseraitlegarage,oùvouspourrieznettoyervotreautooule
garageetoùilestbeaucouppluspratiquedeviderlacuveàpoussière
etnettoyerleltre.Lesous-sol,lasalledelavageouundébarrasaéré
sontégalementdesendroitsquiconviennentbien.
PRUDENCE
Faitespreuvedeprudencelorsquevouspercezdestrousdans
lesmurspuisquedesconduitesdegazoud’eauainsiquedes
filsélectriquespeuvents’ytrouver.Lestrousdanslamaçonneriene
sontpermisquesisastructurenes’entrouvepasfragilisée.Lestrous
danslesmontantsdeboisdevraientêtreforés.Utilisezlesancrages
appropriés,enfonctiondumatériauaveclequelvotremaisonaété
construite,poursuspendrevotreunitémotrice.L’unitémotriceglisse
simplementsurlesupportdexationets’enclenche.

10
Voiràlapage15–Image3
• Placezl’unitémotricecentraledansunendroitquiestàl’écartde
l’espacehabitablegénéral.Ledispositifd’évacuationdevraitêtre
facileàrelieràuntuyaudeventilation.Celapeutêtrefaitpeuimporte
lesmatériauxdeconstructiondelamaison.
• Localisezlesdeuxcâblesàbassetensionsituésprèsdutuyauprincipal.
Dénudezlelàbassetension.Insérezlelàbassetensiondansles
connecteursàbassetensionàressort.Assurez-vousdevousconformer
auxcodesetrèglementslocauxenmatièred’électricité.
Voiràlapage15–Image4
• Assurez-vousqu’uneprisedecourantpourraêtreréservée
uniquementaubranchementdel’unitémotrice.
• Branchezvotreunitémotriceaveclecordond’alimentationfourni.
VotreunitémotriceKenmoren’apasbesoinqu’unsilencieuxysoitajouté.
Votresystèmecentrald’aspirationestdotéd’unsilencieuxinterne.
Voussouhaitezpeut-êtretoutefoisquel’évacuationdel’airsefasseà
l’extérieur.Sic’estlecas,vousaurezbesoindexerl’adaptateurpour
évacuationexterne.Ilpermettrademodierladimensiondudispositif
d’évacuationpourqu’elles’adapteàladimensiondelatuyauteriede
l’aspirateurcentral.
Voiràlapage15–Image5
• Placezl’unitémotricedefaçonàcequeletuyaud’évacuationsoit
aussicourtquepossible.Lalongueurdutuyaud’évacuationne
devraitpasdépasser5m(16,5’).
• Gardezàl’espritquevousaurezbesoind’espacesurlescôtésde
votreunitémotricecentralepouraccéderàlacuveàpoussière.
Voiràlapage15–Image6
• Alignezleraccorddelaprised’admissiond’airdel’unitémotriceavec
letuyauprincipalquisortdumur.NE COLLEZ PAS. Si vous
optezpouruneévacuationàl’extérieur,xezletuyaud’évacuation
audispositifd’évacuationdumoteur.Assurez-vousqueletuyau
d’évacuationestaussicourtquepossible.
NOTE :Installezl’unitémotriceàaumoins30cm(12’’)duplafond
etdetousmursadjacents,àaumoins30cm(27,5’’)duplancher
etàmoinsde1,8m(6’)d’uneprisedecourant.Consulteztousles
règlementslocauxquipeuvents’appliquer.
Voiràlapage15–Image2
AVERTISSEMENT
Nebloquezpaslesfentesdeventilationducapotquisetrouventau
hautdel’unitémotricecentrale.Lemanquedeventilationpeutentraîner
la surchauffe du moteur.
AVERTISSEMENT
Neplacezpasl’unitémotricecentraledansunendroitoùla
températureestélevéeetoùelleserainaccessiblecommeuncomble
ou un vide sanitaire.
Pouruncontrôleultimedelaqualitédel’air,optezpourlasérie650.
Lasérie650estdotéed’unltreHEPAauthentiqueetpeutêtre
intégréeàl’unitémotricequevouschoisissezoupeutêtreachetéechez
undétaillantouundistributeurautorisé.Vousn’avezqu’àxerleltre
HEPAauthentiquetelquemontré.
Voiràlapage15–Image7
VÉRIFICATION DU SYSTÈME
Assurez-vousquevotreinstallationélectriqueestconformeauxcodes
etrèglementslocauxenmatièred’électricité.Branchezl’unitémotrice
dansuneprisedecourantrégulière.Vousêtesmaintenantprêtà
vérifiersil’unitémotriceinstalléefonctionne.
• Assurez-vousqueleltreestconvenablementinstallédansl’unitémotrice.
• Assurez-vousquelacuveàpoussièreestconvenablementxée
àl’unitémotrice.
• Branchezleboyaudanschaqueprised’admissionpourvous
assurerquelescontactsélectriquesfonctionnentcorrectement.
• Assurez-vousqu’iln’yaaucunefuited’airàchaqueprised’admission.
• Assurez-vousqu’iln’yaaucunefuited’airàchaqueraccordement
de tuyaux.
Voiràlapage15–Image8
MODE D’UTILISATION DU SYSTÈME CENTRAL
D’ASPIRATION
Votresystèmecentrald’aspirationestcontrôléparuninterrupteursur
votreboyau.Insérezsimplementleboyaudanslaprised’admissionet
placezl’interrupteurenposition«marche»(ON).Celaferadémarrer
l’unitémotriceetactiveraledébitd’air.
Lorsquevousavezni,placezl’interrupteurduboyauenposition«arrêt»
(OFF)etretirezleboyaudelaprised’admission.Lorsquevousdébranchez
leboyau,tenezleclapetdelaprised’admissionouvertpendantquelques
secondesandepermettreàlasucciondediminueret,ainsi,protégerle
jointdelaprised’admission.
Voiràlapage15–Image8
VOYANTS À DEL – OPTIONNELS SELON LE MODÈLE
Ilestpossiblequevotreappareilsoitdotédecertainsoudetousles
voyantsmontrésci-dessous.
Voiràlapage15–Image9
Marche/Arrêt Défaillance Cuveà Réenclenchement
dumoteur poussièrepleine
Votreunitémotriceestdotéed’unpanneauàDELmulticolores.Cepanneau
àDELvousdonnedel’informationimportantesurlaperformance,l’entretien
etlesdiagnosticsdevotreunitémotrice.Voustrouverezci-dessousles
descriptionsdesdifférentsmessagesquevousenvoievotreunitémotrice.
FONCTIONNEMENT NORMAL
Lorsquel’unitémotriceestarrêtéeetestenmodeattente,laDELseraROUGE.
Lorsquel’unitémotricefonctionne,laDELestVERTE.Silevoyant
«Défaillancedumoteur»estallumé,consultezlasectionsuivantepour
plusdedétails.Silevoyantdelacuveàpoussièreestallumé,videz
lacuveàpoussièreetappuyezsurleboutonRÉENCLECHEMENT,
pendant10secondes

11
DÉFAILLANCE DU MOTEUR
Advenantlecasoùunfusiblesauteouqu’unldumoteursoitdéconnecté
etquel’unitémotricenefonctionnepas,levoyant«marche/arrêt»
(ON/OFF)seraconstammentVERT.Danslecasd’unarrêtcauséparune
surintensité,levoyant«marche/arrêt»(ON/OFF)clignoteraenROUGE,le
VERTs’allumeraets’éteindrarapidementetlevoyantDÉFAILLANCEDU
MOTEURseradecouleurAMBREets’allumeraets’éteindrarapidement.
Ceproblèmeserègleraetleréenclenchementseferaautomatiquement
en15secondessilaconnexionàbassetensionestcoupée(OFF)au
niveau du boyau.
Danslecasoùilyasurintensitécontinue,oùlaconnexionàbasse
tensionfonctionneetoùl’interrupteur«marche/arrêt»(ON/OFF)
surleboyauestconstammentROUGE,levoyantVERTclignotera
lentementetlevoyantDÉFAILLANCEDUMOTEURclignoteralentement
enAMBRE.
Danslecaspeuprobabled’unemauvaisefréquencereçueparl’unité
motrice,celle-cinedémarrerapasetlevoyant«marche/arrêt»
(ON/OFF)seraconstammentROUGE.Danslecasoùlecourantreçu
parl’unitémotriceseraitàhautetension,levoyant«marche/arrêt»
(ON/OFF)alterneraentreleROUGEetleVERTtroisfoisetunecourte
pausesuivra–alternanceentreleROUGEetleVERTtroisfoissuivie
d’unelonguepause–uneséquencequiserépèteraensuite.Ceci
seproduiradefaçoncontinuetantquelatensionneserapasrevenue
àunniveauadéquat.
PANNEAU ACL – OPTIONNEL
Voiràlapage15–Image8
SÉRIE 650
LelogoKenmoreapparaîtrasurl’écranprincipaldupanneauACL.
Celogopeutdélerd’uncôtéàl’autrepouréviterquel’images’incruste
surl’écranACL.Vousverrezlelogolorsquel’unitémotricene
fonctionne pas.
Leboutonquis’alignelemieuxaveclesymboledepuissancesur
l’écranpeutêtreutilisépouractiverl’unitémotrice.Appuyezsur
ceboutonpourmettreenmarcheetarrêterl’unitémotrice.L’unité
motricepeutaussiêtremiseenmarcheàpartirden’importequelle
prised’admission.
LorsquevotreunitémotriceavecACLestenmodeattente,lesquatre
lumièresblanchesdevotrepanneaud’ACLs’allumerontenséquence
etsedéplacerontenalternancedegaucheàdroitepuisdedroiteà
gauche.Cedéroulementserépèteracontinuellementetc’estune
indicationquevotreunitémotriceestprêteàêtreutiliséeetqu’elle
fonctionne correctement.
EN FONCTION
Lorsquel’unitémotricefonctionne,l’indicateurestenvert.Les
4 barres de progression de la performance apparaîtront
Lorsqu’uneunitémotricefonctionnenormalement,les4barres
deperformancedevraientêtreallumées.S’ilyaconstamment
moinsde2barres,vousdevriezvérifierquelestleproblème.
1.Blocagedelasuccionàl’extrémitéduboyau.
2.Obstructiondanslatuyauteriedusystème.
3.Utilisationd’unaccessoireàdébitd’airrestreint–parexemple
un outil de coin.
4.Cuveàpoussièrepleine.
5.Systèmedeltrationencrassé.
CUVE À POUSSIÈRE
Àtoutesles25heuresd’utilisation(environ6mois),l’indicateurdela
cuveàpoussièreclignoteraàl’écran.Celaindiquequ’ilfautvérierla
cuveàpoussièreetlavider.Puisquecetteindicationestbaséesurle
temps,ilsepeutquevoustrouviezlacuvepasassezoutroppleine.Si
vousavezdesanimauxdecompagnie,unatelierouqued’autresfacteurs
peuventcauseruneaccumulationdedébris/poussièreplusrapide,vous
devriezpeut-êtrevérierlacuveàpoussièreplussouvent.
Lorsquelacuveàpoussièreaétévidée,appuyezsurleboutonde
retourpourremettrelecompteurhoraireàzéro.Sivotrealimentation
électriqueestinterrompueousil’unitémotriceestdébranchée,le
compteurdel’indicateurdecuveàpoussièregarderaenmémoireson
compteprécédentetcontinueraparlasuitelecomptehoraire.
Pourremettremanuellementlecompteurdel’indicateurdecuveà
poussièreàzéro,appuyezsimplementsurleboutonalignéavecle
symbole«Retour»,pendant10secondes
INDICATEUR DE DURÉE DE VIE
L’indicateurdeduréedevieafche8barres.Lorsquecesbarressont
effacées,votreunitémotricecontinueraàfonctionner,maisilest
fortementrecommandédel’apporteràvotrecentredeservicelocal
pouruneinspectionetunentretien.Àtoutesles65heuresd’utilisation
del’aspirateur,unebarredel’indicateurdeduréedevies’effacera,
cequisignifiequevotresystèmecentrald’aspirationvousoffreune
longueduréedeservice.Lecompteurdel’indicateurdeduréede
vienepeutêtreremisàzéroqueparvotretechniciendeservice.
Sivotrealimentationélectriqueestinterrompueousil’appareilest
débranché,lecompteurdel’indicateurdeduréedeviegarderaen
mémoiresoncompteprécédentetcontinueraparlasuitelecompte.
INDICATEUR DE SERVICE
Sivotreunitémotriceprésenteunedéfaillanceouundéfautde
fonctionnement,l’indicateurdeserviceclignotera.Sivousvoyez
cesymbole,nousvousrecommandonsd’arrêterl’unitémotrice,
deladébrancherpendant10secondes,puisdelarebrancher.
Silesymboledeservices’affichetoujoursàl’écran,nousvous
recommandons de faire un appel de service.

12
Cesymbolepeutapparaîtreàcausedesdéfaillancessuivantes:
• Problèmedemoteur
• Problèmeélectronique
• Problèmedetensionoudecourant(tropélevéoutropfaible)
• Unitémotricenerépondantpasauxcommandesélectroniques
DÉFILEMENT DE L’ACL
Lorsquel’unitémotricen’estpasenfonction,vouspouvezfairedéler
lesfonctionsdevotreACLpourvérierl’étatdelacuveàpoussière,
lecomptedeladuréedevieouleplusrécentniveaudeperformance.
Pourfairedélercesfonctions,appuyezsimplementsurlebouton
correspondantàlaèchepointantversladroite.
L’écransuivantafcheral’indicateurdeduréedevie.Sivousdélezencore
versladroite,vousverrezl’étatdelacuveàpoussière.Ledélementsuivant
afcheralesderniersniveauxdeperformanceenregistréspourl’unité
motriceparl’indicateurdeperformancedel’écran«Enfonction».
Ledernierdélementversladroiteafcheralenumérodetéléphonedu
serviceàlaclientèle.
Leboutonalignéaveclaèchededélementverslagauchevous
permettradefairedélerlesécransprécédents.
ADAPTATEUR DE SAC
Votreunitémotricepeutêtreéquipéed’unsacenpapierpratiquepour
uneéliminationpluscommodedesdébris.Pourleremplacementdu
sacenpapier,consultezlasection«Sacltreurenpapier»,sous
«Entretiendultre».
Voiràlapage15–Image10
PRISE D’ADMISSION UTILITAIRE
Lapriseutilitaireestsimilaireàuneprised’admission,saufqu’elle
setrouveprèsdel’unitémotrice.Cettepriseestpratiquepuisqu’elle
peutaideràramassertouteslessaletésrépanduesprèsde
l’aspirateurcentral.
PROTECTION CONTRE LA SURCHAUFFE
Silecircuitimpriméatteintunetempératureélevée,l’unitémotricene
fonctionnerapasetlaDELseraéteinte–ousurlesmodèlesavecACL,
l’écranclignotera.Sicelaseproduit,appuyezsurlebouton«marche/
arrêt»(ON/OF),débranchezl’unitémotriceouattendezquelatempérature
baisse.Sileproblèmepersiste,communiquezavecvotredétaillantou
distributeurautorisé.
Voiràlapage15–Image9
PROTECTION CONTRE LA SURCHARGE
Lesystèmecentrald’aspirationutilisedeséquipementsquigèrentles
niveaux de fonctionnement suivant : tension alternative et appel de
courant.Silatensionestinférieureousupérieureàlatensionde
fonctionnementnormale,s’ilyaunappeldecourantélevéouunrotor
bloqué,l’unitémotricenefonctionnerapas.Dansdetellessituations,
ledisjoncteursedéclenchera–pourlesmodèlesàACL,l’écran
clignotera–jusqu’àcequeleproblèmecesse.Sileproblèmepersiste,
communiquezavecvotredétaillantoudistributeurautorisé.L’unité
motriceabesoind’untempsderefroidissementde30minutesavant
d’êtreredémarrée.
Voiràlapage15–Image9
DIAGNOSTICS ET MAINTENANCE
Uneréductiondudébitd’airoudelasuccionindiquequelesystème
centrald’aspirationnefonctionnepasàsonefcacitémaximale.Si
lacuveàpoussièreestpleineetsileltreestencrassé,l’airnepeut
traverserl’unitémotriceetlenettoyagenepeutsefaire.Lesinstructions
fourniesdanscelivretserventdeguidepourl’entretienderoutine.
Undébitd’airouunesuccionconvenablespeuventêtremaintenusen
gardantlacuveàpoussièreetleltrepropreainsiquelatuyauterieetle
boyau libres de toutes obstructions.
VIDANGE DE LA CUVE À POUSSIÈRE
Laplupartdesmodèlessontéquipésdecuveàpoussièreavechublot
quivouspermetdevoirsilacuveàpoussièreabesoind’êtrevidée.
Danslaplupartdescas,lacuveàpoussièren’abesoind’êtrevidéeque
deuxoutrois(2-3)parannée.
Pourretirerlacuveàpoussière,appuyezsurlesboutonsquisetrouvent
surlespoignéesdelacuve.Retirezlacuveetvidezlecontenu.
Replacezlacuveenlaxantsurl’unitémotrice.Pouréviteruneperte
desuccion,assurez-vousquelacuveestfermementxée.
Voiràlapage15–Image11
ENTRETIEN DU FILTRE
LeltreKenmoreestpermanentetautonettoyant.Toutefois,sivous
avezdesquestionsconcernantvotreltrepermanentautonettoyant,
communiquezavecvotredétaillantoudistributeurautorisélocal.
SACS FILTREURS EN PAPIER – OPTIONNEL
Lacapacitédusacenpapierestde22litres.Unsacàpoussièreplein
réduitlaperformancedusystème.Dépendantdevotrefréquence
d’utilisationdevotresystèmecentrald’aspiration,lesacàpoussière
peutavoirbesoind’êtrechangé2à3foisparannée–vouspouvez
vousenprocurerchezvotredétaillantoudistributeurlocal.
Instructions pour changer le sac à poussière :
1.Retirezlacuveàpoussièredel’unitémotrice.
2.Détachezlesacàpoussièredutubed’admission,retirez-leetjetez-le.
3.Placezetpressezfermementlenouveausacàpoussièredansle
tube.Tournezl’ouverturedusacàpoussièrepourqu’ellesexe
fermement sur le tube.
4.Replacezlacuveàpoussièresurl’unitémotricecentrale.
SI VOUS AVEZ DES PROBLÈMES AVEC VOTRE
SYSTÈME CENTRAL D’ASPIRATION KENMORE,
SUIVEZ LES SUGGESTIONS SUIVANTES AVANT
DE FAIRE UN APPEL DE SERVICE.
PERTE PARTIELLE OU TOTALE DE SUCCION
• Assurez-vousquelacuveàpoussièreestbienxée.
• Videzlacuveàpoussière.

13
• Retirezlesdébrisdultre.
• Assurez-vousqueleclapetdechaqueprised’admission
estbienfermé.
DÉBLOCAGE DES TUYAUx
Blocage dans le boyau
Branchezleboyaudansn’importequelleprised’admission.S’iln’ya
aucunesuccionàtraversleboyauaprèsl’avoirbranchédansquelques
prises,leblocageestdansleboyau.Pourdébloquerleboyau,insérez
uninstrumentnonpointuetnontranchant(boyaud’arrosage,bâtonde
bois)dansleboyau.Vouspouvezaussiessayerd’inverserlasuccion
pourdélogercequiobstrueleboyau.
Voiràlapage15–Images12et13
Sil’unedesprisesd’admissionneprésentepasunesuccionnormaleet
quevousvousêtesassuréqueleboyaun’estpasobstrué,c’estquele
blocageestdanslesystèmedetuyauterieentrecetteprised’admission
etl’unitémotrice(voirinstructionsci-dessous).
Insérezleboyaudanslaprised’admissionoùiln’yapasdesuccion;
placezvotremainsurl’extrémitéduboyau.Relevezlamainrapidement.
Répétezplusieursfois.S’ilyatoujoursblocage,communiquezavec
votredétaillantoudistributeurKenmoreleplusprès.
UNITÉ MOTRICE qUI NE DÉMARRE PAS
• Vériezs’ilyaunfusiblesautéouundisjoncteurdéclenchédansla
boîted’alimentationprincipaledelamaison.
• Débranchezl’unitémotriceetvérieztouslesbranchementsdes
prisesd’admissionettouteslesconnexionsàbassetensionpour
vousassurerquetousleslssontbienxés.
• Sil’unitémotricenedémarretoujourspas,communiquezavecle
détaillantoulecentredeserviceautoriséleplusprès.
UNITÉ MOTRICE qUI N’ARRÊTE PAS
• Vériezl’intérieurdechaqueprised’admissionpourvousassurerque
riennebloquelescontactsàbassetension.Siaucuneobstruction
n’estvisible,débranchezl’appareiletcommuniquezavecledétaillant
oulecentredeserviceleplusprès.
UNITÉ MOTRICE qUI S’ÉTEINT D’ELLE-MÊME
• Retirezleboyaudelaprised’admissionpuisréinsérez-leoubasculez
l’interrupteurquisetrouvesurlapoignéeduboyau.Voir«Protection
contrelasurcharge».
Instructions to install utility inlet – optional
Instructions pour l'installation de la prise utilitaire – optionnelle
PVC pipe Insert (length optional)
Raccord de tuyau en PVC
(longueur facultative)
Power unit
Unité motrice
PVC pipe to system
Tuyau en PVC raccordé
au système
Sweep 90 tee
Té évasé à 90 degrés
Inlet valve (low voltage)
Prise utilitaire
(à basse tension)
Low voltage wire to cleaner control box
Fil à basse tension au panneau de commandes
de l'aspirateur

14
PRODUIT KENMORE – GARANTIE LIMITÉE
SearsCanadaInc.garantitceproduitcontretousdéfautsdematériaux
oudefabricationetacceptedecorrigerdetelsdéfauts,saufdansles
casprévusauxlimitationsetexclusionsmentionnéesci-dessous,pour
lapériodestipuléeci-dessousàcompterdeladated’achatinitiale.
SYSTÈME CENTRAL D’ASPIRATION – DEUx (2)
ANS, PIÈCES ET MAIN-D’œUVRE.
GARANTIE DE 15 ANS SUR LE BOÎTIER DE L’UNITÉ
MOTRICE ET SUR TOUTES LES COMPOSANTES
NON-ÉLECTRIqUES (PIÈCES SEULEMENT)
Searsgarantitqueleboîtierdel’unitémotricedevotresystèmecentral
d’aspirationKenmoreainsiquetouteslescomposantesnon-électriques
quis’ytrouvent,commelesletsetjointsd’étanchéité,serontexempts
detousdéfautsdematériaux,defabricationoudemain-d’œuvrepour
unepériodecomplètede15ansàcompterdeladated’achat.
GARANTIE DE 15 ANS SUR LES COMPOSANTES
D’INSTALLATION ET LES PRISES D’ADMISSION
MURALES (PIÈCES SEULEMENT)
Lescomposantesd’installationincluenttoutelatuyauterie(tuyaux),les
raccords(coudes)etlesprisesd’admissionmuralesutiliséspourinstaller
votresystèmecentrald’aspirationKenmore.Sin’importequellecomposante
d’installationKenmorevenaitànepasfonctionnerconvenablementàcause
dedéfautsdefabrication,elleseraremplacéesansfrais.
GARANTIE SUR LE MOTEUR ET LES COMPOSANTES
ÉLECTRIqUES DU SYSTÈME CENTRAL
D’ASPIRATION KENMORE (PIÈCES SEULEMENT)
Searsgarantitlemoteuretlescomposantesélectriquesdevotresystème
centrald’aspirationKenmore(piècesseulement)pourunepériodede5à
10ansàcompterdeladated’achat,selonlemodèlequevousachetez.
Cettegarantiecouvretouteslescomposantesélectriquesinclusesdans
l’unitémotricedusystèmecentrald’aspirationKenmore.Lespériodesde
garantie sont les suivantes :
Modèle Garantie
34088(danslessyst.34525,34827) 5ans
34089(danslessyst.34826,34828,34829) 7ans
(danslessyst.34830) 8ans
34087(danslessyst.34834) 10ans
34090(danslessyst.34835) 10ans
GARANTIE DE DEUx ANS SUR LES ACCESSOIRES
KENMORE
Sidanslesdeuxannéescomplètessuivantladated’achat,n’importe
lequeldesaccessoirespoursystèmecentrald’aspirationKenmore,
incluantl’électrobrosse,leboyauoulesaccessoiresdenettoyage,
nefonctionnaitpasconvenablementàcausededéfautsdefabrication,
rapportez-leàvotrecentredeserviceSearsleplusprèsetilslerépareront
ou le remplaceront sans frais.
LIMITATIONS ET ExCLUSIONS
Cettegarantienes’appliquepasauxproduitsachetésàl’extérieurdu
Canadaniàunproduitquiaétéincorrectementinstalléet/ouassemblé,
soumisàunusagepourlequelleproduitn’apasétéconçuouàun
usageabusif,ouàunproduitquiaétémalutiliséouendommagélors
d’undéménagement,ouàunproduitquiaétéaltéréouréparéde
quelquefaçonquecesoit,entre-autresparunreprésentantd’uncentre
deréparationoudeservicenonautorisé,defaçonàaffectersaabilité
ouànuireàsonrendement,etnecouvrepasnonplustoutproduit
quiestutilisécommercialement.Cettegarantieexclutlesdommages
causésparunemauvaiseutilisationouunemanipulationinappropriée,
commel’aspirationdecorpsétrangersoud’articlessufsammentgros
pourêtreramassésàlamain(ex.desvêtementscommedesbas,des
jouets,etc.).Ellenecouvrepasnonpluslespiècesoulescomposantes
quidoiventêtreremplacéesàlasuited’uneusurenormalecommeles
courroiesd’entraînement.Lesampoulesetlespoilsdesrouleaux-brosseurs
nesontpascouvertsparcettegarantie.Laprésentationd’unreçude
caisseoudetouteautrepreuvedeladated’achatinitialeestrequise
avantqueleserviceautitredelagarantienesoitfait.
EN AUCUN CAS, SEARS CANADA INC. NE POURRA
ÊTRE TENUE RESPONSABLE DE TOUS DOMMAGES
SPÉCIAUx, INDIRECTS OU CONSÉCUTIFS.
Danscertainscas,certainesjuridictionsnepermettentpasl’exclusion
oulalimitationdesdommagesaccessoiresouconsécutifsoul’exclusion
desgarantiesimplicites,donc,leslimitationsetexclusionsmentionnées
ci-dessuspeuventnepasêtreapplicables.
SERVICE DE GARANTIE POUR OBTENIR DE
L’AIDE SUR LE FONCTIONNEMENT DU PRODUIT,
veuillezcommuniqueravecnotrecentredetraitementdesappels:
#detéléphone1-800-4-MY-HOME
(1800-469-4663)
Lien pour courriel : www.sears.ca
POUR DES RÉPARATIONS DE PRODUITS,
veuillezcommuniqueravecvotrecentredeserviceSearsleplusprès.
SI VOUS ExPÉDIEZ LE PRODUIT À UN CENTRE DE
SERVICE
Emballezsoigneusementleproduitetexpédiez-leenportpayé,assuré
defaçonadéquateetpréférablementdanssonemballaged’origine.
Incluezlesdétailssurledéfautpourlequelvousfaitesuneréclamation
etunepreuvedeladated’achatinitiale.
GARANTIE SUR LE SYSTÈME CENTRAL
D’ASPIRATION KENMORE

15
123
4
567
8910
11 12 13
Max.5m(16,5’)
48,6cm(18’’)
38cm(15’’)
10cm(4’’)
Min.70cm(27,5’’)
Maximum
1,8m(6’)
from outlet
(delaprise
decourant)
Min.30cm(12’’)
Min.30cm
(12’’)
Min.30cm
(12’’)
LCD
Screen
Écran
ACL
LEDButtons
On/Off EmptyDirtReceptacle
Marche/arrêt Cuveàpoussièrepleine
MotorStatus Reset
Étatdumoteur Réenclenchement
103,2cm(40,5’’)
49,5cm(19,5’’)

GET IT FIxED, AT YOUR HOME OR OURS!
Just Call: 1-800-4-MY-HOME™
(1-800-469-4663)
24 HOURS A DAY. 7 DAYS A WEEK
For the repair of major brand name appliances in your own home...
no matter who made it, no matter who sold it!
For your nearest Sears Parts & Service location, to bring in
productslikevacuums,lawnequipmentandelectronics.
For Sears Parts & Service, to order the replacement parts, accessories
andowner’smanualsthatyouneedtodo-it-yourself.
WWW.SEARS.CA
TopurchaseorinquireaboutaSearsMaintenanceAgreement,
Call: 1-800-361-6665
9a.m.–8p.m.Mon.–Fri.EST,9a.m.–4p.m.Sat.
FAITES-LE RÉPARER À DOMICILE OU À L’ATELIER!
Téléphonez au : 1-800-4-LE-FOYERMD
(1-800-533-6937)
24 HEURES PAR JOUR, 7 JOURS PAR SEMAINE
Pourlaréparationdesappareilsélectroménagersdegrandes
marquesàvotredomicile...peuimportelefabricantouledétaillant!
Pourconnaîtrel’emplacementduServicedespiècesetde
l’entretienSearsleplusprocheand’apporteràl’atelierdesproduits
telsquedesaspirateurs,tondeusesàgazonouappareilsélectroniques.
Pourconnaîtrelen°detéléphoneduServicedespiècesetdel’entretienSearsandecommanderlespièces
derechange,accessoiresetmanuelsd’instructionsrequispoureffectuervous-mêmelesréparations.
WWW.SEARS.CA
Pouracheteroudemanderdesrenseignementssuruncontratd’entretienSears,
téléphonez au : 1-800-361-6665
de9hà20hdulundiauvendredi(HNE),de9hà16hlesamedi
TMTrademarkofSears,RoebuckandCo.usedunderlicensebySearsCanada
MDMarquedeposée/MCMarquedecommercedeSears,RoebuckandCo.utiliséesenvertud’unelicencedeSearsCanada
Table of contents
Languages: