2 3
IMPORTANT SAFEGUARDS
When using your Kenmore Food Sealer, basic safety precautions should always be
followed, including the following:
1. READ ALL INSTRUCTIONS BEFORE USE
2. Before using the appliance for the rst time, remove any packaging material, promo-
tional labels, and stickers. Safely dispose of plastic bags or small pieces that could
present a suocation or choking hazard to young children.
3. Before using, check that the voltage of the wall outlet corresponds to the one shown
on the rating plate of the appliance. Do not attempt to use the appliance with a voltage
converter.
4. Do not attempt to operate the appliance if there is damage to the cord or plug. Stop
using it immediately and take it to a qualied service facility for examination and repair.
5. Always unplug the appliance from the power source and let the heating strip cool
down beforecleaning and storing. To unplug, grasp plug and pull it from the electrical
outlet; never unplug it by pulling on the power cord.
6. To protect against electrical shock, do not immerse any parts of the food sealer, power
cord, or electrical plug in water or any other liquid. If the appliance falls into or acciden-
tally becomes immersed in water, immediately unplug it from the wall outlet. DO NOT
REACH INTO THE WATER.
7. Do not use the food sealer on wet or hot surfaces or near a heat source.
8. This appliance is not intended for use by persons, including children, with reduced
physical, sensory or mental capabilities, or lack of experience and knowledge, without
supervision and instruction by a person responsible for their safety. Close supervision is
necessary when any appliance is used by or near children to ensure that they do not
play with the appliance.
9. This appliance is recommended for indoor household use only. Using this appliance
for anything other than its intended use will void your warranty.
10. Do not attempt to operate the appliance by any method other than as described in
this manual. Do not use accessories or attachments other than those provided or
recommended by the manufacturer. The use of aftermarket attachments or accessories
not recommended by Kenmore will void your warranty and may cause re, electrical
shock, or injury.
IMPORTANT SAFEGUARDS
11. Regularly clean the food sealer using the cleaning instructions in this manual. Do not
use abrasive cleansers or scouring pads that could scratch the appliance’s surface.
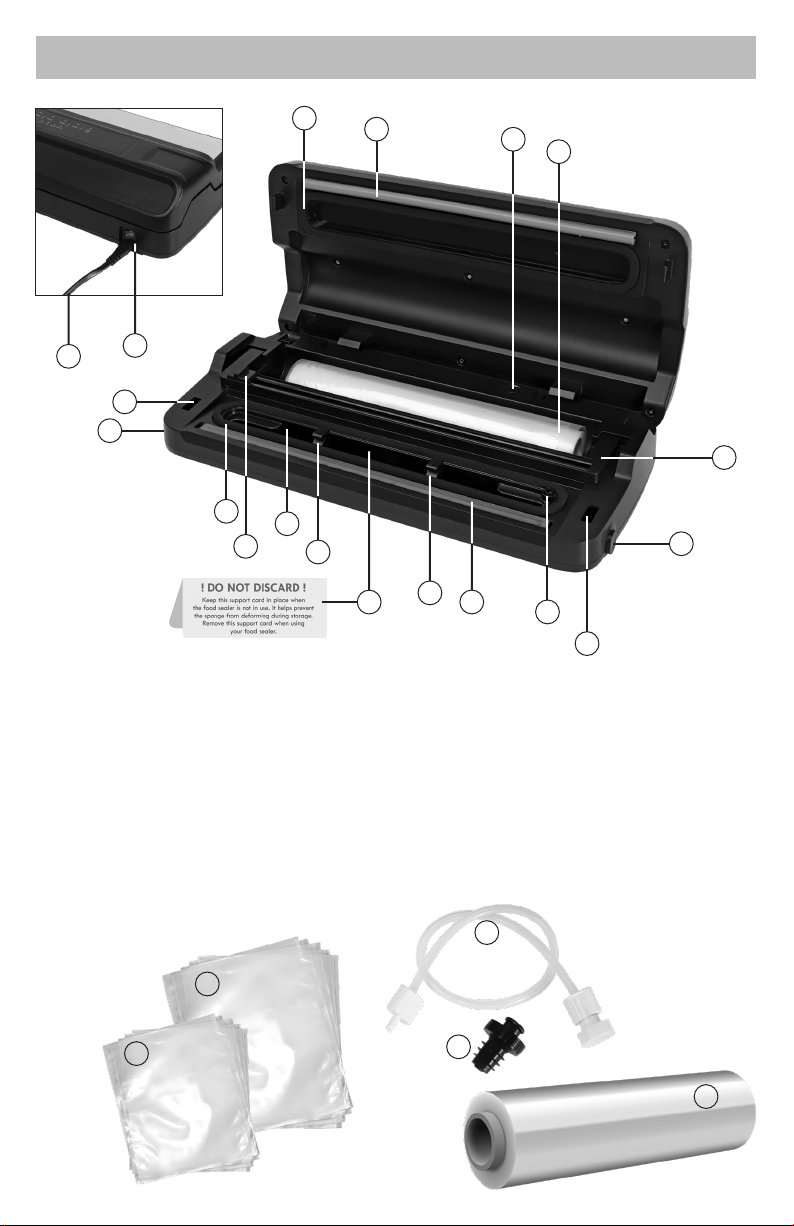
12. To prevent distorting or damaging the sealing sponges, always place the support
card back in the food sealer and leave the lid unlatched when it is not in use.
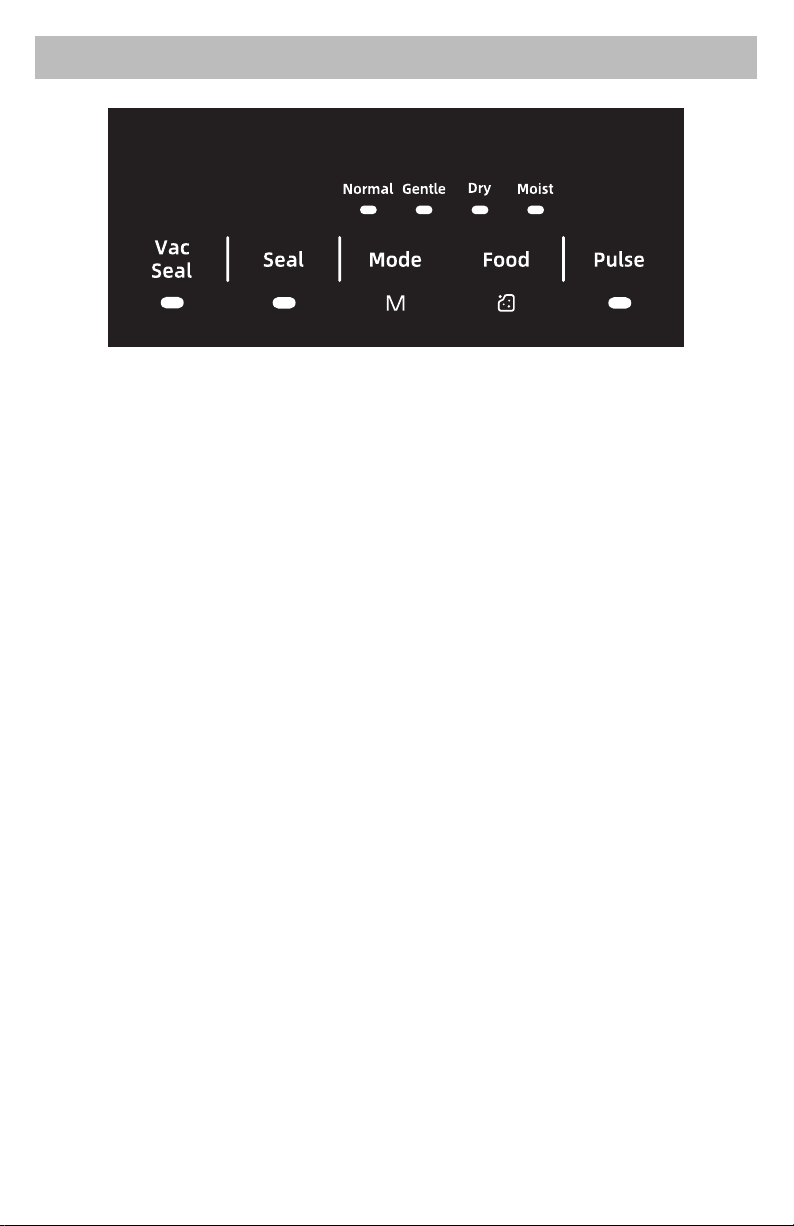
13. This appliance is equipped with NTC intelligent temperature control. When the
temperature of the heating strip exceeds the pre-set safety parameters, the food sealer
will automatically enter safety protection mode. The indicator lights will ash and the
controls will be temporarily disabled while the heating strip cools down. Once the
heating strip has returned to a safe temperature (approximately 2 minutes), the indica-
tor lights will stop ashing and the food sealer will resume its normal operating state.
14. If you see that any part of a bag is melted after sealing, discontinue use and let the
heating strip cool down for at least 90 seconds before using the food sealer again.
15. To reduce the risk of burns or other injuries, do not touch the heating strip during or
after using the food sealer. Wait for it to cool down before cleaning or storing.
16. Always make a hole in the bag and/or release the air valve on a vacuum canister to
vent steam before heating sealed or vacuumed bags or canisters in a microwave oven.
17. Liquid foods are suitable for single sealing only; do not attempt to vacuum seal
liquids.“Moist”mode should be used when vacuum-sealing wet or greasy foods that are
mostly solid such as raw or cooked meat or sh.
18. If the food sealer starts to malfunction during use, unplug it from the wall outlet. Do
not use or attempt to repair a malfunctioning appliance. For any maintenance other
than cleaning, call or email Koolatron Customer Assistance
SAVE THESE INSTRUCTIONS!