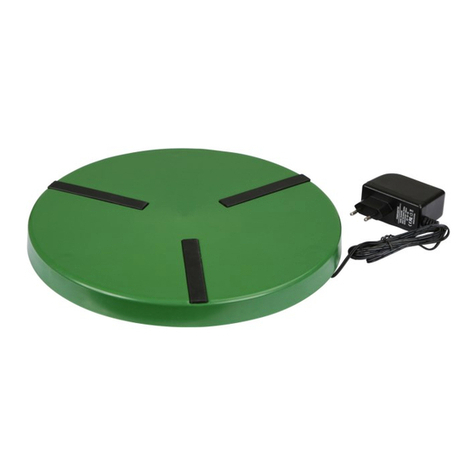
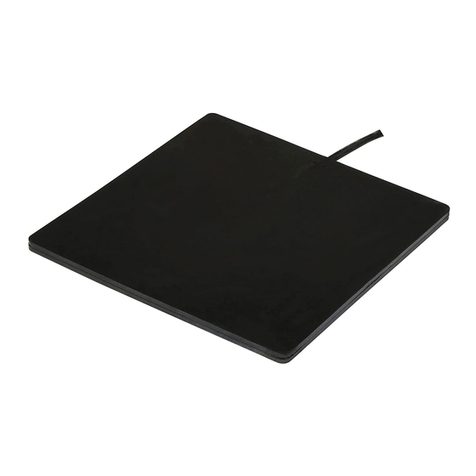
Kerbl 70420 User manual

DE Bedienungsanleitung
1 Sicherheitshinweise
Lesen Sie die nachfolgenden Hinweise sorgfältig,
bevor Sie das Gerät verwenden.
Bewahren Sie diese Bedienungsanleitung gut auf.
Vorsicht!
Gefahr von Personen-, Tier- und Sach-
schädigung durch unsachgemäßen
Gebrauch!
• Sicherstellen, dass das Gerät nur von Personen mit
entsprechenden Fachkenntnissen verwendet wird.
• Gerät von Kindern und gebrechlichen Personen
fernhalten.
• Verwenden Sie die Wärmeplatte ausschließlich in
einem, geschlossenen Raum.
• Die Wärmeplatte entspricht keiner Raumheizung,
die Heizwirkung ist ausschließlich lokal in der
näheren Umgebung der Oberfläche spürbar.
• Die Oberfläche der Heizplatte erwärmt sich und
wird heiß. (maximale Temperatur ca. 60 °C)
• Heizplatte nicht auf hitzeempfindliche Oberflächen
und Gegenstände legen.
• Halten Sie die Minimumhöheneinstellung von 3cm
ein. Das Gerät darf auf keinen Fall ohne Füße
verwendet werden.
• Darauf achten, dass sich keine brennbaren oder
leicht entzündlichen Materialien in der Nähe der
Heizplatte befinden. Halten Sie einen Mindestab-
stand von ca. 50 cm ein.
• Legen Sie keine Gegenstände auf die Wärmeplatte
und decken Sie die Öffnungen der Wärmeplatte
nicht ab, um eine Überhitzung zu vermeiden.
• Das Netzteil ist nicht gegen Feuchtigkeit geschützt.
Stecken Sie das Netzteil nur in eine Steckdose ein,
die in trockenem und geschütztem Bereich liegt.
• Bei nicht lesbaren technischen Daten auf der
Heizplatte (Typenschild) und dem Netzteil darf
diese nicht verwendet werden.
•
Zum Schutz von Personen, Tieren und Einrichtungen
darf das Gerät nur an Netzsteckdosen angeschlossen
werden, die separat durch einen Schutzschalter (FI)
abgesichert sind.
• Alle elektrischen Zuleitungen so verlegen, dass
diese vor Verbiss geschützt sind und für die
Tiere nicht zugänglich sind. Nur verbisssichere
Materialien verwenden.
• Das Netzteil ist so anzubringen, dass es gegen
Verbiss durch Tiere geschützt ist, sowie außer-
halb des Bereichs, der durch Spritzwasser erreicht
werden kann. Empfehlung: Bringen Sie das Netzteil
außerhalb des Stalls an, oder auf einer Höhe von
mindestens 120 cm über dem Fußboden.
• Elektrische Zuleitung nicht mit Öl oder scharfen
Kanten in Verbindung bringen.
• Stellen Sie das Gerät mit einer minimalen Höhe
von 50cm über dem Fußboden auf.
• Die Heizplatte nicht benutzen bzw. unverzüglich
außer Betrieb nehmen, wenn das Gehäuse der Wär-
meplatte oder die Anschlussleitung beschädigt ist.
• Beschädigte Anschlussleitung nicht selbst reparie-
ren. Die Anschlussleitung kann nur vom Hersteller
erneuert werden.
• Heizplatte keiner Druckbelastung mit scharfen
oder spitzen Gegenständen aussetzen.
• Den Stecker nicht am Kabel aus der Steckdose
ziehen und die Heizplatte nicht am Kabel hängend
herumtragen.
• Den Netzstecker immer aus der Steckdose ziehen,
bevor die Heizplatte umgestellt oder gesäubert wird.
• Verwenden Sie ausschließlich das mitgelieferte
Original-Netzteil.
2 Bestimmungsgemäßer Gebrauch
Die Wärmeplatte dient zur Erhaltung der Nestwärme
von Küken nach dem Schlüpfen und zur Erhaltung der
Körpertemperatur der Tiere bei kalten Temperaturen.
Jeder andere Gebrauch gilt als nicht bestimmungsge-
mäß. Bei nicht bestimmungsgemäßem Gebrauch, bei
Eingriffen in das Gerät sowie bei Veränderungen des
Gerätes verlöschen Garantie- und Haftungsansprüche
seitens des Herstellers.
3 Funktion
In der Heizplatte ist ein elektrischer Heizleiter verbaut,
der die Unterseite der Wärmeplatte gleichmäßig
erwärmt. Die Heizplatte kann im Innenbereich ein-
gesetzt werden und ermöglicht die Wärmeerhaltung
von Tieren.
4 Lieferumfang
1 Wärmeplatte
2 Standbeine (4x)
3 Abdeckkappen für Standbeine (4x)
4 Netzteil
1
2
3
4

5 Aufbau und Inbetriebnahme
Bevor Sie die Wärmeplatte zum ersten Mal verwen-
den, befestigen Sie die Standbeine an der Wärme-
platte. Öffnen Sie hierfür die Feststellschrauben an
der Wärmeplatte und führen Sie die Standbeine, wie
in nachfolgender Abbildung dargestellt, ein. Stellen
Sie die Standbeine auf die gewünschte Höhe ein und
arretieren Sie sie mithilfe der Feststellschrauben.
Bringen Sie anschließend die Abdeckkappen an
den Standbeinen an.
Zur Inbetriebnahme der Wärmeplatte gehen Sie
wie folgt vor:
1. Heizplatte auf Beschädigungen prüfen.
2. Heizplatte auf ebenem Untergrund mit der Ober-
seite nach oben platzieren. Die Raumtemperatur
darf 18 °C nicht unterschreiten.
3. Um Wärmeverluste zu vermeiden und die Wärme-
übertragung auf die Tiere zu optimieren, sollte
die Heizplatte auf einem isolierenden Untergrund
platziert werden. Wenn möglich, stellen Sie die
Wärmeplatte mit einer Seite an die Wand oder in
eine Ecke, damit sich die Wärme unter der Platte
anstauen kann und sie vor Zug geschützt ist.
4. Entfernen Sie brennbare oder leicht entzündliche
Materialien aus der Umgebung der Wärmeplatte.
5. Verbinden Sie die Zuleitung der Heizplatte mit
dem mitgelieferten Netzteil.
6. Netzteil mit 230 Volt Steckdose verbinden. Die
Kontroll-LED leuchtet auf sobald die Platte heizt.
Nach kurzer Zeit ist die Erwärmung an der Wärme-
platte fühlbar. Die Aufheizgeschwindigkeit hängt
von der Umgebungstemperatur und dem Unter-
grund ab.
Nach ca. 60 Minuten ist die Wärmeplatte
aufgeheizt, einsatzbereit und die Küken können
darunter Platz nehmen.
7. Zum Abschalten der Heizplatte den Netzstecker
ziehen.
Temperaturanpassung
Das integrierte Thermostat reagiert auf Schwankun-
gen der Umgebungstemperatur, sodass die am Boden
erreichte Temperatur nahezu konstant gehalten wird.
Das Thermostat heizt nur, wenn die Temperatur unter
der Platte sinkt. Unnötiger Stromverbrauch wird
dadurch vermieden.
Mithilfe des Drehreglers kann die Temperatur an
die Bedürfnisse der Küken angepasst werden.
Das Verhalten der Küken gibt einen Hinweis auf
die richtige Temperatureinstellung:
Richtige Temperatureinstellung:
Die Küken halten sich unter der Wärmeplatte auf und
sind ruhig. Sie verlassen die Wärmeplatte lediglich
zum Fressen und Trinken.
Falsche Temperatureinstellung:
Falls die Küken unruhig unter der Wärmeplatte sind,
sich zusammenballen, piepsen und nicht darunter
hervorkommen, ist die Temperatur zu niedrig ein-
gestellt. Den Tieren ist es zu kalt. Erhöhen Sie die
Temperatur mithilfe des Drehreglers an der Platte.

Bei einer zu hohen Temperatureinstellung halten sich
die Küken nur am Rand der Wärmeplatte oder sogar
nur außerhalb auf. Verringern Sie die Temperatur
mithilfe des Drehreglers an der Platte, damit es den
Tieren nicht zu heiß wird.
Indirekt kann die Temperatur auch mithilfe der
Standbeine geregelt werden. Bei einer zu geringen
Temperatur muss die Platte niedriger, bei einer zu
hohen Temperatur höher eingestellt werden.
Höheneinstellung
Die Küken wachsen in den ersten Lebenswochen sehr
schnell. Die Wärmeplatte kann einfach an die Größe
der Tiere angepasst werden. In der Regel sollte dies
mind. einmal pro Woche erfolgen. Hierfür müssen
lediglich die Feststellschrauben an der Platte gelockert
und die Platte nach oben geschoben werden. Arretie-
ren Sie die Standbeine anschließend wieder mithilfe
der Feststellschrauben. Das Verhalten der Küken gibt
einen Hinweis darauf, ob die Höhe richtig eingestellt
ist. Als Maßstab kann die Rückenhöhe der Küken
herangezogen werden.
Falls Ihre Küken unterschiedlich groß und ein unter-
schiedlich starkes Wärmebedürfnis haben, können
Sie die Platte schräg aufstellen. Stellen Sie hierfür
die Standbeine der Wärmeplatte auf der einen Seite
höher ein als auf der gegenüberliegenden.
6 Wartung und Reinigung
VORSICHT!
Gefahr von Personen-,
Tier- und Sachschädigung
• Wartungs- und Reinigungsarbeiten nur mit
gezogenem Netzstecker durchführen.
Beachten Sie bei der Wartung und Reinigung
folgende Hinweise:
• Gerät vor Staub und Verunreinigungen freihalten.
• Gerät nur mit weichem Lappen oder feuchtem Tuch
reinigen. Der Lappen bzw. das Tuch sollte frei von
Benzin und / oder Lösungsmittel sein, da diese die
Heizplatte angreifen oder beschädigen können.
• Die Heizplatte niemals in Wasser tauchen bzw.
nicht mit einem Wasserstrahl reinigen.
7 Technische Daten
Wärmeplatte Mini Wärmeplatte Maxi Netzteil
Artikelnummer / Typenbezeichnung: 70420 70421
Versorgungsspannung / Frequenz: 24 V DC 24 V DC 230 V, 50 Hz
Leistung: 25 W 50 W
Schutzklasse: III III II
Schutzart: IPX4 IPX4 IP20
Abmessungen: 30 x 30 cm 40 x 50 cm
CE-Konformitätserklärung
Hiermit erklärt die Albert Kerbl GmbH, dass sich das in dieser Anleitung beschriebene Produkt/Gerät in Übereinstimmung
mit den grundlegenden Anforderungen und den übrigen einschlägigen Bestimmungen und Richtlinien befindet. Das CE-
Zeichen steht für die Erfüllung der Richtlinien der Europäischen Union.
Elektroschrott
Die sachgerechte Entsorgung des Gerätes nach dessen Funktionstüchtigkeit obliegt dem Betreiber. Beachten Sie die ein-
schlägigen
Vorschriften Ihres Landes. Das Gerät darf nicht mit dem Hausmüll entsorgt werden. Im Rahmen der EU-Richt-
linie über die Entsorgung von Elektro- und Elektronik-Altgeräten wird das Gerät bei den kommunalen Sammelstellen
bzw. Wert-stoffhöfen kostenlos entgegengenommen oder kann zu Fachhändlern, die einen Rücknahmeservice anbieten,
zurückgebracht werden. Die ordnungsgemäße Entsorgung dient dem Umweltschutz und verhindert mögliche schädliche
Auswirkungen auf Mensch und Umwelt.

FR Mode d'emploi
1 Consignes de sécurité
Lisez attentivement les informations ci-dessous avant
d'utiliser l'appareil.
Conservez soigneusement le présent mode d'emploi.
Attention!
Un usage non conforme peut mettre en
danger les personnes et les animaux et
causer des dommages matériels !
• Veiller à ce que seules des personnes disposant
des compétences requises utilisent l'appareil.
• Tenir l'appareil hors de portée des enfants et
des personnes fragiles.
• Utilisez la plaque chauffante uniquement dans
un espace clos.
• La plaque chauffante n'est pas un chauffage de
locaux; la chaleur qu'elle dégage n'est sensible
que localement, à proximité directe de la surface.
• La surface de la plaque chauffe et devient brûlante.
(Température maximale env. 60°C)
• Ne pas poser la plaque chauffante sur des objets
ou des surfaces sensibles à la chaleur.
• Respectez le réglage de hauteur minimum de 3cm.
L'appareil ne doit en aucun cas être utilisé sans
les pieds.
• Veiller à l'absence de matières combustibles ou
facilement inflammables à proximité de la plaque
chauffante. Respectez une distance minimale
d'env. 50cm.
• Afin d'éviter une surchauffe, ne posez pas
d'objets sur la plaque chauffante et ne couvrez
pas ses orifices.
• Le bloc d'alimentation n'est pas protégé contre
l'humidité. Branchez le bloc d'alimentation exclusi-
vement sur une prise située dans un endroit sec
et protégé.
• Si les caractéristiques techniques figurant sur la
plaque chauffante (plaque signalétique) et le bloc
d'alimentation ne sont pas lisibles, ceux-ci ne
doivent pas être utilisés.
•
Afin de protéger les personnes, les animaux et le
matériel, l'appareil doit être exclusivement branché
sur une prise secteur protégée par un disjoncteur
(différentiel) dédié.
• Poser tous les câbles d'alimentation de façon à
ce qu'ils soient protégés des morsures et hors de
portée des animaux. N'utiliser que des matériaux
résistants aux morsures.
• Installer le bloc d'alimentation de manière à le
protéger des morsures d'animaux tout en veillant à
le placer hors des zones exposées à des éclabous-
sures. Recommandation: installez le bloc d'ali-
mentation à l'extérieur de l'étable ou à au moins
120cm au-dessus du sol.
• Le câble d'alimentation ne doit pas entrer en
contact avec de l'huile ou des bords tranchants.
• Placez l'appareil à au moins 50cm au-dessus
du sol.
• Ne pas utiliser la plaque chauffante ou l'éteindre
immédiatement si son boîtier ou le câble de
raccordement sont endommagés.
• Ne pas réparer soi-même le câble de raccordement.
Le remplacement du câble ne doit être effectué que
par le fabricant.
• Ne pas exercer de pression sur la plaque chauffante
avec des objets pointus ou tranchants.
• Ne pas débrancher la plaque chauffante en tirant
le câble. Ne pas porter la plaque chauffante par
le câble.
• Toujours débrancher la plaque chauffante avant
de la régler ou de la nettoyer.
• Utilisez exclusivement le bloc d'alimentation
d'origine fourni.
2 Utilisation conforme à l’usage prévu
La plaque chauffante sert à maintenir la chaleur du
nid des poussins après l'éclosion ainsi que la tempéra-
ture corporelle des animaux lorsqu'il fait froid. Tout
autre usage est considéré comme non conforme.
Tous droits à la garantie et au dédommagement sont
exclus vis-à-vis du fabricant en cas d'utilisation non
conforme, d'intervention sur l'appareil ou de modifi-
cations réalisées sur celui-ci.
3 Fonctionnement
La plaque chauffante est équipée d'une résistance
chauffante qui chauffe sa face inférieure de manière
homogène. La plaque chauffante peut être utilisée à
l'intérieur et permet maintenir au chaud les animaux.
4 Éléments fournis
1 Plaque chauffante
2 Pieds (4x)
3 Caches des pieds (4x)
4 Bloc d'alimentation
1
2
3
4

5 Structure et mise en service
Fixez les pieds sur la plaque chauffante avant de
l'utiliser pour la première fois. Pour cela, desserrez
les vis de blocage sur la plaque chauffante et insérez
les pieds comme indiqué dans l'illustration suivante.
Réglez les pieds à la hauteur souhaitée et fixez-les à
l'aide des vis de blocage.
Placez ensuite les caches sur les pieds.
Pour mettre la plaque chauffante en service,
procédez comme indiqué ci-dessous:
1. Vérifier que la plaque chauffante n'est pas
endommagée.
2. Poser la plaque chauffante sur un support plan en
plaçant la face supérieure en haut. La température
ambiante ne doit pas tomber en dessous de 18°C.
3. Afin d’éviter toute perte de chaleur et d’optimi-
ser le transfert de la chaleur aux animaux, il est
recommandé de placer la plaque chauffante sur un
support isolant. Si possible, placez un côté de la
plaque chauffante contre un mur ou dans un angle
afin que la chaleur puisse s'accumuler au-dessous
et que la plaque soit protégée des courants d'air.
4. Retirez les matières combustibles ou facilement
inflammables à proximité de la plaque chauffante.
5. Reliez le câble d'alimentation de la plaque chauf-
fante au bloc d'alimentation fourni.
6. Brancher le bloc d'alimentation sur une prise
de 230volts. Le témoin LED s'allume dès que
la plaque commence à chauffer. Très rapidement,
la chaleur dégagée par la plaque devient sensible.
La vitesse de chauffe dépend de la température
ambiante ainsi que du support de l'appareil.
Au
bout d'env. 60minutes, la plaque chauffante a
fini de chauffer et peut être utilisée. Les poussins
peuvent donc prendre place au-dessous.
7. Pour éteindre la plaque chauffante, la débrancher
de la prise secteur.
Réglage de la température
Le thermostat intégré réagit aux variations de la
température ambiante. La température atteinte au sol
reste donc quasiment constante. Le thermostat ne se
déclenche que lorsque la température baisse au-des-
sous de la plaque. Ceci permet d'éviter une augmen-
tation superflue de la consommation électrique.
Le bouton rotatif de réglage permet d'adapter la
température aux besoins des poussins.
Le comportement des poussins vous indique si la
température est bien réglée:
Température bien réglée:
Les poussins se trouvent sous la plaque chauffante et
sont calmes. Ils ne quittent la plaque chauffante que
pour s'alimenter et boire.
Température mal réglée:
Si les poussins s'agitent sous la plaque chauffante,
se serrent les uns contre les autres, pépient et restent
constamment au-dessous de la plaque chauffante,
la température est réglée sur un niveau trop bas. Les
animaux ont froid. Augmentez la température à l'aide
du bouton rotatif de réglage sur la plaque.

Si la température est réglée sur un niveau trop élevé,
les poussins se tiennent uniquement au bord voire
hors de la plaque chauffante. Réduisez la température
à l'aide du bouton rotatif de réglage sur la plaque afin
que les animaux n'aient pas trop chaud.
Il est également possible de régler la température
indirectement à l'aide des pieds. Si la température
est trop faible, abaissez la plaque, et inversement
si la température est trop élevée.
Réglage de la hauteur
Au cours des premières semaines suivant leur nais-
sance, les poussins grandissent très vite. La plaque
chauffante peut être adaptée facilement à la taille des
animaux. Généralement, ceci est nécessaire au moins
une fois par semaine. Il sut pour cela de desserrer
les vis de blocage sur la plaque et de lever cette der-
nière. Fixez ensuite les pieds en resserrant les vis de
blocage. Le comportement des poussins vous indique
si la hauteur est bien réglée. Il est possible d'utiliser la
hauteur du dos des poussins comme référence.
Si vos poussins n'ont pas tous la même taille et qu'ils
ont des besoins différents en matière de chaleur, vous
pouvez incliner la plaque. Pour cela, réglez les pieds
d'un côté de la plaque chauffante plus haut que ceux
du côté opposé.
6 Entretien et nettoyage
ATTENTION!
Danger pour les personnes et les animaux
et risques de dommages matériels
• Effectuer les opérations d'entretien et de nettoyage
uniquement après avoir débranché l'appareil de la
prise secteur.
Respectez les instructions suivantes lors de l'entretien
ou du nettoyage :
• Retirer les poussières et les salissures de l'appareil.
• Nettoyer l'appareil uniquement avec un chiffon
doux ou un torchon humide. Le chiffon ou le tor-
chon utilisé ne doit pas être imbibé d'essence et/ou
de solvants car ces substances peuvent attaquer ou
endommager la plaque chauffante.
• Ne jamais plonger la plaque chauffante dans l'eau
ni la nettoyer avec un jet d'eau.
7 Caractéristiques techniques
Plaque chauffante Mini Plaque chauffage Maxi Bloc d'alimentation
Référence / modèle : 70420 70421
Tension d'alimentation / fréquence: 24 V CC 24 V CC 230 V, 50 Hz
Puissance: 25 W 50 W
Classe de protection: III III II
Indice de protection: IPX4 IPX4 IP20
Dimensions: 30 x 30 cm 40 x 50 cm
Déclaration de conformité CE
La société Albert KERBL GmbH déclare par la présente que le produit / l’appareil décrit dans le présent mode d’emploi
est conforme aux exigences fondamentales et aux autres dispositions et directives applicables en la matière. Le label CE
atteste la conformité avec les directives de l’Union européenne.
Ferraille électronique
L’exploitant est tenu d’éliminer correctement l’appareil usagé. Respectez les prescriptions en vigueur de votre pays. Ne
pas jeter l’appareil dans les ordures ménagères. Conformément à la directive européenne sur l’élimination des déchets
d’équipements électriques et électroniques, l’appareil est accepté gratuitement dans les points de collecte municipaux ou
les centres de recyclage ou peut être retourné aux revendeurs spécialisés offrant un service de reprise. Une élimination
réglementaire protège l’environnement et empêche d’éventuelles conséquences nocives sur l’homme et l’environnement.

EN Operating Instructions
1 Safety instructions
Read the following instructions carefully before using
the device.
Keep these operating instructions in a safe place.
Caution!
Risk of physical injury to people and
animals and material damage if used
incorrectly!
• Ensure that the device is only used by people who
have the professional skills required to do so.
• Keep the device out of reach of children and
frail people.
• Use the heating plate only in an enclosed space.
• The heating plate is not a room-heating device;
its heating effect can only be felt locally in the
immediate vicinity of the surface.
• The surface of the heating plate warms up and gets
hot. (maximum temperature approx. 60 °C)
• Do not place the heating plate on surfaces or
objects that are sensitive to heat.
• Keep to the minimum height setting of 3 cm.
The device must never be used without feet.
• Ensure that no flammable or easily combustible
materials are placed near the heating plate.
Maintain a minimum distance of around 50 cm.
• Do not place any objects on the heating plate and
do not block the openings on the heating plate in
order to avoid overheating.
• The power pack is not protected against moisture.
Only plug the power pack into a socket that is
located in a dry and protected area.
•
If technical data on the heating plate (type plate)
and power pack is or becomes illegible, do not use it.
•
For the safety of humans, animals and property, the
device must only be connected to mains sockets that
are fused separately with a residual current circuit
breaker (RCCB).
• All electrical supply lines must be routed so that
they are protected from the risk of being bitten and
are not accessible to animals. Only use gnaw/bite-
proof materials.
•
The power pack must be attached so that it is pro-
tected from animal bites, as well as being outside the
area that can be reached by splashed water. Recom-
mendation: Ax the power pack outside the stable
or at a height of at least 120 cm above the floor.
• Do not allow electrical supply cables to come into
contact with oil or sharp edges.
• Position the device at a minimum height of 50 cm
above the floor.
• Do not use the heating plate or take it out of opera-
tion immediately if the housing on the heating plate
or supply cable is damaged.
• Do not try to repair a damage supply cable yourself.
The supply cable can only be replaced by the
manufacturer.
• Do not expose the heating plate to any compressive
force with sharp or pointed objects.
• Do not pull the plug out of the socket using the
cable and do not carry the heating plate around
by its cable.
• Always remove the mains plug from the socket
before moving or cleaning the heating plate.
• Only use the original power pack supplied.
2 Correct use
The heating plate is intended for maintaining nest
heat for chicks after hatching and for maintaining the
animals' body temperature in cold weather. Any other
use shall be deemed incorrect. In the event of the
incorrect use of, tampering with or modifications to
the device, the manufacturer's warranty and liabilities
shall be deemed invalid.
3 Function
The heating plate contains an electric heating conduc-
tor that evenly warms up the underside of the heating
plate. The heating plate can be used indoors or out
and enables animals to be kept warm.
4 Scope of delivery
1 Heating plate
2 Legs (4x)
3 Cover caps for legs (4x)
4 Power pack
1
2
3
4

5 Setup and commissioning
Before using the heating plate for the first time,
fasten the legs to the heating plate. To do this, open
the fastening screws on the heating plate and guide
the legs in, as shown in the figure below. Set the legs
to the required height and lock them in place using
the fastening screws.
Then ax the cover caps to the legs.
To put the heating plate into operation, proceed
as follows:
1. Check the heating plate for damage.
2. Position the heating plate on an even surface with
the top facing upwards. The room temperature
must not fall below 18 °C.
3. To avoid heat losses and to optimise the transfer
of heat to the animals, the heating plate should be
positioned on an insulated base. If possible, place
the heating plate with one side against the wall or
in a corner so that the heat can build up under the
plate and it is protected against draughts.
4. Remove any flammable or easily combustible
material from the area around the heating plate.
5. Connect the supply line of the heating plate to
the supplied power pack.
6. Connect the power pack to a 230 Volt socket.
The control LED lights up as soon as the plate is
heating up. After a short while, the heating of
the heating plate can be felt. The heating speed
depends on the ambient temperature and the
base.
After around 60 minutes, the heating plate is
fully heated up, ready for use and the chicks can be
placed underneath it.
7. To switch off the heating plate, pull the plug out of
the mains socket.
Temperature adjustment
The integrated thermostat responds to fluctuations in
the surrounding temperature so that the temperature
reached on the ground is kept virtually constant. The
thermostat only heats if the temperature below the plate
falls. This avoids unnecessary energy consumption.
Using the rotary dial, the temperature can be adapted
to the needs of the chicks.
The chicks' behaviour provides an indicator of the
correct temperature setting:
Correct temperature setting:
The chicks huddle under the heating plate and are
calm. They occasionally leave the heating plate to
feed and drink.
Incorrect temperature setting:
If the chicks are unsettled under the heating plate,
are clumping together, cheeping and are not coming
out from under it, the temperature is set too low. It is
too cold for them. Increase the temperature using the
rotary dial on the plate.

If the temperature is set too high, the chicks will only
remain at the perimeter of the heating plate or even
outside it. Reduce the temperature using the rotary
dial on the plate so that the temperature is not too
hot for the animals.
The temperature can also be regulated indirectly using
the legs. If the temperature is too low, the plate needs
to be set lower. If it is too high, it needs to be raised.
Height adjustment
In the first few weeks of life, the chicks grow very
quickly. The heating plate can simply be adjusted
to the size of the animals. Generally speaking, this
should be done at least once a week. To do this,
simply loosen the fastening screws on the plate
and move the plate upwards. Then lock the legs in
position again using the fastening screws. The chicks'
behaviour indicates whether the height is set correctly
or not. The height of the chicks' spines can be used as
a measure.
If your chicks are different sizes and have different
heat requirements, you can position the plate at an
angle. To do this, set the legs of the heating plate
higher on one side than on the other.
6 Maintenance and cleaning
CAUTION!
Risk of physical injury to people and
animals and material damage
• Only perform maintenance and cleaning work
when the mains plug is disconnected.
When carrying out cleaning and maintenance work,
note the following instructions:
• Keep the device free from dust and soiling.
• Only clean the device with a soft cloth or damp
towel. The cloth or towel should be free of petrol
and / or other solvents, since these can attack or
damage the heating plate.
• Never immerse the heating plate in water or clean
it with a water jet.
7 Technical data
Mini heating plate Maxi heating plate Power pack
Article number / type designation: 70420 70421
Supply voltage / frequency: 24 V DC 24 V DC 230 V, 50 Hz
Output: 25 W 50 W
Protection class: III III II
Protection type: IPX4 IPX4 IP20
Dimensions: 30 x 30 cm 40 x 50 cm
CE declaration of conformity
Albert KERBL GmbH hereby declares that the product / device described in these instructions complies with the fundamental
requirements and other relevant stipulations and regulations. The CE mark confirms compliance with the Directives of the
European Union.
Electrical waste
It is up to the operator to dispose of the device responsibly after its useful life in accordance with local regulations. Consult
the relevant regulations for your country. The device must not be disposed of in household waste. Under the terms of the
EU Directive on the disposal of old electrical and electronic equipment, the device can be taken to local authority-run refuse
sites or recycling plants free of charge, or returned to dealers who offer a returns service. Correct disposal protects the
environment and prevents any possible harmful impacts on humans and the environment.

PL Instrukcja obsługi
1Instrukcje bezpieczeństwa
Przed użyciem urządzenia należy uważnie przeczytać
niżej podane instrukcje. Przechowywać niniejszą
instrukcję obsługi wbezpiecznym miejscu.
Ostrożnie!
Niebezpieczeństwo obrażeń osób, zwie-
rząt oraz uszkodzenia mienia na skutek
nieprawidłowego użytkowania!
• Należy zapewnić, aby urządzenie było stosowane
wyłącznie przez osoby dysponujące odpowiednią
wiedzą specjalistyczną.
• Chronić urządzenie przed dostępem dzieci oraz
osób niepełnosprawnych.
• Płytę grzewczą wolno stosować wyłącznie w
zamkniętym pomieszczeniu.
• Płyta grzewcza nie jest odpowiednikiem ogrzewania
pomieszczenia, aefekt grzewczy jest wyczuwalny
jedynie lokalnie wbliższym otoczeniu powierzchni.
• Powierzchnia płyty grzewczej nagrzewa się iosiąga
wysoką temperaturę (maksymalna temperatura:
ok. 60°C).
• Nie stawiać płyty grzewczej na powierzchniach ani
przedmiotach wrażliwych na wysoką temperaturę.
• Należy zachować minimalną wysokość ustawienia
3cm. Nie wolno użytkować urządzenia bez nóżek.
• Zwracać uwagę na to, aby wpobliżu płyty grzewczej
nie znajdowały się palne ani łatwopalne materiały.
Zachowywać minimalny odstęp wynoszący ok. 50 cm.
• Aby uniknąć przegrzania, nie należy umieszczać żad-
nych przedmiotów na płycie grzewczej ani zakrywać
otworów w płycie grzewczej.
• Zasilacz sieciowy nie jest zabezpieczony przed wilgo-
cią. Podłączać zasilacz sieciowy wyłącznie do gniazda
znajdującego się wsuchym ichronionym miejscu.
• Użytkowanie płyty grzewczej jest niedozwolone,
jeżeli dane techniczne na płycie (tabliczka znamio-
nowa) izasilaczu sieciowym są nieczytelne.
•
Aby zapewnić ochronę osób, zwierząt oraz obiektów,
urządzenie wolno podłączać wyłącznie do gniazd
sieciowych, które są zabezpieczone osobnym wyłącz-
nikiem różnicowo-prądowym(FI).
• Układać wszystkie elektryczne przewody zasilające
w takisposób, aby zabezpieczyć je przed przegry-
zieniem idostępem zwierząt. Używać wyłącznie
materiałów odpornych na przegryzienie.
• Zasilacz sieciowy należy umieścić wmiejscu
zapewniającym ochronę przed przegryzieniem przez
zwierzęta oraz zabezpieczonym przed rozpryski-
waną wodą. Zalecenie: umieścić zasilacz sieciowy
na zewnątrz kurnika lub na wysokości co najmniej
120cm nad podłogą.
• Nie dopuszczać do kontaktu elektrycznego przewo-
du zasilającego zolejem ani ostrymi krawędziami.
• Ustawiać urządzenie na minimalnej wysokości
50cm nad podłogą.
• Nie użytkować płyty grzewczej, ewentualnie wyłączyć
płytę zużytkowania, jeżeli obudowa płyty grzewczej
lub przewód przyłączeniowy są uszkodzone.
• Nie naprawiać samodzielnie uszkodzonego przewo-
du przyłączeniowego. Przewód przyłączeniowy może
zostać wymieniony wyłącznie przez producenta.
• Nie wywierać nacisku na płytę grzewczą za pomocą
ostrych lub spiczastych przedmiotów.
• Nie ciągnąć za kabel podczas wyjmowania wtyczki
zgniazda ani nie przenosić płyty grzewczej wiszącej
na kablu.
• Wyjąć wtyczkę sieciową zgniazda przed przestawie-
niem lub czyszczeniem płyty grzewczej.
• Stosować wyłącznie dołączony oryginalny zasilacz
sieciowy.
2 Użytkowanie zgodne zprzeznaczeniem
Płyta grzewcza służy do utrzymania ciepła w gnieździe
piskląt po wylęgu oraz do utrzymania temperatury
ciała zwierząt w przypadku niskiej temperatury
otoczenia. Każde inne użytkowanie jest uznawane za
niezgodne zprzeznaczeniem. Niezgodne zprzezna-
czeniem użytkowanie, ingerencje wurządzenie oraz
modyfikacje urządzenia prowadzą do wygaśnięcia
zobowiązań producenta ztytułu gwarancji irękojmi.
3 Działanie
Wewnątrz płyty grzewczej znajduje się elektryczny
przewód grzejny, który równomiernie podgrzewa
płytę grzewczą od dołu. Płyta grzewcza może być
stosowana wewnątrz pomieszczeń; umożliwia ona
zachowanie ciepła zwierząt.
4 Zakres dostawy
1 płyta grzewcza
2 nóżki (4 szt.)
3 nasadki na nóżki (4 szt.)
4 zasilacz
1
2
3
4
5Montaż iuruchomienie
Przed pierwszym użyciem płyty grzewczej należy
przymocować nóżki do płyty grzewczej. W tym celu
należy otworzyć śruby blokujące na płycie grzewczej
i włożyć nóżki w sposób przedstawiony na poniższym
rysunku. Wyregulować nóżki na odpowiednią wyso-
kość i zablokować je śrubami blokującymi. Następnie
założyć nasadki na nóżki.
W celu uruchomienia płyty grzewczej należy
postępować w następujący sposób:
1. Sprawdzić płytę grzewczą pod kątem uszkodzeń.
2. Umieścić płytę grzewczą na płaskim podłożu;
jej górna część musi być skierowana do góry.
Temperatura w pomieszczeniu nie może spaść
poniżej 18°C.
3. Aby zapobiec stratom ciepła izoptymalizować
przekazywanie ciepła na zwierzęta, płytę grzewczą
należy umieścić na izolującym podłożu. Jeśli to
możliwe, umieścić jedną stronę płyty grzewczej
przy ścianie lub w narożniku, aby ciepło mogło
się gromadzić pod płytą i było zabezpieczone
przed przeciągiem.
4. Usunąć palne lub łatwopalne materiały zotoczenia
płyty grzewczej.
5. Połączyć przewód zasilający płyty grzewczej z
dołączonym zasilaczem sieciowym.
6. Połączyć zasilacz sieciowy zgniazdem sieciowym
230V. Gdy płyta zacznie grzać, zapali się lampka
kontrolna LED. Po upływie krótkiego czasu można
odczuć wzrost temperatury płyty grzewczej. Szyb-
kość nagrzewania zależy od temperatury otoczenia
i podłoża.
Po około 60 minutach płyta grzewcza
jest nagrzana i gotowa do użycia; mogą pod nią
siadać pisklęta.
7. Aby wyłączyć płytę grzewczą, należy wyjąć wtyczkę
sieciową.
Dostosowanie temperatury
Zintegrowany termostat reaguje na wahania tempe-
ratury otoczenia, dzięki czemu temperatura osiągana
na podłodze jest utrzymywana na niemal stałym
poziomie. Termostat włącza grzanie tylko wtedy, gdy
temperatura pod płytą się obniża. Dzięki temu zapo-
biega się niepotrzebnemu zużyciu energii elektrycznej.
Pokrętło regulacyjne umożliwia dostosowanie tempe-
ratury do potrzeb piskląt.
Zachowanie piskląt wskazuje na właściwe ustawienie
temperatury:
Prawidłowe ustawienie temperatury:
Pisklęta pozostają pod płytą grzewczą i są spokojne.
Opuszczają płytę grzewczą tylko na czas jedzenia
i picia.
Nieprawidłowe ustawienie temperatury:
Jeśli pisklęta są niespokojne pod płytą grzewczą,
gromadzą się, piszczą i nie wychodzą spod niej, tem-
peratura jest ustawiona zbyt nisko. Zwierzętom jest
zbyt zimno. Należy zwiększyć temperaturę za pomocą
pokrętła regulacyjnego na płycie.

W razie ustawienia zbyt wysokiej temperatury pisklęta
pozostają tylko na krawędzi płyty grzewczej lub nawet
tylko na zewnątrz. Obniżyć temperaturę za pomocą
pokrętła regulacyjnego, aby zwierzętom nie było
zbyt gorąco.
Pośrednio można także regulować temperaturę za
pomocą nóżek. W przypadku zbyt niskiej temperatury
należy ustawić płytę niżej, a przy zbyt wysokiej tempe-
raturze ustawić płytę wyżej.
Ustawianie wysokości
W pierwszych tygodniach życia pisklęta rosną bardzo
szybko. Płytę grzewczą można łatwo dostosować
do wzrostu zwierząt. Zwykle należy to robić przynaj-
mniej raz w tygodniu. W tym celu wystarczy jedynie
poluzować śruby blokujące płytę i przesunąć ją do
góry. Następnie zablokować nóżki za pomocą śrub
blokujących. Zachowanie piskląt informuje o tym, czy
wysokość jest prawidłowo ustawiona. Jako punktu
odniesienia można użyć wysokości grzbietu piskląt.
Jeśli pisklęta są różnej wielkości i mają różne zapo-
trzebowanie na ciepło, można umieścić płytę ukośnie.
W tym celu należy ustawić nóżki płyty grzewczej wyżej
po jednej stronie niż po stronie przeciwnej.
6 Konserwacja iczyszczenie
OSTROŻNIE!
Niebezpieczeństwo obrażeń osób,
zwierząt oraz uszkodzenia mienia
• Przeprowadzać konserwację iczyszczenie tylko
powyjęciu wtyczki sieciowej.
Podczas konserwacji iczyszczenia przestrzegać niżej
podanych instrukcji:
• Chronić urządzenie przed pyłem izanieczyszczeniami.
• Czyścić urządzenie wyłącznie miękką szmatką lub
wilgotną ścierką. Szmatka lub ścierka nie mogą
zawierać benzyny ani rozpuszczalników, ponieważ
mogłyby one spowodować uszkodzenia
płyty grzewczej.
• Nie zanurzać płyty grzewczej wwodzie ani nie
czyścić strumieniem wody.
7Dane techniczne
Płyta grzewcza mini Płyta grzewcza maksi Zasilacz
Numer artykułu/oznaczenie typu: 70420 70421
Napięcie zasilania/częstotliwość: 24 V DC 24 V DC 230 V, 50 Hz
Moc: 25 W 50 W
Klasa ochronności: III III II
Stopień ochrony: IPX4 IPX4 IP20
Wymiary: 30 x 30 cm 40 x 50 cm
Deklaracja zgodnościCE
Firma AlbertKERBLGmbH oświadcza niniejszym, że opisywany(-e) wtej instrukcji produkt/urządzenie jest zgodny(-e) zpod-
stawowymi wymaganiami oraz pozostałymi, właściwymi przepisami idyrektywami. ZnakCE stanowi potwierdzenie spełniania
wymogów dyrektyw Unii Europejskiej.
Elektroodpady
Odpowiedzialność za prawidłową utylizację urządzenia po zakończeniu jego użytkowania ponosi użytkownik. Należy
przestrzegać przepisów obowiąwzujących wkraju użytkowania. Urządzenia nie wolno wyrzucać do pojemnika na domowe
odpadki. Zgodnie zwytycznymi UE dotyczącymi utylizacji zużytych urządzeń elektrycznych ielektronicznych, urządzenie
można bezpłatnie oddać do miejscowego punktu zbiorczego lub punktu przyjmującego materiały do recyklingu albo oddać
do sklepu specjalistycznego oferującego usługi wzakresie przyjmowania zwrotów. Prawidłowa utylizacja służy ochronie
środowiska naturalnego izapobiega potencjalnemu szkodliwemu wpływowi na człowieka iśrodowisko.
This manual suits for next models
1
Table of contents
Languages:
Other Kerbl Pet Care Product manuals

Kerbl
Kerbl 81609 Operator's manual

Kerbl
Kerbl 70238 User manual

Kerbl
Kerbl HAPPYCOW Uno User manual

Kerbl
Kerbl NoFrost 82844 User manual

Kerbl
Kerbl 81634 Quick start guide

Kerbl
Kerbl 80077 User manual

Kerbl
Kerbl 80078 Instruction sheet

Kerbl
Kerbl 81665 User manual

Kerbl
Kerbl 70236 User manual

Kerbl
Kerbl NoFrost Superior 2.0 User manual