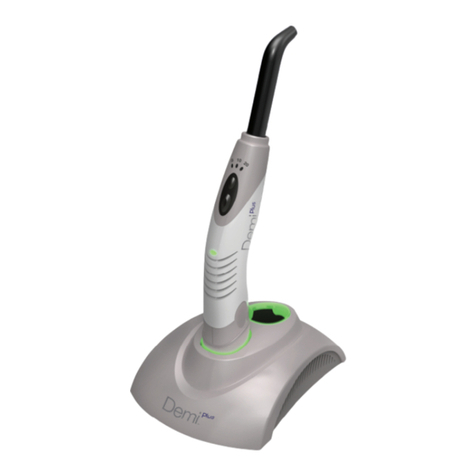
KERR Demi Ultra User manual

DMC0462 Rev. A
For dental use only.
Rx Only.
TRANSPORT AND STORAGE
Ambient Temperature: -4˚F to 104˚F (-20˚C to +40˚C)
Relative Humidity: 10% to 85%
Atmospheric Pressure: 0.5 atm to 1.0 atm @ 500 hPa to 1060 hPa
danaher.com/patents
Kerr and Demi are trademarks owned by Kerr Corporation.
Kerr and Demi are registered with the U.S. PTO and other countries.
©2013 Kerr Corporation
Kerr Corporation
1717 West Collins Avenue
Orange, CA 92867
U.S.A.
(800) KERR-123
kerrdental.com
European Union Representative
Kerr Italia S.r.l.
Via Passanti, 332
I-84018 Scafati (SA), Italy
+39-081-850-8311
kerrdental.eu
Distribution Facilities
Distribution Facilities:
Kerr Australia Pty. Ltd.
112-118 Talavera Road, Unit 10
North Ryde 2113
New South Wales, Australia
TEL: +61-28-870-3000
FAX: +61-29-870-7600
kerrdental.com
Instructions For Use

English
Product Information
Description and Indications for Use
The DemiTM Ultra is a light emitting diode (LED) visible curing device used for the polymerization of light-cured
materials by dental professionals.
IMPORTANT: Read all instructions carefully prior to set-up and use of the Demi Ultra.Listed below are the
components, features, controls and operating modesof the system.
System Components
Quantity Description
1
Demi Ultra Handpiece
1
8mm LED Light Attachment
1
Charging Dock with LED Radiometer
1
Light Shield
1
Power Supply withAdapter Set
1
Instructions for Use
1
Demi Ultra Disposable Barrier Bags (pack of 5)
Features
Figure 1 – Demi Ultra System
CAUTION
Do not autoclave the LED Light Attachment or any part of the curing light
system. Demi Ultra parts are not autoclaveable.
Radiometer
Lights
Light Shield
Controls
Radiometer Sensor
Charging
Indicator
Light
Charging Dock
Electrical Contacts
Indicator Lights
Magnetic Socket Between Attachment and
Handpiece
NOTE: Radiometer is for LED light
sources only
Demi
Ultra
Unit
LED Light
Attachment
Ergonomic
Handpiece
1

Controls
Curing Time Indicator Lights: Three LEDs represent
the three curing modes; from left to right these are: 5
second, 10 second, and 20 second cycles.
Charge Indicator Light: This LED indicates the state of
charge of the power source.
Curing Time Selector: Pressing this button
sequentially toggles the unit through the three curing
modes. If theunit is insleep mode, pressingthis button
awakens the unit in the curing mode last used.
LED Light Button: Pressing this button initiates the
selected curing cycle. Pressing this button during the
cure cycle will interrupt/end the cycle. If the unit is in
sleep mode, pressing this button awakens the unit in
the curing mode last used.
Figure 2 – Demi Ultra controls
Operating Modes
NOTE: For each of the modes explained below, it is assumed that the LED Light Attachment is securely
attached to the Handpiece:
Active
Mode
The “ready” state of the Demi Ultra is Active Mode. In this mode a Curing Time Indicator Light
will be illuminated. The user may cycle between 5 second, 10 second, and 20 second curing
modes by pressing the Curing Time Selector. Curing cycles are also initiated when the unit is
in Active Mode.
Sleep
Mode
The Demi Ultra goes into sleep mode after approximately 60 seconds of no activity, and when
the unit is initially removed from the Charging Dock when charging is complete. While in
sleep mode, all LEDs are turned off and the curing light goes into a lower power state.It can
be awakened by pressing either the Curing Time Selector or LED Light Button once, at which
time the unit will be in Active Mode. The unit will reflect the last cure mode chosen.
Off
Mode
There are two conditions that put the Demi Ultra into Off Mode: (1) When it is seated in the
Charging Dock, and (2) When the unit becomes completely drained. For example, if the unit
is not in the Charging Dock and is left idle for many days the charge will completely drain.
Pressing the control buttons will not awaken the unit if it is in Off Mode. If the charge is
drained, it must be first charged and then removed from the Charging Dock.
Silent
Mode
The Demi Ultra in Active Mode emits sounds to signal activity, such as intermittent beeps
while curing. To mute these sounds, press and hold down the Curing Time Selector Button for
10 seconds. After 10 seconds the unit will beep twice, signaling Silent Mode has been turned
on.The unit will remember this setting, and not produce sounds until Silent Mode is turned
off using the same procedure as was used to switch it on.
Periodic Level Shifting (PLS)
The Demi Ultra employs proprietary Periodic Level Shifting technology. PLS is a constant periodic cycling of
light from a base output to a higher level every second during a curing cycle. PLS technology provides faster,
deeper cures without overheating.
2

Product Safety Warnings and Cautions
Consistent function and safe operation of this curing light system is dependent on the user’s compliance with
the following safety procedures as well as thespecific safety comments and recommendations presented
throughout these Instructions for Use. Users must be qualified medical professionals.
Warnings:
SHOCK
HAZARD
The Demi Ultra Curing Light is an electric device designed to meet worldwide electrical
safety standards, including U.S., Canada, and Europe, to be safe and effective for all
dental applications. To avoid electric shock:
• Do not attempt to open or alter the unit in any way. Only service centers authorized by
Kerr Corporation may open the unit housing and repair the device.
• Do not introduce any foreign objects into the housing of the unit.
• Use only the Demi Ultra charging dock when recharging this product. Never attempt
to use any other device for recharging.
• Connect thepower plug into a suitably grounded and approved outlet. If using an
extension cable, make sure that the ground line is not interrupted.
• Always unplug the charging dock before disinfecting.
• Never use the power supply if it or the cord has been damaged.
HIGH
INTENSITY
LIGHT
The Demi Ultra Curing Light produces high-output curing energy. Prolonged exposure to
the eyes, exposed skin, oral mucosa, or tissues near the pulp can result in irritation or
injury. It is important to observe the following precautions and procedures:
Positioning: When curing, position the LED Light Attachment tip directly over the cure
material. Do not place lightdirectly on or toward unprotected gingiva or skin.
Eye exposure: Do not look directly at the light emitted from thiscuring unit. Do not
operate this device without suitable eye protection for the operator, assistant, and
patient. Select eye protection that filters blue-violet and ultraviolet light. Securely attach
Light Shield before each use. Avoid prolonged exposure of unprotected eyes to light
scatter or reflected light. If light exposure causes blurring/starring of vision or visual
after-image that persists, consult a physician.
Skin exposure:Avoid prolonged exposure to skin. If skin rash, sensitization or other
reaction occurs, discontinue use and seek medical attention.
Oral mucosa exposure:Avoid prolonged exposure to oral soft tissues. Prolonged
exposure may cause soft tissue irritation or burns. Most minor reactions require only
thorough cleansing and palliative treatment. If irritation persists, seek medical attention.
Cautions:
CAUTION
• Use this product only as specifically explained in this manual. Any use of this product
inconsistent with these Instructions for Use is at the discretion, and is the sole
responsibility of, the practitioner.
• The Demi Ultra should be operated only with the supplied LED Light Attachment or
other Demi Ultra LED Light Attachments when available. Do not attempt to use this
product with other Demetron light guides. This product’s warrantydoes not cover any
damage resulting from the attempted use with any light guides or light attachments
other than original Demi Ultra LED Light Attachments. There are no user-serviceable
parts inside the curing unit. Do not open or tamper with the curing unit.
• Check the LED Light Attachment for adequate light output before each procedure. Failure
to verify output may allow inadequate curing (see Product Testing section). Only the
Demi Ultra built-in radiometer or a Demetron radiometer (partnumber 910726)should
be used. Other radiometers may give erroneous output data and cannot be relied upon to
test Demi Ultra output.
• The Demi Ultra should not be used on patients, or by users, fitted with implanted or
external medical devices, such as an implanted heart pacemaker, who have been
cautioned in regard to being exposed to small electrical appliances, such as electrical
shavers, hair dryers, etc. In all such cases, contact the prescribing medical device
practitioner prior to exposing a patient, or user, to the Demi Ultra.
• The System must be maintained in a clean, undamaged condition. An unclean or
damaged unit should not be used. Do not attempt to operate a damaged System until it
has been thoroughly inspected and serviced by qualified service person.
• To prevent cross-contamination, use a disposable plastic sleeve over the LED Light
Attachment during each use. Do not allowcontact of restorative materials with lens on
3

the end of the LED Light Attachment. Attempts to remove cured material may scratch the
lens. A contaminated or chipped/scratched lens will reduce the effectiveness of the unit
and could result in a restoration that is not cured completely.
• Items labeled as “Single Use” are intended for single use only. Discard after use. In order
to prevent cross-contamination, do not reuse with other patients.
• Do not immerse any system components in water or disinfectant.
• Do not spray liquids directly onto the Systemcomponents. Spray a towel, then wipe the
light. Prevent liquids from entering openings on unit, for example the Magnetic Socket
for the LED Light Attachment. Always clean the unit with the LED Light Attachment
installed.
• If the Demi Ultra is moved from a cold to a warm environment condensation on the inside
of the unit may be a potential risk. In such instances, the product should be brought to
ambient temperature before charging and/or operation.
• Persons having a history of photosensitive reactions, including individuals with urticarial
solaris or erythropoietic protoporphyria, orwho are using photosensitizing drugs,
including 8-methoxypsoralen or dimethylchloro – tetracycline, should not be exposed to
light from this unit.
• Do not look directly at the light emitted from the LED Light Attachment. As with any
bright light source, staring directly at the source may cause temporary effectssuch as
after-image. (See Warnings)
• It is recommended that all curing light usersand patients employ suitable eye protection
and protective clothing during operation of the Demi Ultra. (See Warnings for
information on suitable eyewear and clothing)
• Persons who have had surgery for eye cataracts are especially sensitive to light and
generally should not use or be exposed to light from the Demi Ultra unless they employ
suitable protective measures to prevent eye exposure (as described above).
• This product was developed to comply with relevant EMC regulations and standards and
has been tested to verify its conformity with legal requirements. However, the possibility
of EMC disruptions cannot be completely excluded due to variables that may exist within
the work environment, such aspower supply, wiring, and other ambient conditions. If
you should experience problems in the operation of this product, move the unit to a
different location. See the appendix for the EMC manufacturer´s declaration and the
recommended separation distances between the Demi Ultra and portable and mobile RF
communications equipment.
• The dimensions in the figure below represent the minimum patient environment. The
Demi Ultra Charging Dock should not be stored within the patient environment as a
precaution against inadvertent electric shock.
4

Product Setup and First-Time Use
Power Supply Assembly
The power supply is a universal-input unit that accepts 100V - 240V AC nominal.
NOTE: Only Kerr-supplied power supplies are to be used to power the Demi Ultra. There are two types of
power supplies available. The power supplies differ slightly in appearance, but operate the same both
electrically and mechanically.
Attach the Adapter to the Power Supply
1. Select the proper adapter. Each
adapter has a slot into which the
retaining latch on the power
supply fits.
2. Place the adapter onto the power
supply so that the tabs on the
adapter are aligned with their
respective slots on the power
supply (Figure 3).
3. Slide the adapter into the power
supply until a click is heard and
the adapter is locked in place.
Figure 3 – Electrical power supply with an adapter
NOTE: When correctly mounted, the adapter will not rock or move. If the adapter feels loose, remove
it and re-install.
Remove the Adapterfrom the Power Supply
1. Press on the latch retainer
button; slide the adapter away
from the power supply, and
remove the adapter (Figure 4).
2. Retain unused adapters for
future use.
Figure 4 – Removing the adapter
Latch retainer button
NOTE: Use only Kerr supplied
power supply (part number
35815)
5

Using the Charging Dock
The Demi Ultra System uses a battery-less power source that recharges very quickly.Follow these instructions
for effective operation:
1. Plug the power supply into an electrical outlet.
2. Plug the power supply into the Charging Dock. The socket is located at the back of the Charging
Dock (Figure 5).
3. Insert the Demi Ultra unit into the Charging Dock with the controls facing the radiometer.
When charging, the unit’s indicator lights turn off and the charging dock charging indicator
lights turn on. These are on the upper and lower surface of the dock’s “bridge” (Figure 5).
Amber light indicates the unit is charging. Green indicates the unit is fully charged.
When setting up the Charging Dock, alwaysconfirm you are using the correct cable. Place the Charging Dock as
close as possible to the wall outlet. Never allow the cord to drape across an open space where it can be
accidently pulled. When moving the Charging Dock, unplug it from the wall outlet by hand and remove the
Handpiece. Never pull the cord from a distance. Unplug the cord from the Charging Dock only when cleaning.
Figure 5 – Charging Indicator lighting
For Optimal Power Source Performance:
For optimal power source performance, it is recommended to leave the Demi Ultra resting in the Charging
Dock with an active power connection whenever not in use, including overnight.
When recharged regularly, the Demi Ultra requires only 40 seconds for a full recharge. If the power source
fully drains after several days of inactivity the unit may require up to 70 seconds for a full recharge. After fully
recharging, the unit will again require only 40 seconds for subsequent recharges if operation is regular as
stated above.
A full recharge yields approximately 250 seconds of run time, or 25 10-second cures.
Amber = Charging
Green = Charged
6

Product Testing
Test the LED Light Attachment with the Radiometer
CAUTION
It is
highly recommended that curing capability be tested using a hardness disk to ensure a
complete cure
. When a hardness disk is not available, light output can be verified with a
r
adiometer to estimate curing effectiveness. Failure to perform either of these tests may
le
ad to incomplete cures of dental restorative materials.
The
Demi Ultra Charging Dock radiometer should be used only with the Demi Ultra when
fitted with the
8mm LED Light Attachment. Use of the radiometer with other curing lights
or with larger/smaller di
ameter light sources may result in inaccurate measurements.
Verify the Demi Ultra performance before each use using the radiometer built into the Charging Dock:
1. Set the curing time interval for a 10 second cycle.
2. Verify that the radiometer sensor is free of debris that could impact the accuracy of the measurement. If
the radiometer sensor requires cleaning, clean it per instructions in Product Care and Maintenance.
3. Carefully hold the unit so that the lens of the LED Light Attachment is flush with the radiometer sensor
(Figure 6) and centered within the white circle provided.
Figure 6 – The LED Light Attachment aligned with the Radiometer Sensor
4.
While holding the unit steadily in position, press and
release the LED Light Button. In response to the bright
light, the radiometer indicator lights will illuminate from
the bottom up, providing a reading of the light intensity.
5.
Wait until the light goes off before moving the LED Light
Attachment away from the radiometer sensor.
Lights
Color
Intensity
(mW/cm
2
)
5
Blue
1250
4
Blue
1050
3
Blue
950
2
Amber
850
1
Amber
750
Figure 7 – Radiometer test response
The bottom two lights are amber, the top three lights are blue. At least one blue light must be illuminated for a
proper cure. Do not use the Demi Ultra for curing if only the amber lights are illuminated.Reference the
Troubleshooting section for possible solutions.
The lower four indicator lights emit a steady glow. The top indicator light is sensitive to the Periodic Level
Shifting (PLS) of the LED Light Attachment, causing a blinking or flickering effect.
Radiometer Sensor
LED Light Button
Caution:
Do not use the Demi Ultra for
curing if less than 3 Radiometer lights are
illuminated
7

Verifying Radiometer Readings with a Hardness Disk Kit
CAUTION
The r
adiometer reading is just an estimate of curing performance. Actual curing
results depend on the ma
terials and thickness being cured. It is highly recommended
that curing of materials be tested using a
hardness disk kit to ensure a complete cure.
Follow the instructions provided with the kit for the most accurate testing results.
Product Use
CAUTION
To prevent cross
-contamination, a disposal sleeve must be used over the Demi Ultra
with each use
. This will also prevent transfer of resin to the LED Light Attachment.
Kerr Corporation recommends the use of the Demi Ultra Barrier Bag to prevent cross-contamination when
using the Demi Ultra. See the Parts and Accessories section for ordering information.
Adjust the LED Light Attachment and Light Shield
Remove the unit from the Charging Dock. Ensure the LED Light Attachment is properly seated in the Magnetic
Socket and the Light Shield is firmly attached. Rotate each to the desired position for curing.
Figure 8 – Demi Ultra LED Light Attachment rotation
Verify the Handpiece isCharged
In Active Mode, a Curing Time Indicator Light is
on, and the Charge Indicator Light is off. When
there are 40 seconds or less of curing time left,
the Charge Indicator Light glows amber (see
Figure 9) warning the user that the charge is
almost depleted. The Charge Indicator Light
turns red when there is not enough charge to
complete the selected curing cycle duration. If
curing duration is reduced, the light may change
back to amber, indicating there is enough charge
for a shorter curing cycle.
Select Curing Time
The three topmost LEDs indicate which time
interval (cycle) is selected. To change the current
selection, press the Curing Time Selector until the
desired time interval is indicated (see Figure 10).
Activate the Curing Light
Position the light as close to the tooth as possible
without touching it. Press and release the LED
Light Button (see Figure 11). Be sure to hold the
Demi Ultra in position until the curing cycle has
completed.
Figure 9 – Charge Indicator Light “on”
Figure 10 – Selecting a curing time
Charge
Indicator
Light
Curing Time
Selector
8

Other Product Use Notes
If the LED Light Button is pressed at any time during a curing cycle it will stop the cycle. To disable PLS, press
and hold the LED Light Button when starting the curing cycle. PLS will be disabled until the button is released.
While PLS is disabled the Demi Ultra will maintain a steady base light output of 1,100 mW/cm2 and the unit
will beep once per second.
Figure 11 – Curing composite on a tooth
When not in Silent Mode, the unit will emit a short beep when the button is pressed. The beep indicates the
curing cycle has begun. Aslightly longer beep will sound at the end of the curing cycle. During the 10 and 20-
second cycles, a beep is sounded every 5 seconds as well as at the end of the cycle.
Recommended Curing Times
The Demi Ultra is a high-output curing unit. Kerr testing indicates the following recommended curing times as
estimates. Always follow the recommended curing times published by the manufacturer of your dental
restorative materials when available.
Material
Curing Time
Universal composite shades A3 and lighter (2 mm depth)
5 seconds
Universal composite shades A3.5 and darker (2mm depth)
10 seconds
SonicFill shades A3 and lighter (5mm depth)
20 seconds*
Bonding agents, universal resin luting cements and self-etch, self-adhesive cements
5 seconds
*Kerr testing indicates that SonicFill attains a 5mm cure in 10 seconds with a light output exceeding 1000 mW/cm2.
Although Demi Ultra provides light output in excess of 1000 mW/cm2, Kerr continues to adopt a conservative position and
recommends a 20 second cure.
CAUTION
It is highly recommended that curing capability be tested using a hardness disk to ensure a
complete cure. When a hardness disk is not available, light output can be verified with a
radiometer to estimate curing effectiven
ess. Failure to perform either of these tests may
lead to incomplete cures of dental restorative materials.
LED Light
Button
LED Light Attachment
NOTE: Periodic Level Shifting (PLS) will appear
as flickering of the light from the LED Light
Attachment.
9

Product Care and Maintenance
Operating Environment
See Product Specifications section.
Transport and Storage Environment
• Temperature: -4˚F to 104˚F (-20˚C to 40˚C)
• Relative humidity: 10% to 85%
• Atmospheric pressure: 0.5 atm to1.0 atm (500 hPa to 1060 hPa)
See Product Specifications section for dimensions and weights of system components.
Troubleshooting
Problem Resolution
The Handpiece indicator lights don’t
illuminate.
The electrical charge may be completely drained. Put the Handpiece
in the Charging Dock for 70 seconds.
The Handpiece is in the Charging Dock,but
the Charging Indicator Lights don’t light.
Check to verify that the power cord is inserted into the Dock and into
a power receptacle.
Check the power supply and cord for damage. If there is damage
discontinue use of the power supply.
The HandpieceIndicator Lightsare
blinking.
Verify that the LED Light Attachment is fully seated into the Magnetic
Socket.
The Handpiece sounds (beeps) have
stopped.
The Handpiece is in Silent Mode. Press and hold the Curing Time
Selector button for 10 seconds to turn off Silent Mode. The unit will
beep twice to indicate the Silent Mode setting has been changed.
The Handpiece beeps once each second
during a curing cycle.
This indicates PLS is not active, which occurs when the LED Light
Button is pressed and held. Press and release the button when
activating a curing cycle.
A Radiometer test has less than three
lights illuminated.
First, confirm that the LED Light Attachment is flush with the
radiometer Sensor and centered within the white circle provided.
Debris may be blocking or clouding the LED Light Attachment lens or
the Radiometer Sensor. See cleaning instructions in the Product Care
and Maintenance section.
The Charging Indicator Lights on the
ChargingDock blink continuously when
the Demi Ultra unit is in the Charging
Dock.
The unit may not be seated properly in the Charging Dock. Remove
and reseat it.
Check the electrical contacts on the Charging Dock and Handpiece to
see if they are fouled. If so, clean the contacts with a dry cloth, and
reseat the unit.
If the above actions do not resolve the problem, the Demi Ultra may
require service by a qualified technician. Contact Kerr Customer Care
(see back cover) for details on shipping to a service center.
If the resolutions suggested above do not resolve the issue, or for other issues not listedhere, please contact
customer care (see Contact Customer Care).
10

Cleaning
This product must be disinfected as normal preparation for each patient. Read this entire section before
cleaning the Demi Ultra unit. Failure to follow these cleaning guidelines could cause damage.
Cleaning the LED Light Attachment and Handpiece
CAUTION
Do not autoclave the LED Light Attachment or any part of the curing light.Demi
Ultra parts are not autoclaveable. Never use a blunt instrument to remove composite
from the lens. Doing so will damage the lens. Do not immerse or spray cleaning solution
directly onto components. Instead, spray cleaning solutions on a cloth to wipe. Do not
clean the handpiece when it is resting in the Charging Dock.
1. Use the Optics Maintenance Kit (part number 21042) to clean and polish the LED Light Attachment lens.
Follow the instructions included with the kit.
2. Select the cleaning solution. Use a quaternary ammonium compound product like CaviCide®/CaviCide1
solution or CaviWipes®/CaviWipes1that contain 25% alcohol or less. If using CaviWipes®/CaviWipes1,
follow the directions on the package.
3. Remove the Demi Ultra from the Charging Dock and remove the Light Shield from the Handpiece.
4. Wet a cloth or paper towel with cleaning solution and wipe onto the Handpiece, LED Light Attachment,
and Light Shield. Avoid the lens at the end of the LED Light Attachment. Do not separate the Handpiece
and the LED Light Attachment.
CAUTION
When cleaning this product, prevent liquids from entering any opening. Wipe carefully so
that liquid does not run, and always clean the Handpiece with the LED Light Attachment
attached to avoid getting moisture or debris in the Magnetic Socket.
Cleaning the Charging Dock and Radiometer
CAUTION
Be sure to disconnect the power cord from the Charging Dock before cleaning. The
charging dock should be disinfected before every charge to prevent cross-contamination.
Do not spray cleaning solution directly onto components. Instead, spraycleaning solutions
on a cloth to wipe.
1. Disconnect the power cord from the Charging Dock.
2. Wet a cloth with cleaning solution and wipe solution onto the Dock surfaces.
3. Do not wipe or spray the electrical contacts.
4. Examine the Radiometer Sensor for debris and wipe as necessary
5. Wipe carefully so that liquid does not run. Do not allow fluid into the port for the electrical cord.
Prevent liquids from entering any opening.
CAUTION
Additional Cleaning Cautions:
Do not immerse any components of this productin solutions.
Use of solutions other than those recommended may damage plastic parts and will void
product warranty.
Do not use: Denatured alcohol, Lysol®, phenol, ammonia complexor iodine complex
solutions.
Do not use cleaning solutions on the electrical contacts.
11

Product Specifications
Type of Information
Specifications
Light Emitting Diodes:
An array of three LEDs die-mounted on a substrate.
Output peak wavelength range:
450-470 nanometers
Baseline output:
1,100 mW/cm2
Handpiece with LED Light Attachment
dimensions:
Length: 10.7” (27 cm)
Width: 1.3” (3.3 cm)
Charging Dock dimensions:
Length: 5.8” (14.7 cm)
Width:3.2” (8.1 cm)
Height: 3.0” (7.6 cm)
Weight:
Handpiece: 6.5 oz (184 g)
Charging Dock: 16.1 oz (456 g)
Power Supply performance:
2x 10-second cures on a full charge5
Charging time: < 70seconds
Overcurrent Protection
Fuse
AC supply connection:
100-240V AC, 1.0-0.5A, 50-60Hz
Power input:
12VDC, nominal
Equipment class: Class II
Safety:
IEC 60601 -1
EMC (Electro-Magnetic Compliance):
IEC 60601-1-2
Protection from electric shock: Type BF
Protection from ingress of liquids:
Handpiece: IPX4
Charging Dock: IPX3
Operation:
Continuous operation patient application, duty cycle 20
seconds ON/1 minute OFF.
Operating environment:
Ambient temperature: 60˚F to 104˚F (16˚C to 40˚C)
Relative humidity: 10% - 80%, non-condensing
Atmospheric pressure: 0.5-atm to 1.0-atm
(500 hPa -1060 hPa)
Parts and Accessories
Type
Number
Description
System Parts
35665
Demi Ultra 8mm LED Light Attachment
35666
Demi Ultra Charging Dock with built-in LED Radiometer
35667
Demi Ultra Handpiece
35668 Demi Ultra Light Shield
35815
Demi Ultra Power Supply
Accessories
35837
Disposable Hardness Disk Kit (pack of 1)
21042
Optics Maintenance Kit
DEMIULTRA-100
Demi Ultra Barrier Bags (pack of 100)
12

Disposal Instruction
When you plan to dispose of the Demi Ultra, please return it to Kerr for environmentally
sound recycling. Please contact your sales repfor details. The Waste Electrical and Electronic
Equipment (WEEE) Directive forbids the disposal of waste electrical and electronic
equipment as unsorted municipal waste, requiring thatit be collected and recycled or
disposed of separately.
Hazardous substances are present in electrical and electronic equipment and present potential risks to human
health and the environment if disposed of in municipal landfills which are not designed to prevent migration of
substances into the soil andgroundwater.
Product Warranty
Kerr hereby warrants that for a period of three years from the date of purchase, this instrument shall be free
from defects in material and workmanship and will perform satisfactorily under normal use and service.
To register your warranty, complete the online warranty registration within 30 days of purchase at
www.kerrdental.com/warranty. If multiple units have been purchased, fill out one registration form per unit.
Please have your dealer invoice available. You can also register your warranty by calling 1.800.KERR.123
(1.800.537.7123).
THE WARRANTY STATED HEREIN IS THE SOLE WARRANTY APPLICABLE TO KERR PRODUCTS. KERR
EXPRESSLY DISCLAIMS ANY AND ALL OTHER WARRANTIES EXPRESSED OR IMPLIED, INCLUDING
WARRANTIES OR MERCHANTABILITY OR FITNESS FOR A PARTICULAR USE. KERR’S LIABILITY WITH
RESPECT TO ITS PRODUCTS IS EXPRESSLY LIMITED TO THE REMEDIES SET FORTH ABOVE. THE
REMEDIES ARE THE BUYER’S EXCLUSIVE REMEDIES. KERR SHALL UNDER NO CIRCUMSTANCES BE
LIABLE FOR INCIDENTAL OR CONSEQUENTIAL DAMAGES. THE WARRANTY DOES NOT APPLY TO ANY
DAMAGE OR DEFECT CAUSED BY THE USER’S FAILURE TO THE FOLLOWING INSTRUCTIONS FOR USE
OR THE OTHER USER ERROR IN OPERATING OR MAINTAINING THE INSTRUMENT. ALTHOUGH KERR
OFFERS SERVICES TO REPAIR INSTRUMENTS AND PROVIDES REPLACEMENT PARTS AFTER THE
EXPIRATION OF THE WARRANTY, KERR ONLY GUARANTEES THE AVAILABILITY OF SUCH SERVICES
AND REPLACEMENT PARTS FOR TWO YEARS AFTER THE INSTRUMENT MODEL HAS BEEN
DISCONTINUED.
13

Español (España)
Información del producto
Descripción y modo de empleo
El dispositivo DemiTM Ultra es un dispositivo de polimerización visible con diodo electroluminiscente (LED, por sus siglas en inglés)
utilizado para la polimerización de materiales fotopolimerizables realizada por odontólogos.
IMPORTANTE: Lea detenidamente todas las instrucciones antes de configurar y utilizar Demi Ultra. A continuación, se enumeran los
componentes, las funciones, los controles y los modos de funcionamiento del sistema.
Componentes del sistema
Cantidad Descripción
1
Pieza de mano Demi Ultra:
1
Accesorio de la lámpara LED de 8 mm (Guía de luz)
1
Base de carga con radiómetro LED
1
Protección de la luz
1
Fuente de alimentación con juego de adaptadores
1
Instrucciones de uso
1
Bolsas barrera desechables Demi Ultra (paquete de 5)
Características
Figura 1. Sistema Demi Ultra
PRECAUCIÓN
No someta al autoclave la guía de luz de la lámpara LED ni ninguna pieza delsistema de la
lámpara de polimerización. Laspiezas de Demi Ultrano se pueden limpiar en autoclave.
Luces del
radiómetro
Protección de la luz
Controles
Sensor del
radiómetro
Indicador
luminoso
de carga
Base de carga
Contactos eléctricos
Indicadores luminosos
Acoplamiento magnético entre la guía de luz
y la pieza de mano
NOTA:El radiómetro es solo para
fuentes de luz LED.
Unidad
Demi
Ultra
Guía de luz de la
lámpara LED
Pieza de mano
ergonómica
14

Controles
Indicadores luminosos del tiempo de polimerización: Tres
LED representan los tres modos de polimerización. De izquierda a
derecha son: ciclos de 5 segundos, 10 segundos y 20 segundos.
Indicador luminoso de carga: Este LED indica el estado de la
carga de la fuente de alimentación.
Selector del tiempo de polimerización: Al presionar este
botón, la unidad cambiará secuencialmente por los tres modos de
polimerización. Si la unidad está en modo reposo, y presiona este
interruptor, la unidad se activará en el modo depolimerización que
se usó la última vez.
Botón de la lámpara LED: Si pulsa este botón, se iniciará el ciclo
de polimerización seleccionado. Si pulsa este botón durante el ciclo
de polimerización, este se interrumpirá/finalizará. Si la unidad está
en modo reposo, y presiona este interruptor, la unidad se activará
en el modo de polimerización que se usó la última vez.
Figura 2. Controles Demi Ultra
Modos de funcionamiento
NOTA: Para cada uno de los modos explicados acontinuación, se asume que el accesorio de la lámpara LED(guía de luz) está
acoplado de forma segura ala pieza de mano:
Modo
Activo
El estado “ready (listo)” del Demi Ultra es el modo Activo. En este modo, se iluminará el indicador luminoso del
tiempo de polimerización. Elusuario puede elegir entre los modosde polimerización de 5 segundos, 10
segundos y 20 segundos pulsando el Selector del tiempo de polimerización. Los ciclos de polimerización
también se inician cuando la unidad está en modoActivo.
Modo
Reposo
El Demi Ultra pasa al modo reposo tras aproximadamente 60 segundos de inactividad, y al retirar inicialmente
la unidad de la base de carga cuandola carga está completa. Cuando está en modo reposo, todos los LED se
apagan y la lámpara de polimerización pasa a un estado de baja potencia. Puede reactivarse pulsando el
Selector del tiempo de polimerización o el botón de la lámpara LED una vez, momento en el que la unidad
pasará al modo Activado. La unidad reflejará el último modo de polimerización elegido.
Modo
Desactivado
Existen dos situaciones que pasan el Demi Ultra al modo Desactivado: (1) Cuando se encuentra colocado en la
base de carga y (2) cuando la unidad se descarga por completo. Por ejemplo, si la unidad no está en la base de
carga y se deja inactiva durante muchos días, la carga se agotará por completo. El hecho de pulsar los botones
de control no activará la unidad si se encuentra en modo Desactivado. Si la carga se ha agotado, deberá
cargarse primero y, a continuación,retirarse de la base de carga.
Modo
Silencioso
El Demi Ultra en modo Activado emite sonidos por la actividad de las señales, comopitidos intermitentes
durante la polimerización. Para silenciar estos sonidos, mantenga pulsado el botón selector del tiempo de
polimerización durante 10 segundos. Tras 10 segundos, la unidad pitará dos veces, lo que indica que el modo
Silencioso se ha activado. La unidad recordará esta configuración y no emitirá sonidos hasta que el modo
Silencioso se desactive con el mismo procedimiento que se utilizó para activarlo.
Cambio periódico de nivel (PLS)
El Demi Ultra utiliza la tecnología patentada de cambio periódico de nivel. El PLS es unciclo periódico constantede luz de una salida
base a un nivel superior cada segundo durante un ciclo de polimerización. La tecnología PLS permite lograr polimerizacionescon una
mayor rapidez y profundidad sin recalentamiento.
Seguridad del producto Advertencias y precauciones
El funcionamiento constante y seguro de este sistemade lámpara de polimerización dependede la conformidad del usuariocon los
procedimientos de seguridad siguientes, así como de los comentarios y recomendaciones específicos de seguridad presentados a lo
largo de estas Instrucciones de uso. Los usuarios deberán ser profesionales sanitarios cualificados.
Advertencias:
PELIGRODE
DESCARGA
La lámpara de polimerización Demi Ultra es un dispositivo eléctrico diseñado para satisfacer los estándares
internacio
nales de seguridad eléctrica, incluidos los de los Estados Unidos, Canadá y Europa, con respecto a
la seguridad y la efectividad para todas las aplicaciones dentales.
Para evitar una descarga eléctrica:
• No intente abrir ni alterar la unidad de ningún modo. Solo los centros de servicio autorizados por Kerr
Corporation podrán abrir la carcasa de la unidad y reparar el dispositivo.
• No introduzca objetos extraños en la carcasa de la unidad.
• Utilice solo la base de carga Demi Ultra para recargar este producto. No intente nunca utilizar ningún
otro dispositivo para la recarga.
• Conecte el enchufe de alimentación a una toma aprobada y con una conexión a tierra adecuada. Si está
usando un cable alargador, asegúrese de que la conexión a tierra no esté interrumpida.
• Desenchufe siempre la base de carga antes de realizar la desinfección.
• No utilice nunca la fuente de alimentación si ésta o el cable están dañados.
LUCESDE
ALTA
INTENSIDAD
La lámpara de polimerización Demi Ultra genera energía de polimerización de alta capacidad. La exposición
prolongada de los ojos, la piel expuesta, la mucosa oral o los tejidos junto a lapulpa pueden provocar
irritación o lesiones. Es importante seguir las siguientes precauciones y procedimientos:
Colocación: Durante la polimerización, coloque elextremo de la guíade luz de la lámpara LED
directamente sobre el material de polimerización. Nocoloque la lámpara directamente sobre lapiel o las
encías no protegidas.
Exposición ocular:No mire directamente a la luz emitida por esta unidad de polimerización. No utilice
este dispositivo sin la protección ocular adecuada para el dentista, el ayudante yel paciente. Seleccione la
protección ocular que filtra la luz azul/violeta y ultravioleta. Acople con seguridad la protección de la luz
antes de cada uso. Evite una exposición ocular prolongada sin protección a la dispersión de la luz o la luz
reflejada. Si la exposición a laluz provoca una visión borrosa/visión depuntos luminosos o un imagen
residual persistente, consulte a su médico.
Exposición cutánea: Evite la exposición prolongada sobre la piel. Si se produce un sarpullido,
15

sensibilización u otrareacción, interrumpa el uso y busque ayuda médica.
Exposición de la mucosa oral: Evite la exposición prolongada sobre tejidos blandos orales. La exposición
prolongada puede provocar la irritación de los tejidos blandos o quemaduras. La mayoría de las reacciones
menores solo necesitan una limpieza en profundidad y un tratamiento paliativo. Si la irritación persiste,
busque atención médica.
Precauciones:
PRECAUCIÓN
• Utilice este producto únicamente como se explica de forma específica en este manual. Cualquier uso de
este producto que no sigaestas Instrucciones de uso es a discreción del médico y este será el único
responsable.
• El dispositivo Demi Ultra deberá utilizarse únicamente con la guía de luz de la lámpara LED suministrado
u otros accesorios de la lámpara LED Demi Ultra cuando estén disponibles. No intente utilizar este
producto con otras guías luminosas Demetron. La garantía de este producto no cubre ningún daño
resultante del intento de uso con cualquier guía luminosa o accesorio de lámpara que no sean los
accesorios de la lámpara LED Demi Ultra originales. El usuario no puede realizar el mantenimiento de
ninguna pieza del interior de la unidad de polimerización. Noabra ni altere la unidad de polimerización.
• Compruebe que la guía de luz de la lámpara LED emita una luz adecuada antes de cada intervención. Si no
comprueba la emisión, es posible que la polimerización resulte inadecuada (consulte la sección
Comprobación de productos). Solo deberá usarse el radiómetro incorporado Demi Ultra oun radiómetro
Demetron (referencia 910726). Otros radiómetros podrían proporcionar datos de emisión erróneos y no son
fiables para probar la emisión de Demi Ultra.
• El dispositivo Demi Ultra no deberá usarse en pacientes ni por usuarios que lleven dispositivos médicos
implantados o externos, como un marcapasos implantado, y que hayan sido advertidos con respecto a la
exposición a dispositivos eléctricos pequeños, comomaquinillas de afeitar, secadores de pelo, etc. En todos
estos casos, póngase en contacto con el médico que haya prescrito el dispositivo antes de exponer a un
paciente o a un usuario a la Demi Ultra.
• El sistema deberá conservarse limpio y sin daños. No deberá usarse una unidad sucia o dañada. No intente
utilizar un sistema dañadohasta que un miembro cualificado del servicio técnico lo haya inspeccionado y
reparado.
• Para evitar contaminaciones cruzadas, utilice el protector de plástico desechable sobre la guía de la lámpara
LED durante cada uso. No permita el contacto de los materiales reparadores con la lente del extremo de la
guía de luz de la lámpara LED. Si intenta retirar el material polimerizado, podría rayar la lente. Una lente
contaminada o desconchada/rayada reducirá la efectividad de la unidad y podría dar como resultado una
restauración polimerizada de forma incompleta.
• Los elementos etiquetados como “Single Use” (Un solouso) están diseñados paraun solo uso. Deséchelos
después de su uso. Para evitar una contaminación cruzada, no se deben reutilizar con otros pacientes.
• No sumerja ningún componente del sistemaen agua o desinfectante.
• No pulverice líquidos directamente sobre los componentes del sistema. Pulverice sobre una toalla y, a
continuación, limpie la lámpara. Evite que entren líquidos en las aberturas de la unidad, por ejemplo, el
acoplamiento magnético para la guía de luz de lalámpara LED.Limpie siempre la unidadcon la guía de luz
de la lámpara LED colocada.
• Si Demi Ultra de desplaza de un entorno fríoa uno cálido, existe el riesgo de que se forme condensación en
el interior de la unidad. En estos casos,el producto deberá estar a temperatura ambiente antes de cargarlo
o utilizarlo.
• Las personas con un historial de reacciones fotosensibles, incluidos los individuos con urticaria solar o
protoporfiria eritropoyética, o que están usando medicamentos fotosensibilizantes, como el 8-
metoxipsoraleno o la dimetilcloro–tetraciclina, no deberán exponerse a la luz de esta unidad.
• No mire directamente a la luz emitida por la guía de luz de la lámpara LED. Al igual que ocurre con cualquier
fuente de luz brillante, si mira directamente a la fuente, podría provocar efectos temporales, como una
imagen persistente. (Consulte Advertencias).
• Se recomienda que todos los usuarios de la lámpara de polimerización y sus pacientes utilicen una
protección ocular adecuada,así como prendas protectoras durante el uso deDemi Ultra. (Para obtener
información sobre las prendas y las protecciones oculares adecuadas, consulte Advertencias).
• Las personas que se hayan sometido a unaintervención para la eliminación de cataratas son especialmente
sensibles a la luz y normalmente no deberán usar la lámpara Demi Ultra ni estar expuestos a esta, a menos
que utilicen unas medidas protectoras adecuadas para evitar la exposición ocular (como se ha descrito
anteriormente).
• Este producto se ha desarrollado para cumplir con los estándares y las normativas CEM relevantes
(compatibilidad electomagnética), y se han probado para verificar su conformidad con los requisitos
legales. Sin embargo, la posibilidad de alteraciones en la compatibilidad electromagnética no puede
excluirse por completo debido a variables que podrían existir en el entorno de trabajo, como la fuente de
alimentación, el cableado y otras condiciones ambientales. Si experimenta problemas durante el uso de
este producto, mueva la unidad a una ubicación diferente. Consulte el apéndice para conocer la declaración
del fabricante sobre la CEMy las distancias de separación recomendadas entre el dispositivo Demi Ultra y
los equipos de comunicaciones por RF portátiles ymóviles.
• Las dimensiones de la figura siguienterepresentanel entornomínimo del paciente. La base de carga Demi
Ultra no deberá almacenarse en el entorno del paciente como precaución frente a descargas eléctricas
imprevistas.
16

Configuración del producto y uso por primera vez
Conjunto de la fuente de alimentación
La fuente de alimentación es una unidad de entradauniversal que acepta 100–240 V de CA nominales.
NOTA: Solo podrán usarse fuentesde alimentación suministradas por Kerr para proporcionar energía al dispositivo Demi Ultra.
Existen dos tipos de fuentes de alimentación disponibles. Las fuentes de alimentación difieren ligeramente en cuanto a la apariencia,
pero funcionan tanto de forma eléctrica como mecánica.
Conecte el adaptador a la fuente de alimentación.
1.
Seleccione el adaptador adecuado. Cada
adaptador tiene una ranura donde encaja el
gancho de retención de la fuente de alimentación.
2. Coloque el adaptador sobre la fuente de
alimentación, de modo que las pestañas del
adaptador se alineen con las ranuras
correspondientes de la fuente de alimentación
(figura 3).
3. Deslice del adaptadorhacia el interior de la fuente
de alimentación hasta que escuche un clicy el
adaptador se bloquee en su sitio.
Figura 3. Fuente de alimentación eléctrica con un adaptador
NOTA: Si el adaptador está montado correctamente, no se moverá. Si nota que el adaptador está suelto, retírelo y vuelva a
instalarlo.
Retire el adaptador de la fuente de alimentación.
1.
Pulse el botón de retención del gancho; deslice el
adaptador hacia fuera de la fuente de
alimentación y retire el adaptador (figura 4).
2. Conserve los adaptadores que nohaya utilizado
para futuros usos.
Figura 4. Retirada del adaptador
Mediante la base de carga
El sistema Demi Ultra utiliza una fuente de alimentación sin batería que se recarga muy rápido. Siga estas instrucciones para un
funcionamiento efectivo.
1. Enchufe la fuente de alimentación a una tomade corriente eléctrica.
2. Enchufe la fuente de alimentación a la base delcargador. El enchufe se encuentra en la parte posterior dela base
de carga (figura 5).
3. Inserte la unidad Demi Ultra en la base de carga con los controles mirando al radiómetro. Durante la carga, los
indicadores luminosos de la unidad se apagan y los indicadores luminosos de carga de la base de carga se
encienden. Estos se encuentran en la superficie superior e inferior del "puente" de la base (figura 5). La luz ámbar
indica que la unidad se estácargando. La luz verde indica que la unidad está completamente cargada.
Cuando configure la base de carga, confirme siempreque esté usando el cable correcto. Coloque la base decarga todo lo cerca que
pueda de la toma mural. Nunca permita que el cable cruce un espacio abierto donde pueda resultar desenchufado accidentalmente.
Cuando desplace la base de carga, desenchúfela de latoma mural a mano y retire la pieza de mano. Nuncatire del cable desde lejos.
Desenchufeel cable de la base decarga únicamente mientras limpie.
Figura 5. Indicador de carga iluminado
Botón de retención del
gancho
NOTA: Utilice únicamente una fuente
de alimentación suministrada por
Kerr (referencia 35815).
Ámbar = cargando
Verde = cargado
17

Para un rendimiento óptimo de la fuente de alimentación:
Para un rendimiento óptimode la fuente de alimentación, se recomienda dejar el dispositivo Demi Ultra enla base de carga con una
conexión de alimentación activa cuandono se esté utilizando, incluido durante lanoche.
Cuando se recarga con regularidad, el dispositivo Demi Ultra solo necesita 40 segundospara una recarga completa. Si la fuente de
alimentación se descarga por completo tras varios días de inactividad, es posible que la unidad requiera hasta 70 segundos para una
recarga completa. Tras una recarga completa, si el funcionamiento es habitual como se ha indicado anteriormente, de nuevo la
unidad solo necesitará 40 segundos para recargas posteriores.
Una recarga completa dura aproximadamente 250 segundos de tiempo de uso o 25 polimerizaciones de 10 segundos.
Pruebas del producto
Pruebe el accesorio de la lámpara LED con el radiómetro
PRECAUCIÓN
Se recomienda encarecidamente probar la capacidad de polimerización usando un disco de dureza para
asegurar una polimerización completa
. Cuando no haya disponible un disco de dureza, podrá verificar la
emisión de luz con un radiómetro para calcular la efectividad dela polimerización. Si no realiza
ninguna de estas pruebas, es posible que realice polimerizacionesincompletas de materiale
s
restauradores
dentales.
El radiómetro de la basede cargaDemi Ultra deberá utilizarse únicamente con el dispositivo DemiUltra
cuando tenga acoplado el accesorio
(guía de luz) de la lámpara LED de 8 mm. El uso del radiómetro con
otras lámparas de polim
erización o con fuentes de luzde un diámetro mayor/menor puede conllevar
mediciones imprecisas.
Verifique elrendimientode Demi Ultra antes de cadauso mediante el radiómetro incorporadoen la base de carga:
1. Establezca el intervalo de tiempo depolimerización para un ciclo de 10 segundos.
2. Verifique que el sensor del radiómetro no presente residuos que puedan afectar a la precisión de la medición. Si debe limpiar el
sensor del radiómetro, límpielo de acuerdo con las instrucciones de Cuidados y mantenimiento del producto.
3. Sostenga cuidadosamente la unidad, de modo que la lente de la guía de luz de la lámparaLED quede nivelada con el sensor del
radiómetro (figura 6) y centrada dentro del círculo blanco proporcionado.
Figura 6. Guía de luz de lámpara LED alineado con el sensor del radiómetro
4.
Mientras mantiene la unidad fija en su sitio, pulse y suelte el botón de la
lámpara LED. En respuesta ala luz brillante, los indicadores luminosos del
radiómetro se iluminarán de abajo arriba, lo que proporciona una lectura
de la intensidad de la luz.
5.
Espere a que la luz se apagueantes de alejar la guía de luz de la lámpara
LED del sensor del radiómetro.
Luces
Color
Intensidad
(mW/cm
2
)
5
Azul
1250
4
Azul
1050
3
Azul
950
2
Ámbar
850
1
Ámbar
750
Figura 7. Respuesta de la prueba del radiómetro
Las dos luces inferiores son ámbar, las tres lucessuperiores son azules. Para una polimerización adecuada,deberá iluminarse al
menos una luz azul. No utilice el dispositivo Demi Ultra para la polimerización si solose iluminan las luces ámbar. Consulte la sección
Resolución de problemas para conocer las solucionesposibles.
Los cuatro indicadores luminosos inferiores emiten un brillo fijo. El indicador luminoso superior es sensible al Cambioperiódico de
nivel (PLS) de la guía de luz de la lámpara LED, lo que provoca un efecto de parpadeo o intermitencia.
Sensor del radiómetro
Botón de la lámpara LED
Precaución:
No utilice el dispositivo Demi
Ultra para la polimerización si hay menos
de tres luces del radiómetro iluminadas.
18

Verificación de las lecturas del radiómetro conun kit de disco de dureza
PRECAUCIÓN
La lectura del radiómetro es solo un cálculo del rendimiento de la polimerización. Los resultados reales
de la polimerización dependen de los materiales quese van a polimerizar y de su grosor. Se recomienda
encarecidamente probar la polimerización de los materiales usando un disco de durezapara asegu
rar una
polimerización completa. Siga las instrucciones proporcionadas con el kit para obtener los resultados de
pruebas más preciosos.
Uso del producto
PRECAUCIÓN
Para evitar una contaminación cruzada, deberá usarse un
a funda desechable sobre la guía de luz Demi
Ultra con cada uso. Esto también evita la transferencia de resina
a la guía de la lámpara LED.
Kerr Corporation recomienda el usode la funda desechable Demi Ultra para evitar la contaminación cruzada al usar el dispositivo
Demi Ultra. Consulte la sección Piezas y accesorios para solicitar información.
Ajuste el accesorio de la lámpara LED y la protección de la luz.
Retire la unidad de la base de carga. Asegúrese de que la guía de luz de la lámpara LED esté bien asentado en el acoplamiento
magnético y la protección de la luz esté firmemente conectada. Gire cada uno hasta la posición deseada para la polimerización.
Figura 8. Rotación del accesorio de la lámpara LED Demi Ultra
Verifique que la pieza de mano esté
cargada.
En el modo Activado, estará encendido unindicador luminoso
del tiempo de polimerización y estará apagado el indicador
luminoso de carga. Cuando queden 40segundos o menos de
tiempo de polimerización, el indicador luminoso de carga se
encenderá en ámbar (consulte la figura 9) para advertir al
usuario de que la carga está casi agotada. El indicador
luminoso de carga pasará arojo cuando no haya suficiente
carga para completar la duración del ciclo de polimerización
seleccionado. Si se reduce la duración de la polimerización, la
luz volverá a ámbar para indicar que hay carga suficiente para
un ciclo depolimerización más corto.
Seleccione el tiempo de polimerización.
Los tres LED superiores indican el intervalo de tiempo (ciclo)
seleccionado. Para cambiar la selección actual,pulse el selector
del tiempo de polimerización hasta que se indique el intervalo
de tiempo deseado (consulte la figura 10).
Active la lámpara de polimerización.
Coloque la lámpara todo locerca que se pueda del diente sin
tocarlo. Pulse y suelte el botón de la lámpara LED (consulte la
figura 11). Asegúrese de mantener el dispositivoDemi Ultra en
su sitio hasta que se haya completado el ciclo de
polimerización.
Figura 9. Indicador luminoso decarga activado
Figura 10. Selección de un tiempo de polimerización
Notas de uso de otros productos
Si pulsa el botón de la lámpara LED en cualquier momento de un ciclo de polimerización, esto detendrá el ciclo. Para desactivar PLS,
mantenga pulsado el botón de la lámpara LED al iniciar el ciclo de polimerización. PLS se desactivará hastaque se suelteel botón.
Mientras el PLS esté desactivado,el dispositivo Demi Ultra mantendrá una emisión de luz de base fija de 1100 mW/cm2 y la unidad
pitará una vez por segundo.
Figura 11. Polimerización de composite en un diente
Botón de la lámpara LED
Guía de luz de la lámpara LED
NOTA: El cambio periódico de nivel (PLS) se mostrará
como una intermitencia de la luz emitida a través de
la guía de la lámpara LED.
Indicador
luminoso de
carga
Selector del tiempo
de polimerización
19
Other manuals for Demi Ultra
1
Table of contents
Other KERR Dental Equipment manuals
KERR
KERR COMPOTHIXO User manual
KERR
KERR DemiPlus User manual

KERR
KERR SonicFill 2 Manual
KERR
KERR elements IC User manual
KERR
KERR Elements 8:1 User manual
KERR
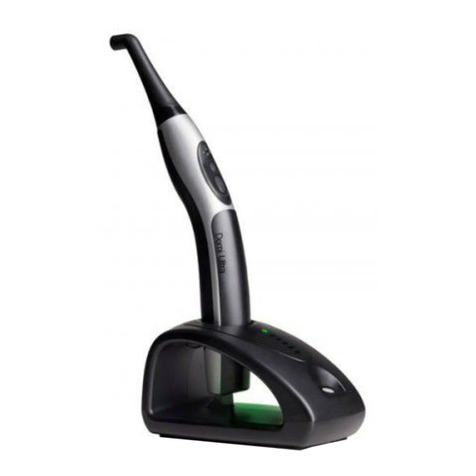
KERR Demi Ultra User manual

KERR
KERR SonicFill User manual

KERR
KERR OptiBond Solo Plus User manual
KERR
KERR EndoVac User manual
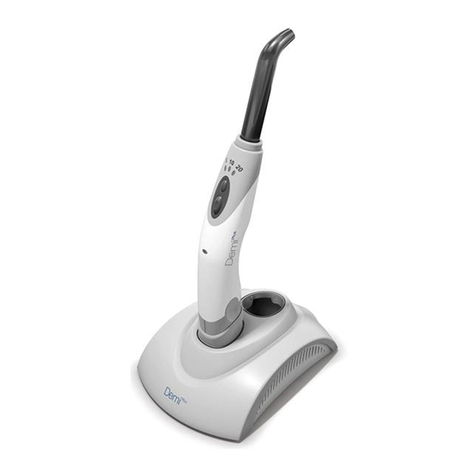
KERR
KERR Demi L.E.D Curing Light User manual

