manuals.online logo
Brands
  1. Home
  2. •
  3. Brands
  4. •
  5. Keurig
  6. •
  7. Dispenser
  8. •
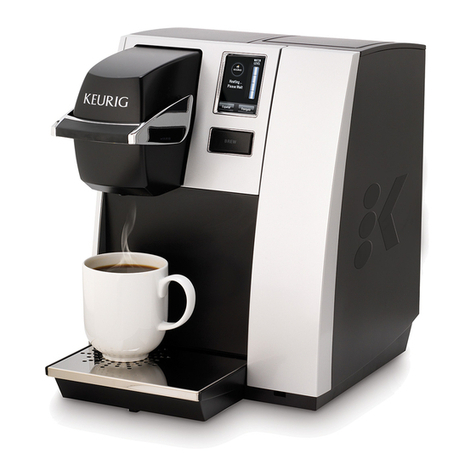
  9. Keurig B150P User manual

Keurig B150P User manual

www.keurig.com I 1.888.CUP.BREW
DO NOT remove or puncture the foil lid of the
K-Cup® portion pack.
NE perforez PAS le godet K-Cup® et n’enlevez
pas son couvercle d’aluminium.
Enjoy!
Savourez!
13
P/N60-201299-000 Rev A
09/11
GUIDE D'INSTALLATION
Cafetière B150P de Keurig®
SET-UP GUIDE
B150P Keurig®Brewer
A. Set-Up RéglagesB. Brew Infusion
Place mug on Drip Tray.
Lift the Keurig®Brewer
Handle.
Placez une tasse sur la
cuvette d’égouttage.
Soulevez la poignée
de la cafetière Keurig®.
Place chosen K–Cup®portion pack into
the K-Cup Assembly Housing. Caution:
Avoid the sharp needles in the K-Cup
Assembly Housing. Lower the Brewer Handle.
Placez le godet K–Cup®choisi dans le boîtier
de K-Cup. Attention : Ne touchez pas aux
aiguilles pointues dans le boîtier de K-Cup.
Abaissez la poignée de la cafetière.
Press the appropriate cup size:
4 oz., 6 oz., 8 oz.,10 oz. or 12 oz.
Then press the flashing BREW Button.
Appuyez sur le bouton qui correspond au
format de tasse approprié : 118 ml (4 oz),
177 ml (6 oz), 237 ml (8 oz), 296 ml (10 oz),
ou 355 ml (12 oz). Appuyez ensuite sur le
bouton d'influsion (BREW).
10 12
11 3 Loosen the two mounting screws located on the upper
rear of the brewer and hang the KQ8 filter kit assembly.
Tighten the mounting screws (do not over tighten).
Dévissez les deux vis de montage situées à l’arrière de la
cafetière, en haut, et accrochez le filtre KQ8. Serrez les vis
de montage (sans excès).
Remove used K-Cup®portion pack after brewing.
CAUTION: K-Cup®will be hot.
Retirez la K-Cup®utilisée après l'infusion.
ATTENTION : La K-Cup®est chaude.
Select
Brew Size
4 OZ.
12 OZ.
6 OZ.
10 OZ.
8 OZ.
Remove adhesive tape and
LCD screen protection label.
Enlevez le ruban adhésif et
l’étiquette de l’afficheur ACL.
Unwrap cord and plug into
grounded outlet.
Déballez le cordon et branchez
la cafetière dans une prise mise
à la terre.
1 2
WARNING: The B150P Brewer requires the use of an external water
filter such as the Omnipure KQ8 (PN 5572), available from Keurig, Inc.
Failure to use a filter invalidates the Brewer warranty.
AVERTISSEMENT : TLa cafetière B150P doit être utilisée avec un filtre
à eau externe comme le filtre Omnipure KQ8 (PN 5572) de Keurig, Inc.
La non-utilisation d’un filtre invalide la garantie de la cafetière.
.
CAUTION: The B150P Brewer is designed to handle local water pressures from 40 psig up to 125 psig. Consult a licensed plumber for
water pressures in your area. Use plumbing fittings and tubing specified to withstand 125 psig.
ATTENTION : La cafetière B150P est conçue pour fonctionner à une pression d’eau maximale de 40 à 125 lb/po2.Consultez un plombier
autorisé pour connaître la pression d’eau de votre région. Utilisez des raccords de plomberie et de la tuyauterie conçus pour résister à
des pressions de 125 lb/po2
NOTE: Do not lift Brewer Handle while heating or brewing.
REMARQUE : Ne soulevez pas la poignée de la cafetière pendant la période de chauffage ni lors de l'infusion.
Lift and lower the Brewer Handle.
Select brew size and then press
the flashing Brew Button.
Soulevez et abaissez la poignée de
la cafetière. Choisissez le format
d'infusion puis appuyez sur le
bouton d'infusion (BREW) clignotant.
Once mug is filled,
discard hot water.
Une fois la tasse
remplie, jetez l’eau
chaude.
8Wait until the screen indicates
“READY” (~4 minutes).
Attendez que le message
« READY » (PRÊT) apparaisse
à l’écran (4 minutes).
9 12
Flush the water filter with at least 4
gallons of water by routing the end of
the EXIT tube to a container or sink then
turn on the water supply.
Rincez le filtre avec au moins 15 litres
d’eau en plaçant l’extrémité du tube de
sortie (EXIT) dans un contenant ou un
évier, puis coupez l’alimentation en eau.
Connect the ‘INLET’ port of the filter
assembly to the local water supply.
Connect a long length of tubing to the
‘EXIT‘ port (do not connect to Brewer yet).
Reliez l’orifice d’alimentation (INLET) du
filtre à la conduite d’alimentation en eau.
Branchez un long tuyau à l’orifice de
sortie (EXIT) du filtre (ne branchez pas le
filtre à la cafetière tout de suite).
4 5 With the water supply off, cut the ‘EXIT’
tube to proper length and connect to
the Inlet Plumbing Port on the Brewer.
Turn on water supply.
Après avoir coupé l’alimentation en
eau, coupez le tuyau de la bonne
longueur et raccordez-le à l’orifice
d’alimentation en eau de la cafetière.
Ouvrez l’alimentation en eau.
6Press and release the
Power Switch.
Appuyez sur le bouton de
mise en marche (POWER).
7
www.keurig.com I 1.888.CUP.BREW
Heating...
Please Wait
4
connect to
water supply

Other manuals for B150P

1

Other Keurig Dispenser manuals

Keurig KOLD Instruction Manual

Keurig

Keurig KOLD Instruction Manual

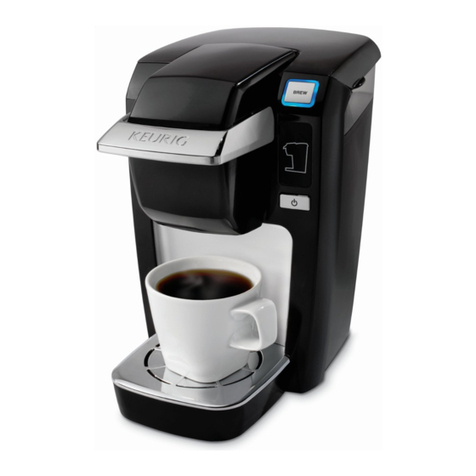
Keurig K10 Mini Plus User manual

Keurig

Keurig K10 Mini Plus User manual

Keurig K150C User manual

Keurig

Keurig K150C User manual

Keurig K10 Mini Plus User manual

Keurig

Keurig K10 Mini Plus User manual

Keurig K-CUP K140 User manual

Keurig

Keurig K-CUP K140 User manual

Keurig K-Cup K145 User manual

Keurig

Keurig K-Cup K145 User manual

Popular Dispenser manuals by other brands

Dispense-Rite SLR-2F-CSD installation instructions

Dispense-Rite

Dispense-Rite SLR-2F-CSD installation instructions

DEMA Extreme 4 manual

DEMA

DEMA Extreme 4 manual

Bravo Italia 1/3.2 manual

Bravo Italia

Bravo Italia 1/3.2 manual

Philips ADD4966 user manual

Philips

Philips ADD4966 user manual

TECHCON SYSTEMS TS255 user guide

TECHCON SYSTEMS

TECHCON SYSTEMS TS255 user guide

Ugolini DELICE 5L UL Operator's manual

Ugolini

Ugolini DELICE 5L UL Operator's manual

lancer Delta-600 R-290 Operation manual

lancer

lancer Delta-600 R-290 Operation manual

Primo Water 900129 troubleshooting guide

Primo Water

Primo Water 900129 troubleshooting guide

Server INS Series manual

Server

Server INS Series manual

Nordson ASYMTEK DispenseJet Series owner's manual

Nordson ASYMTEK

Nordson ASYMTEK DispenseJet Series owner's manual

Franke FXCD1001M Installation and operating instructions

Franke

Franke FXCD1001M Installation and operating instructions

Bobrick B-72974 Instructions for installation

Bobrick

Bobrick B-72974 Instructions for installation

Tork Elevation T2 Mini JBT Series Service and parts manual

Tork

Tork Elevation T2 Mini JBT Series Service and parts manual

DAY 73439 instruction manual

DAY

DAY 73439 instruction manual

Nordson Ultimus V quick start guide

Nordson

Nordson Ultimus V quick start guide

K&M FSD3000 Translation of the original operating manual

K&M

K&M FSD3000 Translation of the original operating manual

Dover Hydro AccuPro quick start guide

Dover

Dover Hydro AccuPro quick start guide

FILTRENA H2O My Dispenser Installation, use and maintenance handbook

FILTRENA

FILTRENA H2O My Dispenser Installation, use and maintenance handbook

manuals.online logo
manuals.online logoBrands
  • About & Mission
  • Contact us
  • Privacy Policy
  • Terms and Conditions

Copyright 2025 Manuals.Online. All Rights Reserved.