Keurig K150C User manual

K150C Plumbed Brewer | Owner’s Manual

2
GENERAL SAFETY INFORMATION Safe Operation & Use
When using electrical appliances, basic
safety precautions should be followed,
including the following:
1. Read all instructions before using.
2. The brewer is only to be installed in
locations where it can be overseen by
trained personnel.
3. For proper operation, the appropriate
ambient temperature ranges between 10°
and 30° Celsius.
4. The use of any accessory not designed
to be used with this appliance may cause
injuries.
5. Do not place on or near a hot gas or
electric cooker or in a heated oven.
6. Do not use outdoors or in an area where a
water jet may be used.
7. To protect against fire, electric shock and
injury do not immerse power cords, plugs
or the appliance in water or any other liquid.
8. Use only water in this appliance! Do not
put any other liquids or foods in the water
reservoir except as instructed in the
Cleaning Instructions in this guide.
9. Turn off and unplug the brewer before
cleaning or maintenance. Allow to cool
before putting on or taking off parts and
before cleaning the appliance.
10. For best operation, plug the appliance into
its own power socket. This helps prevent
blowing a fuse or tripping a circuit breaker.
11. Do not operate any appliance with a
damaged power cord or plug or after the
appliance malfunctions or is damaged in
any way. Contact your Keurig Authorised
Distributor to report any malfunction of or
damage to the brewer.
12. If the power cord is damaged, it must be
replaced by the manufacturer, its service
agent or similarly qualified persons in
order to avoid a hazard.
13. Do not let the power cord hang over the
edge of the table or counter, or touch hot
surfaces.
14. To disconnect, press the POWER button on
the brewer to “OFF” and then remove the
plug from the power socket.
15. Close supervision is necessary when any
appliance is used by or near children.
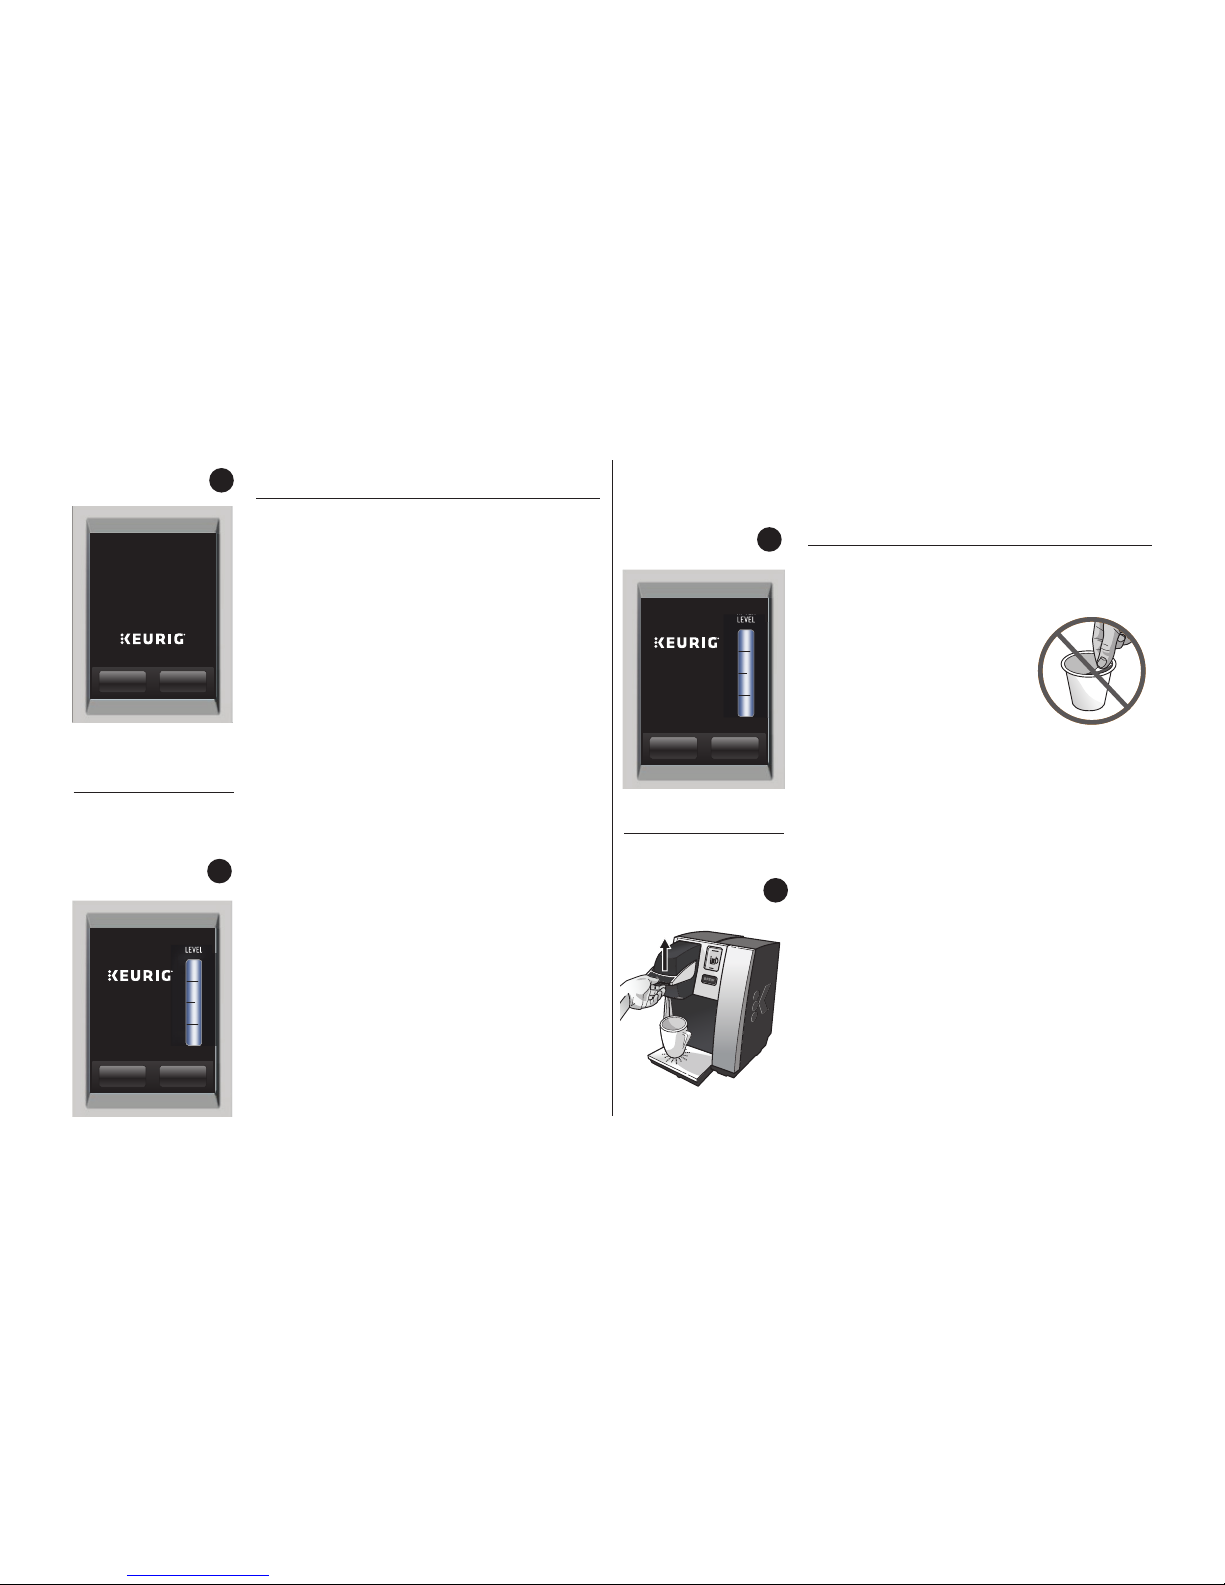
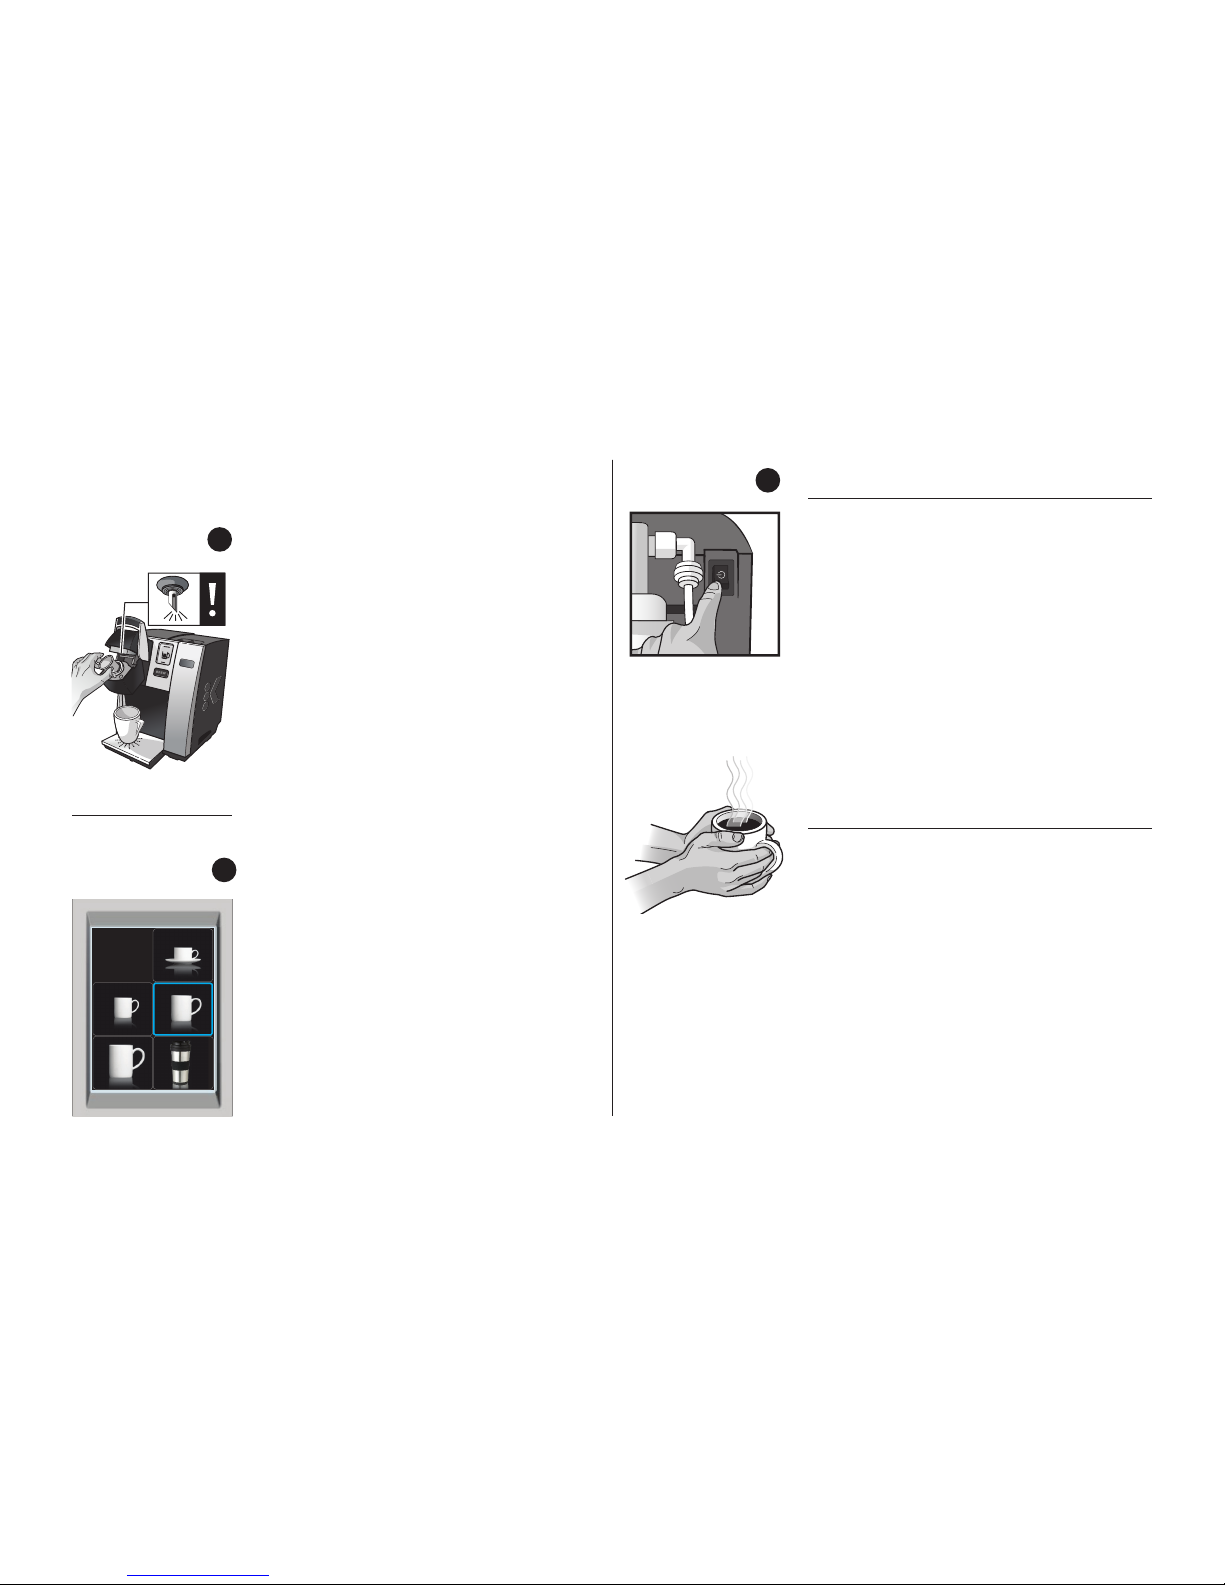
16. Do not lift the handle while
brewing is in progress.
17. Always keep the water reservoir lid on the
water reservoir unless you are refilling it.
18. This appliance is equipped with an earthed
power cord and a 3-pin plug. Never do
anything that might damage the power
cord or plug, such as placing hot or heavy
items on them, bending, stretching or
twisting them.
19. Make sure the plug is correctly inserted
into the power socket. Do not use a
damaged plug or loose power socket.
Never unplug the appliance with wet hands.
20. Do not use the appliance for other than its
intended use.
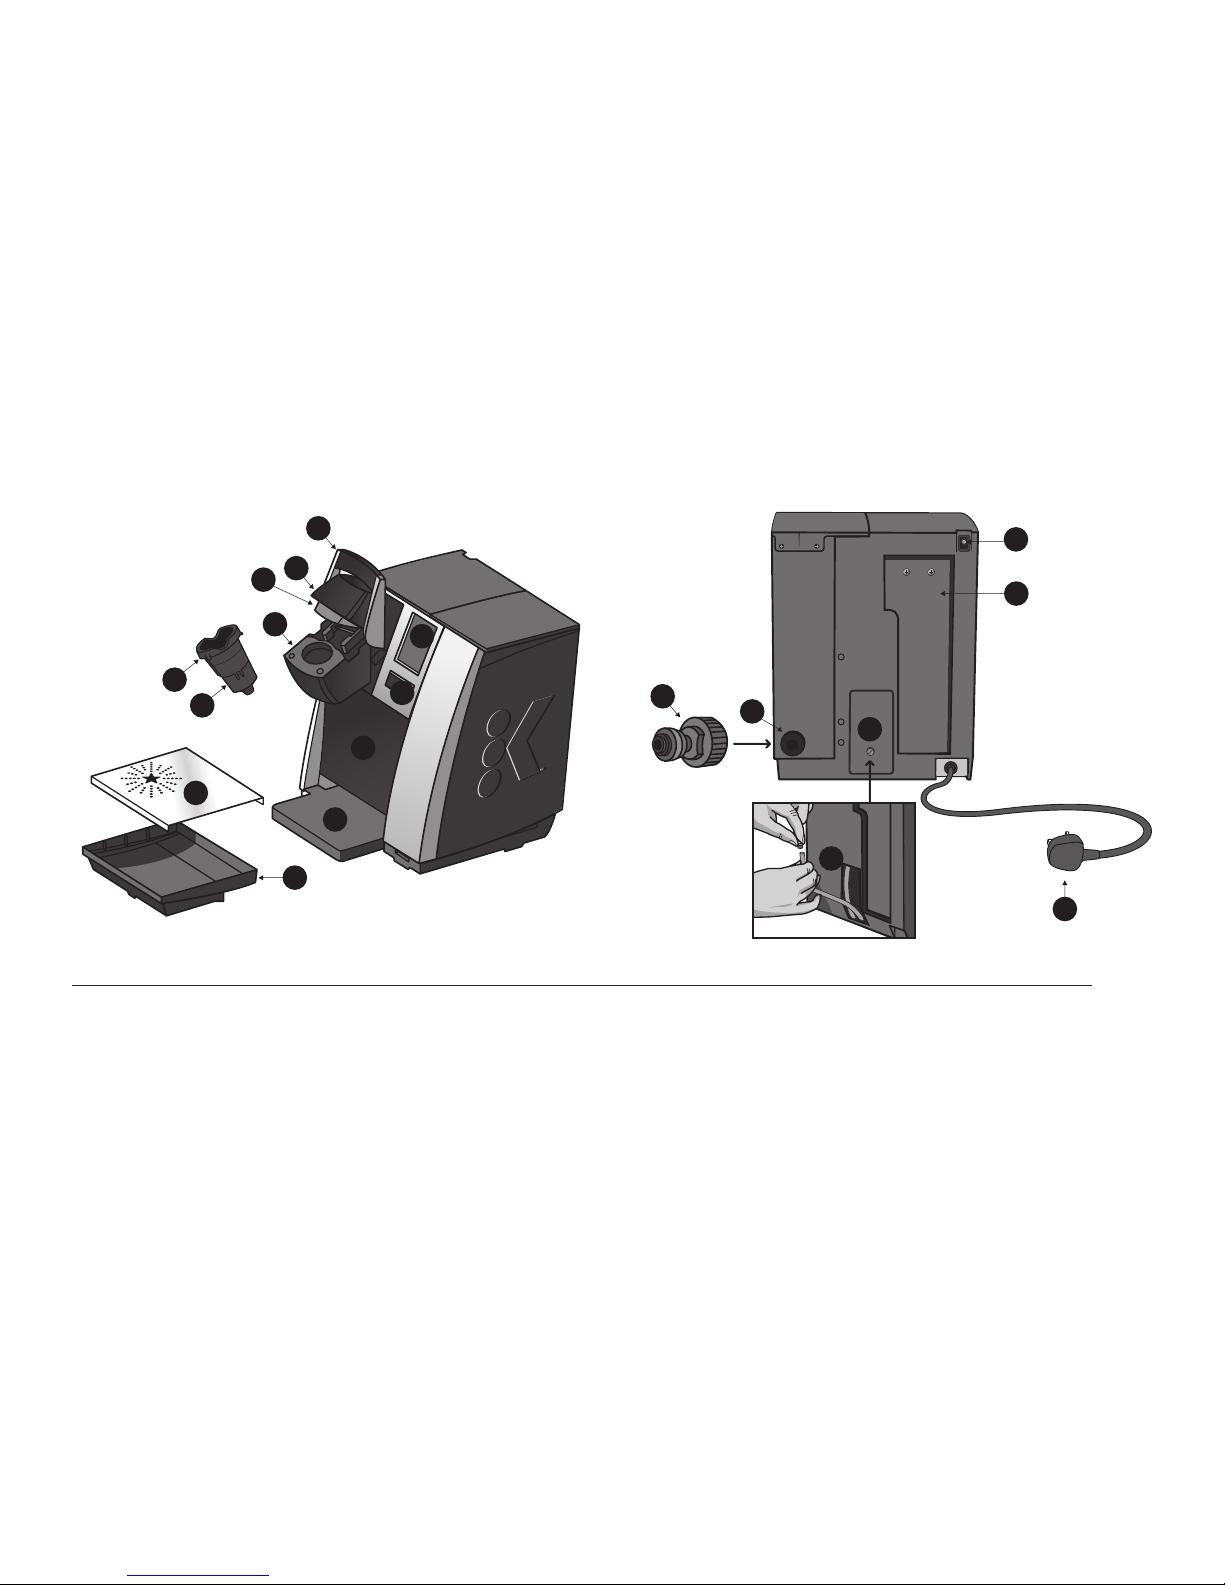
21. Always brew with the removable
puncture plate (item L on page 5)
installed. Failure to do so will result
in a failure to properly brew.
22. The new hose sets supplied with the
appliance are to be used and the old hose
sets should not be reused. All hose sets
must comply with IEC61770.
23. This brewer is designed to handle local
water pressures from 276 kPa to 861 kPa.
Consult a qualified plumber for water
pressures in your area. Use plumbing
fitting and tubing specified to withstand 861
kPa.
24.Installation must comply with the
applicable plumbing and sanitation code
for your area.
25. Only trained personnel should connect the
brewer to water mains.
26. A-weighted sound pressure level is
below 70 dB
WARNING TO USERS AND PARENTS
1. DO NOT permit children to use brewer
unless there is adult supervision. Brewer
dispenses very hot water.
2. SPECIAL NOTICE FOR HOT CHOCOLATE
USERS: IMMEDIATELY AFTER USING A HOT
CHOCOLATE K-CUP® POD, RUN a Hot Water
Brew Cycle without a K-Cup®pod to avoid the
possibility of clogging the exit needle. DO NOT
assume the next user will do this.
SAVE THESE INSTRUCTIONS.

3
Removing the serial number label from the brewer will void warranty.
TABLE OF CONTENTS
KEURIG®SINGLE CUP BREWING SYSTEM
KEURIG® K150C Plumbed — Using Your Plumbed Brewer
BREWER OVERVIEW
Helpful Hints & Unpacking..............................................................4
Features................................................................................................5
SECTION 1 — PLUMBING & SET-UP
Filter and Plumbing Instructions..................................................6
Setting Up Your Brewer ..................................................................7
SECTION 2 — FIRST BREW
Brewing Your First Cup....................................................................7
Stopping the Brew Process............................................................8
Brewing Hot Water...........................................................................8
SECTION 3 — MENU CONTROLS & INDICATORS
Programming Brew Temperature .............................................10
Programming Brew Size ...............................................................10
Programming Auto-Off ................................................................11
Language Settings ..........................................................................11
Contact Screen Settings ...............................................................11
SECTION 4 — CLEANING & MAINTENANCE
Cleaning.............................................................................................. 12
Descaling ............................................................................................ 13
Draining & Storage ......................................................................... 15
SECTION 5 — TROUBLESHOOTING........................................... 16
SECTION 6 — WARRANTY ............................................................. 17
Record your brewer serial number here.
See unpacking instructions on page 4 for serial number location.
CAUTION: There are two sharp needles that puncture the K-Cup®pod,
one above the K-Cup®Pod Holder and the other in the bottom of the
K-Cup®Pod Holder. To avoid risk of injury, do not put your fingers in the
K-Cup®Pod Assembly Housing.
CAUTION: There is extremely hot water in the K-Cup®Pod Holder during
the brewing process. To avoid risk of injury, do not lift the handle or open
the K-Cup®Pod Assembly Housing during the brewing process.
CAUTION: Please always keep the brewer in its upright position to avoid
potential injury and/or damage to your brewer.
This appliance can be used by children aged from 8 years and above if
they have been given supervision or instruction concerning use of the
appliance in a safe way and if they understand the hazards involved.
Cleaning and user maintenance must not be done by children unless they
are older than 8 and supervised. Keep the appliance and its power cord
out of reach of children aged less than 8 years.
Appliances can be used by persons with reduced physical, sensory or
mental capabilities or lack of experience and knowledge if they have been
given supervision or instruction concerning use of the appliance in a safe
way and understand the hazards involved.
Children must not play with the appliance.
WARNING WARNING: TO REDUCE THE RISK OF FIRE OR
ELECTRIC SHOCK, DO NOT REMOVE THE
BOTTOM COVER. NO USER SERVICEABLE
PARTS ARE INSIDE. REPAIR SHOULD BE DONE
BY AUTHORISED SERVICE PERSONNEL ONLY.
RISK OF FIRE OR
ELECTRIC SHOCK
DO NOT OPEN !

5
Brewer Overview
4
Helpful Hints
1. Plug the brewer into a mains socket by itself.
If the electric circuit is overloaded with
other appliances, your brewer may not
function properly.
2. For the best tasting gourmet coffee, tea or
hot chocolate, Keurig recommends the use of
filtered water in the brewer.
Failure to use a filter invalidates the
brewer Warranty.
3. Customise your size, flavour & brew.
With many varieties of K-Cup®pods to
choose from and 5 brew sizes (120 ml, 180
ml, 240 ml, 300 ml and 350 ml) your Keurig®
brewer gives you endless options to
customise the size, flavour and brew that’s
perfect for you. For a strong, intense cup,
select an Extra Bold K-Cup®pod (with up to
30% more ground coffee than regular
varieties) and the brew size that’s right for
you. The smaller the brew size, the more
intense the flavour in your cup. The larger
the brew size, the less intense the flavour
in your cup.
4. Remove K-Cup®pod after use.
Please refer to page 7 for brewing
instructions.
5. Brewing into a travel mug.
To brew into a travel mug, simply remove
the drip tray assembly and place the travel
mug on the drip tray base.
6. Descale the brewer regularly.
Please refer to pages 13 and 14 for
instructions.
Unpacking the Brewer
1. Place the brewer box on a large steady
surface (such as a table or worktop) or on
the floor. Open the box.
2. Turn the box on its side with front of box
face down.
3. Reach into the box and grasp the plastic
bag that contains the brewer.
4. Carefully pull the plastic bag (and
packaging materials) toward you and out
of the box. The brewer will still be encased
in the polyfoam and be on its side.
5. Remove the top polyfoam packaging
material.
6. Carefully lift the brewer off of the bottom
polyfoam and place it upright on a flat,
steady surface.
7. Lift plastic bag off the brewer.
8. Record the serial number for this brewer on
page 3 of this guide. The serial number can
be found on the rating label on the bottom
of the brewer.
9. Place the brewer upright on a flat, steady
surface and remove tape.
We recommend you save all packing
materials in case future shipping of the
product is necessary.
WARNING:
Keep all plastic bags away
from children.

5
A. Handle
B. Lid
C. LCD Screen
D. K-Cup®Pod
Assembly
Housing
HC
N
M
E. Funnel
F. K-Cup®Pod Holder
(E and F are the K-Cup®
Pod Holder Assembly)
G. Drip Tray Plate
H. Drip Tray
I. Drip Tray Base
J. Housing
K. BREW Button
L. Removable Puncture
Plate
M. Power Switch
N. Power cord
O. 3/4 BSP Tap Adapter
(not included)
P. Inlet Plumbing Port
Q. Drain Hatch and Knob
R. Drain Tubes and Plugs
S. Optional Connection
for Water Filtration
System
K
I
R
Q
C
G
F
E
S
H
J
B
D
A
OP
Features K150C Plumbed Brewer
K150C Plumbed Brewer
L

6
SECTION 1 Plumbing & Set-Up
IMPORTANT: You cannot use your Keurig®brewer
until it has been set-up for its first use.
NOTE: If the brewer has been exposed to
temperatures below freezing, allow the brewer
at least two hours to reach room temperature
before brewing. A frozen or extremely cold
brewer will not operate.
WARNING: Keurig®requires the use of an external
water filter. Failure to use a filter invalidates
the brewer Warranty.
fig. 1
fig. 3
fig. 2
Filter and Plumbing Instructions
Your K150C Plumbed brewing system requires
the use of an external water filter. Valid
options include an external filter mounted to
the rear surface of the brewer or an external
filter mounted to a nearby wall.
To mount the filter to your brewer, simply
loosen the two screws, hang the filter and
tighten the two mounting screws (be careful
not to over tighten) (fig. 1).
To mount the filter to a nearby wall, please
follow the filter’s User Instructions.
Once the external filter is mounted to either
the brewer (fig. 2) or wall, connect the filter
to the Inlet Plumbing Port by using a 3/4 BSP
Tap Adapter (fig. 3) and turn on the
water supply.

7
Welcome To The Keurig
150 Brewing System
Designed For
The K-Cup®Pod
Español Français
17:30 PM
Heating...
Please Wait
WATER
LEVEL
L
E
V
E
L
Español Français
17:30 PM
Ready
Choose Your
K-Cup®Pod &
Lift Handle
WATER
LEVEL
W
A
T
E
R
L
E
V
E
L
L
E
V
E
L
Español Français
fig. 4
fig. 5
Setting Up Your Brewer
1. Remove all pieces of packing tape from
the brewer and drip tray. Remove the clear
plastic film from the LCD Screen. Unwrap
the power cord and plug the brewer into
the mains socket. Ensure your brewer is
plumbed in (refer to page 6).
2. Turn the brewer on, the power switch is
located at the top left hand side of the
brewer on the back. The brewer’s LCD
Screen will display the power up welcome
screen (fig. 4).
3. The brewer will automatically fill the
internal water tank with water and then
the water will be heated. This will take
about 4 minutes. During the heating
period, “HEATING PLEASE WAIT” will be
displayed on the LCD Screen (fig. 5).
4. Place a 300 ml mug on the drip tray plate,
then lift and lower the handle. The BREW
button will now be illuminated. Press the
BREW button to start a cleansing brew.
NOTE: A K-Cup®pod should not be used for
this sequence.
5. When the cleansing brew is complete, the
brewer will go into its idle state and will be
ready to brew your first K-Cup®pod.
SECTION 2 First Brew
fig. 7
fig. 6Ready to Brew Your First Cup
1. The LCD Screen will be in its idle state (fig. 6).
2. Lift the handle. The K-Cup®pod holder will
open toward you (fig. 7).
3. Select a K-Cup®pod.
NOTE: Do not remove the
foil lid or puncture the
K-Cup®pod.
4. Place a K-Cup®pod in the K-Cup®pod holder
(fig. 8). CAUTION: There are two sharp
needles that puncture the K-Cup®pod, one
above the K-Cup®pod holder
and the other in the bottom of the K-Cup®
pod holder. To avoid risk of injury, do not put
your fingers in the K-Cup®pod assembly
housing.
5. Lower the handle to close the Lid over the
K-Cup®pod holder. (When it is closed
completely, the BREW button will flash up
to 60 seconds.)
6. Place a mug on the drip tray plate and
select your brew size (fig. 9), then press
BREW. NOTE: If you do not push the BREW
button in 60 seconds, the BREW button will
be disabled to prevent accidental activation.
Re-activate the BREW button by lifting and
lowering the handle completely.

8
120 ml
350 ml
180 ml
300 ml
240 ml
Place Mug,
Select
Brew Size
Stopping the Brewing Process
If you need to stop the brewing after the
process has started, press and release the
power switch (fig. 10) to turn the brewer
‘OFF’. The flow of coffee, tea or hot chocolate
will stop and the heating element and the
LCD Screen will shut off.
NOTE: You may get less coffee, tea or hot
chocolate in your cup during your next brew.
We recommend that you perform a cleansing
brew with water only after a terminated brew.
Then your next brew will be the volume you
have selected.
Brewing Hot Water
Your brewer is able to produce hot water
for use in cooking, making soups, porridge,
etc. Simply lift and lower the handle on the
brewer without adding a K-Cup®pod. The
BREW button will flash. Be sure to have a
mug on the drip tray plate and then press
the BREW button.
fig. 8
fig. 10
fig. 9
7. There may be a short pause before the
brewing process begins. The entire brewing
process lasts for approximately 1 minute
and ends with a burst of air to remove
all liquid from the K-Cup® pod. CAUTION:
There is extremely hot water in the K-Cup®
pod holder during the brewing process. To
avoid risk of injury, do not lift the handle or
open the K-Cup®pod assembly housing during
the brewing process.
8. The end of brewing is indicated by
“KEURIG BREWED ENJOY”.
9. Lift the handle, remove and dispose of the
used K-Cup®pod. CAUTION: K-Cup®pod
will be hot.
10. Enjoy your first cup of Keurig Brewed®
gourmet coffee, tea or hot chocolate!
NOTE: After brewing a hot chocolate K-Cup®
pod, we recommend running a second hot
water brew cycle through the same hot
chocolate pod to clear the exit needle. Once
completed, we recommend running a third hot
water brew cycle without a K-Cup®pod.
11. Your brewer may display “HEATING
PLEASE WAIT” as it heats water for the
next brew cycle.
SECTION 2 First Brew

9
Home
Descale
Brew Temp
Language
Auto OFF
Brew Size(s)
Contact
Menu Controls
To enter the menu mode the brewer should
be plugged in and the power must be off.
Press and hold your finger on the display for
about 5 seconds while pressing and releasing
the power switch (fig. 11). Once the menu
screen appears (fig. 12) remove your finger.
Press any line item to enter the set-up for
that particular feature. Please reference the
menu mode navigation.
If you are experiencing any problems with
your brewer, please contact your Keurig
Authorised Distributor.
SECTION 3 Menu Controls & Indicators
5 seconds
fig.12
fig.11 Menu Mode Navigation
Home
Press “HOME” at any time to return your brewer to an idle state.
Brew Temp
The brew temperature is pre-set at 89˚C. You do not have to
program the brew temperature but you can adjust it up or down
by 1˚ increments (between 86˚ and 92˚celsius). Simply follow the
instructions on page 10.
Brew Size(s)
Five brew sizes are available: 120 ml, 180 ml, 240 ml, 300 ml and
350 ml. To program the brew sizes refer to page 10.
Descale
The brewer should be descaled every 3-6 months to ensure optimal
performance. To descale your brewer, follow the instructions on
pages 13-14.
Auto OFF
Auto OFF allows you to programme your brewer to automatically turn off
14 hours after the last brew. See page 11 for programming instructions.
Language
This brewer is shipped with English as the default language. To change
the language, follow the instructions on page 11.
Contact
The contact setting features allows you to program the contact
information you need for brewer support and help. To program, follow
the instructions on page 11.

10
120 ml
350 ml
180 ml
300 ml
240 ml
OK
Programming Brew
Temperature (86° – 92° C)
The brewer brews at a preset temperature
of 89˚C. You can adjust this temperature
up or down by 1˚ increments (between 86˚
and 92˚celsius). Simply follow the
instructions below.
1. From the Menu Mode, press
“BREW TEMP”.
2. The LCD Screen will now display the
Brew Temperature programming
options (fig. 13). The temperature 89˚C
(initial setting) will be displayed at the
top of the LCD Screen to indicate the
current temperature setting.
3. Press the + symbol to increase the
temperature and the – symbol to lower
the temperature one degree at a time.
4. Once you have reached your desired
brew temperature, press “OK”. The brew
temperature is now programmed. NOTE:
At high altitudes (over 1,525 meters)
if boiling occurs, use the temperature
adjustment (-1°) to lower the temperature.
SECTION 3 Menu Controls & Indicators Programming Your Brew Size
All brew sizes are enabled in the default
setting. If you want to disable any brew size,
just press on the appropriate icon(s). Please
follow instructions outlined below.
1. From the Menu Mode, press “BREW
SIZE(S)”.
2. The LCD Screen will display all enabled
brew sizes. To disable a brew size press
the icon. The tick will change to an “X”
indicating that the brew size is disabled
(fig. 14). To enable a disabled size, press
it again.
3. Once you have selected your desired brew
size(s), press “OK”. The brew size(s) are
now programmed. NOTE: You cannot
delete all brew sizes. To enable a brew size
you have already disabled, just press its icon
and then press “OK”. The 240 ml setting is
the default brew size if all sizes have
been disabled.
fig.14
89°C
+-
Temperature
OK
fig.fig.13

11
fig.16
fig.15 Programming Auto OFF
1. To programme your brewer to turn off 14
hours after the last brew, follow the steps
below.
a. From the Menu Mode, press “AUTO OFF”.
The LCD display will now display the
“AUTO OFF” programming option (fig. 15).
b. To enable the “ AUTO OFF” feature, press
“ON”. “ENABLED” will appear on the screen
and press “OK”. To disable the “AUTO OFF”
feature, press “OFF”. “DISABLED” will
appear on the screen and press “OK”.
Language Settings
The brewer is shipped with English as the
default language. To change the default to
Français or Español, follow the instructions
outlined below.
Set Language
1. From the Menu Mode, press
“LANGUAGE”.
2. The LCD Screen will now display the
Language programming options (fig. 16).
3. Press the desired Language button, then
press “OK” to confirm your selection.
Language
Español
English
Français
OK
Auto OFF
Auto OFF 14 hours
After Last Brew
OK
OFFON
WWW.KEURIG.CO.UK
SET PHONE #
KEURIG UK LIMITED
Contact
OK
ABC DEF
GHI JKL MNO
PQRS TUV WXYZ
Delete . , - Space
OK
Set Company
Contact Screen Settings
The contact screen is pre-programmed with
the following information: Keurig UK
Limited and www.keurig.co.uk.
You can reprogram the brewer with your
contact information. The contact screen will
appear in the screen saver.
1. From the Menu Mode, press “CONTACT”.
The LCD Screen will display the Keurig
default contact information (fig. 17).
2. Press the Upper (Company Name) Box.
The Keypad will appear along with the
current information (fig. 18). NOTE:
Unless changed by the user, Keurig contact
information will be present on the display.
a. Press the Delete Key repeatedly to
remove current information. Enter new
information using the Keypad.
NOTE: To select Upper Case, Lower Case,
Numerals, Upper Case Accents, Lower
Case Accents, press the Keypad Change
Key located at the bottom centre of
the screen.
b. Press “OK” to save your changes and
return to the Main Contact Screen.
NOTE: Pressing the Back Arrow Key will
return to the Main Contact Screen without
saving changes.
fig.17
fig.18

12
21 3
456
789
Delete 0Space
Set Phone #
OK
ABC@ DEF
GHI JKL MNO
PQRS TUV WXYZ
Delete . , - Space
Set Name
OK
3. Press the Middle (Phone Number) Box.
The Numeral Keypad Mode will appear
along with the current information
(fig. 19).
a. Delete current phone number, if any, and
enter new information using the Keypad.
b. Press “OK” to save your changes and
return to the Main Contact Screen.
4. Press the Lower Box. This box can be
customised to contain any information
such as web/email address, contact name,
etc. (fig. 20).
a. Delete or enter new information using
the Keypad.
b. Press “OK” to save your changes and
return to the Main Contact Screen.
c. In the Main Contact Screen (fig. 17), press
“OK” to save the updated screen as the
default and return to the Menu Screen.
The brewer is now fully programmed.
Press “HOME” on the Menu Screen to return
your brewer to its idle state.
SECTION 3 Menu Controls & Indicators
fig.19
fig.20
SECTION 4 Cleaning & Maintenance
Cleaning External Parts
Regular cleaning of the brewer’s external components is recommended.
The following section provides instruction for standard cleaning procedures.
1. Never immerse the brewer in water or other liquids. The housing and
other external components may be cleaned with a damp, soapy,
lint-free, non-abrasive cloth.
2. The drip tray can accumulate up to 350 ml of overflow. The drip tray and
drip tray plate should be periodically inspected and rinsed clean. To
remove the drip tray assembly, simply slide it toward you, keeping it level
at all times to avoid spilling. The drip tray and drip tray plate should not
be placed in the dishwasher. They should be cleaned with a damp, soapy,
lint-free, non-abrasive cloth and rinsed thoroughly.
Cleaning the K-Cup®Pod
Holder Assembly
1. Cleaning the Parts — The K-Cup®pod holder
Assembly can be placed onto the top shelf
of a dishwasher. NOTE: Use low
temperature cycles in the dishwasher. To
remove the K-Cup®pod holder assembly
from the brewer, open the cover by lifting
the handle. Grasp the top of the K-Cup®pod
holder with one hand while pushing up on
the bottom of the K-Cup®pod holder from
underneath with the other until it releases
(fig. 21).
fig.21

13
After cleaning, align the K-Cup®pod holder
with the opening using the two front ribs as
a guide, and snap them into place from
the top.
2. Cleaning the Funnel — The funnel can be
removed from the K-Cup®pod holder by
pulling on it until it pops off (fig. 22). The
funnel is dishwasher safe. To replace it, just
snap it back onto the K-Cup®pod holder.
3. Cleaning the Exit Needle — The exit needle is
located on the inside bottom of the K-Cup®
pod holder assembly. Should a clog arise
due to coffee grinds, it can be cleaned using
a paper clip or similar tool. Remove the
K-Cup®pod holder assembly and detach
the funnel. Insert the paper clip (fig. 22) into
the exit needle to loosen the clog, then
flush with fresh water. The K-Cup®pod
holder assembly can be placed onto the top
shelf of a dishwasher. NOTE: Use low
temperature cycles in the dishwasher.
4. Cleaning the Puncture Plate — The puncture plate can be removed by
grasping the finger grips of either side and pulling forward (fig. 23).
Once removed, spray the puncture plate with detergent, brush clean
and rinse if necessary. Be sure to replace the puncture plate after
cleaning to ensure proper brewer operation.
CAUTION: There are sharp needles that puncture the K-Cup®pod above
the K-Cup®pod holder and in the bottom of the K-Cup®pod holder. To
avoid risk of injury, do not put your fingers in the K-Cup®pod assembly
housing.
!
fig.22
Descaling Your Brewer
Depending on the mineral content of your water, calcium deposits or
scale may build up in your brewer. Scale is non-toxic but if left
unattended can hinder brewer performance. Regularly descaling your
brewer every 3 to 6 months helps maintain the heating element, and
other internal parts that come in contact with water. Calcium deposits
may build up faster, making it necessary to descale more often.
Before you begin, you will need at least 2.5 L of undiluted white vinegar,
or Keurig Descale Solution, fresh water, a large ceramic mug and
access to a sink. Do not use a paper cup.
The following outlines the steps required to prepare the brewer before
the descaling procedure:
1. Unplug the brewer from the power supply.
2. Disconnect or interrupt the external water supply feeding
the brewer.
3. Drain the internal hot and cold water tank (refer to page 15).
4. Remove the two screws located on the back, top, left of the brewer.
Remove the top cover to gain access to the internal cold water tank.
5. Proceed with the descaling procedure on page 14.
fig.23

14
SECTION 4 Cleaning & Maintenance
STEP 2: RINSE
• Discard any residual vinegar from both the hot water tank and
cold water tank.
• Using the two previously removed screws, reattach the top cover back
atop the cold water tank.
• Reconnect the external water supply feeding the brewer.
• Repeat brewing process until you have completed at least 12 brews
using the largest brew size.
• After completion of 12 brews, manually turn the brewer off to exit
DESCALE mode.
For further descale information please contact your Keurig
Authorised Distributor.
Service
Beyond these recommended cleaning and maintenance procedures this
brewer is not user serviceable. For service, please refer to the Warranty
section of this guide.
Descaling Procedure
STEP 1: FILL AND CLEAN
• Pour approximately 1.2 L of the vinegar or Keurig Descale Solution
into the cold water tank. Do not exceed this amount or the cold
water tank will overflow.
• Reconnect the power supply, then select “DESCALE” from the Menu
Mode and allow the solution to get pumped into the hot water tank.
Once completed, add another .75 L of solution to the cold water
tank.
• Place a large mug on the drip tray plate and run a cleansing brew
using the largest brew size. Do not add a K-Cup®pod. Pour the
contents of the mug into the sink after each brew. Replace the mug
on the drip tray plate.
• Add another .5 L of solution to the cold water tank and perform
two additional cleansing brews.
• Let the brewer stand for at least 4 hours while still on leaving the
mug on the drip tray plate to catch any dispersed liquid.

15
120 ml
350 ml
180 ml
300 ml
240 ml
Place Mug,
Select
Brew Size
Purging the Brewer
If your brewer has not been used for
more than one week, you should purge
the water from the internal water tank.
1. Follow Draining the Brewer
instructions below.
2. Once drained, re-connect brewer to
power source and turn on.
3. When the brewer indicates “READY”,
place a large mug on the drip tray
Plate and select Large Mug (300 ml
serving) brew size from the Select
Brew Size Menu (fig. 24).
4. Discard water.
5. Repeat steps 2-4 two more times
to completely purge water from the
internal water tank.
Draining the Brewer
1. Turn off the brewer, unplug it, and allow
the brewer to cool approximately 30
minutes.
2. Disconnect the external water supply
feeding the brewer.
fig.25
3. Turn the brewer round so the back is facing out. Unscrew the small
knob to release the back panel, remove the panel from the brewer,
and set it aside. If the screw is tight, you may need to use a flathead
screw driver.
4. Pull both the tubes downwards until the ends are free. Over a large
jug, or sink, remove the plugs (fig. 25) and drain the water from the
cold and hot water tanks, respectively.
CAUTION: If the brewer was not allowed to cool sufficiently, the water
draining from the tube may be very hot. Recap the tube.
NOTE: To avoid losing parts, when finished, re-insert the tube and screw
the panel back onto the brewer.
If you need assistance with your brewer, please contact your Keurig
Authorised Distributor.
Storage
Drain the internal water tank before storing and ensure that you
store your brewer in a safe and frost free environment. It is
suggested to store your brewer in the upright position. If you store
the brewer in a cold environment, you run the risk of water freezing
inside the brewer and causing damage. When you prepare to use it
after storage, we recommend running three cleansing brews
without a K-Cup®pod. If you plan to move your brewer to a
different location, turn the brewer off, unplug it and empty the
internal water tank. If your brewer has been in an environment
below freezing, please be sure to let it warm to room temperature
for two hours before using.
Drain tube
connected to the
hot water tank.
Drain tube
connected to the
cold water tank.
fig.24

16
If any problems persist, contact your Keurig Authorised Distributor.
SECTION 5 Troubleshooting
SITUATION
Brewer does not
have power
Brewer will
not brew
SOLUTION
•Plug the brewer into an independent socket.
•Check to be sure that it is plugged in securely.
•Make sure that the brewer is powered on and
LCD Screen is illuminated.
•Reset circuit breaker if necessary.
•Plug into a different socket.
•After placing the K-Cup®pod in the K-Cup®pod
holder, make sure the handle is pushed down
securely and the LCD Screen reads “READY TO
BREW” with the BREW Button flashing, then press
the BREW Button.
•The exit needle may be clogged (refer to page 13).
LCD Messages
• If the water flow has been interrupted, LCD Screen
will state “WATER FLOW INTERRUPTED, TO
RESET, PLEASE PRESS BREW BUTTON”. Press
BREW Button to resolve this issue.
• If the messages persist after following these
instructions, contact your Keurig Authorised
Distributor.
SITUATION
Chlorine or mineral
taste in coffee
Brewing a
partial cup
SOLUTION
•Be sure to use filtered water. If you have any
questions, contact your Keurig Authorised
Distributor.
•The exit needle may be clogged (refer to
page 13).
•Clean the K-Cup®pod holder assembly if necessary
and rinse under tap (refer to pages 12-13).
•“Descale” the brewer (refer to pages 13-14).
•If you have repeated the descale procedure on
your brewer twice and it is still only
brewing a partial cup, contact your Keurig
Authorised Distributor.

17
SECTION 6 Warranty
Warranty Information
What is covered by this warranty?
Keurig UK Limited (“Keurig”) warrants that your Keurig®Model
K150C Plumbed brewer (the “brewer”) will be free of defects in
materials or workmanship when used in accordance with this use
and care guide for one year from the date of purchase (the
“warranty period”).
This warranty only applies to Keurig®Model K150C Plumbed brewers
purchased directly from Keurig and operated in the United Kingdom;
if you purchased your K150C Plumbed brewer from a Keurig
Authorised Distributor, you should look to such distributor to resolve
any issues with your brewer, as this warranty does not apply.
What will happen if you file a claim under this warranty?
Keurig will either repair or replace the brewer without charge upon its
receipt of proof of the date of purchase from Keurig and the brewer in
accordance with the terms of this warranty. If Keurig chooses to
replace the original product under this warranty, this warranty applies
to the replacement product only during the remaining warranty period
for the original product after which this warranty will expire and shall
have no effect.
Keurig will reimburse the costs for returns of the brewer where this
warranty applies if shipped with an ATR (as defined below) to the
place designated herein and in accordance with Keurig’s instructions.
What is not covered by the Limited Warranty?
1. This warranty does not extend to, and Keurig is not liable for:
i. any damages of any kind whatsoever which do not directly arise
from defects in materials or workmanship of the brewer. Such
damages include without limitation property damage, any
economic loss, loss of profit or goodwill, costs and expenses
resulting from any breach of this warranty;
ii. damages caused by any act, omission or services performed by
anyone other than Keurig or its authorised service providers, use of
parts other than genuine Keurig®parts, or external causes such as
abuse, misuse, power supply or acts of God; or
iii. any express warranty, written or oral, other than the terms set out
in this warranty.
2. Paragraph 1 does not affect, whether during or outside the
warranty period:
a. Keurig’s liability in respect of:
i. death or personal injury caused by Keurig’s negligence;
ii. any representation by Keurig which amounts to a fraud;
iii. loss or damage which arises from the brewer proving defective
while in consumer use and results from the negligence of a person
concerned in the manufacture or distribution of the brewer;
b. Keurig’s liability in respect of:
i. Keurig not having the right to sell the brewer, the brewer not being
free from any charge or encumbrance and your possession of the
brewer as a purchaser being disturbed by third parties who claim
their rights over the brewer;
ii. the brewer not corresponding with the description; or
iii. the brewer not meeting the standard that a reasonable person
would regard as satisfactory, taking account of any description of
the goods, the price and all other relevant circumstances.

18
How do you obtain warranty service?
Keurig® brewers are high quality appliances and, with proper care, are
intended to provide years of satisfying performance. However, should
the need arise for warranty servicing during the warranty period,
simply call your Keurig Authorised Distributor. Please do not return your
brewer to the address below for servicing without first speaking to
Keurig Customer Service to obtain an Authorisation to Return number
(“ATR”). Brewers returned without an ATR will be returned to the
sender without servicing.
Keurig UK Limited, One Kingdom Street, Paddington Central, London,
W2 6BD, United Kingdom.
This warranty and any non-contractual obligations arising from or in
connection with it shall be governed by English law and this warranty
shall be construed in accordance with English law.
In relation to any legal action or proceedings arising out of or in
connection with this warranty (whether arising out of or in connection
with contractual or non-contractual obligations)(“Proceedings”), each
of you and Keurig irrevocably submits to the exclusive jurisdiction of
the English courts and waives any objection to Proceedings in such
courts on the grounds of venue or on the grounds that Proceedings
have been brought in an inappropriate forum.

19

To learn more about Keurig, visit www.Keurig.co.uk l www.Keurig.ie or contact your Keurig Authorised Distributor
© 2016, Keurig Green Mountain, Inc.
All rights reserved
P/N DC0000000614 Rev A
04/16
Keurig UK Limited
One Kingdom Street, Paddington Central,
London, W2 6BD, United Kingdom Pat. www.GMCR.com/patents
Table of contents
Other Keurig Dispenser manuals
Popular Dispenser manuals by other brands

Electrolux
Electrolux EIW63810X user manual

arteriocyte
arteriocyte magellan Instructions for use

Hewi
Hewi 950.06.103XA Installation and operating instructions

Franke
Franke STRX616 Installation and operating instructions

Amano
Amano AGP-2000 Series Installation & operation manual

Franke
Franke SD5200 installation guide