Keysight x series User manual

Getting Started
Guide
Keysight X-Series
EMI Receiver
This manual provides documentation for the following X-Series
instrument running the Microsoft Windows 10 operating system:
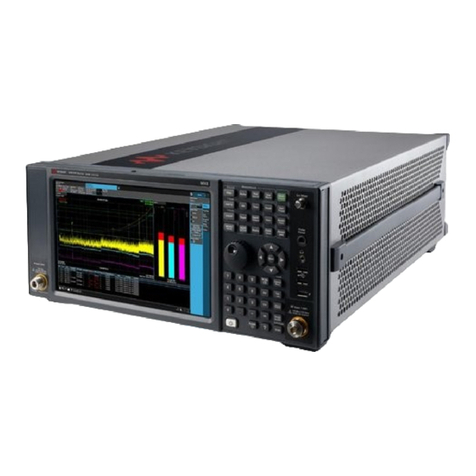
PXE EMI Receiver N9048B

Notices
© Keysight Technologies, Inc.
2018 - 2022
No part of this manual may be
reproduced in any form or by any
means (including electronic storage
and retrieval or translation into a
foreign language) without prior
agreement and written consent from
Keysight Technologies, Inc. as
governed by United States and
international copyright laws.
Trademark Acknowledgments
Manual Part Number
N9048-90007
Publication Date
Edition 1: May 2022
Supersedes: November 2021
Published in USA
Keysight Technologies Inc.
1400 Fountaingrove Parkway
Santa Rosa, CA 95403
Warranty
THE MATERIAL CONTAINED IN THIS
DOCUMENT IS PROVIDED “AS IS,”
AND IS SUBJECT TO BEING
CHANGED, WITHOUT NOTICE, IN
FUTURE EDITIONS. FURTHER, TO
THE MAXIMUM EXTENT PERMITTED
BY APPLICABLE LAW, KEYSIGHT
DISCLAIMS ALL WARRANTIES,
EITHER EXPRESS OR IMPLIED WITH
REGARD TO THIS MANUAL AND
ANY INFORMATION CONTAINED
HEREIN, INCLUDING BUT NOT
LIMITED TO THE IMPLIED
WARRANTIES OF
MERCHANTABILITY AND FITNESS
FOR A PARTICULAR PURPOSE.
KEYSIGHT SHALL NOT BE LIABLE
FOR ERRORS OR FOR INCIDENTAL
OR CONSEQUENTIAL DAMAGES IN
CONNECTION WITH THE
FURNISHING, USE, OR
PERFORMANCE OF THIS
DOCUMENT OR ANY INFORMATION
CONTAINED HEREIN. SHOULD
KEYSIGHT AND THE USER HAVE A
SEPARATE WRITTEN AGREEMENT
WITH WARRANTY TERMS
COVERING THE MATERIAL IN THIS
DOCUMENT THAT CONFLICT WITH
THESE TERMS, THE WARRANTY
TERMS IN THE SEPARATE
AGREEMENT WILL CONTROL.
Technology Licenses
The hardware and/or software
described in this document are
furnished under a license and may be
used or copied only in accordance
with the terms of such license.
U.S. Government Rights
The Software is “commercial
computer software,” as defined
by Federal Acquisition Regulation
(“FAR”) 2.101. Pursuant to FAR
12.212 and 27.405-3 and
Department of Defense FAR
Supplement (“DFARS”) 227.7202,
the U.S. government acquires
commercial computer software
under the same terms by which
the software is customarily
provided to the public.
Accordingly, Keysight provides
the Software to U.S. government
customers under its standard
commercial license, which is
embodied in its End User License
Agreement (EULA), a copy of
which can be found at
http://www.keysight.com/find/sweula
The license set forth in the EULA
represents the exclusive authority
by which the U.S. government
may use, modify, distribute, or
disclose the Software. The EULA
and the license set forth therein,
does not require or permit,
among other things, that
Keysight: (1) Furnish technical
information related to
commercial computer software
or commercial computer
software documentation that is
not customarily provided to the
public; or (2) Relinquish to, or
otherwise provide, the
government rights in excess of
these rights customarily provided
to the public to use, modify,
reproduce, release, perform,
display, or disclose commercial
computer software or
commercial computer software
documentation. No additional
government requirements
beyond those set forth in the
EULA shall apply, except to the
extent that those terms, rights, or
licenses are explicitly required
from all providers of commercial
computer software pursuant to
the FAR and the DFARS and are
set forth specifically in writing
elsewhere in the EULA. Keysight
shall be under no obligation to
update, revise or otherwise
modify the Software. With
respect to any technical data as
defined by FAR 2.101, pursuant
to FAR 12.211 and 27.404.2 and
DFARS 227.7102, the U.S.
government acquires no greater
than Limited Rights as defined in
FAR 27.401 or DFAR 227.7103-5
(c), as applicable in any technical
data.
Safety Notices
A CAUTION notice denotes a
hazard. It calls attention to an
operating procedure, practice, or
the like that, if not correctly
performed or adhered to, could
result in damage to the product
or loss of important data. Do not
proceed beyond a CAUTION
notice until the indicated
conditions are fully understood
and met.
A WARNING notice denotes a
hazard. It calls attention to an
operating procedure, practice, or
the like that, if not correctly
performed or adhered to, could
result in personal injury or death.
Do not proceed beyond a
WARNING notice until the
indicated conditions are fully
understood and met.
3
Where to Find the Latest Information
Documentation is updated periodically. For the latest information about these products, including instrument
software upgrades, application information, and product information, browse to one of the following URLs,
according to the name of your product:
https://www.keysight.com/find/pxe
To receive the latest updates by email, subscribe to Keysight Email Updates at the following URL:
http://www.keysight.com/find/MyKeysight
Information on preventing instrument damage can be found at:
http://keysight.com/find/PreventingInstrumentRepair
Is your product software up-to-date?
Periodically, Keysight releases software updates to fix known defects and incorporate product enhancements.
To search for software updates for your product, go to the Keysight Technical Support website at:
http://www.keysight.com/find/techsupport

4

Contents
5
Contents
1 Quick Start
Initial Inspection 10
Verify the Contents 10
Shipping Problems? 10
Instrument Location and Rack Mounting Requirements 11
Locating the instrument 11
Cooling and rack mounting 11
Turning on the EMI Receiver the First Time 12
Initializing the instrument 12
Anti-Virus Software and Firewalls 16
Instrument Information 17
Power requirements 17
Protecting Against Overpowering 18
Instrument Maintenance 18
Protecting against electrostatic discharge 20
2 Front and Rear Panel Features
Front-Panel Features 22
Display Features 24
Invalid Data Indicator 24
Screen Tabs 25
Meas Bar 26
Measurement Display 27
Menu Panel 28
Bottom Bar 30
Rear-Panel Features 31
Instrument Markings 33

6
Contents
3 Using the EMC32 Software
How to Set Up and Run the EMC32 Software 38
Configuring the PXE 38
4 Instrument Operating System
Microsoft Windows 40
Installed Software 40
Signal analyzer software 40
User installation of software 41
3rd Party Software verified by Keysight 41
Installation of other 3rd Party Software 41
User Accounts 42
Administrator account 42
Instrument accounts 42
Keysight-Only user account 42
Service user accounts 42
User creation of accounts 42
Keysight X-Series EMI Receiver Licensing Options 44
Fixed Licenses 44
Transportable Licenses 44
Network Licenses 45
USB Portable Licenses 45
Configuring Network and USB Licenses 46
Licensing New Measurement Application Software -
After Initial Purchase 47
Installation procedure over USB for Fixed licenses 47
Windows Configuration 49
Settings that can be changed 49
Settings that must not be changed 50
Autoplay/Autorun 51
Configuring Printers 52
Configuring LAN 53

Contents
7
Hostname 53
IP Address & Gateway 53
Connecting to a Network Shared Folder 53
Windows Security 55
Windows Firewall 55
Automatic Updates 55
Spyware Protection 55
System Maintenance 56
Backup 56
System Restore 56
Disk Defragmenting 56
USB Connections 57
Disk Drive Partitioning and Use 58
Backing-up the factory calibration data 58
Disk Drive Recovery Process 60
Updating the software (required after a recovery) 62
5 Using Windows Tools
Remote Desktop: Using the X-Series EMI Receiver Remotely 66
Overview of Remote Desktop operation 66
Setting up Remote Desktop operation 67
How to locate the computer name of the instrument 68
Running a Remote Desktop session 69
Embedded Web Server: Using the X-Series EMI Receiver Remotely 75
Browsers that support the X-Series EMI Receiver Embedded Web Server (these
versions or later) 75
Accessing the instrument through the Internet 75
Controlling the Instrument 77
Enabling SCPI Control of the instrument 78
Selecting the Get Image tab 78
Selecting the Transfer Data tab 79
Selecting the Save/Recall tab 79

8
Contents
Selecting the Docs/Links tab 80
Windows Shortcuts and Miscellaneous Tasks 81
Windows shortcuts (key combinations) 81
Windows taskbar auto-hide feature 82
6 Troubleshooting
Check the Basics 84
Problems with Microsoft Windows 10 86
Returning an EMI Receiver for Service 87
Calling Keysight Technologies 87
Locations for Keysight Technologies 88
Read the Warranty 88
Service Options 89
Packaging the Instrument 90

9
Keysight X-Series EMI Receiver
PXE EMI Receiver N9048B
Getting Started Guide
1 Quick Start
This section explains how to initialize the EMI receiver and view a signal.
The following topics can be found in this section:
“Initial Inspection” on page 10
“Instrument Location and Rack Mounting Requirements” on page 11
“Turning on the EMI Receiver the First Time” on page 12
“Anti-Virus Software and Firewalls” on page 16
“Instrument Information” on page 17

10 X-Series EMI Receiver Getting Started Guide
Quick Start
Initial Inspection
Initial Inspection
Inspect the shipping container and the cushioning material for signs of stress.
Retain the shipping materials for future use, as you may wish to ship the
instrument to another location or to Keysight Technologies for service.
Verify the Contents
Verify the shipping container contents using the box contents list.
Shipping Problems?
If the shipping materials are damaged or the contents of the container are
incomplete:
— Contact the nearest Keysight Technologies office.
— Keep the shipping materials for the carrier’s inspection.
— If you must return the EMI Receiver to Keysight Technologies, use the
original (or comparable) shipping materials. See “Returning an EMI
Receiver for Service” on page 87.

X-Series EMI Receiver Getting Started Guide 11
Quick Start
Instrument Location and Rack Mounting Requirements
Locating the instrument
Make sure that the fan inlet and exhaust vent areas on the sides of the
instrument are not obstructed. The minimal required clearance is 2 inches.
Airflow restrictions cause additional airflow noise and cause the fans to speed
up so they can draw in enough air for the required cooling. This results in
excessive audible noise.
Cooling and rack mounting
Do not rack mount the receiver side-by-side with any other instrument with
side-by-side ventilation. Make sure the exhaust air from the first instrument is
directed away from the inlet of the second unit. If the pre-heated air from the
first instrument is directed into the second instrument, it can cause excessive
operating temperatures in the second unit and can cause instrument failures.
The instrument draws air in from the left side and exhausts air from the right
side.
Safety of any system incorporating the equipment is the responsibility of
the assembler of the system.
When installing the product in a cabinet, the convection into and out of
the product must not be restricted. The ambient temperature (outside the
cabinet) must be less than the maximum operating temperature of the
product by 4° C for every 100 watts dissipated in the cabinet. If the total
power dissipated in the cabinet is greater than 800 watts, then forced
convection must be used.

12 X-Series EMI Receiver Getting Started Guide
Quick Start
Turning on the EMI Receiver the First Time
Initial power-on of the instrument can be accomplished using the following
methods:
Initializing the instrument
Steps Actions Notes
1. Power on the
instrument
a. Position the instrument
so you have easy access
to the power cord and
plug it in.
b. Press the power switch
(located in the lower left
corner of the
instrument’s front panel)
to turn the instrument
on.
See “Instrument Location and Rack
Mounting Requirements and “Power
requirements” on page 17 for more details.
The instrument can require more than 5 minutes to
power-on.
The Keysight Technologies screen appears followed by a
screen that allows you to select Windows10 or the
Recovery option.
2. Viewing the End-User
License Agreement
After a brief startup, the following window appears giving you information about the
End-User License Agreement.
At this time, it is safe to turn off the instrument before initializing the software.
3. Reboot and log on — Click OK When the instrument restarts, the following message
window appears:

X-Series EMI Receiver Getting Started Guide 13
Quick Start
Turning on the EMI Receiver the First Time
This window
appears and covers
the Launch window.
If you do not check the “Do not show this message again” check box, this message will be displayed
each time the instrument is turned on. No application will start while this message is displayed.
Before continuing, make sure that you carefully read the Anti-Virus message and determine what
action is appropriate.
4. Disable the Anti-Virus
message
— Select the check box and
click Continue.
Messages similar to the following continue to appear:
Several required processes continue.
The application initializes.
5. When the installation
is complete, you
should see a display
like this:
6. Set user interface
language
a. On the instrument, press
System, User
Interface tab.
b. Choose the desired
language from the
Language drop-down
menu.
Steps Actions Notes

14 X-Series EMI Receiver Getting Started Guide
Quick Start
Turning on the EMI Receiver the First Time
7. Verify the installation a. On the instrument, press
System, Show
System.
b. Verify that the
purchased
application(s) appear in
the list or have an
entitlement certificate.
If you require further assistance, contact the Keysight
support team.
Online assistance: http://www.keysight.com/find/assist
8. View a signal a. Press the plus
tab.
b. Select
Spectrum Analyzer,
OK.
c. Press Input/Output,
RF Calibrator, 50
MHz.
d. Press FREQ, Center
Freq, 50, MHz.
e. Press SPAN, 50, MHz.
This routes the internal 50 MHz signal to the
instrument’s input.
Steps Actions Notes

X-Series EMI Receiver Getting Started Guide 15
Quick Start
Turning on the EMI Receiver the First Time
The 50 MHz reference signal appears on the display as shown below..
Steps Actions Notes

16 X-Series EMI Receiver Getting Started Guide
Quick Start
Anti-Virus Software and Firewalls
No third-party anti-virus software is shipped with the instrument. It is
recommended that you install anti-virus software if your instrument is
connected to the LAN. Check with your IT department to see what they
recommend.
Do not modify the default network settings as this may cause problems with
the operating system of the instrument.
The instrument is shipped with the Windows 10 firewall enabled and Windows
Defender.
To adjust Windows Defender settings you must be logged in as an
"administrator" (default password:"Keysight4u!"). Minimize the X-Series
Application, click the Start button and type: defender. Then click on Windows
Defender from the Best match column.
Having antivirus software installed may have a slight impact on the
instrument performance.

X-Series EMI Receiver Getting Started Guide 17
Quick Start
Instrument Information
Power requirements
The only physical installation of your Keysight receiver is a connection to a
power source. Line voltage does not need to be selected.
This instrument does not contain user serviceable fuses.
AC power cord
The receiver is equipped with a three-wire power cord, in accordance with
international safety standards. This cable grounds the instrument cabinet when
connected to an appropriate power line outlet. The cable appropriate to the
original shipping location is included with the instrument.
The instruments can operate with mains supply voltage fluctuations up to
±10% of the nominal voltage.
This is a Safety Class 1 Product (provided with a protective
earthing ground incorporated in the power cord). The mains plug
shall only be inserted in a socket outlet provided with a protective
earth contact. Any interruption of the protective conductor inside
or outside of the product is likely to make the product dangerous.
Intentional interruption is prohibited.
Failure to ground the instrument properly can result in personal
injury. Before turning on the instrument, you must connect its
protective earth terminals to the protective conductor of the main
power cable. Insert the main power cable plug into a socket outlet
that has a protective earth contact only. DO NOT defeat the
earth-grounding protection by using an extension cable, power
cable, or autotransformer without a protective ground conductor.
This product is designed for use in Installation Category II and Pollution
Degree 2 per IEC 61010 Second Edition and IEC 664 respectively.
This instrument has autoranging line voltage input. Be sure the supply
voltage is within the specified range.
The Mains wiring and connectors shall be compatible with the connector
used in the premise electrical system. Failure, to ensure adequate earth
grounding by not using the correct components may cause product
damage, and serious injury.
Always use the three-prong AC power cord supplied with this product.
Failure to ensure adequate earth grounding by not using this cord can
cause product damage.

18 X-Series EMI Receiver Getting Started Guide
Quick Start
Instrument Information
Protecting Against Overpowering
The input circuitry of the instrument can be damaged by applying signals that
exceed the maximum safe input level of +30 dBm average total power or +/-
0.2 Vdc (when DC coupled) or +/- 70 Vdc (when AC coupled). Refer to the
instrument's specification guide for more details regarding the Maximum Safe
Input Level. Repairing damage to the input circuitry can be expensive.
If the instrument will be used to measure signals which might be near the
maximum safe input level, use external attenuators and/or limiters to help
protect the instrument input. The External Gain, amplitude Corrections, and/or
Ref Lvl Offset features may be used to compensate for the gains and losses of
external devices. External Gain and Corrections are under the Input/Output
menu and Ref Lvl Offset is under the AMPTD Y-Scale menu.
Instrument Maintenance
Cleaning the instrument
If this product is not used as specified, the protection provided by
the equipment could be impaired. This product must be used in a
normal condition (in which all means for protection are intact)
only.
Install the instrument so that the detachable power cord is readily
identifiable and easily reached by the operator. The detachable
power cord is the instrument disconnecting device. It disconnects
the mains circuits from the mains supply before other parts of the
instrument. The front panel switch is only a standby switch and is
not a LINE switch. Alternatively, an externally installed switch or
circuit breaker (which is readily identifiable and is easily reached
by the operator) may be used as a disconnecting device.
To prevent electrical shock, disconnect the receiver from mains
before cleaning. Use a dry cloth or one slightly dampened with
water to clean the external case parts. Do not attempt to clean
internally.

X-Series EMI Receiver Getting Started Guide 19
Quick Start
Instrument Information
Cleaning Connectors
Cleaning connectors with alcohol shall only be done with the instrument power
cord removed, and in a well-ventilated area. Allow all residual alcohol moisture
to evaporate, and the fumes to dissipate prior to energizing the instrument.
Battery Information
The instrument uses a lithium battery located on the CPU board. This is not an
operator replaceable part. See “Returning an EMI Receiver for Service” on
page 87. Replaceable parts must be approved or supplied by Keysight
Technologies.
You can order the service documentation for the instrument through your
Keysight Sales and Service office.
Keep isopropyl alcohol away from heat, sparks, and flame. Store in
a tightly closed container. It is extremely flammable. In case of fire,
use alcohol foam, dry chemical, or carbon dioxide; water may be
ineffective.
Use isopropyl alcohol with adequate ventilation and avoid contact
with eyes, skin, and clothing. It causes skin irritation, may cause eye
damage, and is harmful if swallowed or inhaled. It may be harmful if
absorbed through the skin. Wash thoroughly after handling.
In case of spill, soak up with sand or earth. Flush spill area with
water.
Dispose of isopropyl alcohol in accordance with all applicable
federal, state, and local environmental regulations.
Danger of explosion if battery is incorrectly replaced. Replace only
with the same or equivalent type recommended. Discard used
batteries according to the manufacturer’s instructions.
Do not throw batteries away but collect as small chemical waste.

20 X-Series EMI Receiver Getting Started Guide
Quick Start
Instrument Information
Protecting against electrostatic discharge
Electrostatic discharge (ESD) can damage or destroy electronic components
(the possibility of unseen damage caused by ESD is present whenever
components are transported, stored, or used).
Test equipment and ESD
To help reduce ESD damage that can occur while using test equipment:
— Before connecting any coaxial cable to an instrument connector for the first
time each day, momentarily short the center and outer conductors of the
cable together.
— Personnel should be grounded with a 1 MΩresistor-isolated wrist-strap
before touching the center pin of any connector and before removing any
assembly from the instrument.
— Be sure that all instruments are properly earth-grounded to prevent
build-up of static charge.
— Perform work on all components or assemblies at a static-safe workstation.
— Keep static-generating materials at least one meter away from all
components.
— Store or transport components in static-shielding containers.
— Always handle printed circuit board assemblies by the edges. This reduces
the possibility of ESD damage to components and prevent contamination of
exposed plating.
Additional information about ESD
For more information about ESD and how to prevent ESD damage, contact the
Electrostatic Discharge Association (http://www.esda.org). The ESD standards
developed by this agency are sanctioned by the American National Standards
Institute (ANSI).
South Korean Class B EMC declaration:
This equipment is Class B suitable for home electromagnetic environments and
is suitable for use in all areas.
Do not use these first three techniques when working on circuitry
with a voltage potential greater than 500 volts.
Other manuals for x series
15
This manual suits for next models
1
Table of contents
Other Keysight Receiver manuals

Keysight
Keysight N9038A Installation and operation manual

Keysight
Keysight x series User manual

Keysight
Keysight N9038A-503 User manual

Keysight
Keysight N5991 User manual

Keysight
Keysight N9038B Quick start guide

Keysight
Keysight N9038A Installation and operation manual

Keysight
Keysight N9038A Installation and operation manual

Keysight
Keysight N9048B PXE Installation and operation manual

Keysight
Keysight N9038A User manual