manuals.online logo
Brands
  1. Home
  2. •
  3. Brands
  4. •
  5. Kicker
  6. •
  7. Speakers
  8. •
  9. Kicker BT Cans User manual

Kicker BT Cans User manual

IMPORTANT SAFETY WARNING! PROLONGED CONTINUOUS OPERATION OF AN AMPLIFIER, SPEAKER, OR SUBWOOFER IN A DISTORTED, CLIPPED, OR OVER-POWERED MANNER CAN
CAUSE YOUR AUDIO SYSTEM TO OVERHEAT, POSSIBLY CATCHING FIRE AND RESULTING IN SERIOUS DAMAGE TO YOUR COMPONENTS AND/OR VEHICLE. AMPLIFIERS REQUIRE UP TO 4
INCHES (10CM) OPEN VENTILATION. SUBWOOFERS SHOULD BE MOUNTED WITH AT LEAST 1 INCH (2.5CM) CLEARANCE BETWEEN THE FRONT OF THE SPEAKER AND ANY SURFACE. KICKER
PRODUCTS ARE CAPABLE OF PRODUCING SOUND LEVELS THAT CAN PERMANENTLY DAMAGE YOUR HEARING! PLEASE USE COMMON SENSE WHEN CONTROLLING VOLUME.
ADVERTENCIA IMPORTANTE DE SEGURIDAD: LA OPERACIÓN PROLONGADA Y CONTINUA DE UN AMPLIFICADOR DE MANERA DISTORSIONADA O CORTADA PUEDE PROVOCAR QUE SU
SISTEMA DE AUDIO SE SOBRECALIENTE CON LA POSIBILIDAD DE INCENDIARSE Y PROVOCAR DAÑOS GRAVES A SUS COMPONENTES O VEHÍCULO. LOS AMPLIFICADORES REQUIEREN UNA
VENTILACIÓN ABIERTA DE HASTA 4 PULGADAS (10 CM). LOS SUBWOOFERS DEBEN MONTARSE CON UN ESPACIO DE AL MENOS 1 PULGADA (2,5 CM) ENTRE LA PARTE FRONTAL DEL
ALTAVOZ Y CUALQUIER SUPERFICIE. LOS EXCITADORES KICKER SON CAPACES DE PRODUCIR NIVELES DE SONIDO QUE PUEDEN DAÑAR PERMANENTEMENTE EL OÍDO. SEA PRECAVIDO
CUANDO CONTROLE EL VOLUMEN.
AVERTISSEMENT DE SÉCURITÉ IMPORTANT: UN FONCTIONNEMENT CONTINU ET PROLONGÉ D’UN AMPLIFICATEUR EN DISTORSION OU EN SATURATION PEUT PROVOQUER LA
SURCHAUFFE DE VOTRE SYSTÈME AUDIO, UN POTENTIEL DÉPART D’INCENDIE ET SÉRIEUSEMENT ENDOMMAGER VOS COMPOSANTS ET/OU VOTRE VÉHICULE. LES AMPLIFICATEURS
NÉCESSITENT UNE VENTILATION OUVERTE JUSQU'À 4 POUCES (10 CM). LES SUBWOOFERS DOIVENT ÊTRE MONTÉS AVEC UN ESPACE D'AU MOINS 1 POUCE (2,5 CM) ENTRE L'AVANT DE
L'ENCEINTE ET TOUTE SURFACE. KICKER-TREIBER KÖNNEN EINEN SCHALLPEGEL ERZEUGEN, DER ZU PERMANENTEN GEHÖRSCHÄDEN FÜHREN KANN! SEIEN SIE BEI DER LAUTSTÄRKEE-
INSTELLUNG BITTE VERNÜNFTIG.
WICHTIGE SICHERHEITSWARNUNG: DER ANHALTENDE, FORTLAUFENDE BETRIEB EINES VERSTÄRKERS IN ÜBERSTEUERTER ODER ABGEHACKTER WEISE KANN DAZU FÜHREN, DASS SICH
DAS AUDIO-SYSTEM ÜBERHITZT UND IN BRAND GERÄT, WAS ZU EINER SCHWEREN BESCHÄDIGUNG DER KOMPONENTEN UND/ODER DES FAHRZEUGS FÜHREN KANN. VERSTÄRKER
BENÖTIGEN EINE OFFENE BELÜFTUNG VON BIS ZU 10 CM. SUBWOOFER SOLLTEN MIT EINEM ABSTAND VON MINDESTENS 2,5 CM ZWISCHEN DER VORDERSEITE DES LAUTSPRECHERS
UND JEDER OBERFLÄCHE MONTIERT WERDEN. LES HAUT-PARLEURS KICKER ONT LA CAPACITÉ DE PRODUIRE DES NIVEAUX SONORES POUVANT ENDOMMAGER L’OUÏE DE FAÇON
IRRÉVERSIBLE ! RÉGLEZ LE VOLUME EN FAISANT PREVUE DE BON SENS.
KICKER®BT Cans
Info Card | Tarjeta de Información | Carte Info | Infokarte
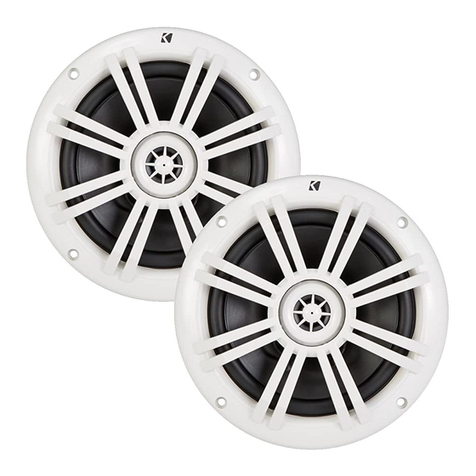
Thank you and congratulations on your purchase of the KICKER BT Cans
Speaker System! The BT Cans are the next generation in mobile audio
systems, combining the innovations of new transfer protocols with KICKER’s
finest speaker and amp performance. This audio system has everything you
need ready to roll right out of the box. Bluetooth and AUX Input, integrated
amplifier, RGB lighting, line output, and a remote control built to mount in a
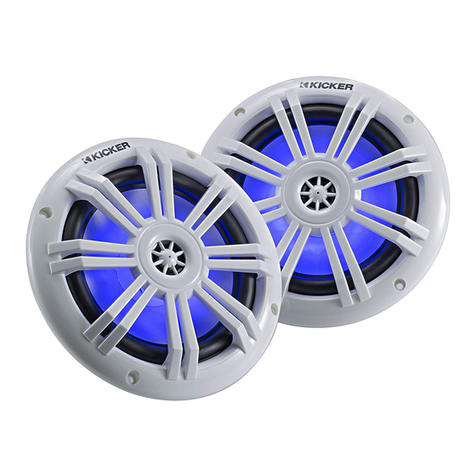
standard marine panel. And at its heart, the high-powered amp and 6.5”
speakers pack a punch with KICKER signature quality audio.
Sincerely
Steve Irby
President/CEO
¡Gracias y felicitaciones por su compra del sistema de altavoces KICKER BT Cans!
Los BT Cans son la próxima generación en sistemas de audio móviles, que
combinan las innovaciones de los nuevos protocolos de transferencia con el mejor
rendimiento de altavoces y amplificadores de KICKER. Este sistema de audio tiene
todo lo que necesita listo para rodar nada más sacarlo de la caja. Entrada Bluetooth y
AUX, amplificador integrado, iluminación RGB, salida de línea, y un control remoto
integrado para montar en un panel marino estándar. Y en su corazón, el amplificador
de alta potencia y los parlantes de 6.5 "tienen un gran impacto con el audio de
calidad característico de KICKER
Atentamente,
Steve Irby
Presidente/CEO
Merci et félicitations pour votre achat du système de haut-parleurs KICKER BT
Cans ! Les BT Cans sont la prochaine génération de systèmes audio mobiles,
combinant les innovations des nouveaux protocoles de transfert avec les
meilleures performances de haut-parleur et d'ampli de KICKER. Ce système
audio a tout ce dont vous avez besoin prêt à l'emploi dès la sortie de la boîte.
Entrée Bluetooth et AUX, amplificateur intégré, éclairage RVB, sortie ligne, et une
télécommande conçue pour être montée dans un panneau marin standard. Et
en son cœur, l'ampli haute puissance et les haut-parleurs de 6,5 pouces offrent
un son puissant avec la qualité audio KICKER.
Cordialement,
Steve Irby
Président/PDG
Vielen Dank und herzlichen Glückwunsch zum Kauf des KICKER BT Cans-Lautspre-
chersystems! Die BT Cans sind die nächste Generation mobiler Audiosysteme und
kombinieren die Innovationen neuer Übertragungsprotokolle mit der besten
Lautsprecher- und Verstärkerleistung von KICKER. Dieses Audiosystem hat alles,
was Sie brauchen, sofort einsatzbereit. Bluetooth- und AUX-Eingang, integrierter
Verstärker, RGB-Beleuchtung, Line-Ausgang, und eine Fernbedienung, die für die
Montage in einem Standard-Marinepanel gebaut wurde. Und das Herzstück sind der
leistungsstarke Verstärker und die 6,5-Zoll-Lautsprecher mit KICKER-typischer
Audioqualität.
Mit freundlichen Grüßen
Steve Irby
President/CEO
IMPORTANT: KICKER recommends a
professional installation performed by authorized
retailers. You are solely responsible for safely
mounting and wiring your products.
IMPORTANTE: KICKER recomienda que se
realice una instalación profesional con
proveedores con licencia. Usted es el único
responsable por la instalación segura y el
cableado de sus productos.
IMPORTANT: KICKER recommande une
installation professionnelle effectuée par des
fournisseurs agréés. Vous êtes l'unique
responsable du montage et du câblage de vos
produits en toute sécurité.
WICHTIG: KICKER empfiehlt eine
professionelle Montage durch lizenzierte
Anbieter. Sie haben die alleinige Verantwortung
für die sichere Montage und Verkabelung Ihrer
Geräte.
Scan here for
owner’s manual
Escanee aquí para manual
del Propietario
Scannen Sie hier nach
benutzerhandbuch
Scannez ici pour manuel
d’utilisation
48btcan65-d
Installation | Instalacion
Install the included 15A fuse on the Yellow +12V Constant wire within 18” of the battery. Connect the battery ring terminals of the Yellow +12V Constant and
Black Ground wires to the battery. Connect the Red +12V Ignition Wire to the switched ignition power source, or dash-mounted switch. Using the included splice
connectors, connect the right speaker to the left speaker. Connect the male LED plug (4-pin molex) to the female LED plug (4-pin molex). Use the KMLC (sold
separately) to control the RGB LED lighting. Connect the remote control to the remote input. Mount the remote control in your vehicle.
Instale el fusible de 15 A incluido en el cable amarillo constante de +12 V, a una distancia máxima de 18” de la batería. Conecte los terminales de anillo de la
batería de los cables amarillo +12 V constante y negro a tierra a la batería. Conecte el cable de encendido rojo de +12 V a la fuente de alimentación de encendi-
do conmutada. Usando los conectores de empalme incluidos, conecte el altavoz derecho al altavoz izquierdo. Conecte el enchufe LED macho (molex de 4 pines)
al enchufe LED hembra (molex de 4 pines). Utilice el KMLC (se vende por separado) para controlar la iluminación LED RGB. Conecte el control remoto a la
entrada remota. Monte el control remoto en su vehículo.
Installez le fusible 15A inclus sur le fil Jaune +12V Constant, à moins de 18” de la batterie. Connectez les cosses à anneau de la batterie des fils jaune +12V
constant et noir à la batterie. Connectez le fil d'allumage rouge +12V à la source d'alimentation d'allumage commutée. À l'aide des connecteurs d'épissure
inclus, connectez le haut-parleur droit au haut-parleur gauche. Connectez la prise LED mâle (molex 4 broches) à la prise LED femelle (molex 4 broches). Utilisez le
KMLC (vendu séparément) pour contrôler l'éclairage LED RVB. Connectez la télécommande à l'entrée de la télécommande. Montez la télécommande dans votre
véhicule.
Installieren Sie die mitgelieferte 15-A-Sicherung am gelben +12-V-Konstantkabel innerhalb von 18 Zoll von der Batterie. Schließen Sie die Batterie-Ringklemmen
des gelben +12-V-Konstantkabels und des schwarzen Massekabels an die Batterie an. Schließen Sie das rote +12-V-Zündkabel an die geschaltete Zündstrom-
quelle an. Verbinden Sie den rechten Lautsprecher mit den mitgelieferten Spleißverbindern mit dem linken Lautsprecher. Verbinden Sie den männlichen
LED-Stecker (4-poliger Molex) mit dem weiblichen LED-Stecker (4-poliger Molex). Verwenden Sie das KMLC (separat erhältlich), um die RGB-LED-Beleuchtung
zu steuern. Verbinden Sie die Fernbedienung mit dem Remote-Eingang. Montieren Sie die Fernbedienung in Ihrem Fahrzeug.
Bluetooth Pairing | Emparejamiento Bluetooth | Appairage Bluetooth | Bluetooth-Kopplung
Press and hold the Source/Pair button of the remote, or the multi-function button of the Right BT65, to enter Bluetooth pairing mode.
The LEDs will begin to blink blue. Select BT CANS KICKER from your list of Bluetooth devices. Once successfully paired, the LEDs will
turn solid blue. Please see the owner’s manual for more installation and operation instructions. Remote not required for operation.
Remote uses Carling-style cutout.
Mantenga presionado el botón Fuente/Emparejar del control remoto, o el botón multifunción del BT65 Derecho, para ingresar al modo
de emparejamiento de Bluetooth. Los LED comenzarán a parpadear en azul. Seleccione BT CANS KICKER de su lista de dispositivos
Bluetooth. Una vez emparejados con éxito, los LED se volverán azules fijos. Consulte el manual del propietario para obtener más
instrucciones de instalación y funcionamiento. Control remoto no requerido para la operación. El control remoto usa un recorte estilo
Carling.
Maintenez enfoncé le bouton Source/Pair de la télécommande ou le bouton multifonction du Droit BT65 pour passer en mode
d'appairage Bluetooth. Les LED commenceront à clignoter en bleu. Sélectionnez BT CANS KICKER dans votre liste d'appareils
Bluetooth. Une fois appairé avec succès, les LED deviendront bleues fixes. Veuillez consulter le manuel du propriétaire pour plus
d'instructions d'installation et d'utilisation. Télécommande non nécessaire pour le fonctionnement. La télécommande utilise une
découpe de style Carling.
Halten Sie die Source/Pair-Taste der Fernbedienung oder die Multifunktionstaste des Rechten BT65 gedrückt, um in den Bluetooth-Pair-
ing-Modus zu wechseln. Die LEDs beginnen blau zu blinken. Wählen Sie BT CANS KICKER aus Ihrer Liste der Bluetooth-Geräte aus.
Nach erfolgreicher Kopplung leuchten die LEDs dauerhaft blau. Weitere Installations- und Betriebsanweisungen finden Sie in der
Bedienungsanleitung. Fernbedienung für den Betrieb nicht erforderlich. Die Fernbedienung verwendet einen Ausschnitt im Carling-Stil.
Fuse (15A ATC)
Fusible (15 A ATC)
Sicherung (15 A ATC)
AUX IN (1V, 3.5mm - black)
Entrada auxiliar (1V, 3.5mm - negro)
Entrée AUX (1 V ; 3,5 mm - noire)
3,5-mm-AUX-eingang (1 V ; 3,5mm - schwarz)
Ground (black)
Conexión a Tierra (negro)
Masse (noire/schwarz)
+12V Ignition (red)
+12V Encendido (rojo)
Allumage +12 V (rouge)
+12 V Zündung (rot)
Use the multi-function button on the Right
BT65 to control.
Short Press - Source
Long Press - Pairing
Very Long Press - Reset
Double-Press - Play/Pause
Use el botón multifunción en el BT65
derecho para controlar.
Pulsación corta - Fuente
Pulsación larga - Emparejamiento
Pulsación muy larga - Restablecer
Doble pulsación - Reproducir/Pausar
Utilisez le bouton multifonction sur le BT65
droit pour contrôler.
Appui court - Source
Appui long - Appairage
Appui très long - Réinitialiser
Appuyez deux fois - Lecture/Pause
Verwenden Sie zur Steuerung die
Multifunktionstaste am Rechten BT65.
Kurz drücken - Quelle
Lang drücken – Koppeln
Sehr langes Drücken - Zurücksetzen
Doppelt drücken – Wiedergabe/Pause
+12V Constant (yellow)
+12V Constante (amarillo)
+12 V Konstantstrom (gelb)
+12 V Permanent (jaune)
12V Battery
Bateria
Batterie
≤18”
(45cm)
LINE OUT (1V, 3.5mm - grey)
Salida de línea (1V, 3.5mm - gris)
Sortie ligne (1 V ; 3,5mm - grise)
Zeilenausgang (1 V ; 3,5mm - grau)
Remote
Remoto
Télécommande
Fernbedienung

This manual suits for next models

1

Other Kicker Speakers manuals

Kicker 41KM604W User manual

Kicker

Kicker 41KM604W User manual

Kicker KM4 User manual

Kicker

Kicker KM4 User manual

Kicker CSS65 User manual

Kicker

Kicker CSS65 User manual

Kicker PSC57 User manual

Kicker

Kicker PSC57 User manual

Kicker KSS50 User manual

Kicker

Kicker KSS50 User manual

Kicker 19418149 User manual

Kicker

Kicker 19418149 User manual

Kicker KS Series User manual

Kicker

Kicker KS Series User manual

Kicker KM6000W User manual

Kicker

Kicker KM6000W User manual

Kicker 45KM604 User manual

Kicker

Kicker 45KM604 User manual

Kicker KMFC User manual

Kicker

Kicker KMFC User manual

Kicker SSMB6 User manual

Kicker

Kicker SSMB6 User manual

Kicker KPM50 User manual

Kicker

Kicker KPM50 User manual

Kicker KMFC8 User manual

Kicker

Kicker KMFC8 User manual

Kicker KM4 User manual

Kicker

Kicker KM4 User manual

Kicker SSMB Series User manual

Kicker

Kicker SSMB Series User manual

Kicker KM4 User manual

Kicker

Kicker KM4 User manual

Kicker KMTC9 User manual

Kicker

Kicker KMTC9 User manual

Kicker KSS50 User manual

Kicker

Kicker KSS50 User manual

Kicker KSC350 User manual

Kicker

Kicker KSC350 User manual

Kicker KSS269 User manual

Kicker

Kicker KSS269 User manual

Kicker 41KPWB User manual

Kicker

Kicker 41KPWB User manual

Kicker KPW2 User manual

Kicker

Kicker KPW2 User manual

Kicker KM60 User manual

Kicker

Kicker KM60 User manual

Kicker KM6000 User manual

Kicker

Kicker KM6000 User manual

Popular Speakers manuals by other brands

Diamond Audio D663 installation manual

Diamond Audio

Diamond Audio D663 installation manual

TDK Tremor S-150 user manual

TDK

TDK Tremor S-150 user manual

Wusic WUSIC-102B user guide

Wusic

Wusic WUSIC-102B user guide

Pyle PWMA820 operating instructions

Pyle

Pyle PWMA820 operating instructions

Monitor Audio WT280 installation guide

Monitor Audio

Monitor Audio WT280 installation guide

Subzero HICAST-4L user manual

Subzero

Subzero HICAST-4L user manual

OSD Audio Black BK-R62A install guide

OSD Audio

OSD Audio Black BK-R62A install guide

Mixx Audio SOUNDQ quick start guide

Mixx Audio

Mixx Audio SOUNDQ quick start guide

AMK DT61 installation manual

AMK

AMK DT61 installation manual

Daza SP-21BT user manual

Daza

Daza SP-21BT user manual

D.A.S. DS-112A user guide

D.A.S.

D.A.S. DS-112A user guide

Roland BTM-1 user manual

Roland

Roland BTM-1 user manual

SMARTY KID EMX-320312 user manual

SMARTY KID

SMARTY KID EMX-320312 user manual

Fantec SB-200BT manual

Fantec

Fantec SB-200BT manual

MTX MP52B owner's manual

MTX

MTX MP52B owner's manual

EAW AC6 instructions

EAW

EAW AC6 instructions

Jam HX-P520 User guide and warranty information

Jam

Jam HX-P520 User guide and warranty information

Sound Projections SM-2+ user guide

Sound Projections

Sound Projections SM-2+ user guide

manuals.online logo
manuals.online logoBrands
  • About & Mission
  • Contact us
  • Privacy Policy
  • Terms and Conditions

Copyright 2025 Manuals.Online. All Rights Reserved.