manuals.online logo
Brands
  1. Home
  2. •
  3. Brands
  4. •
  5. Kimo
  6. •
  7. Transmitter
  8. •
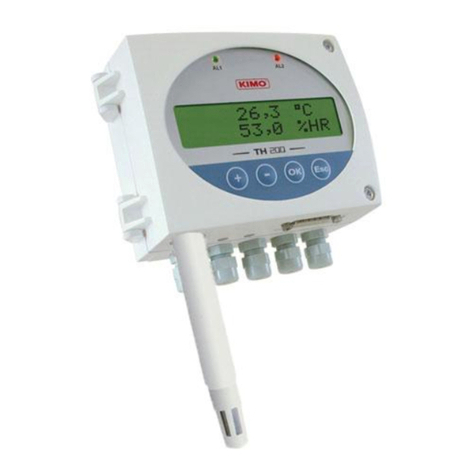
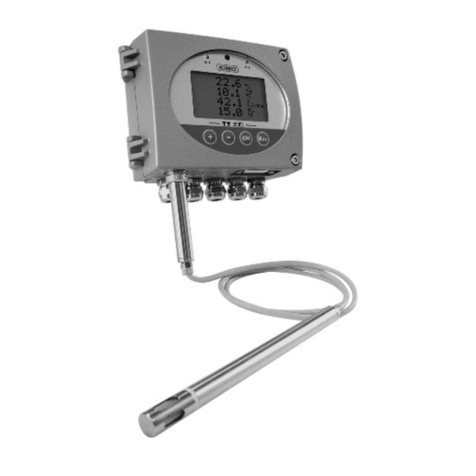
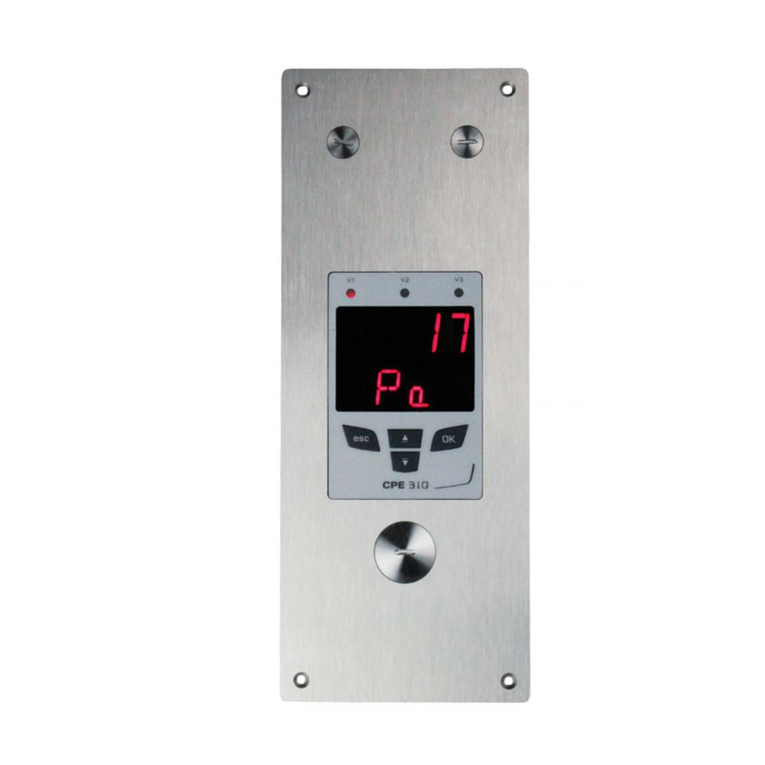
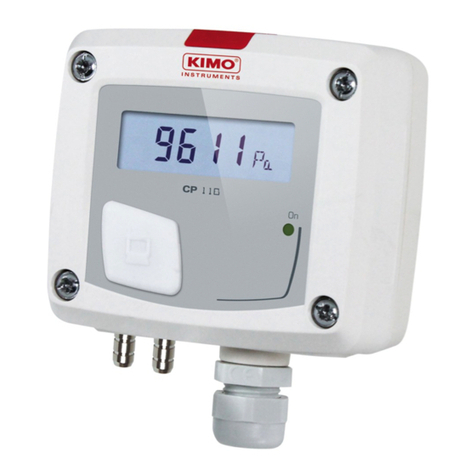
  9. Kimo 210-R Series User manual

Kimo 210-R Series User manual

Configuration of class 210-R transmitters
by keypad
USER MANUAL
Table of contents
1. INTRODUCTION........................................................................................................................................................... 5
1.1. Description of the transmitter................................................................................................................................5
1.2. Description of the keys..........................................................................................................................................5
1.3. Selection of the o tp t signal...............................................................................................................................6
1.4. Protection tip of the sensors.................................................................................................................................6
2. WARNING.................................................................................................................................................................... 7
2.1. Wiring..................................................................................................................................................................7
2.2. Probes................................................................................................................................................................. 7
3. ACCESS TO THE DIFFERENT FUNCTIONS........................................................................................................................8
4. F 100: CONFIGURE THE TRANSMITTER.........................................................................................................................9
4.1. Access to the firmware version..............................................................................................................................9
4.2. Config re the screen............................................................................................................................................9
4.2.1 Set the contrast: F 110...................................................................................................................................9
4.2.2 Set the backlight d ration: F 111...................................................................................................................9
4.2.3 Set the backlight...........................................................................................................................................9
4.3. Lock the keypad: F 140.......................................................................................................................................10
5. F 200: CHANNELS AND MEASUREMENT UNITS CONFIGURATION...............................................................................11
6. F 300: ANALOGUE OUTPUTS MANAGEMENT..............................................................................................................12
6.1. O tp ts diagnostic.............................................................................................................................................12
6.1.1 Connection config ration.............................................................................................................................12
6.1.2 Perform the o tp ts diagnostic....................................................................................................................12
6.2. Set the range of the analog e o tp ts................................................................................................................13
6.3. Set the p rge time (CP210-R).............................................................................................................................14
7. F 400: MANAGE THE RELAYS......................................................................................................................................16
8. F 500: MEASUREMENT SETTINGS...............................................................................................................................18
8.1. A to-zero (CP210-R)..........................................................................................................................................18
8.2. Press re meas rement integration (CP210-R)......................................................................................................18
8.3. Time-delay between two a to-zeros (CP211-R and CP212-R)...............................................................................18
8.4. Air velocity meas rement integration (CTV210-R)................................................................................................19
8.5. Add an offset......................................................................................................................................................19
9. F 600: COMPENSATION, MEANS OF MEASUREMENT AND SECTION SETTINGS............................................................21
9.1. Temperat re compensation (CP210-R).................................................................................................................21
9.1.1 Set the nit................................................................................................................................................. 21
9.1.2 Set the temperat re compensation val e temperat re...................................................................................21
9.2. Altit de compensation (COT212-R, CP210-R and CTV210-R)...............................................................................21
9.3. Selection of the means of meas rement..............................................................................................................22
9.3.1 Select the means of meas rement (CP210-R)...............................................................................................22
9.3.2 Set the coefficient val e of the differential press re element (CP210-R).........................................................22
9.3.3 Set the correction factor val e of the air velocity (CP210-R and CTV210-R)...................................................22
9.4. Setting of the type of section and airflow coefficient (CP210-R, CTV210-R)..........................................................23
9.4.1 Select the type of section.............................................................................................................................23
9.4.2 Select the nit if the section.........................................................................................................................23
9.4.3 Set the size of the section............................................................................................................................23
9.4.4 Set the airflow coefficient (CP210-R)............................................................................................................24
10. FUNCTIONS RECAP.................................................................................................................................................. 25
10.1. F 100............................................................................................................................................................... 25
10.2. F 200............................................................................................................................................................... 25
10.3. F 300............................................................................................................................................................... 26
10.4. F 400............................................................................................................................................................... 26
10.5. F 500............................................................................................................................................................... 27
10.6. F 600............................................................................................................................................................... 27
1. INTRODUCTION
1.1. Description of the transmitter
Class 210-R transmitters with display can be config red via keypad. It is possible to set meas rement nits, activate or not
a channel, etc.
Principle: the config ration options are accessed via folders and sub-folders. Access is made via a numerical code
(f ll details in this man al).
Trend indicator: on the screen, a trend indicator represented by a rising arrow, a going down arrow or a stable arrow is
displayed above the meas rement nit. It means the calc lation of a moving average on the last ho r (M1) to compare
with a moving average on the last 5 min tes (M2):
•If M1 = M2, the trend is stable.
•If M1 < M2, the trend is pwards.
•If M1 > M2, the trend is downwards.
Indicator light: the indicator light blinks q ickly d ring the initialisation phase of the transmitter then becomes fixed
when this phase has been completed.
For the press re transmitters with solenoid valve (CP211-R and CP212-R), it blinks when the solenoid valve is activated.
1.2. Description of the keys
–Up key: increments a val e or a level
–Down key: decrements a val e or a level
–OK key: validates an inp t
–sc key: cancels an inp t or backs to the previo s step
INTRODUCTION
5
10 pa
Up key
Down key
OK key Esc key
Indicator light
1.3. Selection of the output signal
The selection of the o tp t signal in voltage (0-10 V or 0-5 V) or in c rrent (4-20 mA or 0-20 mA) m st be performed with
the transmitter NOT N RGIS D and is made with the DIP switch of the electronic board p tting the on-off switches as
shown on the table below:
Configuration 4-20 mA 0-10 V 0-5 V 0-20 mA
Combinations
1.4. Protection tip of the sensors
It's extremely unwise to remove the protection tip of our hygrometry probes as the sensitive
element is very fragile even to light contacts. However, if you have to remove the protection tip,
take all possible precautions and AVOID ANY CONTACT with the sensitive element.
To remove the protection tip, unscrew it or unclip it.
6
INTRODUCTION
2341 2341 2 3 41 2341
Protection tip
to unscrew
Protection tip
to unscrew
Sensitive
element
Sensitive
element
2. WARNING
2.1. Wiring
In order to avoid cross-wiring:
•1: this cable-gland m st be reserved to relays
•2: this cable-gland m st be reserved to analogue outputs
•3: this cable-gland m st be reserved to power supply
To consider cable-glands as fixation points, the cable diameter range to place in the cable gland
must be between 4 and 8 mm.
The power supply wiring must be performed with crimping copper connections or a tinning in case
of multi-wire cable.
➢After performing the wiring, tight the cable-glands.
For details abo t the different wiring possibilities, please see the data sheet of the concerned sensor.
2.2. Probes
To avoid any device damage, probes must not be subject to voltage above 30 Vac or 60 Vdc with
respect to the ground.
WARNING
7
1 32
3. ACCESS TO THE DIFFERENT FUNCTIONS
This step is compulsory for each configuration.
First, to access to the transmitter f nctions, and for safety, a safety code m st be entered. This safety code is 0101 and can
not be modified.
The transmitter m st be energised.
➢Connect the transmitter.
➢Wait for the initialisation phase.
➢Press OK.
The screen displays “Code” with “0000”. The first 0 blinks.
➢Press OK to go to the second 0.
It blinks.
➢Press Up key to display 1 then press OK.
The third 0 blinks.
➢Press OK to go to the fo rth 0.
➢Press Up key to display 1 then press OK.
The following screen is displayed:
“F 100” is for the n mber of the config ration folder. There are 6 folders:
•F 100: folder of the transmitter config ration. See page 9
•F 200: folder of the channels and nits of meas rement. See page 11
•F 300: folder of the analog e o tp ts. See page 12
•F 400: folder of the relays config ration. See page 16
•F 500: folder of the meas rement config ration. See page 18
•F 600: folder of the meas rement config ration specific to the COT212-R, CP210-R and CTV210-R transmitters.
See page 21
To select the req ired folder:
“F 100” is displayed and 1 is blinking.
➢Press Up key ntil the n mber of the req ired folder is display (“F 100”, “F 200”, “F 300”, “F 400”, “F 500”
or “F 600” according to the type of transmitter).
➢Press OK.
If a wrong code is entered, “COD ” blinks a few seconds on the bottom right of the screen then
the measured values are displayed. It is necessary to enter the right code.
8
ACC SS TO TH DIFF R NT FUNCTIONS
F 100
Code
0101
4. F 100: CONFIGURE THE TRANSMITTER
This folder allows to config re the following parameters of the transmitter: contrast, backlight and keypad locking.
It also indicates the firmware version of the transmitter.
4.1. Access to the firmware ersion
The activation code is validated and “F 100” is displayed (see previo s page).
➢Press OK.
“F 101” is displayed with the firmware version n mber above. (Ex: 1.04)
4.2. Configure the screen
4.2.1 Set the contrast: 110
The transmitter is powered on.
➢Press OK.
➢Enter the activation code (see page 8).
➢Press OK.
“F 100” folder is displayed.
➢Press OK.
➢Press Up key to go the “F 110” folder.
“F 110” is displayed with the n mber corresponding to the contrast level between 0 and 5.
➢Press OK.
The contrast n mber blinks.
➢Set it between 0 and 5 pressing Up and Down keys.
When pressing Up or Down key to change the contrast level, there is a lag time of 1 second where
the digits disappear then they reappear with the new contrast.
➢Press OK.
4.2.2 Set the backlight duration: 111
It is possible to set the backlight d ration:
•0: backlight is inactive
•1: backlight lasts 10 s.
•2: backlight lasts 30 s.
•3: backlight lasts 60 s.
•4: backlight is permanent.
Backlight is activated pressing any key ( nless the level 0 is selected).
“
F 110” s b-folder is displayed.
➢Press Up key.
“F 111” is displayed with the n mber corresponding to the backlight d ration between 0 and 4.
➢Press OK.
The backlight d ration blinks.
➢Set it between 0 and 4 pressing Up and Down keys.
➢Press OK.
4.2.3 Set the backlight
“
F 111” s b-folder is displayed.
➢Press Up key.
“F 112” is displayed with the n mber corresponding to the backlight level between 0 and 10.
F 100: CONFIGUR TH TRANSMITT R
9
➢Press OK.
The backlight level blinks.
➢Set it between 0 and 10 pressing Up and Down keys.
➢Press OK.
4.3. Lock the keypad: F 140
For more safety and avoid any nwanted manip lation, it is possible to lock the keys of the transmitter.
“F 112” s b-folder is displayed.
➢Press Up key.
“F 140” is displayed with “OFF” meaning that the locking is deactivated.
➢Press OK.
“OFF” blinks.
➢Press Up or Down key, “ON” blinks, then press OK.
“LOCK” is displayed for a few seconds then the transmitter displays the meas red val es.
All the keys are inactive.
To reactivate them:
➢Press for 10 seconds on OK key.
“LOCK” blinks for a few seconds then the meas red val es are displayed and the keys are activated.
10
F 100: CONFIGUR TH TRANSMITT R
5. F 200: CHANNELS AND MEASUREMENT UNITS
CONFIGURATION
This folder allows to activate the channels and to config re the meas rement nit for each channel.
The transmitter is powered on.
➢Press OK.
➢Enter the activation code (see page 8).
➢Press OK.
➢Press Up key to go to the folder “F 200”.
➢Press OK.
“00” blinks and the nit corresponding to the channel 1 is displayed.
➢Press OK.
The nit blinks.
➢Press Up and Down keys to select the req ired nit according to the type of transmitter.
Or when “00” blinks:
➢Press Up or Down key to select the s b-folder “F 210” corresponding to the channel 2.
➢Press Up and Down keys to select the req ired nit according to the type of transmitter.
“---” sign allows to deactivate the channel.
Units available according to the channel and the type of transmitter:
CP211-212-213-R: Pa, mmH2O, inWG, mbar, mmHg, daPa, kPa, hPa, m/s*, fpm*, m3/h*, l/s*, cfm*, m3/s*, dam3/h*, °C, °F
CTV210-R: m/s, fpm, km/h, m3/h, l/s, cfm, m3/s, dam3/h, °C, °F
COT212-R: ppm, °C, °F
TM210-R: °C, °F, dT,%RH, g/kg, kJ/kg, °C Td, °F Td, °C Tw, °F Tw, g/m³
TH210-R: %RH, g/kg, kJ/kg, °C Td, °F Td, °C Tw, °F Tw, °C, °F, g/m³
*: nits regarding the air velocity and airflow calc lation, available on CP211-212-213-R transmitters with SQR3 option only.
F 200: CHANN LS AND M ASUR M NT UNITS CONFIGURATION
11
6. F 300: ANALOGUE OUTPUTS MANAGEMENT
6.1. Outputs diagnostic
This f nction allows to check on a meas rement device (m ltimeter, reg lator or a tomate) the proper f nctioning of the
o tp ts. The transmitter will generate a voltage (between 0 and 10 V) or a c rrent (between 0 and 20 mA) according to the
setting of the DIP switch of the transmitter electronic board.
•For a 0-10 V o tp t signal, the transmitter will generate 0 – 5 or 10 V.
•For a 0-5 V o tp t signal, the transmitter will generate 0 – 2.5 or 5 V.
•For a 4-20 mA o tp t signal, the transmitter will generate 4 – 12 or 20 mA.
•For a 0-20 mA o tp t signal, the transmitter will generate 0 – 10 or 20 mA.
6.1.1 Connection configuration
Before carrying out the output diagnostics, all connections and configurations of the transmitter
must be enabled, to avoid any damage on the transmitter and the measurement device!
➢Select a channel for the o tp ts diagnostic.
OUT1 or OUT2, indicated on the electronic board above the terminal blocks.
➢Connect a meas rement device on the channel 1 or on the channel 2.
6.1.2 Perform the outputs diagnostic
Once the connection to the meas rement device is complete, the o tp ts diagnostic on several check points can be
performed:
The transmitter is powered on.
➢Press OK.
➢Enter the activation code (see page 8).
➢Press OK.
➢Press Up key to go to the “F 300” folder.
➢Press OK.
“F 301” blinks, corresponding to the diagnostic of the channel 1.
➢Press OK.
➢Press Up and Down keys to select the signal that the transmitter has to generate.
12
F 300: ANALOGU OUTPUTS MANAG M NT
Screen Generated output xample
0 Deactivated -
1 Sim lates 0% of the o tp t range On the 0-10V range, the transmitter will generate 0V.
2 Sim lates 50% of the o tp t range On the 0-10V range, the transmitter will generate 5V.
3 Sim lates 100% of the o tp t range On the 0-10V range, the transmitter will generate 10V.
If the deviations are too large (> 0.05V or > 0.05mA) between the signal issued and the value
displayed on the multimeter, we recommend to return the transmitter to our factory.
➢For the diagnostic of the channel 2, go to “F 311” folder and do the same proced re as the channel 1.
6.2. Set the range of the analogue outputs
This f nction allows to modify the range of the analog e o tp ts.
Values to enter depend on the measurement unit and not on the measurement range of the
transmitter.
Ex: on a CP211-R press re transmitter (0 to ±1000 Pa) with a reading in mmH2O, the minim m and maxim m ranges m st
be config red on meas ring range of 0 to ±102 mmH2O. See conversion chart on page 15.
The transmitter is powered on.
➢Press OK.
➢Enter the activation code (see page 8).
➢Press OK.
➢Press Up key to go to folder “F 302” corresponding to the low range of the channel 1.
➢Press OK.
The first digit of the low range blinks.
➢Enter with Up and Down keys the fig re val e or the negative sign of the val e then press OK.
The second digit blinks.
➢Enter with Up and Down keys its val e then press OK.
➢Perform the same proced re for the following fig res.
➢Press OK when the last fig re has been config red.
“F 302” blinks, the low range is config red.
➢Press Up key then press OK to enter in the folder “F 303” corresponding to the high range of the channel 1.
The first digit of the high range blinks.
➢Enter with Up and Down keys the fig re val e or the negative sign of the val e then press OK.
The second digit blinks.
➢Enter with Up and Down keys its val e then press OK.
➢Perform the same proced re for the following fig res.
➢Press OK when the last fig re has been config red.
“F 303” blinks, the high range is config red.
To set the low and high ranges of the channel 2, go to the folders “F 312” (low range) and “F 313”
(high range) and follow the setting procedure of the channel 1.
F 300: ANALOGU OUTPUTS MANAG M NT
13
6.3. Set the purge time (CP210-R)
The p rge mode enables to freeze the meas rement when being displayed, enables to lock the analog e o tp ts, and to
activate the relay 1, in order to act ate a de-d st system of an air movement conditions system and to activate the relay 2
in order to isolate the transmitter.
Here is the detailed process of the p rge mode:
1. Meas rement is frozen.
2. Wait for 3 seconds.
3. Activation of the relay 2 (isolation of the transmitter).
4. Wait for time-delay (for example: 10 seconds).
5. Activation of the relay 1 (sending compressed air into the network to clean the installation).
6. P rge d ration (for example: 30 seconds).
7. Deactivation of the relay 1 (stop sending compressed air).
8. Wait for time-delay (for example: 10 seconds).
9. Deactivation of the relay 2.
10. Wait for 3 seconds.
11. Recovery of the meas rement.
The transmitter is powered on.
➢Enter the activation code (see page 8).
➢Press OK.
➢Press Up key to go to the “F 300” folder.
➢Press OK.
➢Press Up key to go to the “F 390” folder corresponding to the p rge mode setting.
➢Press OK.
➢With the Up and Down keys, select ON to activate the p rge mode or OFF to deactivate it.
➢Press OK.
➢Press Up key to go to the “F 391” folder corresponding to the p rge d ration setting.
➢Press OK.
➢With the Up and Down keys, set the p rge d ration from 1 to 60 seconds.
14
F 300: ANALOGU OUTPUTS MANAG M NT
➢Press OK.
➢Press Up key to go to the “F 392” folder corresponding to the d ration between two p rges.
➢Press OK.
➢With Up and Down keys, set the d ration between two p rges from 1 to 9999 min tes.
➢Press OK.
➢Press the Up key to go to the “F 393” folder corresponding to the delay setting.
➢Press OK.
➢With Up and Down keys, set the delay from 1 to 60 seconds.
➢Press OK.
The purge duration must be between 1 and 60 seconds.
The duration between 2 purges must be between 1 and 9999 minutes.
The delay duration must be between 1 and 60 seconds.
Unit of meas rement conversion chart
•Pressure
Pa mmH2O InWG mbar mmHG kPa PSI daPa hPa
CP211-R ±100 ±10.2 ±0.40 ±1.00 ±0.75 ±0.100 - ±10.0 ±1.00
CP212-R ±1000 ±102.0 ±4.01 ±10.00 ±7.50 ±1.000 - ±100.0 ±10.00
CP213-R ±10 000 ±1019.7 ±40.14 ±100.00 ±75.00 ±10.000 - ±1000.0 ±100.00
•Temperature
TH210-R °C °F
Ambient model From 0.0 to +50.0 From +32.0 to +122.0
Model with polycarbonate probe From -20.0 to +80.0 From -4.0 to +176.0
Model with stainless steel probe From -40.0 to +180.0 From -40.0 to +356.0
TM210-R °C °F
Ambient model From 0.0 to +50.0 From +32.0 to +122.0
Terminal block model From -100.0 to +400.0 From -148.0 to +752.0
CTV210-R / COT212-R °C °F
Ambient model From 0.0 to +50.0 From +32.0 to +122.0
CP210-R °C °F
On terminal block From -100.0 to +400.0 From -148.0 to +752.0
•Air velocity
CTV210-R m/s fpm km/h
Standard From 0 to 30 From 0 to 5905 From 0 to 108
F 300: ANALOGU OUTPUTS MANAG M NT
15
7. F 400: MANAGE THE RELAYS
When the transmitter is still in alarm state, the relay goes off and activates its negative or positive sec rity according to its
config ration.
Three relays activation modes are available:
•Rising edge (1 threshold): the relay goes off when the meas rement exceeds the threshold and stops when it
is below the threshold.
•Falling edge (1 threshold): the relay goes off when the meas rement is below the threshold and stops when it
exceeds the threshold.
•Monitoring (2 thresholds): the relay goes off when the meas rement is o tside the defined low and high
thresholds.
It is possible to set 2 different relays activation:
•“F 400” folder corresponds to the relay 1 setting
•“F 410” folder corresponds to the relay 2 setting
The relay setting proced re explained below corresponds to the relay 1 setting. For the relay 2 setting, go to the
corresponding folder and perform the same proced re as for the relay 1.
The transmitter is powered on.
➢Press OK.
➢Enter the activation code (see page 8).
➢Press OK.
➢Press the Up key to go to the “F 400” folder.
➢Press OK.
This folder corresponds to the activation relay mode.
➢With Up and Down keys, select the req ired relay activation mode:
16
F 400: MANAG TH R LAYS
Rising edge Falling edge
Meas rement (m) > Threshold (S) d ring the time-delay
T1 Relay activation→
Meas rement (m) < Threshold (S) - Hysteresis (H)
d ring the time-delay T2 Relay deactivation→
Meas rement (m) < Threshold (S) d ring time-delay
T1 Relay activation.→
Meas rement (m) > Threshold (S) + Hysteresis (H)
d ring time-delay T2 Relay deactivation→
Monitoring
The relay goes off when the meas rement is o tside the low and
high thresholds.
•0/3: relay is deactivated
•1/3: rising edge mode
•2/3: falling edge mode
•3/3: monitoring mode
➢Press OK.
“F 400” blinks.
➢Press Up key to go to the “F 401” folder of relay 1 (“F 411” for relay 2) then press OK.
➢With Up and Down keys, select the channel where the relay will be activated.
➢Press OK.
“F 401” blinks.
➢Press Up key to go to the “F 402” folder (“F 412” for relay 2) then press OK.
This folder corresponds to the threshold 1 settings.
➢Set the threshold 1 with the Up and Down keys.
➢Press OK when the last digit has been set.
“F 402” blinks.
➢Press Up key to go to the “F 403” folder (“F 413” for relay 2) then press OK.
This folder concerns:
•For a rising or falling edge: hysteresis setting
•For a monitoring: threshold 2 setting
➢Set the hysteresis or threshold 2 with the Up and Down keys.
➢Press OK when the last digit has been set.
“F 403” blinks.
➢Press Up key to go to the “F 404” folder (“F 414” for relay 2) then press OK.
This folder corresponds to the delay 1 setting.
➢Set the delay 1 with the Up and Down keys.
➢Press OK when the last digit has been set.
“F 404” blinks.
➢Press the Up key to go to the “F 405” folder (“F 415” for relay 2) then press OK.
This folder corresponds to the delay 2 setting.
➢Set the delay 2 with Up and Down keys.
➢Press OK when the last digit has been set.
“F 405” blinks.
➢Press Up key to go to the “F 406” folder (“F 416” for relay 2) then press OK.
This folder corresponds to the relay safety. The relay o tp ts are by defa lt, in negative security: the relay is
energized when a set point is reached. With the keypad, yo can swap the relays in positive security: then, the
relay is de-energised when a set point is reached or d ring a power o tage.
➢Activate or deactivate the safety relay with Up and Down keys.
•1: positive safety
•0: negative safety
➢Press OK to confirm.
F 400: MANAG TH R LAYS
17
8. F 500: MEASUREMENT SETTINGS
In order to compensate a potential drift of the transmitter, it is possible to add an offset to val e displayed by the
transmitter.
Adding an offset is only possible for the meas red parameters (temperat re, h midity, press re, air velocity, ...). It is not
possible to add one for the calc lated parameters (airflow, psychrometry,...).
8.1. Auto-zero (CP210-R)
Class 210 press re transmitters have an a to-zero which g arantees a good reliability of the meas rement in high and low
ranges.
The a to-zero compensates for any long-term drifts of the sensitive element, with the man al adj sting of the zero.
To perform a self-calibration:
➢Unpl g the 2 press re connection t bes.
➢Press a to-zero b tton. (See “Connection” on the data sheet).
If the instrument has a display, it is possible to perform an auto-zero pressing for 3 seconds the
“ sc” key. “AutoZ” is displayed briefly meaning the auto-zero has been well performed.
On the CP211-R and CP212-R transmitters, it is not necessary to unplug the 2 pressure connection
tubes (see chapter 8.3).
8.2. Pressure measurement integration (CP210-R)
This function is available on CP210-R transmitters only.
The press re meas rement element is very sensitive and reacts to press re changes. When making meas rements in
nstable air movement conditions, the press re meas rement may fl ct ate. The integration coefficient (from 0 to 9) makes
an average of the meas rements; this helps to avoid any excessive variations and g arantees a stable meas rement.
New displayed value = [((10 - Coef.) x New val e) + (Coef. x Old val e)] /10
Example: CP212-R (0-1000 Pa) – C rrent meas rement: 120 Pa – New meas rement: 125 Pa
The press re so rce being stable, the ser selects a low integration. Integration: 1, maxim m admitted variation ±10 Pa.
The variation is lower than 10 Pa, it is possible to apply the integration calc lation form la.
Next displayed value: ((9 * 125) + (1 * 120))/10 = 124.5 i.e, 124 Pa. If the new meas rement had been 131 Pa, the
next displayed val e wo ld have been 100% of the new val e i.e, 131 Pa.
The transmitter is powered on.
➢Press OK.
➢Enter the activation code (see page 8).
➢Press OK.
➢Press Up key to go to folder “F 500”.
➢Press OK.
➢Set the integration val e with Up and Down keys.
This val e m st be between 0 and 9 with:
•Coefficient 0: no integration, important fl ct ation of the displayed val e.
•Coefficient 9: maxim m integration, more stable meas rement display.
8.3. Time-delay between two auto-zeros (CP211-R and CP212-R)
On transmitters having a solenoid valve for a to-zero (CP211-R and CP212-R), it is possible to set an interval between 2
a to-zeros:
The transmitter is powered on.
18
F 500: M ASUR M NT S TTINGS
➢Press OK.
➢Enter the activation code (see page 8).
➢Press OK.
➢Press Up key to go to folder “F 500”.
➢Press OK.
➢Press Up key to go to folder “F 510”.
➢Press OK.
The d ration between two a to-zeros is displayed.
➢Set it with Up and Down keys.
This time-delay m st be between 0 (no a to-zero) and 60 min tes.
➢Press OK to validate the d ration.
8.4. Air elocity measurement integration (CTV210-R)
This function is available on CTV210-R transmitters only.
The air velocity meas rement element of the class 210 is very sensitive and reacts to air velocity changes. When making
meas rements in nstable air systems, the air velocity meas rement may fl ct ate. The integration coefficient (from 0 to 9)
makes an average of the meas rement; this helps to avoid any excessive variations and g arantees a stable meas rement.
New displayed value = [((10 - Coef.) x New val e) + (Coef. x Old val e)] /10
Example: CTV210-R with hot wire (0-30 m/s) – C rrent meas rement: 2 m/s – New meas rement: 8 m/s
The air velocity so rce being nstable, the ser selects a strong integration. Integration: 7. The variation is lower than
10 m/s, it is possible to apply the integration calc lation form la.
Next displayed value: ((2 * 8) + (7 * 2))/10 = 3 m/s.
The transmitter is powered on.
➢Press OK.
➢Enter the activation code (see page 8).
➢Press OK.
➢Press Up key to go to folder “F 501”.
➢Press OK.
➢Set the integration val e with Up and Down keys.
This val e m st be between 0 and 9 with:
•Coefficient 0: no integration, important fl ct ation of the displayed val e.
•Coefficient 9: maxim m integration, more stable meas rement display.
8.5. Add an offset
The transmitter is powered on.
➢Press OK.
➢Enter the activation code (see page 8).
➢Press OK.
➢Press Up key to go to folder “F 500”.
➢Press OK.
“F 521” blinks, corresponding to the setting folder for the main parameter.
➢Press OK.
The first n mber of the offset blinks.
➢Enter with Up and Down keys the n mber val e or the negative sign of the val e then press OK.
The second n mber blinks.
➢Enter with Up and Down keys its val e then press OK.
➢Repeat the proced re for the following n mbers.
➢Press OK when the last n mber is set.
“F 521” blinks, the offset for the main parameter is config red.
F 500: M ASUR M NT S TTINGS
19
➢Press Up key then press OK to enter in the “F 531” folder corresponding to the offset of the second parameter.
The first n mber of the offset blinks.
➢Enter with Up and Down keys the n mber val e or the negative sign of the val e then press OK.
The second n mber blinks
➢Enter with Up and Down keys its val e then press OK.
➢Repeat the proced re for the following n mbers.
➢Press OK when the last n mber is set.
“F 531” blinks, the offset for the main parameter is config red.
The unit of the offset is set by default and can not be modified. If this unit is not the same than
the unit of measurement, a conversion must be done.
20
F 500: M ASUR M NT S TTINGS

This manual suits for next models

7

Other Kimo Transmitter manuals

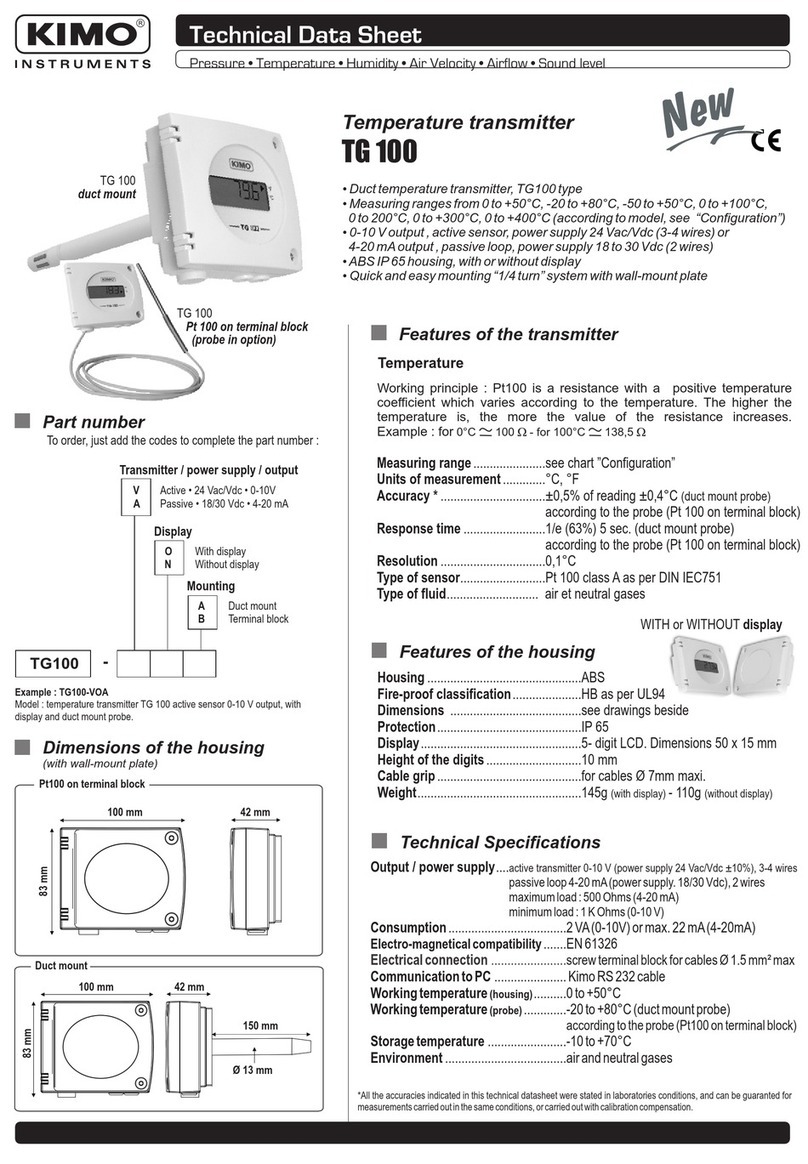
Kimo TG 100 Instruction Manual

Kimo

Kimo TG 100 Instruction Manual

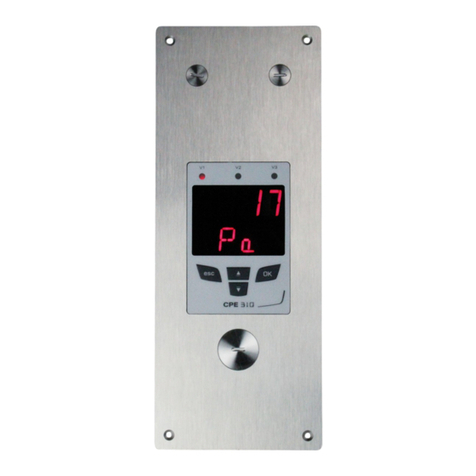
Kimo CPE 311-S User manual

Kimo

Kimo CPE 311-S User manual

Kimo CP 111 Instruction Manual

Kimo

Kimo CP 111 Instruction Manual

Kimo Class 300 User manual

Kimo

Kimo Class 300 User manual

Kimo CA 310 User manual

Kimo

Kimo CA 310 User manual

Kimo CPE 300 User manual

Kimo

Kimo CPE 300 User manual

Kimo HM 50 Instruction Manual

Kimo

Kimo HM 50 Instruction Manual

Kimo Class 200 User manual

Kimo

Kimo Class 200 User manual

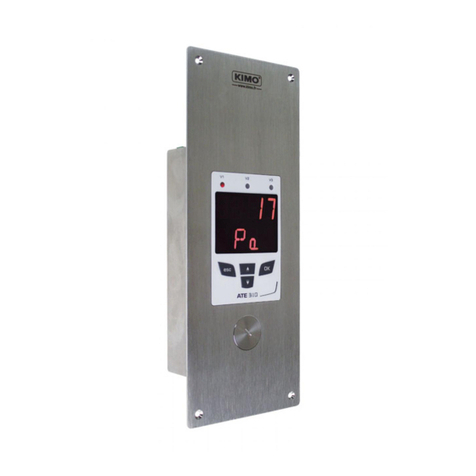
Kimo ATE 310 User manual

Kimo

Kimo ATE 310 User manual

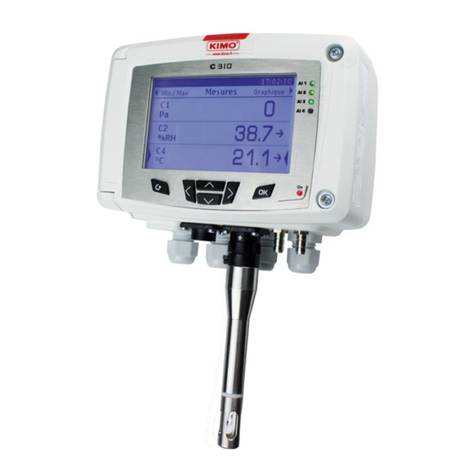
Kimo C310 User manual

Kimo

Kimo C310 User manual

Popular Transmitter manuals by other brands

Savant PAV-VIM8S series Quick reference guide

Savant

Savant PAV-VIM8S series Quick reference guide

DPCAV AV681TX Assembly instructions

DPCAV

DPCAV AV681TX Assembly instructions

Fukuda Denshi LX-7120 Operation manual

Fukuda Denshi

Fukuda Denshi LX-7120 Operation manual

Bircher RFGate 3.2.T Supplementary sheet to the original instruction manual

Bircher

Bircher RFGate 3.2.T Supplementary sheet to the original instruction manual

Nautel NV30 Operation and maintenance manual

Nautel

Nautel NV30 Operation and maintenance manual

IFM TCC8 Series operating instructions

IFM

IFM TCC8 Series operating instructions

Altinex DA1935KM user guide

Altinex

Altinex DA1935KM user guide

Visonic WT-100 installation instructions

Visonic

Visonic WT-100 installation instructions

Sennheiser SK 1012-90 manual

Sennheiser

Sennheiser SK 1012-90 manual

Nautel GV20 installation manual

Nautel

Nautel GV20 installation manual

Technaxx FMT1200BT user manual

Technaxx

Technaxx FMT1200BT user manual

Evikon E2618-H2 user manual

Evikon

Evikon E2618-H2 user manual

Elenos ETG 2000.20 user manual

Elenos

Elenos ETG 2000.20 user manual

Max Machinery 276-5 Series instruction manual

Max Machinery

Max Machinery 276-5 Series instruction manual

EBS PX200NB Installation and programming manual

EBS

EBS PX200NB Installation and programming manual

Creative Bluetooth Audio BT-D1 quick guide

Creative

Creative Bluetooth Audio BT-D1 quick guide

M-system KAC instruction manual

M-system

M-system KAC instruction manual

Nivus NivuFlow Mobile 600 instruction manual

Nivus

Nivus NivuFlow Mobile 600 instruction manual

manuals.online logo
manuals.online logoBrands
  • About & Mission
  • Contact us
  • Privacy Policy
  • Terms and Conditions

Copyright 2025 Manuals.Online. All Rights Reserved.