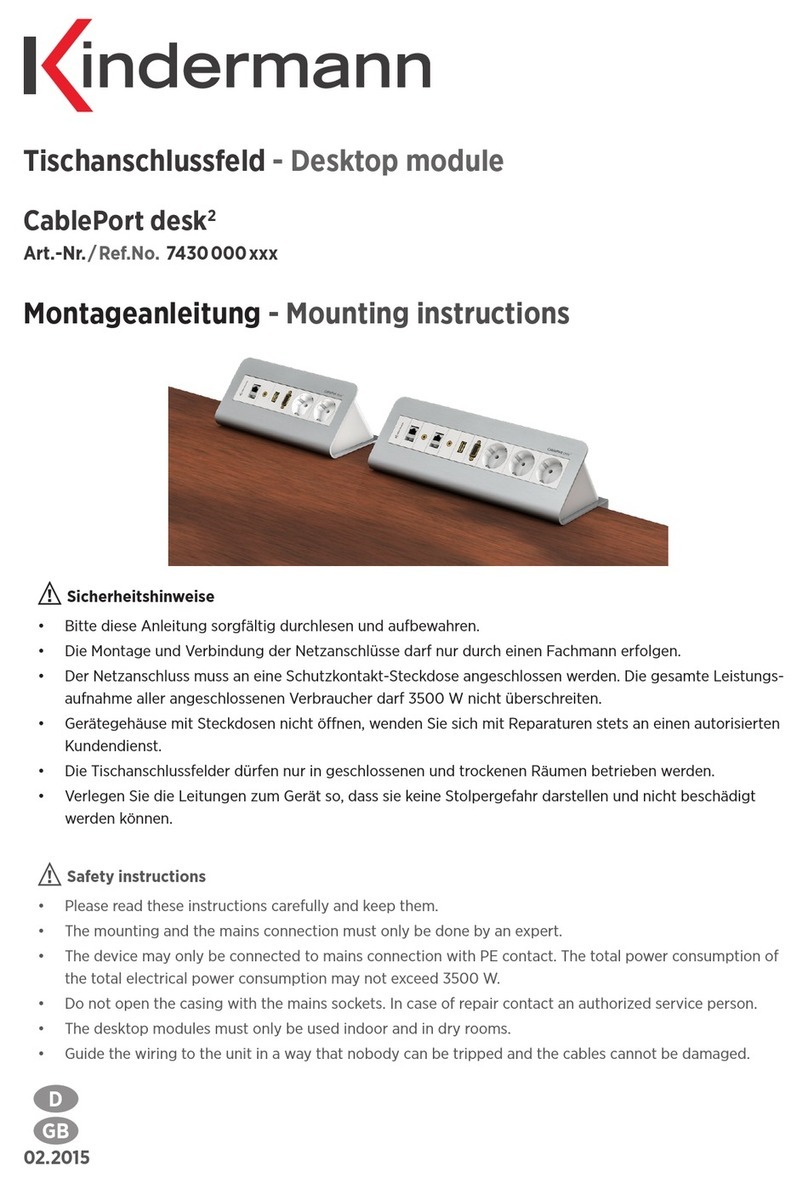
Kindermann CablePort desk2 wave User manual

Montageanleitung - Mounting instructions
03.2017
D
GB
Tischanschlussfeld - Desktop module
CablePort desk2 wave
Art.-Nr./Ref.No. 7430 xxx 6xx

2
Sicherheitshinweise
• Bitte diese Anleitung sorgfältig durchlesen und aufbewahren.
• Die Montage und Verbindung der Netzanschlüsse darf nur durch einen Fachmann erfolgen.
• Der Netzanschluss muss an eine Schutzkontakt-Steckdose angeschlossen werden.
Die gesamte Leistungsaufnahme aller angeschlossenen Verbraucher darf 3500 W nicht überschreiten.
• Gerätegehäuse mit Steckdosen nicht önen, wenden Sie sich mit Reparaturen stets an einen
autorisierten Kundendienst.
• Die Tischanschlussfelder dürfen nur in geschlossenen und trockenen Räumen betrieben werden.
• Verlegen Sie die Leitungen zum Gerät so, dass sie keine Stolpergefahr darstellen und nicht beschädigt
werden können.
• Legen Sie induktive Ladecover nicht allein auf die induktive Ladestation. Die Ladestation kann
überhitzen!
• Legen Sie keine metallischen Gegenstände, Magneten, Magnetstreifen-Karten, auf die induktive
Ladestation. Die Ladestation kann überhitzen!
Safety instructions
• Please read these instructions carefully and keep them.
• The mounting and the mains connection must only be done by an expert.
• The device may only be connected to mains connection with PE contact.
he total power consumption of the total electrical power consumption may not exceed 3500 W.
• Do not open the casing with the mains sockets. In case of repair contact an authorized service person.
• The desktop modules must only be used indoor and in dry rooms.
• Guide the wiring to the unit in a way that nobody can be tripped and the cables cannot be damaged.
• Do not place the wireless charging cover solely on the wireless charger.
Charger may be damaged due to overheating.
• Do not place foreign materials, such as metal objects, magnets, and magnetic stripe cards,
between the mobile device and the wireless charger. Charger may be damaged due to overheating.

3
* Einrastbare Anschlussblende
mit Kabelpeitsche
* Click adapter plate with
cable+plug connection
Induktive Qi-Ladestation
mit blauer Ladeanzeige-LED
3-Coils Qi wireless charger
with blue indicator light LED
* Vorkonfektionierte
Steckdoseneinheit
* Pre-configured
socket unit
Metallwinkel für Kabelschlange (Zubehör)
Metal angle for cable-snake (accessory)
Kabelschlange für Kabelführung (Zubehör)
Cable-snake for cable management (accessory)
Notwendiges Werkzeug:
Innensechskantschlüssel SW 4 (im Lieferumfang), Kreuzschlitz-Schraubendreher
Necessary tools for mounting:
Allan key 4 mm (included), crosstip screwdriver
Frontblende mit Modulträger
Front panel with module holder
USB-Ladeadapter
(2 x USB Typ A, 5V/2400 mA)
USB charger (power only!)
(2 x USB type A, 5V/2400 mA)
Anschlussleitung GST 18i, 1 m
Power cable with GST 18i plug, 1 m
Netzzuleitung mit Buchse GST 18i (Zubehör)
Power cable with GST 18i plug (accessory)
Klemmteil zur Tischmontage (2x)
Clamp for table mounting (2x)
Abnehmbare Abdeckung
Removable cover
Kabelduchführung
Cable entry
* = Option
Teilebezeichnung / Description of parts
◀
click

4
Montage der Konnect flex click 45 Blenden / Installation of Konnect flex click 45 plates
Wir empfehlen bei der Verwendung einer Kabelschlange Anschlussblenden mit 1 m oder 3 m Kabel
(Buchse/Stecker) zu bestücken. Alle Kabel durch die dafür vorgesehene Önung führen.
When using a cable-snake for cable management, we recommend connection plates with length of
1 m or 3 m (socket/plug). Lay cables through entry in housing.
Kabelschlange montieren (Option) / Mounting cable-snake (option)
Abdeckung abnehmen / Removing cover
Abdeckung abnehmen: Tischanschlussfeld wie gezeigt ablegen, vier Klemmschrauben M3x8
herausdrehen, Abdeckung abnehmen.
Removing cover: Place desktop module as shown, loose four clamping screws M3x8, remove cover.
Abdeckung montieren: Abdeckung in Pfeilrichtung in die V-Nut des Frontbleches drücken,
vier Klemmschrauben M3x8 eindrehen.
Mounting cover: Place desktop module as shown, tighten four clamping screws M3x8.
Netzkabel ziehen!
Unplug the power cable!
Kabel ohne Überkreuzungen verlegen!
Lay cables without overcrossing!

5
Anschlussblende ausbauen / Detach connector plate
Gerätegehäuse mit Steckdosen nicht önen!
Do not open casings with power sockets!
• Tischanschlussfeld abbauen,
Abdeckung abnehmen
• Äußere Blende ausbauen: Rastnasen mit
Werkzeug eindrücken und vorsichtig
aushebeln
• Gewünschte Blende entsprechend zum
Rand schieben und ausbauen
• Abdeckung, Anschlussfeld montieren
• Remove desktop module and cover
• Detach adapter plate at the edge:
press click elements with tool and carefully
disengage it
• Push required plate to the edge and
remove it accordingly
• Lock cover and desktop module
Montage an Tischplatte / Mounting at table
• CablePort desk2wave Tischkante anlegen
• Tischklemme (2x) mit Innensechskantschlüssel 4 mm gegen Uhrzeigersinn anziehen
• Mount CablePort desk2wave on the table edge
• Tight table clamp (2x) with allan key 4 mm counterclockwise
⤸
Netzkabel ziehen!
Unplug the power cable!

6
Technische Daten / Technical data
Das CablePort desk wave ist für den Betrieb an Netzspannung 220 ~ 240 VAC / 50, 60 Hz und
Umgebungstemperatur 0° bis 40 °C geeignet.
The CablePort desk wave is suitable for supply voltage 220 ~ 240 VAC / 50, 60 Hz and ambient
temperature from 0° to 40 °C.
Integrierter USB-Lader – 2400 mA / Integrated USB-charger – 2400 mA
Für kabelgebundenes Aufladen mobiler Endgeräte wie Smartphones, PDAs, Laptops und ähnliche Geräte.
For recharging portable devices such as phones, smartphones, tablets, PC and similar devices.
Spezifikation / Specifications:
Standby / standby: 0.1 W
Ezienz / eciency: 81%
Ausgangsspannung / output voltage: 5V
Max. Ausgangsstrom / Max. output current: 2400mA
Normale Aufladezeiten / Average charging time (Lithium):
80 % aufgeladen / 80% charged: < 1 Std. 15 Min / < 1 h 15
100 % aufgeladen / 100% charged: < 2 Std. / < 2 h

7
Integrierte Qi-Ladestation* mit Ladeanzeige / Wireless Qi-Charger* with indicator light
Kabellose, induktive Ladung für Smartphones, die kompatibel mit dem Qi-Standard sind. Legen Sie ein
unterstütztes Mobilgerät auf die Mitte der Oberfläche des Ladegeräts. Die LED zeigt Ladevorgang an.
Wireless, inductive charger for smartphones, which are compatible to Qi-standard*. Place a supported
mobile device in the center of the charging surface. LED shows charging.
Viele Smartphones unterstützen den Qi-Standard zum kabellosen Laden, bei manchen muss erst die
Einstellung im Telefon aktiviert werden. Für viele, andere Geräte gibt es spezielle Lade-Hüllen.
Fragen Sie Ihren Händler.
Many smartphones support Qi-standard for wireless charging. Sometimes it must be activated in phone.
For many other devices are special designed covers available. Contact your dealer.
Spezifikation / Specifications:
Ausgang / output: DC 5V/1000 mA max
Frequenz / frequency: 100 ~ 200 kHz
Ezienz / eciency: 72% max.
Standby / standby: 0.05 W
Entfernung / wireless distance: < 5 mm
Technik / technology: 3 Spulen, Qi-fähig, großer Ladebereich
3 coils, Qi enabled, wide charging area
Sicherheit / safety: Smart Chip für Schutz gegen Überhitzung, Überspannung,
Überladung
Smart chip protection from overheating, overvoltage and
overcharges
Achtung!
• Legen Sie induktive Ladecover nicht allein auf die induktive Ladestation. Die Ladestation kann
überhitzen!
• Legen Sie keine metallischen Gegenstände, Magneten, Magnetstreifen-Karten, auf die induktive
Ladestation. Die Ladestation kann überhitzen!
Attention!
• Do not place the wireless charging cover solely on the wireless charger.
Charger may be damaged due to overheating.
• Do not place foreign materials, such as metal objects, magnets, and magnetic stripe cards,
between the mobile device and the wireless charger. Charger may be damaged due to overheating.

xxDGB- Änderungen vorbehalten / Subject to alterations Printed in Germany
Kindermann GmbH · Mainparkring 3 · D-97246Eibelstadt · E-Mail: [email protected] · www.kindermann.com
Abmessungen / Dimensions
Gehäusebreite / housing width:
6-fach / 6-fold: 331 mm
Tischplattenstärke 10 – 60 mm
Desktop thickness 10 – 60 mm
178
228
23 27
101
10-60
Zubehör / Accessories
Lieferbare Anschlussblenden und Verbindungskabel, sowie weiteres Zubehör finden Sie unter
www.kindermann.com
Please visit our website www.kindermann.com for more information about adapter plates, connection
cables and accessories.
Table of contents
Other Kindermann Control Unit manuals
Popular Control Unit manuals by other brands

STMicroelectronics
STMicroelectronics STEVAL-IHP005V1 user manual

Helios
Helios KWL-KNX Connect Installation and operating instructions

Carlisle
Carlisle DeVilbiss AG362P Series Service manual

Hayward
Hayward OmniPL HLBPRO4SW installation manual

HP
HP 83400 Series Getting started

rada
rada DRV40 product manual

resideo
resideo Braukmann RV277 installation instructions

LS ELECTRIC
LS ELECTRIC XGT Series user manual

CLA-VAL
CLA-VAL 636-03 Installation operation & maintenance

eckstein
eckstein Keyestudio ESP-01S manual

Wabtec
Wabtec ABDX-SS 664742 Operation and maintenance instruction

ThinkPad
ThinkPad EM120R-GL Regulatory notice