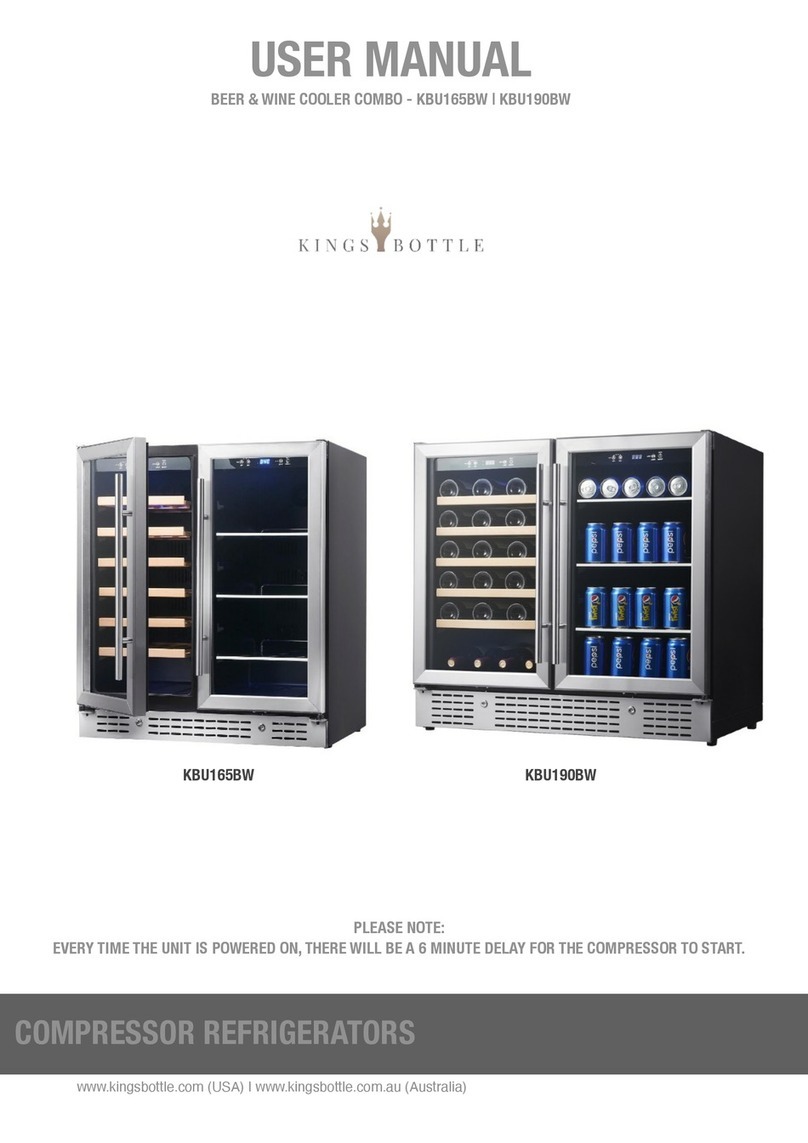
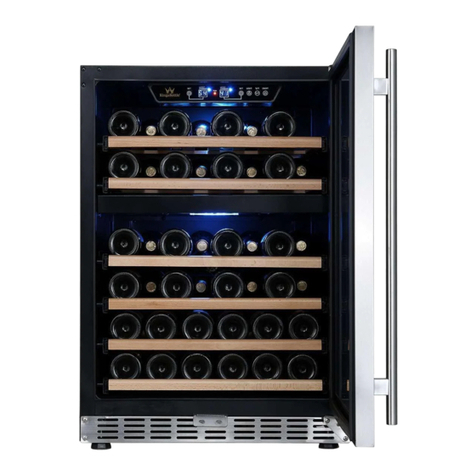
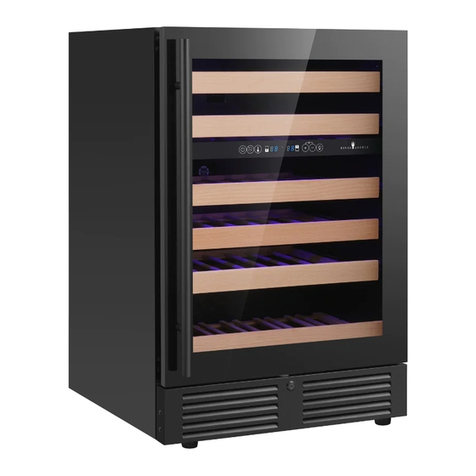
KingsBottle KBU145BX User manual

www.kingsbottle.com (USA) |www.kingsbottle.com.au (Australia)
USER MANUAL
SINGLE ZONE REFRIGERATORS
KBU145BX | KBU265BX | KBU425BX
KBU145WX | KBU265WX | KBU425WX
COMPRESSOR REFRIGERATORS
BEVERAGE REFRIGERATORS
SINGLE ZONE WINE REFRIGERATORS
KBU145BX-SS
KBU265BX-SS
KBU425BX-SS
KBU425WX-SS
KBU265WX-SS
KBU145WX-SS
PLEASE NOTE:
•Before connecting the refrigerator to the power source, let it stand upright for approximately 2 hours. This will reduce the possibility of a
malfunction in the cooling system from handling during transportation.
•Every time the unit is powered ON, there will be a 6-minute delay for the compressor to start.
•This appliance is using flammability refrigerant, flammable and explosive articles should not be put in or near the cabinet, to avoid the fire
or explode caused.
KBU: KingsBottle USA
KB: KingsBottle (Australia)
BX: Beverage Refrigerator With Inverter Compressor
WX: Single Zone Wine Cooler With Inverter Compressor
DX: Dual Zone Wine Cooler With Inverter Compressor
SS: Glass Door With Stainless Steel Door Frame
FG: Borderless Black Glass Door
Description of Product Number:

www.kingsbottle.com (USA) |www.kingsbottle.com.au (Australia) 2
Congratulations
Congratulations and thank you for
choosing our KingsBottle
refrigerators. We are sure you will
find your new appliance a pleasure
to use. Before installing and
operating the refrigerator, we
recommend that you read through
this manual which provides a
description of your refrigerator and
its functions.!
To avoid the risks that are always
present when you use an electric
appliance, it is important that the
appliance is installed correctly and
that you read the safety instructions
carefully to avoid misuse and
hazards.!
We recommend that you keep this
instruction booklet for future
reference and pass it on to any
future owners.!
After unpacking the appliance,
please inspect it to verify it is not
damaged. If in doubt, do not use
the appliance but contact us or your
local customer care center.!
CONTENTS
TABLE OF CONTENTS
Chapter
Contents
Page
Part I
Important Safety & Pre-Use Instructions
3
Part II
Diagram & Description of Refrigerator
4
Part III
Installation Instructions!
5-8
Part IV
Layout & Storage
9-11
Part V
Temperature Setting and Operating the
Refrigerator
12
PART VI
Troubleshooting Guide
13-15
Part VII
Maintenance Guide
16
Part VIII
Technical Data
17
Part IX
Warranty Information
18
COMPRESSOR REFRIGERATORS
DISCLAIMER
The manufacturer accepts no liability for any spoilage to the
content of the refrigerator, not even when the device is within the
warranty period. Similarly, the manufacturer accepts no liability for
personal injury due to incorrectly stored goods, which are for
personal consumption or resale.

www.kingsbottle.com (USA) |www.kingsbottle.com.au (Australia) 3
PART I IMPORTANT SAFETY INSTRUCTIONS
Please read this user manual carefully and store in a handy
place for later reference. The symbols you will see in this
booklet have these meanings:!
This symbol indicates information concerning your personal safety
This symbol indicates information on how to avoid damaging the
appliance
This symbol indicates tips and information about the use of the
appliance
This symbol indicates tips and information about economical and
ecological use of the appliance
TO REDUCE THE RISK OF FIRE, ELECTRICAL SHOCK, OR
INJURY WHEN USING YOUR APPLIANCE, FOLLOW
THESE BASIC PRECAUTIONS:
1. Read all instructions before using the refrigerator.
2. DANGER or WARNING: Risk of child entrapment. Child
entrapment and suffocation pose a serious problem and
children should not be let near the appliance unsupervised.
Junked or abandoned appliances are still dangerous…
even if they will “just sit in the garage for a few days."
3. Before you throw away your old refrigerator:
•Take off the door.
•Dismantle the Shelves into pieces so that children may
not climb inside easily.
4. Never allow children to operate, play with, or crawl inside
the appliance.
1. The refrigerator must be plugged into its dedicated
110/115V, 60Hz AC electrical outlet.
( Note: 220/240V, 50 Hz in Australia)
2. The plug must be accessible when the refrigerator is in
position.
3. It is essential that the power point is properly grounded.
Consult a qualified electrician if you are unsure.
4. Don’t use extension cords or adapter plugs with this
refrigerator.
5. If the power cord is damaged, have it replaced by a
qualified service technician.
6. Unplug the refrigerator before cleaning it, or changing the
light bulb to avoid electric shock.
7. Never clean appliance parts with flammable fluids. The
fumes can create a fire hazard or explosion.
8. Never unplug the refrigerator by pulling the electrical cord
as this may damage it. Grip the plug firmly and pull straight
out.
9. Choose a location for your refrigerator that isn’t too cold.
The ambient room temperature should be above 50° F.
10. Stand your refrigerator in a dry place – avoid areas of high
moisture or humidity.
11. Don’t put the refrigerator in frosty or unprotected areas like
a garage or on the verandah.
12. Keep the refrigerator out of direct sunlight.
13. Don’t locate the refrigerator near stoves, fires or heaters.
14. Do not store in the vicinity of any other appliance. Do not
store near gasoline or any other flammable vapors. The
fumes can create an explosion or lead to a fire hazard.
15. When installed correctly, your refrigerator should:
16. Have adequate space at the back and sides for air
circulation. (See Page 5)
17. Be aligned to the surrounding cupboards.
18. Have doors that will self-close from a partially open position
SAFETY
place for later reference.
The symbols you will see in this booklet have these meanings:
WARNING
CAUTION
TIPS & INFORMATION
ENVIRONMENTAL TIPS
Meanings of symbols used in this manual are shown below:
WARNING
‘flammable’ and/or a small flame symbol,
do not store them inside any refrigerator or
freezer. If you do so you may cause an explosion.
remove any doors. Children can suffocate if they get
trapped inside.
blowing gases. Avoid safety hazards by carefully
disposing of this appliance.
WARNING
The refrigerator must be plugged into its own
dedicated 220-240V, 50Hz AC electrical outlet.
The plug must be accessible when the refrigerator is
in position.
It is essential the power point is properly earthed to
ground.Consult a qualified electrician if you are unsure.
Don’t use extension cords or adapter plugs with this
refrigerator.
If the power cord is damaged, have it replaced by a
qualified service technician.
Unplug the refrigerator before cleaning it, or changing
the light bulb to avoid electric shock.
Never unplug the refrigerator by pulling the electrical
cord as this may damage it. Grip the plug firmly and
pull straight out.
Choose a location for your refrigerator that isn’t too cold.
The ambient room temperature should be above 10°C.
Stand your refrigerator in a dry place – avoid areas
of high moisture or humidity.
Don’t put the refrigerator in frosty or unprotected areas
like a garage or on the verandah.
Keep the refrigerator out of direct sunlight.
Don’t locate the refrigerator near stoves, fires or heaters.
When installed correctly, your refrigerator should:
– Have adequate space at the back and sides
for air circulation (refer to page 9).
– Be aligned to the surrounding cupboards.
– Have doors that will self-close from a partially
open position.
WARNING
This appliance may contain a small quantity of environmentally
friendly, but flammable, non-synthetic R600a refrigerant:
damaged during transportation and installation.
8g of refrigerant. The amount of refrigerant charged in the
appliance can be found on the rating plate on the appliance.
in the built-in structure, clear of obstruction.
accelerate the defrosting process, other than those
recommended by the manufacturer.
3
per 8g of refrigerant. The amount of refrigerant charged
in the appliance can be found on the rating plate on
the appliance.
BEFORE USING YOUR REFRIGERATOR
•Remove the exterior and interior packing.
•Before connecting the refrigerator to the power source, let it stand upright for approximately 24 hours. This will reduce the possibility of a
malfunction in the cooling system from handling during transportation.
•Clean the interior surface with lukewarm water using a soft cloth.
www.kingsbottle.com (USA) |www.kingsbottle.com.au (Australia) 4
PART II!! DIAGRAM & DESCRIPTION OF REFRIGERATOR
FEATURES
COMPRESSOR REFRIGERATORS
YOUR REFRIGERATOR ALSO INCLUDES THE FOLLOWING:
•Instruction manual
•Two keys
•Top and bottom hinges , also screws for changing the door hinge
1 Top Hinge
2 Door
3 Handle
4 Front Grille
5 Adjustable Stand Feet
6 Lower Hinge
7 Display Control Panel
8 Shelves

www.kingsbottle.com (USA) |www.kingsbottle.com.au (Australia) 5
77
(3.03″)
805(31.69″)
820(32.28″)
595(23.42″)
533(20.98″)
(22.75″)
578
605
(23.81″)
>613(24.13″)
>830(32.67″)
JC-145
PART III!INSTALLATION INSTRUCTIONS
INSTALLATION
MODEL
WIDTH
DEPTH
HEIGHT
INCLUDED !
STAND HEIGHT
NOTE
KBU145
23.42”
595mm
22.75”
578mm
32.28”
820mm
0.59”
15mm
These front-venting models can be built into cabinetry.
Should it be built into cabinetry, there should be an
additional 0.5” (20mm) on either side, behind and on top of
the unit. These extra spaces enable units to be placed in the
position efficiently, accommodate the door when opened,
and without the power cords being damaged.
KBU265
23.42”
595mm
27.55”
700mm
47.24”
1200mm
0.59”
15mm
KBU425
23.42”
595mm
27.36”
695mm
70.86”
1800mm
0.59”
15mm
610
(24.01″)
(28.74″)
>730
>1810(71.25″)
77
1785(70.27″)
1800(70.86″)
(23.42″)
595
(25.59″)
650
JC425
77(3.03)
(0.59-2.36″)15-60
45(1.77″)
1710(67.32″)
(23.3″)
592
(27.36″)
695
610
(24.01″)
(28.93″)
>735
>1210(47.63″)
77(3.03″)
1185(46.65″)
1200(47.24″)
(23.42″)
595
(25.59″)650
(27.55″)700
JC-265
610
(24.01″)
(28.74″)
>730
>1810(71.25″)
77
1785(70.27″)
1800(70.86″)
(23.42″)
595
(25.59″)
650
JC425
77(3.03)
(0.59-2.36″)15-60
45(1.77″)
1710(67.32″)
(23.3″)
592
(27.36″)
695
610
(24.01″)
(28.93″)
>735
>1210(47.63″)
77(3.03″)
1185(46.65″)
1200(47.24″)
(23.42″)
595
(25.59″)650
(27.55″)700
JC-265
KBU145 SERIES
23.42”W x 22.75”D x 32.28”H
( 595W x 578D x 820H mm )
Included stand height 0.59” (15mm)
KBU425 SERIES
23.42”W x 27.36”D x 70.86”H
(595W x 695D x 1800H mm)
Included stand height 0.59”(15mm)
KBU265 SERIES
23.42”W x 27.55”D x 47.24”H
(595W x 700D x 1200H mm)
Included stand height 0.59”(15mm)

www.kingsbottle.com (USA) |www.kingsbottle.com.au (Australia)"6
PART III!INSTALLATION INSTRUCTIONS
INSTALLATION
COMPRESSOR REFRIGERATORS
INSTALLING YOUR REFRIGERATOR
1. Move the unit into its final position.
2. If the unit is not tilting back, minor adjustments can be made to the leveling legs.
3. Compare the alignment of the appliance to the surrounding cupboard. The top of the appliance should be level side to side (see
diagram below).
4. If the unit now rocks from one corner to the opposite rear corner, this means that the floor is uneven. You may need to put some
packing under the ridge to the rear of the appliance. You could use thin pieces of a solid material such as a thin board, vinyl floor tiles
or laminate.
5. You may now need to fine tune the installation by repeating steps 2, 3 and 4.
6. Wipe off any dust that has accumulated during shipping and clean following the directions in Part VI ( Care & Maintenance)
7. Plug the appliance into the power point. Don’t use a double adaptor or extension cord.
8. It is recommended that you allow the unit to rest an hour or two before you put any bottles in it. This will confirm that it is operating
correctly and make the conditions appropriate for drinks storage.
Congratulations! You have successfully installed your refrigerator.
DOOR LOCK
This unit comes with an optional key lock. The keys are located inside the plastic bag that contains the user manual. To lock the door,
simply insert the key into the lock and turn clockwise making sure the metal pin is engaged completely. Then remove the key and place it
in a secure place for safekeeping. To unlock the door, insert the key into the lock and turn counterclockwise.
Before you move your appliance into the place where it
will operate, check that it will have adequate clearance.
Clearance is required for air circulation and too little
clearance may affect the performance of your appliance.
We recommend minimum clearances of:
NOTE:
Doors are designed to sit proud of cabinetry (not flush).
The clearances shown above are the recommended
minimum clearances. The clearance at the rear must not
exceed 75mm.
The appliance should arrive with the front levelling feet
wound up. The appliance may need to be tilted backward
at the top by about 10-15mm from vertical (see diagram
below). This will allow the door to gravitate to the closed
position. The complete closure of the door seal is reliant on
manually pushing the door closed to provide a consistent
door seal.
CAUTION
The rollers are designed for forward or backward movement
only.They are not castors. Moving the refrigerator sideways
may damage your floor and the rollers.
1. Move the appliance into its final position.
2. If the appliance is not tilting back as described earlier,
minor adjustments can be made to the two front
levelling legs by turning the feet in an anticlockwise
direction (below). This will increase the height of
the feet. If you have difficulty turning the foot, have
someone tilt the appliance back to gain better access.
If it is not tilted back enough and the levelling legs are
fully extended, additional packing might be required
(see note 4 for appropriate materials).
3. Compare the alignment of the appliance to the
surrounding cupboard. The top of the appliance should
be level from side to side (see diagram below). If
you need to adjust the level, use the levelling feet as
detailed in step 2.
4. If the appliance now rocks from one corner to the
opposite rear corner, this means that the floor is uneven.
You may need to put some packing under the ridge to
the rear of the appliance. You could use thin pieces of
solid material such as thin board, vinyl floor tiles
or laminate.
5. You may now need to fine tune the installation by
repeating steps 2, 3 and 4.
6. Wipe off any dust that has accumulated during shipping
and clean following the directions on page 17.
double adaptor or extension cord.
8. It is recommended that you let the appliance for an hour
or two (three hours for a freezer) before you put any
food in it. This will confirm that it is operating correctly
and make the conditions appropriate for food storage.
Congratulations! You have successfully installed your
refrigerator/freezer.
10 –15mm
Height adjustable
front rollers
50mm (75mm max)
30mm
30mm
Recommended
airspace
CABINET
DOOR

www.kingsbottle.com (USA) |www.kingsbottle.com.au (Australia)"7
1. As shown in Figure A, use a flat-
blade screwdriver to open the
upper hinge buckle to see the
hinge shaft, and then use a flat-
blade screwdriver to pry the
hinge shaft and take it out. Then
unscrew the lower hinge in the
same way.
2. As shown in Figure B, the
installation method of the upper
part of the door is the same as
the lower part.
3. When the upper and lower parts
are removed, pull the door
parallel to the outside. The door
can be taken out.
4. Remove the glass door, use the hex wrench to remove the upper door hinge and the lower door hinge mounting screws, and
remove the upper and lower door hinges.
5. Pay special attention to this: 1) The glass door is turned 180 degrees to install, and the lock hook and magnet of the door are
removed and reinstalled to the other side. 2) The upper hinge and lower hinge are also exchanged at the same time.The right
upper hinge is changed into the left lower hinge. The right lower hinge is changed into the left upper hinge. Becomes the lower
door hinge, and becomes the upper door hinge when the right lower door hinge is changed to the left side;
6. Install the door hinge first as shown in Figure C, and install the lower door hinge as shown in Figure D.
7. Lift the door as shown in Figure D. Firstly insert the lower hinge into the corner fittings, align the mounting holes, and insert the
hinge shaft into the hinge hole in position. Then cover back the Hinge buckle. The installation of the lower part of the door is
completed;
8. Install the upper part of the door as shown in Figure C, the same method as the lower part of the installation door. In the end
the door revert is finished.
9. Install the door hinge Note: When installing the upper door hinge, please move the door hinge to the side of the outer casing
and then tighten the screw. After the lower door is installed, move the screw to the inside of the outer casing and tighten the
screw to prevent the door from falling.
INSTALLATION
Upper Hinge
Hinge Shaft
Hinge Buckle
Upper Hinge
Lower Hinge
Glass Door
1
2
3
4
5
6
B
C
D
A
REVERSE THE DOOR

www.kingsbottle.com (USA) |www.kingsbottle.com.au (Australia)"8
INSTALLATION
Door
Lock
Door Alarm Magnet
Magnet Fix Hole
Lock Fix Hole
1
2
3
4
5
CHANGE THE DOOR ALARM PARTS
A
B
COMPRESSOR REFRIGERATORS
INSTALL THE DOOR HANDLE
Install the door handle provided with the appliance by following these
steps:
Step 1 -Remove the gasket at the inner side of the door to expose the
two screw holes.
Step 2 -Install the handle tightly with the screws and washers provided.
Step 3 -Tidy and restore the gasket.
Gasket
Handle Screw
Handle
Door Frame
Step 1: After the door is flipped, disassemble the lock and the door alarm magnet (No. 2 and No.3 in the picture);
Step 2: Install the locking plate (No. 2 in the picture) to position No. 5;
Step 3: Install the magnet (No. 3 in the picture) to the position No. 4 in the picture.
CHARCOAL FILTRATION SYSTEM
In order to maintain the quality and taste of fine drinks, it must be stored under ideal
temperature and environmental conditions. Your refrigerator is equipped with an activated
carbon filtration system to ensure pure air, efficient cooling and maintain odor-free cabinets
to store your fine drinks. The filter assembly is located on the rear panel inside the cellar.
We recommend replacing this filter every 12 months. To replace the filter:
•Remove the bottles stored on the two shelves in front of the filter.
•Remove the shelves and set aside
•Hold the filter and turn it counterclockwise 45 degrees and pull it out.
•Place the new filter into the hole and turn the filter 45 degrees clockwise.

www.kingsbottle.com (USA) |www.kingsbottle.com.au (Australia)"10
PART IV! ! LAYOUT AND STORAGE
STORAGE
COMPRESSOR REFRIGERATORS
805
820
532
576
6
46
595
576
595
65
65
D
C
B
A
.
.
.
1
145B--B
.
.
A3
mm
2022-05-24
23
.
.
4
5
678
72
97 101
97 100
530
40
15
20
24
77
77
19
45
19
45
34 34
820--880
44
100530
100
730
100100
730
102
8
8
8
8
300
86
Ø86
8
97
KBU145WX
KBU265WX
KBU425WX

www.kingsbottle.com (USA) |www.kingsbottle.com.au (Australia)"11
PART IV! ! LAYOUT AND STORAGE
STORAGE
YOUR CABINET WAS DESIGNED TO STORE A MAXIMUM NUMBER OF BOTTLES SECURELY. WE RECOMMEND THAT YOU
OBSERVE THE TIPS BELOW TO OPTIMIZE LOADING.
1. Disperse your bottles evenly so as not to concentrate the weight in any one area. Also, be careful that your bottles do not touch either
the back of the cabinet or the step at the bottom.
2. Also, make sure that bottles are not all grouped together either at the top or bottom of the cabinet.
3. A refrigerator that is full and has a nice allowance for air movement will work more efficiently.
4. Never try to adjust shelf with bottles still on it.
TO REMOVE A ROLLING SHELF (WINE REFRIGERATOR):
1. Remove all bottles
2. Pull the shelf out as far as possible
3. Push the RIGHT side lever downward but the LEFT side lever upward (as illustrated below. A long flat screwdriver may help if necessary.)
4. Remove the shelf
PLEASE NOTE
Before modifying your cabinet’s original configuration in any way, be sure to ask your dealer for advice.
Important safety instructions . . . . . . . . . . . . . 3
Bar refrigerator with ice box features . . . . . . . . . 4
Bar refrigerator without ice box features . . . . . . . 5
Single door all refrigerator features . . . . . . . . . 6
Bar freezer features . . . . . . . . . . . . . . . . 7
Single door all freezer features . . . . . . . . . . . 8
Installing your new appliance . . . . . . . . . . . . 9
Ventilation around your appliance. . . . . . . . . 9
Installing your refrigerator . . . . . . . . . . . 9-10
Initial start-up . . . . . . . . . . . . . . . . . . . 10
Manual controls . . . . . . . . . . . . . . . . . . 10
Controlling the temperature. . . . . . . . . . . . 10
Using your appliance – Ice box models . . . . . . . . 11
Making ice . . . . . . . . . . . . . . . . . . 11
De-icing the ice box . . . . . . . . . . . . . . . 11
Freezer operation . . . . . . . . . . . . . . . . . 12
Reversing the ice box door opening direction . . . . . 13
Reversing the door opening direction WIM1000 &
WFM0700 . . . . . . . . . . . . . . . . . . . . 14
Reversing the door opening direction WIM1200,
WRM1300, WRM2400, WFM0900 & WFM1800 .15
Care and maintenance . . . . . . . . . . . . . . . .
Changing the light bulb . . . . . . . . . . . . . 16
General information . . . . . . . . . . . . . . . . 17
Cleaning the appliance . . . . . . . . . . . . . 17
Safety . . . . . . . . . . . . . . . . . . . . . 17
Switching off your appliance . . . . . . . . . . . 17
Troubleshooting . . . . . . . . . . . . . . . . . . 18
Warranty . . . . . . . . . . . . . . . . . . . . . 19
Congratulations and thank you for choosing our
refrigerator/freezer. We are sure you will find your new
appliance a pleasure to use. Before you use the appliance,
we recommend that you read through the relevant sections
of this manual, which provides a description of your
appliance and its functions.
To avoid the risks that are always present when you use
an electric appliance, it is important that the appliance is
installed correctly and that you read the safety instructions
carefully to avoid misuse and hazards.
We recommend that you keep this instruction booklet
for future reference and pass it on to any future owners.
After unpacking the appliance, please check it is not
damaged. If in doubt, do not use the appliance but contact
your local customer care centre.
TIPS & INFORMATION
If you find
the refrigerator is damaged or marked, you must report it
within 7 days if you wish to claim for damage/marks
under the manufacturers warranty. This does not affect
your statutory rights.
ENVIRONMENTAL TIPS
dispose of those materials through your local recycling
depot or by placing them in appropriate collection
containers.
your local authorities and ask for the correct method
of disposal.
TO REMOVE A METAL SHELF (BEVERAGE REFRIGERATOR):
1. Take out all items from the shelves you are going to remove.
2. Please keep the door opened fully all the way before pulling out the shelves.
3. Pull out the shelf horizontally aligning the notch and grove.
4. Lift shelf and remove completely.
A
A

www.kingsbottle.com (USA) |www.kingsbottle.com.au (Australia)"12
OPERATION
PART V!! OPERATING YOUR REFRIGERATOR
Each refrigerator includes an operating panel on the front of the unit. This operating panel includes several features to operate and control the temperature of
both the upper and lower zones of the refrigerator, light color and brightness.
ON/OFF: Press ON/OFF button for 3 seconds to turns the power on or off.
C/F SWITCH: Switch between °C and °F.
TEMP SETTING: Press the TEMP SETTING button before adjusting the temperature. When pressed for the first time, the display flashes and shows the set
temperature. After 5 seconds, it will display the measured internal temperature.
DISPLAY WINDOW: 2-digit LED display to show setting temperature or actual interior temperature.
UP / DOWN: Adjust the temperature preset value.
LIGHT:Turns the interior light on/off, or change the light color between blue and white. When the door is opened, the light will be switched on automatically.
KEY LOCK FUNCTION: If there is no any operation with digital control for 3 minutes, it will be locked automatically. Press UP and DOWN in the same time
for 3 seconds to unlock.
SETTING THE TEMPERATURE CONTROL
1. Make sure the power cord is connected to a properly grounded outlet.
2. Press the ON/OFF button to turn the power ON.
3. Press the TEMP SETTING button.
4. The temperature setting can be adjusted between 36°F to 68°F ( 2°C to 20°C). Set the temperature as you desire by pushing the UP or DOWN button.
When you push the UP or DOWN button for the first time, the LED readout will show the original temperature set at the previous time.
5. Once you have set the desired temperature, wait for 5 seconds. The temperature shown on the display panel will automatically switch to show the actual
measured temperature inside the unit. The actual temperature will always be shown until the next time you press the UP or DOWN button to change the
temperature settings.
NOTE: The desired temperatures may fluctuate depending on whether the interior light is ON or OFF, the ambient temperature, the location of the unit and
the orientation of the bottles. The display is just a guide, be guided by how cold your drinks are at consumption. Remember units go into defrost mode, and
this will show a higher display, it’s only for short periods and doesn’t have time to affect drink temperature. In general, once the unit has settled, it will keep
products within 5°F (2°C) of the set temp easily in temperatures up to and beyond 100°F (38°C).
TEMPERATURE SETTINGS FOR WINE SERVICE
Different varietals of wine require different temperature settings. The recommended temperature ranges for long term preservation of various wines is
Red Wines: 52-64°F (11-18°C ); White Wines: 44-51°F (7-10°C); Sparkle Wines: 41-43°F (5-6°C).
1. In the event of a power interruption, all previous temperature settings will be automatically saved and each compartment will return to the previous
temperature setting.
2. If the unit is unplugged, loses power, or is turned off, there will be a 6 minute delay for the compressor to restart after the unit is powered ON.
3. When you use the refrigerator. for the first time or restart the refrigerator after having been shut off for a long time, there will be a few degrees variance
between the temperature you select and the one indicated on the LED readout for the first few hours of operation. After a few hours of operation, the
temperature will normalize to the displayed temperature.
COMPRESSOR REFRIGERATORS
ON/OFF
UP
DOWN
LIGHT
C/F SWITCH
TEMP SETTING
place for later reference.
The symbols you will see in this booklet have these meanings:
WARNING
CAUTION
TIPS & INFORMATION
ENVIRONMENTAL TIPS
Meanings of symbols used in this manual are shown below:
WARNING
‘flammable’ and/or a small flame symbol,
do not store them inside any refrigerator or
freezer. If you do so you may cause an explosion.
remove any doors. Children can suffocate if they get
trapped inside.
blowing gases. Avoid safety hazards by carefully
disposing of this appliance.
WARNING
The refrigerator must be plugged into its own
dedicated 220-240V, 50Hz AC electrical outlet.
The plug must be accessible when the refrigerator is
in position.
It is essential the power point is properly earthed to
ground.Consult a qualified electrician if you are unsure.
Don’t use extension cords or adapter plugs with this
refrigerator.
If the power cord is damaged, have it replaced by a
qualified service technician.
Unplug the refrigerator before cleaning it, or changing
the light bulb to avoid electric shock.
Never unplug the refrigerator by pulling the electrical
cord as this may damage it. Grip the plug firmly and
pull straight out.
Choose a location for your refrigerator that isn’t too cold.
The ambient room temperature should be above 10°C.
Stand your refrigerator in a dry place – avoid areas
of high moisture or humidity.
Don’t put the refrigerator in frosty or unprotected areas
like a garage or on the verandah.
Keep the refrigerator out of direct sunlight.
Don’t locate the refrigerator near stoves, fires or heaters.
When installed correctly, your refrigerator should:
– Have adequate space at the back and sides
for air circulation (refer to page 9).
– Be aligned to the surrounding cupboards.
– Have doors that will self-close from a partially
open position.
WARNING
This appliance may contain a small quantity of environmentally
friendly, but flammable, non-synthetic R600a refrigerant:
damaged during transportation and installation.
8g of refrigerant. The amount of refrigerant charged in the
appliance can be found on the rating plate on the appliance.
in the built-in structure, clear of obstruction.
accelerate the defrosting process, other than those
recommended by the manufacturer.
3
per 8g of refrigerant. The amount of refrigerant charged
in the appliance can be found on the rating plate on
the appliance.
DISPLAY WINDOW

www.kingsbottle.com (USA) |www.kingsbottle.com.au (Australia)"13
TROUBLESHOOTING GUIDE
PROBLEM
POSSIBLE CAUSE
SOLUTION
1. Refrigerator
does not operate
1. Not plugged in
2. The appliance is turned OFF at the control panel
3. The power outlet is powered off or the output voltage is
too low
4. The circuit breaker has tripped, or a fuse has blown out
1. Press ON/OFF
2. Check and make sure the power plug is well connected
3. Ask a technician to check whether the power outlet has an accurate
voltage output
4. Ask an technician for help
2. Refrigerator is
not cold enough;
can not cool down
to the preset temp.
The compressor does not start
ask a technician for help / check the connection of the compressor
The ambient temperature is too high (over 100°F | 38°C)
Move the refrigerator to a cool and ventilated place
Place too many bottles at once
Put in the bottles in batches. It is recommended not to exceed 1/3 of full load
at a time. After the temperature in the cabinet drops to the set temperature,
store the next batch.
The inlet and outlet of the front grille are blocked.
Remove objects that may block the air inlet and outlet
The door is not closed tightly, or the door gasket is not
properly sealed.
Please refer to the problem #6 “The door will not close properly” and its
solutions. Then unplug the power plug for 5 hours, wait for the ice on the
evaporator melt, restart the refrigerator.
The door opening time is too long or too frequent
Reduce the times/frequency of door openings.
There are other objects besides drink bottles in the
cabinet, which affects the air circulation.
This refrigerator is designed for wine, beer and soft drinks storage, if there are
other objects, please remove it. The number of bottles placed on each layer
cannot exceed the standard configuration.
If the refrigerator is placed outdoors or in a place with a
lot of dust/oil stains, after a period of time, a large amount
of dust will accumulate on the condenser fins, which will
affect the cooling effect.
Move the refrigerator to a place with less dust, regularly check the dust
accumulation status, and clean it with a blower.
Fans (condenser fan or evaporator fan) stop working or
operate at low speed
Ask the technician to check whether there is a standard voltage on the fan
terminal when turning on the power. If the voltage is abnormal, please check
the switching power supply or the motherboard or circuit failure. If the voltage
is normal, the fan may be damaged, please replace with a new fan.
The compressor or its accessories are damaged
Turn off the power and ask the technician to diagnose.
Refrigerant leak
If the compressor, condenser fan, and evaporator fan are all working properly,
but the refrigerator cannot reach the set temperature or does not cool at all,
there may be a refrigerant leak issue.
3. Compressor
starts and stops
frequently
The door is not closed tightly.
Please refer to the problem #6 “The door will not close properly” and its
solutions. Then unplug the power plug for 5 hours, wait for the ice on the
evaporator melt, restart the refrigerator.
The door gasket is not properly sealed.
1. Use low heat on a hairdryer to make the door seal take shape.
2. Replace with a new door gasket.
The door is opened too often.
Reduce the times/frequency of door openings.
The ambient temperature is too high (over 100°F | 38°C)
Move the refrigerator to a cool and ventilated place
Improper setting of temperature and the temperature
variances
Properly increase the temperature and its variances
The temperature sensor is not connected correctly.
Read the wiring diagram to make the correct connection of the sensor.
The sensor is faulty.
Replace with a new sensor
4. The light does
not work.
Not plugged in, or the light button is "OFF." Not enough
brightness.
The light itself is faulty.
PCB circuit faulty.
1. Adjust the brightness of the lamp according to the operating instructions.
2. Replace with new bulb; the lamp has its polarity.
3. Find a technician to repair.
PART VI!TROUBLESHOOTING GUIDE

www.kingsbottle.com (USA) |www.kingsbottle.com.au (Australia)"14
TROUBLESHOOTING GUIDE
PROBLEM
POSSIBLE CAUSE
SOLUTION
5. The Refrigerator
seems to make
too much noise.
No standing hours before connecting the refrigerator to
the power source.
Turn off the power and let it stand for hours.
The stand feet is not leveling; vibrations lead to noise
Adjust the stand feet and ensure they are leveled.
The floor is not stable enough
Move to a solid and stable floor
Hot and cold contraction sounds of the inner tank and
other plastics
No action required. It will gradually disappear.
Copper pipe hits other objects and makes noise
Gently adjust the position of the pipe.
The vibration of internal moving parts caused by inertia
when the compressor is stopped or started
It’s normal, no action required.
A liquid plumbing noise may come from the flow of the
refrigerators gases
As each cycle ends, you may hear gurgling sounds. It’s normal, no action
required.
Vibration of cooling copper pipes or fans hit other objects
Open the back cover of the refrigerator, and properly adjust the copper pipes
and wires so that they will not hit or resonate with other objects.
Compressor or fan itself failure
Find a technician to repair.
6. The door will not
close properly.
Door is blocked by the non-standard size bottles
Adjust the position of bottles, or the number of shelves appropriately
The hinges of the upper and lower doors are loose
Adjust and fix the door hinge
The door sealing rubber is deformed
1. Use low heat on a hairdryer to make the door seal take shape.
2. Replace with a new door gasket.
The door body is deformed
Replace with a new door
7. Evaporator ice
up
The door is not closed tightly, or the door gasket is not
properly sealed.
Please refer to the problem #6 “The door will not close properly” and its
solutions. Then unplug the power plug for 5 hours, wait for the ice on the
evaporator melt, restart the refrigerator.
Poor cooling performance. The fridge does not cool or
can not reach the preset temperature value.
Please refer to the problem #2 “Refrigerator is not cold enough; can not cool
down to the preset temp.” and the corresponding solutions. Then unplug the
power plug for 5 hours, wait for the ice on the evaporator melt, restart the
refrigerator.
The compressor never stops even if the refrigerator cools
and reaches the preset temperature value
The controller (PCB board) or temperature sensor is faulty, please ask a
technician to repair.
8. External cabinet
seems too hot
The ambient temperature is too high (over 100°F | 38°C)
Move the refrigerator to a cool and ventilated place
The inlet and outlet of the front grille are blocked.
Remove objects that may block the air inlet and outlet
If the refrigerator is placed outdoors or in a place with a lot
of dust/oil stains, after a period of time, a large amount of
dust will accumulate on the condenser fins, which will
affect the cooling effect.
Move the refrigerator to a place with less dust, regularly check the dust
accumulation status, and clean it with a blower.
The condenser fan stops working or operates at low
speed
Ask the technician to check whether there is a standard voltage on the fan
terminal when turning on the power. If the voltage is abnormal, please check
the switching power supply or the motherboard or circuit failure. If the voltage
is normal, the fan may be damaged, please replace with a new fan.
9. Condensation
on the glass door
Ambient humidity is high
Use a soft cloth to wipe dry the water
The door opening is too frequent
Reduce the frequency of door openings.
The door does not close properly.
Please refer to the problem #6 “The door will not close properly” and its
solutions. Then unplug the power plug for 5 hours, wait for the ice on the
evaporator melt, restart the refrigerator.
The heating glass is OFF (heating glass door is only
available for specific models)
Turn on the heating glass
The heating glass function fails (heating glass door is only
available for specific models)
Find a technician to repair, or replace with a new door.
PART VI!TROUBLESHOOTING GUIDE

www.kingsbottle.com (USA) |www.kingsbottle.com.au (Australia)"15
TROUBLESHOOTING GUIDE
PROBLEM
POSSIBLE CAUSE
SOLUTION
10. Water leakage
(outside of the
cabinet)
Condensation dripping from the glass door to the floor
Please refer to the problem #9 “Condensation on the glass door” and its
solutions.
Water overflows in the water pan next to the compressor
Open the back cover of the compressor and make sure that the water
pipe is in the water receiving tray.
11. Water leakage
inside the cabinet
The outlet of the water tray below the evaporator is blocked
Remove the blockages
The water pipe connected to the water tray under the
evaporator falls off.
Re-connect the water pipe, glue it with glue and tighten it with cable ties
The water tray cannot catch all the water drops from the
evaporator
Reinstall the water tray.
12. High humidity
in the cabinet or
condensation on
the bottle surface
Ambient humidity is high
Move the refrigerator to a cool and ventilated place
The door opening time is too long or too frequent
Reduce the times/frequency of door openings.
The door does not close properly.
Please refer to the problem #6 “The door will not close properly” and its
solutions.
13. The
temperature
difference between
the bottles inside
the cabinet is large
There are other objects besides drink bottles in the cabinet,
which affects the air circulation.
This refrigerator is designed for wine, beer, soft drinks storage, if there are
other objects, please remove it. The number of bottles placed on each
layer cannot exceed the standard configuration.
The running time is too short, and the system has not reached a
stable state.
No action required. After extending the cooling time, the temperature
inside the cabinet will be uniform.
14. The power
consumption is
different from the
value on the label
Power consumption is related to many factors, such as ambient
temperature, ventilation conditions, the number of bottles in the
cabinet, preset temperature, and voltage level. The actual
situation may differ from the power consumption indicated on
the label. This is normal.
No action required.
15. Incomplete
display characters
The number on the display is missing one or two strokes
The wiring of the display is poor connected. In most cases, it will not
affect the cooling function of the refrigerator.
The display is not displayed, but the keys have sound
Find a technician to repair.
16. Button failure
The door opening time is too long, resulting in too much
condensation on the glass panel
Avoid opening the door for a long time when the machine is turned on, it
will return to normal in ten minutes after the door is closed.
Signals such as cars, hair dryers, induction cookers, and mobile
phones accidentally interfere with the refrigerator.
Keep away from the signal source, turn off and unplug the power, then
restart the refrigerator.
Display or control board failure.
Find a technician to repair.
17. There is smell
inside the cabinet
The new machine may leave a small amount of environmental
cleaner
No action required, it will disappear gradually.
The smell of wooden shelves
No action required, it will disappear gradually.
18. Error code E1
Upper chamber temperature probe sensor failure
The sensor in the UPPER zone is defective, or the socket/plug on PCB is
poor connected. Please check the connection or replace the sensor.
19. Error code E2
Lower chamber temperature probe sensor failure
The sensor in the LOWER zone is defective, or the socket/plug on PCB is
poor connected. Please check the connection or replace the sensor.
20. Error code E3
Defrost probe sensor failure
Check whether the circuit between the sensor and the PCB control board
is normal. If the circuit is normal, replace the temperature sensor.
19. Error code HH*
High-temperature alarm.
There are likely to be the following problems: pipeline refrigerant
leakage, capillary blockage, abnormal evaporator fan.
Check for the following problems: pipeline refrigerant leakage, capillary
blockage, abnormal evaporator fan. Or, refer to Problem #2 "Refrigerator
is not cold enough; won't cool to preset temperature." and its solution.
20. Error code LL*
Low-temperature alarm.
There may be the following problems: the evaporator fan is
abnormal, and the PCB control board is faulty.
Check that the evaporator fan and PCB control board are working
properly. If it is defective, please replace it.
PART VI!TROUBLESHOOTING GUIDE
"HH" high temperature alarm: 2 hours after the refrigerator is powered on, it will start to detect over-temperature: if it exceeds 26°c, the digital tube will
display HH. After HH on display continues for more than 1 hour, the HH will flash, and the buzzer will sound “Beeping".The compressor can still start and stop
normally. If it lasts for more than 20 minutes, the buzzer stops sounding, the compressor is forced to stop, and the "HH" on the display keeps flashing. The state
needs to be powered off and on again to recover.
"LL" low temperature alarm: 2 hours after the refrigerator is powered on, it will start to detect. If the temperature is less than 0°c and lasts for more than 15
minutes, it will start to protect: at this time, the digital tube will flash "LL" by default, and the buzzer will emit a "beep" ” sound, and the compressor stops
working at the same time; when the temperature is higher than 2°C, the low temperature protection is cancelled.

www.kingsbottle.com (USA) |www.kingsbottle.com.au (Australia)"16
CLEANING YOUR REFRIGERATOR
BEFORE CLEANING: Turn off the power, unplug the appliance, and remove all items including all the shelves.
•Wash the inside surfaces with warm water and baking soda solution. The solution should be about 2 tablespoons of baking soda with
a quart of water.
•Wash the shelves with a mild detergent solution.
•Wring excess water out of the sponge or cloth when cleaning area of the controls, or any electrical parts.
•Wash the outside cabinet with warm water and a mild liquid detergent. Rinse well and wipe dry with a clean, soft cloth.
•After installation, we recommend that owners apply a thin layer of Olive Oil with a clean rag, to all exposed Stainless Steel areas. This
should then be polished in and buffed off with another clean rag to a non-oily finish. This process will aid protection against dirt and
other corrosive contaminants, by providing a temporary food-safe shield. The Olive Oil layer also makes later polishing and removal of
fingerprints easier. This process should be repeated frequently every 3-4 months. ALL stainless steel can rust; it is a myth that
stainless steel doesn’t rust.
POWER FAILURE!
Most power failures are corrected within a few hours and should not affect the temperature of your appliance if you minimize the number of
times the door is opened. If the power is going to be off for a longer period of time, you need to take the proper steps to protect your contents.
VACATION TIME !
Short vacations: You may leave the refrigerator operating during vacations of less than three weeks.!
Long vacations: If the appliance will not be used for several months, remove all items and turn offthe appliance. Clean and dry the
interior thoroughly. To prevent mold growth, leave the door open slightly, blocking it open if necessary.!
MOVING YOUR REFRIGERATOR!
1. Remove all items.
2. Securely tape down all loose items (shelves) inside your appliance.
3. Turn the adjustable leg up to the base to avoid damage.
4. Tape the door shut.
5. Be sure the appliance stays secure in the upright position during transportation. Also, protect the outside of the appliance with a
blanket or similar item.
ENERGY SAVING TIPS!
•The refrigerator should be located in the coolest area of the room, away from heat-producing appliances, and away from direct sunlight.
Ventilation at the rear also helps a lot with energy usage, to create a positive air flow where possible, although with this range they are
designed to be fully built in.
•When you are not using refrigerator during weekdays etc. it is recommended to set the temp at a higher level, so set at 64°F (18°C )
during periods of non-usage, this will not only mean less run time, it will also keep drinks at a temp that won’t get them spoiled. It saves
energy also which these days are a growing concern for most households.
•Keep the refrigerator stocked; an empty refrigerator will run longer, believe it or not.
DISPOSAL
Before disposal of the appliance.
1.Disconnect the main plug from the main socket.
2.Cut off the main cable and discard it
Correct disposal of this product
This symbol on the product, or in its packaging, indicates that this product may not be treated as household
waste. Instead, it should be taken to the appropriate waste collection point for the recycling of electrical and
electronic equipment. By ensuring this product is disposed of correctly, you will help prevent potential negative
consequences for the environment and human health, which could otherwise be caused by the inappropriate
waste handling of this product. For more detailed information about the recycling of this product, please
contact your local council, your household waste disposal service, or the shop where you purchased the
product.
MAINTENANCE
place for later reference.
The symbols you will see in this booklet have these meanings:
WARNING
CAUTION
TIPS & INFORMATION
ENVIRONMENTAL TIPS
Meanings of symbols used in this manual are shown below:
WARNING
‘flammable’ and/or a small flame symbol,
do not store them inside any refrigerator or
freezer. If you do so you may cause an explosion.
remove any doors. Children can suffocate if they get
trapped inside.
blowing gases. Avoid safety hazards by carefully
disposing of this appliance.
WARNING
The refrigerator must be plugged into its own
dedicated 220-240V, 50Hz AC electrical outlet.
The plug must be accessible when the refrigerator is
in position.
It is essential the power point is properly earthed to
ground.Consult a qualified electrician if you are unsure.
Don’t use extension cords or adapter plugs with this
refrigerator.
If the power cord is damaged, have it replaced by a
qualified service technician.
Unplug the refrigerator before cleaning it, or changing
the light bulb to avoid electric shock.
Never unplug the refrigerator by pulling the electrical
cord as this may damage it. Grip the plug firmly and
pull straight out.
Choose a location for your refrigerator that isn’t too cold.
The ambient room temperature should be above 10°C.
Stand your refrigerator in a dry place – avoid areas
of high moisture or humidity.
Don’t put the refrigerator in frosty or unprotected areas
like a garage or on the verandah.
Keep the refrigerator out of direct sunlight.
Don’t locate the refrigerator near stoves, fires or heaters.
When installed correctly, your refrigerator should:
– Have adequate space at the back and sides
for air circulation (refer to page 9).
– Be aligned to the surrounding cupboards.
– Have doors that will self-close from a partially
open position.
WARNING
This appliance may contain a small quantity of environmentally
friendly, but flammable, non-synthetic R600a refrigerant:
damaged during transportation and installation.
8g of refrigerant. The amount of refrigerant charged in the
appliance can be found on the rating plate on the appliance.
in the built-in structure, clear of obstruction.
accelerate the defrosting process, other than those
recommended by the manufacturer.
3
per 8g of refrigerant. The amount of refrigerant charged
in the appliance can be found on the rating plate on
the appliance.
PART VII!CARE AND MAINTENANCE

www.kingsbottle.com (USA) |www.kingsbottle.com.au (Australia)"17
TECHNICAL DATA
PART VIII! ! TECHNICAL DATA
MODEL NO.
KBU145BX | KBU145WX
KBU265BX | KBU265WX
KBU425BX | KBU425WX
VOLUME
5.12 CF ( 145 Liter )
9.36 CF ( 265 Liter)
15.00 CF ( 425 Liter )
TYPE OF COOLING
compressor with air-circulated fan
cooling
compressor with air-circulated fan
cooling
compressor with air-circulated fan
cooling
CLIMATE TYPE
N
N
N
ELECTRICITY PROTECTION
GRADE
I
I
I
NOMINAL VOLTAGE/
FREQUENCY
110-115V/60HZ (USA)
220-240V/50HZ (AU)
110-115V/60HZ (USA)
220-240V/50HZ (AU)
110-115V/60HZ (USA)
220-240V/50HZ (AU)
RATED CURRENT
1.2A (USA) | 0.5A (AU)
1.7A (USA) | 0.8A (AU)
1.7A (USA) | 0.9A (AU)
RATED POWER(W)
100W (USA) | 65W (AU)
165W (USA) | 129W (AU)
165W (USA) | 130W (AU)
REFRIGERANT
R600a / 25g
R600a / 45g
R600a / 52g
AMBIENT TEMPERATURE
32 - 100 °F ( 0 -38°C)
TEMPERATURE RANGE
36-68 °F ( 2 - 20°C)
NET WEIGHT
115 lbs (52 KGS)
167 lbs (76 KGS)
227 lbs (103 KGS)
GROSS WEIGHT
(INC. PALLET)
145 lbs (66 KGS)
194 lbs (88 KGS)
273 lbs (124 KGS)
DIMENSION
23.42”W x 22.75”D x 32.28”H;
( 595W x 578D x 820H mm )
Included stand height 0.59” (15mm)
23.42”W x 27.55”D x 47.24”H
( 595W x 700D x 1200H mm )
Included stand height 0.59” (15mm)
23.42”W x 27.36”D x 70.86”H
( 595W x695D x 1800H mm )
Included stand height 0.59” (15mm)

www.kingsbottle.com (USA) |www.kingsbottle.com.au (Australia)"18
TECHNICAL DATA
PART IX!WARRANTY INFORMATION
COMPRESSOR REFRIGERATORS
Please speak to your retailer before calling us if you did not purchase your refrigerator directly from KingsBottle.
WHO IS COVERED: This warranty is extended only to the original end-user purchaser or the person receiving the product as a gift, and shall not be extended
to any other person or transferee.
LIMITED WARRANTY – If your refrigerator is not operating properly, KingsBottle reserves the right to repair or replace the refrigerator. KingsBottle may
request the consumer to contact a local refrigeration company to service the refrigerator. All cost for labor and materials is covered for 2-year from the date of
receipt. If KingsBottle deems the unit not repairable, KingsBottle will use the value of your original order toward a replacement (Any replacement unit will follow
the warranty terms of the initial purchase). For customer service, please e-mail us via [email protected].
THE LIMITED WARRANTY DOES NOT COVER: Damage due to such things as an accident, misuse, abuse, mishandling, neglect, unauthorized repair or
any other cause beyond the control of the seller whether similar or dissimilar to the foregoing. Purchaser understands and acknowledges that the goods sold
here are WINE & BEVERAGE REFRIGERATORS, which house beer and other wines. Purchaser assumes all the risk of using these units, including the risk of
spoilage, humidity variations, temperature variations, leaks, fires, water damage, mold, mildew, dryness and similar perils that may occur.
SPECIAL NOTE: Warranty is only honored for the unit which is used in the countries where the unit was initially purchased. And, if your product was
purchased at any 3rd party retailer and not directly from KingsBottle, we do not offer an extended warranty policy. You MUST contact the retailer of purchase
directly. In the event your retailer does not offer an extended warranty plan, we recommend you contact a third party warranty provider. However, regardless of
point of purchase, all KingsBottle refrigerators are backed by a TWO YEAR manufacturer's warranty from date of sale.
This manual suits for next models
11
Other KingsBottle Kitchen Appliance manuals

KingsBottle
KingsBottle KBU50DX-FG User manual

KingsBottle
KingsBottle KBU50BX User manual

KingsBottle
KingsBottle KBU165BW User manual

KingsBottle
KingsBottle KBU-328 SERIES User manual

KingsBottle
KingsBottle KBU-52 Series User manual

KingsBottle
KingsBottle KBU-55 SERIES User manual

KingsBottle
KingsBottle KBU28LRX User manual

KingsBottle
KingsBottle KBUSF50B User manual

KingsBottle
KingsBottle KBU145DX User manual

KingsBottle
KingsBottle KB50WX-FG User manual