manuals.online logo
Brands
  1. Home
  2. •
  3. Brands
  4. •
  5. KingShield
  6. •
  7. Lantern
  8. •
  9. KingShield PL6PIRW Manual

KingShield PL6PIRW Manual

Thank you for purchasing a quality KingShield Porch Lantern with PIR. Please read these instructions
fully prior to initial use.
Every effort has been made to ensure that the guidance information on this sheet will enable the
installation of the Lantern to be carried out safely and correctly.
This product should be inst lled by competent person nd in ccord nce with the current IEE Wiring
Regul tions. If in doubt, consult qu lified electrici n.
Always switch off mains supply before servicing, fitting or replacing lamps. Always check the lamp is
correct for the application, including its voltage and wattage. Never exceed the maximum wattage.
Ensure the lamp is correctly located in the lampholder.
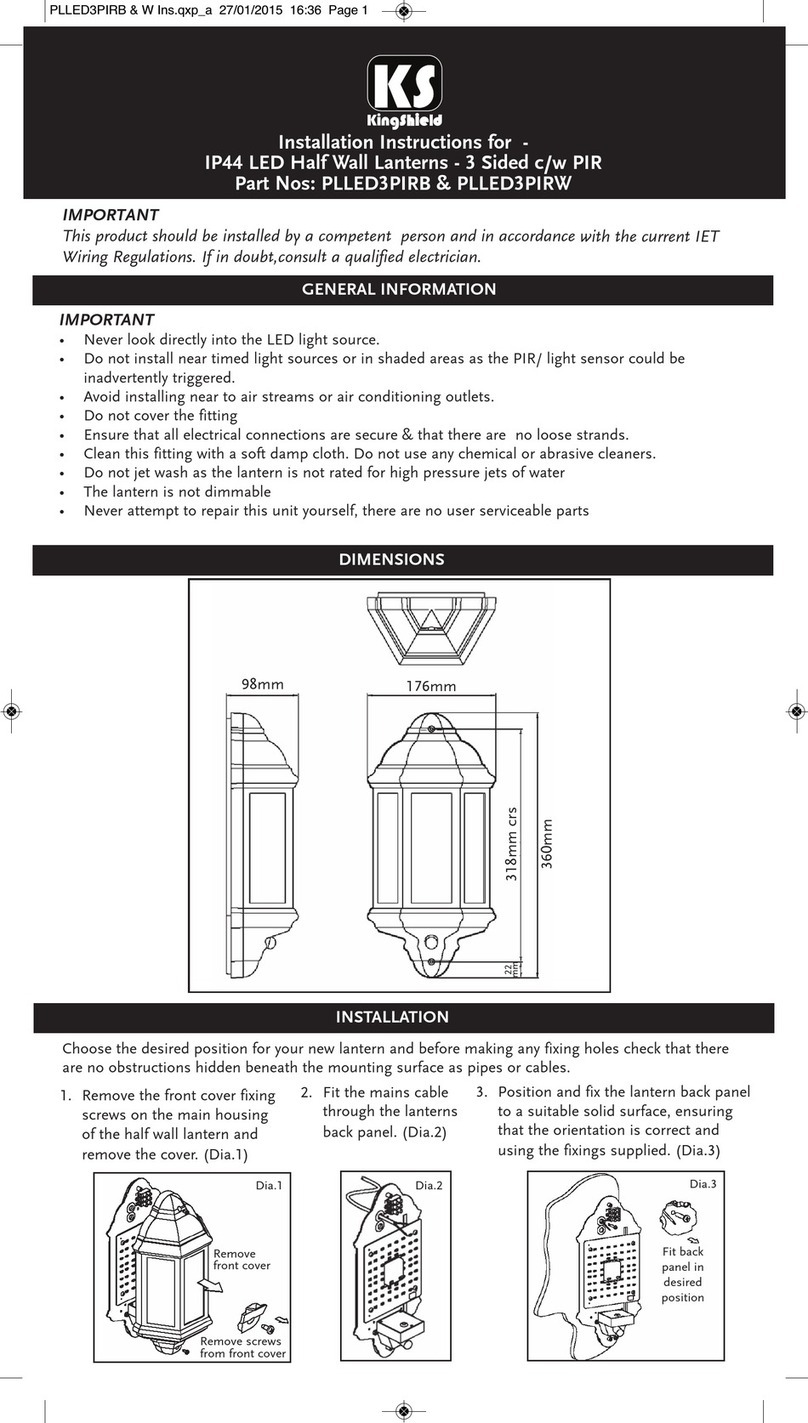
1. Unscrew capping nuts (2off) on front of fitting then remove terminal housing cover at back and
unplug the two connectors.
2. Hold the terminal housing cover up to the wall in the desired fixing position, mark hole positions.
This fitting should not be fitted to wet or damp surfaces such as freshly plastered or painted walls.
3. Cut hole in rubber grommet in terminal housing cover and feed mains cable through.
4. Drill holes on the points marked on the wall in step 2. use an ø8mm drill bit and insert rawl plugs prior
to screwing into position.
5. Connect the live and neutral cables to the 3-way terminal block and then relocate the connector into
the terminal housing, see fig.2for details. NOTE: Earth terminal is for convenience as this is a class II
product.
6. Re-connect the two connectors removed in step (1).
7. Position the fitting onto the terminal housing that was secured to the wall in steps 2,3,4and then
secure using the capping nuts that were removed in step 1.
8. Remove lid by unfastening the fixings and screw lamp into lampholder, re-secure lid into position.
9. Turn on mains supply to test the fitting. Lamp will light for approx 30 seconds, then flash 4times and
go off. Daylight walk-by test, Turn “Lux” fully clockwise and “time” fully anti-clockwise, perform
walk-past and lamp should light for approx 5-15 sec and then go out. Adjust “Lux” and “time” controls
as required.
1. Turn on the light at the switch.
2. Operate the switch Off/On, twice in 3seconds.
3. The lamp will then flash 3times to indicate that it is in ‘Manual Override Status’. The lamp will then
stay on.
4. The lamp will remain illuminated for up to 8hours.
5. To cancel, Switch Off at the light switch & leave for 10 seconds.
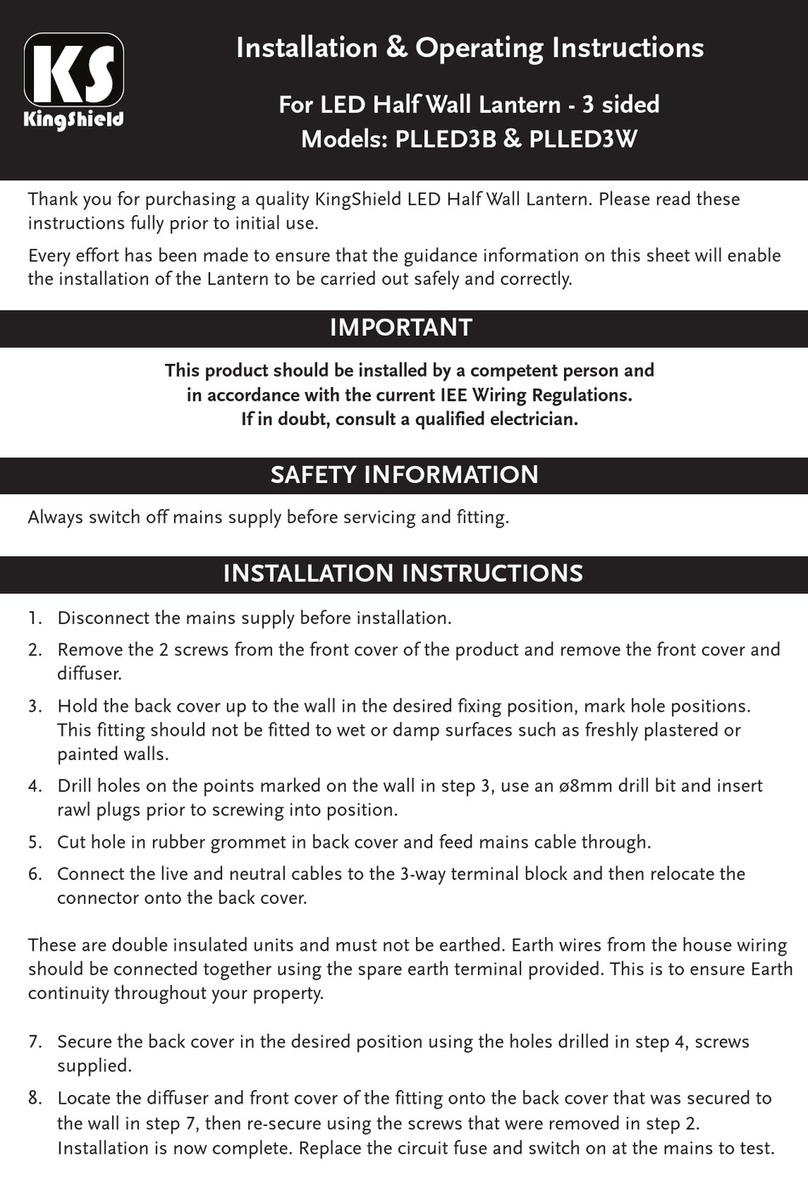
Inst ll tion & Oper ting Instructions
For Porch L ntern - 6 sided with PIR
Models: PL6PIRW & PL6PIRB
IMPORTANT
SAFETY INFORMATION
INSTALLATION INSTRUCTIONS
MANUAL OVERRIDE FUNCTION
GUARANTEE
Your KingShield Porch Lantern with PIR is guaranteed for 12 months from the date of purchase.
This is in addition to your statutory rights.
PL6PIRW & PL6PIRB Ins:Layout 1 19/11/13 11:36 Page 1
Issue no: 703428
WEST ROAD . HARLOW
ESSEX . CM20 2BG . UK
s [email protected]
W W W. G R E E N B R O O K . C O . U K
Supply: 240VAC, 50Hz
IP Rated: IP44
Time Delay: 5sec to 6min (+/- 2min)
Ambient Light: <10 LUX ~ 2000 LUX
Detection Distance: Max 8m +/- 2m
Detection Range: 140°
Installation Height: 0.5 - 3.5m
Power Consumption: 0.45 (Static 0.1 )
Detection Motion Speed: 0.6 ~ 1.5m/s
TECHNICAL INFORMATION
PLEASE KEEP THESE INSTRUCTIONS SAFE FOR FUTURE REFERENCE
DETECTION RANGE FOR THE PIR SENSOR
Step 4
Drill holes on the points
marked in step 2, insert
Rawl Plugs & screw into
position, typ. 3pos’ns.
Step 8
Unscrew lid fixing, remove lid,
screw lamp into position and
resecure lid.
Step 2
Mark hole positions through
fixing holes in Terminal housing,
typ. 3pos’ns.
Step 1
Unscrew
Capping Nuts.
Step 7
Locate main body
of the fitting to the
Terminal Housing
& resecure Capping
Nuts.
Step 3&5
Cut hole in Rubber
Grommet, feed mains
cable through & connect
to Terminal Block see
Fig.2for details.
Step 6
Secure PIR Connectors.
42W or CFL 14W
ES
PL6PIRW & PL6PIRB Ins:Layout 1 19/11/13 11:36 Page 2

This manual suits for next models

1

Other KingShield Lantern manuals

KingShield ELTSLED65NM Manual

KingShield

KingShield ELTSLED65NM Manual

KingShield GSS User manual

KingShield

KingShield GSS User manual

KingShield PLLED3B Manual

KingShield

KingShield PLLED3B Manual

KingShield Corvus Series User manual

KingShield

KingShield Corvus Series User manual

KingShield PLLED3PIRB User manual

KingShield

KingShield PLLED3PIRB User manual

Popular Lantern manuals by other brands

Eaton Crouse-Hinds Pauluhn DLLA M2 Series Installation & maintenance information

Eaton

Eaton Crouse-Hinds Pauluhn DLLA M2 Series Installation & maintenance information

smart & green bulbLITE2 Instruction

smart & green

smart & green bulbLITE2 Instruction

esotec Cube operating instructions

esotec

esotec Cube operating instructions

Stahl EXLUX 6009 Series operating instructions

Stahl

Stahl EXLUX 6009 Series operating instructions

Philips SolarSpot brochure

Philips

Philips SolarSpot brochure

BEGA 99 396 Instructions for use

BEGA

BEGA 99 396 Instructions for use

MELINERA 106324 instructions

MELINERA

MELINERA 106324 instructions

Eurotops Z 09553 operating instructions

Eurotops

Eurotops Z 09553 operating instructions

WE-EF VFL530 Installation and maintenance instructions

WE-EF

WE-EF VFL530 Installation and maintenance instructions

Gavita GAN Electronic 250W 400V Interlight manual

Gavita

Gavita GAN Electronic 250W 400V Interlight manual

BEGA 33 289 Series Instructions for use

BEGA

BEGA 33 289 Series Instructions for use

DOTLUX 2528-0FW120 user manual

DOTLUX

DOTLUX 2528-0FW120 user manual

LUXX LIGHTING LUX-200-277-80 user manual

LUXX LIGHTING

LUXX LIGHTING LUX-200-277-80 user manual

Coleman 639C700 owner's manual

Coleman

Coleman 639C700 owner's manual

Elgo LINESMART OLN 402 Installation and operating instruction

Elgo

Elgo LINESMART OLN 402 Installation and operating instruction

esotec Lumina instruction manual

esotec

esotec Lumina instruction manual

Jaykal JLS68103-G60-ACTR installation instructions

Jaykal

Jaykal JLS68103-G60-ACTR installation instructions

Lunux Q-Rail instruction manual

Lunux

Lunux Q-Rail instruction manual

manuals.online logo
manuals.online logoBrands
  • About & Mission
  • Contact us
  • Privacy Policy
  • Terms and Conditions

Copyright 2025 Manuals.Online. All Rights Reserved.