manuals.online logo
Brands
  1. Home
  2. •
  3. Brands
  4. •
  5. Kino Flo
  6. •
  7. Lighting Equipment
  8. •
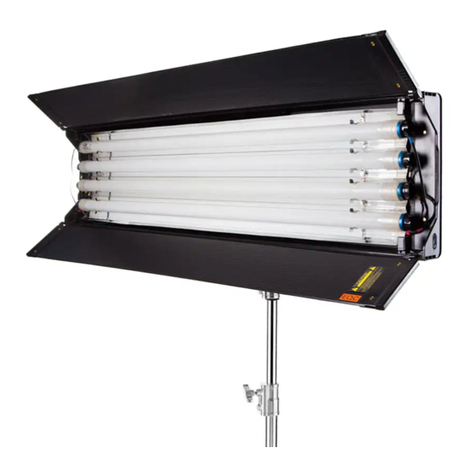
  9. Kino Flo Select DMX 4Bank User manual

Kino Flo Select DMX 4Bank User manual

Operation Manual
Select DMX 4Bank
Part No. 3100023 Rev B 01-07-2008
2
4Bank
4Bank System consists of:
1 Fixture
1 Mounting Plate
1 Extension Cable
1 Select DMX 4Bank Ballast
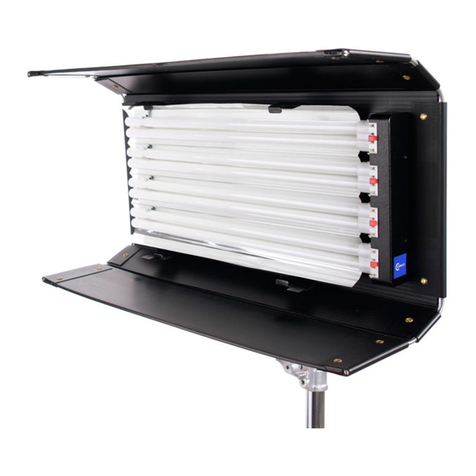
CFX-4804 4ft 4Bank Fixture
CFX-2404 2ft 4Bank Fixture
MTP-K41 Mounting Plate w/ 3/8” Pin
X16-25 4Bank Extension, 25ft
BAL-450-120 Select/Dmx 4Bank Ballast,
120VAC
BAL-450-230 Select/Dmx 4Bank Ballast,
230VAC
3
The 4Bank fixture is comprised of a removable Louver,
Reflector, and Lamp Harness. The Louver and Reflector
are held in place with Velcro fasteners. The Lamp Harness
is secured by means of a ¼ turn fastener and two clips.
To Release the Lamp Harness
Remove the harness from 2 clips located under the reflector.
Rotate the ¼ turn fastener clockwise to release harness.
The lamps can operate independent
of the fixture allowing them to be
built into sets or custom soft boxes
or hand held as a single tube for an
eye-light.
WARNING: Always use safety coated
lamps to avoid injury if lamp breaks.
4
Locking Lamp Connector:
Depress both tabs on lamp connector and apply to lamp pins.
Match the Harness color-codes at each end of the lamp.
Push lamps into the fixture’s Lamp Holder Clips.
Lamp Harness Color Codes
The Harness wiring is color-coded. The same color-
code must match at each end of the lamp for proper
operation.
RED
YELLOW
BLACK
BLUE
4Bank Harness
5
Align the center pin of the
mounting plate to the center
hole on the mating plate.
Rotate plate clockwise until the
four shoulder rivets drop into
the receptacle. A locking pin
will snap into place when the
plate is properly seated.
Restricting the airflow around the lamps can cause the lamp to
operate hotter. This increased heat will raise the lamp’s color
temperature and green spike. Therefore, it is recommended to
clip gels to the Doors of the Fixture.
Do Not clip gels to louver.
Do Not block the fixture ends in a manner that restricts airflow.
6
Optional Lollipops
w/ Baby Receivers
allow mounting to
a 5/8” pin or a
baby stand.
To remove the plate, pull up on
the locking pin and rotate the
plate counter clockwise.
The standard mount comes with
a 3/8” Lollipop that clamps into a
grip head. The ball and socket
mount allows the fixture to be
oriented in a broad range of
angles.
The yellow wire loops provide
attachment points for a safety
chain.
The grommet
holes along
the edge of
the fixture
are designed
to allow the
fixture to be
screwed onto
set walls.
MTP-LB MTP-LBT
7
To insert the cable, align the key
ways on the extension cable with the
circular receptacle on the ballast.
Rotate the locking ring until it clicks
into the lock position. Lamps can
operate as far as 75 feet from the
ballast. (3 x 25ft extensions)
A Splitter can be used at the Ballast
or on the end of an Extension Cable
to split a 4Bank run into either
4 Singles or 2 Doubles.
This allows for greater rigging
flexibility.
WARNING!
1) ALWAYS TURN OFF THE BALLAST BEFORE connecting or
disconnecting Lamps, Harnesses or Extension Cables.
2) Use only with Sine wave inverters. Do not operate on SCR dimmers.
3) If powering the ballasts through a Dimmer Pack set the Dimmer to
Non-Dim Mode.
The 120 VAC Ballast requires 110 to 130 Volts AC 50/60 Hertz on an earth
grounded circuit; the 230 VAC Ballast requires 220 to 240 Volts AC on an
earth grounded circuit. The electronic Ballast operates at a high frequency of
25KHz. It is dead–quiet, instant–on and lightweight.
Load Considerations:
Kino Flo ballasts are not power factor corrected. They will draw double the
current on the neutral from what is being drawn on the two hot legs. On large
installations it may be necessary to double your neutral run so as not to
exceed your cable capacity.
8
Color Band
Ballast Operation Continued….
Cold Temperature Operation
The Select DMX Ballast series is designed to operate at temperatures
from 14F to 122F (–10C to +50C). In cold temperatures, the Ballast
may not strike the lamp(s) instantly. Switch the Ballast to OFF, wait
seven seconds and try again. If the Ballast does not strike after two
or three attempts, turn off the Ballast, check that the Extension and
Harness connections are secure and re-strike. Once operating for
a few minutes, the Lamps should re-strike instantly.
Lamp Select Feature
The Select Ballasts have a 4FT / 2FT switch. Set the Selector Switch to
4FT for 4ft lamps and 2FT for 2ft or 15” lamps.
The Ballast operates remote from the fixture. Connect the Extension
cable to the Ballast and the Lamp Harness. After the lamps are properly
installed the Ballast can be turned on. Each switch controls one lamp.
The color bands on the lamp harness correspond to the switches as
illustrated.
Blue
Black
Yellow
Red
9
A) Circular Output Connector: Provides electrical power to the lamp
head with the use of a 4Bank extension cable.
B) DMX-In & DMX-Out: DMX-IN receives DMX signals from Dimmer
Board. DMX-OUT relays DMX signal through to other Fixtures or
Instruments.
C) Fuse: Provides circuit protection. Note: If Fuse is "blown" or
"open" replace with same type of fuse rating as marked.
D) DMX TERMINATE Switch: Terminates DMX signal at the end of
Fixture series.
E) Individual Lamp / Fixture Switch: Converts between INDIVIDUAL
LAMP and FIXTURE methods of DMX control.
F) DMX Address: Sets DMX Address of Fixture.
G) Lamp Select: Set to 4ft for 4ft lamps and 2ft for 2ft or 15” lamps.
H) Manual Switches: Turns lamps on and off manually.
A E F G HB D
C
Lamp Select feature continued…
When operating 4ft lamps in high ambient temperature or where the
units are rigged into place with restricted airflow, the 2FT setting can
be used to lower the color temperature and remove any green spike.
The light drops about a half an f-stop in exposure when dropping from
4FT to 2FT.
It is not recommended to operate 2ft lamps in the 4FT setting. At the
4FT setting, the color temperature of the 2ft lamps will rise
dramatically and experience a high green spike.
10
DMX Addressing
Push the tabs above or below the number
window to set the address.
(Valid addresses range from 001 to 512.)
The yellow light above the address block
will illuminate if a DMX signal is present.
Each DMX 4Bank ballast operates on 5
addresses.
After the DMX address is entered, the
ballast automatically assigns the next 4
addresses to lamps 2,3,4 and a 5th address
controls the 2ft setting. Programming the
5th address at full dimmer setting activates
the 2ft setting.
Note: When DMX cables are applied the
manual 4ft/2ft select feature will be disabled.
To get manual control of the 4ft/2ft feature
1) Unplug the DMX cable or
2) Leave cables plugged in and set address to
”000”. There is a 5 second delay when
switching between DMX and Manual control.
Manual lamp switching is not affected by
DMX control.
The DMX Terminate Switch must be set
to open ( O ) on Ballasts within the DMX
chain.
Set to closed ( I ) when the Ballast is the
last DMX control device in the chain.
Note: When the last Ballast’s DMX
Terminate Switch is set to “I,” it will absorb
all energy in the DMX line, ensuring DMX
signals are transmitted correctly. If a signal
is not terminated, it is called a “Reflected
Wave,” and may create transmission errors
by causing valid DMX signals to be
canceled.
IMPORTANT!
The dimmer
board/light console
should have its
channel set to
LINEAR light
output response.
(LINEAR response
is the default
setting on most
dimmer boards.)
11
Any theatrical lighting board with DMX
512 protocol can be used to
individually turn on/off lamps in a
Fixture.
Select DMX 4Bank Ballasts can be
jumpered using the IN and OUT ports.
As many as 100 Ballasts can be
jumpered on one chain as long as the
DMX cable run remains under 1000
feet or 40 x 25ft DMX cables.
DMX Cables
The Fixture uses five-pin XLR male
and female connectors to receive DMX
signals from the Dimmer Board and
jumper the Fixtures in a series. DMX
pin-out wiring follows the USITT
DMX512 standard:
Pin 1: Shield
Pin 2: Data -
Pin 3: Data +
Pin 4: Spare -
Pin 5: Spare +
Note: Pin four and five in the Fixture
are connected internally as Pin four to
four and Pin five to five. Connecting
Pin four and five as the pass-thru
allows secondary data to be passed
through for other equipment.
Do Not use Microphone
Cables and other, general
purpose, two-core Cables
designed for audio or signaling
use. They are not suitable for
DMX512. Problems due to
incorrect cabling may not be
immediately apparent.
Microphone Cables may appear
to work fine, but systems built
with such Cables may fail or be
prone to random errors. Cable
must comply with EIA-485
(RS485).
NOTE: If a Fixture or Ballast loses its DMX signal it will hold its last DMX
command. For this reason it is important to turn a Fixture or Ballast off using the
DMX commands. For example, if you try to turn off the lights by turning off the
dimmer board the lights will remember their last DMX command and stay on. The
Fixtures or Ballasts require a DMX “Off” or “ Black-out” command in order to turn
off.
Note: When operating Ballasts at great distances from the dimmer board,
it is recommended to use Opto-Isolators to provide DMX signal amplification.
12
DMX Lamp
Sequence
Lamp # Dimmer
Level
Lamp 1 12
Lamp 1~2 37
Lamp 1~3 64
Lamp 1~4 83
Setting the unit to
"Fixture Mode" allows
the user to turn lamps
on and off with an
“inside-out” pattern
from a dimmer board.
Dimmer level - Lamp response
Each ballast has 5 addresses. Addresses 001-004 control the lamps. Sliding
the fader on the dimmer board from 0 ~ 100 controls the number of lamps that
are on within a fixture. Address 005 controls the 2ft setting.
Note: The lamps may respond ± 4 channel levels, depending on the dimmer
board. To control the 2ft select feature, program the 5th address (005) at full.
Setting the dimmer value under 49% or not programming address 5 will
restore the 4ft setting.
4Bank Lamp Sequence
One of the best applications for the "Fixture Mode" is when lighting Blue and Green
Screens or large Cycloramas.
For example: One row of fixtures can be set to Fixture mode on a common address.
When the fader on the dimmer board is brought up or down all the Fixtures on that
address will have the same lamps turned on.
4 ( Red )
2 ( Yellow )
1 ( Black )
3 ( Blue )
To Control Light Levels From Multiple Fixtures:
1) Set ballast to Fixture mode.
2) Set all ballast addresses to a common address (e.g. 001).
3) Set address 005 if the 2ft setting is required.
4) Set end of line switch to “I” on the last unit in the DMX chain.
13
For example, if the DMX 4 Bank base address is set at 001 the
configuration below will provide 4 lamps individually addressable through
DMX512.
Setting the unit to “Individual Lamp” mode allows each lamp within
the fixture to have its own address. Although this option will use up
a lot of addresses, it may be preferable for certain situations.
The “Individual Lamp” mode is useful in achieving light effects like
flickering, chasing or creating light patterns. Individual lamps or
fixtures can be rigged into a set by using a 4Bank to Single or Double
splitter. A Single splitter can provide 4 individual cable feeds to lamps
or fixtures in a set. (For parts see page 16).
After the DMX address is entered, the Select DMX 4Bank
automatically assigns the next 4 addresses to lamps 2, 3, 4 and the
5th address controls the 2ft setting. On address 5 to activate the 2ft
lamp setting, set dimmer slider to full. Setting the dimmer value under
49% or not programming address 5 will restore the 4ft setting.
Note: The 4ft/2ft select setting controls all 4 lamps equally.
Individual settings per lamp are not possible.
4Bank Lamp Sequence
4 ( Red )
2 ( Yellow )
1 ( Black )
3 ( Blue )
DMX Address
Sequence
DMX address 001
Lamp# DMX
Address
Lamp 1 1
Lamp 2 2
Lamp 3 3
Lamp 4 4
2ft Setting 5
14
X16-25 4Bank Ext. Cable, 25ft
X16-12 4Bank Ext. Cable, 12ft
CFX-4804 4ft 4Bank Fixture
CFX-2404 2ft 4Bank Fixture
MTP-K41 “Twist-On” Mount w/ 3/8” Pin
To Chase one lamp through multiple fixtures:
1) Set ballast to Individual Lamp mode.
2) Set each ballast with its own address: 001, 006, 011, 016 and
so on.
3) Program address 005, 010, 015 etc. for 2ft operation.
4) Program lamp sequence to chase from 001 through 004, 006-009,
011-014 and so on.
5) Set end of line switch to “I” on the last unit in the DMX chain.
To Chase same lamp position simultaneously through multiple
fixtures:
1) Set ballast to Individual Lamp mode.
2) Set each ballast address to 001 (or a common address).
3) Program address 005, 010, 015 etc. for 2ft operation.
4) Program lamps to chase from address 001-004.
5) Set end of line switch to “I” on the last unit in the DMX chain.
15
FIX-4804 4ft 4Bank Fixture Shell
FIX-2404 2ft 4Bank Fixture Shell
BAL-450-120 Select/DMX 4Bank, 120VAC
BAL-450-230 Select/DMX 4Bank, 230VAC
DFS-4804 4ft 4Bank Flozier, Full
DFS-4804-H 4ft 4Bank Flozier, Half
DFS-D4 2ft 4Bank Flozier, Full
DFS-D4-H 2ft 4Bank Flozier, Half
MTP-B41 “Twist-On” Mount w/ Baby Receiver
MTP-B41S “Twist-On” Mount w/ Baby Receiver
Short
MTP-B41T “Twist-On” Mount w/ Baby
Receiver Straight
MTP-L Lollipop 3/8” Pin
MTP-LB Lollipop w/ Baby Receiver
MTP-LBS Lollipop w/ Baby Receiver Short
MTP-LBT Lollipop w/ Baby Receiver Straight
MTP-BAL Select Ballast Mount
16
LVR-4804-B 4ft 4Bank Louver, Black
LVR-2404-B 2ft 4Bank Louver, Black
REF-4804 4ft 4Bank Reflector
REF-2404 2ft 4Bank Reflector
X16-A4 4Bank to Single Splitter
X16-A9 4Bank to Double Splitter
X09-25 Double Ext. Cable, 25ft
X09-12 Double Ext. Cable, 12ft
X04-25 Single Ext. Cable, 25ft
X04-12 Single Ext. Cable, 12ft
HAR-4804 4ft 4Bank Harness
HAR-2404 2ft 4Bank Harness
HAR-4802 4ft Double Harness
HAR-2402 2ft Double Harness
HAR-4801 4ft Single Harness
HAR-2401 2ft Single Harness
17
See web site: www.kinoflo.com for more accessories.
Kino Flo 4Bank Fixture Dimensions
Barndoor Weight
Fixture Style Length Width Depth Width w/Lamps
2ft 4Bank 27.00” 13” 3.5” 6.5” 7.5 lbs
4ft 4Bank 52.00” 13” 3.5” 6.5” 11.5 lbs
EXP-LHC-T12 Lamp Holder Clips T12, 24pk
EXP-M&T Adhesive Mounts and Releasable
Ties, 25pk
PRT-HLC Kino Locking Lamp Connector, 1pk
18
KAS-C46 KAS-54L KAS-KFC BAG-201
Part Description Dimensions Weight Holds
Number (Empty)
BAG-201 2ft 4Bank Soft Case 27.5 x 7 x 14” 3lb / 1.4kg 2ft 4Bank System (1)
(70 x 18 x 35.5cm)
BAG-401 4ft 4Bank Soft Case 53.5 x 7 x 14” 4.6lb / 2.1kg 4ft 4Bank System (1)
(136 x 18 x 35.5cm)
INS-L4 4-Lamp Foam Pad 24 x 9 x 1” N/A Fits KAS-48, 72, 96
(61 x 23 x 2.5cm)
INS-L6 6-Lamp Foam Pad 24 x 13 x 1” N/A Fits KAS-54S, 54L,
(61 x 33 x 2.5cm) 96L
Kino Flo Double Fixture Dimensions
Barndoor Weight
Fixture Style Length Width Depth Width w/Lamps
2ft Double 27.00” 7.5” 3.5” 6.0” 4.7 lbs
4ft Double 52.00” 7.5” 3.5” 6.0” 7.7 lbs
Kino Flo Single Fixture Dimensions
Barndoor Weight
Fixture Style Length Width Depth Width w/Lamps
2ft Single 27.00” 4.5” 3.5” 3.5” 2.7 lbs
4ft Single 52.00” 4.5” 3.5” 3.5” 4.3 lbs
19
Kino Flo Lamp w/ Harness Dimensions
Lamp Type Length Width
2ft Med. Bi-Pin 24.5” 1.5”
3ft Med. Bi-Pin 36.5” 1.5”
4ft Med. Bi-Pin 48.5” 1.5”
Part Description Dimensions Weight Holds
Number (Empty)
KAS-21 2ft System Ship Case 30 x 10 x 15” 12.5lb / 5.6kg 2ft 4Bank System (1)
(76 x 25.5 x 38cm)
KAS-41 4ft System Ship Case 57 x 9.5 x 15” 25lb/ 11.3kg 4ft 4Bank System (1)
(145 x 24 x 38cm)
KAS-48 4ft Lamp Ship Case 52.5 x 10.5 x 11” 15.5lb / 7kg 4ft Lamps (20)
(133.5 x 26.5 x 28cm)
KAS-54L 4ft Fixture Ship Case, 57 x 15 x 17” 25lb / 11.3kg 4ft 4Bank Fixture (5)
Large (145 x 38 x 43cm)
KAS-54S 4ft Fixture Ship Case, 57 x 15 x 11.5” 21lb / 9.5kg 4ft 4Bank Fixture (3)
Small (145 x 38 x 29cm)
KAS-C26 6-Lamp Carry Case, 26.5 x 6 x 4” 1lb / .5kg 2ft Lamps (6)
(2ft) (67.5 x 15 x 10cm)
KAS-C46 6-Lamp Carry Case, 50.5 x 6 x 4” 1.5lb / .7kg 4ft Lamps (6)
(4ft) (128.5 x 15 x 10cm)
KAS-GAF Gaffer Kit Ship Case 55 x 12 x 19.5” 34lb / 15.3kg 4ft 4Bank System (2)
(139.5 x 30.5 x 49.5cm)
KAS-INT Interview Kit Ship Case 35 x 11 x 21” 27lb / 12.2kg 2ft 4Bank System (2)
(89 x 28 x 53.5cm)
KAS-KFC Ballast & Cable 21.5 x 15 x 12” 6lb / 2.7kg Ballasts, Cables,
Crate w/ Lid (54.5 x 38 x 30.5cm) Mounting Plates
20
Environmental: Disposal of Old Electrical & Electronic Equipment.
This symbol on the product or on its packaging indicates that this product
shall not be treated as household waste. This product is made of recyclable
materials and should be disposed of in accordance with local and state
regulations.
BAL-450-120
Select/Dmx 4Bank Ballast, 120VAC
Input Voltage: 120VAC 50/60Hz
Output Frequency: 25 kHz
Amperage: F75/4.6A, F40/3.2A, F30/2.5A
Lamp switching: 4-1/off
Output Switching: 4ft / 2ft
Ballast size: 12.5 x 12.5 x 2.5”
(32 x 32 x 6.5cm)
Weight: 6.5lb / 2.9kg
BAL-450-230
Select/Dmx 4Bank Ballast, 230VAC
Input Voltage: 230VAC 50/60Hz
Output Frequency: 25 kHz
Amperage: F75/2.4A, F40/1.7A, F30/1.3A
Lamp switching: 4-1/off
Output Switching: 4ft / 2ft
Ballast size: 12.5 x 12.5 x 2.5”
(32 x 32 x 6.5cm)
Weight: 6.9lb / 3.1kg

Other Kino Flo Lighting Equipment manuals
Kino Flo FreeStyle Mini LED Kit User manual

Kino Flo

Kino Flo FreeStyle Mini LED Kit User manual

Kino Flo Flathead 80 User manual

Kino Flo

Kino Flo Flathead 80 User manual

Kino Flo Single User manual

Kino Flo

Kino Flo Single User manual

Kino Flo Diva-Lite 200 Installation manual

Kino Flo

Kino Flo Diva-Lite 200 Installation manual

Kino Flo Celeb 850 LED DMX User manual

Kino Flo

Kino Flo Celeb 850 LED DMX User manual

Kino Flo BarFly 100 User manual

Kino Flo

Kino Flo BarFly 100 User manual

Kino Flo Freestyle 41 LED User manual

Kino Flo

Kino Flo Freestyle 41 LED User manual

Kino Flo Flathead 80 User manual

Kino Flo

Kino Flo Flathead 80 User manual

Kino Flo Celeb 401 DMX LED User manual

Kino Flo

Kino Flo Celeb 401 DMX LED User manual

Kino Flo ParaZip 200 User manual

Kino Flo

Kino Flo ParaZip 200 User manual

Kino Flo ParaBeam 400 Series User manual

Kino Flo

Kino Flo ParaBeam 400 Series User manual

Kino Flo ParaBeam 410 Yoke Mount User manual

Kino Flo

Kino Flo ParaBeam 410 Yoke Mount User manual

Kino Flo Tegra 4Bank Universal User manual

Kino Flo

Kino Flo Tegra 4Bank Universal User manual

Kino Flo DIV-L20X-120U User manual

Kino Flo

Kino Flo DIV-L20X-120U User manual

Kino Flo Diva-Lite 401 User manual

Kino Flo

Kino Flo Diva-Lite 401 User manual

Kino Flo Celeb 400 DMX LED User manual

Kino Flo

Kino Flo Celeb 400 DMX LED User manual

Kino Flo Diva-Lite 30 User manual

Kino Flo

Kino Flo Diva-Lite 30 User manual

Kino Flo Mini-Flo KIT- 239X-12 User manual

Kino Flo

Kino Flo Mini-Flo KIT- 239X-12 User manual

Kino Flo Celeb 401Q DMX LED User manual

Kino Flo

Kino Flo Celeb 401Q DMX LED User manual

Kino Flo Diva-Lite 400 Universal User manual

Kino Flo

Kino Flo Diva-Lite 400 Universal User manual

Kino Flo Mini-Flo User manual

Kino Flo

Kino Flo Mini-Flo User manual

Kino Flo Tegra 4Bank Universal User manual

Kino Flo

Kino Flo Tegra 4Bank Universal User manual

Kino Flo FreeStyle T42 LED User manual

Kino Flo

Kino Flo FreeStyle T42 LED User manual

Kino Flo ParaZip 415 DMX User manual

Kino Flo

Kino Flo ParaZip 415 DMX User manual
Popular Lighting Equipment manuals by other brands

RICOMAN R123101 installation instructions

RICOMAN

RICOMAN R123101 installation instructions

Liton LRLD6 installation instructions

Liton

Liton LRLD6 installation instructions

Philips Selecon PL1 Series Installation & user manual

Philips

Philips Selecon PL1 Series Installation & user manual

Brightline ZELo Assembly instructions

Brightline

Brightline ZELo Assembly instructions

HEPER DOMINI 12 LED Installation & maintenance instructions

HEPER

HEPER DOMINI 12 LED Installation & maintenance instructions

Tiroled RK-FL50W-06-G7 manual

Tiroled

Tiroled RK-FL50W-06-G7 manual

Retlux RNL 106 operating manual

Retlux

Retlux RNL 106 operating manual

Draper 03187 Original instructions

Draper

Draper 03187 Original instructions

LED Group ROBUS R18230DL-01 instructions

LED Group

LED Group ROBUS R18230DL-01 instructions

MOB MO9382 user manual

MOB

MOB MO9382 user manual

LDR Suono f650 plus white operating instructions

LDR

LDR Suono f650 plus white operating instructions

Chauvet Scorpion GVC user manual

Chauvet

Chauvet Scorpion GVC user manual

IKEA RODRET manual

IKEA

IKEA RODRET manual

Amada AMWS08 instruction manual

Amada

Amada AMWS08 instruction manual

Freespirit Recreation ReadyLight Instructions for assembly and operation

Freespirit Recreation

Freespirit Recreation ReadyLight Instructions for assembly and operation

Northern Lights A4000 quick start guide

Northern Lights

Northern Lights A4000 quick start guide

wofi 11557 installation instructions

wofi

wofi 11557 installation instructions

Barthelme 66000574 operating instructions

Barthelme

Barthelme 66000574 operating instructions

manuals.online logo
manuals.online logoBrands
  • About & Mission
  • Contact us
  • Privacy Policy
  • Terms and Conditions

Copyright 2025 Manuals.Online. All Rights Reserved.