manuals.online logo
Brands
  1. Home
  2. •
  3. Brands
  4. •
  5. Kit-Lock
  6. •
  7. Lock
  8. •
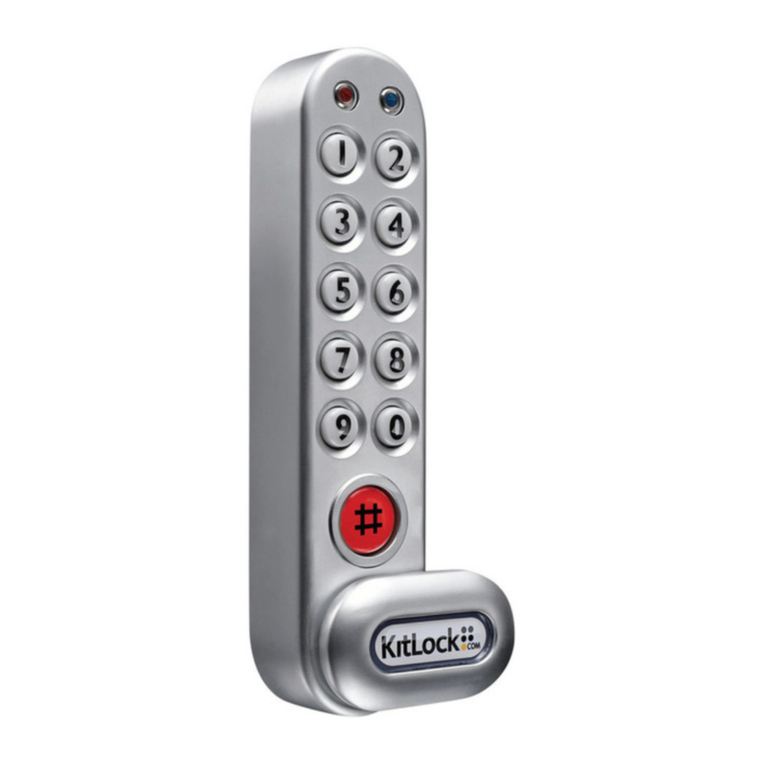
  9. Kit-Lock KL20 User manual

Kit-Lock KL20 User manual

SPECIAL NOTES
KL2O
Installation and Operating Instructions
Please read carefully:
• Before installing the lock, familiarise yourself with the installation and operating instructions.
• The factory preset combination is 0-0-0-0.
• YourKitLockissuppliedreadytottodoorsupto22mm(7/8”) thick.
• Please refer to the dimensions on the reverse to select the correct back plate for the door thickness.
INSTALLATION GUIDE
TheKL20isdesignedtobettedushintoa27mmx83mm(11/16”x31/4”) hole, either for a new install, or to
replaceanexistingmechanicalcamlock.
Installing your KitLock
A
Step1 Ifnecessary,removeexistingcamlock.
Step2 Markapositionatasuitabledistancefromthedoor
edge, ensuring enough clearance for the cam to work.
Step3 Markarectangularguide27mmx83mm(11/16”x
31/4”) to suit the chosen orientation.
Step 4 Drill inside the four corners, then using a hacksaw
or jigsaw, cut from the hole to hole to create the
rectangle.
KitLock
Back Plate Awith4xscrews
Back Plate Bwith4xscrews
1
2
3
4StraightCamx1
CamFixingScrewx1
Contents Default Supply
Back Plate Cwith4xscrews
StraightCamx1
CrankedCamx2
1
2
Optional Fixing Pack
1. 2. 3.
4.
N.B. Optional Fixing Pack(above)mayberequired.
5
A B
1.
5.
C
2.
Step 5 Hold the lock in place and secure with the correct
backplateforthedoorthickness,usingthe4xing
screws supplied.
Step6 Fitcamandsecurewithcamxingscrew.
Step 7 Now check the operation of the lock using the
factory preset combination 0-0-0-0.
Step 8 Change the code using the instructions overleaf.
3
3.
CODELOCKS UK
HEADQUARTERS
Tel:+44(0)1635239645
Fax:+44(0)1635239644
[email protected]
www.codelocks.com
Helpline, service & spares
Freephone:0800393405
CODELOCKS INC US
Tel:+17149792900
Fax:+17149792902
[email protected]
www.codelocks.us
Helpline, service & spares
Tollfree:1.877.codelock
CODELOCKS
(Australia) PTY LTD
Tel:+61298821009
Fax:+61298826030
[email protected]
www.codelocks.com.au
Helpline, service & spares
Tollfree:1800052131
CHANGING THE CODE
FINDING THE CODE
DIMENSIONS
Turn the dials to the preset combination 0-0-0-0.
Slide the Reset Button to the reset position.
Set your new combination.
NoteIfthedialsareloose,ensurethehandleisfully
turned.
SlidetheResetButtonbacktocentreposition.Make
a note of your new combination prior to locking.
1
2
3
4
Whentheindicatorisinthelockedposition,inserttheMasterKeyandturn180degreesclockwisetoopenthedoor.
TurntheMasterKey180degreescounterclockwiseandthenremovethekey.
1
With the door now open, you can access the back of the lock. Push and hold the Decode Lever towards the nearest
edge of the lock (Fig. 1), and turn each dial towards the Decode Lever. You will feel a click as each code number is
found,andthedialwillstopturning.Ifthedialcontinuestoturn,makesureyouareturningthedialsthecorrectway.
2
ReleasetheDecodeLeverwhenallfourcodenumbershavebeenfound.Makeanoteofthecombinationandensure
it unlocks the lock. You can now reset, or continue to use, the found combination.
3
KL20
89mm
(39/16”)
IOI-KL20-v1-0419
© 2019 Codelocks Ltd. All rights reserved.
Typical Door Prep.
27mm
(11/16”)
Note ThisfunctionrequirestheMasterKey(soldseparately).Thismethodshouldonlybeusedtoopenthelockinanemergency,orwhentheUserCodehasbeenforgotten.
The factory preset combination is 0-0-0-0. The
combination can be reset with the handle in the fully
locked / unlocked position.
Note: Do not set your combination to 0-0-0-0.
The dials will auto-scramble to 0-0-0-0 when the
handleisturnedtopreventleavingyourcodeexposed.
Reset ButtonDials
Indicator
MasterKey
Handle
FRONT
Decode Lever
Fig.1 BACK
33mm
(15/16 ”)
83mm
(31/4 ”)
Suitable for 1-4mm (1/32” - 3/16”)
door thickness
22mm
(7/8”)
5mm
(3/16 ”)
10mm
(3/8”)
BACK PLATES A B C
Suitable for 18-22mm (11/16” - 7/8”)
door thickness
Suitable for 16-18mm (5/8” - 11/16”)
door thickness
33mm
(15/16”)
32mm
(11/4 ”)

Other Kit-Lock Lock manuals

Kit-Lock KL1000 User manual

Kit-Lock

Kit-Lock KL1000 User manual

Kit-Lock KL1000 User manual

Kit-Lock

Kit-Lock KL1000 User manual

Kit-Lock 1000 Installation manual

Kit-Lock

Kit-Lock 1000 Installation manual

Kit-Lock KL1500 User manual

Kit-Lock

Kit-Lock KL1500 User manual

Kit-Lock KL1000 User manual

Kit-Lock

Kit-Lock KL1000 User manual

Kit-Lock KL1000 User manual

Kit-Lock

Kit-Lock KL1000 User manual

Popular Lock manuals by other brands

Assa Abloy Yale 8800 Series installation instructions

Assa Abloy

Assa Abloy Yale 8800 Series installation instructions

Stanley QET320 installation instructions

Stanley

Stanley QET320 installation instructions

XLOCK 145 instruction manual

XLOCK

XLOCK 145 instruction manual

Rosslare LK-M06L installation manual

Rosslare

Rosslare LK-M06L installation manual

Kwikset Smartcode 914 installation guide

Kwikset

Kwikset Smartcode 914 installation guide

Sewosy CPREG-4 Series Implementation manual

Sewosy

Sewosy CPREG-4 Series Implementation manual

Sargent ASSA ABLOY SN Series installation instructions

Sargent

Sargent ASSA ABLOY SN Series installation instructions

Waferlock C-700 Series Modular Assembly Manual

Waferlock

Waferlock C-700 Series Modular Assembly Manual

COMPX Stock Locks C1704 Dimensional drawing

COMPX

COMPX Stock Locks C1704 Dimensional drawing

Gianni Industries GEM EM-NH2350 specification

Gianni Industries

Gianni Industries GEM EM-NH2350 specification

PROMIX Promix-SM420 operating manual

PROMIX

PROMIX Promix-SM420 operating manual

Snap-loc E-TRACK SINGLES manual

Snap-loc

Snap-loc E-TRACK SINGLES manual

Wittkopp SmartCam user manual

Wittkopp

Wittkopp SmartCam user manual

Assa Abloy Corbin Russwin CL3500 Series installation instructions

Assa Abloy

Assa Abloy Corbin Russwin CL3500 Series installation instructions

wink haus blueMatic EAV operating manual

wink haus

wink haus blueMatic EAV operating manual

Visionis VIS-ML300LED-BL Installation & user guide

Visionis

Visionis VIS-ML300LED-BL Installation & user guide

National Cabinet Lock C8102 Dimensional drawing

National Cabinet Lock

National Cabinet Lock C8102 Dimensional drawing

iLoq D50S Series Mounting and care instructions

iLoq

iLoq D50S Series Mounting and care instructions

manuals.online logo
manuals.online logoBrands
  • About & Mission
  • Contact us
  • Privacy Policy
  • Terms and Conditions

Copyright 2025 Manuals.Online. All Rights Reserved.