manuals.online logo
Brands
  1. Home
  2. •
  3. Brands
  4. •
  5. KMC Controls
  6. •
  7. Controllers
  8. •
  9. KMC Controls CSP-4702 User manual

KMC Controls CSP-4702 User manual

CSP-4702 1 Installation Guide
Installation Guide
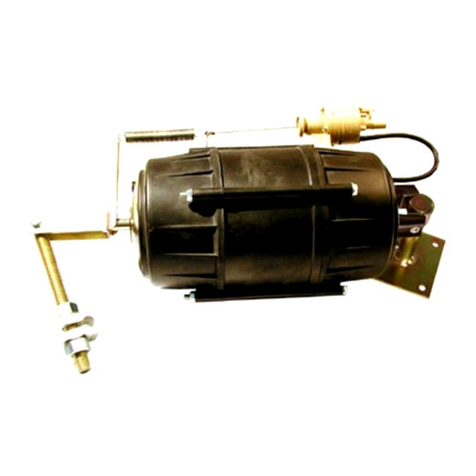
Analog Differential-Pressure VAV Controller/Actuator
CSP-4702
Mounting
Illustration 1—Overview (Direct-Coupled Mounting)
approximately 5° may provide tight
damper shut-o.
3. Align the actuator and slide it onto the shaft.
4. Leaving a small gap between the actuator and
mounting surface to prevent any binding, nger-
tighten the nuts on the V-bolt.
5. Insert the provided (HMO-4002) non-rotation
bracket into the slot at the base of the actuator
and secure the non-rotation bracket with two #8
or #10 self-tapping screws.
6. Evenly tighten the V-bolt nuts (30–35 in-lb.).
7. If desired, use a 7/64-inch hex key wrench to
loosen and position the end-stop screw.
NOTE: The two holes at the top of the actuator
are NOT for use in direct-coupled
applications. (They are for remote
mounting, such as with the optional HLO-
4001 Crank Arm Kit.)
NOTE: For VAV applications with the analog
CTE-5202 thermostat, see the CTE-5202
Applications Guide. For static pressure
controller applications, see the CSP-
4702 Static Pressure (Bypass) Control
Application Guide.
The CSP-4702 mounts directly to 1/4- to 5/8-inch (6 to
16 mm) round shafts or 1/4- to 7/16-inch (6 to 11 mm)
square shafts.
1. Ensure the damper can move freely through its
entire range of motion, and x any binding before
installing the actuator. Turn the damper blade to
its fully closed position.
2. Press (to the right) and hold the gear disengage-
ment lever (see Illustration 1), rotate the actuator
to the fully closed position, and release the lever.
NOTE: Depending on the damper-seal design,
backing the actuator o its stop
HMO-4002
Non-Rotation
Bracket
Mounting
Surface
5.312
(134.9)
Adjustable Stop
Min/Max
Flow Limit
Meter Taps
Min/Max
Flow
Setting
Pots
Open &
Close
LEDs
2.50
(63.5)
2.812
(71.4)
2.60
(66.0)
Gear
Disengagement Lever
1.563
(39.7)
∆
P Ports
Barbed
Connections
for 1/4" FR
Tubing
Removeable Conduit Fitting
with 1/2" NPS Threaded Hole
Mounting .........................................................................................................1
Wiring Connections .........................................................................................2
Rotation Direction ...........................................................................................2
Air Pressure Connection...................................................................................2
Min. and Max. Flow Limits...............................................................................3
Limits Set at the CSP-4702 ...........................................................................3
Limits Set at the Thermostat .........................................................................3
Operation Test..................................................................................................3
Maintenance ....................................................................................................3
Troubleshooting ...............................................................................................4
No Rotation..................................................................................................4
Wrong Rotation Direction or Stroke Range..................................................4
No Pressure Output Signal...........................................................................4
Wiring Issues................................................................................................4
Static Pressure Control.....................................................................................4
More Information.............................................................................................4
Important Notices............................................................................................4
CSP-4702 2 Installation Guide
Rotation Direction
The CSP-4702 is factory-set for counterclockwise to
close. To reverse the direction (with the conduit cover
removed), move the jumper to the CW position.
Wiring Connections
1. Loosen the screw on the conduit ing and lift up
to remove the ing.
2. Using a utility knife or drill, cut the red plug
to accept wiring or replace the plug with an
application-specic ing.
NOTE: The red plug (or similar ing) protects
internal components from debris, helping to
ensure long actuator life.
3. Thread wires through the plugged opening and
connect to the terminal block as shown.
4. Make the air pressure connections (see Air
Pressure Connection on page 2), set MIN/
MAX ow (see Min. and Max. Flow Limits on
page 3), and change the rotation direction (see
Rotation Direction on page 2) as needed.
5. Reinstall the conduit ing and tighten the screw.
Air Pressure Connection
Connect the CSP-4702 to a dierential pressure ow
sensor with 1/4-inch OD x 0.040-inch wall FR instru-
ment and control tubing:
1. Connect the “HI” port to the
(high side) “H” of the sensor.
2. Connect the “LO” port to the
(low side) “L” of the sensor.
NOTE: For use as a static pressure controller, see
the CSP-4702 Static Pressure (Bypass)
Control Application Guide.
NOTE: For VAV applications, the SSS-1000 series
dierential pressure ow sensor must be
mounted with the arrow pointing in the
direction of the air ow. To connect to 1/4-
inch tubing from the CSP-4702, an SSS-100x
dierential pressure ow sensor requires
a 3/8" to 1/4" barb union adapter and 1"
of 3/8" OD x 0.062 “FR” tubing for both
connections (as shown in the illustration).
An SSS-101x sensor does not require the
3/8" tubing or adapter.
NOTE: All tubing should be free of kinks and
restrictions.
NOTE: For about 15 seconds after power is applied,
no rotation occurs and one or both of the
LEDs will ash. The Close LED illuminates
(solid red) when the actuator is closing. The
Open LED illuminates (solid green) when
opening. When the actuator reaches the end
of rotation or the mechanical stop, the LED
may stay illuminated a brief time if the
called for condition remains unsatised.
~24 VAC (Class 2 Only) Power
2–10 VDC Thermostat Signal (Input)
1–5 VDC Air Pressure Signal (Output)
16 VDC Power to Thermostat (Output)
Common (Power, Input, Outputs)
Illustration 2—Connections
Illustration 3—Rotation Indicators and Jumper
To
“H”
To
“ L”
CCW = Jumper on Upper 2 Pins
CSP-4702
24 VAC CTE-5202
(Used in VAV
applications but
not in static
pressure bypass
applications)
Damper
SSS-100x Sensor
1/4-Inch Tubing
SET
POINT
3/8" Tubing
3/8" to 1/4" Union Adapters
CSP-4702 3 Installation Guide
Operation Test
To test the CSP-4702 operation:
1. Temporarily disconnect the thermostat signal
wire leading to the “2–10 IN” terminal.
2. Jumper the “2–10 IN” terminal to the “16 VDC
OUT” terminal. The green Open LED should
illuminate, and the shaft drive hub should start
rotating the damper open. The damper should
go to full open unless the maximum limit was
set at the CSP-4702, and then the damper will
only go to the maximum seing. If the damper is
rotating closed, change the direction jumper. (See
Rotation Direction on page 2.)
3. Remove any jumper to the “2–10 IN” terminal.
If there is a normal amount of airow in the
duct at the time (creating a dierential pressure
exceeding the minimum limit), the red Close LED
should illuminate, and the shaft drive hub should
be rotating the damper closed. The damper
should go to full closed unless the minimum limit
was set at the CSP-4702, and then the damper will
only go to the minimum seing. If the damper
is rotating open, change the rotation direction
jumper. (See Rotation Direction on page 2.)
4. Reconnect the thermostat signal wire to the “2–10
IN” terminal.
5. Adjust the thermostat’s setpoint all the way up
(simulating a drop in temperature and a need for
less cooling or more heating) and then all the way
down (simulating a rise in temperature and a
need for more cooling or less heating) and check
that the damper position reacts accordingly.
Min. and Max. Flow Limits
NOTE: If desired, the min. and max. limits can
be set within the thermostat or the CSP-
4702, but do NOT try to set the limits at
BOTH the controller and the thermostat
(or else the limits will not reect either the
controller’s or the thermostat’s limits).
Limits Set at the CSP-4702
To set the minimum and maximum ow limits at the
CSP-4702 (with thermostat supplying 2–10 VDC):
1. Ensure the thermostat output is 2–10 VDC. For
the CTE-5202 thermostat, see the CTE-5202
Applications Guide.
2. Loosen the screw on the conduit ing and lift up
to remove the ing.
3. Connect a voltmeter to the meter taps. The
middle pin (REF) is the common for the outer
(MIN and MAX) pins.
4. Adjust the MIN potentiometer for the desired
minimum voltage. The factory default is 0 VDC =
0" wc.
NOTE: 1 VDC = 1" wc. If, for example, the desired
minimum is 0.5" wc, set the voltage for 0.5
VDC.
5. Adjust the MA X potentiometer to the desired
maximum voltage. The factory default is 2 VDC =
2" wc.
NOTE: If, for example, the desired maximum is 1.5"
wc, set the voltage for 1.5 VDC.
6. Reinstall the conduit ing and tighten the screw.
Limits Set at the Thermostat
To set the ow limits at the thermostat (with CSP-
4702 potentiometers set at their defaults):
1. Return the CSP-4702 potentiometers to the factory
defaults if necessary (see above).
2. Set the thermostat output limits according to its
instructions. For the CTE-5202 thermostat, see the
CTE-5202 Applications Guide.
NOTE: Voltage from the thermostat = desired ΔP
x (voltage span = 8 VDC)/(pressure span =
2" wc) + 2 VDC. For example, if a minimum
of 0.1" is desired instead of the default 0",
then 0.1 x 4 + 2 (= 0.4 + 2) = 2.4 VDC for the
minimum limit. If a maximum of 1.9" is
desired instead of the default 2", then 1.9 x
4 + 2 (= 7.6 + 2) = 9.6 VDC for the maximum
limit.
LIMITS
0-2 VDC/ 0-2"H2O
MIN REF MAX
Illustration 4—CSP-4702 Limits Adjustment
Maintenance
No routine maintenance is required. The motors
are permanently lubricated and all internal gear-
train components are oil-impregnated. Careful
installation will also ensure long term reliability and
performance.
CSP-4702 4 Installation Guide
Static Pressure Control
Besides VAV applications, the CSP-4702 can also act
as a static pressure controller in such applications as
AHU or RTU bypass control. It is not then connected
to a thermostat. For information, see the CSP-4702
Static Pressure (Bypass) Control Application
Guide.
© 2018 KMC Controls, Inc. 036-019-04F
KMC Controls, Inc.
19476 Industrial Drive
New Paris, IN 46553
574.831.5250
www.kmccontrols.com
[email protected]
More Information
For specications, see the CSP-4702 Data Sheet on
the KMC web site.
For applications (with the CTE-5202 thermostat)
and other information, see the CTE-5202 Applica-
tions Guide.
For information about using the CSP-4702 as static
pressure controller in AHU/RTU bypass applica-
tions, see the CSP-4702 Static Pressure (Bypass)
Control Application Guide.
Troubleshooting
No Rotation
NOTE: For about 15 seconds after power is applied,
no rotation occurs and one or both of the
LEDs will ash.
• Check that the shaft moves freely. (Press and
hold the gear disengagement lever and manually
rotate the shaft.)
• Check wiring. (See Wiring Issues section below.)
• Check for a tripped circuit breaker to the
transformer, for proper supply voltage from the
transformer (or power supply), and for enough
capacity (VA) for all connected devices. See their
respective data sheets and Tips for Connecting
24-Volt Power Application Note (AN0604D)
available on the KMC Controls web site.
• Check that the direction jumper is in the proper
position. See Rotation Direction on page 2.
• Check the polarity and level of the input signal
from the thermostat.
Wrong Rotation Direction or Stroke Range
• Check the position of the direction jumper. See
Rotation Direction on page 2.
• Check the ow limits (on the controller and the
thermostat). See Min. and Max. Flow Limits on
page 3.
• Check the adjustable stop position.
No Pressure Output Signal
• Check the wiring. (See Wiring Issues section
below.)
• Check air ow and sensor. Tubing should be free
of kinks and restrictions. Sensor must be oriented
in the correct airow direction.
Wiring Issues
• Check for correct wiring at the each device.
• Use a voltmeter and ohmmeter to check the
terminals for expected values.
• See Tips for Connecting 24-Volt Power Applica-
tion Note (AN0604D).
NOTE: Wiring must be adequate to avoid
excessive voltage drop on long runs! Allow
plenty of “cushion” in measurements. A
meter may be too slow to register transient
dips or peaks during startup.
Important Notices
The material in this document is for information
purposes only. The contents and the product it
describes are subject to change without notice.
KMC Controls, Inc. makes no representations or
warranties with respect to this document. In no event
shall KMC Controls, Inc. be liable for any damages,
direct or incidental, arising out of or related to the
use of this document.
This device complies with Part 15 of the FCC Rules.
Operation is subject to the following two conditions:
(1) this device may not cause harmful interference,
and (2) this device must accept any interference
received, including interference that may cause
undesired operation. This Class B electronic appara-
tus complies with Canadian ICES-003.

Other KMC Controls Controllers manuals

KMC Controls MEP-3001 Operating instructions

KMC Controls

KMC Controls MEP-3001 Operating instructions

KMC Controls BAC-9001CE User manual

KMC Controls

KMC Controls BAC-9001CE User manual

KMC Controls BAC-5900 Series User manual

KMC Controls

KMC Controls BAC-5900 Series User manual

KMC Controls BAC-7401 Operating instructions

KMC Controls

KMC Controls BAC-7401 Operating instructions

KMC Controls CEE-3009 User manual

KMC Controls

KMC Controls CEE-3009 User manual

KMC Controls MCP-1160 Series User manual

KMC Controls

KMC Controls MCP-1160 Series User manual

KMC Controls MEP-4201 User manual

KMC Controls

KMC Controls MEP-4201 User manual

KMC Controls SimplyVAV BAC-8001 User manual

KMC Controls

KMC Controls SimplyVAV BAC-8001 User manual

KMC Controls MEP-4201 User manual

KMC Controls

KMC Controls MEP-4201 User manual

KMC Controls CSC-2000 Series User manual

KMC Controls

KMC Controls CSC-2000 Series User manual

KMC Controls BAC-7302 Operating instructions

KMC Controls

KMC Controls BAC-7302 Operating instructions

KMC Controls CSC 3000 Series User guide

KMC Controls

KMC Controls CSC 3000 Series User guide

KMC Controls FlexStat BAC-12 63 Series User manual

KMC Controls

KMC Controls FlexStat BAC-12 63 Series User manual

KMC Controls KMDigital KMD-5290E Operating instructions

KMC Controls

KMC Controls KMDigital KMD-5290E Operating instructions

KMC Controls CSC-3501 User manual

KMC Controls

KMC Controls CSC-3501 User manual

KMC Controls FlexStat BAC-120063CW-ZEC Operator's manual

KMC Controls

KMC Controls FlexStat BAC-120063CW-ZEC Operator's manual

KMC Controls BAC-7003 User manual

KMC Controls

KMC Controls BAC-7003 User manual

KMC Controls MEP-5062 User manual

KMC Controls

KMC Controls MEP-5062 User manual

KMC Controls KMD-7001 Original operating instructions

KMC Controls

KMC Controls KMD-7001 Original operating instructions

KMC Controls BAC-4000 series User guide

KMC Controls

KMC Controls BAC-4000 series User guide

KMC Controls SimplyVAV BAC-8205 User manual

KMC Controls

KMC Controls SimplyVAV BAC-8205 User manual

KMC Controls MEP-4 Series User guide

KMC Controls

KMC Controls MEP-4 Series User guide

KMC Controls MCP-1020 Series User manual

KMC Controls

KMC Controls MCP-1020 Series User manual

KMC Controls CSC 3000 Series User guide

KMC Controls

KMC Controls CSC 3000 Series User guide

Popular Controllers manuals by other brands

alphainnoTec Luxtronik operating instructions

alphainnoTec

alphainnoTec Luxtronik operating instructions

digitalview 41710002X-3 instructions

digitalview

digitalview 41710002X-3 instructions

FeiYu Tech 41AP quick start guide

FeiYu Tech

FeiYu Tech 41AP quick start guide

Kieback&Peter FBR5 manual

Kieback&Peter

Kieback&Peter FBR5 manual

Oriental motor CRD514-KD Information

Oriental motor

Oriental motor CRD514-KD Information

Icom IP1000C quick start guide

Icom

Icom IP1000C quick start guide

Multitech CommPlete MR9600-100 user guide

Multitech

Multitech CommPlete MR9600-100 user guide

PowerWalker AVR 1200 quick start guide

PowerWalker

PowerWalker AVR 1200 quick start guide

Tolomatic BCS10 Quick start quide

Tolomatic

Tolomatic BCS10 Quick start quide

Delta VFD-L user manual

Delta

Delta VFD-L user manual

AutomationDirect NITRA PNEUMATICS Setup instructions

AutomationDirect

AutomationDirect NITRA PNEUMATICS Setup instructions

Casa Fan ST4-150 II Mounting and operating manual

Casa Fan

Casa Fan ST4-150 II Mounting and operating manual

Life Smart LS143 quick start guide

Life Smart

Life Smart LS143 quick start guide

COLORKINETICS Data Enabler IntelliPower installation instructions

COLORKINETICS

COLORKINETICS Data Enabler IntelliPower installation instructions

Control Technologies 2646 MultiPro installation guide

Control Technologies

Control Technologies 2646 MultiPro installation guide

Delta DAC-1600 installation guide

Delta

Delta DAC-1600 installation guide

WorkPro Nemesis 136 User instructions

WorkPro

WorkPro Nemesis 136 User instructions

Iron logic Matrix III NET user manual

Iron logic

Iron logic Matrix III NET user manual

manuals.online logo
manuals.online logoBrands
  • About & Mission
  • Contact us
  • Privacy Policy
  • Terms and Conditions

Copyright 2025 Manuals.Online. All Rights Reserved.