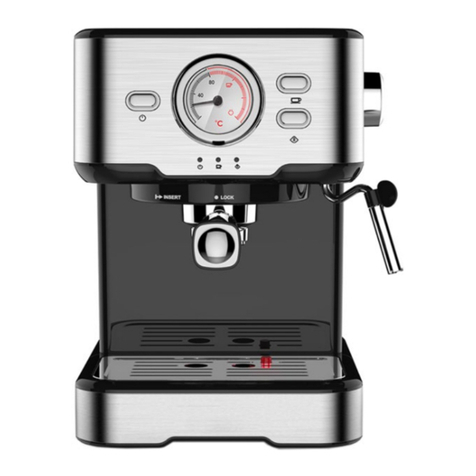
Kogan KAESSPCOFFA User manual

ESPRESSO COFFEE
MACHINE
KAESSPCOFFA


Before using any electrical appliance, the following basic precautions should always be
followed including the following:
•Read all instructions before use. Retain this guide for future reference.
•This appliance is not intended for use by persons (including children) with reduced
physical, sensory or mental capabilities, or lack of experience and knowledge,
unless they have been given supervision or instruction concerning use of the
appliance by a person responsible for their safety.
•Children should be supervised to ensure that they do not play with the appliance.
•If the supply cord is damaged, it must be replaced by the manufacturer, its service
agent or similarly qualified persons in order to avoid a hazard.
•When the appliance is not in use and before cleaning, unplug the appliance from
the outlet firstly.
•Check that the voltage of wall outlet corresponds to rated voltage marked on the
appliance before use.
•This appliance has been incorporated with a grounded plug. Ensure that the wall
outlet in your house is well earthed.
•To protect against fire, electric shock and injury to persons do not immerse main
parts of the product, cord, plug, in water or other liquid.
•The appliance must not be immersed in liquid.
•Remove plug from wall outlet before cleaning and when not in use. Allow
appliance to cool down completely before removing/attaching components, or
before cleaning.
•Do not operate any appliance with a damaged cord or plug, or after the appliance
malfunctions or is damaged in any manner. Contact Kogan.com for further
assistance immediately.
•The use of accessory attachments not included with the appliance may result in
fire, electric shock or injury to persons.
•Place the appliance on a flat surface or table. Do not allow power cords to hang
over the edge of table or counter.
•Ensure that the power cord does not touch any hot surface of the appliance.
•Do not place the coffee maker on any hot surface or near heat sources in order to
avoid damage to the appliance.
•To d i s connect, remove the plug from the wall outlet. Always hold the plug and
never pull the cord.
•Do not use the appliance for any purpose other than intended use. Place the unit in
a dry environment.
•Be careful not to get burned by the steam emitted from the appliance.
SAFETY & WARNINGS

•Do not touch the hot surface of the appliance (such as the steam wand and the
steel mesh). Always use the handle or knobs.
•Never operate the coffee maker without water.
•DO NOT remove the metal funnel while brewing coffee. Only remove the metal
funnel to make additional coffee more than 10 seconds after brewing has finished.
Caution should also be taken while removing the metal funnel since the metal
parts will be hot. Make sure to hold it by the handle and to use the filter retention
clip to dispose of coffee grounds. Caution should be taken when moving the unit
with hot liquids inside.
•Connect the plug to a wall outlet before use, and turn any switches off before the
plug is removed from wall outlet.
•This appliance can be used by children aged from 8 years and above if they have
been given supervision or instruction concerning use of the appliance in a safe way
and if they understand the hazards involved. Cleaning and user maintenance shall
not be made by children unless they are older than 8 and supervised. Keep the
appliance and its cord out of reach of children aged less than 8 years.
•Appliances can be used by persons with reduced physical, sensory or mental
capabilities or lack of experience and knowledge if they have been given
supervision or instruction concerning use of the appliance in a safe way and
understand the hazards involved.
•This appliance is intended to be used in household and similar applications such
as:
ostaff kitchen areas in shops, offices and other working environments
ofarm houses
oby clients in hotels, motels and other residential type environments
obed and breakfast type environments
•Do not use the appliance outdoors.
•WARNING: The filling aperture must not be opened during use.
•Warning: Potential injury from misuse. The heating element surface is subject to
residual heat after use.
•Cleaning and user maintenance shall not be made by children without supervision.
•Save these instructions for future reference.
Disposal
This marking indicates that this appliance should not be disposed with
other household wastes. To prevent possible harm to the environment or
human health from uncontrolled waste disposal, recycle this appliance
responsibly to promote the sustainable reuse of material resources.

Control panel
OVERVIEW
Control panel
Steam knob
Steam wand
Water
tank
Drip plate
Drip tray
Filter
Pressurised
funnel
Thermometer
Steam knob
Steam temperature indicator
Power indicator
Coffee temperature indicator
ON/OFF button
Coffee/steam
control button
Pump control
button

1. To insert the selected filter in the porta-filter, make sure to align the notch on the
filter with the groove inside the porta-filter.
2. Turn the filter to the left or right to lock in place. This will help secure the filter in the
porta-filter.
INSTALLATION

Before first use
To ensure the first cup of coffee will taste excellent, you should rinse the coffee maker with
warm water as follows:
1. Pull out the water tank of the coffee maker. Pour water into the water tank; the
water level should not exceed the “MAX” mark in the tank. Re-insert the tank into
the coffee maker.
2. Set steel mesh into the metal funnel (without coffee in steel mesh), then put the
metal funnel under the metal funnel holder (see Fig.1) and turn it anticlockwise until
it is fixed tightly (see Fig.2 and Fig.3).
3. Place an espresso cup you have prepared on the drip plate. Make sure the steam
knob is at the “O” position.
4. Connect the plug to the wall socket and press the ON/OFF button to turn on the
unit. The power indicator will be illuminated in red.
5. Press down the pump control button; the pump will then pump water accordingly.
Close the pump by pressing the pump control button again.
6. Make sure the coffee/steam button is at the higher position. The appliance will
begin preheating until the coffee indicator illuminates in green, signifying that the
preheating is finished.
7. Press down the pump control button again and water will flow out.
OPERATION
Metal funnel
holder Fig.2 Fig.3
Fig.1
Note:
As the appliance is not equipped with any cup or jug, always prepare your own jug or
cup before use.

8. After water has flown for 1 minute, press the pump control button once more. Pour
out the water in each container then clean them thoroughly. The unit is now ready
to start brewing coffee.
Preheating
It is recommended to preheat the appliance before making coffee (including the funnel and
cup) so that the coffee flavour will not be influenced by cold surfaces.
1. Remove the water tank and fill it with desired amount of water. The water level
should be between the “MAX” mark and the “MIN” mark in the tank. Re-insert the
tank into the appliance securely.
2. Set the steel mesh into the metal funnel (without coffee in steel mesh), then put the
metal funnel under the metal funnel holder (see Fig.1) and turn it anticlockwise until
it is fixed tightly (see Fig.2 and Fig.3).
3. Place an espresso cup you have prepared on the drip tray.
4. Connect the appliance into power supply. Make sure the steam knob is at the "O"
position.
5. Press the ON/OFF button to turn on the unit; the power indicator will illuminate in
red. Make sure the coffee/steam button is at the higher position.
6. Press the pump control button to the lower position. When water is flowing out,
close the pump immediately by pressing the pump control button again to the
higher position. The purpose of the step is to pump the water from the tank into the
housing.
7. When the coffee indicator is illuminated in green, press down the pump control
button again. Hot water should now be flowing.
8. After water has flown for 20 seconds, press the pump control button. The
preheating will now have finished.
Note:
There may be noise when pumping the water for the first time. This is normal, as the
appliance is releasing the air within it. After about 20s, the noise will disappear.

Espresso Coffee
1. Remove the funnel by turning it clockwise.
2. Add ground coffee to the steel mesh with measuring spoon (a spoon of ground
coffee powder can make about a cup of top-grade coffee). Press the ground coffee
powder down tightly with the tamper.
3. Set the steel mesh into the metal funnel (without coffee in steel mesh), then put the
metal funnel under the metal funnel holder (see Fig.1) and turn it anticlockwise until
it is fixed tightly (see Fig.2 and Fig.3).
4. Pour out the hot water in the cup. Then place the hot cup on removable drip tray.
5. Make sure the steam knob is at the "O" position and the coffee/steam button is at
the higher position.
6. At this time, the coffee indicator should be illuminated in green. Once the lamp
illuminates, press down the pump control button to the lower position. Wait for a
moment, and coffee will begin flowing out.
7. You should press and release the pump control button to the higher position
manually when desired coffee is obtained or the colour of coffee changes weak
obviously.
8. After finishing making coffee, press the ON/OFF button, and the power indicator
and coffee indicator will dim. When the coffee maker finishes operating, your coffee
is now ready.
9. Take the metal funnel out by turning it clockwise, and pour the coffee residue out.
10. Let the components cool down completely, then rinse under running water.
WARNING: Do not leave the coffee maker unattended during making coffee, as you
will sometimes need to operate the machine manually.
Note:
During brewing coffee or making steam, it is normal that the ready indicator may dim.
This indicates that the heater is warming up to keep the temperature within the
standard range.

Cappuccino
You can make a cup of cappuccino by topping a cup of espresso with frothing milk.
1. Prepare espresso first as per the instructions above, and make sure that the steam
knob is at the "O" position.
2. Press the coffee/steam button to the lower position, waiting until the steam
indicator illuminates in green.
3. Fill a jug with about 100ml of milk for each cappuccino to be prepared. It is
recommended to use whole milk at a refrigerated temperature (not hot).
4. In order to get better milk foam performance, it is recommended to keep the steam
knob at open position for approx. 15 seconds, since the early steam contains too
much water, then keep the knob at “O” position and conduct next step.
5. Insert the steam wand into the milk (approx. two centimetres deep), then turn the
steam knob slowly anticlockwise. Steam will come out from the steam wand.
Frothed milk is produced by moving the vessel around and from up to down.
6. When the required amount of frothing is reached, you can turn the steam knob to
the “O” position.
7. To avoid the steam outlet being blocked after frothing milk each time, put an
empty jug under the steam wand, then turn on the steam knob and press the
pump control button to the lower position. The pump will begin operating. Once
the water has been flowing for 30 seconds, press the pump control button to the
higher position.
8. Let the components cool down completely, then rinse under running water. Ensure
the steam wand / nozzle is thoroughly cleaned after each use. Remove the nozzle
cover and rinse, while cleaning the internal nozzle with a wet towel.
9. Press and release the ON/OFF button to power the unit off.
10. Pour the frothed milk into the espresso that was previously prepared. Sweeten if
desired by sprinkling the froth with a little cocoa powder.
Note: Please follow the instructions below if the steam outlet is blocked: turn the steam
knob to “O” position and let the coffee maker cool down for about half an hour. Poke the
Note:
During steaming, the metal funnel must be assembled and in position.
Note:
Never touch steam outlet during steam jetting and be careful not to get burnt.
Note:
Never turn the steam knob rapidly, as the steam will accumulate rapidly in short time
which may increase the potential of the risk of explosion.

steam outlet several times with a needle around 1mm in diameter. Finally, press the
coffee/steam button and turn on the steam knob to check if the appliance can produce
steam normally when the steam indicator (green) illuminates. Please contact Kogan.com if
the appliance cannot produce steam after operated as above.
Note: After steaming, allow the maker to cool down at least for 5 minutes before making
coffee again, otherwise a burnt odour may be noticeable in prepared coffee. If you want to
make coffee immediately: press and release the steam button and dip the steam wand into
a cup. Press the pump control button down and turn on the steam control knob; water will
flow out from steam wand. After the ready indicator dims, press and release the pump
control button, then turn the steam control knob to “O” position. When the ready indicator
illuminates, the appliance is prepared for making coffee once again.

Frothing Milk/Producing Steam to Heat Liquids
The steam wand can be used to froth milk and make hot beverages like drinking chocolate,
water or tea.
1. Remove the water tank and fill it with desired amount of water. The water level
should be between the “MAX” mark and the “MIN” mark in the tank. Re-insert the
tank into the appliance securely.
2. Connect the appliance to the wall socket.
3. Press the ON/OFF button to turn on the unit; the power indicator will illuminate in
red.
4. Press the pump control button, making sure the coffee/steam button is at the
highest position. When there is water flowing out, close the pump immediately.
5. Press down the coffee/steam button and wait for a moment. The appliance begins
to heat until the indicator illuminates green, signifying that the heating is finished.
6. Dip the steam wand into the liquid to be heated. If you want to froth milk, dip the
steam wand about 2 centimetres into the milk. Slowly turn the steam knob anti-
clockwise to start making steam.
7. When the desired result is achieved, you can turn the steam knob to the “O”
position.
8. To avoid the steam outlet being blocked after frothing milk each time, put an
empty jug under the steam wand, then turn on the steam knob and press the
pump control button to the lower position. The pump will begin operating. Once
the water has been flowing for 30 seconds, press the pump control button to the
higher position.
9. Let the components cool down completely, then rinse under running water. Ensure
the steam wand / nozzle is thoroughly cleaned after each use. Remove the nozzle
cover and rinse, while cleaning the internal nozzle with a wet towel.
10. Press and release the ON/OFF button to power the unit off.
Note: Please follow the instructions below if the steam outlet is blocked: turn the steam
knob to “O” position and let the coffee maker cool down for about half an hour. Poke the
steam outlet several times with a needle around 1mm in diameter. Finally, press the
coffee/steam button and turn on the steam knob to check if the appliance can produce
steam normally when the steam indicator (green) illuminates. Please contact Kogan.com if
the appliance cannot produce steam after operated as above.
Note: After steaming, allow the maker to cool down at least for 5 minutes before making
coffee again, otherwise a burnt odour may be noticeable in prepared coffee. If you want to
make coffee immediately: press and release the steam button and dip the steam wand into
a cup. Press the pump control button down and turn on the steam control knob; water will
flow out from steam wand. After the ready indicator dims, press and release the pump
control button, then turn the steam control knob to “O” position. When the ready indicator
illuminates, the appliance is prepared for making coffee once again.
Automatic Power off Function
The appliance will turn off automatically if there is no any operation within 29 minutes.

1. Turn off and unplug the appliance, then let the coffee maker cool down completely
before cleaning.
2. Clean housing of coffee maker with moisture-proof sponge often and clean water
tank, drip tray and removable shelf regularly then dry them.
3. Detach the metal funnel by turning it clockwise and get rid of any coffee residue
inside. Clean it with a gentle detergent and rinse it under water. Do not wash the
metal funnel in a dishwasher.
4. Clean all the attachments in the water and dry thoroughly.
5. Ensure the steam wand / nozzle is thoroughly cleaned after each use. Remove the
nozzle cover and rinse, while cleaning the internal nozzle with a wet towel.
CLEANING & CARE
Note:
Do not clean the appliance with alcohol or solvents. Never immerse the housing in
liquid for cleaning.
Note:
Clean the appliance after every use in order to ensure proper function.

Cleaning Mineral Deposits
To ensure your coffee maker operates efficiently, the internal piping should be cleaned every
1-2 months to guarantee optimal coffee flavour.
1. Fill the tank with water and descaler to the MAX level. The proportion of water and
descaler is 4:1. Use a household descaler, or citric acid at a ratio of 100:3 (water to
citric acid).
2. Follow the preheating process above (steps 2-6) to set the water temperature.
3. When there is water flowing out, close the pump by pressing the pump control
button again and wait for a moment for the appliance to reheat.
4. When the ready indicator illuminates green, press down the pump control button
to the lower position and “brew” two cups’ worth of water/descaler (about 60ml).
Then close the pump and wait for 5 seconds.
5. Press down the coffee/steam button, waiting until the green indicator is
illuminated. Make steam for 2 minutes and then turn the steam knob to the "O"
position. Press the ON/OFF button to turn off the unit immediately and let the
descaler collect in the internal piping for at least 15 minutes.
6. Restart the unit and repeat steps 2-5 at least three times, then press and release
the coffee/steam button. When the green indicator is illuminated, press down the
pump control button to brew until no descaler is left.
7. Perform the brewing process (using no coffee powder) with tap water filled up to the
MAX level of the water tank. Repeat the steps of 2-5 for 3 times (it is not necessary
to wait 15 minutes in step 5), then brewing again until no water is left in the tank.
Note:
Ensure you repeat step 7 at least three times to guarantee the piping is clean.

Issue
Cause
Steps to Resolve
The coffee maker will
not power on.
The power outlet is not
plugged in securely.
Plug the power cord into a
wall outlet correctly. If the
appliance still does not work,
contact Kogan.com
Water leaks from the
bottom of coffee maker.
There is excessive water in
the drip tray.
Clean the drip tray.
The coffee maker
malfunctions.
Contact Kogan.com for
further assistance.
Water leaks from outer
side of filter.
There is some coffee powder
on filter edge.
Ensure the filter is clean
before use.
Acidic (vinegary) taste
noted in coffee.
Appliance not cleaned
correctly after cleaning
mineral deposits.
Clean coffee maker as per
“before the first use” several
times.
The coffee powder is stored
in a hot, wet place for a long
time. The coffee powder
turns bad.
Please use fresh coffee
powder and store unused
coffee powder in a cool, dry
place. After opening a
package of coffee powder,
reseal it tightly and store in a
refrigerator to maintain
freshness.
Plastic taste noted in
coffee.
Appliance in use for first time.
Test runs with hot water
strongly recommended
before making any to drink.
Upon first use, run the coffee
machine with just hot water
to clean and prepare the
appliance. Do not drink these
initial test runs. Ensure water
has been run for at least one
minute before making coffees
to serve.
Burnt taste noted in
coffee.
Water flowing through grinds
too slowly, leading to a bitter
and burnt tasting coffee.
Adjust your grinder for a
coarser grind of the beans.
No steam from nozzle. The nozzle on the steam
wand is blocked.
Use a toothpick or small,
narrow brush to remove
possible blockage. Ensure the
nozzle and cover are properly
cleaned after each use.
The steam function will
not generate froth.
The steam ready indicator is
not illuminated.
The unit is only ready for
frothing once the indicator is
lit.
The container is too big or
poorly shaped for frothing.
Use a tall and narrow cup.
Skim milk used for frothing.
Use whole milk or half-skim
milk.
TROUBLESHOOTING

Need more information?
We hope that this user guide has given you
the assistance needed for a simple set-up.
For the most up-to-date guide for your product,
as well as any additional assistance you may require,
head online to help.kogan.com
Table of contents
Other Kogan Coffee Maker manuals

Kogan
Kogan KACOFXXAUTB User manual

Kogan
Kogan KACOFAUTWTA User manual

Kogan
Kogan KAESSPCOFFB User manual

Kogan
Kogan KGNCMAVAA User manual

Kogan
Kogan KACOFXXNESA User manual

Kogan
Kogan KGNCMAVAA User manual

Kogan
Kogan Premium Ez-press User manual

Kogan
Kogan Ez-press User manual

Kogan
Kogan KACOFNESDA User manual

Kogan
Kogan KACOFXXNESB User manual