Kogan KACKR4LMLTB User manual

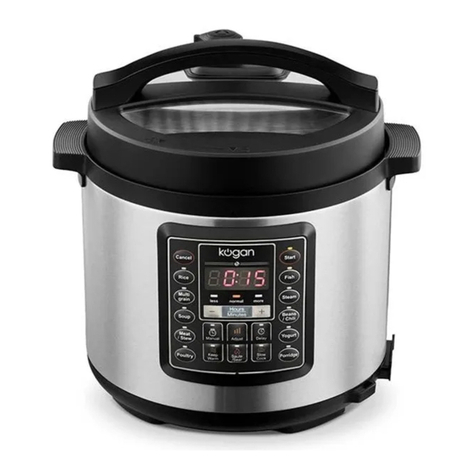
12-IN-1 MULTI COOKER
KACKR4LMLTB


Read this user guide carefully before you use the appliance, and save it for future reference.
Danger!
•Do not immerse the appliance in water, nor rinse it under the tap.
Warning
•This appliance is not intended for use by persons (including children) with reduced
physical sensory or mental capabilities or lack of experience and knowledge unless
they have been given supervision or instruction concerning use of the appliance by
a person responsible for their safety.
•This appliance is intended to be used in household and similar applications such
as:
ostaff kitchen areas in shops, offices and other working environments;
ofarm houses;
oby clients in hotels, motels and other residential type environments;
obed and breakfast type environments.
•Children should be supervised to ensure that they do not play with the appliance.
•This appliance should be positioned in a stable situation with the handles
positioned to avoid spillage of the hot liquids.
•This appliance is intended to be used in household and domestic use only.
•Make sure that the damaged power cord is replaced by Kogan.com; a service
centre authorised by Kogan.com or similarly qualified persons to avoid a hazard.
The appliance is not intended to be operated using an external timer or a separate
remote-control system.
•Check if the voltage indicated on the appliance corresponds to the local power
voltage before you connect it.
•Only connect the appliance to a grounded power outlet. Always make sure that the
plug is inserted firmly into the power outlet.
•Do not use the appliance if the plug, the power cord, the inner pot, the sealing ring
or the main body is damaged. Cease use immediately and contact Kogan.com if
damage is present.
•Avoid spillage on the connector.
•Potential injury from misuse
•Do not let the power cord hang over the edge of the table or worktop on which the
appliance stands.
•Make sure the heating element, the temperature sensor and the outside of the
inner pot are clean and dry before you put the plug-in the power outlet.
SAFETY & WARNINGS

•Do not plug in the appliance or press any of the buttons on the control panel with
wet hands.
•The heating element surface is subject to residual heat after use.
•The appliance is not intended to be operated by means of an external timer or
separate remote-control system.
•The appliance must not be immersed.
Caution
•Do not expose the appliance to high temperatures, nor place it on an operating or
still hot stove or cooker.
•Do not expose the appliance to direct sunlight.
•Place the appliance on a stable, flat and level surface. Always put the inner pot in
the appliance before you put the plug-in the power outlet and switch it on.
•Do not place the inner pot directly over an open fire.
•Do not use the inner pot if it is deformed, mishappen or damaged.
•The accessible surfaces may become hot when the appliance is operating. Take
extra caution when touching the appliance.
•Beware of hot steam coming out of the steam vent during cooking or out of the
appliance when you open the lid. Keep hands and face away from the appliance to
avoid the steam.
•Do not lift and move the appliance while it is in use.
•Do not exceed the maximum water level indicated in the inner pot to prevent
overflow which might cause a potential hazard.
•Do not place the cooking utensils inside the pot while cooking, keeping warm or
reheating rice.
•Only use the cooking utensils provided. Avoid using sharp utensils.
•To avoid scratches, it is not recommended to cook ingredients with crustaceans
and shellfish. Remove the hard shells before cooking.
•Do not insert metallic objects or alien substances into the steam vent.
•Do not place a magnetic substance on the lid. Do not use the appliance near a
magnetic substance. Always allow the appliance cool down before you clean or
move it.
•Clean the appliance after each use. Do not clean the appliance in a dishwasher.
•To prevent damage to the appliance do not use alkaline cleaning agents when
cleaning, use a soft cloth and a mild detergent.
•Always unplug the appliance if not used for a longer period.
•If the appliance is used improperly, for professional or semi-professional purposes,
or if it is not used according to the instructions in this user guide, the warranty
becomes invalid and Kogan.com reserves the right to refuse liability for any
damage caused.

Power failure backup function
•The unit has a backup function that reserves the status before a power failure.
•If power failure occurs during a cooking process and power supply is resumed within
a short time, the count-down of the cooking time continues where it left off.
•If power failure occurs when the appliance is at pre-set mode and power supply is
resumed within a short time, the countdown of the pre-set time continues where it
left off.
•If the power supply is not resumed within a short time, the appliance might not
continue with the previous working process but will stay in standby mode.

1
Main unit
5
Spoon
2
Inner pot
6
Power cord
3
Steam container
7
Measuring cup
4
Scoop
8
User guide
COMPONENTS

1
Lid
6
Removable condensation compartment
2
Removable inner lid
7
Handle
3
Open button
8
Inner lid lock
4
Control panel
9
Power socket
5
Removable steam valve
OVERVIEW

1
Cancel
6
Cooking time and temperature settings
2
Reheat
7
Start
3
Keep Warm
8
Menu and Decrease value
4
Timer
9
Menu and Increase value
5
Cooking stages
10
Cooking programs

Note:
During the cooking process, if you want to open and close the lid (especially when there is a
lot of water in the inner pot), make sure to slowly close it or wait for 1-2 minutes, so that the
steam disperses and the pressure is released. This is to avoid liquid in the inner pot being
ejected from the steam vent.
Before first use
1. Take out all the accessories from the inner pots and remove all packaging
materials of it.
2. Clean the parts of the appliance thoroughly before using it for the first time.
Cooking rice and grains
Rice is an automatic cooking program. The cooking time is depending on water and rice
quantity. To cook rice for 4 people takes approximately 30-45 minutes.
Menu
Default Time
Time
Rice
Auto
N/A
Grains
45min
10min - 3h
1. Measure rice with the provided measuring cup. Ensure the cup is full but not
passed the top, as per the image below.
Note:
Ensure all parts are completely dry before operating the appliance.
OPERATION

2. Rinse the rice, put the washed rice in the inner pot.
3. For the rice setting, add water to the level indicated on the scale inside the inner
pot that corresponds to the number of cups of rice used. Flatten the rice so it is
spread evenly.
4. Wipe off any water outside of the inner pot and put it into the appliance. The
outside of the inner pot must be dry.
5. Close the lid, plug the power cord into the device and then plug the device into a
wall outlet to power on.
Note:
•Do not exceed the volume indicated or exceed the maximum water level, as this
may cause the appliance to overflow.
•Different types and quantity of rice require a different amount of water. The
amount of water you pour in will directly affect the flavour and nutrition of the rice.
Use the provided measuring cup and follow the water level indications to get the
best cooking result.
Note:
Ensure that the outside of the inner pot is dry and clean and that there is no residue on
the inside of the appliance.

6. Press the “+” or “-” button to select the desired program.
7. Press the “OK” button to start cooking.
8. When the cooking is finished, the appliance will beep and switch to Keep Warm
mode automatically. The ‘warm’ indicator will light up, and screen count up keeps
warm time.
9. Press the “CANCEL” button to finish the process.
•After the cooking is finished, immediately stir and loosen the rice to release
excessive moisture for fluffy rice.
•Depending on the cooking conditions, rice on the bottom may become slightly
browned.

Cooking Pilaf / Pilau
Menu
Default Time
Time Regulation
Pilaf
30min
10min – 2h
1. Mix the washed rice with other ingredients and spices in the inner pot.
2. Pour some water into the inner pot and close the lid.
3. Press the “+” or “-” button to select the desired program.
4. Press the “OK” button to start cooking.
5. When the cooking is finished, the appliance will beep and switch to Keep Warm
mode automatically.
•After the cooking is finished, stir the pilaf and loosen it immediately to release
excessive moisture for fluffy rice
•Depending on the cooking conditions, pilaf on the bottom may become slightly
browned.

Quick Recipe - Pilaf with pork
•Pork: 300g
•Rice: 2 cups
•Oil: 35ml
•Carrot: 150g
•Onion: 100g
•Garlic: 10g
•Water: 2 cups
•Salt: to taste
•Spices: to taste
1. Rinse the rice. Cut the meat into cubes 2-2.5cm. Carrots and onions cut into strips.
Cut the garlic into halves.
2. Meat, carrots, onion, garlic, rice put in a bowl. Add salt, spices and oil. Mix and add
water. Close the lid.
3. Select the pilaf program. Cooking time 30 minutes.
4. When the cooking is finished, the appliance beeps and switches to warm keeping
mode automatically.
Note:
After cooking is finished, stir the pilaf.

Cooking Congee, Soup, Porridge or Stew
•It is normal to find the porridge stickier if it is left in the warm-keeping mode for too
long.
•When you cook porridge, make sure to follow the water level indications
accordingly.
Menu
Default Time
Time Regulation
Congee
30min
5min - 4h
Soup
1h
30min - 4h
Porridge
70min
5min - 4h
Stew
40min
5min - 4h
1. Put the ingredients in the inner pot.
2. Wipe off the water outside of the inner pot and put it into the appliance.
3. Close the lid.
4. Press the “+” or “-” button to select the desired program.
5. Press the “OK” button to start cooking.
Note:
The countdown does not go during the preheat stage. After the end of the preheat
stage, the program starts cooking and counting down the time.
Try to ensure that the box fits appropriately.

6. When the cooking is finished, the appliance beeps and switches to warm keeping
mode automatically.
Steaming
Menu
Default Time
Time Regulation
Steam
25min
5min - 1h
1. Place the ingredients in a steam container.
2. Add water to the inner pot according to the cooking time. But at least 2 measuring
cups.
3. Place the steam container in the inner pot.
4. Wipe off the water outside of the inner pot and put it into the appliance.
Note:
To use the steam cooking mode, the steam container provided must be used.
Try to ensure that the box fits appropriately.

5. Press the “+” or “-” button to select the desired program.
6. Press the “OK” button to start cooking.
7. When the cooking is finished, the appliance beeps and switches to warm keeping
mode automatically.
Baking
Menu
Default Time
Time Regulation
Bake
45min
10min - 2h
1. Whisk the ingredients for cake well.
2. Coat the inner pot with some butter or cooking oil and then pour the cake mixture
into it.
3. Close the lid.
Note
The countdown does not go during the preheat stage. After the end of the preheat
stage, the program starts cooking and counting down the time.

4. Press the “+” or “-” button to select the desired program.
5. Press the “OK” button to start cooking.
6. When the cooking is finished, the appliance beeps and switches to warm keeping
mode automatically.
7. Open the lid and carefully take out the inner pot to cool down.
8. After the inner pot has cooled down, put a plate or cake rack on top of the pot and
then up over to take the cake out.
Note:
•If the mixture is not well beat up, there will be big bubbles in the cake and the cake
will have a rough taste. If the mixture is over beat up, the cake will be too hard
without bubbles.
•Pour the cake mixture into the inner pot and start the baking process before the
bubbles burst.
•When the baking is finished, do not leave the cake inside of the inner pot. Take it
out immediately to avoid the cake getting damp.

Sauté
When the cooking is finished, the appliance beeps and switches to warm keeping mode
automatically.
•Cook only with the lid open
Menu
Default Time
Time Regulation
Sauté
15min
1min - 1h
1. Wipe off the water outside of the inner pot and put it into the appliance.
2. Add oil into the pot.
3. Press the “+” or “-” button to select the desired program.
4. Press the “OK” button to start cooking.
•Do not place the ingredients until the alarm sounds and the countdown
starts.
•The countdown will start when the bowl has reached the Sauté
temperature.
5. Put ingredients into the pot and stir until the end of the program.

Yoghurt
Menu
Default Time
Time Regulation
Yoghurt
7h
1min –12h
1. Use your favourite recipe to make homemade yoghurt. Mix the ingredients in a
deep plate and cover the plate with foodstuff film. The height of the plate should
not exceed the height of the steam container.
2. Pour 5 glasses of water into the inner pot and place the steam container.
3. Place the plate in the steam container.
4. Wipe off the water outside of the inner pot and put it into the appliance.
5. Press the “+” or “-” button to select the desired program.
6. Press the “OK” button to start cooking.

7. When the cooking is finished, the appliance beeps and switches to standby mode
automatically.
Note:
•Cool the yoghurt in the fridge.
•Serve yoghurt with fresh berries, fruits and nuts.
Reheating
Menu
Duration of Work
Reheat
Up to 12h
1. Take cooled rice or other dishes and spread them evenly over the inner pot.
2. Pour some water onto the rice to prevent it from becoming too dry. The quantity of
water depends on the amount of rice.
3. Close the lid and put the plug into the power socket.
4. Press the "Heating up" button to start heating.
5. When the food is warmed up, press the “CANCEL” button to end the program.
Table of contents
Other Kogan Kitchen Appliance manuals

Kogan
Kogan KAGRL2SNPRA User manual

Kogan
Kogan KAPIEMKR4HA User manual

Kogan
Kogan 6 Mini Pie Maker User manual

Kogan
Kogan KACOFNESD User manual

Kogan
Kogan KAFDDHYDRTA User manual

Kogan
Kogan KA6TDHDTRSA User manual

Kogan
Kogan KAGRLSMARTA User manual

Kogan
Kogan KASMSVDC13A User manual

Kogan
Kogan KASTMXBABKA User manual

Kogan
Kogan KASLCR12PCA User manual
Kogan
Kogan KASLCR12PCA User manual

Kogan
Kogan KACITRPRESA User manual

Kogan
Kogan KA4SNDWPRSA User manual

Kogan
Kogan KACKW3PSTNA User manual

Kogan
Kogan TastyChef KACKRFCSTNA User manual
Kogan
Kogan KAMEATSLICA User manual

Kogan
Kogan KA10TDHDTRA User manual
Kogan
Kogan KAMU14COOKA User manual

Kogan
Kogan KAMFRWARBKA User manual

Kogan
Kogan KAFMPIEMKRA User manual