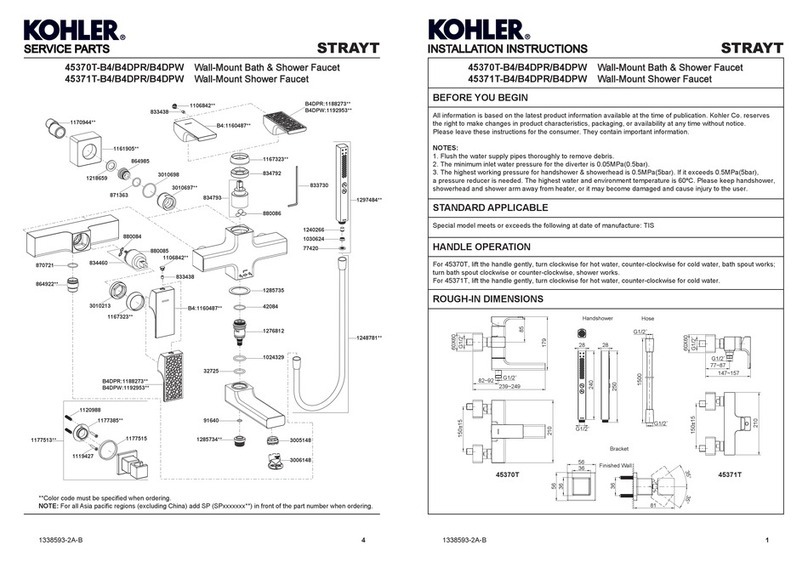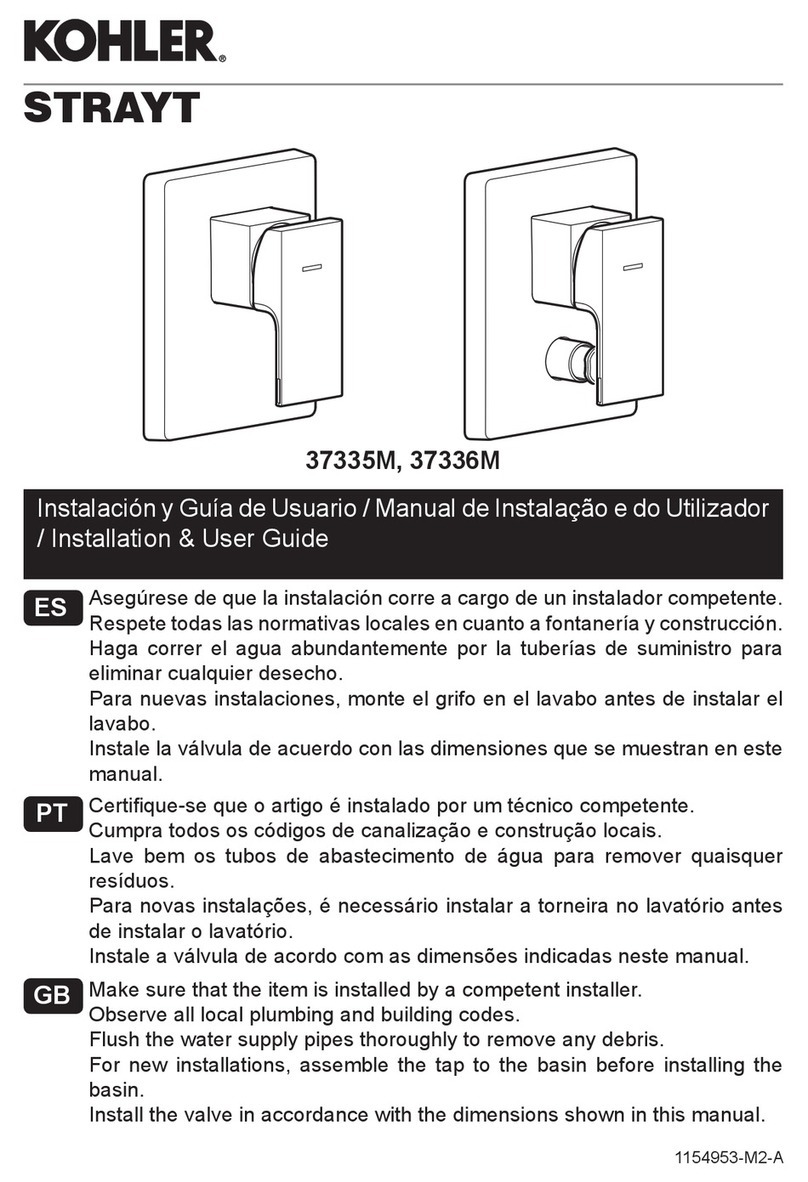
1170816-X2-A 2
1170816-X2-A 3
INSTALLATION
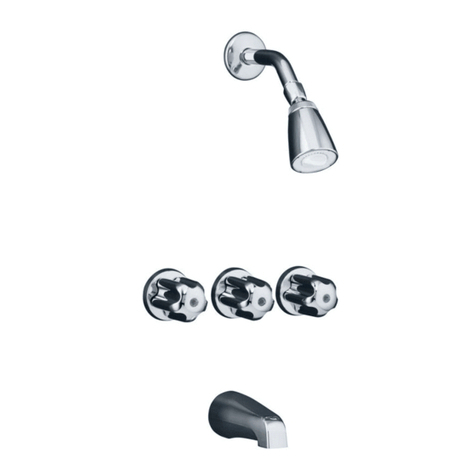
Loosen the screws(1), and remove the
plastic guards(2) after completed the
finished wall. Check and ensure that the
connectors(3) on the valves are
orthogonal. Check and ensure that the
triangle marks of the upper valve locate
on the 90ºand 210º separately. If not,
need to adjust the connector so that the
valves are on this initial states.
Slide the faceplate kit(4) onto the valve,
and the red mark and cold mark are
below. Secure the connector kit(6) and
the faceplate kit to the valve with the
screws(5). if installation is difficult, you
can loosen the screws(7) with a 2.5 mm
hex wrench, and adjust the connector
ring(8) so that its two screw holes are
level and symmetrical. NOTE: For
37272X-7, the connector kit with the
screws(9) should be installed onto the
upper valve, and the screws are below
two screw hole.
Install the washers(10). Turn the
rings(11) by hand so that the centerline
of the anchor holes locate on the 300º.
Make the heave of the handle kits(12)
locate on the 210º, then install the
handle kits onto the valve. Check and
ensure that the screw hole of the rings
are coaxial with the screw hole of the
handle kits. If not, poke the ring with the
hex wrench(13) so that they are coaxial.
NOTE: For 37272X-7, the handle kit with
the screw(14) should be installed onto
the upper valve.
Insert the screws(15) into the screw hole
of the handle kits with the hex
wrench(13), and tighten them. Press the
plugs(16).
1
2
3
Triangle Mark
เครื่องหมายสามเหลี่ยม
4
5
6
7
8
10
9
Hole
รู
Screw
สกรู
Anchor Hole
รูยึดพุก
11
12
14
15
16
13
CARE AND CLEANING
For best results, keep the following in mind when
caring for your product:
•Always test your cleaning solution on an
inconspicuous area before applying to the entire
surface.
•Wipe surfaces clean and rinse completely with
water immediately after applying cleaner. Rinse and
dry any overspray that lands on nearby surfaces.
•Do not allow cleaners to soak on surfaces.
•Use a soft, dampened sponge or cloth. Never use
an abrasive material such as a brush or scouring
pad to clean surfaces.
•The ideal cleaning technique is to rinse thoroughly
and blot dry any water from the surface after each
use.
การดูแลรักษาและทําความสะอาด
เพื่อการดูแลรักษาและทําความสะอาดผลิตภัณฑของทาน
อยางมีประสิทธิภาพ โปรดปฏิบัติตามคําแนะนําดังนี้
•ทดสอบน้ำยาทําความสะอาดกับพื้นผิวผลิตภัณฑในบริเวณ
ที่ไมเปนที่สังเกตกอนใชนํ้ายาทําความสะอาด
•หลังจากที่ใชนํ้ายาทำความสะอาด เช็ดทำความสะอาดและ
ลางนํ้าออกทันที จากนั้นเช็ดใหแหง
•หามแชนํ้ายาทำความสะอาดบนพื้นผิวผลิตภัณฑ
•ใชฟองนํ้าหรือผานุมทำความสะอาดพื้นผิวผลิตภัณฑ หามใช
วัสดุหยาบ เชน แปรงหรือแผนขัด
•ขอแนะนำในการดูแลพื้นผิวผลิตภัณฑคือ ลางนํ้าสะอาดใหทั่ว
และเช็ดคราบนํ้าบนพื้นผิวผลิตภัณฑหลังจากการใชงานทุกครั้ง
การติดตั้ง
คลายสกรู(1), และถอดฝาครอบพลาสติก(2)
หลังจากติดตั้งเขากับผนังเรียบรอยแลวตรวจ
สอบใหแนใจวาขอตอบนวาลว(3) ตั้งฉากกัน
ตรวจสอบใหแนใจวาเครื่องหมายสามเหลี่ยม
บนวาลวดานบนอยูในตำแหนง 90 องศา และ
210 องศา หากไมจำเปนตองปรับตำแหนง
ของวาลวจะอยูในรูปแบบตามขั้นตอนเบื้องตน
เลื่อนชุดฝาครอบ(4) เขากับวาลวโดยให
เครื่องหมายสีแดงและเครื่องหมายน้ำเย็นอยู
ดานลาง ยึดชุดขอตอ(6) และชุดฝาครอบ
เขากับวาลวดวยสกรู(5) ถาหากเกิดการขัดของ
ในการติดตั้ง ใหคลายสกรู(7) ดวยประแจแอล
ขนาด 2.5 มม. และปรับแหวนรองขอตอ(8)
เพื่อใหรูสกรูได ระดับและอยูในแนวเดียวกัน
ขอสังเกต สำหรับรุน 37272X-7 ชุดขอตอ
พรอมสกรู(9) ควรประกอบ เขากับวาลวดานบน
และขันสกรูเขากับรูดานลาง 2 รู
ประกอบแหวนรอง(10) หมุนแหวนรอง(11)
ดวยมือเพื่อใหตรงกับจุดกึ่งกลางของรูยึดพุกบน
ตำแหนง 300 องศา ประกอบชุดมือจับ(12)
บนตำแหนง 210 องศา ตรวจสอบใหแนใจวา
แหวนรองอยูในแนวเดียวกับรูยึดสกรูของชุด
มือจับถาหากไมอยูในแนวเดียวกันใช
ประแจแอล(13) เขี่ยแหวนรองใหอยูในแนว
เดียวกัน
ขอสังเกต สำหรับรุน 37272X-7 ชุดขอตอ
พรอมสกรู(14) ควรประกอบเขากับวาลวดานบน
และขันสกรู
สวมสกรู(15) รูยึดสกรูของชุดมือจับ
ดวยประแจแอล(13) และขันใหแนน
จากนั้นใหสวมปลั๊ก(16)
การรับประกันสินคา LIMITED WARRANTY
Kohler (Thailand) Public Company Limited warrants to the original
products, which are purchased from authorized distributors and dealers
within Kingdom of Thailand only, to be free of defects in material and
workmanship.
Within the below mentioned periods from the date of purchase,
Kohler(Thailand) Public Company Limited will at its election, repair,
replace or make appropriate adjustment where company’s inspection
disclose any such defect occurring in normal usage and maintenance but
is not responsible for labor charges, removal charges, installation, or
other incidental or consequential costs. In no event shall the liability of
Kohler(Thailand) Public Company Limited exceed the purchase price
of the product. This warranty applies only to Kohler Faucets installed in
Thailand.
• Ceramic Valve(leak/drip)
- Lifttime Limited Warranty* for residential use
- and Five (5) Years for commercial use
• Finish Five(5) Years
• Fitting Five(5) Years
• Automatic faucet One(1) Year
• Hygiene spray(leak/drip Five(5) Years for selected models
from hygiene spray body) only
• Shower Five(5) Years
• Bathroom accessories Five(5) Years
This limited warranty DOES NOT COVER the defect or damage caused by
accident, natural disasters such as fire, flood, or earthquake, misuse or
abuse of products. Improper care and cleaning will avoid the warranty.
Consumers are responsible for the cost of service parts and service fee
for such cases.
To ensure continuous product quality and performance, as well as
product durability and lifetime, without any damage to the product,
consumers should purchase and use only genuine service parts and
after-sales services from Kohler (Thailand) Public Company Limited or
company’s authorized service centers, distributors, or dealers only.
*KOHLER® Faucet Lifetime Limited Warranty
Kohler (Thailand) warrants its faucets manufactured after January 1,
1997, to be leak and drip free during normal residential use for as long as the
original consumer purchaser owns his or her home. If the faucet should
leak or drip during normal use, Kohler (Thailand) will, free of charge;
replace
the new cartridge necessary to put the faucet in good working
condition.
Kohler (Thailand) also warrants all other aspects of the faucet or
accessories (“Faucet”)**to be free of defects in material and workmanship
during normal residential use for as long as the original consumer
purchaser owns his or her home. If a defect is found in normal residential
use, Kohler (Thailand) will, at its election, repair, provide a replacement
part or product, or make appropriate adjustment. Damage to a product
caused by accident, misuse, or abuse is not covered by this warranty.
Improper care and cleaning will also void the warranty.
Proof of purchase (original sales receipt) must be provided to
Kohler(Thailand) with all warranty claims. Kohler (Thailand) is not
responsible for labor charges, installation, or other incidental or consequen-
tial costs. In no event shall the liability of Kohler (Thailand) exceed the
purchase price of the Faucet.
Important: Never use cleaners containing abrasive cleansers, ammonia,
bleach, acids, waxes, alcohol, solvents or other products not
recommended for chrome. This will void the warranty.
To obtain warranty service, please contact your dealers or contact the
KOHLER (Thailand) Call Center, together with proof of purchase at;
Call Center
KOHLER (Thailand) Public Company Limited
16th Floor, Jasmine City Building
2 Soi Sukhumvit 23, Sukhumvit Road,
Wattana, Bangkok 10110
Tel: 02204-6222 Fax: 0-2204-6224
COPYRIGHT ©2012 BY KOHLER (THAILAND) PUBLIC COMPANY
LIMITED

