Kolibri Automatic Bill Counter User manual


H
This manual contains important information on safety measures
and operational features of the Kolibri Automatic Bill Counter. Please
read it carefully before operating your machine and keep it for future
reference. While every effort has been made to include all features
into this user manual, specifications stated may not reect all features
of the latest software versions. If you have any questions about your
Kolibri Automatic Bill Counter and its operation, please contact technical
support at www.kolibriusa.com/contact/.

Table of Contents:
1. INTRODUCTION
1.1 About the Kolibri Automatic Bill Counter_________________________________________ 1
1.2 Important Safety Notes_________________________________________________________ 1
1.3 Box Contents __________________________________________________________________ 2
1.4 Product Specifications _________________________________________________________ 2
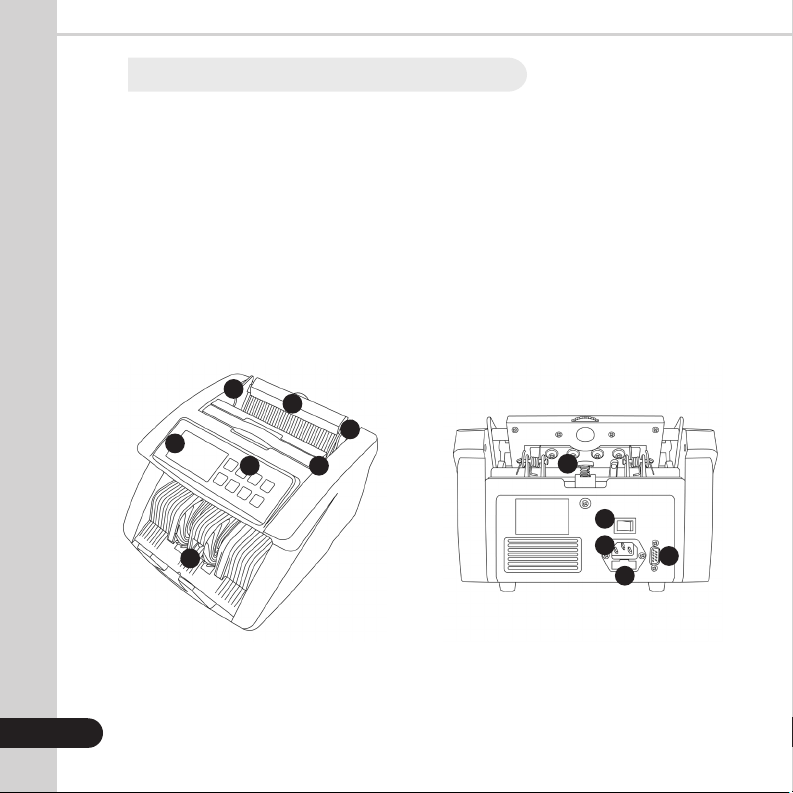
1.5 Views of the Kolibri Automatic Bill Counter ______________________________________ 3
1.6 Control Panel __________________________________________________________________ 4
1.7 Home Screen __________________________________________________________________ 5
2. GETTING STARTED
2.1 Powering Up ___________________________________________________________________ 6
2.2 Loading the Hopper ____________________________________________________________ 6
2.3 Carrying the Unit _______________________________________________________________ 8
3. OPERATING MODES AND FUNCTIONS
3.1 Auto & Manual Mode ___________________________________________________________ 8
3.2 Count Mode ___________________________________________________________________ 9
3.3 Add Mode _____________________________________________________________________ 9
3.4 Batch Mode____________________________________________________________________ 9
3.5 Add + Batch Mode ____________________________________________________________ 10
4. DETECTION FEATURES
4.1 UV Counterfeit Detection ______________________________________________________ 10
4.2 MG Counterfeit Detection______________________________________________________ 11
4.3 IR Detection___________________________________________________________________ 11
4.4 Half Note Detection ___________________________________________________________ 11
4.5 Double Note Detection ________________________________________________________ 12
4.6 Chain Note Detection__________________________________________________________ 12
5. MAINTENANCE, TROUBLESHOOTING AND SERVICE
5.1 Maintenance__________________________________________________________________ 13
5.2 Feed Gap Adjustment _________________________________________________________ 16
5.3 Sensitivity Settings ____________________________________________________________ 18
5.4 Troubleshooting ______________________________________________________________ 19
5.5 Warranty______________________________________________________________________ 22
5.6 Contact Information___________________________________________________________ 23

1.1 About the Kolibri Automatic Bill Counter
Thank you for choosing the Kolibri Automatic Bill Counter.
The Kolibri Automatic Bill Counter is a cash processing machine that is sophisticated,
but simple to operate. It saves time and reduces counting errors by swiftly and precisely
counting stacks of bills at the speed of 1500 bills per minute. The Kolibri Automatic Bill
Counter also comes with many built-in features and reliable counterfeit detection while
maintaining high level performance.
1.2 Important Safety Notes
When using this product, basic safety precautions should always be followed, including
the following:
• Do not use this product in areas where it may be exposed to water or any other
liquids.
• Unplug this product from the wall outlet before cleaning. Use a damp cloth or
air duster to clean the unit.
• To avoid the risk of electrical shock, do not disassemble this unit. Disassembling
will expose you to dangerous voltages and other safety risks. Incorrect
reassembly may cause electrical shock when the unit is subsequently used.
• Only use this product with the power cord supplied with it. Plug the power
cord into a properly grounded wall outlet. Do not remove the grounding pin
from the power cord. Failure to properly ground the unit can result in severe
injury or fire.
• Make sure the device is placed on a at surface. Do not operate the unit in
areas with high temperature, humidity or smoke as these conditions may
impede performance.
• This product is designed for indoor use in a well-ventilated environment. Keep
the unit away from direct sunlight and strong magnetic elds which may
interfere with the counterfeit detection sensors.
• When not using the unit for an extended period of time, disconnect the power
cord from the wall outlet.
INTRODUCTION
1.
1

1.3 Box Contents
- Kolibri Automatic Bill Counter
- External Display
- Power Cord
- User Manual
- Accessories
1.4 Product Specifications
Counting speed: 1500 bills per minute
Hopper capacity: 200 bills
Stacker capacity: 200 bills
Weight: 10.6 lbs (4.8 kg)
Dimensions: 11.4’’ x 9.8’’ x 6.9’’ (290mm x 250mm x 175mm)
Power source: AC 100V, 60Hz, < 80W
2

1. Hopper
2. Bill Guides
3. Carrying Handle
4. Control Panel
5. Screen
6. Stacker
7. Feed Gap Adjuster
8. Power Switch
9. RS-232M Port
10. Fuse
11. AC Power
1.5 Views of the Kolibri Automatic Bill Counter
3
FRONT VIEW BACK VIEW
1
2
34
5
6
7
8
9
10
11
2


1. USD - Currency
2. BATCH Function (Activated)
3. ADD Function (Activated)
4. Number of Bills Counted
5. Total Number of Bills Counted
6. Selected Batch Amount (Activated)
7. UV Detection (Activated)
8. MG Detection (Activated)
1.7 Home Screen
5
1 2 3
4
56
7
8

6
GETTING STARTED
2.
2.1 Powering Up
Ensure the hopper and stacker are empty. Then, attach the provided power cable to the
power inlet on the back of the machine. Make sure to plug the power cable into a three-
prong outlet and turn on the power switch located on the back of the machine .
The unit will load and conduct a self-checking. The screen will display “0” when the unit
is ready to operate.
2.2 Bill Loading
In order to avoid jams, it is important to correctly load the hopper. Kolibri recommends
not to use more than 200 bills at a time. Follow the 3-step loading technique below to
ensure smooth bill feeding.
WARNING: Hazardous moving parts!
Do not place fingers, hair, clothes, etc. near the moving parts.
7
STEP 1:
Correct or remove the bills that
are severely wrinkled, damaged or
folded. Square the bill stack.
STACK IT

7
PLACE IT FLIP IT
STEP 2:
Place the bill stack on the carrying
handle, with the bottom of the
stack touching the bill guide plate.
As it is shown in the illustration.
STEP 3:
Flip the bill stack towards the rear
of the machine so the stack is now
leaning against the bill guide plate
The bills will load automatically
(unless in manual mode).
Below is a side view of the bill loading technique. All bills must be between the rollers and the
feeding plate to be counted smoothly.

OPERATING MODES & FUNCTIONS
3.
3.1 Auto & Manual Mode
After turning the machine on for the first time it will default to AUTO mode. In this mode
the machine starts counting automatically. To operate in MANUAL mode, press the
“A/M” button on the control panel. Machine will beep twice, indicating that MANUAL
mode is activated. If the machine is set to operate in MANUAL mode, it will stop counting
automatically; the “START” button must be pressed to begin each count. To go back to
AUTO mode, press “A/M” button again. Machine will beep once indicating activation of
the AUTO mode.
8
1. Grasp the handle. 2. Pull the handle up.
2.3 Carrying the Unit

3.2 Count Mode
After turning the machine on it will default to count mode. To count bills, place them
in the hopper and follow the procedure described in 2.2 Bill Loading. The machine will
start counting automatically (if in AUTO mode) and move the bills from the hopper
to the stacker as it counts them. The machine will stop counting when the hopper is
completely emptied and the counted number of bills will be displayed on the screen.
Remove the bills from the stacker and place another stack into the hopper to count
another batch of bills. When the bills are removed from the stacker the screen will clear
itself of the previous count, or it can be cleared by pressing the “CLEAR” button.
3.3 Add Feature
This feature is available by pressing the “ADD” button. When this function is activated,
an “ADD” indicator is displayed on the home screen. The machine counts multiple stacks
of bills and keeps track of the total number of bills will be displayed on the bottom right
corner of the screen. When ready to count the next stack of bills, empty the stacker and
load the new stack to be counted into the hopper. The unit will continue counting and
add the new count to the total. To exit ADD mode, press the “ADD” button again.
3.4 Batch Feature
This feature is available by pressing the “BAT” button. When this function is activated, the
“BAT” indicator will be displayed on the screen along with the batch size. The machine
counts a preset number of bills. It beeps and stops counting when the batch number
has been reached, even if bills remain in the hopper. By default, the batch size is preset
to 100. You may press the “BAT” button repeatedly to cycle through different preset
batch quantities (100, 50, 20, 10), or use the “MG/+” and “UV/-” buttons to manually
select a desired batch size. To exit the BATCH function, press the “BAT” button until the
“BAT” indicator disappears from the screen.
9

3.5 Add + Batch Feature
This feature batches the desired quantity of bills and monitors the runnig total at the
same time. To activate this function, press the “ADD” and “BAT” button until both the
“BAT” and the “ADD” indicators are displayed on the screen. By default, the batch size
is preset to 100. Use the “MG/+” and “UV/-” buttons to manually select your desired
batch size. To exit the ADD+BATCH feature, press the “ADD” and “BAT” buttons until the
indicators on the screen disappear.
DETECTION FEATURES
4.
4.1 UV Counterfeit Detection
The Kolibri Automatic Bill Counter can identify bills suspected of being counterfeit using
an ultraviolet light detection system. This function is available in all modes by pressing
the “UV” button until the “UV” indicator is displayed on the screen.
When a suspect bill is detected, the unit will stop, beep and display the error code “E01”
on the screen. The unit will not stop beeping or start until the suspect bill is removed from
the stacker, and the “START” button is pressed. The suspect bill will not be added to the
count.
Please note that a suspect UV bill does not necessarily mean that the bill is counterfeit.
There are several reasons a genuine bill may be recognized as counterfeit. Possible
reasons for a bill to be indicated as suspect include: detergent washed bills, direct
sunlight exposure, worn out bills, excessively dirty bills or advanced counterfeiting
techniques used to produce the bill. Separate equipment may be required to determine
definitively whether a note is counterfeit.
10

4.2 MG Counterfeit Detection
The Kolibri Automatic Bill Counter can identify bills suspected of being counterfeit by
utilizing magnetic ink detection. This function is available in all modes by pressing the
“MG” button until the “MG” indicator is displayed.
When a suspect bill is detected, the unit will stop, beep and display the error code “E02”
on the screen. The unit will continue to beep until the suspect bill is removed from the
stacker, and the “START” button is pressed. The suspect bill will not be added to the
count.
Please note that a suspect MG bill does not necessarily mean that the bill is counterfeit.
There are several reasons a genuine bill may be recognized as counterfeit. Possible
reasons for a bill to be indicated as suspect include: worn out bills, excessively dirty bills
or advanced counterfeiting techniques used to produce the bill. Separate equipment may
be required to determine definitively whether a note is counterfeit.
4.3 IR Detection
The Kolibri Automatic Bill Counter can identify bills by their size and thickness utilizing
infrared detection. By default, this function is always on in all modes in order to identify
half note, double note, or chain note errors.
4.4 Half Note Detection
The Kolibri Automatic Bill Counter incorporates infrared light sensors that notify users
if a half note passes through the counting mechanism. This function is activated
automatically in all modes. If the unit detects a half note, it will stop, beep and display
the error code “HLF” on the screen. The unit will continue to beep until action is taken. To
clear the error, all bills must be removed from the stacker and recounted.
11

4.5 Double Note Detection
Bills may stick to each other due to excessive dirt, folding or various other reasons. The
Kolibri Automatic Bill Counter uses infrared light sensors to determine whether two bills
are stuck together. This feature is active automatically in all modes. If a double bill is
encountered the unit will stop, beep and display the error code “dbL” on the screen. The
unit will continue beeping until action is taken. To clear the error, all bills must be removed
from the stacker and recounted.
4.6 Chain Note Detection
The Kolibri Automatic Bill Counter utilizes infrared light sensors and a self checking
system that alerts the user in rare cases when several notes pass through the counting
mechanism at once. This feature is activated in all modes. If the unit detects a chain
error, it will stop, beep and display the error code “CHn” on the screen. The unit will
continue beeping until action is taken. To clear the error, all bills must be removed from
the stacker and recounted.
12

5.1 Maintenance
ATTENTION: Always power off the unit and disconnect from power source before
cleaning.
Most operational problems can be avoided by regular care and preventative
maintenance. Taking regular care of the Kolibri Automatic Bill Counter will significantly
increase its lifetime.
All parts of the Kolibri Automatic Bill Counter need daily care and cleaning. Pay closed
attention to the sensors, which are delicate components. If only dust or other foreign
matter adheres to the sensors, it may cause various problems during operation of the
machine. Dirty sensors can affect the Kolibri’s Automatic Bill Counter’s performance
and cause genuine bills to be rejected. It is suggested that the user performs weekly
maintenance on the unit to maintain top performance.
For best results, it is recommended to use an air duster and a soft bristle brush to
remove any dusy or debris from the interior of the unit. When not using the machine for
an exrended period, cover it with the provided dust cover to prevent dust from settling
inside.
•To avoid malfunction caused by foreign objects, please clean your machine frequently
•Clean Hopper and Stacker sensors with the provided soft bristle brush or a dry
cloth frequently
•Clean the sensors with the provided soft bristle brush or a dry cloth frequently
•Rubber rollers may be cleaned with a slightly damp cloth. You may use a small
amount of isopropyl alcohol to dampen the cloth and clean the rollers. Wait until the
rollers are completely dry before turning on the machine.
13
MAINTENANCE, TROUBLESHOOTING AND SERVICE
5.

14
2 inches
1. Place fingers under control
panel and thumbs on the
side panels.
3. Secure sensor housing and
control panel back to the
initial position.
2. Lift control panel about 2 inches.


5.2 Feed Gap Adjustment
Sometimes, during the transportation or shipment of the unit, the adjustments of the feed
mechanism may loosen. This can also happen during normal wear and tear, and can lead
to DOUBLE/CHAIN errors.
The feed gap is the actual height of the bill feed path and should be turned to just about
the thickness of a single bill. If the feed gap is too wide, the user may experience a high
amount of DOUBLE/CHAIN errors which are caused by more than one bill entering the
scanning path at one time. If the feed gap is too tight, the unit may not be able to pass
bills into the scanning path or catch on bills and tear them.
To adjust the feed gap properly, you will need a philips screwdriver (not included).
1. Ensure the machine is turned off.
2. Locate the feed gap adjustment knob (green) and the fixing plate screw (green
circle) at the back of the machine (loosen before performing any adjustment)
16

18
17
3a. If more than one bill is being pulled into
the feed mechanism (Double/Chain
errors), turn the knob clockwise
(decrease gap Adjust 1 turn, then
re-test the machine to see if the
problem is corrected. Repeat if
necessary.
NOTE: If the feed gap is adjusted too narrow,
chain error, bill jams and tears can occur.
3b. If Chain error or bill jamming is seen
on the input, turn the knob
counterclockwise (increase gap).
Adjust 1 turn, then re-test the machine.
Repeat as necessary.
NOTE: If the feed gap is adjusted too wide,
double and half errors can occur.
Clockwise
Counterclockwise
Fixing Plate & Screw
4. Fix the adjusted position by
tightening (clockwise) the fixing
plate screw.
IMPORTANT NOTE:
The Kolibri Automatic Bill Counter’s feed
gap adjustment can be sensitive during
adjustments. DO NOT overturn each
adjustment or you may overshoot the
optimum gap. We recommend testing with
a stack of bill after each adjustment turn.
Table of contents
Other Kolibri Cash Counter manuals