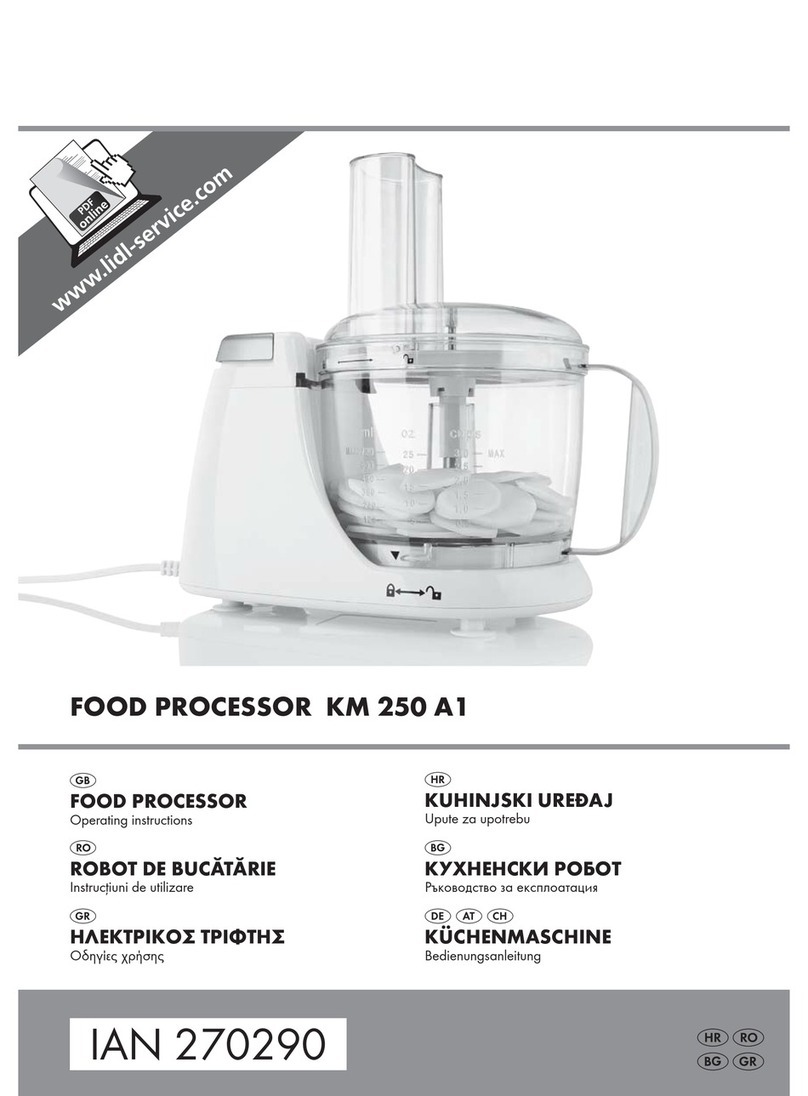
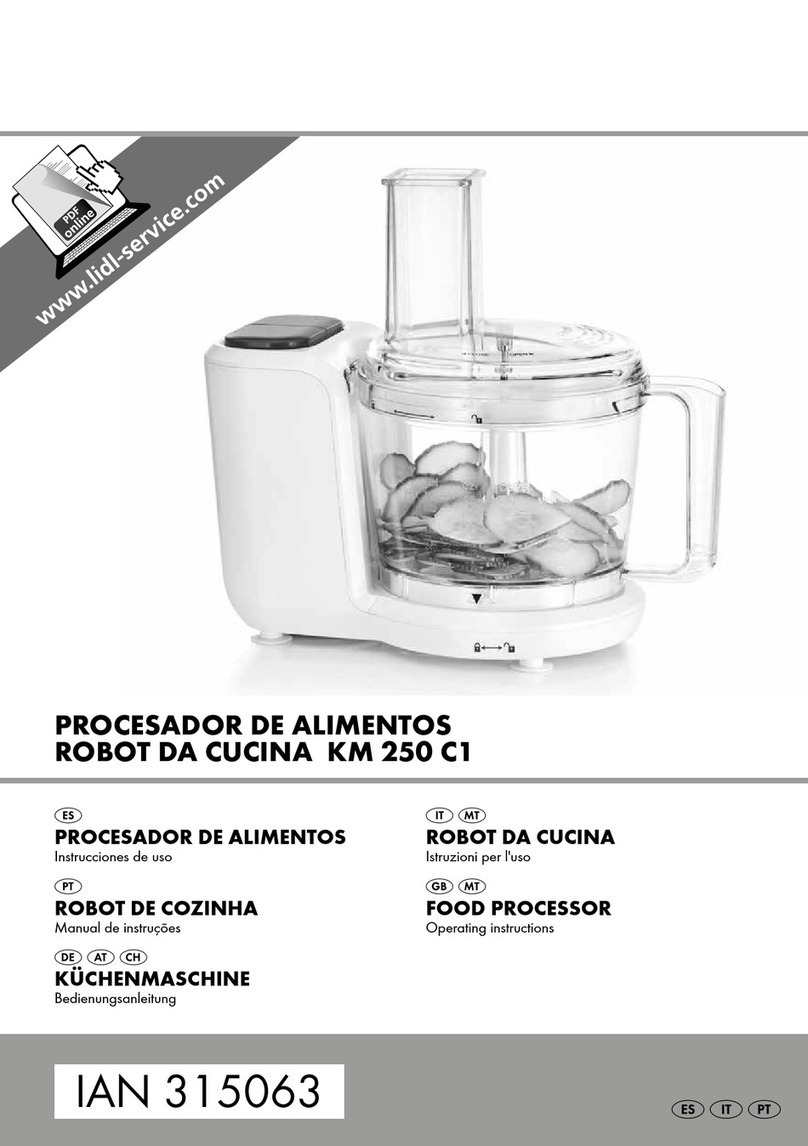
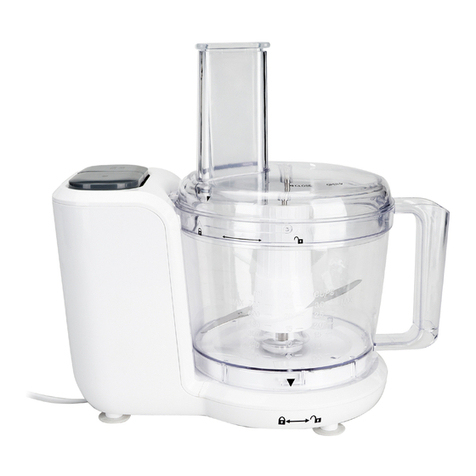
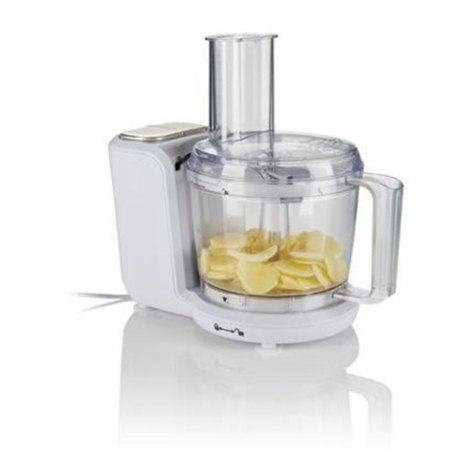
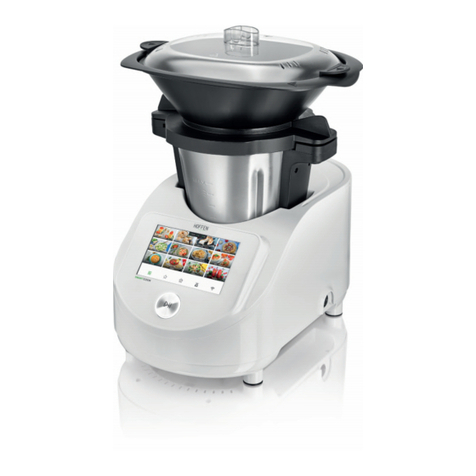
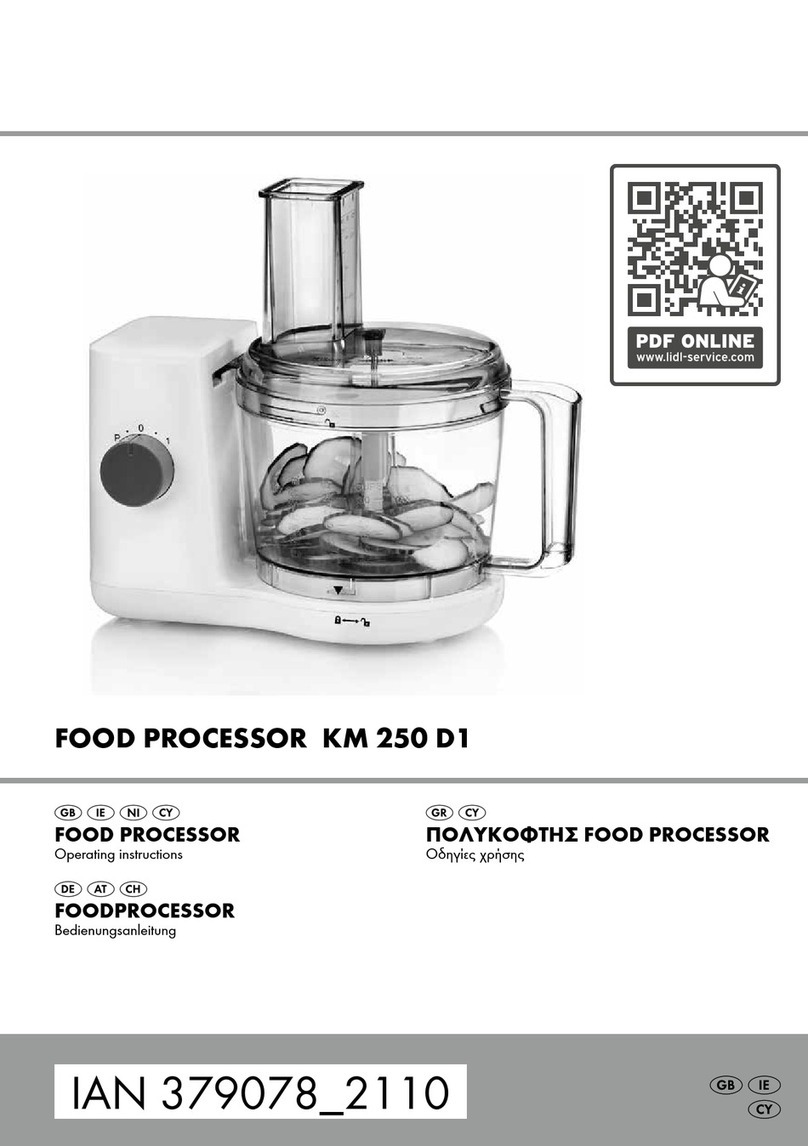
Kompernass 270290 User manual

IAN 270290
FOOD PROCESSOR KM 250 A1
FOOD PROCESSOR
Operating instructions
KUHINJSKI APARAT
Navodila za uporabo
KONYHAI ROBOTGÉP
Használati utasítás
ROBOT KUCHENNY
Instrukcja obsługi
KUCHYNSKÝ ROBOT
Návod na obsluhu
KUCHYŇSKÝ ROBOT
Návod k obsluze
KÜCHENMASCHINE
Bedienungsanleitung

GB Operating instructions Page 1
PL Instrukcja obsługi Strona 11
HU Használati utasítás Oldal 21
SI Navodila za uporabo Stran 31
CZ Návod k obsluze Strana 41
SK Návod na obsluhu Strana 51
DE/AT/CH Bedienungsanleitung Seite 61
Before reading, unfold the page containing the illustrations and familiarise yourself with all functions of
the device.
Przed przeczytaniem proszę rozłożyć stronę z ilustracjami, a następnie proszę zapoznać się z wszystkimi
funkcjami urządzenia.
Olvasás előtt kattintson az ábrát tartalmazó oldalra és végezetül ismerje meg a készülék mindegyik
funkcióját.
Pred branjem odprite stran s slikami in se nato seznanite z vsemi funkcijami naprave.
Před čtením si otevřete stranu s obrázky a potom se seznamte se všemi funkcemi přístroje.
Pred čítaním si odklopte stranu s obrázkami a potom sa oboznámte so všetkými funkciami prístroja.
Klappen Sie vor dem Lesen die Seite mit den Abbildungen aus und machen Sie sich anschließend mit allen
Funktionen des Gerätes vertraut.


1
KM 250 A1
GB
Table of Contents
Introduction............................................................2
Proper use.............................................................2
Package contents .......................................................2
Appliance description....................................................2
Technical details ........................................................2
Safety instructions ......................................................3
Beforefirstuse.........................................................5
Assembling the appliance ................................................5
Cutting blades ...................................................................... 5
Food processing attachments .......................................................... 6
Operation .............................................................6
Using the cutting blades .............................................................. 6
Working with the food processor ....................................................... 7
Cleaning and care.......................................................8
Storage...............................................................8
Disposal...............................................................9
Service................................................................9
Importer ..............................................................9
Troubleshooting .......................................................10

2KM 250 A1
GB
Introduction
Congratulations on the purchase of your new
appliance.
You have selected a high-quality product.
The operating instructions are part of this product.
They contain important information on safety, use
and disposal. Before using the product, familiarise
yourself with all operating and safety instructions.
Use this product only as described and only for
the specified areas of application. Please also
pass these operating instructions on to any future
owner(s).
Proper use
This appliance is intended exclusively for chopping
and processing food. This appliance is intended
exclusively for use in domestic households.
Not to be used for commercial purposes.
Package contents
Food processor
(lid, pusher, bowl, motor unit)
Cutting blades
Disc adapter
Grater attachment
Slicer attachment
Operating instructions
Check the delivery contents for completeness im-
mediately after unpacking.
Appliance description
Pusher
Feed tube
Lid
Cutting blades
Bowl
Drive shaft
Motor unit
ON button
OFF/PULSE button
Disc adapter
-Grater attachment
3Slicer attachment
Technical details
Rated voltage: 220–240 V ~, 50 Hz
Nominal power: 250 W
Protection class: II
CO time: 1 minute
CO time
The CO time (continuous operation time) is the
amount of time an appliance can be operated
without the motor overheating and becoming
damaged. When the specified CO time has been
reached, the appliance must be switched off until
the motor has cooled down to room temperature.

3
KM 250 A1
GB
Safety instructions
DANGER – ELECTRIC SHOCK!
► The appliance must only be connected to correctly installed and earthed
mains power sockets. Ensure that the rating of the local power supply
corresponds with the details on the rating plate of the appliance.
► Ensure that the power cord does not become wet or moist during use.
Route the cable in such a way that it cannot be crushed or damaged.
► Keep the power cord away from hot surfaces.
► Do not perform any repairs on the appliance. All repairs must be per-
formed by our Customer Services or by qualified personnel.
► Remove the plug from the mains power socket when the appliance is being
cleaned or in the event of a fault. Switching the appliance off is insufficient,
since the appliance receives power for as long as the plug is connected to
the mains power socket.
► To avoid risks, arrange for defective plugs and/or power cables to be
replaced at once by qualified technicians or our Customer Service
Department.
► The appliance and its connecting cable must be kept away from children.
Never submerge the appliance in water or other liquids.

4KM 250 A1
GB WARNING! RISK OF INJURY!
► Always disconnect the appliance from the mains power supply when fitting
or removing accessory parts. This will prevent unintentional activation of the
appliance.
► The appliance should always be disconnected from the mains when not
supervised and before assembly, disassembly or cleaning.
► Only use the original accessory parts for this appliance. Accessory parts
from other manufacturers may not be suitable, and this may lead to risks!
► This appliance may not be used by children.
► Appliances can be used by persons with reduced physical, sensory or
mental capabilities or lack of experience and knowledge if they are super-
vised or have been given instruction concerning use of the appliance in
a safe way and if they understand the hazards involved.
► Children must not play with the appliance.
► Caution: the cutting blades, the slicer attachment and the grater attachment
are very sharp! For this reason, take care when cleaning.
► Caution: the cutting blades, the slicer attachment and the grater attachment
are very sharp! For this reason, take care when emptying the bowl.
► When the appliance is operating, do not put anything other than the ingre-
dients to be processed into the bowl.
► Never use the appliance for purposes other than those described in these
instructions. Otherwise you run a risk of serious injury!

5
KM 250 A1
GB
Before first use
■ Remove all packaging materials from the appli-
ance.
■ Clean the appliance as described in the section
"Cleaning and care".
■ Ensure that all parts are completely dry before
operating the appliance.
Assembling the appliance
NOTE
► The appliance will not start until the bowl
and the lid are correctly attached.
1) Place the motor unit on a flat surface so
that the sucker feet can attach firmly and the
appliance stands firmly in place.
2) Place the bowl onto the motor unit
so that the arrow on the bowl points
towards the open lock symbol on the
motor unit . Then turn the bowl until the
arrow points to the closed lock symbol
and the bowl clicks into place.
If you want to work with the cutting blades ,
assemble the appliance as described in the section
"Cutting blades".
If you want to work with the food processing at-
tachments, assemble the appliance as described
in the section "Food processing attachments".
Cutting blades
1) Place the cutting blades onto the drive
shaft . The flattened side of the drive shaft
must correctly fit into the take up of the cutting
blades . Otherwise the cutting blades
cannot be properly attached.
2) Place the lid onto the bowl so that the
arrow on the lid coincides with the
arrow and the opened lock symbol
on the bowl .
3) Turn the lid until the arrow on the lid
points to the arrow and the closed lock
symbol on the bowl .
4) Place the pusher into the feed tube .
5) Insert the plug into a mains power socket.
WARNING! RISK OF INJURY!
► To avoid personal injury and damage to the appliance, never insert or
place your hands or any foreign objects into the feed tube.
► Do not change accessories unless the drive is stationary and the mixer is
unplugged from the power supply! The appliance will run on for a short
time after being switched off!
► Never leave the appliance unattended!
► Before changing accessories or additional parts that are in motion during
operation, the appliance must be switched off and disconnected from
mains power.
6KM 250 A1
GB
Food processing attachments
1) Select the desired attachment:
–the slicer attachment 3
–or the grater attachment -.
2) If another attachment is still installed: press the
long metal tab of the attachment inwards and
slide the attachment out of the disc adapter
using the metal tab as an aid. You can now lift
the catch at the other end of the attachment
out of the disc adapter .
3) Insert the new attachment with the catch first
into the disc adapter .
4) Then carefully push the side with the large
metal tab into the disc adapter . The best
way to do this is to press with both thumbs on
the outer edges of the attachment until it clicks
completely into place in the disc adapter .
5) Place the disc adapter with the attachment
fitted onto the drive shaft . The flattened side
of the drive shaft must correctly fit into the
take up of the disc adapter . Otherwise the
disc adapter cannot be properly attached.
6) Place the lid onto the bowl so that the
arrow on the lid coincides with the
arrow and the opened lock symbol
on the bowl .
7) Turn the lid until the arrow on the lid
points to the arrow and the closed lock
symbol on the bowl .
8) Place the pusher into the feed tube .
9) Insert the plug into a mains power socket.
Operation
Using the cutting blades
The cutting blades can be used to chop foods
such as onions or meat.
NOTE
► Do not attempt to mix liquids with the cutting
blades . These will overflow or spray out.
1) Fit the cutting blades as described in the
chapter "Assembling the appliance".
2) Cut the ingredients into pieces of approxi-
mately 2–3 cm.
3) Pour the ingredients in. Do not exceed the
quantities specified in the following table.
INGREDIENT MAX.
AMOUNT SPEED
Bread max. 80 g ON
Cheese max. 150 g ON
Meat max. 300 g ON
Herbs max. 30 g ON
Garlic 80–200 g PULSE
Onions max. 300 g PULSE
Ice cubes max. 140 g PULSE
NOTE
► The speeds given in the table are intended as
reference values. These can vary depending
on the quality and quantity of the ingredients!
4) Close the lid .

7
KM 250 A1
GB
5) Start chopping by pressing the ON button .
Press OFF/PULSE button once when all the
ingredients have been chopped and you want
to stop the appliance.
If you would like to continue to process the
ingredients using the PULSE function, press
the OFF/PULSE button several times in
succession until the ingredients are sufficiently
chopped.
If ingredients stick to the sides of the bowl or the
blades:
–Switch the appliance off.
–Remove the lid .
–Remove the ingredients from the cutting
blades and the inside using a dough
scraper or a spoon.
–Close the lid .
–Restart the appliance.
NOTE
► Only process meat that is boneless!
► Do not allow the appliance to operate for
long periods when chopping (hard) cheese.
Otherwise the cheese will become too hot,
start to melt and clump.
► If you wish to add ingredients during the cut-
ting process, add them via the feed tube !
The appliance stops if the lid is opened!
Do not exceed the maximum quantities speci-
fied in the table when adding ingredients!
Working with the food processor
You can grate or slice food using the processor’s
attachments -/3.
1) Select the required attachment and assemble
everything as described in the chapter "Assem-
bling the appliance".
2) Remove the pusher from the feed tube .
3) Cut the food into pieces that will easily fit into
the feed tube .
4) Start grating/slicing by pressing the ON
button .
5) Then gradually add the food. Push the food in
using the pusher without applying pressure.
Do not exceed the quantities specified in the follow-
ing table.
INGREDIENT SLICER ATTACHMENT
Apples/carrots max. 350 g
Cucumber max. 1.5
Potatoes max. 350 g
Onions max. 200 g
INGREDIENT GRATER ATTACHMENT
Apples/carrots max. 350 g
Parmesan max. 150 g
Potatoes max. 350 g
Hard cheese (e.g.
mature Gouda) max. 200 g

8KM 250 A1
GB
NOTE
► Do not prepare large quantities all at once,
but in several portions. Empty the bowl
after each use.
► Do not allow the appliance to operate for
long periods when chopping (hard) cheese
or chocolate. Otherwise the ingredients will
become too hot, start to melt and clump.
Cleaning and care
WARNING
RISK OF ELECTRIC SHOCK!
► Always remove the plug from the mains
power socket before cleaning the appliance.
Under no circumstances must the motor
unit be submerged in liquid! This could
result in a potentially fatal electric shock
and the appliance could be damaged.
► Never open the appliance housing! Other-
wise there is a risk of a fatal electric shock.
WARNING RISK OF INJURY!
► Take extreme care when cleaning the cutting
blades , the slicer attachment 3and the
grater attachment -.
► These parts are extremely sharp!
CAUTION – PROPERTY DAMAGE!
► Do not use solvents or abrasive cleaners. These
will damage the surface of the appliance!
► Do not use abrasive, aggressive or chemical
cleaning agents! They could irreparably dam-
age the surface!
NOTE
► Always clean all parts immediately after use.
This makes food residue easier to remove.
► Processing strongly staining foods, such as
carrots, can lead to staining of the plastic
parts on the appliance. This is not a defect in
the appliance and will not adversely affect
operation.
You can rub off discolourations using a little
cooking oil.
■ Clean the motor unit and the power cable
with a damp cloth. Dry everything properly
before re-using it.
■ Clean the bowl , the lid , the pusher ,
the cutting blades , the disc adapter , the
slicer attachment 3and the grater attachment -
in warm washing up water. Afterwards, rinse all
parts with clean water so that no detergent re-
sidue remain on the parts.
Dry all parts thoroughly, before re-using the
appliance.
Storage
■ Store the cleaned appliance in a clean, dust-free
and dry location.

9
KM 250 A1
GB
Disposal
Never dispose of the ap-
pliance in normal domestic
waste. This product is subject
to the provisions of European
Directive 2012/19/EU.
Dispose of the appliance via an approved disposal
company or your municipal waste facility. Please
observe the currently applicable regulations.
Please contact your waste disposal centre if you
are in any doubt.
The packaging is made from environ-
mentally friendly material and can be
disposed of at your local recycling plant.
Service
Service Great Britain
Tel.: 0871 5000 720 (£ 0.10/Min.)
IAN 270290
Hotline availability: Monday to Friday 08:00 -
20:00 (CET)
Importer
KOMPERNASS HANDELS GMBH
BURGSTRASSE 21
44867 BOCHUM
GERMANY
www.kompernass.com

10 KM 250 A1
GB
Troubleshooting
PROBLEM POSSIBLE CAUSE POSSIBLE SOLUTIONS
The appliance is not
working.
The appliance is not connect-
ed with a mains power socket.
Connect the appliance to
a mains power socket.
The appliance is damaged. Contact Customer Services.
The appliance will not start.
The bowl is not correctly
clicked into place on the motor
unit .
Check the placement of
the bowl and correct it
if necessary.
The lid is not/not correctly
in place and closed. Close the lid correctly.
If the malfunction cannot be corrected with the above suggestions, or if you have determined that
the malfunction may have other causes, please contact our Customer Service.

11
KM 250 A1
PL
Spis treści
Wstęp. . . . . . . . . . . . . . . . . . . . . . . . . . . . . . . . . . . . . . . . . . . . . . . . . . . . . . . . . . . . . . . . 12
Zastosowanie zgodne z przeznaczeniem ..................................12
Zakres dostawy .......................................................12
Opis urządzania .......................................................12
Dane techniczne .......................................................12
Wskazówki dotyczące bezpieczeństwa....................................13
Przed pierwszym użyciem...............................................15
Składanie urządzenia ..................................................15
Nóż tnący ........................................................................15
Tarka............................................................................16
Obsługa..............................................................16
Praca z użyciem noża tnącego ........................................................16
Praca z użyciem tarki................................................................17
Czyszczenie i pielęgnacja. . . . . . . . . . . . . . . . . . . . . . . . . . . . . . . . . . . . . . . . . . . . . . . . 18
Składowanie..........................................................18
Utylizacja ............................................................19
Serwis...............................................................19
Importer .............................................................19
Usuwanie usterek......................................................20

12 KM 250 A1
PL
Wstęp
Serdecznie gratulujemy zakupu nowego urządzenia.
Wybrany produkt charakteryzuje się wysoką jako-
ścią. Instrukcja obsługi stanowi element składowy
produktu. Zawiera ona ważne wskazówki na temat
bezpieczeństwa, użytkowania i utylizacji. Przed
przystąpieniem do eksploatacji produktu należy
zapoznać się ze wszystkimi wskazówkami dotyczą-
cymi obsługi i bezpieczeństwa. Produkt należy
użytkować wyłącznie zgodnie z zamieszczonym
tu opisem oraz w podanym zakresie zastosowań.
W przypadku przekazania urządzenia następnej
osobie, nie zapomnij dołączyć również instrukcji
obsługi.
Zastosowanie zgodne z
przeznaczeniem
Urządzenie jest przeznaczone wyłącznie do roz-
drabniania produktów spożywczych. Urządzenie
to przeznaczone jest wyłącznie do zastosowania
w gospodarstwach domowych. Nie należy go
używać do celów komercyjnych.
Zakres dostawy
Robot kuchenny
(pokrywa, popychacz, misa, blok silnika)
Nóż tnący
Adapter tarczy
Tarcza do ucierania
Tarcza do cięcia
Instrukcja obsługi
Natychmiast po rozpakowaniu urządzenia należy
sprawdzić, czy nie brakuje żadnego elementu.
Opis urządzania
Popychacz
Lejek do napełniania
Pokrywa
Nóż tnący
Misa
Wałek napędowy
Blok silnika
Przycisk ON (wł.)
Przycisk OFF/PULSE (wył./pulsacja)
Adapter do tarcz
-Tarcza do ucierania
3Tarcza do cięcia
Dane techniczne
Napięcie znamionowe: 220 - 240 V ~, 50 Hz
Moc znamionowa: 250 W
Stopień ochrony: II
Czas pracy: 1 minuta
Czas pracy
Czas pracy określa, jak długo można korzystać
urządzenia bez zagrożenia przegrzaniem silnika
i tym samym jego uszkodzenia. Po upływie poda-
nego czasu pracy krótkotrwałej urządzenie należy
wyłączyć i odczekać aż do całkowitego ostygnięcia
silnika.

13
KM 250 A1
PL
Wskazówki dotyczące bezpieczeństwa
NIEBEZPIECZEŃSTWO PORAŻENIA PRĄDEM ELEKTRYCZNYM!
► Podłączaj urządzenie tylko i wyłącznie do prawidłowo zainstalowanego
i uziemionego gniazda zasilania. Napięcie w sieci elektrycznej musi być
zgodne z danymi podanymi na tabliczce znamionowej urządzenia.
► Należy zwracać uwagę na to, aby podczas pracy urządzenia kabel
sieciowy nie był mokry ani wilgotny. Kabel należy tak poprowadzić, aby
nie został zakleszczony ani uszkodzony.
► Kabel sieciowy trzymać z dala od gorących powierzchni.
► Nie wolno samodzielnie wykonywać żadnych napraw urządzenia.
Wszelkie naprawy mogą być wykonywane tylko przez serwis lub przez
wykwalifikowanych specjalistów.
► Wyciągnąć wtyk z gniazda sieciowego, gdy urządzenie jest czyszczone
lub w przypadku błędnego działania. Samo wyłączenie urządzenia nie
wystarczy, gdyż jest ono nadal podłączone do napięcia sieci, dopóki
wtyk sieciowy znajduje się w gniazdku sieciowym.
► Naprawę uszkodzonego wtyku lub kabla sieciowego zleć niezwłocznie
wykwalifikowanemu specjaliście lub serwisowi, aby uniknąć wszelkich
zagrożeń.
► Urządzenie oraz jego kabel zasilający należy trzymać poza zasięgiem
dzieci w wieku poniżej 8 lat.
Nigdy nie zanurzaj urządzenia w wodzie ani żadnej innej cieczy.

14 KM 250 A1
PL
OSTRZEŻENIE! ZAGROŻENIE ODNIESIENIEM OBRAŻEŃ!
► Podczas demontażu lub montażu akcesoriów należy z zasady zawsze
odłączać urządzenie od zasilania sieciowego. W ten sposób można
uniknąć przypadkowego włączenia urządzenia.
► Przy braku nadzoru oraz przed montażem, złożeniem, rozłożeniem lub
czyszczeniem należy zawsze odłączać urządzenie od zasilania sieciowego.
► Do niniejszego urządzenia należy stosować wyłącznie oryginalne akcesoria.
Akcesoria innych producentów mogą nie być do tego celu odpowiednie
i mogą stanowić zagrożenia podczas użytkowania!
► Dzieci nie mogą posługiwać się urządzeniem.
► To urządzenie może być używane przez osoby o zmniejszonych zdol-
nościach fizycznych, sensorycznych lub umysłowych lub też osoby nie-
posiadające odpowiedniego doświadczenia i/lub wiedzy, wyłącznie
pod nadzorem lub po przeszkoleniu w zakresie bezpiecznego używania
urządzenia oraz wynikających z niego zagrożeń.
► Dzieci nie mogą bawić się urządzeniem.
► Ostrożnie: nóż tnący, tarcza do cięcia oraz tarcza do ucierania są bardzo
ostre! Dlatego podczas czyszczenia należy zachować ostrożność.
► Ostrożnie: nóż tnący, tarcza do cięcia oraz tarcza do ucierania są bardzo
ostre! Dlatego podczas opróżniania misy należy zachować ostrożność.
► W czasie pracy urządzenia należy dodawać do misy wyłącznie prze-
twarzane produkty.
► Nie używać urządzenia do innych celów niż opisane w tej instrukcji.
W przeciwnym razie istnieje zagrożenie odniesieniem obrażeń!

15
KM 250 A1
PL
Przed pierwszym użyciem
■ Usuń z urządzenia wszystkie elementy opako-
wania.
■ Czyścić urządzenie w sposób opisany w roz-
dziale „Czyszczenie i pielęgnacja”.
■ Przed ponownym użyciem urządzenia upewnić
się, że wszystkie części są całkowicie suche.
Składanie urządzenia
WSKAZÓWKA
► Robot może zostać uruchomiony tylko wtedy,
gdy misa oraz pokrywa zostaną
prawidłowo założone.
1) Ustawić blok silnika na równej powierzchni,
aby nóżki z przyssawkami przyssały się, a
urządzenie było bezpiecznie ustawione.
2) Założyć misę w taki sposób na blok silni-
ka , aby strzałka na misie wskazywała
na otwartą kłódkę na bloku silnika .
Obrócić misę na tyle, aby strzałka
wskazywała na zamkniętą kłódkę , a misa
się zablokowała.
Jeśli praca ma się odbywać za pomocą noża tną-
cego , należy kontynuować składanie urządze-
nia w sposób opisany w rozdziale „Nóż tnący“.
Jeśli chce się pracować za pomocą tarki, należy
kontynuować składanie urządzenia w sposób
opisany w rozdziale „Tarka“.
Nóż tnący
1) Założyć nóż tnący na wałek napędowy .
Spłaszczona strona wałka napędowego
musi przy tym wejść prawidłowo w uchwyt
noża tnącego . W innym przypadku nóż
tnący nie może zostać założony.
2) Założyć pokrywę na misę , aby strzałka
na pokrywie wskazywała na strzałkę
oraz symbol otwartej kłódki na misie .
3) Obrócić pokrywę na tyle, aby strzałka
na pokrywie wskazywała na strzałkę
oraz na symbol zamkniętej kłódki na misie .
4) Włożyć popychacz do lejka do napełnia-
nia .
5) Włożyć wtyk sieciowy do gniazda sieciowego.
OSTRZEŻENIE! ZAGROŻENIE ODNIESIENIEM OBRAŻEŃ!
► Nigdy nie wrzucać przedmiotów obcych ani nie wkładać rąk do lejka do
napełniania. Pozwoli to uniknąć obrażeń ciała i uszkodzenia urządzenia.
► Akcesoria wymieniać wyłącznie po zatrzymaniu napędu oraz po wyjęciu
wtyku sieciowego. Urządzenie po wyłączeniu obraca się jeszcze przez
pewien czas!
► Nigdy nie zostawiać urządzenia bez nadzoru.
► Przed wymianą osprzętu lub elementów dodatkowych, które podczas
pracy są w ruchu, należy wyłączyć urządzenie i odłączyć je od sieci elek-
trycznej.

16 KM 250 A1
PL
Tarka
1) Wybrać odpowiednią tarczę:
–tarczę tnącą 3
–lub tarczę do ucierania -.
2) Jeśli zainstalowana jest jeszcze inna tarcza:
Wcisnąć długi uchwyt metalowy tarczy do
środka i jednocześnie wysunąć tarczę za
pomocą metalowego uchwytu z adaptera
tarczy . Teraz można mocowanie na
drugim końcu tarczy wyjąć z adaptera .
3) Włożyć nową tarczę z mocowaniem do
adaptera tarczy .
4) Następnie ostrożnie wcisnąć bok z dużym
uchwytem metalowym w adapter tarczy .
Najlepiej przy tym wcisnąć oboma kciukami
zewnętrzne krawędzie tarczy, aż tarcza
znajdzie się w całości w adapterze i tam
się zablokuje.
5) Założyć adapter tarczy z zamontowaną
tarczą na wałek napędowy . Spłaszczona
strona wałka napędowego musi przy tym
zaczepić się prawidłowo w uchwycie adaptera
tarczy . W innym przypadku adapter tarczy
nie może zostać założony.
6) Założyć pokrywę na misę , aby strzał-
ka na pokrywie wskazywała na strzałkę
oraz symbol otwartej kłódki na misie .
7) Obrócić pokrywę na tyle, aby strzałka
na pokrywie wskazywała na strzałkę
oraz na symbol zamkniętej kłódki na misie .
8) Włożyć popychacz do lejka do napełnia-
nia .
9) Włożyć wtyk sieciowy do gniazda sieciowego.
Obsługa
Praca z użyciem noża tnącego
Za pomocą noża tnącego można rozdrabniać
produkty spożywcze, jak na przykład cebula lub
mięso.
WSKAZÓWKA
► Nie należy próbować mieszać za pomocą
noża tnącego cieczy. Przeleją się one lub
rozprysną się.
1) Założyć nóż tnący w sposób opisany
w rozdziale „Składanie urządzenia“.
2) Pokroić produkty na kawałki ok. 2 - 3 cm.
3) Dodać składniki. Nie przekraczać przy tym
ilości wskazanych w poniższej tabeli:
SKŁADNIK MAKS.
ILOŚĆ PRĘDKOŚĆ
Chleb maks. 80 g ON
Ser maks. 150 g ON
Mięso maks. 300 g ON
Zioła maks. 30 g ON
Czosnek 80 - 200 g PULSE
Cebula maks. 300 g PULSE
Kostki lodu maks. 140 g PULSE
WSKAZÓWKA
► Prędkości wskazane w tabeli są wartościami
orientacyjnymi. W zależności od rodzaju i
ilości składników mogą się one zmieniać!
4) Zamknąć pokrywę .

17
KM 250 A1
PL
5) Przyciskając przycisk ON rozpocząć
rozdrabnianie. Przycisnąć jeden raz przy-
cisk OFF/PULSE , gdy wszystkie składniki
zostały rozdrobnione i urządzenie ma zostać
zatrzymane.
Jeśli składniki mają być przetwarzane z za-
stosowaniem funkcji PULSE, należy przycisnąć
przycisk OFF/PULSE kilka razy po sobie,
aż wszystkie składniki zostaną rozdrobnione.
Jeśli składniki osadzą się na ściankach misy lub
przykleją się do noża:
–Wyłączyć urządzenie.
–Zdjąć pokrywę .
–Usunąć składniki z noża tnącego oraz ze
ścianki wewnętrznej misy za pomocą łopatki
do ciasta lub łyżki.
–Zamknąć pokrywę .
–Uruchomić ponownie urządzenie.
WSKAZÓWKA
► Należy rozdrabniać wyłącznie mięso bez
kości!
► Nie pozostawiać urządzenia zbyt długo
włączonego, gdy rozdrabnia się na przykład
(twardy) ser. Ser staje się wtedy zbyt gorący,
zaczyna się topić i skawala się.
► Jeśli w czasie procesu cięcia mają zostać jesz-
cze dodane składniki, należy je dodać przez
lejek do napełniania ! Jeśli pokrywa
zostanie otwarta, urządzenie się zatrzyma!
Należy jednak uważać, by podczas do-
dawania produktów nie przekroczyć ilości
maksymalnych, wskazanych w tabeli!
Praca z użyciem tarki
Za pomocą tarcz -/3tarki można ucierać lub
ciąć.
1) Należy wybrać żądaną tarczę i złożyć wszystko
razem, jak opisane to zostało w rozdziale
„Składanie urządzenia”.
2) Wyjąć popychacz z lejka do napełniania .
3) Pociąć produkty na mniejsze kawałki, aby bez
problemu można je było włożyć do lejka do
napełniania .
4) Przyciskając przycisk ON rozpocząć
ucieranie/cięcie.
5) Następnie po kolei wkładać dany produkt
spożywczy do robota. Następnie za pomocą
popychacza popychać produkt dalej, bez
wywierania nacisku.
Nie przekraczać przy tym ilości wskazanych w
poniższej tabeli:
SKŁADNIK TARCZA DO CIĘCIA
Jabłka/marchew maks. 350 g
Ogórek wężowy maks. 1,5 sztuki
Ziemniaki maks. 350 g
Cebula maks. 200 g
SKŁADNIK TARCZA DO
UCIERANIA
Jabłka/marchew maks. 350 g
Parmezan maks. 150 g
Ziemniaki maks. 350 g
Twardy ser
(np. dojrzały
ser gouda)
maks. 200 g
Other manuals for 270290
1
This manual suits for next models
1
Table of contents
Languages:
Other Kompernass Food Processor manuals

Kompernass
Kompernass KH 701 User manual

Kompernass
Kompernass KM 250 B1 User manual

Kompernass
Kompernass KH701-07/08-V1 User manual

Kompernass
Kompernass KM 250 D1 User manual

Kompernass
Kompernass KM 600 A1 User manual

Kompernass
Kompernass KM 250 B1 User manual

Kompernass
Kompernass 270290 User manual

Kompernass
Kompernass KM 250 B1 User manual

Kompernass
Kompernass KM 250 C1 User manual

Kompernass
Kompernass KM 250 C1 User manual