GENERAL SAFETY INSTRUCTIONS
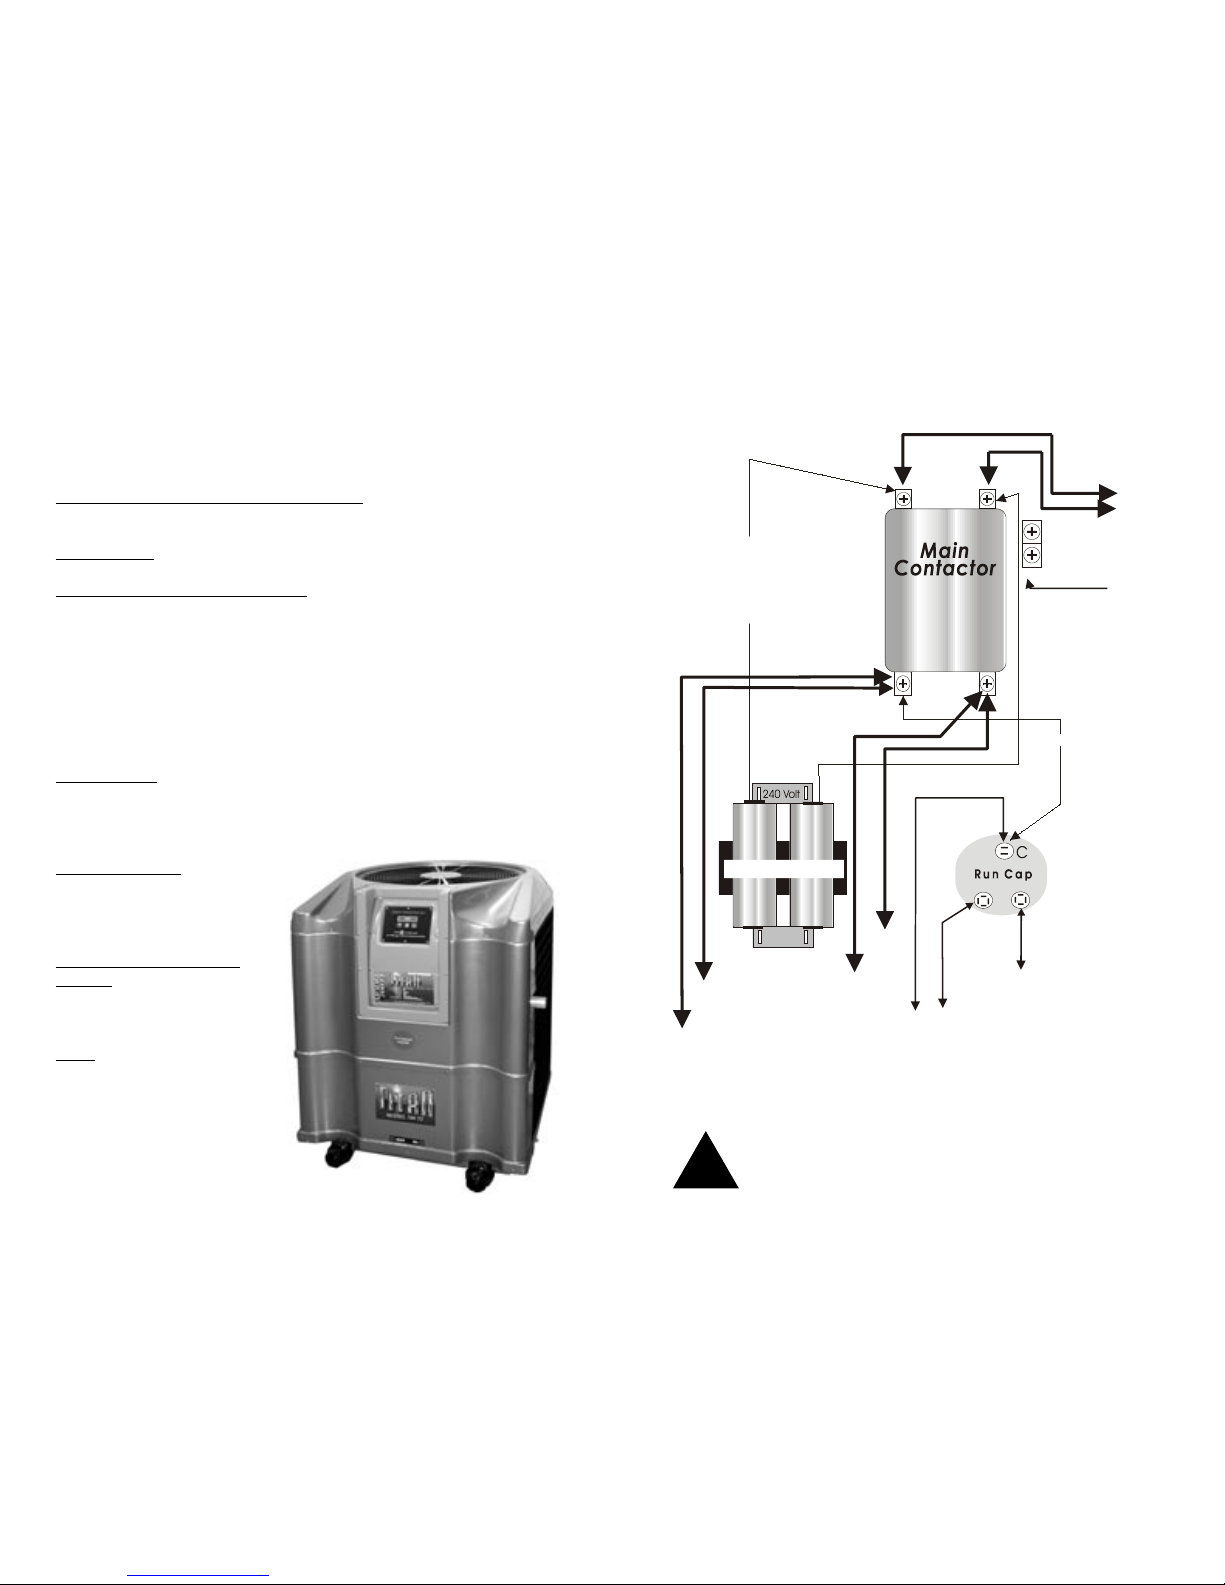
All electrical installation must be done by a qualified, licensed electrical
contactor in accordance with all national and local wiring codes.
Unit must be bonded to the pool equipment or a 6 ft. copper rod.
Once installed, always shut off main power to the unit whenever the access
panel is opened or removed.
UNIT INSTALLATION
LOCATION- The placement of the pool heater is very important in insuring
the maximum operating efficiency, while keeping installation costs to a
minimum and allowing access for service and maintenance.
The unit is best suited for outdoor installation and should not be installed
indoors. If the unit must be installed indoors, adequate air exchange must
be provided to insure efficient unit operation. (Please call the manufacturer
for details).
CLEARANCE- Please allow 12 inches of clearance from walls, fences, or
bushes around the sides and back of your unit, and at least 24 inches in
the front for operation and service access. Allow 4 feet of vertical clearance
from the top of the unit to the roof overhang. (This will provide quieter
operation and will prevent re-circulation of cold air into the unit, which will
affect the units heating efficiency).
SPRINKLERS and ROOF RUN OFF- Redirect or cap any sprinklers that
directly hit the unit, and do not install the heater under or near an area
which will subject it to large amounts of water run off. A gutter or downspout
may be needed to protect the heater.
SLAB OR BASE THE UNIT SITS ON- Please provide a secure level
surface at least 36” x 36” for the units base.
RISK OF ELECTRICAL SHOCK OR ELECTROCUTION
The electrical supply to this product must be installed
by a licensed or certified electrician in accordance
with the National Electrical Code and applicable
local codes and ordinances. Improper installation
will create an electrical hazard, which could result
in death or serious injury to pool or spa users,
installers, or others due to electrical shock, and may
also cause damage to property. Read and follow the
specific instructions inside the manual.
Drainage- A drain fitting is provided in the bottom of the unit. This fitting
allows unit condensation or rainwater to escape, keeping the inside of the
unit relatively dry. Keep the drain fitting clear of leaves or debris to insure
proper drainage. You can divert the drain water by attaching a ½ inch
garden hose to the drain fitting and redirecting it to area better suited for
drainage. (Ask your installer).
PLUMBING
See Plumbing Diagram on pages 4-5
Piping Sequence- Pool -to- water circulating pump -to- filter-pool heater-
-to- check valve -to- chlorinator -to- pool (if a chlorinating device is used,
it must be downstream of the heater, with a flapper-style check valve
installed in a vertical run between it and the heater.) See Page 16 on unit
protection for more details.
Pipe Connections - Water IN from filter is on the RIGHT. Water OUT
to pool is on the LEFT. Normal applications do not require an external
bypass. The unit is equipped with 2 inch unions.
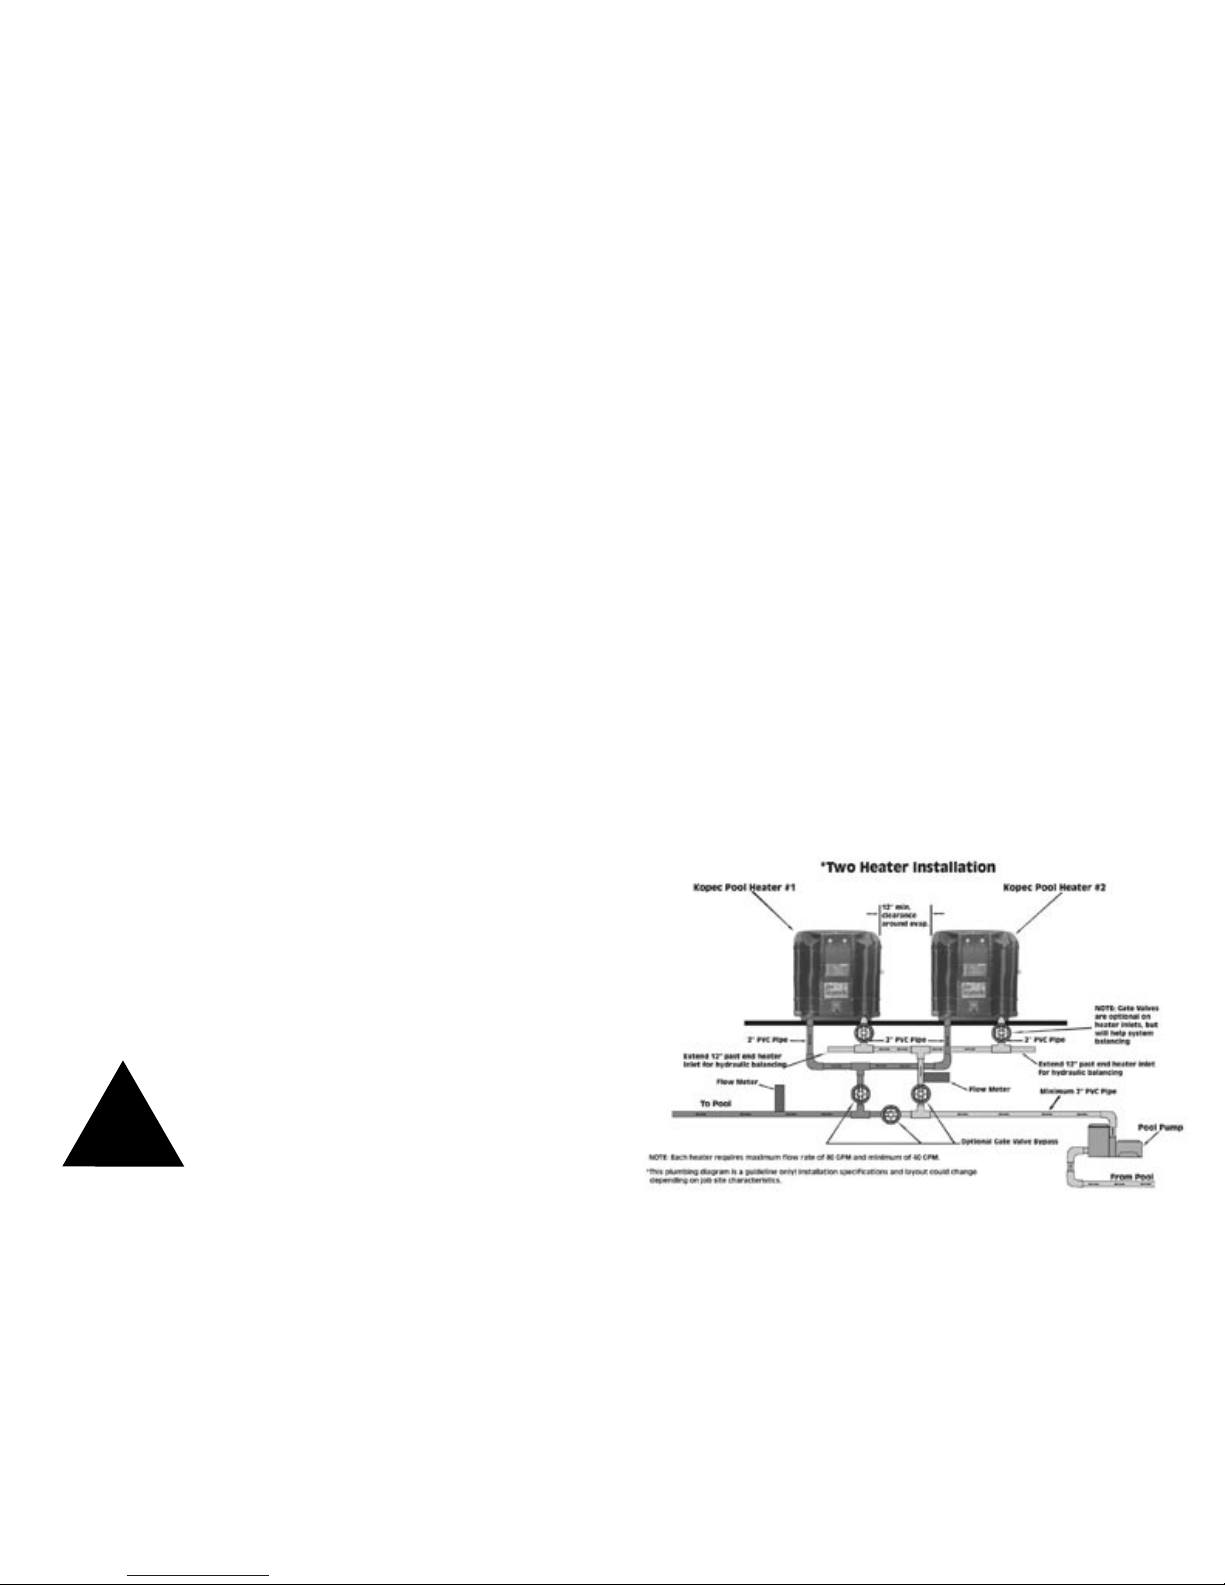
Multiple Unit Installations- All plumbing on multiple installations must be
in PARALLEL by using an equalized manifold supply pipe. DO NOT install
in series. Visit our web site for multiple unit plumbing diagrams