manuals.online logo
Brands
  1. Home
  2. •
  3. Brands
  4. •
  5. Kramer
  6. •
  7. Extender
  8. •
  9. Kramer VM-2HDT User manual

Kramer VM-2HDT User manual

VM
-2HDT, VM-3HDT Quick Start (P/N: 2900-300859QS REV 1)
P/N:
2900- 300859QS
Rev:
1
Scan for full manual
VM-2HDT, VM-3HDT Quick Start Guide
This guide helps you install and use your VM-2HDT, VM-3HDT for the first time.
Go to www.kramerav.com/downloads/VM-2HDT to download the latest user manual and check if firmware
upgrades are available.
Step 1: Check what’s in the box
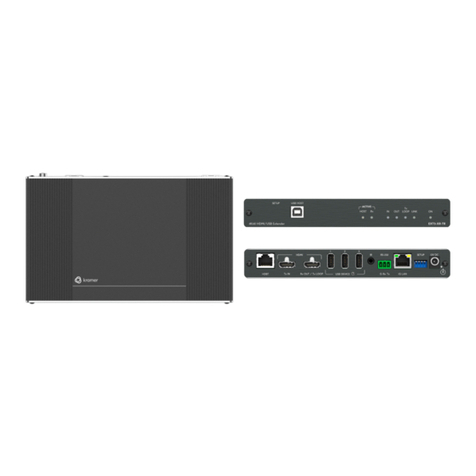
VM-2HDT or VM-3HDT HDBT DA/Extender
4 Rubber feet
1 Bracket set
1 Power adapter and cord
1 Quick start guide
Step 2: Get to know your VM-2HDT, VM-3HDT
This section defines the VM-3HDT. VM-2HDT is identical but has 2 HDBT OUT connectors (OUT 1 and OUT 2).
# Feature Function
1 PROGRAM Mini USB
Connector
Use to send RS-232 commands.
Connect to a PC to perform firmware upgrades (via K-Upload) and work with the EDID
Designer. K-Upload and EDID Designer can be downloaded from our Web site at:
www.kramerav.com/support
2 EDID SETUP Button Press to capture one of the output EDIDs or the default EDID to the input EDID.
3
IN LED
Lights when an active input signal is detected.
4
LINK LEDs (1 to 3)
Lights when a link is established with the receiver (VM-2HDT: 1 to 2).
5 OUTPUT LEDs
(LOOP and 1 to
3)
Lights when an active output acceptor (sink) is detected on the LOOP or HDBaseT
receiver that is connected to the output (
VM-2HDT
: LOOP and 1 to 2).
6 ON LED Lights when the unit receives power.
7
INPUT HDMI Connector
Connects to the HDMI source.
8
LOOP OUT HDMI Connector
Connect to a local monitor or a daisy-chained distributor, for example, a VM-4HDT.
9 HDBT OUT Connectors (1 to 3) Connect to an HDBT acceptor, for example
TP-580R
(
VM-2HDT
: 1 to 2).
10
IR 3.5mm Mini Jack Connect to the remote IR sensor/emitter.
11
RS-232 3-pin Terminal Block Connect to a serial controller to control a remote device that is connected to the RS-232
port of the HDbaseT receiver.
12
SETUP 8-way DIP-switch
Used to set the IR and RS-232 command behavior.
13
SETUP 4-way DIP-switch For future use.
14
5V DC Connector Connects to the 5V DC power supply.
Step 3: Install VM-2HDT, VM-3HDT
Install VM-2HDT, VM-3HDT using one of the following methods:
•Attach the rubber feet and place the unit on a flat surface.
•Fasten a bracket (included) on each side of the unit and attach it to a flat surface.
For more information go to www.kramerav.com/downloads/VM-2HDT, VM-3HDT.
•Mount the unit in a rack using an optional RK-T2B rack adapter.
Step 4: Connect the inputs and outputs
Always switch OFF the power on each device before connecting it to your VM-2HDT, VM-3HDT. For best results, we recommend
that you always use Kramer high-performance cables to connect AV equipment to VM-2HDT, VM-3HDT.
Step 5: Connect the power
Connect the 5V DC power adapter to VM-2HDT, VM-3HDT and plug it into the mains electricity.
Safety Instructions
Caution:
There are no operator serviceable parts inside the unit.
Warning:
Use only the Kramer Electronics power supply that is provided with the unit.
Warning:
Disconnect the power and unplug the unit from the wall before installing.
See www.KramerAV.com for updated safety information.
Step 6: Operate VM-2HDT, VM-3HDT
To enable/disable IR and RS-232 routing, set the DIP-switches (by default, set to OFF) as follows:
Out # IR Routing is enabled when: RS-232 Routing is enabled when:
OUT 1 DIP 1 – OFF (up) DIP 5 – OFF (up)
OUT 2
DIP 2 – OFF (up)
DIP 6 – OFF (up)
OUT 3 DIP 3 – OFF (up) DIP 7 – OFF (up)
Acquire EDID by:
•Manually sending RS-232 serial
commands via a touch screen
connected to USB.
•Using the Kramer EDID Designer
tool connected to USB.
•Pressing the EDID SETUP front
panel button.
USB:
RS-232
Baud Rate: 115200
Data Bits: 8
Command Format:
ASCII
Stop Bits:
1
Parity: None
Example (Copy the EDID data from the Output 1 to the
Input):
“#CPEDID 1,1,0<cr>
Factory Reset
Protocol 3000: #FACTORY command to reset to factory default
configuration.
To
Read the EDID via EDID SETUP front panel button:
1. Press EDID SETUP.
The LEDs indicate the current EDID source:
Default EDID – all the connected output LEDs flash.
An output – that output LED lights for about 5 seconds.
2. Press EDID SETUP.
3. Press repeatedly to cycle through EDID source options until the desired EDID source is selected:
OUT 1>OUT 2>OUT 3>all LEDs flash (OUT 1 and OUT 2 for VM-2HDT).
4. Wait a few seconds for VM-2HDT, VM-3HDT to read the EDID.
When complete, all the LEDs return to normal operation and display the current output connection status.
If a disconnected output is chosen, the VM-2HDT, VM-3HDT loads the default EDID.
To force RGB mode:
To force the EDID to support only RGB color space:
1. Press and hold EDID SETUP until all the LEDs fast-flash together several times then turn off.
2. If required, read the EDID.
To return to normal mode:
1. Press and hold EDID SETUP until all the LEDs flash once.
2. If required, read the EDID.
Technical Specifications
VM-2HDT
VM-3HDT
Inputs 1 HDMI 1 HDMI On a female HDMI connector
Outputs
1 LOOP HDMI
1 LOOP HDMI
On a female HDMI connector
2 HDBT 3 HDBT On RJ-45 female connectors
Ports 1 USB 1 USB On a Mini female connector
1 RS-232 1 RS-232 On a 3-pin terminal block connector
1 IR
1 IR
On a 3.5mm mini jack
Maximum Extension Range
40m (130ft)
At 4K@60Hz (4:2:0)
70m (230ft) At full HD (1080p@60Hz 36bpp)
Video Max. Resolution 4K@30Hz and 4K@60Hz 4:2:0
Max. Data Rate
10.2Gbps (3.4Gbps per graphic channel)
Compliance Supports HDMI 2.0, HDCP 1.4, and
HDBaseT 1.0
Control Front Panel EDID setup button
IN, LINK, OUTPUT and ON indication LEDs
Rear Panel
DIP-switches
Power Consumption 5V DC, 1.6A 5V DC 2.1A
Power Source 5V DC, 4A
Environmental Conditions Operating Temperature 0° to +40°C (32° to 104°F)
Storage Temperature
-40° to +70°C (-40° to 158°F)
Humidity
10% to 90%, RH non-condensing
General Net Dimensions (W, D, H) 18.8cm x 11.5 cm x 2.54cm
(7.4" x 4.53" x 1.")
Shipping Dimensions (W, D, H) 34.5cm x 16.5cm x 5.2cm
(13.6” x 6.5” x 2.05”)
Net Weight
0.53kg (1.17lbs) approx.
Shipping Weight
1.29kg (2.84lbs) approx.
Accessories Included Power adapter and cord
Specifications are subject to change without notice at www.kramerav.com

Other manuals for VM-2HDT

1

This manual suits for next models

1

Other Kramer Extender manuals

Kramer Tools VP-14xl User manual

Kramer

Kramer Tools VP-14xl User manual

Kramer PL-18 User manual

Kramer

Kramer PL-18 User manual

Kramer VM-2HDT User manual

Kramer

Kramer VM-2HDT User manual

Kramer EXT3-XR-TR User manual

Kramer

Kramer EXT3-XR-TR User manual

Kramer WP-2UT/R-KIT User manual

Kramer

Kramer WP-2UT/R-KIT User manual

Kramer TP-400FW User manual

Kramer

Kramer TP-400FW User manual

Kramer TP-600TRxr User manual

Kramer

Kramer TP-600TRxr User manual
Kramer VP-14 User manual

Kramer

Kramer VP-14 User manual

Kramer EXT3-TR User manual

Kramer

Kramer EXT3-TR User manual

Kramer VA-4X User manual

Kramer

Kramer VA-4X User manual

Kramer K-Able/XL Box User manual

Kramer

Kramer K-Able/XL Box User manual

Kramer PT-100 User manual

Kramer

Kramer PT-100 User manual

Kramer PT-2H User manual

Kramer

Kramer PT-2H User manual

Kramer WP-789T User manual

Kramer

Kramer WP-789T User manual

Kramer TP-600TRxr User manual

Kramer

Kramer TP-600TRxr User manual

Kramer 617T User manual

Kramer

Kramer 617T User manual

Kramer WP-3H2 User manual

Kramer

Kramer WP-3H2 User manual

Kramer TP-330FW User manual

Kramer

Kramer TP-330FW User manual

Kramer TP-600TRxr User manual

Kramer

Kramer TP-600TRxr User manual

Kramer DS Vision 3000 User manual

Kramer

Kramer DS Vision 3000 User manual

Kramer PT-3H2 User manual

Kramer

Kramer PT-3H2 User manual

Kramer TP-300FW User manual

Kramer

Kramer TP-300FW User manual

Kramer FC-50 User manual

Kramer

Kramer FC-50 User manual

Kramer KW-14R User manual

Kramer

Kramer KW-14R User manual

Popular Extender manuals by other brands

Vision TECHCONNECT TC-HDMIW30C owner's manual

Vision

Vision TECHCONNECT TC-HDMIW30C owner's manual

CTC Union EOC-10 quick start guide

CTC Union

CTC Union EOC-10 quick start guide

J-Tech Digital JTD-3023 user manual

J-Tech Digital

J-Tech Digital JTD-3023 user manual

Monoprice Audio-E Local user manual

Monoprice

Monoprice Audio-E Local user manual

MuxLab 100509 Quick installation guide

MuxLab

MuxLab 100509 Quick installation guide

Marmitek GigaVideo 580 Technical data

Marmitek

Marmitek GigaVideo 580 Technical data

Cables to Go TruLink user manual

Cables to Go

Cables to Go TruLink user manual

Biamp Audia EXPI Operation manual

Biamp

Biamp Audia EXPI Operation manual

Yamaha CVS-10 user guide

Yamaha

Yamaha CVS-10 user guide

Xantech XT-HDBT-EX100-4K18G-KIT user manual

Xantech

Xantech XT-HDBT-EX100-4K18G-KIT user manual

Manhattan 177269 instructions

Manhattan

Manhattan 177269 instructions

Gefen DVI-141DLB user manual

Gefen

Gefen DVI-141DLB user manual

Digitus DC-51101-LOCAL user manual

Digitus

Digitus DC-51101-LOCAL user manual

Hawking Hi-Gain HD45X user manual

Hawking

Hawking Hi-Gain HD45X user manual

Digital Extender HDCR user manual

Digital Extender

Digital Extender HDCR user manual

Pro Control Pro.rfz Quick reference guide

Pro Control

Pro Control Pro.rfz Quick reference guide

Vertiv AVOCENT HMX8000 Quick installation guide

Vertiv

Vertiv AVOCENT HMX8000 Quick installation guide

Zenisu Keisoku ZS-6103EG-F1 user manual

Zenisu Keisoku

Zenisu Keisoku ZS-6103EG-F1 user manual

manuals.online logo
manuals.online logoBrands
  • About & Mission
  • Contact us
  • Privacy Policy
  • Terms and Conditions

Copyright 2025 Manuals.Online. All Rights Reserved.