manuals.online logo
Brands
  1. Home
  2. •
  3. Brands
  4. •
  5. Kramer
  6. •
  7. Media Converter
  8. •
  9. Kramer VP-475UX User manual

Kramer VP-475UX User manual

Other manuals for VP-475UX

1

Other Kramer Media Converter manuals

Kramer VP-417 User manual

Kramer

Kramer VP-417 User manual

Kramer PT-871/2xr-KIT User manual

Kramer

Kramer PT-871/2xr-KIT User manual

Kramer KDS-EN7 User manual

Kramer

Kramer KDS-EN7 User manual

Kramer VM-1610 User manual

Kramer

Kramer VM-1610 User manual

Kramer VM-4DH User manual

Kramer

Kramer VM-4DH User manual

Kramer WP-EN6 User manual

Kramer

Kramer WP-EN6 User manual

Kramer VM-28H User manual

Kramer

Kramer VM-28H User manual

Kramer VP-25xl User manual

Kramer

Kramer VP-25xl User manual

Kramer DigiTOOLS 7408 User manual

Kramer

Kramer DigiTOOLS 7408 User manual

Kramer 6810HDxl User manual

Kramer

Kramer 6810HDxl User manual

Kramer VP-426C User manual

Kramer

Kramer VP-426C User manual

Kramer FC-69 User manual

Kramer

Kramer FC-69 User manual

Kramer VM-1610 User manual

Kramer

Kramer VM-1610 User manual

Kramer FC-102Net User manual

Kramer

Kramer FC-102Net User manual

Kramer WP-789R User manual

Kramer

Kramer WP-789R User manual

Kramer VP1 User manual

Kramer

Kramer VP1 User manual

Kramer VA-1DVI User manual

Kramer

Kramer VA-1DVI User manual
Kramer KDS-SW3-EN7 User manual

Kramer

Kramer KDS-SW3-EN7 User manual

Kramer VP-420 User manual

Kramer

Kramer VP-420 User manual

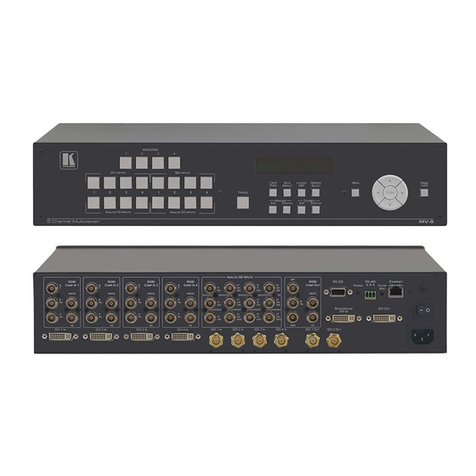
Kramer MV-6 User manual

Kramer

Kramer MV-6 User manual

Kramer DigiTOOLS VM-2HDCP User manual

Kramer

Kramer DigiTOOLS VM-2HDCP User manual

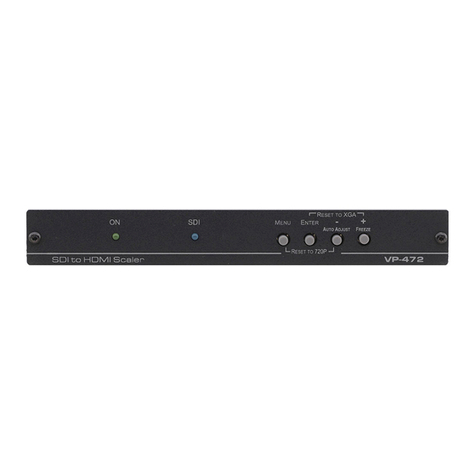
Kramer VP-472 User manual

Kramer

Kramer VP-472 User manual

Kramer VA-11 User manual

Kramer

Kramer VA-11 User manual

Kramer VP-701XL User manual

Kramer

Kramer VP-701XL User manual

Popular Media Converter manuals by other brands

TR-Electronic CMS582M-4096/4096 IOL DMS 14H7 KRF Assembly instructions

TR-Electronic

TR-Electronic CMS582M-4096/4096 IOL DMS 14H7 KRF Assembly instructions

Korenix JetCon 2301S user manual

Korenix

Korenix JetCon 2301S user manual

StarTech.com ET91000LCOAM manual

StarTech.com

StarTech.com ET91000LCOAM manual

Alesis AI-3 Reference manual

Alesis

Alesis AI-3 Reference manual

Caton Vpro 5100 user guide

Caton

Caton Vpro 5100 user guide

Cypress CSC-5500 Operation manual

Cypress

Cypress CSC-5500 Operation manual

H&B TX-100 Installation and instruction manual

H&B

H&B TX-100 Installation and instruction manual

Bolin Technology D Series user manual

Bolin Technology

Bolin Technology D Series user manual

IFM Electronic Efector 400 RN30 Series Device manual

IFM Electronic

IFM Electronic Efector 400 RN30 Series Device manual

GRASS VALLEY KUDOSPRO ULC2000 user manual

GRASS VALLEY

GRASS VALLEY KUDOSPRO ULC2000 user manual

Linear Technology DC1523A Demo Manual

Linear Technology

Linear Technology DC1523A Demo Manual

Lika ROTAPULS I28 Series quick start guide

Lika

Lika ROTAPULS I28 Series quick start guide

Weidmuller IE-MC-VL Series Hardware installation guide

Weidmuller

Weidmuller IE-MC-VL Series Hardware installation guide

Optical Systems Design OSD2139 Series Operator's manual

Optical Systems Design

Optical Systems Design OSD2139 Series Operator's manual

Tema Telecomunicazioni AD615/S product manual

Tema Telecomunicazioni

Tema Telecomunicazioni AD615/S product manual

KTI Networks KGC-352 Series installation guide

KTI Networks

KTI Networks KGC-352 Series installation guide

Gira 0588 Series operating instructions

Gira

Gira 0588 Series operating instructions

Lika SFA-5000-FD user guide

Lika

Lika SFA-5000-FD user guide

manuals.online logo
manuals.online logoBrands
  • About & Mission
  • Contact us
  • Privacy Policy
  • Terms and Conditions

Copyright 2025 Manuals.Online. All Rights Reserved.

VP-475UX Quick Start
P/N:
2900- 301031QS
Rev:
2
Scan for full manual
VP-475UX Quick Start Guide
This guide helps you install and use your VP-475UX for the first time.
Go to www.kramerav.com/downloads/VP-475UX to download the latest user manual and check if firmware
upgrades are available.
Step 1: Check what’s in the box
VP-475UX Dual Channel 12G SDI to HDMI Scaler
2 male 75Ω terminators
1 Quick start guide
1 Power cord
1 Set of rack ears
4 Rubber feet
Step 2: Get to know your VP-475UX
#
Feature
Function
1
IN LEDs
Illuminate to indicate the input resolutions (1 and 2):
Off –no input signal.
Red –SDI input signal is SD:
NTSC –480i or 480p Interlaced or progressive video
formats.
PAL –576i or 576p Interlaced or progressive video
formats.
Yellow –SDI input signal is HD:
1.5G –720p progressive or 1080i interlaced video
format.
3G –1080p progressive video format.
Blue –SDI input signal is UHD:
6G –2160p30 progressive video format.
12G –2160p60 progressive video format
2
SDI BNC
Connectors
IN
Connect to SDI sources (1 and 2).
LOOP
Connect to the IN connector of the next unit in the daisy chain or connect to a local display
(1 and 2).
For best results, when an input is connected and it’s corresponding LOOP is
not used, connect a 75Ω terminator (supplied) to the unused LOOP connector.
For example, if IN 1 is connected and LOOP 1 is not in use, connect a
terminator plug to LOOP 1.
3
HDMI OUT Connectors
Connect to HDMI acceptors (1 and 2).
4
ANALOG OR AES/EBU XLR
(L, R) Connectors
Connect to a balanced stereo audio acceptor or to a digital AES/EBU receiver (OUT 1 and
OUT 2).
5
LAN RJ-45 Connector
Connect to a browser device via LAN and also use for firmware upgrade.
#
Feature
Function
6
RESET Button
Press briefly to restart the system.
Press for ≥10 seconds to reset IP settings to factory default values.
The device powers up and loads the factory default values.
7
CTRL Mini USB Connector
Device control and firmware upgrade.
8
Power Socket
AC connector enabling power supply to the VP-475UX.
9
Power Switch
Switch for turning the unit ON and OFF.
Step 3: Install VP-475UX
Install VP-475UX using one of the following methods:
Remove the three screws from each side of the unit, reinsert those screws through the rack ears
and mount on a 19" rack.
Attach the rubber feet and place the unit on a flat surface.
Step 4: Connect the inputs and outputs
Always switch OFF the power on each device before connecting it to your VP-475UX. For best results, we recommend that
you always use Kramer high-performance cables to connect AV equipment to the VP-475UX.
You can daisy-chain the VP-475UX by looping the LOOP source to the next machine.
Step 5: Connect the power
Connect AC power to the rear of the VP-475UX, switch on its power and then switch on the power on each device.
Safety Instructions
Caution:
There are no operator serviceable parts inside the unit.
Warning:
Use only the power cord that is supplied with the unit.
Warning:
Do not open the unit. High voltages can cause electrical shock! Servicing by qualified personnel only.
Warning:
Disconnect the power and unplug the unit from the wall before installing.
See www.KramerAV.com for updated safety information.
Step 6: Operate VP-475UX:
Operate VP-475UX remotely via:
•USB/LAN port, by
Protocol 3000 serial
commands transmitted
by laptop, or other
serial controller.
•Embedded web pages
via a browsing device
that is connected to
LAN.
RS-232
Protocol 3000
Baud Rate:
115200
Stop Bits:
1
Data Bits:
8
Parity:
None
Command format example (set pattern 13 on HDMI OUT 1):
#VID-PATTERN 1,13
TCP/IP Parameters
IP Address:
192.168.1.39
UDP Port #:
50000
Subnet Mask:
255.255.0.0
Maximum UDP Connections:
10
Default Gateway:
192.168.0.1
Maximum TCP Connections:
10
TCP Port #:
5000
Factory Settings:
DHCP disabled
Default Hostname:
VP-475UX-xxxx (xxxx = last
4 digits of serial ID)
Full Factory Reset
Web Page:
Device Settings > Upgrade.
Protocol 3000:
#FACTORY<CR>
Rear Panel Factory
RESET Button:
Press and hold RESET on power up. The device automatically
resets, loading factory default values.
For each HDMI output configure the ports via the AV Configuration Web page:
•Define the source: SDI or a Signal Generator.
•Select the output resolution and adjust image settings.
We recommend that you have identical frame rates for both the input and the output.
•Set the SDI extracted audio output groups (4) and stereo channels per group (2).
•Define the extracted audio output format: Analog or AES.
Note that if AES is selected, keep Pair set to 1 so that all the audio channels appear on the AES outputs.
Technical Specifications
Inputs
2 SDI
Auto-sensing 12G/6G/HD-SDI/SDI video signal on 75Ω
BNC connectors
Outputs
2 HDMI
On female HDMI connectors
2 SDI (Input Loop)
On 75Ω female BNC connectors
2 XLR Balanced Stereo Audio or
AES/EBU Digital Audio
On XLR connectors
Ports
ETH
On an RJ-45 female connector
USB
On a female mini USB connector
SDI SMPTE Standard
Compliance
12G-SDI
SMPTE ST-2082-1
3G HD-SDI
SMPTE 424M
6G
SMPTE ST-2081
HD-SDI
SMPTE 292M/344M
SDI
SMPTE 259M
Input Resolutions
Maximum Resolution
4K@60Hz (4:2:2)
Data Rate
259Mbps up to 12Gbps
SDI Cable Equalization
Maximum Reach
12G-SDI
70m (230ft)
6G and 3G HD-SDI
100m (330ft)
HD-SDI
200m (660ft)
SDI
300m (980ft)
HDMI Video
Maximum Resolution
4K@60Hz (4:4:4)
Output Resolutions
Progressive: Native, 640x480@60Hz, 720x480@60Hz,
720x576@50Hz, 800x600@60Hz, 1024x768@60Hz,
1280x720@50/60Hz, 1280x720@24/25/30/50/60Hz,
1280x768@60Hz, 1280x1024@60Hz,
1600x1200@60Hz, 1680x1050@60Hz,
1920x1080@24/25/30/50/60Hz, 1920x1200@60Hz,
3840x2160@24/25/30/50/60Hz
Conversion Latency
50ms (approx.)
Controls
Front panel
IN LEDs
Remote
Mini USB
LAN
Web UI
Power
Source
100-240V AC
Consumption
58VA max.
Environmental Conditions
Operating Temperature
0° to +40°C (32° to 104°F)
Storage Temperature
-40° to +70°C (-40° to 158°F)
Humidity
10% to 90%, RH non-condensing
Enclosure
Size
19”, 1U
Type
Aluminum
Cooling
Fan Ventilation
Regulatory Compliance
Safety
CE
Environmental
RoHs, WEEE
General
Net Dimensions (W, D, H)
43.64cm x 18.3cm x 4.36cm (17.18" x 7.2" x 1.72")
Shipping Dimensions (W, D, H)
55cm x 27.6cm x 10.7cm (21.7" x 10.87" x 4.21")
Accessories
Included
Power cord
Specifications are subject to change without notice at www.kramerav.com