Ksenia micro poli User manual

code R30049.110en www.kseniasecurity.com
ed.12/2021
micro poli
WLS multifunction magnetic
contact
Installation guide
INTRODUCTION
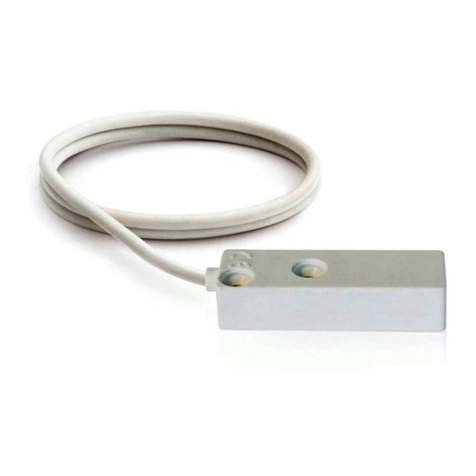
micro poli is a wireless multifunction sensor, in compliance with the wireless bidirectional 868 MHz
protocol used by Ksenia Security. Inside a very small case characterized by an essential and minimalist
design, micro poli is much more than a simple magnetic contact.
micro poli is:
•ananti-masking magnetic contact to detect the opening of doors and windows;
•aninertial sensor to detect the vibrations of increasing intensity up to the breaking of glass/windows;
•able to measure the inclination of the window/door frame it protects, it allows the management of any
type of window opening (casement window, tilt and turn window, bottom hung windows, etc.) which it
would otherwise be impossible with only the magnetic contact.
As anti-masking magnetic contact with two REEDs (long side/short side) inside the transmitter, it is
extremely suitable for any type of door or window frames thanks to the installation position of the magnet
with respect to the transmitter. It is also possible to activate only one REED to detect the opening of the
window, according to the type of installation; masking attempts by applying a more powerful magnet
outside the frame can be detected, in this case it triggers a masking signal while the opening of the contact
triggers a Zone Alarm.
As inertial sensor, thanks to the 3-Axis accelerometer based on MEMs technology, when the vibration
exceeds the programmed sensitivity threshold, it triggers an alarm.
As advanced sensor, thanks to the 3-Axis accelerometer, it measures the angle of inclination of the window
within which the zone is considered on idle and beyond which it triggers an alarm.
KSI5008000.301 - white
KSI5008000.302 - black
KSI5008000.304 - brown

code R30049.110en www.kseniasecurity.com
ed.12/2021
As all the other KSENIA wls devices, micro poli implements DPMS (Dynamic Power Management System)
which allows to dynamically reduce interference and energy consumption of battery and optimize the
power transmission according to the distance between devices and the type of installation too. Besides, it is
possible to program the interval of supervision from 1 to 240 minutes.
A tamper switch, which detects the cover opening and removal, can be disabled.
The lithium battery duration (CR2477 3V - not rechargeable) is guaranteed for 4 years.
The case is compliant with IP54 protection degree so that it can be installed also in case of humidity and
condensation.
The height of the device can be adjusted by adding up to three shims to the transmitter and magnet bodies,
to fit better most of frames installations.
Descriptions and features
• n. 2 REEDs to detect the opening of doors and windows. Thanks to two REEDs placed in different
positions inside the device, micro poli fits any type of frame and installation position; the double REEDs
detect the masking attempts by applying a more powerful magnet outside the frame and trigger a
masking signal. REEDs can be configured also to work singularly;
• n. 1 accelerometer based on 3-axis MEMS technology that allows double use: as an inertial sensor for
the detection of vibrations, by means of the measurement of programmable sensitivity, triggering an
alarm; as an advanced sensor, to measure the angle of inclination of the frame on which it is installed, it
allows to generate an alarm when the frame exceeds the programmed angle of inclunation;
• n. 1 tamper switch, which detects the cover opening and the removal from the wall and that can be
disabled.
• n. 1 lithium battery (CR2477 3V - not rechargeable), duration is guaranteed for 4 years and monitor of
level battery from Installer interface.
TECHNICAL CHARACTERISTICS
• Power supply: lithium battery CR-2477 3V (duration 4 years) included
• Frequency: 868 MHz
• Open Air Range: up to 300m
• 2 solid state REED switches
• 3-Axis accelerometer (MEMS technology)
• Tamper switch against cover opening and its removal
• Protection degree: IP54
• Temperature Range: +5°C +40°C
• Transmitter dimensions: 39x52x22mm (LxHxW)
• Magnet dimensions: 15x39x17mm (LxHxW)
• Optional stackable shims for transmitter and magnet: height 2.8mm each

code R30049.110en www.kseniasecurity.com
ed.12/2021
DESCRIPTION
Legend
1. Transmitter Inside cover
2. 1 magnet: two possible positions (A and B)
3. CR2477 button battery holder
4. Tamper micro-switch
5. REED long side / External indication of magnet position
6. REED short side / External indication of magnet position
Internal signalling red LED. By setting the test mode on panel, this LED blinks whenever the device
successfully transmits an alarm or reset signal.
INSTALLATION
1. Open transmitter and magnet covers;
2. insert the button battery into the battery compartment;
3. if necessary, install the stackable shims for transmitter and magnet;
4. for positioning micro poli, please follow the instructions described below;
5. to fix the micro poli to the frame, use the adhesive strip provided or self-tapping/self-drilling screws,
diameter 3.5mm, rounded cylindrical head;
6. when finished, close both covers.
CR 2477
3V

code R30049.110en www.kseniasecurity.com
ed.12/2021
POSITIONING
The transmitter can be installed in different positions, thanks to its two REEDs, as shown in the following
image:
Please find below some installation examples.
micro poli
Top view Base internal view with screws Back view with screws
Transmitter orientation
long side short side

code R30049.110en www.kseniasecurity.com
ed.12/2021
Side-hung casement window
• To use micro poli as a magnetic contact (figure A) place the transmitter on the frame and the magnet on
the mobile door. Figure B shows an optional installation.
• The distance between the magnet and the indicator on the transmitter must not exceed 10mm.
Tilt and Turn window
• To use micro poli as a magnetic contact on a tilt-and-turn window, it is necessary to fix the transmitter
on the mobile door and the magnet on the frame.
• The distance between the magnet and the indicator on the transmitter must not exceed 10mm.

code R30049.110en www.kseniasecurity.com
ed.12/2021
Fixed glazing window
• Place only the micro poli transmitter, without the magnet, directly on the glass (figure A) or on the
frame (figure B).
Operating distances
On the mounting surface (not ferromagnetic), for all configurations and the axes of operation (x - y - z) based
on how the device is installed.
To be compliant with the certifications below, drill a hole
at the point indicated inside the box and insert the screw
included (self-tapping, diameter 2.2mm, lenght 4,5mm,
rounded cylindrical head) as shown in figure.
Vertical installation of the detector
Axis x Closed contact 20 mm Open contact 30 mm
Axis y magnet at 10mm Closed contact 20 mm Open contact 30 mm
Axis z magnet at 10mm Closed contact 20 mm Open contact 25 mm

code R30049.110en www.kseniasecurity.com
ed.12/2021
Replacing the battery
Note: temperatures below +5 °C can cause the micro poli to report a false low battery indication. Operation
below +5 °C will reduce the battery life significantly. Caution! Observe the correct polarity when installing
battery. Use only lithium CR-2477 3V batteries for replacement.
Warning! Battery may explode if mistreated. Do not recharge, disassemble or dispose of in fire. Dispose of
used batteries according to the instructions. The supplied product contains a battery with a button/coin
element. Do not swallow the battery. Danger of chemical burn. If the battery is swallowed, it can cause
severe internal burns in just 2 hours and lead to death.
Keep new and used batteries away from children.
If the battery compartment does not close securely, suspend the use of the product and keep it away from
children. In case of suspected ingestion or insertion of the battery into any other body orifices, seek medical
advice immediately.
1. Open the front cover - 2. Replace the battery inside the upper cover
CR 2477
3V

code R30049.110en www.kseniasecurity.com
ed.12/2021
CONFIGURATION
1. Start the configuration of micro poli from Installer-> Wireless Peripherals -> Wireless sensors
configuration program;
2. add the micro poli and enter the serial number printed on the device label;
3. save and apply the programming;
4. in a few seconds the icon of the radio signal level detected and other data will appear in the real time
section, if correctly installed.
The following images show an example of a micro poli real time section correctly acquired by the lares 4.0
control panel and the description of the values:
RF reception - Radio signal level with the following values:
Radio signal 1 (higher than -76dBm)
Radio signal 2 (between -90dBm and -76dBm)
Radio signal 3 (between -100dBm and -91dBm)
Radio signal 4 (lower than -101dBm)
RF head of the receiver to which the device is hooked
Signal strength in dBm referred to the receiver to which the device is hooked
Serial number of the device
Opening angle (if on idle and magnetic contact and vasistas are enabled, a dash <-°> is
displayed and not an angle = 0°)

code R30049.110en www.kseniasecurity.com
ed.12/2021
In case of installation on a casement window
• micro poli has an anti-opening and removal tamper and the associated zone (or zones) generates a
sabotage alarm if the device is opened or removed. Possibility to exclude the analysis of the tamper by
disabling the sabotage.
• Set the position of the magnet with respect to the sensor (long side / short side).
• Enable / disable the masking analysis of both reeds contacts. This configuration affects the real time of
the zone together with the state of the reeds contacts (open / closed).
•AddaMagnetic contact Zone, assign it to micro poli.
• (Option) If you want to set up the inertial sensor operation as well:
1. set up the sensitivity level considering that the vibration propagation depends on the material on
which it is installed;
2. it is possible to disable the glass break detection when the magnetic contact is open;
3. add an Inertial Zone, assign it to micro poli and configure the appropriate values.
Installation on a tilt and turn window
• Set the tilt window inclination angle within which the zone is considered on idle and beyond which it
triggers the alarm.
•AddaMagnetic contact Zone, assign it to micro poli.
• (Option) If you want to set up the inertial sensor operation as well:
1. set up the sensitivity level considering that the vibration propagation depends on the material on
which it is installed;
2. it is possible to disable the glass break detection when the magnetic contact is open;
3. add an Inertial Zone, assign it to micro poli and configure the appropriate values.
Installation on a fixed glazing window
• “Disabled with open window” parameter must be disabled (default value).
• Set up the sensitivity level considering that the vibration propagation depends on the material on which
it is installed.
•AddanInertial Zone, assign it to micro poli and configure the appropriate values.
Battery level signal:
green = battery charged
yellow = warning battery level, charge at 25%
red = warning battery level, charge at 10%
red with <!>= low or failure battery followed by “Battery failure” event

code R30049.110en www.kseniasecurity.com
ed.12/2021
Summary table of Magnetic Contact Zone real time
The real time of the zone (alarm / idle / masking) varies according to the REEDS contacts set up (long side or
short side, identifiable by the indicators on the cover of the transmitter), and to the "Masking" parameter
set up (valid for both REEDs contacts).
SET UP MAGNETIC
CONTACT STATUS
O = Open
C = Closed
REAL TIME ZONE
if “Masking” enabled
REAL TIME ZONE
if “Masking” disabled
Long side OO
Alarm Alarm
OC
Masking Alarm
CO
Idle Idle
CC
Masking Idle
Short side OO
Alarm Alarm
OC
Idle Idle
CO
Masking Alarm
CC
Masking Idle

code R30049.110en www.kseniasecurity.com
ed.12/2021
DIAGNOSTIC
The diagnostic of micro poli offers:
1. the visualization of the real-time status of the wireless peripheral;
2. the visualization of the real-time status of the zones associated with it;
3. in case of battery failure, the "Battery failure" event is sent;
4. in case of failure of the peripheral itself, the "Missing wireless peripheral” event is sent;
5. in case of failure of the peripheral itself, on the Home page -> Faults and tampers section, the
message “micro poli - Missing wireless peripheral” appears, it is even a link to click and open the
related configuration page.
QUANTITY DATA
Technical specification, appearance, functional and other product characteristics may change without notice.
COMPLIANCE
Europe - RoHS, CE
lares 4.0 models wls 96 16 40 40 wls 140 wls 644 wls
Maximum number of wls
sensors
32 16 40 40 64 64
This manual suits for next models
3
Table of contents
Other Ksenia Security Sensor manuals

Ksenia
Ksenia KSI5CLV-02.00W User manual

Ksenia
Ksenia velum DT AM User manual

Ksenia
Ksenia velum DT-AM User manual

Ksenia
Ksenia velum DT-AM WLS User manual

Ksenia
Ksenia UNUM User manual

Ksenia
Ksenia velum-C DT-AM WLS User manual

Ksenia
Ksenia UNUM User manual

Ksenia
Ksenia unum wls User manual

Ksenia
Ksenia velum-C DT-AM WLS User manual

Ksenia
Ksenia KSI5201100.300 User manual