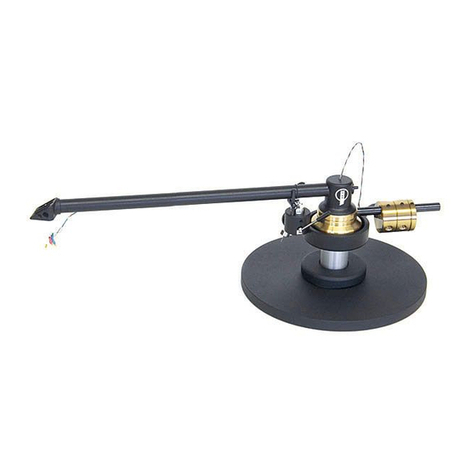
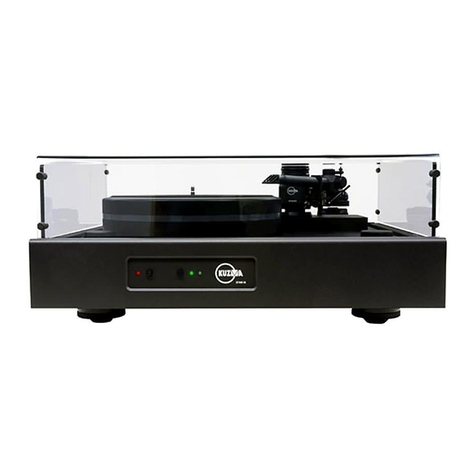
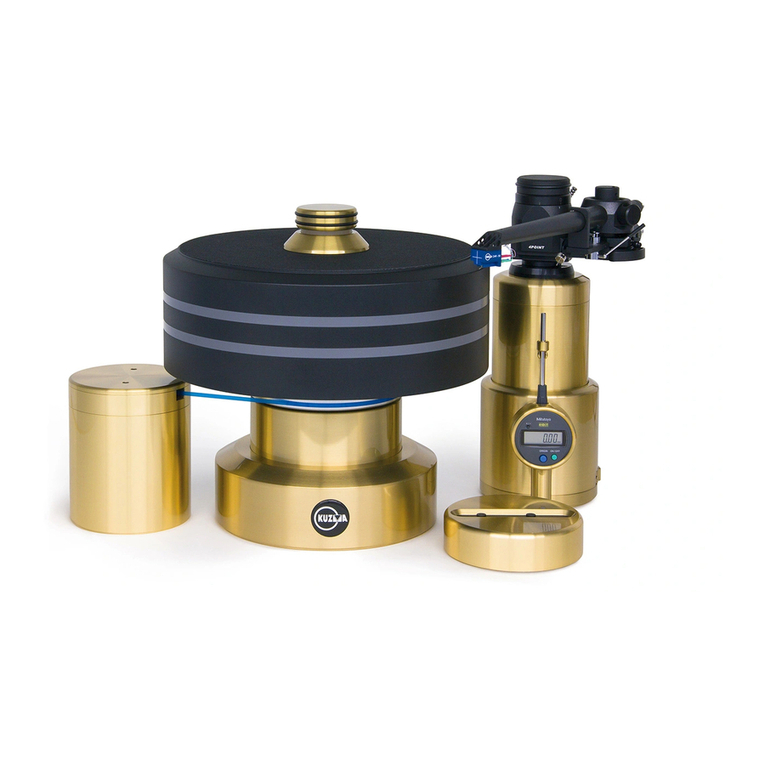
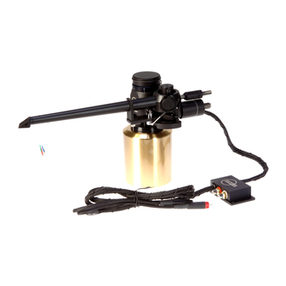
Kuzma Air Line User manual

1
Instruction manual
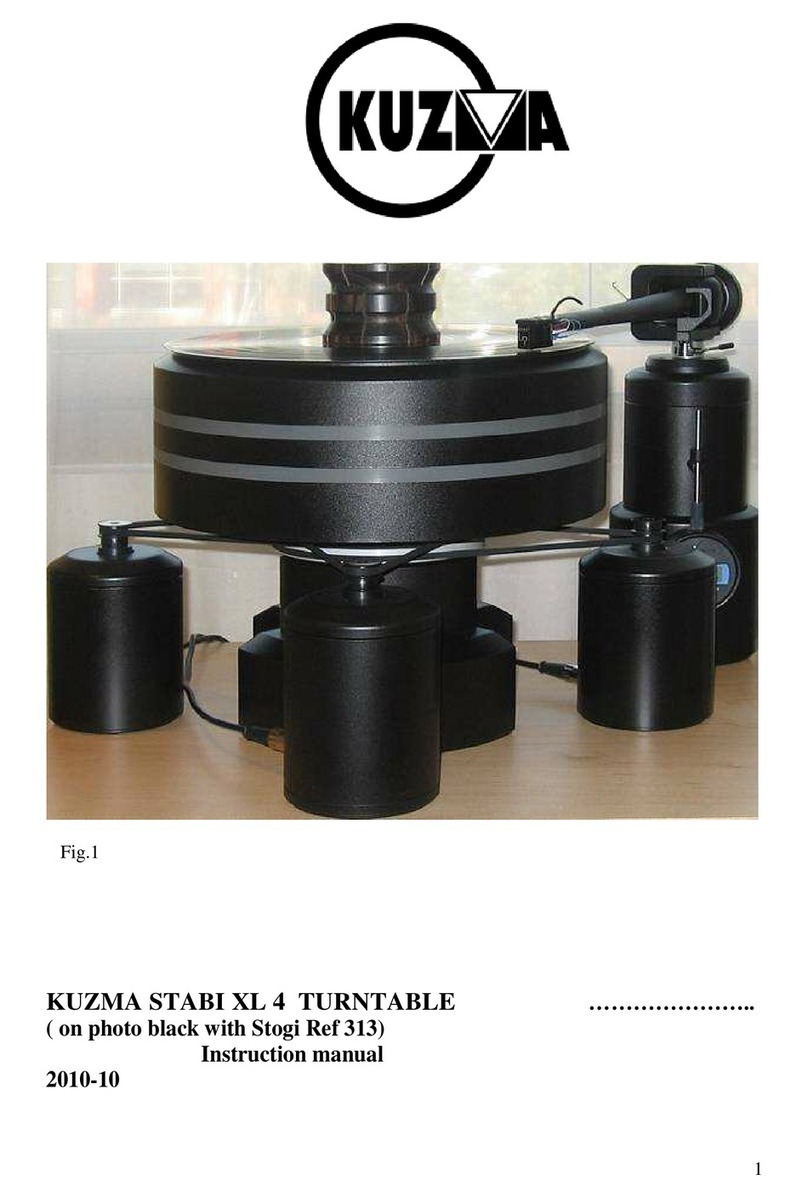
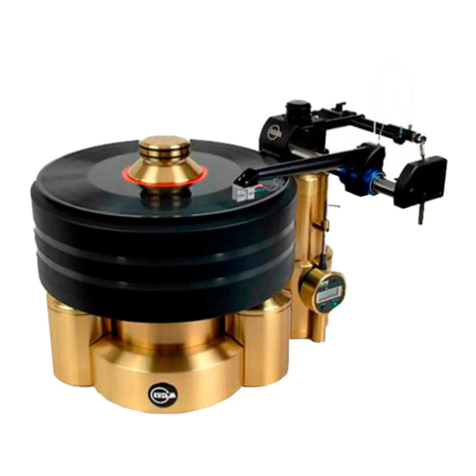
KUZMA AIR LINE AIR BEARING TONEARM (on Stabi XL turntable)
With silver filters Serial Number: ……….
2010-4

2
KUZMA LTD
INSTRUCTION MANUAL FOR AIR LINE tonearm
The Air line tonearm is a very precisely engineered piece of equipment. However the
construction is robust and requires minimal maintenance for optimal performance.
CONTENTS: Page
1.0. General description 3
2.0. Unpacking 4
3.0. Setup description 5
4.0. Air supply Setup 6-9
5.0. Tonearm Setup 10-14
5.1. Basic Setup 10
5.3. Adjustment of tracking force 10
5.4. Adjustment of tangential geometry 11-12
5.5. Fine horizontal levelling 13
5.6. Adjustment of VTA 13
5.7. Adjustment of azimuth 14
5.8. Adjustment of cueing device 14
6.0. Operation of the tonearm 14
7.0. Damping 15
8.0. Zero switch kit 16
9.0. Maintenance 16
10.0. Troubleshooting 18-19
S
mall ring

3
1.0. General description:
Main outer box contains two inner boxes. One box contains the compressor with oil, PVC
double drain bottles and the second box contains the tonearm with all spare parts: Allen keys,
armbase, geometry protractor and PVC tubing.
Oil lubricated electric compressors, which are the quietest on the market supply the air. The
compressor has a cylinder (head) where air is compressed and then is stored in a reservoir. On
the outlet of the reservoir is an automatic sensor system which measures the pressure inside
the reservoir. When the air pressure drops below a certain level (6bar), the system
automatically starts the compressor head and fills the reservoir to a higher pressure, at which
point the system automatically switches off ( 8-8.5 bar- 2 minutes working & 2 minutes
cooling ).
On the outlet of the reservoir there is an air filter and pressure regulator, which keep the air
output pressure on the chosen level of 4.2- 4.5 bar (60 psi).
Due to compression, moisture in the air is collected in the system. This is automatically
drained by an electronic device system (timer & solenoid) and mechanically with automatic
drain systems. Water (with a little brown oil) is collected into plastic bottles from the
reservoir, filter and the automatic sensor system (three black tubes into bottles).
Silver filters are positioned separately nearby the tonearm and they dry the air further and
remove any oil mist from the compressed air. This is automatically drained into holder
stands. The compressor is equipped with a safety valve and switches off in case of
overheating. The whole system is easily maintained and simple to use.
KUZMA AIR LINE-Linear tracking air bearing tonearm:
Effective length 184 mm
Fixing distance 212 mm-Kuzma cutout
Effective mass 13 gr vertical
Recommended cartridge compliance Below 25 cu
Minimum clearance below platter 30 mm
Height adjustment Yes
VTA fine adjustment 10 mm
Azimuth fine adjustment Yes
Air bearing Diameter 20mm x 50 mm
Load axial or radial 30 N (aprox 3 kg)
Air pressure 4 bar ( 60 psi )
Air consumption 4 L/min
Mass 2 Kg
Safety Precautions:
Electrical connection to the mains comes from the compressor via the cable. Please keep the
compressor away from moisture and be careful not to damage the mains cable.
Important Note:
The turntable or turntable support must be capable of very fine horizontal adjustment levelling
to give the Air Line the desired horizontal level. The correct level is achieved with the
tonearm acting itself as the most precise spirit level. See 5.5.

4
2.0. Unpacking:
Compressor with “double drain bottle system.”
2.1. Compressor box:
Open the box and lift up the compressor by the handle. It is a heavy item. Remove the plastic
bag. Inside the box is the instruction manual for the compressor, a bottle with oil, and a
plastic drainage bottle. In a small bag inside the compressor housing are the air filter and
black PVC nozzle for pouring oil into the compressor. Remove the two pieces of cardboard
wedged between compressor head and housing for transport. The compressor should not be
transported with oil inside unless you can guarantee that it will be in a vertical position at all
times. Position the compressor on a hard surface with plenty of air for ventilation!!! Do not
position it in a closed space, sun or in temperatures below freezing. The compressor will be
connected to the mains voltage.
2.2. Tonearm box:
On top of the box you will find this instruction manual. After lifting the top cover and second
layer of foam, remove the black armbase, one double silver filters with supporting stands, the
set of Allen keys and black PVC tubing. Lift filters out carefully because the filter stands are
not fixed onto the filters and they can slide down. Do not remove tonearm until you have
fixed the armbase onto the turntable.

5
3.0. Setup description:
Do not slide the tonearm bearing unnecessarily without compressed air!
Do not tilt the compressor while it contains oil! For transport check page 15!
Do not rotate VTA knob when the lever is in the lock position!
Check working cycle of the compressor!
3.1. Tonearm:
Mount the armbase onto armboard. The dimension and position is the same as for Stogi
tonearms but the main cutout hole is bigger. It is called the Kuzma cutout- that means that
central hole has 40 mm in diameter. Three screws will fix the armbase from the top through
the armboard into the black metal ring. On Stabi XL it is fixed directly on to the XL’s brass
arm base.
With the Allen key, firmly secure armbase. Position it in such way, that the hole for fixing
tonearm height (rough VTA) is easily accessible during mounting. The usual direction is
away from the platter.
Lift the tonearm from box, taking care of wires and tube loop, as well as tonearm cable.
Then fix the tonearm gently into the armbase with Allen key 2mm. The tonearm should be
rotated in such a position that the headshell is outside of the platter, i.e. as in the rest position
off the record. The height of the tonearm in the armbase should be such that the centre of the
main stainless steel bearing shaft is at the approximate height of an LP.
Unscrew the small black ring under the tonearm. It will slide down to the armbase. Fix it
gently. If you now unlock the tonearm in the armbase, this ring will hold the tonearm at the
same height but it can still be rotated horizontally. This is important when adjusting tonearm
geometry.
Check that the scale for VTA, in front of the main base, is in the middle position with the
edge in line with the thicker mark. This means that the actual VTA can be precisely adjusted
plus/minus 5 mm. If this is not the case, move the locking rod lever away from the lock
position, in a similar way to lowering a cueing device. Now by rotating the VTA knob bring
the position of the base to the middle part of the scale. Lock back gently.
3.2. Air supply description:
The compressor is factory set for working pressure. Position it in a suitable place with mains
outlet.
Position silver filters vertically on the floor or other suitable place near the tonearm. Check
the arrows for air flow, which should be from the compressor to silver filters and then to
tonearm.
Choose the shorter piece of PVC tube that runs from the tonearm to the silver filters( see
silver arrows marked F. Connect PVC tube. All connections are 'quick fit'. Simply push in the
tube at the filter and at the tonearm. It seals automatically.
When removing the tube, you must first push in the blue (or black) plastic collar and at the
same time pull out the tube. This is much easier done when there is no compressed air inside
the tube.
The longer piece of tubing connects the compressor output and silver filters input. It is a hard
but flexible tube and it can be hidden behind your skirting board. Permanent walking or
placement of furniture on top of it, however, will break it.

6
If necessary the PVC tube can be cut to length with a sharp knife. Position the tube on a hard
surface and cut down at 90 degrees.
4.0. Air supply Setup:
4.1. Compressor:
Note: The working cycle of the compressor takes around 2 minutes building up pressure
from 6 to 8 bars and then cooling down for 2 minutes (not working). It is necessary to
monitor this cycle occasionally!
Everything is set and checked by Kuzma Ltd. The only item to be added is oil inside the
compressor and air intake filter, which must be fitted after transport.
If the compressor is in an upright position, it can be moved safely.
For more details see instructions with the compressor.
If the working cycle is longer then 4-5 minutes (heating the compressor), and stand by
(cooling) shorter then 1 minute, stop using the compressor and check maintenance, FAQ (
web) or “troubleshooting“ pages.!!!
When you first turn ON compressor it will take a bit longer time (3-5 minutes) to fill the
reservoir from zero to 8 bars. But the compressor must be connected to the air supply tube.
Note: The compressor has a safety valve and overheating protection!
Note: Do not position it in a small non ventilated space!
Note: The compressor is factory adjusted to a higher pressure (8 bar-120 psi) than quoted in
the Compressor Instruction Manual. (See label at the side of the cover!)
Note: Do not switch on the compressor before filling with oil and connecting the air intake
filter. Also insure that all air supply tubes are connected.
Note: Oil should last for at least 5 years of normal use and should be replaced when it is
very dark - almost black in colour.
Note: Check water condensation occasionally, 1-3 months approx.
If you have any questions, check our web site for FAQ or just drop us an E mail:
Compressor - front view
Compressor pressure
indicator-reservoir
Main
s
switch
Pressure regulator
Output pressure indicator
Output tube
-
quick fit conn.
Drai
n bottles
Dust & moisture
f
ilters

7
At the front of the compressor is a pressure regulator with filters and pressure gauges and at
the other end of compressor is the main cable and input air filter (oil refill).
In the plastic bag inside the compressor’s housing is an air intake filter and nozzle for filling
the oil.
Remove the small plastic cap from the metal input tube at the head of compressor, which is on
the same side as the mains cable.
Fix the nozzle onto the oil bottle, after cutting the metal cover on the oil bottle and 5-8 mm of
nozzle.
Putting the nozzle into the metal tube, gently squeeze all the oil into the compressor.
Double drain PVC bottles Compressor oil level in bubble
Compressor - rear view - air intake filter
At the side of the compressor is a glass bubble which will show the level of oil when the
compressor is not working. Wipe any spillage of oil and fix the air intake filter on to the
metal tube.
Locate the double PVC drain bottle which have three black 'quick fit' fittings at the top end of
bottle. There are three black tubes (6mm in diameter), which drain moisture from various
parts of the compressor (reservoir, filter, cylinder). Push them into the top of the fitting on the
bottle.
Optional: *Valve on drain tube on compressor:
For normal operation this should be open (level along the axis of the tube). If used in the same
room as the tonearm it should be closed to avoid noise at the end of the compressor working
cycle.
Air intake filter& oil filling

8
Note: Every week or so this should be open for a few hours when the compressor is
running!
4.2. Air tubes:
Connect the PVC tubes in blue 'Quick fit' fittings. Keep the valve lever closed at the tone
arm.
There are two pieces of PVC air supply tubing. The shorter connects the air supply from the
red filters to the tonearm and the longer connects the compressor to the red filters. On one end
of the longer tube is a valve. This end should be connected to the input of red filters. The
valve lever should be in “close position” (as supplied i.e. with lever at 90 degrees to the
tube). The other end is plugged in at compressor output. See page 6.
4.3. Silver filters (dryers):
Note: Keep the silver filters in an upright position. They might leak otherwise.
Note: They should be sealed; otherwise the compressor can not build up pressure.
The silver filters which are positioned near the tonearm have an automatic drainage system.
When full air pressure is reached in the compressor (and compressor stops), open valve on the
tube before the silver filters (allowing the air to flow in). This will automatically seal the
automatic drain systems in these dryers. If there is no pressure inside, they will not seal.
There is no need to do this manually (unless if there is no valve on supply tube). Check if it is
sealed properly by listening for any hissing noises.
Silver filters-dryers- see arrow for airflow

9
4.4. Air pressure Setup:
Note: keep valves on air tube supply and tonearm in the closed position. All tubes must
be connected.
4.4.1. Compressor ON:
Plug the compressor into the mains and leave it permanently turned ON. The main switch is
under the cover on the top. It has two positions. Be careful inside not to hurt your fingers,
although there is no danger of electrical shock. When the main switch is turned ON, pressure
will start to build up and this will be shown on the pressure gauge on the left side of the
compressor. This shows the air pressure in the reservoir. It should rise and reach 8-8.5 bars
(110-120 psi) in about 3-5 minutes. The right hand pressure gauge shows output working
pressure. It should rise and then show constant 4.5 bars (65 psi). The knob on top of the filter
is for readjusting the working pressure. To readjust, it must first be pulled up.
4.4.2. Silver filters sealed:
When full air pressure is reached in the compressor (the compressor stops working in about 3-
5 minutes) open the valve on the tube before silver filters and the air pressure will flow into
the filters which will automatically seal the automatic drain systems in these dryers-filters.
4.4.3. Tonearm’s air pressure in the bearing:
Note: When tonearm is not in use the valve on the tonearm should be in the closed
position. You should not move the tonearm unnecessarily.
Open the valve on the tonearm and the small pressure indicator will show a similar level of air
pressure (4-4, 5 bar) as on the right hand pressure indicator on the compressor. If not, check
for leaks (hiss noise) at red filters.
Note: See also 5.0: On the tonearm now remove protective shaft cover and the security wire
which has restricted movement of the arm bearing during transport. The tonearm is not
balanced, as there is no extra weight on the headshell. When the air bearing is functioning,
the counterweight will rotate the tube so that the headshell will go up.
Open the valve again and move the tonearm once or twice along the main bearing shaft (if
tonearm is new or has not been used for few days). This will clean the shaft of dust particles.
After use merely close the valve on the tonearm and the pressure indicator on the tonearm will
show zero pressure. You can not move the tonearm now. The compressor will go on standby.
Every few hours or so air release noises can be heard and the compressor will switch on a few
times per day when resting in the stand by position.

10
5.0. Tonearm Setup:
Note: See also 4.4.3.
On the tonearm remove the protective shaft cover and the security wire which has restricted
movement of the arm bearing during transport. The tonearm is not balanced, as there is no
extra weight on the headshell. When the air bearing is functioning, the counterweight will
rotate the tube so that the headshell will go up. To avoid this, mount the cartridge in the
headshell with stylus guard on. Open the valve. Pressure on the small pressure gauge on the
tonearm, should show about 4 bars.
By holding the headshell and lifting it, so that the counterweight support is not touching
the cueing device rod, gently move the tonearm towards the centre of the platter a few
times and also rotate it up and down. If you feel any resistance do not push but check the
air supply or pressure. Check wire and air supply loops to ensure that they are not crossing
each other.
5.1. Mounting of the tonearm:
Again check the height of the tonearm. The basic height should be such, that the centre of the
shaft (centre of vertical movement), is at the height of an LP on the platter. If there is a big
difference, readjust the height of the armbase. If small (1 – 2mm), readjust by rotating the
VTA knob, after first unlocking the VTA lever.
Put the alignment protractor on the platter without a record. Be careful not to touch the
cantilever. Rotate the tonearm so that the base is parallel to and touching the narrow part
of the protractor. This will precisely position the tonearm. Fix the tonearm with the Allen
key 2.5mm. Due to its special construction, it is not necessary to over tighten.
If necessary, due to the added weight of the tonearm, re-balance the turntable. Use a spirit
level to adjust horizontality of the turntable platter. If this is not possible readjust the
turntable support. Do note that spirit levels are not completely accurate. The turntable should
be horizontal; otherwise the tonearm will slide in one direction more than in another.
5.2. Mounting the cartridge:
With Allen screws 2.5mm, fix the cartridge onto the headshell. The position of the needle
should be in line with the end of the headshell when viewed from the side. Then fix cartridge
pins with tweezers.
Cartridge pins are: colours or other symbols:
Right (+) red
Left (+) white
Right ground (-) green
Left ground (-) blue
5.3. Adjustment of tracking force:
The counterweight is made from two parts. Rotating the counterweight position from one red
point to another, changes the tracking force for 0.1grams. Locking is achieved by holding the
part which is nearest to the bearing and rotating the smaller part (view from headshell)
anticlockwise for about quarter of a turn.
11
In the unlocked position rotation of the counterweight is easy. To begin with, the tonearm
should be balanced to zero tracking force. This is not easy to achieve due to the very low
friction in the bearing.
Heavy cartridges (above 15g):use a small counterweight which should be firmly screwed by
hand at the end of the threaded rod for counterweight.
Light cartridges (below 3 g): as an option a lighter counterweight is available.
Add tracking force by rotating the counterweight anticlockwise, then locking the
counterweight. Move the tonearm gently with the fingers in one direction, while the cueing
device is in the up (not play) position. The counterweight support will slide along the cueing
device rod with a certain friction. The tonearm will move to a certain distance. Now repeat
the same in the other direction. A big difference in the distance travelled means that the
tonearm is not horizontal. Try to adjust the level of the turntable again, especially in the
direction along the bearing shaft.
5.4. Adjustment tangential geometry:
Protractor position
Put a record on the platter and, using the cueing device lever, lower the cartridge onto the
record. Observe the VTA. If you know, what is the best VTA for your cartridge, and then
adjust VTA by unlocking lever from 'Lock' position and rotating the knob to achieve the
desired VTA, locking the lever back gently. Remove the record and put on the geometry
protractor which should touch the side base of the tonearm. If you can, fix the platter and
protractor against rotation.

12
Protractor – position from top
Move the cartridge along the headshell to such a distance, that the tip of the diamond (needle)
is on the line on the protractor, which goes from centre of record towards edge of record.
This is the line where the tip of the diamond will be 'tangential' to all grooves on an LP.
Using the cueing device, just lift the needle above the protractor for an mm or so. Move the
tube along to see if the needle is travelling along this line. If it is travelling parallel to the
line but in front or at the back, then reposition the cartridge. But if it travels at an angle to this
line, (e.g. if tip is at line 66mm but not at 121mm) then rotation of the tonearm must be
repeated. The protractor was not precisely aligned against the base, or the cutout for position
of the armbase was not precise. Experimenting with small rotations of the tonearm will solve
the problem. The tip of the diamond must travel parallel to the centre line, even if it is in
front or behind. Now simply position the cartridge backwards or forwards. When you are
sure, check by actually lowering the tip onto the protractor. The cantilever will deflect due to
the tracking force.
When this is complete the needle should travel along the line. You must achieve a tangential
position on the grooves. Rotate the whole cartridge without moving it along the headshell, so
that cantilever is tangential to the parallel lines. Just chose one and then align the cantilever
to be parallel, by twisting the cartridge body in the headshell.
When this has been done, check again if the needle travels along the line from the centre of
the spindle. Check again, if cantilever is in a tangential line. Fix the cartridge screws one at
a time, gradually, being sure not to move the cartridge.
After the cartridge is firmly secured check geometry again.
Note: Do not use the damping facility while levelling the tone arm! Lift out paddle from
oil.

13
Now you can start playing LPs. On a spinning record gently lower the needle into the first
groove. When the needle touches the record it will move in and out a little before settling into
the first groove. If it moves inside, skipping a few grooves or drops from the record, that
means that the horizontality of the tonearm is not correct.
If it jumps out towards the edge of the record, then the tonearm is tilted too much downwards
towards the edge of the LP. You must raise that part of the turntable. If it moves inwards,
towards the centre of the record, then it is tilted too much upwards and you must lower that
part of the turntable. See 5.5.
5.5. Fine horizontal levelling of the tone arm:
Note: Do not use the damping facility while levelling the tone arm! Lift out paddle!
Note: Do not use spirit level for fine levelling adjustment.
This will avoid cartridge skipping in the grooves. The tonearm itself is the best levelling
device.
Bring the cartridge above the LP in the middle of the modulated grooves having the cueing
device in the upper position. Then lift up the headshell and let it drop back towards LP.
The cueing device being in the “up” position will prevent the cartridge dropping on the
LP. The headshell will bounce up and down because rod of cueing device will restrict
movement of the threaded rod of counterweight at the back. At the same time the
whole assembly will drift sideways in one direction, or only move very little.
Try the same experiment above the outer perimeter of the LP and also at the inner grooves
The tone arm is correctly levelled when:
Above the outer grooves the whole assembly moves slowly away from the record.
Above the middle of the grooves it stays more or less stable or has a very small
drift.
Above the inner grooves the whole assembly moves slowly towards the record
centre.
If the tone arm is stable at the outer groove and moves towards the centre at the middle
and inner grooves, then the tone arm should be levelled in such a way, that the whole
assembly will slide towards the outer perimeter of the LP.
If it is stable at the inner groove and moves slowly outwards at the middle and also if at the
outer perimeter of LP it runs outwards (away from LP centre). Then the arm should
be levelled so that the whole assembly will drift towards the LP centre at inner groove.
5.6. Adjustment of VTA:
Note: Do not operate VTA knob while the lever is in the lock position!
VTA is adjusted by rotating the knob on the top of the base. Rotation in the direction of the
arrow (+), means that the tonearm will be raised at the support. A rough scale can be seen on
the front of the main base. This is on a scale of 10mm. In the middle of the scale is a stronger
line indicating the zero starting point. The space between each line represents 1mm
difference. Full rotation of the knob is 8 markings, representing 0.1mm between two lines.

14
To make VTA adjustment easier, you can rotate the ring while holding the main knob to
adjust the zero starting point on the knob. This knob can rotate a little even when the lever is
in the lock position (the lever locks the support mechanism and not the knob itself). The
lever, gently pushed into the lock position, gives rigidity to the VTA system due to its special
construction. Fine adjustments, of only few 0.1mm, will make a big difference in sound on the
same LP. Bear in mind that the tonearm cables need at least 40 hours of 'burning in' for
optimal performance.
5.7. Adjustment of azimuth:
To make azimuth adjustments, release the two screws locking the mechanism at the centre top
of the tube, with Allen key 2mm. The small tube, with a hexagonal screw on the left side, is
for fine rotation of the tube. To change azimuth, insert Allen key 2mm and finely rotate it.
The Allen key might feel loose in the screw but when you rotate it, by small increments, it
will change the azimuth. Returning it back will bring azimuth to its previous position.
Changes can be seen by misalignment of the white lines on the top of the centre of the tube.
Even 15 degrees rotation of the Allen key will make a significant difference.
Of course the use of a test record and oscilloscope is mandatory for optimal azimuth. VTA
changes and even changes in the height of the armbase will not change azimuth, due to
precision in construction.
5.8. Adjustment of the cueing device:
The cueing device has no damping for motion as is usual. Due to the construction it is not
needed. It can stay in any position and can be precisely cued on the record. Using the Allen
key 1.5mm to release the small knob, which holds the lever and rotating it, we can adjust the
height of the cartridge above the record.
Note: Cueing device level resistance:
The blocking plate, at the end of air bearing shaft, controls ease of movement of cueing
device lever. If released with Allen key 4mm, it can be pushed away from the main tone arm
tower and this eases movement. When fixing the blocking plate back, be sure that it is parallel
to the main tower, otherwise this can cause the distance from diamond tip to record surface to
be different at the outer grooves compared to the inner grooves. Slight rotation of the blocking
plate can correct this. See page 16.
6.0. Operation of the tonearm:
The compressor should be permanently switched ON. When tonearm is not in use, the valve
on the tonearm should be in the lock (closed) position. In use, open the valve and move the
tonearm once or twice along the main bearing shaft (if tonearm has not been used for more
then few days). This will clean the shaft of dust particles.
After use merely close the valve on the tonearm and the pressure indicator on the tonearm will
show zero pressure. You cannot move tonearm now. The compressor will go on stand by.
Every few hours or so air release noises can be heard and the compressor will switch on a few
times per day when resting in the stand by position. Cue cartridge slowly.

15
7.0. Damping:
A damping system, consisting of a paddle, damping trough and silicone oil, can also be
retrofitted on all Air Line tonearms.
The paddle is fixed on to the threaded rod and the trough is fixed on to the blocking plate.
With oil levels, paddle height, damping can be changed from zero to max. This is suitable for
cartridges with high compliance.
Note: Do not use the damping facility while levelling the tone arm! The tonearm will not
move freely.
Inserting silicone oil:
Cut off the tip of the nozzle from PVC bottle. Squeeze silicone oil into the trough- it will go
slowly before it spreads evenly. Fill it up to the line or about half way up.
Damping system
Damping change:
Release black plastic nut by hand and rotate the paddle-screw into the trough with
Allen key 1.5mm. To secure paddle at the desired height, fix it with the rotating CCW plastic
nut, while preventing paddle - screw rotation with an inserted Allen key.
Optimisation:
The only way to reach optimum damping is by experimentation. Start with the height
of the paddle when the needle is in the groove so that the tip of the paddle is just
touching the surface of the silicone oil. Listen to the sound and increase the depth.
Also observe what happened when the needle touches the grooves, how the whole
assembly moves in a horizontal level a few times, before stabilising in the groove. If
you have a test record observe how the damping decreases movement of the assembly
when resonance occurs.
For a lot of cartridge combinations the best sound will be without the use of damping.
But cartridges with higher compliance might benefit.
Damping trough
Damping paddle

16
8.0. Zero Switching kit (optional):
The function of the “zero switching kit” is to eliminate the noise of the compressor switching
ON and OFF being heard through the speakers.
Kit is available from us, consisting of switching box, which can be fitted in the compressor
ONLY by a qualified electrician.
9.0. Maintenance:
NOTE: Check our web site for frequently asked questions (FAQ) for some more
answers.
When air is consumed, the compressor works automatically, approximately every 2 minutes
and then rests for about 2 minutes (working cycle). When it stops you will hear the noise of
air being released. The automatic drainage system works every few hours and you will hear a
similar noise when air is released from the reservoir in the compressor. This is normal. The
amount of water& brown oil released depends on the working hours of the compressor and
the humidity of the air. In winter months there is less. Water will be collected in the PVC
bottles. Air pressure will push liquid from the first into the second bottle. When the second
bottle is half full, unscrew it and empty it. From the silver filters, small amounts of water will
drain into the supporting stands. Lift up the filters and empty the liquid. Occasionally some
noises will be heard due to the automatic drainage system releasing water.
With normal use check this every few months. If the tonearm is used every day and humidity
is high, (over 70%) then monthly checking is recommended. In the compressor manual,
working conditions are described for compressors used all day, every day, and all the time in
industry, where conditions are much more demanding.
9.1. Disassembly of the tonearm:
9.1.1. Removing the bearing assembly from the shaft:
Note: Clean only occasionally- i.e. every year or two.

17
Air bearing assembly and bearing shaft with cueing device-blocking plate removed.
Protect the cartridge. Do not slide the bearing without compressed air. Allen key 4 mm will
release the top screw of the blocking plate, which is at the end of the shaft. Slide it off. Then
gently pull off the whole assembly (tube with blue bearing). Be careful as the wires are short,
and put the assembly down on the platter. The wires can be pulled out from the rear of the
tube a little with gentle force and can be pushed back if the wire loop is too big.
Using the cloth supplied (which does not leave small particles), soak with 75-95% isopropyl
alcohol (not acetone or any other solvents) and wipe the shaft clean.
Spread the cloth over the platter under the blue bearing and from the bottle, squeeze alcohol
onto the inside of the bearing, which will then drain on to the cloth. You will hear bubbling
noises of the air coming through it. After a few minutes the shaft and bearing will be dry and
you can gently slide back the bearing. Move it a few times back and forth. Fix back the
blocking plate.
Be careful to also insert the cueing mechanism bearing in the 'up' position. Press gently and
fix it. Then align the plate vertically with the main tonearm base. If the cueing mechanism is
too hard to move, unlock the plate so there is less pressure against it.
Check loops and, if necessary, push back a little bit of wire. The wire loop should be long
enough, but if it is too long the loop will wobble.
9.2. Compressor- transportation:
If you can ensure the compressor will be in an upright position at all times it is not necessary
to remove the oil. If, however, there is a possibility that it may be tilted or turned upside
down then the oil must be removed!To do this it is necessary to refer to the compressor
instruction manual.
Note: First ensure that there is no pressure in the compressor and that it is disconnected from
the mains. Loosen the screw holding the rubber seal on top of the compressor head and lift off
the cover. Pour away oil and return the head cover and fix the screw. Ensure that sealing ring
is correctly positioned.

18
10.0. Troubleshooting:
NOTE: Check our web site for frequently asked questions (FAQ) for some more
answers. See also appendix of this manual.
10.1. Cartridge skips the groove:
Tonearm is not horizontal: check horizontality
Excessive dirt on record: check and clean for small particles stuck in the groove
Inaccurate geometry: check that the cartridge tip follows line
Low tracking force
Moisture or dirt in the bearing: clean and check PVC bottle and Red filters stands
Clean shaft and bearing with alcohol- see # 11
10.2. Cartridge does not cue first groove but runs in:
Tonearm is tilted down toward the centre of the record: adjust horizontal level down.
See above
10.3. Cartridge runs from record outwards:
Tonearm is tilted up towards the edge of the record: adjust horizontal level upwards.
10.4. Compressor cannot generate enough pressure, or runs for longer than normal:
Note: Check that the silver filters drainage system is sealed, as described at build up of the
pressure. Leaking (hiss noise) in the system: check tubes and its connections, silver filters,
and the compressor.
Check working cycle when the arm is operating. The compressor should take two minutes to
build up pressure from 6 to 8- 8.5 bar. It should then cool down for 2 minutes. If the working
cycle is longer or the cooling shorter, there is a leak in the system or a damaged compressor.
When the arm is not operating (valve on the arm closed and arm meter shows no pressure) the
compressor will be on standby and it will switch on occasionally (2-4 times per day). This
also means that there is no leak in the system. If it is switching on every hour or so, there is a
leak in the system and the working cycle might be too long.
Close the valve on the arm and see if the pressure builds into normal cycle from 6 to 8 bars in
less then 2 minutes. Then open the valve on the tonearm and the working cycle should be
around 2 minutes. If it is longer than 3 minutes, then there is a leak in the system. The
working pressure should be 4-4.2 bar. If it is higher readjust.
Close the regulator pressure valve to zero and see if the pressure builds up to 8 bars and the
compressor switches off after aprox. 2 minutes. If not, then the problem is in the compressor.
If the pressure build up is normal, then readjust working pressure back to 4-4.3 bar.

19
10.5. Compressor does not start:
Check the mains electricity. Compressor was overheated and overheating protection switches
it off. Overheating protection needs replacing.
10.6. Compressor switching noise through the speakers:
The compressor has the same effect as household refrigerators which generate noise when
switching on or off. Some systems are more sensitive than others. If possible the compressor
should be connected to a secondary electrical circuit then the audio system. If this is not
possible then the compressor should be as far away as possible from the audio system
connected to the mains. A noise filter on the compressor together with a long mains cable
might help. See also Zero Switching kit: 8.0.
NOTE: Check our web site for frequently asked questions (FAQ) for some
more answers. See also Appendix.
Kuzma Ltd
Hotemaze 17A
SI-4205 PREDDVOR
SLOVENIJA
P: +386 4 25 35 450
F: +386 4 25 35 454
www.kuzma.si
Other manuals for Air Line
1
Table of contents
Other Kuzma Turntable manuals

Kuzma
Kuzma STABI M User manual

Kuzma
Kuzma Stabi S User manual

Kuzma
Kuzma 4Point User manual

Kuzma
Kuzma 4Point User manual

Kuzma
Kuzma Stabi XL4 User manual

Kuzma
Kuzma STABI S PS AC User manual

Kuzma
Kuzma 313VTA User manual

Kuzma
Kuzma 4POINT 9 User manual

Kuzma
Kuzma STABI REF PS 2 User manual

Kuzma
Kuzma XL DC User manual

Kuzma
Kuzma Stabi S12 User manual

Kuzma
Kuzma STABI R User manual

Kuzma
Kuzma Stabi XL User manual

Kuzma
Kuzma Kuzma Stabi Reference Turntable User manual

Kuzma
Kuzma Air Line User manual

Kuzma
Kuzma Stabi S PS User manual

Kuzma
Kuzma STABI R User manual

Kuzma
Kuzma XL AIR KIT User manual

Kuzma
Kuzma Stogi S User manual

Kuzma
Kuzma Stabi XL2 User manual