manuals.online logo
Brands
  1. Home
  2. •
  3. Brands
  4. •
  5. Kyocera
  6. •
  7. Cell Phone
  8. •
  9. Kyocera Digno M Service manual

Kyocera Digno M Service manual

Introduction
Setting Guide
Basic Operation
For explanations of basic functions, refer to "Basic Manual".
:
JOYKYL22
1177
FPower key
Power ON
Press and hold F(Power key) until the incoming light turns on.
Unlocking
Tap the screen and slide " " to " "
to unlock.
Sliding " " to " "/" "/" "
activates Phone/Camera/Write now
plus.
[ (Apps)]
The Application list appears.
Navigation bar
C : Return to the previous screen.
H : Display the Home screen.
N : Display the recently-used applications. Long-touch to display the notification panel.
• Long-touch Hor drag/flick the navigation bar up, and slide to " "/" "/" " to activate/display Write now
plus/Google Search/Slide screen.
• On some screen, a key other than the keys mentioned above may appear.
Display
Directly touch with your finger to operate.
Tap
Lightly touch a screen
and then immediately
release your finger.
Long-touch
Keep touching an
item or key.
Flick
Touch the screen and
flick up/down/left/
right.
■Character entry
Use flick input or tap a key several times to enter characters.
Flick input
Long-touch a key to display enterable
characters as shown in the right. Flick to the
direction of the character to enter.
《Character entry screen
(10 key)》
Character entry mode switch key
Tap to switch character type.
Initial settings
The first time the product turns ON, "au かんたん設定 (au Easy Setting)" activates automatically. Press Cand then from the Home
screen →[ ( アプリ一覧 (Apps))] →[ 設定 (Settings)] →[ 言語と入力 (Language & input)] →[ 言語 (Language)] →"English" to switch
language, then set au Easy Setting. From the Home screen →[ (Apps)] →[au Easy Setting].
• If you skip the operation of "au かんたん設定 (au Easy Setting)" when you purchased the product, you can set au ID later. In that case,
Applications list →Tap "au かんたん設定 (au Easy Setting)" or "au ID 設定 (au ID Setting)".
■au ID
By setting au ID, you can use various services provided by au such as "au Kantan Kessai" which allows you to purchase applications from
the auスマートパス (au Smart Pass) or Google Play. Main setting items are as follows.
au ID*Register your au phone number or a character string for au ID (user ID).
au ID password Register password for using au ID.
* "au ID" which is already used by another user cannot be set.
1 2 3 4 5
Welcome to au screen →
[Next]
[Registration] Check the content
and [OK]
[au ID の設定・保存
(Set and save au ID)]
Enter a security password →
[OK]
Default value is four-digit
security code written at
subscription of communication
service.
6* Registering new au ID
except phone number:
Register a new ID from
[お好きな au ID を新
規登録したい方はこち
ら(New registration of
au ID)]
* Registering your au
ID:
Set from [au ID をお
持ちの方はこちら
(Register your au ID)]
7 8 9
Enter au ID password
→[ 利用規約に同意
して新規登録 (Agree
terms of service and
register)]
When the au スマート
パス (au Smart Pass)
notification setting screen
appears, follow the
onscreen instructions.
[OK] →[設定画面へ (Go
to setting screen)]
Register information
necessary for re-issue of
password.
Enter " 生年月日 (Date
of birth)", " 秘密の質問
(Secret question)", " 答え
(Answer)" →[ 入力完了
(Done)] →[ 設定 (Set)]
[終了 (Done)]
10 11 12 13 14
Select data to hand
over →[Agree, and
next] →Confirm the
note and [Yes]
If no data to hand over,
select "Next".
Check the Terms
of Service (reading
required), select a
service to use →
[Agree, and next]
Check the Terms
of Service (reading
required), select a
service to use →
[Agree, and next]
Check the Terms
of Service (reading
required), select a service
to use →[Agree, and
next]
For "3LM", the setting screen
appears. Tap "Activate".
[Finish]
Setting up Google account
Set up Google account to use Google applications such as "Gmail", "Play Store", "Hangouts".
Setting items are as below (besides the items below, register "First" name, "Last" name, "Security question and Answer").
User name Register your Google account (user ID) and a character string for mail address. You can register a desired name,
but a name already registered by another user cannot be set.
Password Register password for the Google account.
1 2 3 4 5
On the Google account
setting screen →
[New]
If you have a Google
account, tap "Existing".
Enter "First" name and
"Last" name →[ ]
Enter a user name →[ ]
Checking registration of
username starts.
Enter a password and
reenter the password for
confirmation →[ ]
Enter question, answer
and spare mail address*
in case you forgot the
password →[ ]
* Ifyouhavenoothermail
addresses,remainas
blank.
6 7 8 9
10
Select if you join Google+
Tap "Not now" to go to the
next, here as explanation.
Check the contents,
then[ ]
Enter text displayed on
screen →[ ]
*Thisscreenmaynot
bedisplayed.
Make purchase
settings of Google
Play as required
Confirm the back
up setting and [ ]
Google account
registration is
completed.
*Thisscreenmay
notbedisplayed.
E-mail
To use E-mail (@ezweb.ne.jp), subscription to LTE NET is required.
If you did not subscribe it when you purchased the product, contact an au shop or Customer Service Center.
Your E-mail address is determined automatically after initial setting. You can change the E-mail address later.
■Initial settings
1 2 3 • After E-mail initial
settings is done,
your E-mail address
appears. Check E-mail
address and tap [ 閉じ
る(Close)].
• When the description
screen for E-mail
function appears,
confirm the content and
tap " 閉じる (Close)".
Home screen →[
(E-mail)]
Check the contents,
then [ 接続する
(Connect)]
■Changing your E-mail address
1 2 3 4 5
Home screen →[
(E-mail)]
[][E-mail settings] [Other settings] →[接続
する (Connect)]
[Eメールアドレスの
変更 (Change E-mail
address)]
6 7 8
Enter the security code →
[送信 (Send)]
Check the contents,
then [ 承諾する
(I accept)]
Enter E-mail address
→[ 送信 (Send)] →
[OK]
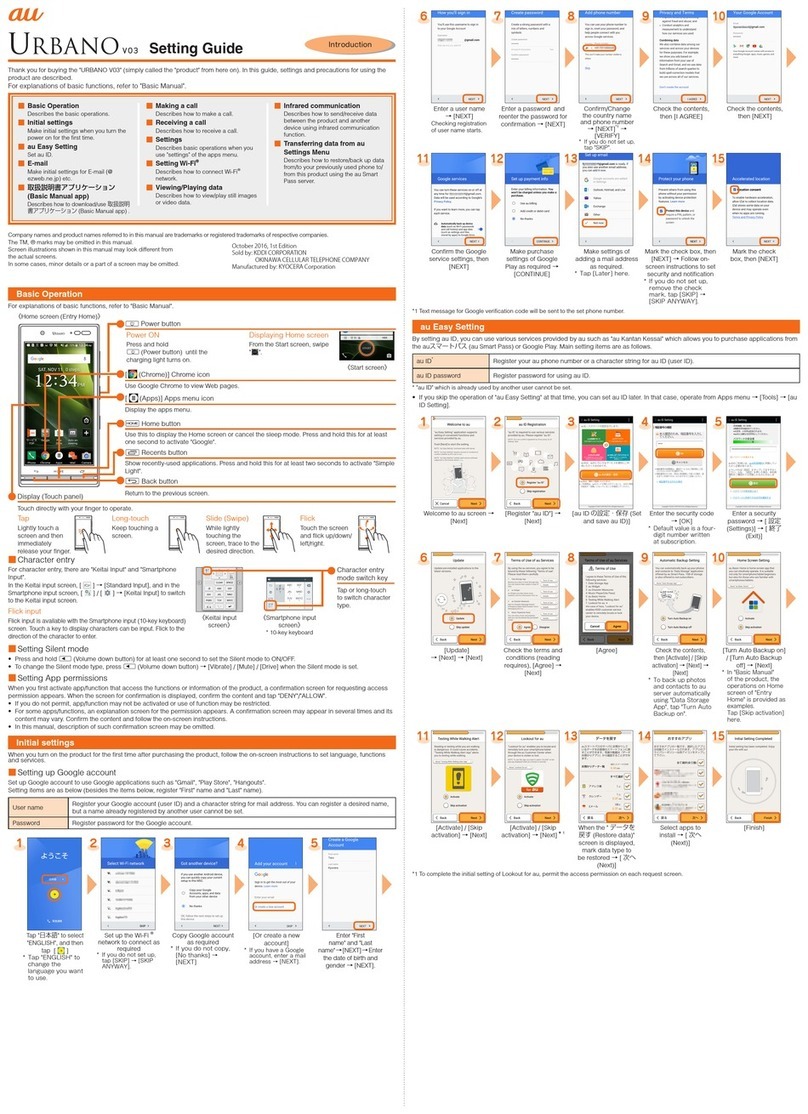
Thank you for buying the "DIGNO®M" (simply called the "product" from here on). In this guide, settings and precautions for using the
product are described.
For explanations of basic functions, refer to "Basic Manual".
■Basic Operation
Describes the basic operations.
■Initial settings
Make initial settings when you turn the
power on for the first time.
■Setting up Google account
Describes how to set up Google
account.
■E-mail
Make initial settings for E-mail (@
ezweb.ne.jp) etc.
■Making a call
Describes how to make a call.
■Receiving a call
Describes how to receive a call.
■Setting Wi-Fi®
Describes how to connect Wi-Fi®
network.
■Viewing/playing data
Describes how to view/play still images
or video data.
■Infrared communication
Describes how to send/receive data
between the product and another
device using infrared communication
function.
■Saving battery power
Describes how to set for saving battery
power using "E-saving settings".
Company names and product names referred to in this manual are trademarks or registered trademarks of respective companies.
The TM, ® marks may be omitted in this manual.
Screen illustrations shown in this manual may look different from the actual screens. In some cases, minor details or a part of a screen may be omitted.
November2013,1stEdition
Soldby: KDDICORPORATION,
 OKINAWACELLULARTELEPHONECOMPANY
Manufacturedby:KYOCERACorporation
■Backing up E-mail
You can back up E-mail.
Backed up data is saved on a microSDTM memory card (/storage/sdcard1/private/au/email/BU/) when a microSDTM memory card is
attached. If a microSDTM memory card is not attached, data is saved on the internal storage (/storage/emulated/0/private/au/email/BU).
1 2 3 4 5
Home screen →[
(E-mail)]
[][E-mail settings] [Backup/Restore] [Backup] →Confirm the
notes and [OK]
6
PC-mail settings
You can use mail addresses except for E-mail (@ezweb.ne.jp).
You need to set up a PC-mail account to use PC-mail. For the first time use, make settings as
follows.
Applications list →[PC mail] →Enter mail address and password →[Next] →Set
account →[Next] →Enter account name etc. →[Next]
Select a mail type to back
up →[OK]
Making a call
■Direct input calling ■Making a call from incoming/outgoing
history
1 2 1 2
Home screen →[ ]
(Phone)
Enter a phone
number →[]
(Call)
Phone number input
screen →"" (Outgoing
call)/" " (Incoming call)
[] of a party to
call
■Calling from a contact
1 2 3
Phone number entry
screen →[ ]
Tap a party to call []
Receiving a call
■Calling
1 2 3
Receiving screen →Slide
"" to " " at the right
Start calling. To end the call,
[] (End call)
■Answering with answering memo
Answer by the answering memo message and record a message of the party when you cannot answer calls.
1 2 3 4
Receiving screen →[ ] [Reply Auto
answering]
The caller hears the
guidance.
To answer the call, slide
"" to " " at the right
Setting Wi-Fi®
Use your home Wireless LAN (Wi-Fi®) or public wireless LAN to connect to the Internet.
Main settings are as follows.
Easy setting by camera Use for registration of an access point compatible with "Easy setting by camera".
WPS system Use for registration of access point compatible with Wi-Fi Protected SetupTM with WPS mark.
* If you turn on wireless LAN (Wi-Fi®) function, battery consumption increases. You are recommended to turn wireless LAN (Wi-Fi®) function to OFF
when not using wireless LAN (Wi-Fi®) function.
1 2 3
Applications list →
[Settings]
[Wi-Fi]
Available Wi-Fi
networks are detected
automatically and
their SSIDs appear in
the Wi-Fi networks.
[WI-FI EASY SETTINGS]
When access point is not detected,
tap " " to add access point
manually.
■Using Wi-Fi connection tool by the camera
4 5 6 7
Follow the onscreen
instructions to register
an access point.
[Easy setting by camera] [ 画像送信に同
意し、利用する
(Accept for sending
image and use)]
→[ スタート (Start)]
Select provider,
manufacturer of the
wireless LAN router
■Using WPS system access point
WPS button WPS PIN entry
4 5
Keep pressing WPS
button of access point
to set to WPS mode.
An access point is
automatically detected
and registration starts.
4 5
Enter displayed PIN
code for access point,
then registration starts.
[WPS button] [WPS Pin Entry]
Viewing/playing data
By transferring data from the previously used au phone to a microSD™ memory card, you can view/play* still image/movie data using
"Photo library" in the product.
* Copyrighted data on the previously used au phone cannot be transferred to the product. However, some 着うたフル ®, ビデオクリップ , 着うたフル
プラス ®may be able to be transferred and played on the product with the same phone number by backing up with LISMO Port Ver 4.2 or later.
1 2
Applications list →
"Photo library"
When you activate for
the first time, explanation
screen appears.
Follow the onscreen
explanations, [Next] →
[Next] →[Exit].
Tap data to be displayed
Data is played.
Infrared communication
You can send/receive profiles or various data between the product and another device using infrared communication.
■Receiving data
1 2 3 Point the infrared
data port of the
product to the
infrared data port
of the other device.
When authentication
code entry screen
appears, enter
authentication code
(four-digit number)
→[OK].
Applications list →
[Infrared com.]
[Receive]
■Sending data
1 2 3 4
Point the infrared
data port of the
product to the
infrared data port
of the other device.
Applications list →
[Infrared com.]
[Send profile]/[Send
contacts]/[Send file]*
If you tap "Send profile", data
transfer starts.
* For File Commander, select
data to start data transfer.
Select a data item
to send →[OK]
When authentication
code entry screen
appears, enter
authentication code
(four-digit number) →
[OK].
Saving battery power
Use "E-saving settings" to set screen timeout and screen brightness, to enable/disable auto rotation of screen, Wi-Fi®, Bluetooth®, GPS
satellites, Reader/Writer, P2P, CPU clock restriction function, TonTo-ON function, Auto data control function, Pedometer and All data
communication so that you can save the battery power.
Right now: Select "Custom" or "Long life" and enable power saving mode.
On scheduled time: Specify times of a day to enable power saving mode.
When battery is low: Specify the battery level to enable power saving mode.
1 2
Applications list →
[E-saving settings]
"Right now"/"On scheduled
time"/"When battery is low"
→[OFF]
When "Custom" is
selected, settings can be
made from .

Other Kyocera Cell Phone manuals

Kyocera K126C User manual

Kyocera

Kyocera K126C User manual

Kyocera BASIO 4 Installation guide

Kyocera

Kyocera BASIO 4 Installation guide

Kyocera TORQUE G04 Installation guide

Kyocera

Kyocera TORQUE G04 Installation guide

Kyocera DuraForce PRO User manual

Kyocera

Kyocera DuraForce PRO User manual

Kyocera Torcque XT User manual

Kyocera

Kyocera Torcque XT User manual

Kyocera 2345 User manual

Kyocera

Kyocera 2345 User manual

Kyocera Duraxa User manual

Kyocera

Kyocera Duraxa User manual

Kyocera HYDRO VIBE User manual

Kyocera

Kyocera HYDRO VIBE User manual

Kyocera W65K Installation guide

Kyocera

Kyocera W65K Installation guide

Kyocera KX2 User manual

Kyocera

Kyocera KX2 User manual

Kyocera 2325 User manual

Kyocera

Kyocera 2325 User manual

Kyocera 2119b User manual

Kyocera

Kyocera 2119b User manual

Kyocera HYDRO VIBE User manual

Kyocera

Kyocera HYDRO VIBE User manual

Kyocera Blade User manual

Kyocera

Kyocera Blade User manual

Kyocera Torino S2300 User manual

Kyocera

Kyocera Torino S2300 User manual

Kyocera Phantom KE414 User manual

Kyocera

Kyocera Phantom KE414 User manual

Kyocera Rio E3100 User manual

Kyocera

Kyocera Rio E3100 User manual

Kyocera K352 User manual

Kyocera

Kyocera K352 User manual

Kyocera Domino S1310 User manual

Kyocera

Kyocera Domino S1310 User manual

Kyocera Urbano L02 Service manual

Kyocera

Kyocera Urbano L02 Service manual

Kyocera 1100 Series User manual

Kyocera

Kyocera 1100 Series User manual

Kyocera K112 User manual

Kyocera

Kyocera K112 User manual

Kyocera Cyclops K325 User manual

Kyocera

Kyocera Cyclops K325 User manual

Kyocera K322 User manual

Kyocera

Kyocera K322 User manual

Popular Cell Phone manuals by other brands

Sony Ericsson Cyber-Shot K770 Programming manual

Sony Ericsson

Sony Ericsson Cyber-Shot K770 Programming manual

Samsung SCH-A475 user manual

Samsung

Samsung SCH-A475 user manual

LG GD900 Titanium -  GD900 Crystal Cell Phone 1.5... user guide

LG

LG GD900 Titanium - GD900 Crystal Cell Phone 1.5... user guide

Alcatel One Touch 213 manual

Alcatel

Alcatel One Touch 213 manual

Motorola V505 quick start guide

Motorola

Motorola V505 quick start guide

Samsung GT-I9300I user manual

Samsung

Samsung GT-I9300I user manual

LG LG-E410j user guide

LG

LG LG-E410j user guide

Alcatel GO FLIP 3 4052Z quick start guide

Alcatel

Alcatel GO FLIP 3 4052Z quick start guide

Haier W970 user manual

Haier

Haier W970 user manual

Samsung GT-E1360M Service manual

Samsung

Samsung GT-E1360M Service manual

Lemon Duo216 manual

Lemon

Lemon Duo216 manual

Crosscall CORE-S4 quick start guide

Crosscall

Crosscall CORE-S4 quick start guide

Nokia 6215i user guide

Nokia

Nokia 6215i user guide

Verykool I600 user manual

Verykool

Verykool I600 user manual

Nokia 3155 Disassembly instructions

Nokia

Nokia 3155 Disassembly instructions

LG C1300i -  Cell Phone user guide

LG

LG C1300i - Cell Phone user guide

Motorola MOTO Q 9c Getting started guide

Motorola

Motorola MOTO Q 9c Getting started guide

LG Optimus E730 user guide

LG

LG Optimus E730 user guide

manuals.online logo
manuals.online logoBrands
  • About & Mission
  • Contact us
  • Privacy Policy
  • Terms and Conditions

Copyright 2025 Manuals.Online. All Rights Reserved.