KYT NZ-RACE User manual

ISTRUZIONI D’USO
USER'S MANUAL
INSTRUCTIONS
D’UTILISATION
INSTRUCCIONES DE USO
GEBREUCHSANLEITUNGEN

ITALIANO
ENGLISH
FRANÇAIS
ESPAÑOL
DEUTSCH

IT IT
4 5
- A -
- B -
VI RINGRAZIAMO PER AVER SCELTO KYT
AVVERTIMENTO! Per la tua sicurezza, è importante leggere completamente il manuale del
proprietario e tutte le etichette di avvertenza.
Leggere attentamente queste istruzioni prima di utilizzare il casco. Sono molto importanti per la tua
sicurezza e per la vita del tuo casco. I caschi sono stati concepiti, progettati e realizzati utilizzando
le più avanzate tecnologie per la massima sicurezza del motociclista. I caschi sono stati creati solo
per uso motociclistico e non possono garantire una protezione adeguata se utilizzati per altri scopi
o sport. In caso di incidente, soprattutto quelli che comportano forti impatti, un casco non eviterà
tutti i rischi di lesioni mortali. Non esporre il casco a fonti di luce intense soprattutto se i colori
sono brillanti e/o uorescenti e potrebbero sbiadire.
CASCO CONFORME ALLE NORME IN VIGORE NEL PAESE DI ACQUISTO
INFORMAZIONI PER L’UTENTE
A. Nessun casco può proteggere chi lo indossa da ogni possibile impatto.
B. Per la massima protezione, il casco deve adattarsi saldamente alla testa e tutti i cinturini di
ritenzione devono essere ssate saldamente.
C. Il casco è progettato per essere trasportato tenendo il sottogola, quando non è indossato.
D. Nessun adesivo deve essere applicato sul casco ad eccezione di quelli consigliati dal produttore
del casco. Non forare o tagliare il guscio.
E. Il casco è progettato per assorbire gli urti distruggendo parzialmente la calotta e la calottina
interna. Molti di questi danni non sono visibili. Pertanto se l'elmo subisce un forte colpo, l'elmo deve
essere sostituito anche se apparentemente non danneggiato.
F. La linea è essenziale per le prestazioni previste del casco.
G. Il casco può essere danneggiato e reso inecace da petrolio e prodotti derivati dal petrolio,
detergenti, vernici, adesivi, ecc. Per pulire il casco usare solo sapone neutro con acqua.
H. Non utilizzare mai un casco che ha subito un urto anche se non appaiono danni visibili; in caso
di impatto il casco dovrà essere sostituito.
I. NZ-RACE non è progettato per essere utilizzato con auricolari e/o dispositivi simili
PER PULIRE IL CASCO È NECESSARIO USARE SOLO:
- PER IL GUSCIO: ACQUA CALDA E SAPONE DELICATO
- PER L'IMBOTTITURA DI COMFORT: ACQUA CALDA E SAPONE DELICATO
AVVISO DI SICUREZZA
1. LEGGERE ATTENTAMENTE QUESTE ISTRUZIONI
E OSSERVARLE RIGOROSAMENTE PRIMA DI
UTILIZZARE IL VOSTRO CASCO NUOVO
Questo casco è stato concepito e realizzato per proteggere la
testa in caso di urto grazie alla capacità di assorbimento degli
urti dei diversi materiali utilizzati.
2. NON UTILIZZARE UN CASCO CHE HA SUBITO
UNO SHOCK
Un casco che ha subito uno shock non deve più essere
utilizzato. A volte i danni non sono visibili dall'esterno, tuttavia
i materiali interni possono essere danneggiati. Il casco è
progettato per assorbire gli urti per alterazione e parziale
distruzione di alcune parti: in caso di urto ulteriore non sarà in
grado di proteggerti con la massima sicurezza. Restituisci il tuo
casco al produttore per un controllo esperto o sostituiscilo
con uno nuovo.
AVVERTIMENTO! Non comprare mai un casco usato o
prendere in prestito il casco di qualcun altro. Nel tempo la
schiuma protettiva dei caschi si adatterà ai contorni della testa
di un utente. Un casco usato o preso in prestito potrebbe non
orire la stessa protezione di un casco nuovo.
3. USO CORRETTO
AVVERTIMENTO! Seleziona attentamente la taglia del tuo
casco in quanto è molto importante per la tua sicurezza. Chiedi
consiglio al tuo rivenditore autorizzato quando scegli la taglia
adatta del tuo casco. Per controllare la taglia corretta del tuo
casco, seguire le istruzioni nella sezione (4). Non usare mai un
casco troppo piccolo o troppo grande per la tua testa.
AVVERTIMENTO! Indossare un casco di taglia sbagliata può
aumentare il rischio di lesioni gravi o morte in un incidente. Un
casco che è troppo grande per la tua testa potrebbe staccarsi o
cadere durante un incidente.
4. COME CONTROLLARE LA TUA TAGLIA
Un casco sicuro dovrebbe adattarsi perfettamente alla tua
testa. Per controllare le dimensioni: indossa il casco allaccialo
e scuoti la testa a sinistra / destra e avanti / indietro. Prova
a spostarlo con le mani. Se scivola e si muove signica che
è troppo grande. Quindi prova una taglia più piccola. Se la
pressione sulla testa ti dà fastidio o ti fa male, prova una taglia
più grande. È necessario eseguire il “ROLL-OFF TEST” (vedi
gura B). Allacciate il casco, tenete il sottogola con una mano
e con l'altra cercate di toglierlo tirandolo con forza da dietro.
Se il casco si sla la taglia non è corretta, verica di poter girare
liberamente la testa e che la visuale laterale sia libera. Verica di
poter respirare liberamente e che nulla ostruisca il usso d'aria
all'interno del casco.
AVVERTIMENTO! Se il casco si stacca o si sposta sugli occhi,
prova un'altra taglia o un altro modello o marca. Devi essere in
grado di vedere il bordo nel tuo campo visivo superiore.

IT IT
6 7
FIGURA - A
FIGURA - B
FIGURA - C
5. POSIZIONAMENTO
Indossalo sempre nella posizione corretta (vedi gura A). Non allacciare il casco se è stato
posizionato troppo indietro (vedi gura B) o avanti (vedi gura C).
6. VISIERA
puoi equipaggiare il tuo casco con due diversi tipi di visiera (disponibili in diverse sfumature
di colore): antigrao e antiappannamento. Pulire la visiera con acqua tiepida (utilizzare acqua
demineralizzata se disponibile) e sapone neutro, per massimizzare l'eetto antiappannamento,
evitare di usare acqua contenente troppo cloro. Non utilizzare alcol, benzina o altri solventi né
prodotti per la pulizia dei vetri che potrebbero contenere alcol. Rimuovere la visiera prima di pulire
l'interno del casco. Riposizionarlo solo quando i prodotti per la pulizia saranno completamente
evaporati. Non attaccare alcun adesivo o nastro adesivo alla visiera poiché ciò indebolirebbe la sua
protezione. Ciò può danneggiare la visiera. Non guidare con la visiera appannata. Una cattiva visione
può provocare un incidente, provocando lesioni gravi o addirittura la morte.
AVVERTENZA
Per una migliore visibilità, soprattutto di notte, sostituire immediatamente una visiera graata.
Usa visiere colorate solo durante il giorno. Le visiere più scure non sono omologate e sono destinate
esclusivamente all'uso in pista. La visiera antiappannamento è stata trattata internamente con uno
speciale processo che riduce la condensa in condizioni di utilizzo normali tra -5 ° C e + 40 ° C (23
° F e 104 ° F) con un'umidità relativa dell'80%. È una protezione contro la formazione di nebbia
e non un assorbente di umidità. L'eccessiva condensa d'acqua può trasformarsi in un velo d'acqua
all'interno della visiera. Far satare il casco per ridurre questo fenomeno.
7. PULIZIA E MANUTENZIONE
Pulisci il casco solo con acqua tiepida (non usare mai acqua calda) e poche gocce di sapone neutro
oppure usa gli appositi PRODOTTI PER LA PULIZIA DEL CASCO. Lasciare asciugare il casco a
temperatura ambiente non esporlo a fonti di calore e non utilizzare mai un phon per asciugarlo.
- Pulizia della calotta
AVVERTENZA! Utilizzare solo metodi approvati per pulire il casco. L'uso di altri prodotti chimici
o metodi non approvati può danneggiare la calotta o la fodera del casco. Un casco danneggiato può
aumentare il rischio di lesioni gravi o morte in un incidente.
Finitura lucida: KYT consiglia di pulire il casco con prodotti progettati per la pulizia e la lucidatura
automobilistica. Tutti i caschi KYT sono riniti con uno strato di base / rivestimento trasparente di tipo
automobilistico. I composti abrasivi adatti possono essere utilizzati per una pulizia profonda per rimuovere
molti gra e segni. Segui diligentemente le istruzioni del prodotto. Una lucidatura eccessiva con composti
abrasivi può causare leggere abrasioni che possono opacizzare la nitura del casco. Adesivi e decalcomanie
lasceranno residui di adesivo quando vengono rimossi. Per rimuovere i residui di adesivo, utilizzare tamponi
imbevuti di alcol. Assicurati di rimuovere immediatamente il liquido in eccesso e di pulire l'area con acqua
e sapone una volta rimosso il residuo di adesivo. Non esercitare una pressione eccessiva durante lo
sfregamento quando si tenta di rimuovere i residui di adesivo, ma utilizzare più trattamenti leggeri.
Finitura non lucida: per i caschi con nitura non lucida, si consiglia di utilizzare acqua calda e sapone neutro.
Usa più trattamenti per lo sporco più pesante. Non utilizzare una pressione eccessiva o composti abrasivi
durante la pulizia della supercie in quanto si potrebbe creare un eetto "lucido". Esecuzione della pulizia
della nitura non lucida.
1. Si prega di pulire i caschi da polvere, insetti o erba entro un giorno.
Avanzamento della pulizia:
1) Pulire il casco con acqua tiepida e un panno.
2) Se sono rimasti dei residui, asciugare il casco e rimuovere ogni residuo di contaminazione con gomma
da cancellare.
Non utilizzare alcool o diluenti per pulire il casco perché potrebbero danneggiare la vernice.
2. Evitare la contaminazione da olio poiché è estremamente dicile da pulire una volta esposto.
- Pulizia interna
Anche se consigliamo di cambiare un casco ogni 3-5 anni, l'accumulo di sudore, umidità e sporcizia può
deteriorare il tessuto e le cuciture e questo può causare cattivi odori. Per lavare gli interni rimovibili KYT,
si consiglia il lavaggio a mano. Se si utilizza una lavatrice, utilizzare l'impostazione "Delicato" e asciugare
all'aria. KYT sconsiglia di utilizzare la centrifuga per le imbottiture interne in quanto potrebbe danneggiare
il materiale. Per gli interni non rimovibili, KYT consiglia di utilizzare prodotti antibatterici e antimua come
"Helmet Fresh". O un altro prodotto simile.
- Pulizia delle ventilazioni
Sporcizia e detriti possono penetrare nella ventilazione del tuo casco KYT. Bombolette di aria compressa
utilizzate per pulire le tastiere del computer possono essere utilizzate per soare i detriti dal sistema di
ventilazione. Si consiglia di rimuovere tutti gli elettrodi rimovibili prima di eseguire questo processo.
- Pulizia della visiera
Le visiere del casco sono realizzate con materiali in policarbonato con rivestimento in poliuretano
resistente all'abrasione. Dovrebbe essere pulito usando sapone delicato e acqua calda. Non utilizzare mai
acqua calda, acqua salata, benzene, diluenti, benzina o altri agenti aggressivi. Inoltre, l'uso di detergenti
generici commerciali non è raccomandato perché possono inuire sulla qualità del materiale della visiera.
Trattare con cura durante la pulizia dello schermo per preservare il rivestimento resistente all'abrasione.
Quando sono visibili gra profondi, si consiglia vivamente di sostituire la visiera del casco. Le visiere
colorate sono per "solo uso diurno" e non sono adatti per l'uso di notte o in condizioni di scarsa visibilità.
8. NON MODIFICARE IN ALCUN MODO IL TUO CASCO
Non tentare mai di manomettere il casco. Non tagliare né forare la calotta del casco. Non inserire viti.
Non dipingerlo. Non modicare il sottogola. Non rimuovere lo scudo inferiore né in caso di incidente.
Non modicare l'imbottitura di comfort tagliando o rimuovendo il polistirolo in quanto ciò ridurrebbe
notevolmente la capacità di assorbimento degli urti del casco. Utilizzare solo ricambi originali. La modica
del casco può aumentare il rischio di lesioni gravi o morte in un incidente.

IT IT
8 9
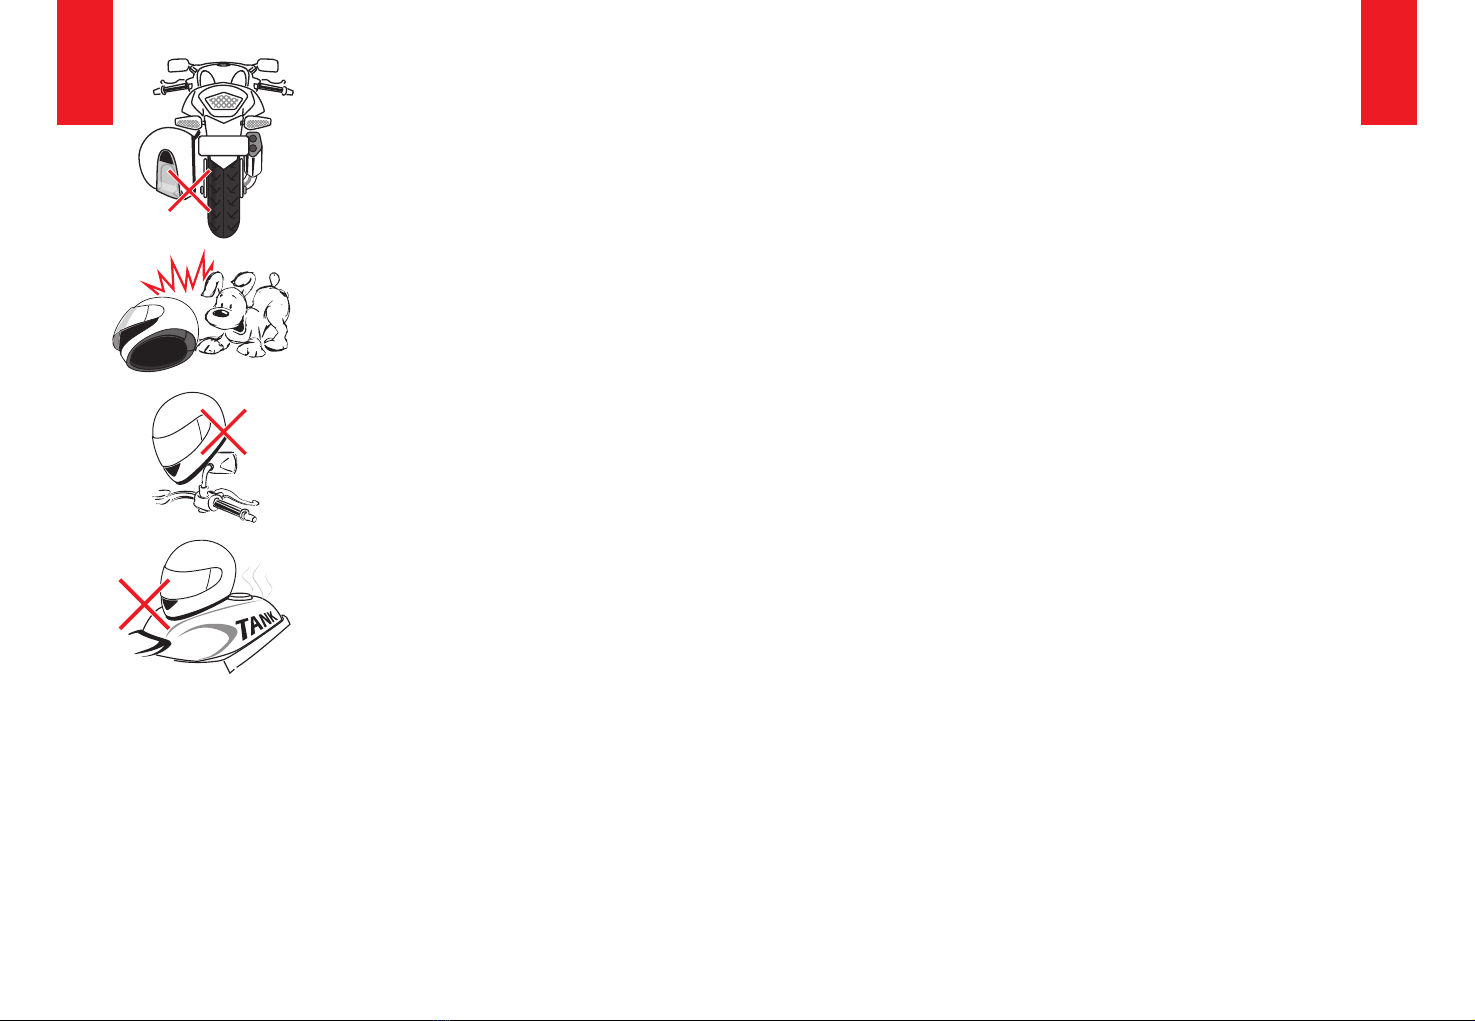
9. UTILIZZA IL TUO CASCO CON ATTENZIONE. NON
APPENDERLO ALLA MOTO DURANTE LA GUIDA.
Anche se il tuo casco è molto robusto deve essere sempre maneggiato
con cura. L'impatto con oggetti solidi o ruvidi può danneggiare il
rivestimento di vernice o anche peggio e ridurre la sicurezza del
casco. Non guidare mai con il casco appeso alla motocicletta poiché
danneggerebbe il rivestimento di vernice, lo scudo e il sottogola.
Tenerlo sempre lontano da marmitta, gas di scarico, fonti di calore,
dalle intemperie. Quando non si guida proteggerlo sempre dai raggi
solari, soprattutto se il colore del casco è scuro.
10. TENERE IL CASCO FUORI DALLA PORTATA DEGLI
ANIMALI
Assicurati che il tuo animale domestico non “mastichi” né “gra” il
casco e l'imbottitura di conforto. Il danno causato sarebbe irreparabile.
11. CONSERVARE IL CASCO IN UN POSTO SICURO
Non lasciare mai il casco sugli specchietti né sul manubrio per evitare
danni alle imbottiture di comfort.
AVVERTENZA! Un casco conservato in modo improprio può
danneggiarsi e aumentare il rischio di lesioni gravi o morte in caso di
incidente. Dovresti :
- Conservare il casco in un luogo fresco e asciutto,
- Tenere il casco lontano da animali domestici e altri animali,
- Tenere il casco lontano da fonti di calore superiori a 122F (50°C) e
non posizionarlo su o vicino a superci calde,
- I caschi lasciati al sole per lunghi periodi di tempo, potrebbero sbiadire
nel tempo.
12. NON ESPORRE IL CASCO A SOLVENTI
Non lasciare mai il casco sul serbatoio troppo a lungo poiché i fumi
della benzina lo danneggerebbero. Non esporre mai il casco a solventi
come benzina o qualsiasi altro tipo di carburante per evitare danni alla
visiera, alle piccole parti in plastica e all’imbottitura di comfort.
13. ISPEZIONA IL TUO CASCO
Per assicurarti che il tuo casco sia nelle migliori condizioni per massimizzare la tua protezione, ispeziona sempre il
tuo casco prima di guidare:
- Controllare lo scudo e il meccansimo della visiera, se necessario, serrare correttamente e nuovamente le viti
del meccansimo visiera. Assicurati di non stringere troppo le viti. Le viti della piastra di base in plastica possono
rompersi e le viti plastiche possono rimuovere i manicotti delle viti se serrati eccessivamente.
- Vericare la presenza di danni al casco: se il casco è danneggiato o crepato, smettere immediatamente di usarlo.
Seguire le istruzioni nella sezione (15). se il tuo casco è caduto, potresti non essere in grado di vedere il danno.
- Vericare la presenza di parti usurate o danneggiate: i componenti in plastica possono usurarsi nel tempo. Se
trovi parti usurate o danneggiate, sostituiscile o acquista un nuovo casco. Seguire le istruzioni nella sezione (14).
- Controlla la tua visiera: se la tua visiera è graata o danneggiata, potrebbe ridurne la visibilità, sostituiscila se
necessario. Assicurati sempre di vedere abbastanza bene per guidare in sicurezza la tua motocicletta.
AVVERTENZA! Se alcune parti cadono durante la guida, la vista potrebbe essere ostruita e ciò potrebbe causare
un incidente.
- Vericare che il sistema di ritenzione (sottogola) non sia danneggiato. Se è slacciato o strappato, sostituire il
casco.
- Vericare che l’imbottitura di conforto sia in posizione.
14. I CASCHI ATTENUANO I SUONI IMPORTANTI E RIDUCONO GLI AVVISI DI
CAMBIAMENTI AMBIENTALI
AVVERTENZA! Quando si utilizza un casco, soprattutto della tipologia integrale, in un certo
senso si è isolati dall'esterno. I cambiamenti climatici possono prenderti alla sprovvista: temporali
improvvisi, sbalzi di temperatura, entrata e uscita dai tunnel o le condizioni dei passi di montagna
possono causare umidità o mancanza di visibilità sulla visiera. Non guidare con la visiera appannata.
L'uso di un casco riduce la tua capacità di sentire il rumore del traco, soprattutto ad alta velocità.
Quando si utilizza un casco integrale, avere la visiera aperta o chiusa fa una grande dierenza. Per
una guida sicura, analizza come il livello di velocità e il tipo di casco possano inuenzare la percezione
delle condizioni stradali e se la visiera debba essere aperta o chiusa.
15. PARTI DI RICAMBIO
AVVERTENZA! L'uso di parti di ricambio non prodotte da KYT può aumentare il rischio di
lesioni gravi o morte in caso di incidente. Utilizzare solo parti KYT specicamente progettate per
funzionare con questo casco.
16. SOSTITUZIONE DEL CASCO
AVVERTENZA! Sebbene il tuo casco KYT sia costruito con i migliori materiali disponibili per
orire un prodotto di lunga durata, alla ne dovrà essere sostituito. Sostituisci immediatamente il
casco se:
- Ha subito un impatto. Il tuo casco è progettato per UN SOLO impatto. Un impatto può rompere
il guscio esterno o comprimere il rivestimento antiurto. Potrebbe non essere possibile rilevare
questo danno. Qualsiasi impatto in un incidente o in una caduta da un minimo di 1.2 mt è suciente
per danneggiare il tuo casco.
- Il guscio, la fodera o il sistema di ritenzione sono danneggiati. La calotta del casco, la calottina
interna che assorbe gli urti e il sistema di ritenzione devono essere in buone condizioni per orirti la
massima protezione.
Anche se il tuo casco non è stato danneggiato, deve essere sostituito ogni 3 o 5 anni a seconda di
quanto lo usi. Nel tempo, i raggi UV e l'invecchiamento di adesivi e componenti danneggeranno il
tuo casco. Indossare un casco danneggiato può aumentare il rischio di lesioni gravi o morte in un
incidente.
17. SMALTIMENTO DEL CASCO
AVVERTIMENTO! Se acquisti un nuovo casco, distruggi quello vecchio per assicurarti che
non possa essere riutilizzato. Non vendere o regalare il tuo vecchio casco, anche se non è stato
danneggiato. Nel tempo la schiuma protettiva nel
il casco si adatterà ai contorni della tua testa. Se qualcun altro usa questo casco, non fornirà loro la
stessa protezione.
18. GARANZIA
Con la presente KYT estende una garanzia limitata all'acquirente, un casco KYT è privo di difetti di
materiale e lavorazione.
19. COPERTURA
Questa garanzia è applicabile solo ai difetti del produttore e il periodo di garanzia no a 2 anni
dalla data di acquisto. Questa garanzia non si applica a problemi che derivano da un uso improprio,
negligenza, modiche, incidenti, ecc. Un cambio di colore uorescente non è soggetto a garanzia in
quanto questa è una caratteristica tipica del colore uorescente; potrebbe sbiadire o degradarsi a
seconda dell'ambiente, dell’uso o dai comportamenti dell'utente.
20. DISCLAIMER
Qualsiasi garanzia di commerciabilità e qualsiasi garanzia implicita viene espressamente esclusa.
Inoltre KYT non sarà responsabile per eventuali danni consequenziali.
21. PROCEDURA
Per ricevere la garanzia, si prega di portare il casco, la ricevuta con la data di acquisto e un breve
promemoria che include una descrizione del problema, il nome e il numero di telefono al rivenditore
KYT autorizzato da cui è stato acquistato il casco.

IT IT
10 11
FIGURA 1
SISTEMA DI RITENZIONE DOUBLE D-RING — Figura 1
Per allacciare il casco, far passare il nastro attraverso i due anelli (1), tirare l'estremità del nastro
(2) no a quando il cinturino non preme contro la mascella e fare clic sul bottone automatico anti-
scuotimento (3) in posizione come mostrato nella gura.
Vericare che il casco calzi bene (vedere il paragrafo “Scegliere il casco giusto” nel libretto
“Avvertenze di sicurezza”).
Per rimuovere il casco, sganciare il bottone automatico tirando l'estremità del nastro e allentare il
nastro, facendolo passare attraverso gli anelli, utilizzando la linguetta rossa come mostrato in gura.
N.B. I BOTTONI / VELCRO POSIZIONATI SUL SISTEMA DI RITENZIONE
NON SONO FISSAGGI MA SONO PRESENTI SOLO PER PREVENIRE LO
SCUOTIMENTO DEL CINTURINO: NON DEVONO ESSERE UTILIZZATI IN
ALTERNATIVA AL FISSAGGIO DELLA CINGHIA.
2 31
ISTRUZIONI D'USO
Q
E
S
T
V
U
W
Y
X
RG
F
PRESA D’ARIA FRONTALE MENTONIERA — E — Figura 2/3
Il usso di aria in ingresso nella parte frontale del casco (mentoniera) può essere regolato agendo
sulla parte centrale della presa d’aria:
- Figura 2: presa d’aria completamente chiusa.
- Figura 3: presa d’aria completamente aperta.
PRESE D’ARIA FRONTALI SUPERIORI —F — Figura 4/5
Il usso di aria in ingresso nella parte frontale superiore del casco può essere regolato facendo
scorrere il cursore presente sulle prese d’aria stesse:
- Figura 4: Far scorrere i cursori verso l’estremità anteriore, in tal modo le prese d’aria saranno
completamente chiuse.
- Figura 5: Far scorrere i cursori verso l’estremità posteriore, in tal modo le prese d’aria saranno
completamente aperte
FIGURA 2
E
FIGURA 3
E
FIGURA 5
F
FIGURA 4
F

IT IT
12 13
ESTRAZIONE PRESA D’ARIA POSTERIORE —G —Figura 6
L’innovativa presa aria posteriore è stata studiata per migliorare ulteriormente la ventilazione interna
del casco stesso sfruttando i ussi d’aria residui che grazie all’eetto Venturi sono in grado di gene-
rare una depressione nella parte sottostante della stessa garantendo così una notevole estrazione di
aria calda interna e il conseguente mantenimento di una confortevole temperatura.
IMBOTTITURA — H— I—J — K
Le imbottiture interne possono essere agevolmente rimosse per essere lavate o sostituite.
Imbottitura centrale interna: CALOTTINA — H— Figura 7/8
Rimozione e Montaggio
La calottina (H) è ssata al casco per mezzo di 2 bottoni automatici (I) e una linguetta
di ssaggio ( J)
Rimozione — Figura 7
Impugnare la parte posteriore della calotta (vicino alla nuca) e sganciare la linguetta di ssaggio
( J) spingendola e contemporaneamente ruotandola verso l’interno. Staccare i bottoni automatici
( I) e rimuovere la calottina interna (H). Porre molta attenzione nella rimozione, facendo leva
sulla parte rigida del bottone e tirando leggermente verso l’interno del casco senza rovinare
il bottone stesso.
Attenzione: per evitare di danneggiare il rivestimento interno, prima di estrarre la
calottina assicurarsi di aver sganciato i bottoni automatici.
Montaggio — Figura 8
Posizionare la calottina (H) all’interno del casco controllando il verso di montaggio.
1) Appoggiare la parte posteriore della calottina alla parte ssa del rivestimento interno avendo cura
che la linguetta di ssaggio (J) sia correttamente inserita nell’apposito alloggiamento (K).
G
FIGURA 6
FIGURA 8
FIGURA 7
H
I I
K
J
J
H

IT IT
14 15
Rimozione e Montaggio
Rimozione — Figura 10
Impugnare il guanciale (L) nella parte anteriore, spingerlo verso la parte posteriore del casco e
contemporaneamente ruotarlo verso l’interno no a sganciare i tre bottoni automatici.
Montaggio — Figura 11
Capovolgere il guanciale dalla posizione originaria. Inserire il gancio di ssaggio (M) nell’apposito
foro di aggancio di colore rosso (N). Appoggiare la parte posteriore del guanciale alla parte ssa del
rivestimento interno avendo cura che la linguetta di ssaggio (O) sia correttamente inserita nell’ap-
posito alloggiamento (P). Spingere il guanciale verso la parte interna del casco e agganciare i bottoni.
Controllare che il montaggio sia stato eseguito correttamente vericando:
> che il guanciale sia saldamente bloccato in posizione tramite i bottoni automatici
> che il cinturino sia completamente libero all’interno della fessura di passaggio e
FIGURA 10
L
FIGURA 11
M
O
P
N
2) Agganciare i bottoni automatici (I). Dopo il ssaggio controllare che la calottina aderisca corretta-
mente all’interno del casco (imbottitura in polistirolo).
Imbottiture laterali interne: GUANCIALI — L— Figura 9
L L
FIGURA 9
L L
non sia rimasto schiacciato sotto il guanciale durante il montaggio.
Solo il corretto bloccaggio del guanciale ed il corretto posizionamento del cinturino
assicurano che il sistema di ritenzione mantenga la sua ecacia.
Nel caso non si riesca a bloccare il guanciale correttamente astenersi dall’usare
il casco.
VISIERA — Q— R— S
La visiera deve essere periodicamente pulita e controllata.
La presenza di sporco e/o di gra profondi sulla supercie della visiera può essere causa di riessi
di luce anomali o aberrazioni che diminuiscono la sicurezza di guida. Sostituire immediatamente la
visiera nel caso si riscontrino tali difetti.
Azionamento — Figura 12
La visiera (Q) deve essere azionata agendo solo sulla leva di sollevamento (R). Evitare di azionarla
FIGURA 12
Q
Q
R
R
S

IT IT
16 17
3) Estrarre la visiera dal meccanismo ruotandola leggermente e contemporaneamente spingendola
verso l’esterno. Ripetere l’operazione sul lato opposto.
Montaggio — Figura 13-B
Per assicurare il miglior funzionamento del sistema di rotazione, prima di pro-
cedere al montaggio della visiera assicurarsi che tutti i particolari (sedi sul casco e
superci della visiera a contatto con le parti in movimento) siano perfettamente
pulite.
Posizionare la visiera come se fosse nella posizione di completa apertura. Posizionare la visiera sul
meccanismo in modo che la sede di rotazione coincida con l’anello di rotazione.
1) Far scorrere la leva (T);
2) Esercitare una leggera pressione in modo da fare aderire gli agganci presenti sulla visiera negli
appositi vani posti sul meccanismo di rotazione.
Ripetere l’operazione sul lato opposto.
A montaggio completato controllare che la visiera sia saldamente vincolata al casco, che ruoti
liberamente e che si blocchi correttamente nelle posizioni di fermo.
A
B
FIGURA 13 A-B
2
2
1
3
1
T
T
T
agendo sulle altre zone in modo da non causare danneggiamenti accidentali (gra) o sporcare il
campo visivo.
Apertura visiera: spingere la visiera leggermente verso l’esterno tramite la levetta di sollevamento
(R) per disimpegnare la linguetta di blocco dalla sede (S) ricavata sotto la guarnizione e sollevarla
verso l’alto.
Chiusura visiera: per bloccare la visiera in posizione di fermo abbassarla no a che la linguetta sia
bloccata all’interno della sede (S) ricavata sotto la guarnizione.
Sono previste due posizioni di blocco (visiera completamente aperta/chiusa) e quattro posizioni
intermedie. L’azionamento deve sempre essere completato no alle posizioni di blocco, avvertibili da
un leggero scatto a visiera correttamente bloccata. Per sbloccare la visiera dalle posizioni di fermo
è suciente, azionandola come sopra indicato, esercitare una leggera pressione nella fase iniziale del
movimento no allo sblocco dalla posizione di fermo.
Durante la guida la visiera non deve essere mai lasciata nelle posizioni intermedie;
deve essere sempre bloccata nelle posizioni di fermo.
Rimozione — Figura 13A
1) Sollevare la visiera no alla posizione di completa apertura.
2) Far scorrere completamente la leva (T). Mantenere in tensione la leva (T). Se queste condizioni non fossero vericate ed il meccanismo di rotazione della
visiera non funzionasse correttamente, astenersi dall’usare il casco e rivolgersi
esclusivamente a personale autorizzato.
Regolazione — Figura 14
Nel caso in cui, dopo la sostituzione o dopo un uso prolungato del casco, si vericassero inltrazi-
oni dai bordi della visiera in posizione completamente chiusa, potrebbe essere necessario eseguire
la regolazione del meccanismo di azionamento della visiera.
Sollevare la visiera no alla posizione di completa apertura.
FIGURA 14
U
W
V
Rimuovere la visiera, come specicato nel paragrafo precedente.
Allentare le tre viti (U - V - W) senza rimuoverle e senza smontare il meccanismo.
Traslare in orizzontale l’intero meccanismo e serrare nuovamente le viti.
Ripetere le operazioni sul lato opposto, traslando il meccanismo nella medesima direzione del
precedente. Al termine dell’operazione controllare che la visiera si chiuda e aderisca perfettamente
alla guarnizione.
MECCANISMO VISIERA
Rimozione
Dopo aver rimosso la visiera come indicato nei paragra precedenti, allentare e rimuovere le viti (U
- V - W); successivamente rimuovere il meccanismo dalla calotta.

IT IT
18 19
Montaggio
I meccanismi non sono intercambiabili. Prima di procedere è necessario identicare
il rispettivo lato di montaggio. Posizionare il meccanismo sulla calotta, inserire le viti e ed
avvitarle.paragraphs.
Dopo il montaggio controllare che i meccanismi siano posizionati correttamente e
ssati saldamente alla calotta. Procedere poi al montaggio della visiera ed alla sua
regolazione come specicato ai paragra precedenti.
A montaggio completato controllare che la visiera sia saldamente vincolata al casco, che ruoti
liberamente e che si blocchi correttamente nelle posizioni di fermo.
Se queste condizioni non fossero vericate ed il meccanismo di rotazione della
visiera non funzionasse correttamente, astenersi dall’usare il casco e rivolgersi
esclusivamente a personale autorizzato.
RIMOZIONE E MONTAGGIO VISIERA “RACING”
F
F

EN
21
IT
20
ITALIANO
ENGLISH
FRANÇAIS
ESPAÑOL
DEUTSCH
PARANASO
Rimozione — Figura 15
Il paranaso è inserito a scatto tra la calotta ed il rivestimento interno della mentoniera; per rimu-
overlo è suciente tirare verso l’alto.
Montaggio — Figura 16
Posizionare il paranaso centrandolo sull’apertura visiera, inserendo le linguette tra la calotta ed il
rivestimento mentoniera.
Premere energicamente sul paranaso in corrispondenza delle linguette no a che il bordo inferiore
del paranaso sia completamente aderente al bordo della calotta.
Se queste condizioni non fossero vericate e il paranaso non fosse aderente al bordo calotta o
comunque posizionato non correttamente, astenersi dall’usare il casco e rivolgersi esclusivamente a
personale autorizzato.
FIGURA 15
FIGURA 16

EN EN
22 23
- A -
- B -
THANK YOU FOR CHOOSING KYT
WARNING! For your safety, it is important that you completely read the owner’s
manual and all warning labels.
Read this instruction carefully before using your helmet. This manual is very important for your
safety and for your helmet life. Helmets have been conceived, designed and manufactured using the
most advanced technologies for motorbike rider’s maximum safety, Helmets have been created for
motorcycle use only and cannot guarantee suitable protection if used for other purposes or sports.
In case of an accident, especially with strong impacts, a helmet will not avoid all risks of fatal injuries.
Do not expose your helmet to intense light sources especially if the color is uo as yellow, orange,
red or green because the resistance to the light for this kind of color is very low and it may fade.
Helmet is in compliance with the standards valid in the country of purchase
INFORMATIONS FOR USERS
A. No Helmet can protect the user against any type of crash. Certainly the protection capacity
of the helmet is not endless, some crashes may generate such high stress that even the energy
absorbed by the helmet is not enough to protect the user from injuries. No helmet, even top quality
helmets, can protect the head against any kind of impacts.
B. The helmet is designed to be worn with retention straps securely fasten. Do not wear scarves
or neck guards which could make the strap slide and let the helmet fall o in case of a crash.
C. Do not stick or glue any element if not recommended by the producer.
D. Do not cut or punch the shell.
E. The function of the helmet is to reduce the stress from user’s head in case of a crash; this
happens through a partial destruction and/or deformation of its components (mostly external shell
and internal polystyrene). In this way, part of the energy generated by the impact, is absorbed by
the helmet components in order to reduce vibrations and stress from the user’s head, eliminating or
limiting the possibility of injures.
F. Inner liner is essential to assure the best helmet functionality. The integrity of the shell and of
the inner are essential to ensure the maximum performance in terms of safety.
G. The helmet may be damaged by using paints, stickers, petrol or cleaning products even if the
damage is not visible.
H. Do not use a helmet that suered severe blows even though the damage is not readily visible; if
the helmet is damaged it must be replaced.
I. NZ-RACE is not designed to be used with earphones and/or similar devices.
SAFETY WARNING!
1. READ THIS INSTRUCTION CAREFULLY AND
STRICTLY OBSERVE IT BEFORE USING YOUR
NEW HELMET
This helmet has been conceived and manufactured to
protect your head in case of shock thanks to the shock
absorption ability of the dierent materials used.
2. NEVER USE AGAIN A HELMET THAT HAS
SUFFERED A SHOCK
A helmet that has suered a shock must not be used
anymore. Sometimes damages are not visible from the
outside however the internal materials may be damaged. The
helmet is designed for shock absorption by alteration and
partial destruction of some parts: in case of further shock it
won’t be able to protect you with the maximum safety.
WARNING! Never buy a used helmet or borrow
someone else’s helmet. Over time the protective foam in
helmets will adjust to the contours of a user’s head. A used
or borrowed helmet may not oer as much protection as
a new helmet.
3. PROPER WEARING
WARNING! Carefully select the size of your helmet as it
is very important for your safety. Ask for your authorized
dealer’s advice when choosing your helmet suitable size.
In order to check your helmet proper size follow the
instruction below. Never use a helmet that is too small or
too big for your head.
WARNING! Wearing the wrong size helmet can increase
your risk of serious injury or death in an accident. A helmet
that is too large for your head may be dislodged or knocked
o in an accident.
4. HOW TO CHECK YOUR SIZE
A safe helmet should close-t your head. To check the
size wear your helmet and shake your head left/right and
forward/back. Try to move it with your hands. lf it slips
it means it is too big. Therefore try a smaller size. lf the
pressure on your head bothers or hurts you, try a bigger
size. You must carry out the “ROLL-OFF TEST”: Fasten your
helmet, Hold onto the chin strap with one hand and using
the other one try to take it o by strongly pulling from the
back. lf the helmet comes o, the size is not correct, Check
that you can turn your head freely and that your side view is
not limited. Check if you can breathe freely and that nothing
obstructs the air owing inside the helmet.
WARNING! If the helmet comes o or shifts over your
eyes, try another size or another model or brand. You must
be able to see the edge in your upper eld of vision.

EN EN
24 25
FIGURE - A
FIGURE - B
FIGURE - C
5. POSITIONING
Always wear it in the proper position (gure A). Do not fasten your helmet if you have
positioned it too much backward (gure B) or forward (gure C).
6. VISOR
To clean your visor use warm water (use demineralized water if available) and neutral soap.
Avoid using water containing too much chlorine. Do not use alcohol, gasoline or other solvents
or window cleaning products which could contain alcohol. Remove the visor before cleaning
the internal of the helmet. Place it back only when the cleaning products are completely
evaporated
WARNING. For safety visibility - especially at night - immediately replace a scratched visor. Use
colored visors only during the day. Darker visors are not homologated and are intended for race
track use only.
Do not stick any adhesives or adhesive tape to the screen since this would weaken its protection.
This can damage the screen. Do not drive with a fogged up screen. Bad vision can provoke an
accident, causing severe injuries or even death.
7. CLEANING AND MAINTENANCE
Clean your helmet with lukewarm water only (never use hot water) and few drops of neutral soap
or use the special HELMET CLEANING PRODUCTS. Let the helmet dry at ambient temperature,
do not expose to heat sources and never use a blow drier to dry it.
- Shell Cleaning
WARNING! Only use approved methods to clean the helmet. Using other
unapproved chemicals or methods may damage the helmet shell or lining. A
damaged helmet may increase your risk of serious injury or death in an accident.
Glossy Finish : KYT recommends cleaning your helmet with products designed for automotive
cleaning and polishing. All KYT Helmets are nished with an automotive type base coat/clear coat
nish. Rubbing compounds can be used for deep cleaning to remove many scratches and scus.
Follow the product’s instructions diligently. Over polishing with rubbing compounds can cause light
abrasions which may dull the nish of your helmet. Stickers and decals will leave adhesive residue
when removed. To remove the adhesive residue, use alcohol swabs. Be certain to immediately wipe
away the excess liquid and clean the area with soap and water once the adhesive residue is removed.
Do not use excessive pressure while rubbing when attempting to remove the adhesive residue, use
multiple light treatments instead.
Non Glossy Finish : For non Glossy Finish helmets, we recommend using warm water and mild soap.
Use multiple treatments for heavier dirt. Do not use excessive pressure or rubbing compounds
while cleaning the surface as a “glossy” eect could be created. Running the Non glossy nish
appereance.
1. Please clean helmets from dust, bugs or grass within one day.
Cleaning progress :
1) Clean the helmet with warm water and cloth.
2) If there are any remains left, dry the helmet and remove any remaining contamination with rubber
eraser.
Do not use alcohol or thinner to clean the helmet because they may damage the paint.
2. Avoid oil contamination as it is extremely dicult to clean once exposed.
- Interior Cleaning
Although we recommend changing a helmet every 3 to 5 years, the accumulation of sweat, humidity
and dirt can deteriorate the fabric and stitching and this may cause odor. To wash KYT removable
pads, hand washing is recommended. KYT does not recommend using spin dryer for the interior
pads as it may damage the material. For non removable interiors, KYT recommends using anti
bacteria and mildew eliminating products such as “Helmet Fresh.” Or other similar product.
- Vent Cleaning
Dirt and debris can nd its way into venting of your KYT helmet. Compressed air cans used for
cleaning computer keyboards may be used to blow the debris from the ventilation system. It is
recommended that you remove any removeable pads before doing this process.
- Shield Cleaning
The helmet shield is made of polycarbonate materials with a polyurethane abrasion resistance
coating. It should be cleaned using mild soap and warm water. Never use hot water, salt water,
benzene, thinner, gasoline or any other harsh agents. Additionally the use of commercial shield
cleaners is not recommended because they may aect the quality of the shield material. Treat
carefully when cleaning the shield to preserve the abrasion resistant coating. When deep scrathes
are visible, it is highly recommended that the helmet shield be replaced. Tinted shield are for “Day
time use only” and are not suitable for use at night or in conditions of poor visibility.
8. DO NOT MODIFY YOUR HELMET IN ANY WAY
Never try to tamper your helmet. Do not cut or drill the shell of your helmet. Do not insert screws.
Do not paint it. Do not modify the chin strap. Do not remove rubber base trim or the rubber
window trim, it could be very dangerous in case of an accident. Do not modify the comfort padding
by cutting or removing the polystyrene as this would greatly reduce the helmet shock absorption
capacity. Use only original spare part.
Modifying your helmet may increase your risk of serious injury or death in an accident.

EN EN
26 27
14. HELMETS SOFTEN IMPORTANT SOUNDS AND REDUCE WARNINGS OF
ENVIRONMENTAL CHANGES
WARNING! When using a helmet, especially of the integral variety, in a way, you are isolated
from the exterior. Climatic changes may catch you o guard: sudden storms, temperature changes
while entering and exiting tunnels or going through mountain passes may cause humidity or lack of
visibility on your screen. Do not drive with a fogged up screen.
Using a helmet reduces your ability to hear the sound of trac, especially at high speed. When
using an integral helmet, having the screen opened or closed makes a big dierence. For safe driving,
analyze how the level of speed and the type of helmet aect the perception of the road conditions
and whether the screen has to be opened or closed.
15. REPLACEMENT PARTS
WARNING! Use of replacement parts not manufactured by KYT may increase your risk of serious
injury or death in an accident. Only use KYT parts that are specically designed to work with this
helmet.
16. HELMET REPLACEMENT
WARNING! Although your KYT helmet is constructed with the best materials available to oer a
long lasting product, it will eventually need to be replaced. Immediately replace your helmet if :
- It has suered an impact. Your helmet is only designed for ONE impact. An impact may fracture
the outer shell or compress the impact absorbing liner. You may not be able to detect this damage.
Any impact in a crash or a drop from as low as 4 feet is enough to damage your helmet.
- The shell, lining, or retention system is damaged. The helmet shell, the impact absorbing lining, and
the retention system must be in good condition to provide you with the most protection.
Even if your helmet has not been damaged, it needs to be replaced every 3 to 5 years depending
on how much you use it. Over time, UV rays and adhesive and component aging will damage your
helmet. Wearing a damaged helmet may increase your risk of serious injury or death in an accident.
17. HELMET DISPOSAL
WARNING! If you buy a new helmet, destroy the old one to ensure it cannot be reused. Do not
sell or give away your old helmet, even if it has not been damaged. Over time the protective foam
in the helmet will adjust to the contours of your head. If someone else uses this helmet it will not
provide them with as much protection.
18. WARRANTY
KYT hereby extends a limited warranty to the purchaser of a KYT helmet that the helmet is free of
defects in material and workmanship.
19. COVERAGE
This warranty is applicable to manufacturer’s defects only and the warranty period up to 2 years
from the date of purchase. This warranty does not apply to any problems that arise from wearer’s
missuse, neglience, modications, accidents, etc. A change of uorescent color is not subject to
warranty as this is a typical characteristic of uorescent color; it may fade or degrade depending on
the user’s environment.
20. DISCLAIMER
Any warranty of merchantability and any implied warranty are hereby expressly disclaimed. In
addition KYT shall not be liable for any consequential damages.
21. PROCEDURE
In order to received warranty, please take your helmet, your receipt showing the date of purchase,
and a brief memo that includes a description of the problem, your name, and phone number to the
authorized KYT Dealer from which you purchased your helmet.
9 USE YOUR HELMET CAREFULLY, DO NOT
HANG IT TO YOUR MOTORCYCLE WHILE
DRIVING
Although your helmet is very strong it must always be
handled with care. Impacts to solid or rough objects may
damage the paint coating or, even worse, may reduce
the helmet safety. Never ride with your helmet hanging
down from your motorcycle as it would damage the
paint coating, the visor and the chin strap. Always keep it
away from muer, exhaust gases and heat sources. In hot
weather when you are not riding always protect it from
sunlight, especially if the color of the helmet is dark.
10. KEEP YOUR HELMET OUT OF THE REACH
OF PETS
Make sure to keep your pets away from the helmet and
its liners. The damage could be irreparable.
11. STORE YOUR HELMET IN A SAFE PLACE
Do not keep your helmet on the rearview mirror or
handlebar to avoid damages to the comfort padding.
WARNING! An improperly stored helmet can become
damaged and may increase your risk of serious injury or
death in an accident. You should :
- Store helmet in a cool and dry place,
- Keep helmet away from pets and other animals,
- Keep helmet away from heat in excess of 122°F (50°C)
and do not set on or near hot surfaces,
- When helmets left out in the sun for extended periods
of time, it may fade overtime.
12. DO NOT EXPOSE YOUR HELMET TO
SOLVENTS
Never keep your helmet on the fuel tank for too long
as the exhausting gasoline fumes may damage it. Never
expose your helmet to solvents such as gasoline or any
other type of fuel in order to avoid damages to the visor,
small plastic parts and comfort padding.
13. INSPECT YOUR HELMET
To ensure that your helmet is in the best condition to maximize your protection, always inspect your
helmet for damage before riding :
- Check the shield and shield ratchet : retighten shield ratchet screws if neccessary. Be sure not to
over tighten any screws. Plastic base plate screws can break and plastic screws can strip the screw
sleeves if over tighten.
- Check for the helmet damage : if your helmet is damaged or cracked, stop using it immediately.
Follow the instruction in section (15). if your helmet has been dropped, you may not be able to see
the damage.
- Check for worn or damaged parts : plastic components may wear out over time. If you nd worn
or damaged parts, replace them or purchase a new helmet. Follow the instruction in section (14).
- Check your face shield : If your face shield is scratched or damaged it may reduce the visibility,
replace if neccessary. Always make sure you can see well enough to safely operate your motorcycle.
WARNING! If parts fall o while riding, your vision may be blocked which could cause an accident.
- Check the retention system (chinstrap) for damage. If it is frayed or ripped, replace the helmet.
- Check that the crown pad is in place.

EN EN
28 29
USER'S INSTRUCTIONS
FIGURE 1
DOUBLE D-RING RETENTION SYSTEM — Figure 1
Insert the free end of the strap into the rings. Pull until the strap ts tightly around the jaw.
After doing this, it should be impossible to slide out the helmet; verify that, by taking it from the
back edge and rotating it towards the front, the helmet cannot be removed and that it remains
well xed on your head.
If the helmet tends to come o or it moves freely on the head, pull the strap tight until the right
pressure is reached and repeat test.
If after repeating the test you are not able to eciently tighten the retention system, do not use
the helmet.
Only after the strap has been adjusted tightly, x the end part of the strap by fastening it with the
press stud on the tongue. (gure 1A).
The only function of the press stud tted on the chin strap is to avoid uttering of the end part
while riding. The fact the press stud is fastened is no guarantee that the helmet has been positioned
and closed correctly: the correct fastening of the strap must be veried exclusively through the
operations described in the previous paragraphs. To release the retention system, unfasten the press
stud and pull the tongue to loosen the closure. Slide out the end part of the strap from the "Double
D- Rings". Use the unlocking tongue only to remove the helmet! Never unlock while
riding. If the retention system does not work correctly, do not use the helmet and
contact Suomy authorized personnel only.
2 31
Q
E
S
T
V
U
W
Y
X
RG
F
FRONT AIR INTAKE CHIN — E — Figure 2/3
The ow of incoming air in the front part of the helmet (chin) may be regulated by adjusting on the
middle part of the air intake:
- Figure 2: air intake closed.
- Figure 3: air intake fully open.
FIGURE 2
E
FIGURE 3
E
FRONT AIR INTAKE UPPER — F — Figure 4/5
The ow of incoming air in the upper front part of the helmet may be regulated by sliding the
cursor on the air intake:
- Figure 4: Slide the cursors forwards to completely close the air intake
- Figure 5: Slide the cursors backwards to completely open the air intake
FIGURE 5
F
FIGURE 4
F

EN EN
30 31
REAR AIR VENTS — G—Figure 6
The innovative rear air intake has been designed to further improve ventilation inside the helmet,
using residual air ows that, thanks to the Venturi eect, are able to generate a depression in the
lower part of the helmet, in order to ensure a substantial extraction of the hot air inside it,
consequently maintaining a comfortable temperature.
PADDING —H—I—J—K
The inner padding can be easily removed to be washed or replaced.
Inner central padding: INNER SHELL — H— Figure 7/8
Assembly and disassembly
The inner shell (H) is xed to the helmet through two press studs (I) and a securing tab (J)
Removing the inner padding — Figure 7
Grab the back of the shell (near the nape), release the securing tab (J) by pushing it and, at the same
time, rotate inwards. Snap to open the press studs (I) and remove the inner shell (H). Be very care-
ful when removing the shell. Press on the rigid part of the stud and pull slightly inwards the inside of
the helmet without damaging the press stud.
Caution: to avoid damages to the inner lining, before removing the inner shell make
sure that all the press studs have been unhooked.
Assembly — Figure 8
Insert the inner shell (E) inside the helmet, check the assembly direction rst.
1) Put the back part of the inner shell on the xed part of the inner liner checking that the security
tab (j) is correctly inserted in its seat (K)
2) Fasten the press studs (I). After xing the inner shell, make sure the shell is correctly positioned
inside the helmet (polystyrene padding).
FIGURE 6
G
FIGURE 8
FIGURE 7
H
I I
K
J
J
H

EN EN
32 33
Assembly — Figure 11
Turn upside down the cheek pads from the original position.
Insert the xing hook (M) in the red hooking hole (N). Put the back part of the cheek pad on the
xed part of the inner lining. Verify that the fastening strap (O) is correctly inserted in the appropri-
ate seat (P). Push the cheek pad to the back part of the helmet and hook the press studs.
Verify that the part was assembled correctly by checking that:
- the cheek pad is rmly locked in position
- the strap is completely free inside the hole and is not blocked under the cheek
pad during assembly.
Only the correct assembly of the cheek pad and the correct positioning of the strap
will assure the proper ecacy of the retention system. During use, the locking
lever must always be xed in lock position; if it cannot be locked correctly do not
FIGURE 10
L
FIGURE 11
M
O
P
N
Inner side padding: CHEEK PADS —L— Figure 9
Assembly and disassembly
Removing the pads — Figure 10
Grab the cheek pad (L) from the front part, push it to the back part of the helmet and then rotate
inwards until all the press studs are unhooked.
L L
FIGURE 9
L L
use the helmet.
VISOR —Q —R —S
The visor must be periodically cleaned and controlled. If the visor is dirty and/or has bad scratches
on the surface there could be unusual light reections or deviations, which may jeopardize safety.
Immediately replace the visor if there are these problems.
How to operate — Figure 12
The Visor (Q) has to be operated only by using the lifting lever (R). Do not open it using other
areas to avoid causing accidental damages (scratches) or dirtying the eld of vision.
Opening the visor: push lightly the lifting lever outwards (R), to unlock the tab from its seat (S)
under the gasket and lift it up.
FIGURE 12
Q
Q
R
R
S

EN EN
34 35
Open the visor completely. Position the visor on the mechanism so that the rotation seat is
inserted in the rotation ring.
1) Slide the lever (T)
2) Press slightly to stick the hooks on the visor into the slots on the rotation mechanisms
Repeat the operation on the opposite side.
After tting the mechanism verify that the visor is tightly xed to the helmet, that it rotates freely
and that it locks correctly into the locking positions.
If this doesn’t happen and the rotation mechanism of the visor doesn’t work cor-
rectly, do not use the helmet and contact authorized personnel only.
Adjustment — Figure 14
After replacing the part, or after long use of the helmet you experience inltration from the closed
visor, it may be necessary to adjust the mechanisms of the visor.
Lift the visor until it is completely open.
A
B
FIGURE 13 A-B
2
2
1
3
1
T
T
T
Closing the visor: to lock the visor in position, lower it until the tab is blocked inside its seat (S) in
the gasket.
There are two locking positions: intermediate and visor completely open.
The visor must be opened or closed completely up to the lock position. The visor is correctly
locked into position when it clicks into its seat. To unlock the visor from the lock position just
follow the above procedure, lightly press during initial phase of the movement until the visor is
unlocked.
While riding the motorcycle the visor must never be left in the intermediate posi-
tions; it must always be locked in the locking positions.
Removing the visor — Figure 13A
1) Open the visor until it is completely open.
2) Slide the lever (T) and Keep it in tension (T)
3) Remove the visor from its mechanism by rotating and at the same time pull it outwards. Repeat
the operation on the opposite side.
Assembly — Figure 13-B
To assure the proper operation of the rotation system of the visor, before tting
the visor back on, verify that all the parts (seats on helmet, visor surface in contact
with the moving parts) are perfectly clean.
Remove the visor, as specied in the previous paragraph.
Loosen the screws (U - V - W) without removing them and without disassembling the mechanism.
Shift horizontally the whole mechanism and tighten the screws.
Repeat the operations on the opposite side by shifting the mechanism on the same direction of the
previous one.
Once nished, check if the visor can be easily closed and if it adheres to the gasket
VISOR MECHANISM
Removing the mechanism
After removing the visor as indicated in the paragraphs above, loosen and remove the screws
FIGURE 14
U
W
V
(U - V - W); then remove the mechanism from the shell.
Fitting the mechanism
The mechanisms are not interchangeable. Before proceeding it is necessary to
identify the correct assembly side. Put the mechanism on the shell, insert the screws
tightening them.
After tting the parts, verify that the mechanisms are positioned correctly and
tightly xed to the shell. Then t the visor and adjust it as specied in the above
paragraphs.
After tting the mechanism verify that the visor is tightly xed to the helmet, that it rotates freely
and that it locks correctly into the locking positions.
If this doesn’t happen and the rotation mechanism of the visor doesn’t work
correctly, do not use the helmet and contact authorized personnel only.

EN EN
36 37
REMOVAL AND ASSEMBLY OF “RACING” VISOR
F
F

FR
39
EN
38
ITALIANO
ENGLISH
FRANÇAIS
ESPAÑOL
DEUTSCH
NOSE GUARD
Removal — Figure 15
The nose cover is snapped into place between the cap and the inner lining of the chin guard. To
remove it, all you have to do is pull it upwards.
Assembly — Figure 16
Place the nose cover in the middle of the visor’s opening, inserting the tabs between the cap and
the chin guard. Press with force on the nose cover where the tabs are located until the lower edge
of the nose cover is fully adherent to the edge of the cap.
If this doesn’t happen and the nose guard does not adhere to the edge of the shell or is not posi-
tioned correctly, do not use the helmet and contact authorized personnel only.
FIGURE 15
FIGURE 16
Table of contents
Languages:
Other KYT Motorcycle Accessories manuals