La Marzocco vulcano swift User manual

instruction manual
Contents
1. Foreword page 2
2. Dimensions page 2
3. Packaging page 2
4. Disposal page 2
5. General description page 3
6. Use page 4
7. nstallation and wiring page 4
8. Operation of the appliance page 5
9. Warnings regarding operation page 8
10. Safety devices page 8
11. Warnings regarding safety page 9
12. Noise levels page 10
13. Maintenance page 10
14. Cleaning the appliance page 11
1
EN
La Marzocco S.r.l.
Via La Torre 14/H
Località La Torre
50038 Scarperia e San Piero
(Firenze) – TAL A
www.lamarzocco.com
info@lamarzocco.com
T: +39 055 849 191
F: +39 055 849 1990
vulcano swift

1. Foreword
Read this manual from cover to cover
before using the appliance as it contains
important instructions for the safety, oper-
ation and maintenance of the appliance.
Look after this manual and keep it in a
safe place.
The manufacturer reserves the right to
make changes to the product and to the
manual.
2. Dimensions
VULCANO SW FT
GR NDER-DOSER
3. Packaging
On opening the packaging, check care-
fully to make sure the appliance is
intact and that there are no signs of
damage. f in any doubt, do not use the
unit and contact personnel with the
appropriate professional skills.
The packaging materials must be kept
out of the reach of children as they
represent a potential source of danger.
Keep the packaging until the warranty
has expired.
4. Disposal
Do not litter: dispose of the packaging
materials according to the laws in force.
Should you decide not to use the appli-
ance any more, remember to unplug it
so that it cannot be used, and then cut
the cable in the point where it comes
out of the appliance.
Contact specialized firms for information
on the disposal of the components of
the appliance.
2
EN

NFORMAT ON FOR USERS RES D NG N THE
EUROPEAN UN ON
n accordance with art. 13 of
Legislative Pursuant to art. 26 of
Legislative Decree of March 14, 2014,
no. 49: " mplementation of Directive
2012/19/EU on Waste Electrical and
Electronic Equipment (WEEE)."
The crossed bin symbol shown
here and on the equipment or its
box indicates that, at the end of
its useful life, the product (EEE)
must be collected separately from other
waste, with prohibition of disposal with
mixed waste.
For more information, contact
La
Marzocco s.r.l.
5. General description
HOPPER COVER
HOPPER
TAMPER (coffee bean container)
LOCK NG SL DE M CROSW TCH F X NG P NS
M CROSW TCH
TAMPER W NDOW SETT NG D SK
HOPPER F X NG P NS
CAP FOR CLEAN NG HOLE GR ND NG ADJUSTMENT LEVEL START PUSH BUTTON
SER AL NUMBER LABEL
SW TCH
DR P TRAY
3
EN

6. Use
This appliance has been designed
SOLELY for grinding coffee beans. Any
other use is understood to be improper,
and consequently hazardous. The manu-
facturer cannot be held responsible for
any damage as a result of improper or
incorrect use.
Do not use the appliance for grinding
other types of food, or anything else.
THE GR NDER-DOSERS MANUFAC-
TURED BY OUR COMPANY ARE
NTENDED FOR SK LLED PERSONNEL
ONLY FOR PROFESS ONAL USE AND
NOT FOR HOUSEHOLD USE. The user
must be an adult.
Do not allow children or incapable
persons to use the appliance.
This appliance is intended for use at
maximum altitudes of 2000 m.
7. nstallation and wiring
The appliance must be installed by
skilled technical personnel in conformity
with the safety rules in force. ncorrect
installation may result in injury of
persons or animals, or damage to prop-
erty, for which the manufacturer cannot
be held responsible.
•
The appliance must be placed on a
stable, flat surface (we recommend to
install the appliance at an height
between 80 and 100 cm from the
floor).
•
Before plugging in the appliance, make
sure the voltage and frequency values
of the supply mains correspond to the
ratings indicated on the label featuring
the appliance’s technical data.
•
The wall socket must be fitted with an
efficient earth contact. Consequently,
it is essential to make sure the earth
system is efficient and in conformity
with current safety rules. f in any
doubt, have the system thoroughly
checked by personnel with the appro-
priate professional skills.
T S COMPULSORY TO EARTH THE
APPL ANCE.
The manufacturer cannot be held
responsible in the event this regulation
is not complied with.
•
t is essential to make sure the ratings
of the system are suitable for the
power absorbed by the appliance - as
indicated on the label featuring the
technical data - and that the wall
socket is protected against overcur-
rents.
•
Do not use extension cables, plug
adapters for multiple sockets or make-
shift connections.
•
n EEC member countries, the regula-
tion in force calls for the external equi-
potential terminal on the outer part
of the appliance’s base plate to be
connected to a equipotential node if
the installation is to be correct.
•
The appliance is suitable for indoor use
only. Do not use the appliance outdoor.
•
Thoroughly clean the appliance at the
first installation; follow the instructions
in chapter 9 and 14.
•
Do not install the appliance near to
water dispenser or similar product that
could throw water jet on the appliance.
4
EN

8. Operation of the appliance
PREL M NAR ES
HOPPER
HOPPER
F X NG P N
OPEN
Make sure the hopper is positioned
correctly on the appliance and fixed to
the casing with relevant pins.
Close the locking slide and fill the
hopper with coffee beans. Open the
locking slide so that the beans are
allowed to drop into the grinding system.
SW TCH NG THE APPL ANCE ON AND OFF
START PUSH BUTTON
n order to power up the appliance, turn
the on-off switch knob to .
Engage the filter holder directly to the
appliance (apply only a light amount of
torque; if the grinder shifts on the
counter top, you are using too much
force).
Once the filter holder is engaged, start
the grinding in this way: push the start
button to grind, dispense and tamper a
double dose.
The red indicator lights located above
the start button is illuminated when the
appliance is grinding and tamping.
When the volume of ground coffee in
the filter holder reaches the set level,
the grinding motor turns off. The
tamping motor continues to run for a
few seconds, “polishing” the tamped
coffee.
Once the red light is no longer illumin-
ated, you may remove the filter holder
from the grinder and engage it into the
espresso machine.
f when you push the start button the
red indicator lights will flash, is occur-
ring at least one of the following condi-
tions:
•
You attempted to start the process with
a full filter holder.
•
The safety timer has run out due to an
empty bean hopper, a closed locking
slide, or a plugged bean hopper chute.
•
There is no filter holder engaged in the
appliance.
5
EN

ADJUST NG GR ND NG
FINER
GRINDING
COARSER
GRINDING
n order to achieve finer or coarser
grinding, move the grinding adjustment
level. To increase the coarseness of the
ground coffee, the adjustment level
must be rotated clockwise; to increase
the fineness, turn the level anticlock-
wise.
The adjustment level remains in the
chosen position without having to be
locked in place. The adjustment must
be performed with the motor on, and
preferably without any coffee between
the grinding blades. Grind small
amounts of coffee in order to determine
the optimal degree of fineness.
Before checking the fineness of the
ground coffee, grind some doses of
coffee to fill the duct between the
grinding area and the outlet.
This operation must be done whenever
the grinding setting has been changed
in order to empty the duct of the
previous ground coffee. The change of
the grinding setting might vary the
weight of the doses. Therefore adjust the
doses only after the grinding setting.
n case the range of grinding adjustment
is not enough, to get the requested
grinding set, please proceed as the
following:
•
close the locking slide and switch the
grinder off;
•
unscrew the check pins of the coffee
bean hopper and remove it;
•
remove the screws which fix the
grinding adjustment level into the
grinding adjustment disk and remove
the level;
•
fit back the level and put the holes in
line with the ones of the adjustment
disk so to allow a wider grinding
adjustment;
•
tighten the screws of the level into the
adjustment disk;
•
put the hopper back;
•
only after having secured the hopper
into the grinder cabinet by tightening
the pins, open the locking slide and
proceed with the grinding adjustment.
HOPPER
LEVEL F X NG SCREW
GR ND NG ADJUSTMENT LEVEL
GR ND NG ADJUSTMENT D SK
f the coffee comes out of the espresso
coffee machine very quickly, it means
the coffee is ground too coarse. Vice
versa, if it comes out too slowly, it
means the coffee is ground too fine.
Nonetheless, bear in mind that there are
many conditions liable to influence the
correct supply, such as the weight of the
portions, the compacting, the espresso
machine settings, and the cleaning of
the filters.
6
EN

COFFEE DOSE ADJUSTMENT
The coffee dose adjustment must be
done solely by skilled technical
personnel only after disconnecting the
appliance from the power supply by
unplugging.
SET SCREW
COLLAR
MPELLER
t is possible to change the dosage
quantity by raising or lowering the
height of the impeller.
Proceed as following:
•
remove the tamper window by
loosening the screws;
•
loosen the set screw in the collar of the
tamper shaft coupling.
•
holding the tamper shaft coupling in
place, rotate the impeller in the direc-
tion desired. To increase the dosage
amount, turn the impeller clockwise,
as viewed from below. To decrease the
dosage amount, turn the impeller
counter-clockwise, as viewed from
below. Approximately, one 360° turn is
equivalent to 1 gram of coffee.
•
ensure that the set screw is against the
flat side of the tamper shaft. Re-
tighten the set screw in the collar of
the tamper shaft coupling.
Before reconnecting the appliance to the
power supply, fix the tamper window in
correct position by relevant screws.
•
F NE DOSE ADJUSTMENT
This type of adjustment can be made by
user
Finer adjustment of the dose can be
given by moving the full limit
microswitch. Loosen the microswitch
locking pin. Change the height of the
full limit microswitch by rotating the
setting disk, turning to the left to
increase the dose and to the right to
decrease it; once obtained the optimal
position (indicated by the flat face on
the disk), tighten the locking pin.
M CROSW TCH
LOCK NG P N
M CROSW TCH
SETT NG D SK
7
EN

9. Warnings regarding operation
•
Do not leave the appliances turned ON
without coffee in the hopper.
•
Do not insert, when filling the hopper
with coffee beans, foreign objects.
Handle with clean hands.
•
After any hopper filling and in normal
use of the appliance, the hopper lid
must be positioned correctly.
•
For an optimal functioning of the
appliance a room temperature range
from 15°C to 35°C is suggested.
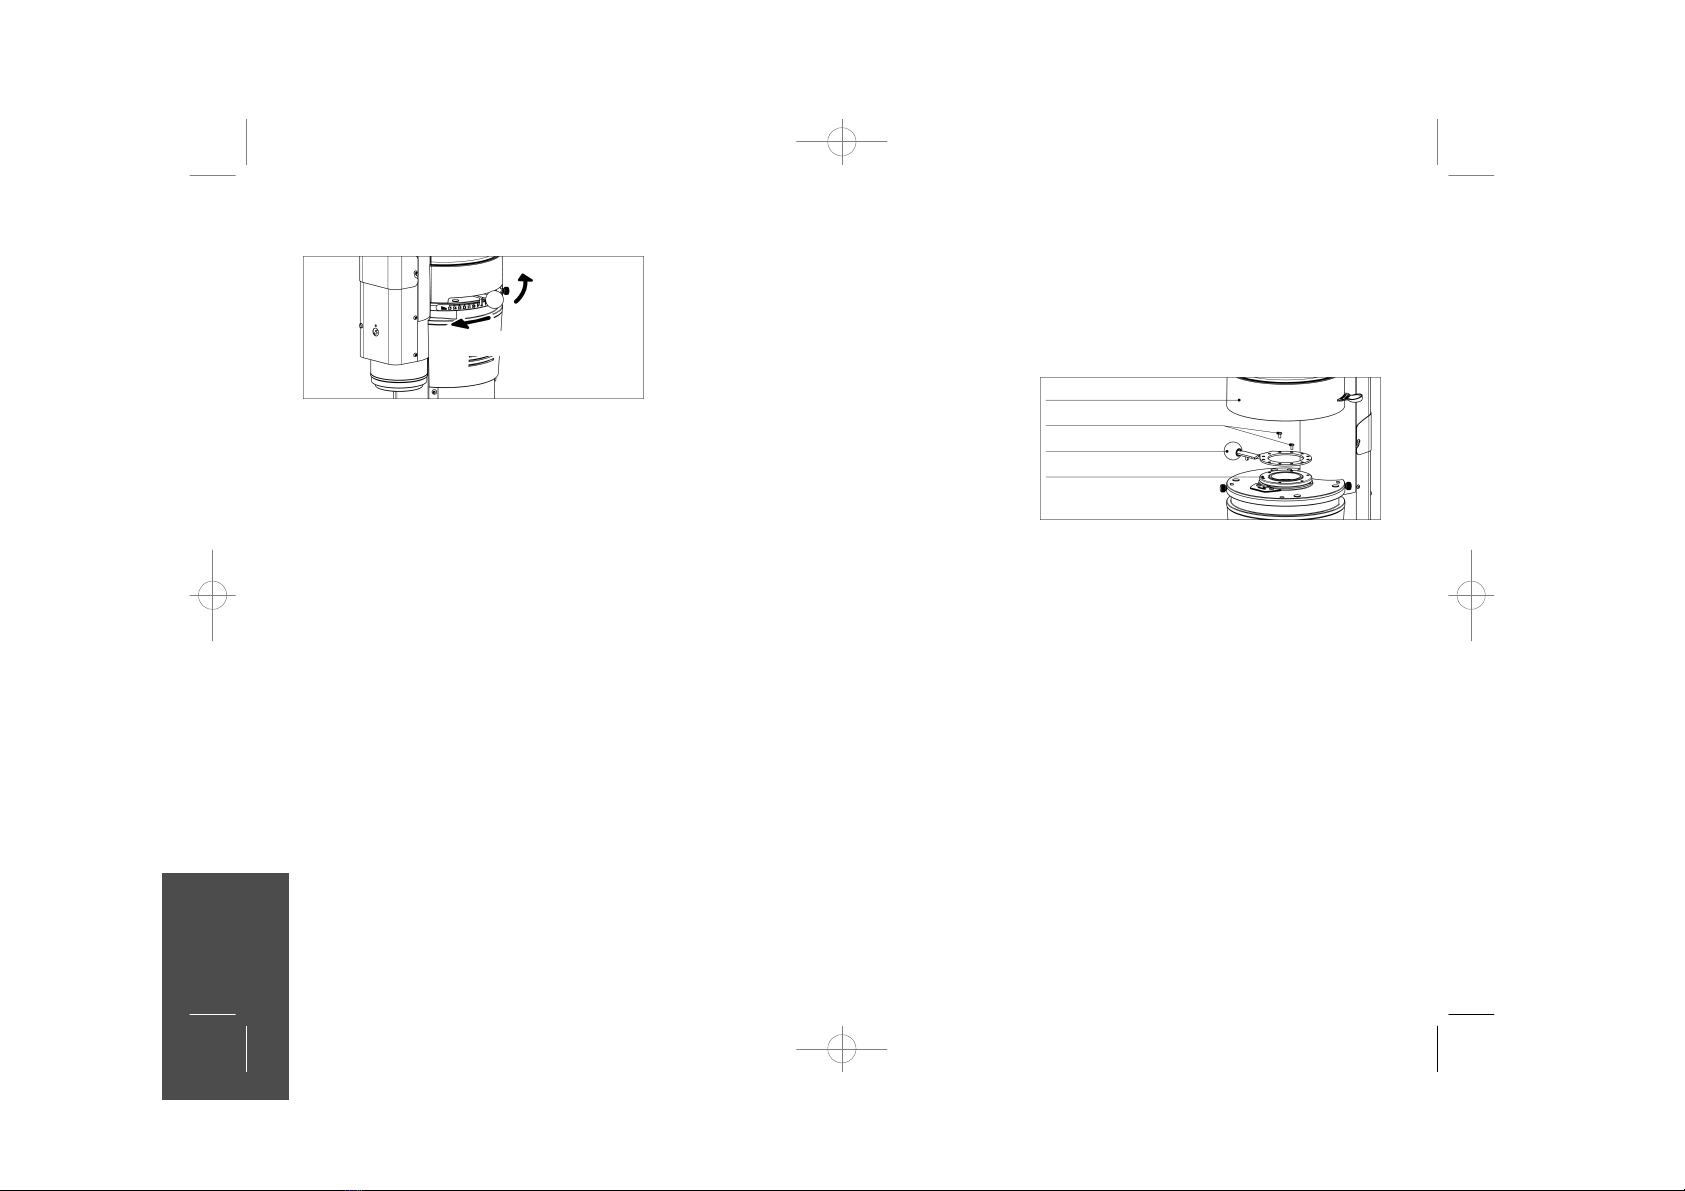
•
When adjusting the grind (grind setting
point), do not put the grinding blades
(burrs) in touch when motor is turning.
This will damage the he grinding
blades (burrs) and affect the grind
quality.
•
F RST NSTALLAT ON
For the correct use of the grinding
blades, at the first installation or
whenever the grinding blades have
been replaced, grind some doses of
coffee (approximately 1kg). Do not use
those first doses.
•
OPERAT NG RANGE OF THE MOTOR
N THE VERS ONS W TH S NGLE-
PHASE MOTORS, OBSERVE THE
DUTY CYCLE STATED N THE LABEL
LOCATED ON THE S DE OF THE
APPL ANCE.
E. g. : a data on the label 35s ON /
45s OFF points out an allowed duty
cycle of 35 seconds switched on and
45 seconds switched off.
10. Safety devices
THERMAL OVERLOAD PROTECT ON
The appliance’s motor is protected
against overheating resulting from over-
currents by a thermal overload protec-
tion which, when tripped, cuts off the
power supply to the motor. Should the
protection trip as a result of anomalous
operation, such as the grinding blades
jamming, the appliance must be turned
off using the on-off switch,
UNPLUGGED FROM THE MA NS, AND
SK LLED TECHN CAL PERSONNEL
CONTACTED. NEVER PERFORM ANY
WORK ON THE APPL ANCE WH LE T
S ATTACHED TO THE MA NS, TO
AVO D THE R SK THAT MOTOR
TURNS ON SUDDENLY. f the appli-
ance overheats as a result of the motor
stopping, allow the appliance to cool
down before performing any repair work.
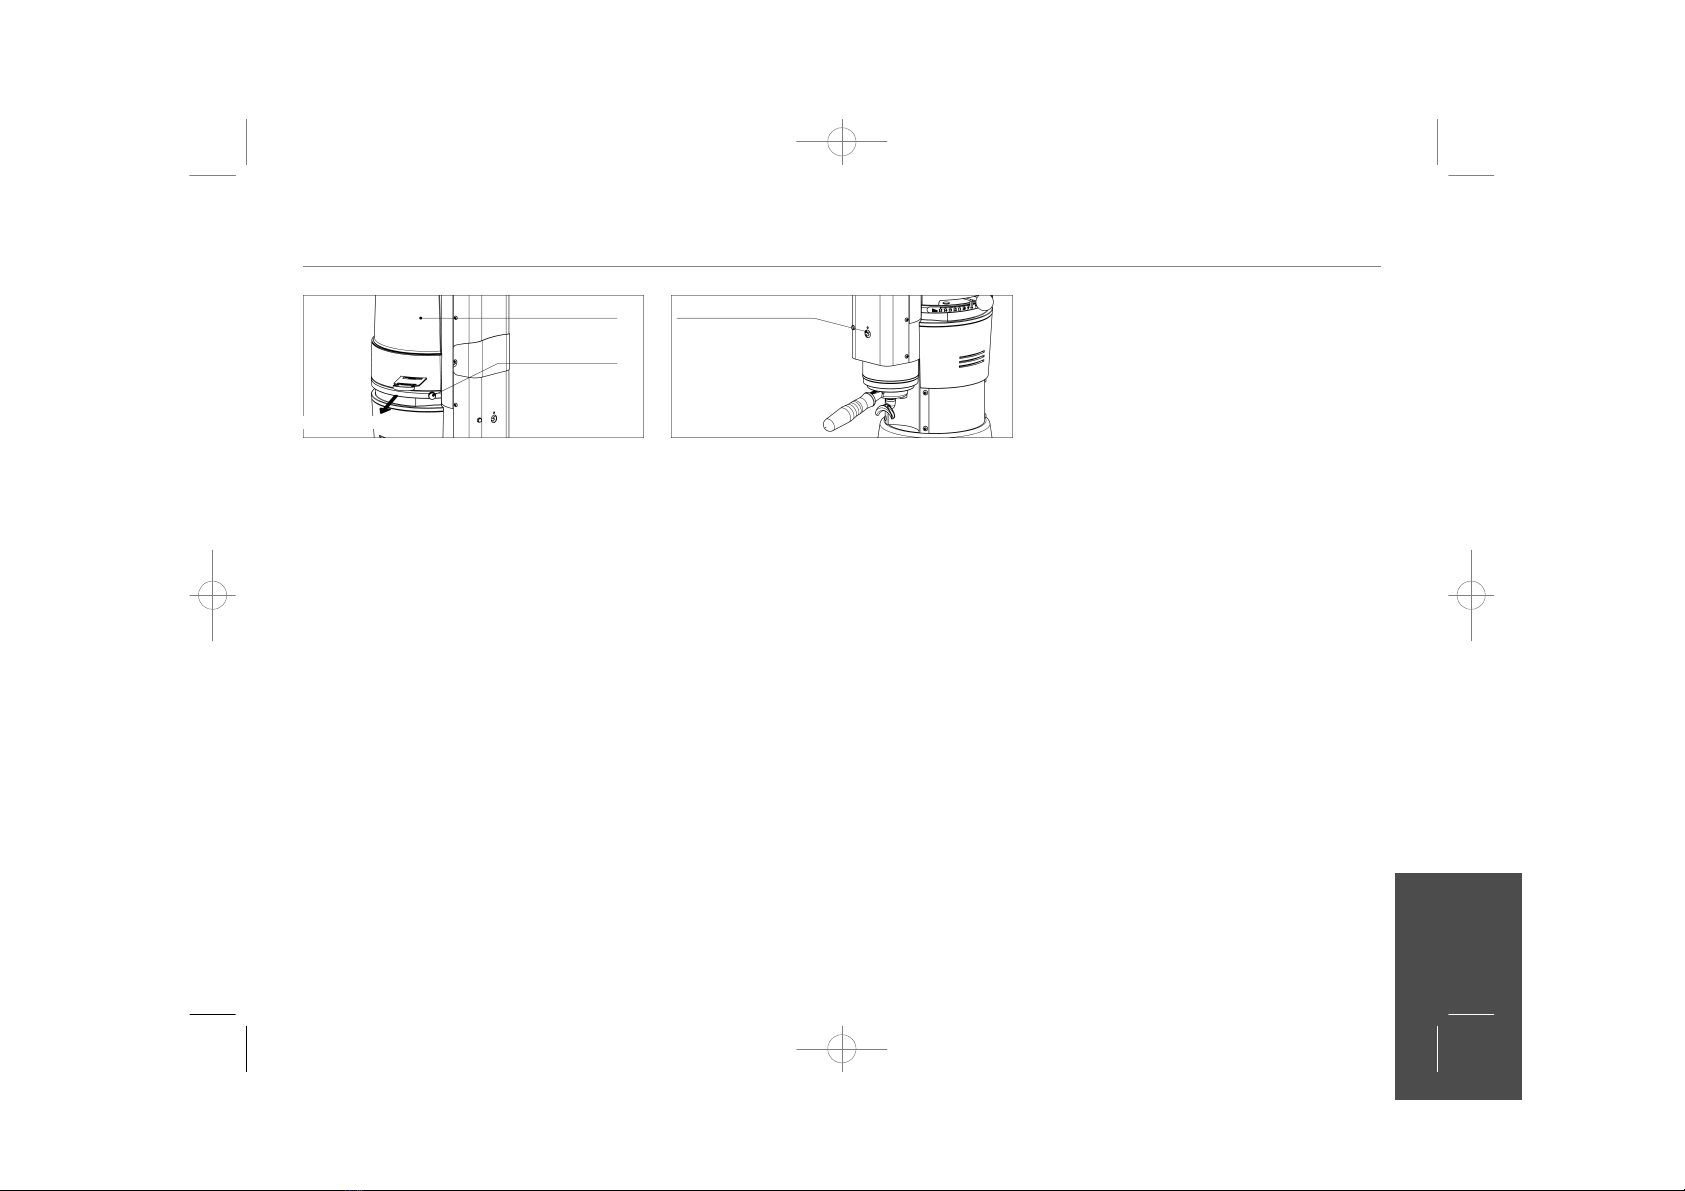
MOTOR LOCK NG M CROSW TCH
HOPPER
TONGUE
M CROSW TCH
The system that protects against acci-
dental contact with the rotating parts of
the grinding system consists of a
microswitch, situated under the body of
the appliance, that cuts the electricity to
the motor.
The push button that controls this
device is operated by a tongue in the
collar of the hopper. f the hopper is
removed or not properly in place, the
microswitch prevents the appliance from
working. To ensure the hopper is posi-
tioned correctly it must be fixed to the
casing using the relevant pins.
8
EN

11. Warnings regarding safety
This electrical appliance must be used
in conformity with the rules in force
governing safe operation.
•
WHEN OPERAT NG THE APPL ANCE,
BEWARE OF THE MOV NG MECHAN-
CAL PARTS’ N THE AREA OF THE
GR ND NG BLADES AND OF THE
GROUND COFFEE OUTLET. BEFORE
REMOV NG THE HOPPER FROM THE
GR ND NG SYSTEM, D SCONNECT
THE POWER SUPPLY. AVO D
REMOV NG FORE GN BOD ES FROM
THE GR ND NG SYSTEM OR HOPPER
W THOUT F RST UNPLUGG NG THE
APPL ANCE FROM THE MA NS.
•
Take care, as the grinding blades may
continue rotating for a short while even
after the appliance is switched off.
•
THE USER S NOT AUTHOR ZED TO
REMOVE SCREWS OR ANY PARTS
SCREWED ONTO THE APPL ANCE OR
TO SABOTAGE THE ELECTR CAL
C RCU T.
•
n the event the appliance is not
working properly or is faulty, contact
skilled technical personnel, and do not
attempt to make repairs yourself.
•
BEFORE PERFORM NG ANY WORK
ON THE APPL ANCE, NCLUD NG
CLEAN NG AND/OR MA NTENANCE,
D SCONNECT T FROM THE POWER
SUPPLY BY UNPLUGG NG. TURN NG
OFF THE APPL ANCE US NG TS
MASTER SW TCH DOES NOT
ASSURE THE SAME COND T ONS OF
SAFETY.
•
Do not sabotage the appliance.
•
When the appliance is left unattended,
the appliance’s power supply must be
disconnected using its master switch
(for example, at night, during work
breaks, midweek closing or holidays).
•
Do not let liquids of any kind come
into contact with the internal or
external parts of the appliance.
•
Never put ground coffee in the hopper
intended only for coffee beans.
•
DO NOT TUG ON THE SUPPLY
CABLE TO UNPLUG THE APPL ANCE
FROM THE MA NS.
•
Do not touch the appliance with damp
or wet hands or feet.
•
Do not use the appliance barefoot.
The manufacturer cannot be held
responsible for bodily injury or damage
to property if these regulations are not
complied with.
9
EN

12. Noise level
EEC Countries:
The maximal noise emission of our
appliances (valued as acoustic power) is
81 dB(A).
The daily personal noise exposure of a
worker, due ONLY to an appliance’s
limit operation of 240 minutes per eight
hours, is 78 dB(A), according to
European Directive 86/188/EEC and
European Directive 2003/10/EC.
Therefore during he appliance’s normal
operation, no provisions are to be taken
in order to prevent such risks arising or
likely to arise from noise exposure at
work (articles 3-8 of European Directive
2003/10/EC).
USA & Canada:
The noise level of our appliances is
included within the limits stated in U.
S. regulation 29 CFR 1910. 95 (‘
Occu-
pational Health and Environment
Control - Occupational noise exposure
’)
for eight hours continuously in a day (in
reference to a noise exposure due solely
to appliance operation).
Said noise level has been determined on
identical news appliances.
13. Maintenance
t is essential to check the state of the
supply cable and plug periodically.
N THE EVENT THE SUPPLY CABLE
OR PLUG ARE DAMAGED, CALL N
SK LLED TECHN CAL PERSONNEL TO
REPLACE THEM, TH S TO PREVENT
ANY R SK.
N -CERT F ED APPL ANCES, A
SPEC AL TOOL S REQU RED TO
OPEN THE BASE PLATE TO GET AT
THE CABLE.
t is recommended to use original spare
parts only.
n order to assure the lasting efficiency
of the appliance, skilled technical
personnel must be called in to perform
periodical maintenance, including
detailed checks of the state of those
components subject to wear.
The state of the grinding blades must be
checked periodically. Keeping the
grinding blades in an excellent state
assures high-quality grinding, resulting
in greater productivity and limited over-
heating.
10
EN

14. Cleaning the appliance
D SCONNECT THE APPL ANCE’S
POWER SUPPLY BY UNPLUGG NG T
BEFORE CLEAN NG. THE APPL ANCE
MUST NOT BE CLEANED US NG
WATER JETS.
Do not install the appliance in rooms
where water jets are used for cleaning.
THE APPL ANCE MUST BE CLEANED
PER OD CALLY BY SK LLED TECH-
N CAL PERSONNEL ONLY.
Use perfectly clean, disinfected cloths
or brushes for cleaning.
Do not use abrasive products as these
are liable to take the sheen off shiny
parts.
Hopper
LOCK NG SL DE HUB
HOPPER
Wash the hopper once it has been
removed from the appliance, using
neutral soap and water, rinse abundantly
with lukewarm and dry thoroughly.
To clean the internal surfaces it is
necessary to remove the hopper, slip off
the locking slide by pushing down the
click. Then turn the hub clockwise and
lift to remove it (see picture).
t is advisable to clean the hopper peri-
odically.
To reassemble completely the hopper
please proceed in the reverse order with
previous instructions.
Once the hopper has been cleaned it
must be put back on the appliance
properly fixing it with the relevant pins.
Grinding system
As explained in the paragraph "
ADJUST NG
GR ND NG
" remove the hopper and the
adjustment level.
Unscrew the adjustment disk by turning
it clockwise. After having removed the
upper blade holder, clean the grinding
blades, threads and the entire system
thoroughly using a clean brush or cloth.
To clean the threads of the grinder
please use a small wire brush.
We recommend to check that the
threads of the grinder and of the
grinding adjustment disk are clean: to
do so screw the adjustment disk anti-c-
lockwise
without the upper blade holder until the
end. f the grinding adjustment disk can
not turn easily, than it is necessary to
clean again. f the cleaning operations
are not done as above the risk is to
damage the threads.
GR ND NG
ADJUSTMENT D SK
UPPER GR ND NG
BLADE HOLDER
GR ND NG
ADJUSTMENT SPR NGS
Please check that the grinding adjust-
ment springs are on their place. Having
refitted the upper grinding blade holder
in the relevant slot, please lubricate,
with grease suitable for food contact,
the threads of the grinding adjustment
disk and its underneath surface which
touches the upper grinding blade holder.
Screw the adjustment disk by turning it
anticlockwise, place the adjustment
level and fix it on adjustment disk with
the relevant screws
After having refitted the hopper properly
adjust grinding as required.
11
EN

mpeller
SHAFT LOCK
MPELLER
The impeller must be cleaned only by
skilled technical personnel, after discon-
necting the appliance from the power
supply, according to the following
instructions:
•
Remove the tamper window by loosen-
ing the screws;
•
Press and hold upward the shaft lock
to prevent the shaft from turning;
•
With your thumb and forefinger, press
against the impeller flats. Turn the
impeller clockwise, as viewed from
below, to remove;
•
With the impeller out, clean around the
bayonet ring with a clean brush or
cloth and wipe loose grounds from this
area;
•
nsert the cleaning brush into the
coffee collection area above the
impeller and again wipe loose grounds
away;
•
Clean the impeller with a soft, dry
cloth;
•
Reinstall the impeller by turning
counter clockwise;
•
Before reconnecting the appliance to
the power supply, fix the tamper
window in correct position by relevant
screws.
Coffee outlet chute
The cleaning of the coffee outlet chute
must be made by the insertion of the
tool 5.372.5 into the hole (caution
when moving the tool).
12
EN
Produced by:
Mazzer Luigi Spa
Via Moglianese,113 – 30037 Gardigiano di Scorzè (Venezia) - taly
E-mail:mazzer@mazzer.com - http://www.mazzer.com
All right reserved. t is prohibited to reproduce, adapt or translate this document without prior written authorization.
First Edition: 2013
Last Revised: VS04 07/2017
Other manuals for vulcano swift
1
Table of contents
Other La Marzocco Coffee Grinder manuals

La Marzocco
La Marzocco Linea Instruction sheet

La Marzocco
La Marzocco Swift mini User manual

La Marzocco
La Marzocco GB/5 Instruction sheet

La Marzocco
La Marzocco vulcano User manual

La Marzocco
La Marzocco La Marzocco User manual

La Marzocco
La Marzocco Swift User manual

La Marzocco
La Marzocco SWIFT EPSB User manual

La Marzocco
La Marzocco Mazzer Major V User manual

La Marzocco
La Marzocco Major V User manual

La Marzocco
La Marzocco K-6 User manual