Lakes Bathrooms SS120S Installation and operating instructions

+ SS120 Hinged Panel Bathscreen
Installation & Maintenance instructions
Lakes
Bathrooms
Rev. 09.16

IMPORTANT NOTES :
Please Read Carefully & retain these instructions for Future Reference.
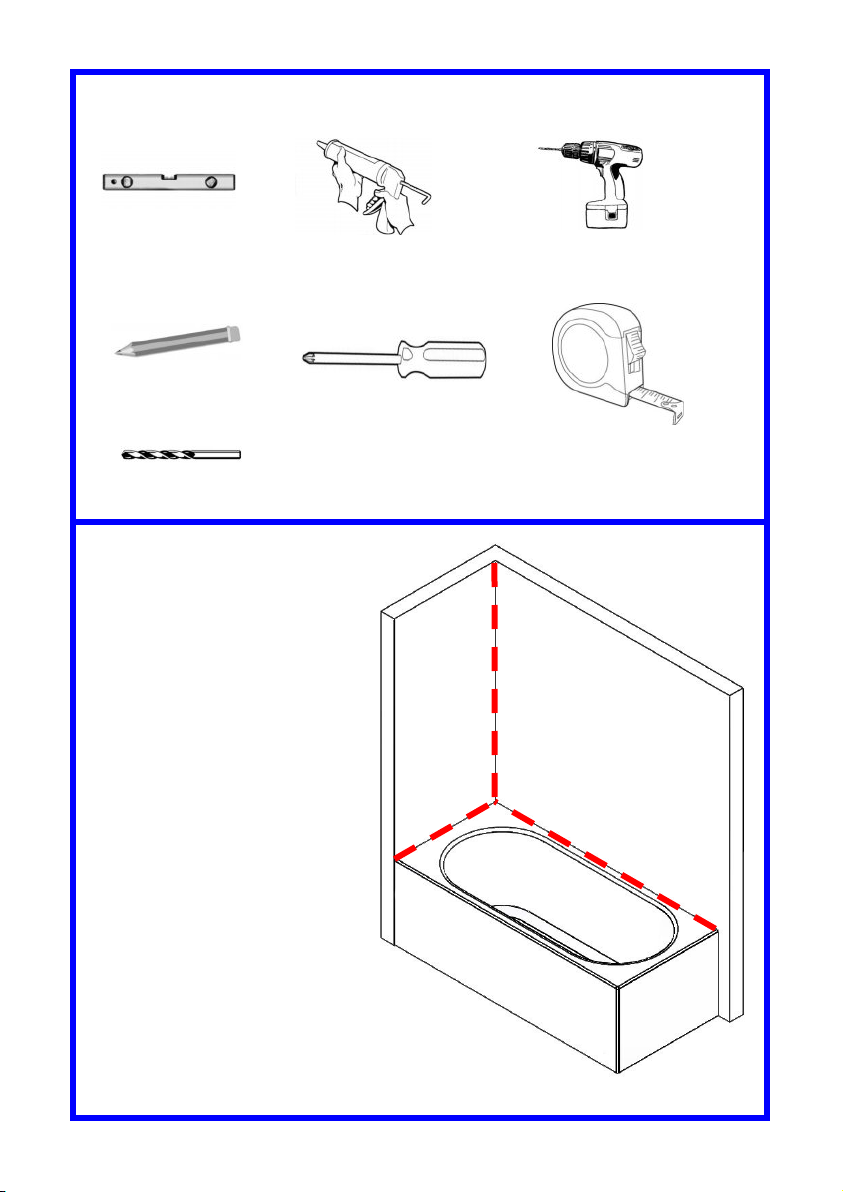
1. For ease & safety we advise that two persons assemble this product.
2. Protect bathtub surfaces at all times.
3. Check for cables, pipes etc before drilling walls.
4. Ensure all surfaces are dry, clean & free of loose debris / dust.
5. Unpack goods with care (small parts can become lodged in packaging &
inadvertently discarded). Check parts supplied against parts & fittings listed herein.
Damaged parts / omissions may be resolved by calling Lakes Bathrooms Helpline.
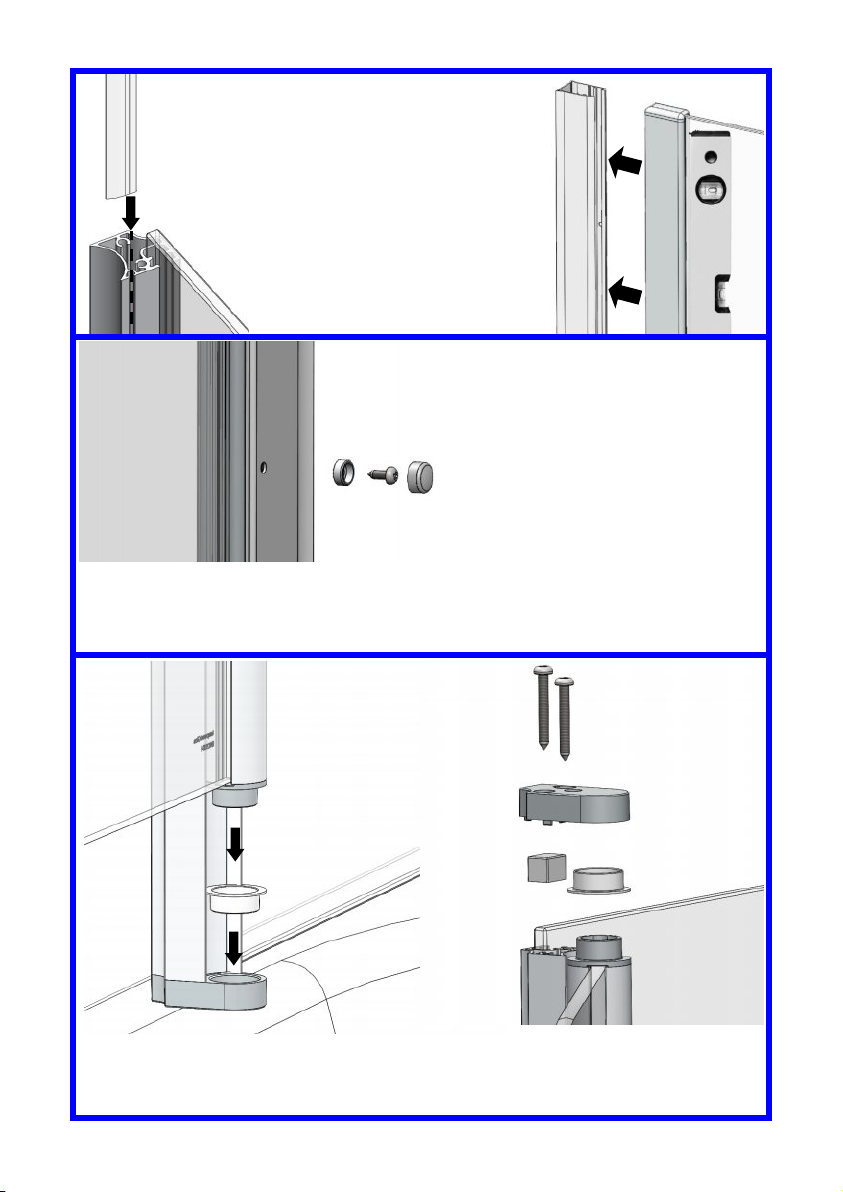
6. Whilst precautions are taken in manufacture, care must be taken when handling as
rail ends may have sharp edges.
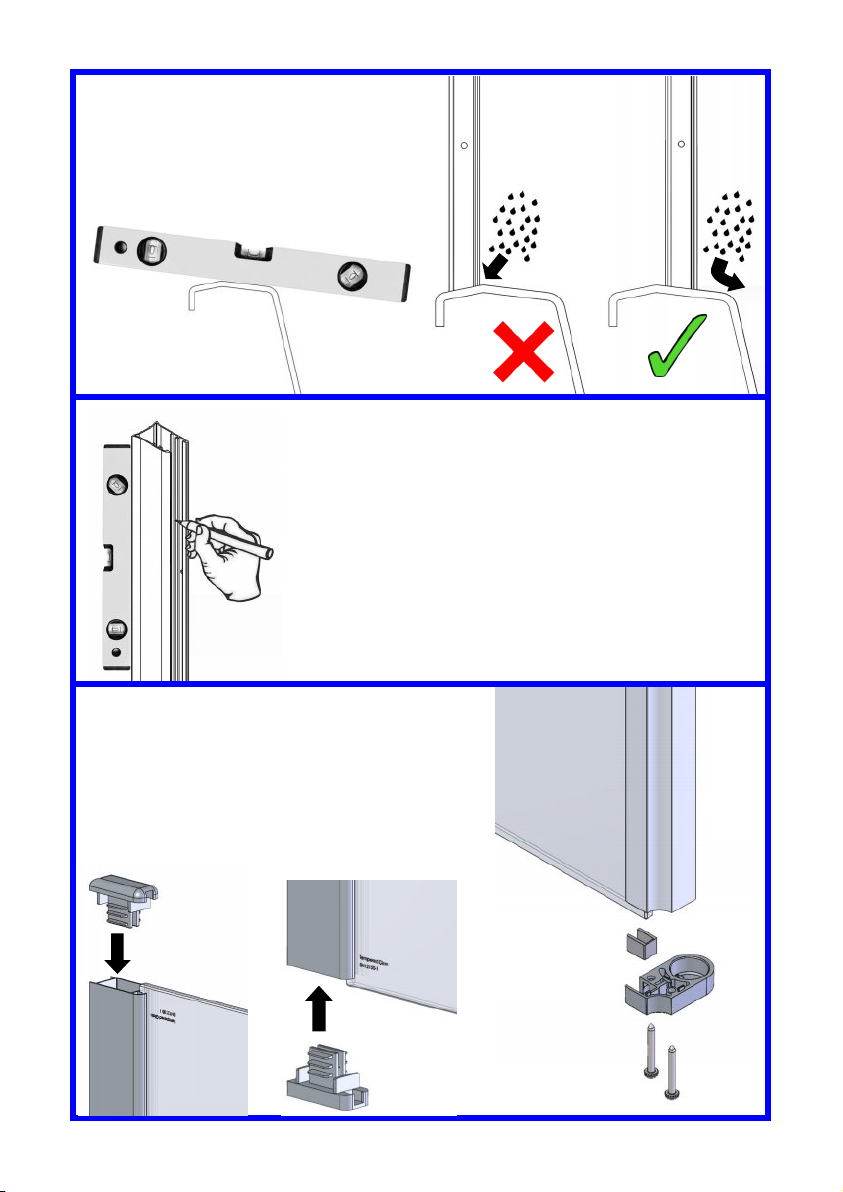
7. Before commencing, check :
a) bathtub is level & completely sealed to finished / tiled walls.
b) finished walls are sound & free of cracks loose tiles / grout.
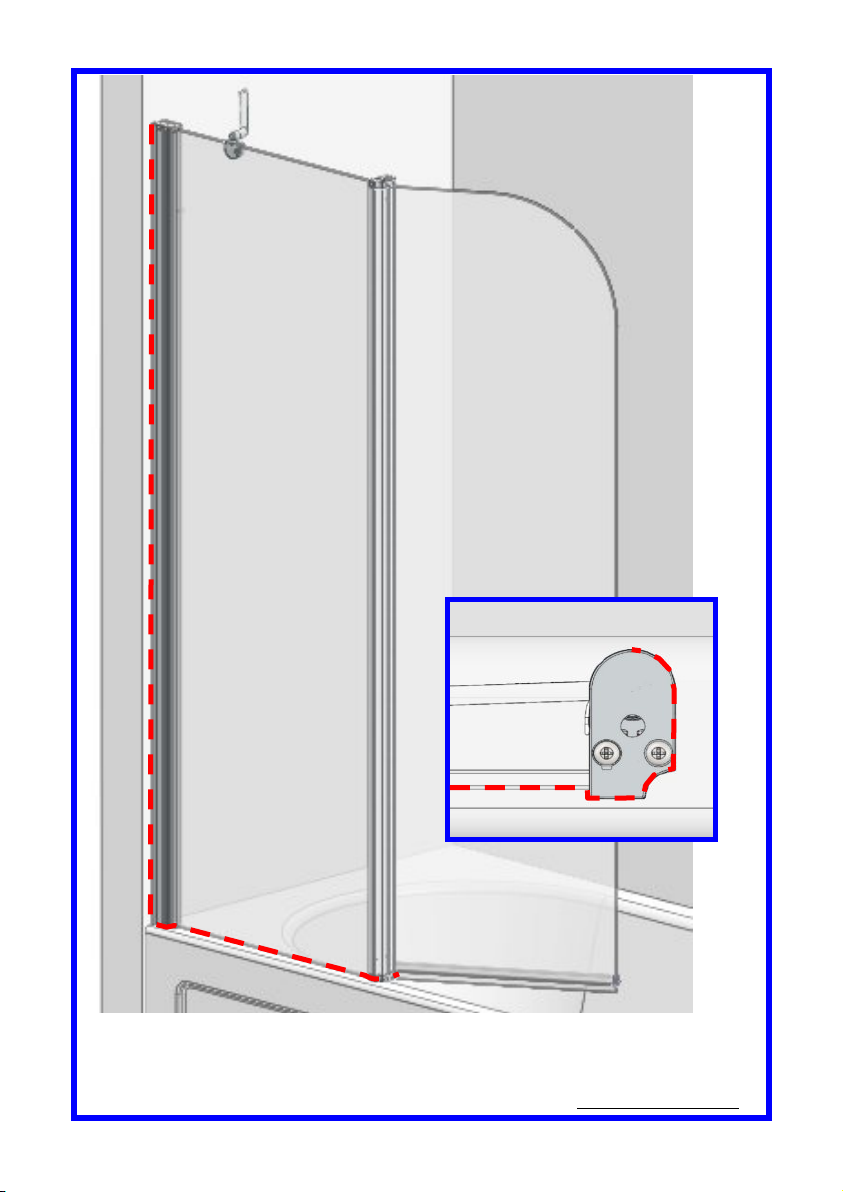
8. AFTER INSTALLATION, DO NOT ‘WET’ ENCLOSURE FOR 48 HOURS (ENSURE FULL CURE
OF SILICONE SEALANT).
USE :
General Care & Maintenance.
Provided this product is installed & operated in accordance with these instructions, problems
should not arise. However should maintenance be required it should be carried out by a
competent person with reference to these instructions. Before any work is carried out the
root cause of the problem must be identified. Lakes Bathrooms service engineers are
available if necessary to consult / carry out remedial work. Call Lakes Bathrooms HELPLINE.
Cleaning.
(Every one to two weeks depending on local water {hardness} conditions).
All glass panels in this product have a hydrophobic coating aiding ‘runoff’ of water droplets,
reducing the need for frequent cleaning. For best appearance / product life however, regular
cleaning is recommended.
Use ONLY mild soap / detergent solutions to clean. Rinse with water, squeegee glass panels
& wipe frames dry with a soft cloth. Under no circumstances should abrasive, caustic or
scouring products be used. DO NOT use ‘spray & leave’ type cleaning products.
Non compliance with these cleaning instructions may cause plated / painted finishes to
deteriorate & could adversely affect safe operation of the enclosure.

Daily Care.
To prevent the build up of limescale, do not allow water droplets to dry on glass or frames.
After showering, rinse with water, remove droplets from glass with a squeegee & wipe frame
with a soft cloth.
Customer Service.
Quality Guarantee : Lakes Bathrooms Ltd guarantee Shower Doors & Enclosures against any
manufacturing or material defects for the lifetime of the product. We will resolve defects free
of charge by repairing / replacing parts as we feel necessary. To be ‘free of charge’ service work
must be carried out by Lakes Bathrooms or approved agents.
Not Covered by this Guarantee : Damage or defects that result from improper installation,
improper use, or lack of maintenance (including limescale buildup). Damage or defects that
result from repairs / modifications undertaken by unauthorized persons. This guarantee is in
addition to statutory & other legal rights.
What to do if something goes wrong : Should the product not function correctly on initial use,
firstly, contact the installer to check that unit installation & commissioning are in accordance
with these instructions. Should this not resolve difficulties or should performance decline,
consult ‘Troubleshooting’ section to see if simple home maintenance is needed. Alternatively
our HELPLINE staff can assist, or if necessary arrange for a service engineer to visit.
Spares : We maintain extensive spare part stocks. Spares can be ordered / purchased from your
retailer in the first instance. Parts will normally be dispatched within two working days from
order placement.
Pro Forma invoices will be sent for cheque payments.

Parts supplied:
1x Wall Profile
1x Fixed Panel 1x Hinge
Panel
1x Hinge Seal
2x Hinge (Handed
pair)
1x Top Plug
1x Bottom Plug
2x Glazing Gasket
2x Hinge Washer
1x Bottom Seal
2x Wall Profile Cap
(Handed Pair)
2x Seal End Cap
(Handed Pair)
3x Wall Plug
3x 60mm M5 Screw
3x 10mm M3.5 Screw,
Washer & Cover cap
4x 30mm M4 screw
1x Bracing Arm Kit

Tools Required:
Spirit level with Good quality silicone
sealant and applicator
Power drill with 8mm
Pencil
Pozidriv Screwdriver
Tape measure
3mm HSS drill bit
Lakes fully reversible hinged
panel bathscreen for fitting left
or right handed to suitable
bathtub. Ensure bath rim is
level & that bath / wall (tile)
joints are sealed & cured over
entire length of bath sides as
shown prior to fitting screen.
DO NOT SEAL BATH EDGES UP
TO A FITTED SCREEN!

With the curved face of the wall profile facing
outwards, use the spirit level to ensure wall
profile is plumb, mark screw holes then drill
the wall with the 8mm masonry bit, plug and
affix the wall profile using 3x 60mm M5
screws
It is important to assess the fall of the
bath rim and position the wall profile
so that any water runs off into the bath
and does not pool on the bath rim
Determine the hand of the screen and
insert the top & bottom plugs into the glass
profile and making sure the glass gasket is
in place, affix the bottom hinge using 2 of
the 30mm M4 screws.

Using the wall profile holes as a guide, drill the 3mm holes and then
secure the fixed panel using the 10mm M3.5 screws and washers then
push on the cover caps.
1. Fit the hinge seal into the
groove on the hinge profile.
2. Slide the fixed panel assembly
into the wall profile and position
so that the bottom of the panel
sits on the rim of the bathtub &
is plumb.
1 2
Ensuring the washer is in place, lower hinge panel into bottom hinge.
Check glass gasket & top bearing washer are fitted as shown, hold panel
upright in place & fit top hinge with 2x 30mm M4 screws.

Fit the bottom seal to the
hinge panel. Seal may be
“wetted” to aid fitting.
Fit end cap to end of seal.
A small blob of silicone can
be used to secure cap. Fit wall profile top cap
Loosen clamping screw then place bracing arm on glass as shown. Position
arm so that the wall end sits flush with the wall the mark the hole position,
drill (8mm), plug & affix to wall using 5mm x 60mm screw. Ensuring the
gasket is in position in the bracing arm, tighten the clamping screw.

Use of good quality silicone sealant & cleaning / degreasing of all joint
areas is recommended.
Apply continuous silicone sealant bead as indicated EXTERNALLY ONLY

BASIC TROUBLESHOOTING :
Screen hinges noisy / not moving smoothly : Apply sanitary silicone based
grease to hinge bearing inner diameters. Check that hinge seal is not
distorted or trapped in gap between profiles.
Leakage in area of bottom hinge : ensure bottom seal is pushed fully up to
bottom hinge.
Water pooling on inside of screen :
Check ‘fall’ of bath rim is toward bathing area (certain bathtubs are
unsuitable for screens of this type).
Leakage :
The sealing method described in these instructions relies on a continuous
seal between walls & bathtub before installing the screen (see fig A), &
positioning of the screen inside the ‘high’ point of the rim, then ensures a
watertight seal around the perimeter, & prevents ‘pooling’ against the
screen. Should ‘pooling’ be a problem it is likely due to incorrect screen /
rim positioning. In the unlikely event of a screen leak, water will be visible
on the outside of the screen itself or around the perimeter silicone seal
ONLY. Water / moisture appearing outside this area (ie at floor level, or
under bathtub) is normally due to incorrect bathtub / screen sealing.
Lakes Bathrooms Ltd
Alexandra Way
Ashchurch
Tewkesbury
Gloucestershire GL20 8NB
Service England, Scotland, Wales.
8.30am—5pm Mon ~ Thurs
8.30am—4.30pm Fri
Tel / HELPLINE : 01684 853870
Fax : 01684 857411
www.lakesbathrooms.co.uk
Email : admin@lakesbathrooms.co.uk
Service : Northern Ireland
Ian A Kernohan
Firtrees
Green Way Industrial Estate
Conlig
Northern Ireland BT23 7SU
8.30am—5pm Mon ~ Thurs
8.30am—4.30pm Fri
Tel : 02891 270233
Fax : 02891 270597
Email : info@iakonline.com
Table of contents
Other Lakes Bathrooms Bathroom Fixture manuals